Whats your plan with the engine , strip and rebuild or drop it in as is ?

Was 88 Red Hot Rescue Rebuild Now 1987 Advantage
Started by
MINIMADrt
, Nov 14 2014 10:20 PM
99 replies to this topic
#62

MINIMADrt
-
- Members
-

- 465 posts
Speeding Along Now
- Location: oxford
- Local Club: none at mo
Posted 10 January 2015 - 12:34 PM
Whats your plan with the engine , strip and rebuild or drop it in as is ?
not quite sure yet i was thinking of rebuild especially check it over to make sure its alright.
was thinking over sized valves mg turbo cam hif44 carb regetted and a few little tweeks ran the set up a while ago in my first car so may go the same again as i was happy with it then.
not quite sure yet tho going to be a while before its needed but always good to have plans in place
#63
Covert
-

- Members
-
- 526 posts
Super Mini Mad
- Location: Northampton
Posted 10 January 2015 - 12:38 PM
Good luck with it , hope its in better nick than mine !
Rebore, new cam , new crank etc etc etc
Rebore, new cam , new crank etc etc etc
#64
MINIMADrt
-
- Members
-
- 465 posts
Speeding Along Now
- Location: oxford
- Local Club: none at mo
Posted 18 January 2015 - 09:13 PM
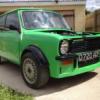
sad day today mini was picked up at 7.30am this morning to go to a new home.


all nice in her new home

managed to swing my father inlaw back into having use of my old garage again for a small fee to cover electric. only problem being i have to share it with my brother in laws motor bike so a little tighter than i would of liked but beats working out side.
as i left today it now sits like this

today was the first time i had properly looked at it and my god what a peach it really is i have defiantly got a right job on my hands but at least now im not restricted to times, weather and day light.
#65
MINIMADrt
-
- Members
-
- 465 posts
Speeding Along Now
- Location: oxford
- Local Club: none at mo
Posted 19 January 2015 - 09:27 PM
hi all called into the garage to day for a couple of hours after work and got some more stripped of but at the same time un earthed some really bad repairs and rot


#66
MINIMADrt
-
- Members
-
- 465 posts
Speeding Along Now
- Location: oxford
- Local Club: none at mo
Posted 29 January 2015 - 07:31 PM
not much of an update just been busy blasting and refurbishing all the bolt on parts the body shell stand fairly untouched since it was stripped.
my plan at the moment is to find another shell and v5 in better condition than the one i have and sell on the redhot shell and v5 to some one with more time on there hands.
i am ment to be traveling down to bristol on sunday to have a look at a shell but not sure if its going to be any better than what i all ready have.
unless any one on here has a decent shell at a reasonable price then i hope this journey is worth while.
#67
Covert
-
- Members
-
- 526 posts
Super Mini Mad
- Location: Northampton
Posted 29 January 2015 - 08:23 PM
Shame after all the work you put in
#68
MINIMADrt
-
- Members
-
- 465 posts
Speeding Along Now
- Location: oxford
- Local Club: none at mo
Posted 29 January 2015 - 08:43 PM
Shame after all the work you put in
I must admit it is.
Once I stripped it it needs:
Full floor pan
Inner sills
Outer sills
Both rear quarters
Both door steps
At least rh inner wing
Both wings
Front panel
Scuttle panel
X2 door skins
Rh rear wheel arch
Both a panels
Cross member
Rear lick board
Boot lid
Bonnet
X2 rear companion boxes
I think that's the list.
All this because some one fitted bloody over sills
Solid under neath just rotted out from the bottom up.
#69
MINIMADrt
-
- Members
-
- 465 posts
Speeding Along Now
- Location: oxford
- Local Club: none at mo
Posted 30 January 2015 - 11:41 AM
Please people's thoughts. Is it better the devil you know than the devil you don't
Do I just bite the bullet and do the shell I have or kick it in and find anouther one???
Do I just bite the bullet and do the shell I have or kick it in and find anouther one???
#70
Ben_O
-

- Paint Doctor
-
- 9,794 posts
Mill Road Garage
- Location: Isle of Wight
Posted 30 January 2015 - 12:03 PM
Please people's thoughts. Is it better the devil you know than the devil you don't
Do I just bite the bullet and do the shell I have or kick it in and find anouther one???
BETTER THE DEVIL YOU KNOW!!!
At least you know what your shell needs. if you find a 'better' shell, it's either going to be expensive (if it genuinely is better) or you will find that it needs almost as much work once you start poking around.
Once you get going with it, it will come together soon enough. When i first stripped mine, i thought the same and wondered if it was all going to be worth it but now i have made a start, it is slowly coming together.
Best thing to do is price up the panels you need and then compare that to a shell that needs little or no welding and see where you stand. If you have the panels for instance up front, it really is surprising how quickly you can get them fitted.
I know i could have my shell fully welded and finished in around 5 weeks if i had all the panels to hand and that was/is in quite a mess. My only delay is funds really so i just buy the next logical panels as and when i can afford them.
#71
Covert
-
- Members
-
- 526 posts
Super Mini Mad
- Location: Northampton
Posted 30 January 2015 - 03:03 PM
i agree with ben, you know what your current shell needs , the "better" shell could look good but have hidden sins, fibreglass, filler and lots more rust!
#72
MINIMADrt
-
- Members
-
- 465 posts
Speeding Along Now
- Location: oxford
- Local Club: none at mo
Posted 30 January 2015 - 05:26 PM
Thank you very much for your input all taken on board going to be a busy night.
Whatch this space.
Whatch this space.
#73
MINIMADrt
-
- Members
-
- 465 posts
Speeding Along Now
- Location: oxford
- Local Club: none at mo
Posted 15 February 2015 - 10:19 AM
hi all been a while but been busy with every thing i have managed to decide what i was going to do with the mini and that is do it. so a few pictures of recent progeress.
i have managed to strip of all the proofing of the rear seats and weld the back panel on to some extent at mo rest will be done today. also just been refurbing any thing i can when im not working on the the shell.
stripped shot blasted and painted the column.


and then the rear panel


still getting use to the welder some weld are better than others still trying to find the best method


and then the seat base

well thats roughly how it sits and the moment
is it ok to remove rear quarters from window down with out a rear valance being fitted??
all comments and help appreciated
Cheers all Richard
#74
Daz1968
-

- Members
-
- 2,058 posts
Up Into Fourth
- Location: Dudley
Posted 15 February 2015 - 06:18 PM
Coming together then now, on the welding I find butt welding much easier with about 1mm gap between the panels and I then get much better penetration at lower power, if they are too close the power has to be higher to penetrate and I find it blows holes easily, what's that weld like on inside has it fully penetrated I have also heard a tip that if you put fibreglass resin over both sides of the repair after grinding down it seals any small holes and prevents moisture from getting in the filler but not tried this myself.
#75
MINIMADrt
-
- Members
-
- 465 posts
Speeding Along Now
- Location: oxford
- Local Club: none at mo
Posted 15 February 2015 - 07:11 PM
Coming together then now, on the welding I find butt welding much easier with about 1mm gap between the panels and I then get much better penetration at lower power, if they are too close the power has to be higher to penetrate and I find it blows holes easily, what's that weld like on inside has it fully penetrated I have also heard a tip that if you put fibreglass resin over both sides of the repair after grinding down it seals any small holes and prevents moisture from getting in the filler but not tried this myself.
cheers daz. yeah slowly but getting along. i left a small gap about .6 of a mil may be not enough as im not completely happy with the penetration but its on now and seems solid so i have see how it goes but they say you learn. i havent heard of that method so may try it. i was told of a tip with copper tho if you can place a piece behind the place to be plug welded and hold it tight it will help prevent the weld falling through or causing a hole.
it also helps a little bit in warping as it help take the heat away. i used a 90 degree and a straight copper pipe join split and hammered flat it it worked wonders really pleased with the results i got.


1 user(s) are reading this topic
0 members, 1 guests, 0 anonymous users


