
Nice project ! Good work

78 Restoration / Fast 998 Build
Started by
kyle9832
, Dec 31 2014 01:56 PM
41 replies to this topic
#17

kyle9832
-
- Members
-

- 434 posts
Speeding Along Now
- Location: leicester
Posted 29 January 2015 - 09:55 PM
Nice project ! Good work
cheers for the feedback mate! should start to get more done when the weathers a bit nicer!
#18
Mad Max
-

- Members
-
- 306 posts
Speeding Along Now
- Location: On a driveway under a car
Posted 30 January 2015 - 01:00 PM
Not bad for first time welding. All minis are like this, abit of rust here and hole there. Its all pretty standard to be honest.
Good luck with the project, will be all worth it come summer, blasting around the B roads.
#19
kyle9832
-
- Members
-
- 434 posts
Speeding Along Now
- Location: leicester
Posted 30 January 2015 - 04:10 PM
Not bad for first time welding. All minis are like this, abit of rust here and hole there. Its all pretty standard to be honest.
Good luck with the project, will be all worth it come summer, blasting around the B roads.
yeah I hope so! I just wasn't expecting as much rust as there is! haha
#20
kyle9832
-
- Members
-
- 434 posts
Speeding Along Now
- Location: leicester
Posted 01 February 2015 - 07:01 PM
my goal for today was to cut out all of the rusty bits so that my new panels will be ready to fit, I started by cutting a hole in both rear quarter panels( will be replaced anyway due to copious amounts of filler) and hacking away at all the rust until I got back to fresh metal
some of the rust before I started cutting it all out


^ note the thickness of the filler at the bottom of the cut panel!
after cutting the worst of it out

and the other side

whilst it was still light I got the welder out and started to re fabricate the wheel arch, will do all of the fabrication before the quarter panels go back on so I can do it all from the outside instead of trying to fumble around inside.
And again I was pleased with the result! this being only my second time welding!

and tacked a piece in underneath, I was about to do the front bit but I had no light and was getting dark very quickly!
so only had time to tack

any feedback I greatly appreciate!!! cheers for looking:)
#21
kyle9832
-
- Members
-
- 434 posts
Speeding Along Now
- Location: leicester
Posted 02 February 2015 - 07:44 PM
have just ordered a repair panel for the rear damper tower in the boot, I was going to leave it but do not know the integrity of the weld so better to be safe than sorry

Edited by kyle9832, 02 February 2015 - 07:45 PM.
#22
kyle9832
-
- Members
-
- 434 posts
Speeding Along Now
- Location: leicester
Posted 08 February 2015 - 05:39 PM
well thought it was about time I updated this after my weekend work! and a looooongggg weekend at that! all my repair panels came so could start repairing all the rotten bits, I started by cutting out the old wheel arch tower ^^^^^ (above) and put a new one in.
I cut out all the rotten floor so I could start with a blank canvas,
as I had cut the wheel arch away I had to make a new lip for the strut tower and repair the rusty metal on the exising arch.

I tacked the wheel arch in place before putting the lip on it so I knew it was all in the right place.
in this picture you can see the rear kickboard, notice on the right that the kickboard has two layers to it, that outer layer I found was GLUED to the existing kickboard! the kickboard that holds the sub frame in place! so I had to replace that!

after I had done the lip for the other side I started to rebuild the floor in the boot which had been cut out

after seeing the state of the kickboard I thought it best just to replace the hole thing, after cutting out the old one, lining up the body again with the reference points I had put in place I tacked the new heel board into position and attached a small plate from the seat to heel board to hold the car in the straight position.

when the old one was cut out I had to cut out quite a lot of the floor so I started to build the floor back up to sit on the kickboard lip.


I will try and finish it all off next weekend and can then start putting the new side panels and rear panel in place!
any feedback is appreciated! cheers for looking:)
#23
kyle9832
-
- Members
-
- 434 posts
Speeding Along Now
- Location: leicester
Posted 08 February 2015 - 05:41 PM
*edited* posted twice
Edited by kyle9832, 08 February 2015 - 05:43 PM.
#24
alex-95
-

- Members
-
- 6,078 posts
I am THE CLAMP MAKER
- Location: l
Posted 08 February 2015 - 06:05 PM
The welding looks good for a first timer  , One problem though, You should have braced the shell before cutting out so much or cut out less and do bit by bit. The rear end could sag down a bit.
#25
kyle9832
-
- Members
-
- 434 posts
Speeding Along Now
- Location: leicester
Posted 08 February 2015 - 06:18 PM
The welding looks good for a first timer
yeah i should have, but it seems alrigt now its back together! should be alright i hope!, cheers for feedback mate:)
#26
kyle9832
-
- Members
-
- 434 posts
Speeding Along Now
- Location: leicester
Posted 08 February 2015 - 07:07 PM
The welding looks good for a first timer
yeah i should have, but it seems alrigt now its back together! should be alright i hope!, cheers for feedback mate:)
just to add, I did make a couple of reference points on the floor so it went back in the right position sideways, but didn't think it would bend forwards!
#27
domdee
-

- Members
-
- 1,183 posts
Formally known as dominicdee
- Location: hull
- Local Club: hull clubs on FB
Posted 08 February 2015 - 07:39 PM
Good work
#28
kyle9832
-
- Members
-
- 434 posts
Speeding Along Now
- Location: leicester
Posted 08 February 2015 - 07:42 PM
Good work
cheers mate:)
#29
kyle9832
-
- Members
-
- 434 posts
Speeding Along Now
- Location: leicester
Posted 14 February 2015 - 11:02 PM
bit of a miserable day here in Leicester so thought I would get all the old paint off my newly bored engine block and paint it, turns out this is a very longggg process of removing all the old paint so spent a good couple of hours doing it! but was definitely worth it I think!
after removing most of the paint and degreasing.


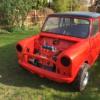
decided to go for gloss red as it is the same colour as my car. and the main reason is that I now have +5 hp! everyone wins!
#30
kyle9832
-
- Members
-
- 434 posts
Speeding Along Now
- Location: leicester
Posted 25 February 2015 - 05:26 PM
sent my rear seat rest off to be recovered a couple of weeks ago to see if I liked the colour scheme and got it back today and looks brilliant!!

will send the rest of the interior off to be covered in the same now.
I will also update this thread with the welding work ive been doing in the next few days.
cheers for looking!


0 user(s) are reading this topic
0 members, 0 guests, 0 anonymous users


