Jump to content


Photo
- - - - -

Radius Arm Dust Seal Installation


  • Please log in to reply
10 replies to this topic

#1 newenglandmini

newenglandmini

    Super Mini Mad

  • Members
  • PipPipPipPipPipPip
  • 646 posts
  • Location: Connecticut

Posted 30 March 2015 - 09:46 PM

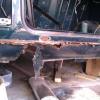
I am unable to seat the radius arm support pin dust seals.  The seals don't seat in the shoulder on the radius arm casting and the thrust washer works it way into the seal ID when I tighten the nut.  How do I do assemble these bits and what should the assembly look like when done correctly? 


Attached File  PICT0047.JPG   100.38K   140 downloads


#2 nicklouse

nicklouse

    Moved Into The Garage

  • TMF+ Member
  • PipPipPipPipPipPipPipPipPipPipPip
  • 18,998 posts
  • Location: Not Yorkshire
  • Local Club: Anonyme Miniholiker

Posted 30 March 2015 - 09:55 PM

First things that washer is the wrong way round. The ring should be arm side.

#3 Guess-Works.com

Guess-Works.com

    Gearbox Guru

  • Traders
  • PipPipPipPipPipPipPipPipPipPipPip
  • 19,839 posts
  • Local Club: Rugby Classic Mini Owners Club

Posted 30 March 2015 - 09:56 PM

The dust seal covers both the lip on the arm and the thrust washer, therefore preventing the ingress of dirt between the thrust washer and the arm.


#4 spiguy

spiguy

    Camshaft & Stage Two Head

  • Members
  • PipPipPipPipPipPipPipPip
  • 1,537 posts
  • Location: UnderTheCar

Posted 30 March 2015 - 09:57 PM

The thrust washer should be inside the seal when fitted, so what you are finding is correct. When it is on the car, the subframe (on the inside) and the radius arm bracket (on the outside) will sit right against the thrust washer face, and the seal will be up against these surfaces. That's how it's supposed to be.


Just position the thrust washer up against the pin and pop the seal over it.


First things that washer is the wrong way round. The ring should be arm side.


+1 to that :-)


Edited by carlukemini, 30 March 2015 - 09:58 PM.


#5 newenglandmini

newenglandmini

    Super Mini Mad

  • Members
  • PipPipPipPipPipPip
  • 646 posts
  • Location: Connecticut

Posted 30 March 2015 - 10:48 PM

Alright lads, brilliant!  As always, thanks for the prompt and thorough assistance.


#6 Bodhi

Bodhi

    Learner Driver

  • Noobies
  • PipPip
  • 22 posts
  • Location: Stony stratford

Posted 19 October 2015 - 06:44 PM

Where the groove is off set on the thrust washer does it matter which way it's positioned.

#7 Spider

Spider

    Moved Into The Garage

  • Admin
  • PipPipPipPipPipPipPipPipPipPipPip
  • 15,684 posts
  • Location: NSW
  • Local Club: South Australian Moke Club

Posted 19 October 2015 - 07:18 PM

The Arm is knackered!  The shoulder for the seal has just about rusted away and in any case, the thrust face looks like a lava pit!


I can't see the whole thrust face from that photo, but if all of it looks something like that, then it will have a fair bit of side float, not the best for handling or braking.


I'd suggest finding another Arm.


#8 newenglandmini

newenglandmini

    Super Mini Mad

  • Members
  • PipPipPipPipPipPip
  • 646 posts
  • Location: Connecticut

Posted 03 November 2015 - 01:20 PM

A belated thank you for your observation.  I inspected the surface and determined that it is not rusted, but it does have what appears to be damage from disassembly.  I'm going to true the surface before reassembly.


#9 Stevie W

Stevie W

    One Carb Or Two?

  • Members
  • PipPipPipPipPipPipPip
  • 1,204 posts
  • Location: Southampton
  • Local Club: P&SMOC

Posted 03 November 2015 - 08:16 PM

Hi Corey,


The position of the offset groove doesn't matter as long as this groove is facing inwards towards the radius arm.

One thing worth mentioning is the actual seal itself. Try and buy or use genuine Rover items as I've now just replaced all 8 of these for the 2nd time due to poor quality rubber parts that crack and perish.

Not too bad a job on the rear sub-frame but a royal pain in the behind on the front, especially when you have a servo fitted!! 


Cheers, Steve.


#10 newenglandmini

newenglandmini

    Super Mini Mad

  • Members
  • PipPipPipPipPipPip
  • 646 posts
  • Location: Connecticut

Posted 13 November 2015 - 01:36 PM

Hi Steve,


I just inspected the new seals that came with my radius arm rebuild kit.  They show surface cracking as-installed brand-new!  I'll follow your advice and source some better quality seals.


#11 Stevie W

Stevie W

    One Carb Or Two?

  • Members
  • PipPipPipPipPipPipPip
  • 1,204 posts
  • Location: Southampton
  • Local Club: P&SMOC

Posted 14 November 2015 - 03:12 PM

Hi Corey,


Well done for spotting the cracks, this is exactly what my rebuild kit seals were like! The genuine ones are better.....but check each one as some of these are "pre-cracked" too!!


Cheers, Steve.


1 user(s) are reading this topic

0 members, 1 guests, 0 anonymous users