Jump to content


Photo
- - - - -

'67 Morris Super De-Luxe


  • Please log in to reply
68 replies to this topic

#1 Tupers

Tupers

    Up Into Fourth

  • Members
  • PipPipPipPipPipPipPipPipPip
  • 4,156 posts
  • Location: Devon

Posted 12 May 2015 - 11:36 PM

I bought this on a little bit of a whim in December but wasn't really sure what I was going to do with it but having just started another MK1 restoration at work I've decided to make a start on my own. 


It's a '67 Morris Super De-Luxe hydro car and was formerly automatic but that wont be returning. I may well do away with the hydro suspension as well to keep it simple. 


Externally it's pretty rough but it has been off the road since the '90s. 

IMG_1320_zpsdnknualn.jpg


It's got one new wing on it but having been in bare metal for 20 years it's now rather shagged. 

IMG_1322_zpsr6llxqec.jpg


The passenger A-panel, A piller and step sill aren't much better. 

IMG_1347_zpsmdqcdiwy.jpg


The front floors are a little to flintstones looking for my liking. 

IMG_1357_zpsvny5v0fb.jpg


On the plus side most of the trim is still present and is in very good nick. 

IMG_1343_zpspzmlxzgz.jpg


IMG_1356_zpsvhlhfoqp.jpg


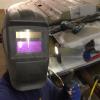
Here it is after an evenings worth of disassembly. hopefully another evenings work will see me ready to starting chopping the scabby bits off. 

IMG_1501_zpspr5xuisz.jpg


#2 Daz1968

Daz1968

    Up Into Fourth

  • Members
  • PipPipPipPipPipPipPipPipPip
  • 2,058 posts
  • Location: Dudley

Posted 14 May 2015 - 12:25 PM

nice project and look forward to updates as I am about to attempt a full floor replacement on my mk2 with m machine floor and unsure about bracing so this should help if I follow progress

#3 minimissions

minimissions

    Up Into Fourth

  • Members
  • PipPipPipPipPipPipPipPipPip
  • 3,427 posts
  • Location: North West
  • Local Club: M.M.O.C

Posted 14 May 2015 - 10:19 PM

Looks like a really nice little project there will be watching this one :)

#4 James_eaton_thewholething

James_eaton_thewholething

    One Carb Or Two?

  • Members
  • PipPipPipPipPipPipPip
  • 1,063 posts
  • Location: Manchester

Posted 14 May 2015 - 11:00 PM

looks like you are going to be in for some fun


#5 Tupers

Tupers

    Up Into Fourth

  • Members
  • PipPipPipPipPipPipPipPipPip
  • 4,156 posts
  • Location: Devon

Posted 15 May 2015 - 07:43 PM

The whole front end has come off as well as the front frame and some more of the interior gubins. Just the rear windows, headlining and rear trim to come out before it goes off to be blasted. 

IMG_1647_zpsdfbsorcr.jpg


I also had a nice stack of panels + a rear frame turn up from Mini Spares, it should certainly keep me busy.  

IMG_1646_zpseosnnkwb.jpg


#6 Tupers

Tupers

    Up Into Fourth

  • Members
  • PipPipPipPipPipPipPipPipPip
  • 4,156 posts
  • Location: Devon

Posted 27 June 2015 - 02:30 PM

I haven't had a chance to do anything on this recently but I did decide to take the plunge and have the body blasted to see just what I'm dealing with.

IMG_3805_zpslxveyehd.jpg


I had hoped that to only do front floor pans but both inner sills also need replacing so I'll be doing doing two half floors instead. 

IMG_3816_zpsm9ybsyfr.jpg


IMG_3813_zps2w5v9one.jpg


The rear half of the the rain gutter also need replacing. Fortunately I have a section cut from a shell that I can use here. 

IMG_3851_zpsuwezf14w.jpg


The back half of the boot floor also need attention but that's nothing new for Minis. 

IMG_3832_zpsulcacgg5.jpg


One big plus is that both rear quarters are incredibly straight. 

IMG_3857_zpsxv2pwrwu.jpg


IMG_3858_zpsadgsusyt.jpg


#7 RossKnight

RossKnight

    One heck of a member

  • Members
  • PipPipPipPipPipPipPipPipPip
  • 2,539 posts
  • Location: Hampshire or Surrey
  • Local Club: JKSA MOC

Posted 27 June 2015 - 03:48 PM

Ah man I want a mk1 project. Why do you get all the cool stuff!

#8 Ben_O

Ben_O

    Mill Road Garage

  • Paint Doctor
  • PipPipPipPipPipPipPipPipPipPip
  • 9,794 posts
  • Location: Isle of Wight

Posted 27 June 2015 - 10:47 PM

another nice project  :mrcool:


#9 minimissions

minimissions

    Up Into Fourth

  • Members
  • PipPipPipPipPipPipPipPipPip
  • 3,427 posts
  • Location: North West
  • Local Club: M.M.O.C

Posted 02 July 2015 - 01:52 PM

Looking good so far, i am undecided whether i want to get my mk1 blasted yet.... not sure how much would be left however at least like you said you then know what your dealing with..


#10 Zeemax Adventure

Zeemax Adventure

    Speeding Along Now

  • TMF+ Member
  • PipPipPipPipPip
  • 301 posts
  • Location: Llandudno

Posted 03 July 2015 - 09:09 AM

Cool Project, Looks fairly solid considering its age


#11 Tupers

Tupers

    Up Into Fourth

  • Members
  • PipPipPipPipPipPipPipPipPip
  • 4,156 posts
  • Location: Devon

Posted 11 July 2015 - 03:50 PM


Ah man I want a mk1 project. Why do you get all the cool stuff!

To be fair I've only actually got two projects on the go at the moment although they are cool. 


Looking good so far, i am undecided whether i want to get my mk1 blasted yet.... not sure how much would be left however at least like you said you then know what your dealing with..

Blasting is a bit daunting but it saves so much time in the long run and shows up a lot of flaws that wouldn't be noticeable buy other stripping methods. I still worry every time we go to pick a project up though. 


I've got back onto this for a couple evenings work on this week starting at the back. 
IMG_4170_zpspbzaxa5t.jpg
 
IMG_4176_zpsu4bovbx3.jpg
 
The boot floor was particularly bad around the valance closing panel gussets and the battery box was a bit nasty so they came off. 
IMG_4194_zpshclrvqg0.jpg
 
I made the new section from on large sheet rather than mess about with two or three smaller repair sections although I wont be welding it in just yet.  
IMG_4282_zpsiqwhegh8.jpg
 
Both rear wheel arches have gone at the back so they're got the chop as well. 
IMG_4191_zps4hvrc5w1.jpg
 
IMG_4221_zps7er82kk1.jpg
 
After making template and cutting the repair sections I used a wood block and chisel to put make the joggle on the inner edge of the arch. 
IMG_4231_zpsd5suudfu.jpg
 
Here they are clamped in. I just need to pop some holes and weld them on.
IMG_4212_zpsvfqdqvmk.jpg
 
IMG_4236_zpsfhw8guss.jpg
 
I also decided to push the boat out and got a new fliches and a pair of half floors for Mini Spares. 
IMG_4276_zpsk3rv2zuf.jpg
 
IMG_4271_zpsisujq4r0.jpg


#12 minimissions

minimissions

    Up Into Fourth

  • Members
  • PipPipPipPipPipPipPipPipPip
  • 3,427 posts
  • Location: North West
  • Local Club: M.M.O.C

Posted 13 July 2015 - 10:02 PM

The time aspect of cutting etc is s big plus to having it done that's true.. But like you say at least you no what you have to work with and then you can just start again... Yours is looking top would you suggest a spit with such a project??? Looks like it could make life easier..

#13 Tupers

Tupers

    Up Into Fourth

  • Members
  • PipPipPipPipPipPipPipPipPip
  • 4,156 posts
  • Location: Devon

Posted 18 July 2015 - 01:24 PM


 Yours is looking top would you suggest a spit with such a project??? Looks like it could make life easier..


The spit really is invaluable on something like this I wouldn't be without it. 


I've been plugging away again and got the wheel arch repairs welded in. 

IMG_4349_zps0tefypp1.jpg


IMG_4352_zpsu42nqk2g.jpg


With the arch repairs in I did the final trim on the boot floor repair and welded it in along with the valance closing panels and battery box. 

IMG_4361_zpsxqau086j.jpg


I painted the cavities behind the closing panels and then it was on with the valance. 

IMG_4372_zpsknqxswxt.jpg


The front of both arches need repairs but I decided to replace the heel board and closing panels first to give me something to line everything up to. 

IMG_4394_zpsbyuxkzua.jpg


IMG_4409_zpsi37v7bxf.jpg


After lining the closing panels up I took everything off as one unit to weld before it was refitted. 

IMG_4432_zps1abnmfjn.jpg


At the moment it's only welded along the seat base and exhaust tunnel as I'll be replacing the floor soon. 

IMG_4445_zpsqvd6f6vc.jpg


With those parts on I cleaned up the holes in the arch and seat base and started making templates. 

IMG_4458_zpswvzifbso.jpg


I'll get these welded in next week and then I can get onto the other side before doing the floors. 

IMG_4453_zpsqsibrw21.jpg


Edited by Tupers, 18 July 2015 - 01:26 PM.


#14 minimissions

minimissions

    Up Into Fourth

  • Members
  • PipPipPipPipPipPipPipPipPip
  • 3,427 posts
  • Location: North West
  • Local Club: M.M.O.C

Posted 18 July 2015 - 06:19 PM

Thought it would come in handy Defo need to be on the look for one myself top work looks like your getting through it :)

#15 Nino

Nino

    Mini Mad

  • Members
  • PipPipPipPip
  • 178 posts
  • Location: Jutland

Posted 18 July 2015 - 07:07 PM

this is some nice welding ! :) 


2 user(s) are reading this topic

0 members, 2 guests, 0 anonymous users