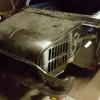
Out for a drive this afternoon and heard some bangs etc, pulled over to find the bolt that goes through the top engine steady bush and bolts into the engine block has sheared off in the block :-( there is nothing protruding to get a hold of with mole grips etc.
The way I see it the only option I have is to drill it out, having never done this before and being in an awkward position I don't feel confident doing this.
Is there anyone near Diss in Norfolk who would come and do this for beer tokens?
As an alternative could I fit the engine steady that fits to the thermostat housing? Would this one by itself be enough?
Thanks in advance,
Steve.


Help Needed - Snapped Engine Steady Bolt...
Started by
monkey
, Apr 12 2016 04:35 PM
25 replies to this topic
#1

monkey
-
- TMF+ Member
-

- 1,382 posts
One Carb Or Two?
- Location: Diss, Norfolk
- Local Club: Diss Mini Club
Posted 12 April 2016 - 04:35 PM
#2
Swift_General
-
- Members
-
- 871 posts
One Carb Or Two?
- Location: England
Posted 12 April 2016 - 04:39 PM
I would get the bolt out (but can't recommend someone near you - sorry). Alternatively use something like this.
http://www.minispare...|Back to search
http://www.minispare...|Back to search
#3
monkey
-
- TMF+ Member
-
- 1,382 posts
One Carb Or Two?
- Location: Diss, Norfolk
- Local Club: Diss Mini Club
Posted 12 April 2016 - 04:51 PM
thanks for the link swift_general I think that may be the answer - I didn't know these exsist!
I am very tempted to buy some easy out extractor things as I would like to do the job properly, but I know that the stud had gone through to the water jacket, so if I bugger the thread up I will be even more stuck!
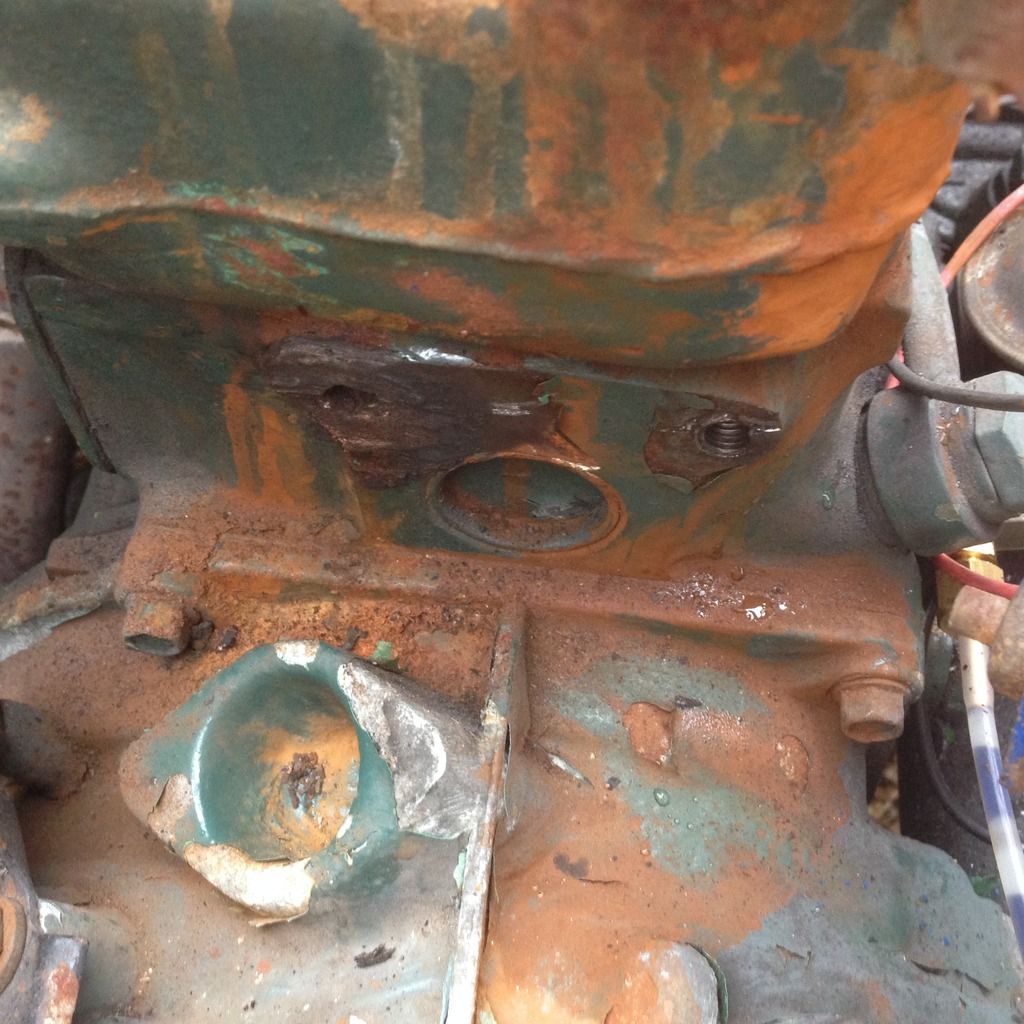
Presumably the bracket in your link bolts to the two bolts in the middle of the picture below?
What sort of bolt is used to hold the engine steady to the bracket in the link?
Thanks for the quick reply!
I am very tempted to buy some easy out extractor things as I would like to do the job properly, but I know that the stud had gone through to the water jacket, so if I bugger the thread up I will be even more stuck!
Presumably the bracket in your link bolts to the two bolts in the middle of the picture below?
What sort of bolt is used to hold the engine steady to the bracket in the link?
Thanks for the quick reply!

#4
Cooperman
-

- TMF+ Member
-
- 23,285 posts
Uncle Cooperman, Voted Mr TMF 2011
- Location: Cambs.
- Local Club: MCR, HAMOC, Chelmsford M.C.
Posted 12 April 2016 - 05:02 PM
Don't use an Easy-out. They are not known as 'Easy-snap' for nothing!
You can drill out the broken bolt using a 90 degree drill attachment then drill further and fit a Heli-coil. The thread size is 5/16" UNF.
You can drill out the broken bolt using a 90 degree drill attachment then drill further and fit a Heli-coil. The thread size is 5/16" UNF.
#5
monkey
-
- TMF+ Member
-
- 1,382 posts
One Carb Or Two?
- Location: Diss, Norfolk
- Local Club: Diss Mini Club
Posted 12 April 2016 - 05:50 PM
Well I only had it out a week ago and refitted it with copper grease so I doubt it is that stuck!
Whilst I know that is the correct thing to do cooper man, I don't have a 90degree drill adapter or any taps or helicoils so once I have paid all that, I don't feel comfortable doing it so an option like swift_general has offered up seems inviting. What bolt would be needed to use that bracket?
Cheers
Steve
#6
nicklouse
-

- Members
-
- 18,587 posts
Moved Into The Garage
- Location: Not Yorkshire
- Local Club: Anonyme Miniholiker
Posted 12 April 2016 - 05:56 PM
Can't see any snapped bolt?
I guess we are talking about the rear bolt hole?
And you mention that you are through to the water jacket.
I think you have bigger issues at the moment.
I guess we are talking about the rear bolt hole?
And you mention that you are through to the water jacket.
I think you have bigger issues at the moment.
#7
Cooperman
-
- TMF+ Member
-
- 23,285 posts
Uncle Cooperman, Voted Mr TMF 2011
- Location: Cambs.
- Local Club: MCR, HAMOC, Chelmsford M.C.
Posted 12 April 2016 - 05:56 PM
It's a bit odd that a bolt should shear in use. There are two bolts holding the stepped bracket onto the block; a short one and a long one which goes through he steady bar. Have they both sheared or only the long one? If just the long one I suspect it was broken when the engine was installed (that's when I have done it  ) and it was not noticed. The steady bar was probably held in place (just) by the clamping effect of the other bolt, then it broke away after a bit of driving.
#8
monkey
-
- TMF+ Member
-
- 1,382 posts
One Carb Or Two?
- Location: Diss, Norfolk
- Local Club: Diss Mini Club
Posted 12 April 2016 - 06:15 PM
So it's snapped about 3-4mm into the hole, and it's the left hand Hole in the picture above.
When I removed it to change the bushes on the engine steady, water pissed out, so someone in a past life has gone into the water jacket. When I refitted the bolt it sealed so I don't think it's too much of an issue?
The shorter front bolt is still fine
When I removed it to change the bushes on the engine steady, water pissed out, so someone in a past life has gone into the water jacket. When I refitted the bolt it sealed so I don't think it's too much of an issue?
The shorter front bolt is still fine
#9
Cooperman
-
- TMF+ Member
-
- 23,285 posts
Uncle Cooperman, Voted Mr TMF 2011
- Location: Cambs.
- Local Club: MCR, HAMOC, Chelmsford M.C.
Posted 12 April 2016 - 06:24 PM
Can't see how a 5/16" dia steel bolt could shear. The shear load to break it would be around 1 ton and that is in simple shear rather than supported by the bracket.
Normally that bolt only breaks when being (over) tightened during assembly.
#10
AlexMozza
-

- Members
-
- 1,248 posts
One Carb Or Two?
- Location: Bratton, Wiltshire
- Local Club: Not Yet
Posted 12 April 2016 - 06:37 PM
http://www.somerford...os=v&chapter=20
At the bottom are broken steady repair kits.
They will get you out of trouble if you don't fancy drilling out the snapped bolt.
At the bottom are broken steady repair kits.
They will get you out of trouble if you don't fancy drilling out the snapped bolt.
#11
monkey
-
- TMF+ Member
-
- 1,382 posts
One Carb Or Two?
- Location: Diss, Norfolk
- Local Club: Diss Mini Club
Posted 12 April 2016 - 06:47 PM
Cheers Alex - just ordered similar from eBay 
Cooper man - all I know is that the bolt was fine when I put it in, whether I over tightened it or under tightened it, when I left it it was in one piece and has been fine for a week - but now half is missing and half is stuck in the block.
Cooper man - all I know is that the bolt was fine when I put it in, whether I over tightened it or under tightened it, when I left it it was in one piece and has been fine for a week - but now half is missing and half is stuck in the block.
#12
Swift_General
-
- Members
-
- 871 posts
One Carb Or Two?
- Location: England
Posted 12 April 2016 - 09:48 PM
Monkey - I would echo Cooperman's comments. Don't use 'easyouts'. I've used them before and you're likely to end up with a broken one to deal with, (being much harder and virtually 'un drillable') rather than a broken bolt. Normally that would be a blind hold so that fact that you suggest it goes through the to the water jacket will obviously need investigating.
Edited by Swift_General, 12 April 2016 - 09:51 PM.
#13
gazza82
-
- Members
-
- 3,014 posts
Up Into Fourth
- Location: Bucks
- Local Club: TMF+
Posted 12 April 2016 - 10:19 PM
You can get reverse drill bits that drill in anti-clockwise and often the old bolt comes out as a result if the heat generated.
Of course the you have to get the bolt off the bit!
But they do seem to be more successful than easi-outs and work in small drills.
Of course the you have to get the bolt off the bit!
But they do seem to be more successful than easi-outs and work in small drills.
#14
MRA
-
- Banned
-
- 7,607 posts
Previously known as 'mra-minis.co.uk'.
- Location: Due to move again....
Posted 12 April 2016 - 11:39 PM
Nothing wrong with easi outs, we used them a lot in aircraft and still do so..... I have lots of the things what they are not good with is rusted in bolts, but as you had copper slipped yours it would be fine, I suspect you didn't have the correct support bracket in place hence why is broke, they are SAE5 bolts so not overly strong but still more than capable of doing the job if supported and bot bolts are tightened correctly.
Cooperman is right about the 1000kg shear capacity, but this becomes a little different when you don't have the supporting bracket and you get a combination of tensile and shear forces, this combination in your case has caused fatigue, in just the same way that Uri Gella breaks spoons.
Part item number 23 in the picture below
 image.axd.jpg 8.05K
4 downloads
image.axd.jpg 8.05K
4 downloads
Edited by MRA, 12 April 2016 - 11:41 PM.
#15
GraemeC
-

- TMF+ Member
-
- 7,438 posts
Crazy About Mini's
- Location: Carnforth
Posted 13 April 2016 - 08:01 AM
Of no use here, but I must admit I prefer the early set up with the backing plate connecting the two bolts together too.


1 user(s) are reading this topic
0 members, 1 guests, 0 anonymous users


