I'll be interested in the feedback.Interesting stuff! My solder joints when joining 2 wires always ends up wicking along the wire. It ends up with about 40mm of solid joint and by the time you add heatshrink then all flexibility is gone.
I used these solder sleeves at work many years ago and that was for military work. The fact that the solder ring is very short and the heatshrink supports the joint makes me happier.
I'll try them when they arrive and report back.

Mcmini Micra Conversion
Started by
McMini 22
, May 17 2016 10:31 PM
308 replies to this topic
#301

Northernpower
-

- Members
-

- 2,414 posts
Mr. 7-Port
- Name: Graham
- Location: North Yorkshire (God's County)
- Local Club: Its out there somewhere
Posted 18 August 2017 - 07:44 PM
#302
McMini 22
-
- Members
-
- 289 posts
Mini Mad
- Location: East lothian
Posted 19 August 2017 - 02:07 PM
I was trying to make 2 hooks and then join them. This method took a fair bit of heat, hence the wicking.
I have since just used a but joint. Forcing the wire stripped ends together, tidy it up, then solder it. This way worked much better with less wicking as it took less heat.
I have since just used a but joint. Forcing the wire stripped ends together, tidy it up, then solder it. This way worked much better with less wicking as it took less heat.
#303
McMini 22
-
- Members
-
- 289 posts
Mini Mad
- Location: East lothian
Posted 22 August 2017 - 01:04 PM
What a mess!
 Spaghetti! by Ewan McLean, on Flickr
So far I have -
Re-formed the ECU to Engine loom. Only temporary and using Spiwrap it went quite quickly.
Buzzed out the oil switch
Buzzed out the starter signal
Tried to buzz out the alternator to ignition light (no success).
Plan is to get it cranking and then work out the fuel and then the sparks.
Thinking of replacing the battery to starter cable with 50mm2. Is this heavy enough?
I have a battery cutout switch between the seats but this will have to move as my seats are bigger and the exhaust is pretty close to the terminals.
#304
McMini 22
-
- Members
-
- 289 posts
Mini Mad
- Location: East lothian
Posted 06 September 2017 - 12:39 PM
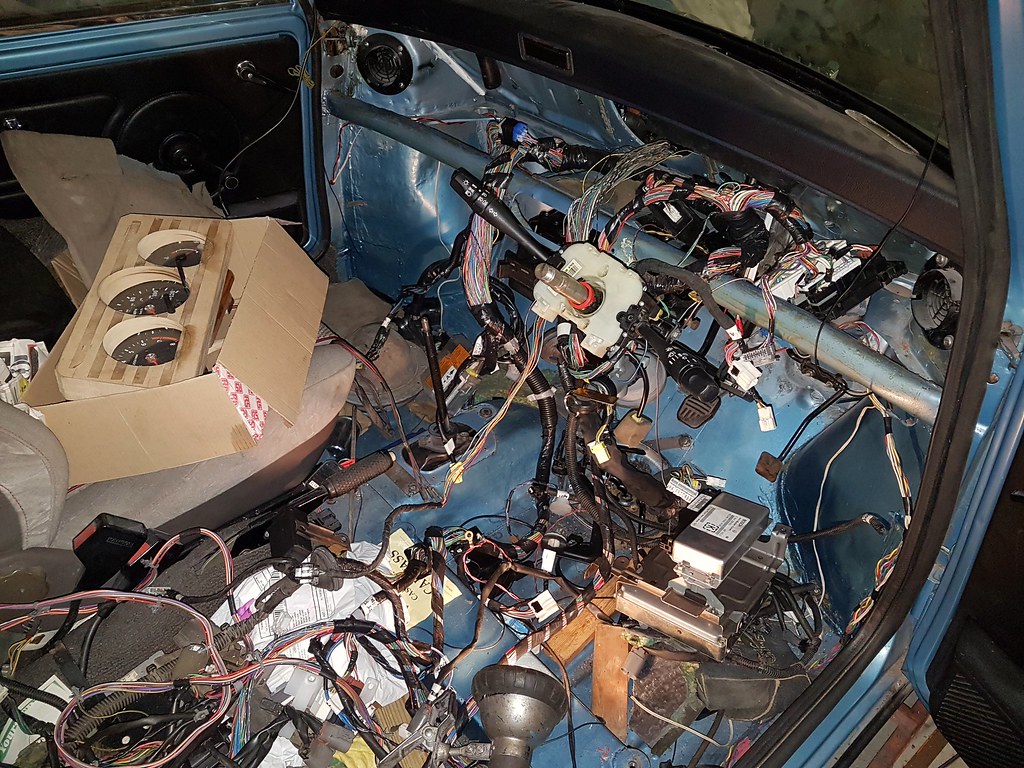
I decided to put my engine to body earth here.
 2017-09-06_01-22-01 by Ewan McLean, on Flickr
So it involved scraping the back of the web until I got shiny metal. As I couldnt see behind there, I used my borescope camera. Although the photo quaity is not perfect, this was as a great purchase and plugs directly into my phone.

#305
McMini 22
-
- Members
-
- 289 posts
Mini Mad
- Location: East lothian
Posted 24 October 2017 - 12:50 PM
Sorry for not updating. It has just been easier to post photos on facebook since Photobucket became idiots!
Needed a hole in the inner wing to allow me to turn engine by hand. Chain drilled and then ground it all smooth.
 Hole by Ewan McLean, on Flickr
Throttle body/cable was hitting my heater hose bulkhead fittings (even after shortening the bracket) so I had to move the cable to closer to this position. It has a temporary bracket at the moment and will get something a bit stronger later.
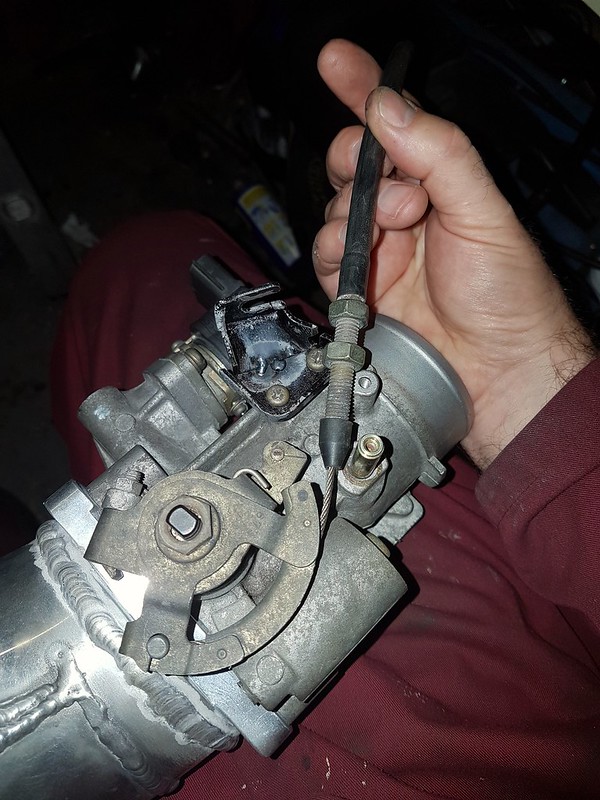 T.v. bracket by Ewan McLean, on Flickr
I bought some silicone/fibreglass sleeve to protect the oil breather pipe as it os pretty close to no4 exhaust header.
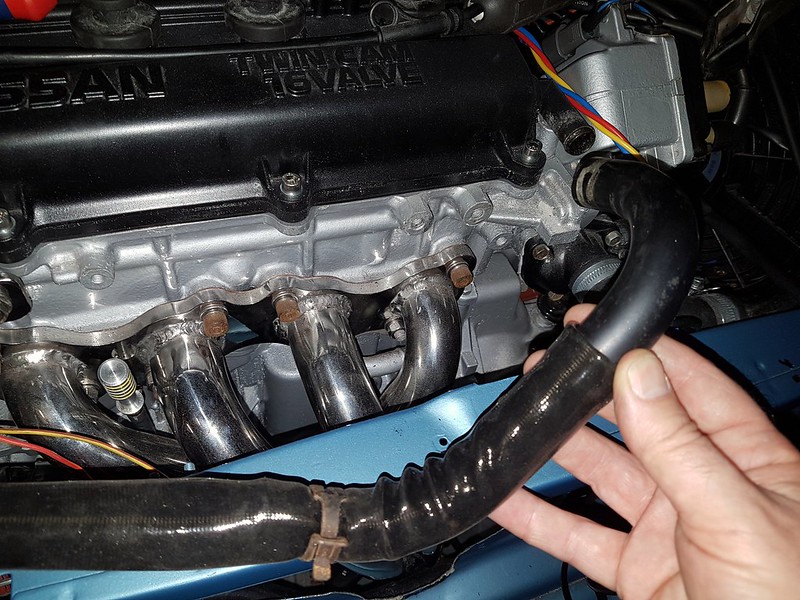 2017-10-24_01-25-21 by Ewan McLean, on Flickr
Now the main culprit for soaking up my time. I made my plenum ages ago but never checked it for leaks. It had about 10 leaks and has been in the welding shop 4 times to get it sorted. I still have a couple to sort out. When it is all air tight I have decided to grind all the welds on the chamber down and weld 12mm wide bands over them. The 90 degree angle bit (base to chamber) will get an L shaped length formed and welded as I have seen a few plenums on the internet burst at the seams. Mostly on Turbos but I'm not taking any chances!
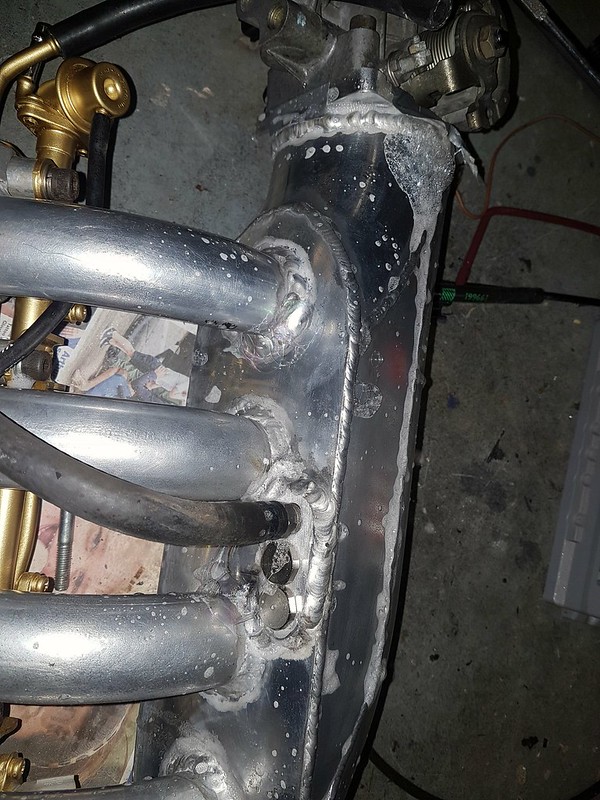 Leaky by Ewan McLean, on Flickr
I also had to repair the fuel tank valve as it was burst. A wee bit brake pipe and then a load of epoxy sorted it out.
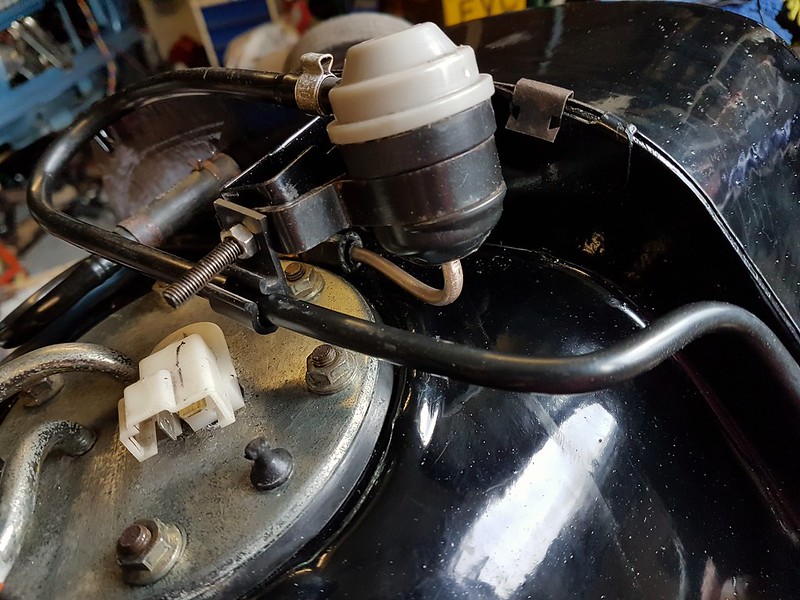 Valve by Ewan McLean, on Flickr
#306
thelegg
-

- Members
-
- 612 posts
Super Mini Mad
- Location: Forton
Posted 24 October 2017 - 10:20 PM
Where did you buy the silicone protector sleeve from as I could really do with putting one on mine
#307
McMini 22
-
- Members
-
- 289 posts
Mini Mad
- Location: East lothian
Posted 25 October 2017 - 02:06 PM
Same place I buy most of my bits, good old eBay. Lol.
#308
StefanMini
-

- Noobies
-
- 102 posts
Mini Mad
- Location: Andijk
- Local Club: M.S.C.N
Posted 01 June 2023 - 04:49 PM
Nice project! Did you ever finish te job? As your last post is already a few years ago.
#309
thelegg
-
- Members
-
- 612 posts
Super Mini Mad
- Location: Forton
Posted 13 July 2023 - 07:12 AM
Nice project! Did you ever finish te job? As your last post is already a few years ago.
There has been more progress on this posted on Facebook I believe, if your on Facebook join Nissan powered classic minis


1 user(s) are reading this topic
0 members, 1 guests, 0 anonymous users


