Jump to content


Photo
- - - - -

'62 Honda V-6 Franken Mini


  • Please log in to reply
7 replies to this topic

#1 Johnny Mac

Johnny Mac

    Learner Driver

  • Noobies
  • PipPip
  • 24 posts
  • Location: San Francisco Bay Area

Posted 03 November 2016 - 11:11 PM

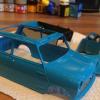
I was talking to Magneto in another section and he suggested I do a build thread so here goes. I've been doing restorations and restomods for about 45 years now. I like restomods the best. I like to leave it relatively unscathed on the outer surface and update/upgrade everything under the hood, er, bonnet. I had just finished doing a 1956 Willys (Jeep) Wagon and wanted to do something small. I saw Mini Tec's video on their 6-cylinder rear-engine Mini Cooper and I was sold. I found a '62 in Wisconsin that had no engine/transmission and the price was right. The pictures looked good. Even the supplemental detailed ones I had the owner take for me. Once I got it though I found that most of the bottom was window screen, architectural foam and bondo. So the first six months were spent cutting out rot and replacing all the cut out areas with fresh sheet metal. One very nice surprise has been how inexpensive body panels are for Minis!

The whole front end was fiberglass when it showed up so that went into the dumpster the first day. After a few days of exploratory surgery I determined the only safe way to do the job was to cut out the entire driver side pan and sill. If I did both side at the same time the car would fold in half! So I did just that. I installed the left side, the right side and welded them together afterwards. Simple enough sentence, but it took a few months to accomplish.

More later.


Cheers! Johnny Mac

Attached Files


#2 Johnny Mac

Johnny Mac

    Learner Driver

  • Noobies
  • PipPip
  • 24 posts
  • Location: San Francisco Bay Area

Posted 03 November 2016 - 11:25 PM

By the way, a rotisserie only cost about $80 in materials and was super easy to fab together. And it really, really helped.

After the floor pan and sills were done I went through almost a quart of seam sealer. After that the whole bottom are was undercoated with the Permatex rubberized undercoating. Next I took care of noise with Lizard Skin. It's a spray on sound abatement material that really works. I don't plan on running with a headliner so the Lizard Skin went everywhere. In more ways than one. My buddy didn't get out of the way fast enough and I shot the backs of his legs. It worked though, he was much quieter after that...


Attached Files


#3 Johnny Mac

Johnny Mac

    Learner Driver

  • Noobies
  • PipPip
  • 24 posts
  • Location: San Francisco Bay Area

Posted 03 November 2016 - 11:46 PM

More on the Franken Mini who will be known as Nelly, as in "Whoa Nelly!"

Once I was happy with the interior I went about destroying it right away. The new rear sub-frame is installed 27 inches to the rear of the cross member. So everything to the rear of that had to be cut out. Rear seat, inner wheel wells, boot floor pan and rear seat shelf. Once I was done the rear end was very wobbly I can tell you! So  everything had to be braced till I was ready. The day we slid the rear sub-frame in we had to remove all the bracing so we had to go really carefully not to tweak anything. The sub-frame had to go in through the driver's door and then slide back. After welding in some custom brackets it was in to stay.

The front sub-frame was a lot easier. I shortened the inner wings and cleaned up the front wall. Can't call it the firewall any more!


Attached Files


#4 Johnny Mac

Johnny Mac

    Learner Driver

  • Noobies
  • PipPip
  • 24 posts
  • Location: San Francisco Bay Area

Posted 03 November 2016 - 11:58 PM

More on Nelly,


Next came repair work on the outside. The only areas that really needed work were both scuppers. So those were cut out and replaced. I also added NACA ventholes behind the doors on both sides. These will act as fresh air intake for the engine compartment. Next I started working on the boot lid. US license plates wont fit in the channel in the boot lid so I cut that out and began the smoothing process. I also cut 5 holes in the lid for hot air exhaust from the engine. These vent holes will have beauty rings with stainless steel hardware cloth to keep fingers out.

Attached Files


#5 Magneto

Magneto

    One Carb Or Two?

  • Members
  • PipPipPipPipPipPipPip
  • 889 posts
  • Location: Kansas City, USA
  • Local Club: KC MINI Club

Posted 04 November 2016 - 01:28 AM

Thanks for posting this thread Johnny Mac, doesn't the MiniTec frame tie all the way to the front of the shell?


#6 Johnny Mac

Johnny Mac

    Learner Driver

  • Noobies
  • PipPip
  • 24 posts
  • Location: San Francisco Bay Area

Posted 04 November 2016 - 08:22 PM

The original design coming from them only has the sub-frames connecting to the front and rear of the floor pan respectively. I was thinking about extending cross braces from the driver's front point to the passenger rear and vice versa. Just to join them together.


#7 Johnny Mac

Johnny Mac

    Learner Driver

  • Noobies
  • PipPip
  • 24 posts
  • Location: San Francisco Bay Area

Posted 04 November 2016 - 09:01 PM

Next, I took a step away from the body work and started the electrical system. I love the Copper Bussman fuse/relay blocks. They are very inexpensive and provides 5 relays and 10 fuses in a waterproof compartment. Totally customizable and compact too! I used one for functions that will be hot all the time and one that gets hot off the master switch. The weatherproof construction allowed me to put them on a bracket and mount them up front on the old firewall immediately behind the fuel cell.

For instrumentation I wanted a little bit more than the stock binnacle, but at the same time I didn't want to lose the cool shelf so I made my own instrument panel. For instruments I chose a dual quad GPS set-up from Speed Hut. The right side is fuel level, oil pressure, engine temperature and battery voltage. The left side is a combination tachometer and speedometer. The speedometer is GPS based. The cool part about that is with an internal accelerometer it can now display 0-60 elapsed time and standing quarter mile time using the little LCD display in the center. The little button changes functions and stages the accelerometer.

I'm using color coded wire for ease of identification. I started with a 60's British wire color code standard and then had to add a few new things for the ECM and other components that didn't exist back then. All of the wires will be in nylon mesh bundles.

Finally, the master switch and starter switch will go in the center of the "transmission tunnel". There's a barrel key to turn everything on and a guarded momentary switch to start the engine.

Attached Files


#8 Johnny Mac

Johnny Mac

    Learner Driver

  • Noobies
  • PipPip
  • 24 posts
  • Location: San Francisco Bay Area

Posted 04 November 2016 - 09:24 PM

After the electrical system was started I mounted the front end and welded it in place. Before I forget, I want to give special thanks to John Goolevitch for all his advice on body work. It was his idea to do the floor pan one side at a time and it worked out great. That pocket knife is still coming your way, John.

Once I had all the body panels in place I started stripping the car to get it ready for paint. I decided to use Aircraft paint stripper. Ironic that right on the can it says specifically not to use on aircraft. What? Whatever. The little mini had more than ten coats of various color paint so I had to strip several times before I got down to bare steel.

Finally, I started mounting all of the bolt-on's to check for proper fitment. Extra wide fender flares (wheel arches?) are on their way and as soon as I get those mounted I can shoot primer, block, primer, block and finish coat. The plan is British racing green with a wide silver stripe that goes right over the top all the way.

This brings me up to where I am currently. Suspension, brakes, pedals, fuel cell and radiator are also on order. Once that order comes in there will be another couple of months of furious activity. I would love to get this little monster finished in time for Mini Thunder 2017. I think that's in February.

Cheers!

Johnny Mac

Attached Files


1 user(s) are reading this topic

0 members, 1 guests, 0 anonymous users