Jump to content


Photo
- - - - -

Help With Rear Radius Arm Rebuild


  • Please log in to reply
4 replies to this topic

#1 Brian Cartmell

Brian Cartmell

    Starting My Mini Up

  • TMF+ Member
  • Pip
  • 3 posts
  • Location: Sacramento, CA

Posted 11 September 2017 - 01:05 AM

Im doing a complete restoration on a 61 Morris Mini 850 and thought id tackle te Rear radius arms, I did all my research and ordered the GSV1125 kit from minispares (with extra bushing).

Well got it all torn apart to find it has a bushing at each end and what I think is a steel tube in the middle,

This wasn't what I was expecting, I removed one bushing which was quite a ugly experience.

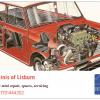
Question is do I (and HOW ?) remove the steel sleeve/tube and other bushing and replace with Minispares kit I ordered or go back with two bushings and sleeve ????Attached File  radius arm bushing.jpg   31.84K   5 downloads


#2 cian

cian

    One Carb Or Two?

  • Traders
  • PipPipPipPipPipPipPip
  • 869 posts
  • Location: northern ireland
  • Local Club: Minis In Northern Ireland

Posted 11 September 2017 - 02:13 AM

You have got one of the early 2 bushing arms, best to leave the steel tubing in there as they are far better than the replacement plastic ones as they tend to split and let grease into the entire arm, do you want to rebuild this arm or go to the one bush one bearing arm?

#3 Brian Cartmell

Brian Cartmell

    Starting My Mini Up

  • TMF+ Member
  • Pip
  • 3 posts
  • Location: Sacramento, CA

Posted 11 September 2017 - 03:12 AM

I want to rebuild it but am unsure of what to do now ?  


#4 Spider

Spider

    Moved Into The Garage

  • Admin
  • PipPipPipPipPipPipPipPipPipPipPip
  • 15,142 posts
  • Location: NSW
  • Local Club: South Australian Moke Club

Posted 11 September 2017 - 07:56 AM

I want to rebuild it but am unsure of what to do now ?  


Remove the Inner side bush and if you really want to, the steel tube to clean it all up.


You can get tools for removing the bush, or if you have a dremal and some time / patience, slot through the bush BUT don't go all the way through it, only go to about 90% the way through and then using a small screw driver, drive that behind it to split & collapse it, then it will fall out. The steel tube is only a neat fit inside the arm, it will push out.


The bush is easy to get a hold of, it's the same as has already been supplied in your kit.


As Cian suggested ^ re-use the steel tube. The plastic ones are rubbish.


You'll need to ream both bushes after fitting them.


Or you could give them to a firm who overhauls them to do for you.


#5 tiger99

tiger99

    Crazy About Mini's

  • Members
  • PipPipPipPipPipPipPipPipPipPip
  • 8,584 posts
  • Location: Hemel Hempstead

Posted 11 September 2017 - 11:02 PM

That will be a very nice car, and quite valuable once restored! The snag with what you are doing is that the inner bush, which is carrying the very high peak load of the rubber cone as well as wheel location loads, did not tend to last very long, so the needle roller was introduced. Now, in theory, a plain bronze bush will carry a higher load than a needle roller of the same diameter, but only if it is well lubricated. I strongly recommend keeping such a rare and valuable car original, with two bushes, but with regular (2000 miles max) greasing with the best modern grease that you can find. I would suggest that it needs to be a general purpose grease, not graphite or moly. Maybe something like Lucas Red N Tacky?


Such an early car is understandably likely to have worn bearings by now, but sadly in many cases in newer cars it happens due to neglect of lubrication, and most of the radius arm work that is done could have been avoided. The later needle roller design will give at least 50k, often 100k miles or more if regularly maintained except maybe in a highly tuned car.. With a bit of practice the entire car can be greased in 5 to 10 minutes, a more pleasant task in a newly restored and clean car. Yours will take a bit longer because it should have grease nipple(s) on the gearchange mechanism as well as 6 at the front, 2 at the rear on the suspension.


Have fun!


1 user(s) are reading this topic

0 members, 1 guests, 0 anonymous users