Edited by leepol83, 26 December 2018 - 07:20 PM.


Rear Heel Board Repairs, Subframe Alignment ?
Started by
leepol83
, Dec 26 2018 07:18 PM
16 replies to this topic
#1

leepol83
-
- Members
-

- 1,744 posts
Camshaft & Stage Two Head
Posted 26 December 2018 - 07:18 PM
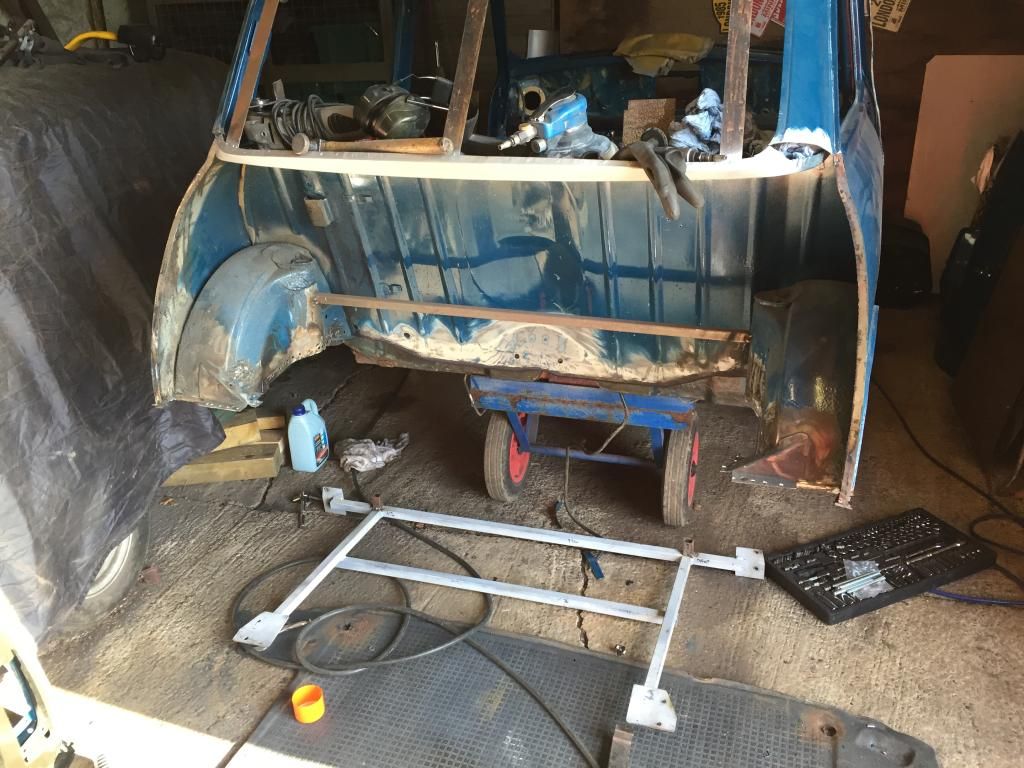
Hi chaps just gathering info before I tackle this as my next job, I have to replace the rear floor boot complete but I’m thinking maybe do the heel board repairs first what do you think ? It’s both sides of the heel board I need to repair so I’ll get genuine panels to do it with, I’ve my concerns with getting it back in the same place!!! My thoughts are to make a metal jig up out of some box section bolted to all the rear subframe mounts and use that to align my heel board repairs so it goes back the same, is this enough to guarantee the correct position of the rear subby or is there more I need to do ? Cheers chaps appreciate you’re advice and help on this as I’m not looking forward to it at all ?thanks again.
#2
Homersimpson
-

- Members
-
- 829 posts
One Carb Or Two?
- Location: Redditch
Posted 26 December 2018 - 07:36 PM
If you are doing one side at a time then drop the subframe (you can do this by leaving the rear mounts in and just dropping the front), cut out the rot on one side, refit the frame, tack the panel in then drop the frame again, weld it in and then do the other side.
Its fairly simple if the front mounts are reasonably ok (i.e. not rotted off completely) and the rear mounts are good or at least not bad enought that the frame is dropping through the boot floor.
If its really bad then I use a plumb line dropped to the floor from the various points and string lines to set it all up.
#3
leepol83
-
- Members
-
- 1,744 posts
Camshaft & Stage Two Head
Posted 26 December 2018 - 07:54 PM
Thanks mate the mounts are all ok so no completely rotten so at the moment I do have good reference points, I’ve already dropped the subframe that is rotten for sure ha ha!!! So maybe I can’t refit it to check ?
#4
cal844
-

- Members
-
- 9,626 posts
Crazy About Mini's
- Location: Ballingry, Fife
- Local Club: TFMOC
Posted 26 December 2018 - 08:09 PM
My dad made a location jig from a piece of 4x4 box section and two pieces of angle iron welded on the ends with holes for the trunnion bolts to go through.
We then marked and cut the heelboard to fit home made heelboard ends.
We then marked and cut the heelboard to fit home made heelboard ends.
#5
sonikk4
-

- Admin
-
- 16,051 posts
Twisted Paint Polisher!!!
- Name: Neil
- Location: Oxfordshire
Posted 26 December 2018 - 08:20 PM
Subframe would be ideal but for ease and lightness make a jig.
I made mine from 20mm box and 2mm plate. You will need to gusset it or add another cross section as i did other wise you could end up with problems.
#6
sonikk4
-
- Admin
-
- 16,051 posts
Twisted Paint Polisher!!!
- Name: Neil
- Location: Oxfordshire
Posted 26 December 2018 - 08:22 PM
#7
leepol83
-
- Members
-
- 1,744 posts
Camshaft & Stage Two Head
Posted 26 December 2018 - 08:39 PM
R right I see so the extra cross bar in the middle is just so it doesn’t twist I’m assuming as you say ma give problems, what’s the 2 small uprights (the unpainted bits) do they go to the boot floor ?
Thanks mate
Thanks mate
#8
spiguy
-
- Members
-
- 1,537 posts
Camshaft & Stage Two Head
- Location: UnderTheCar
Posted 26 December 2018 - 11:28 PM
I just did mine a side at a time. Cut out the area you plan to replace, then bolt the subframe back into place, attaching it on the remaining 3 points. Support the subframe underneath on the side you have cut out. Then put your repair panel in position and adjust positioning until it lines up with the mount holes (ensure the subframe is level of course) and run the bolts in. You can then mark a line on the repair section (I used heritage end repair panels - they come with plenty metal on them, extending well inwards) cut it and then with the subframe bolted to the repair section, tack it in place. This ensures that you preserve correct alignment.
Once the repair section is welded in, repeat the process for the other side. Your repaired side positions the subframe now for you to repeat the process on the other side. This whole process is ALOT easier if you have removed the radius arms of course!
#9
leepol83
-
- Members
-
- 1,744 posts
Camshaft & Stage Two Head
Posted 27 December 2018 - 10:14 AM
Brilliant if that’s the case maybe I’m best to purchase my new heritage subframe and new mounts first then at least I’ll 100 percent know it’ll fit then
Cheers guys
Cheers guys
#10
sonikk4
-
- Admin
-
- 16,051 posts
Twisted Paint Polisher!!!
- Name: Neil
- Location: Oxfordshire
Posted 27 December 2018 - 08:10 PM
R right I see so the extra cross bar in the middle is just so it doesn’t twist I’m assuming as you say ma give problems, what’s the 2 small uprights (the unpainted bits) do they go to the boot floor ?
Thanks mate
Those two small uprights touch the floor when its in place. Just another thing to help position things.
#11
leepol83
-
- Members
-
- 1,744 posts
Camshaft & Stage Two Head
Posted 28 December 2018 - 12:30 AM
Brilliant thanks
Any tips on actually getting the piece out, looks like it’s spot welded to the seat base and the floor ?
Any tips on actually getting the piece out, looks like it’s spot welded to the seat base and the floor ?
#12
sonikk4
-
- Admin
-
- 16,051 posts
Twisted Paint Polisher!!!
- Name: Neil
- Location: Oxfordshire
Posted 28 December 2018 - 08:18 PM
Brilliant thanks
Any tips on actually getting the piece out, looks like it’s spot welded to the seat base and the floor ?
Just be patient, pop every spot weld you can find and make sure they all split. The awkward area is in the companion bin area so personally i always remove them purely for access.
#13
leepol83
-
- Members
-
- 1,744 posts
Camshaft & Stage Two Head
Posted 30 December 2018 - 09:25 PM
I’ve got to do the complete rear quarter panels so access should be ample I’m hoping, I’ll probably just do one complete side at time including the rear quarter panel replacement ????
Cheers chaps I feel a little more confident now ??
Cheers chaps I feel a little more confident now ??
#14
cal844
-
- Members
-
- 9,626 posts
Crazy About Mini's
- Location: Ballingry, Fife
- Local Club: TFMOC
Posted 30 December 2018 - 10:59 PM
I’ve got to do the complete rear quarter panels so access should be ample I’m hoping, I’ll probably just do one complete side at time including the rear quarter panel replacement ????
Cheers chaps I feel a little more confident now ??
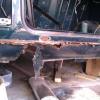
If the damage is at the wheel arch to sill seam you can buy these repair sections (and any Mini panel) from M Machine based in Darlington UK. Great service and well packaged
#15
leepol83
-
- Members
-
- 1,744 posts
Camshaft & Stage Two Head
Posted 31 December 2018 - 07:56 PM
The damage is lower down yes but I got a pair of genuine rear quarters for £190 posted ? so may aswell use them it’s a better job In my opinion, or maybe I could cut em up ? and repair hmmm! Got me thinking now


1 user(s) are reading this topic
0 members, 1 guests, 0 anonymous users


