Jump to content


Photo
- - - - -

1991 Rover Mini Mainstream Cooper - Restoration


  • Please log in to reply
2 replies to this topic

#1 EatSleepJDM

EatSleepJDM

    previously known as 88minicity

  • Members
  • PipPipPipPipPipPip
  • 631 posts
  • Location: Swindon, Wiltshire
  • Local Club: Blakehill Minis

Posted 16 April 2020 - 11:51 PM

I’m starting to lose count of how many projects i’ve had in the last few years, whether it be minis or other forms of financial ruin. So it’s about time I started a build thread for one again i think!

This is my latest project that I recently picked up.

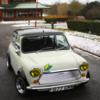
Introducing ‘Henry’, a 1991 Mainstream Cooper in desperate need of saving.

I stumbled across it for sale on facebook marketplace looking sorry for itself. However it had the correct 1275 engine, a host of new panels included as well as some panels already replaced on the car so it was a good base to start from.

The plan is to restore it back to it’s original spec as these last of the carb Coopers are getting rarer, so would be nice to save this one.

Anyway, on to some photos.

Made the trip up to go and collect it and pull it out the garage it had been sat in for yearsAnd how it sits before it all begins!

E178-DAEF-4-B51-4456-A352-7-D09936-C1845

E178-DAEF-4-B51-4456-A352-7-D09936-C1845

Looking forward to getting on with this! I will update as I go along

Cheers

Edited by EatSleepJDM, 04 July 2020 - 09:48 PM.


#2 EatSleepJDM

EatSleepJDM

    previously known as 88minicity

  • Members
  • PipPipPipPipPipPip
  • 631 posts
  • Location: Swindon, Wiltshire
  • Local Club: Blakehill Minis

Posted 17 April 2020 - 12:13 AM

First job was to strip off the fibreglass panels that were not going to be needed and sell them to make way for metal replacements. Removed the fibreglass doors, poly windows, flipfront and fibreglass bootlid.

2-C566-D50-2-A8-F-4294-BF79-236468964-F4

Now I had plenty of access the next job was to get the engine running. I will be giving the engine a refresh when it’s out but it would be nice to know it ran before i took it apart.

Charged the battery, linked up a jump pack and tried the key but found the ignition barrel to be a mess. So the fix of the day for that was a screwdriver across the starter motor and a bit of easy start, and after a few turns it fired up! Green light to take the engine/box out..

5365-C91-D-C0-EC-4527-86-D3-00-EB9011-F6

All came out nicely, and a bit of a cleanup and bay strip left it like this

EC7-FA88-B-930-A-4-B00-84-FF-2-B2568-FFB

Next job was to get it in the garage and stripped ready to make a spit to make the underside welding easier

153-A03-A3-A661-467-D-8-B2-E-432-A17-FA0

2-EF63025-3-D80-4040-A7-BB-EEA4238-BC10-

88-AE6-F86-4-D57-4736-9-AED-58890-D9320-

Now to bite the bullet and start the welding. Hopefully there’s some metal left after i’ve had a go at it with the grinder!

Edited by EatSleepJDM, 17 April 2020 - 12:15 AM.


#3 EatSleepJDM

EatSleepJDM

    previously known as 88minicity

  • Members
  • PipPipPipPipPipPip
  • 631 posts
  • Location: Swindon, Wiltshire
  • Local Club: Blakehill Minis

Posted 27 April 2020 - 06:19 PM

As with alot of us lately i’ve had some time to spend on the mini.

Been starting on the passenger side and working my round the shell and then do the front end.

Bolted on my passenger door firstly to check it fits the hole and also to act as my reference point for sill etc

642432-B3-7037-49-DD-9-A67-88-FBF2-DBC19

Gaps around the window frame of door looked good, but then whilst checking the swage line against rear quarter i found this. This quarter panel was replaced by previous owner unfortunately, and hadn’t lined it up with the rear panel. Confirmed by the window now fitting either!

40-BAA150-1-F5-E-4411-8-D29-24-EA6-CA28-

So unpicked the welds and made a couple of cuts to be able to move the panel down. This meant I had to do a bit of tweeking to do B post lip join as it was now too close to the door. So cut a slice out of the panel

25-DB0-BD5-1-D75-4-D59-AB73-EF244-B1502-

266-EB3-FC-615-D-4-E29-8-E51-172-A8-F923

Made a section to let in

D513-F93-E-6938-4-F47-AD8-F-7583701645-D

FECD0-E94-1-B22-4-C82-A809-5485-FFB9-F30

Then rewelded the panel elsewhere and filled where I had welded the joining pieces and a couple of dents etc. Will get round to rubbing it down when it’s all prepped for paint

5-D0-E424-B-A781-491-F-8759-9-DA8877-C2-

Probably would of been easier to just replace the panel but all good practise.

Couple of patches needed in the boot floor next and then move on to the driver side


1 user(s) are reading this topic

0 members, 1 guests, 0 anonymous users