Jump to content


Photo
- - - - -

Cv Boot Replacement


  • Please log in to reply
7 replies to this topic

#1 Tornado99

Tornado99

    One Carb Or Two?

  • Members
  • PipPipPipPipPipPipPip
  • 750 posts
  • Location: Vancouver

Posted 20 August 2020 - 04:44 PM

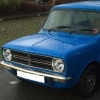
Did my first CV boot replacement on my '88 Mini which I've owned for only two months. Outer left side torn and throwing grease about. This is fairly recent as it was not torn at purchase inspection in July. 

While doing the work of hub removal, discovered the arm drop limiter bumper was not present. Also missing was the water splash shield inner side of the hub. Upper ball join also feeling too loose. Will need to address all of these when I do the rubber cone & shock replacements in coming weeks. 


As per one online video, I attempted to remove the outer CV joint with the drive shaft still in situ, without having to remove the inner pot joint boot to allow full shaft removal. But I was unable to get good enough hammer strikes on the outer joint shoulder to pop it off the retaining clip. Not enough clearance to swing the hammer and the whole shaft would move with each blow I could apply. So off with the inner pot boot (very easy) and took it all to the bench. Next problem I had was with the metal clamps included with the boot kits I had purchased (MiniSpares). The smaller one had to be on the very smallest clip points to approach anything near proper fit. Even after crimping the clamp with proper tool, it was barely snug. The outer was even worse, as at minimum diameter clip engagement, way too much slack that crimping would not take up. So grabbed a long zip strap and made the boot hold nicely. Knew of the concerns around the zip connector interfering with the hub so used a dremel drum sander to knock down edges of the connector a fair amount. 

Next issue was trying to get the newly supplied C ring to seat well enough to allow joint onto the shaft. Ring was just too open. Fiddled a while with different vise squeezes to compress the shape and finally got it to seat in the groove much better and the joint went right on. 

Back on the car, the zip strap connector was clearing the hub alright. Used another zip strap on the inner pot joint. I had used a 400 ft-lbs electric impact driver (newly purchased for this job) to easily remove the axle nut and it also worked well to install it. Plan was to then move to my big torque ratchet to final set to spec (158 ft-lbs?)....but found the whole suspension would move upwards against the rubber cone as I tried to apply torque using downward force. I had a bit of 2x4 wood jammed under a wheel stud and to the ground so that rotation was prevented. Could not get anywhere near tight. So went back to the electric gun and let it keep hammering away until it seemed to barely more the nut...then a bit longer to align the split pin holes. Is this reasonable to leave it or should I find a better way to get the torque wrench to work? I cannot access this nut with wheel on as there is no removable cover on the wheel's hub. 


#2 Spider

Spider

    Moved Into The Garage

  • Admin
  • PipPipPipPipPipPipPipPipPipPipPip
  • 15,021 posts
  • Location: NSW
  • Local Club: South Australian Moke Club

Posted 20 August 2020 - 07:00 PM

I gotta agree with what you found on the supplied clips for the CV Boot. I don't ever recall being supplied with Clips that would fit, that could be done up or wouldn't foul on the Hub. I have used Tie Wire, while not as nice looking as Clips, it is very effective, though, for many years now, I've been using Stainless Steel Cable Ties as these do up in line, rather than at 900 line the Nylon types, but you really do need a gun to get them tight enough.  CBS sell a Nylon Cable Tie they call a 'Flattie', I have also used them with great success, but you need to use the small ones and put 2 together to get the length you need for the big end of the CV, they do have a longer one, but it's too wide to fit.


In regards to your CV Nut, it sounds like you have Disc Brakes ? If that is the case, there's 2 specs there in regards to how tight the nut needs to be, depending on the brand of CV you have. If it has 2 holes for the split pin, those are 150 ft/lb, then to the next slot, if it has only 1 hole, then they are 197 ft/lb, then to the next slot. The trouble with rattle guns is you just don't know how tight something is when using them. The Rated Output Torque of them is tight on the nose of them. As you load Sockets etc on them, at each 'joint' in your fitted tools, because there is always some play in them some Torque at the end Socket is always lost, but again, it's hard to say how much. My concern here for you is, with that Rattle Gun, it may well have been over torqued and could be approaching the Yield Strength of the Threaded part of the CV, that's when it's tightened beyond it's Elastic Range and has started to stretch, which could lead to a failure. It might be possible to measure the CV for this both in overall length and the diameter of the smallest parts of it, or another way, though with some risk is to drive it for a short time on some very quite roads, then check if the Nut is as tight as it is when you last did it up, as when fasteners have been torqued beyond yield, they are in a plastic range where they will continue to grow in length until the fail, so if the nut is X tight now, and you find it looser after applying some load, then it is karput and shouldn't be driven until it's replaced. It maybe OK, but there's just no way of knowing, with a gun that can go as high as 400 ft/lb and in particular, if the CV is the type that has the 2 holes.


#3 Tornado99

Tornado99

    One Carb Or Two?

  • Members
  • PipPipPipPipPipPipPip
  • 750 posts
  • Location: Vancouver

Posted 20 August 2020 - 07:51 PM

I gotta agree with what you found on the supplied clips for the CV Boot. I don't ever recall being supplied with Clips that would fit, that could be done up or wouldn't foul on the Hub. I have used Tie Wire, while not as nice looking as Clips, it is very effective, though, for many years now, I've been using Stainless Steel Cable Ties as these do up in line, rather than at 900 line the Nylon types, but you really do need a gun to get them tight enough.  CBS sell a Nylon Cable Tie they call a 'Flattie', I have also used them with great success, but you need to use the small ones and put 2 together to get the length you need for the big end of the CV, they do have a longer one, but it's too wide to fit.


In regards to your CV Nut, it sounds like you have Disc Brakes ? If that is the case, there's 2 specs there in regards to how tight the nut needs to be, depending on the brand of CV you have. If it has 2 holes for the split pin, those are 150 ft/lb, then to the next slot, if it has only 1 hole, then they are 197 ft/lb, then to the next slot. The trouble with rattle guns is you just don't know how tight something is when using them. The Rated Output Torque of them is tight on the nose of them. As you load Sockets etc on them, at each 'joint' in your fitted tools, because there is always some play in them some Torque at the end Socket is always lost, but again, it's hard to say how much. My concern here for you is, with that Rattle Gun, it may well have been over torqued and could be approaching the Yield Strength of the Threaded part of the CV, that's when it's tightened beyond it's Elastic Range and has started to stretch, which could lead to a failure. It might be possible to measure the CV for this both in overall length and the diameter of the smallest parts of it, or another way, though with some risk is to drive it for a short time on some very quite roads, then check if the Nut is as tight as it is when you last did it up, as when fasteners have been torqued beyond yield, they are in a plastic range where they will continue to grow in length until the fail, so if the nut is X tight now, and you find it looser after applying some load, then it is karput and shouldn't be driven until it's replaced. It maybe OK, but there's just no way of knowing, with a gun that can go as high as 400 ft/lb and in particular, if the CV is the type that has the 2 holes.


Good info on the boot fixtures....my disc braked car had seizing wire used on the failed boot, and zip strap on the inner pot joint large end. In fact whomever restored the car seemed to like seizing wire as I'm finding in multiple uses....headlamp bulb secured to shell in place of usual metal clips, vacuum advance line to rubber hose clamps, etc.  I've never really used wire in this way before....I see there is a special tool used to make the nice twists. Will look into alternative boot clamps....think there are metal type zip straps locally in a couple of places. 


As for the axle nut...what is a good method to hold wheel/hub while using hand torque ratchet? My ratchet only goes to 150 ft-lbs so sounds like I need 200 ft-lbs for my single hole axle nut. Otherwise I can put my 200 lbs mass on one foot of breaker bar to get close ;-)


#4 Cooperman

Cooperman

    Uncle Cooperman, Voted Mr TMF 2011

  • TMF+ Member
  • PipPipPipPipPipPipPipPipPipPipPip
  • 23,313 posts
  • Location: Cambs.
  • Local Club: MCR, HAMOC, Chelmsford M.C.

Posted 20 August 2020 - 09:11 PM

I normally use locking wire, with around 4 full turns. Agree that the clips supplied are pretty useless.


#5 Norris73

Norris73

    Mini Mad

  • TMF+ Member
  • PipPipPipPip
  • 105 posts

Posted 20 August 2020 - 10:25 PM

Nasty job changing CV boots, the grease is horrible stuff and goes everywhere. Agree with everyone regarding supplied clips. However recently discovered that the quality of the CV boot clip pliers on the market varies massively. After trying to compress CV boot clips on a Fiat Punto using cheap (under £10 cv boot pliers, the type you see on eBay with the red handles) I gave up and went looking for something better.

Get yourself a set of Laser Tools 4136 cv boot pliers - these are right around £25, and will make your life 100x easier! When working on more modern vehicles you will find the CV boots are more plasticky than rubber and the clips need to compressed even tighter than on the mini (and the clips often are made of heavier gauge metal, just to make it doubly difficult).


I purchased some universal stainless cv boot clips off a specialist that you simply cut to size before crimping, these work a lot better than the supplied clips, a box of 20x (10 of inner smaller diameter and 10 of the larger outer ones) was under £5. It is worth persevering with the proper cv boot clips, as they will last a lot longer than cable ties and the like.


Edited by Norris73, 20 August 2020 - 10:27 PM.


#6 steeley

steeley

    Super Mini Mad

  • Just Joined
  • PipPipPipPipPipPip
  • 623 posts
  • Location: bournemouth

Posted 21 August 2020 - 05:46 AM

Have got then right tapered hub nut behind hub nut?

Drill two holes in a piece of strong bar long enough to hit the floor slip it over two hub nuts

And lever against it

#7 Cooper Mac

Cooper Mac

    Mini Mad

  • TMF+ Member
  • PipPipPipPip
  • 222 posts

Posted 21 August 2020 - 07:32 AM

This is the tool I use to restrain the Wheel Hub, it's self explanatory really. I used some 75 x 6 mm steel strip that I had in stock, and left it at the length it was (the longer the better for the torque reaction) as I might need to use a bit off the end for something else at some point......


Hub-retaining-tool-2.jpg


Edited by Cooper Mac, 21 August 2020 - 07:32 AM.


#8 Tornado99

Tornado99

    One Carb Or Two?

  • Members
  • PipPipPipPipPipPipPip
  • 750 posts
  • Location: Vancouver

Posted 21 August 2020 - 05:28 PM

Im thinking to try holding the brake on using a 2x4 on pedal and jammed to steering column bracket.
I believe the problem I encountered with hub moving upward against suspension was the leverage created between the axle nut and the wood placed under one wheel stud to ground. This made my downward wrenching lever hub upwards. If brake holds enough to stop rotational action, a jackstand directly beneath hub should make a firm wrenching experience.


1 user(s) are reading this topic

0 members, 1 guests, 0 anonymous users