Jump to content


Photo
- - - - -

Mini ´79 Complete Restoration Project.


  • Please log in to reply
9 replies to this topic

#1 SirBallD

SirBallD

    On The Road

  • Noobies
  • PipPip
  • 36 posts
  • Location: Roskilde

Posted 02 April 2021 - 09:13 AM

Hi all,


I've decided to create this thread, so all you guys'n'gals can follow the progress in the restoration of my classic Mini saloon 1979, 850cc.

I bought the Mini in the late 1990's and it was my transport-buddy during my apprenticeship to become an aircraft technician. I named my Mini "Grisling" which is the danish name for Winnie the Pooh's little buddy, Piglet.

Moved from central Copenhagen (yup, the one in Denmark and not the american snuff) out into the country site, and got married and had two kids. Changed my line of work and travelled all over the world for six years. Two kids, an old house and all the travelling meant that I didn't have time for my Mini.


Now I've decided to start the restoration of my fantastic Mini.


The Mini was parked in the garage since 2005 and I haven't done anything to it in the meantime. It just got dusty and was beginning to sag.


I'll try to include as many pictures and descriptions as possible so you can see what I've done and highlight all the bumps in the road and my solutions.


By the way, yes I'm danish, so if the grammar is not completely correct, please bear with me  :D


Let the restoration begin  :genius:


Cheers

Stefan


#2 Chris1275gt

Chris1275gt

    One Carb Or Two?

  • TMF+ Member
  • PipPipPipPipPipPipPip
  • 800 posts
  • Location: Reading

Posted 02 April 2021 - 10:36 AM

Hi Let's have some before pictures to start us off.

#3 MiniMadRacer

MiniMadRacer

    One Carb Or Two?

  • Members
  • PipPipPipPipPipPipPip
  • 850 posts
  • Location: Essex

Posted 02 April 2021 - 01:10 PM

I bet your English is a lot beter than our Danish ....sounds a nice project


#4 SirBallD

SirBallD

    On The Road

  • Noobies
  • PipPip
  • 36 posts
  • Location: Roskilde

Posted 03 April 2021 - 08:01 PM

I just realised that I don't have alot of pictures my mini  O_O , so I guess I have to take some pictures in the morning, even though I already started taking the car apart.

 
Attached File  110-1049_IMG_1.JPG   75.62K   1 downloads

My Mini is the one on the left. Red with black seams. 12" wheels and the engine was a 998cc leadfree engine with a 12G295 top.


Attached File  117-1732_IMG.JPG   65.01K   1 downloads

This is from the premiere of The Italian Job in 2003 (not in 1969  :lol: ).

It's not apparent in the picture, but the drive-in was full of Mini's. They offered free entrance if you arrived in a classic Mini og the BMW semi-mini.


Edited by SirBallD, 03 April 2021 - 08:04 PM.


#5 SirBallD

SirBallD

    On The Road

  • Noobies
  • PipPip
  • 36 posts
  • Location: Roskilde

Posted 03 April 2021 - 09:09 PM

I purchased a used 998cc A+ engine in the UK which was shipped to Denmark.

Attached File  20191113_184017 (Medium).jpg   65.14K   3 downloads

The engine was not completely as expected, but I think it'll work out. It's not easy when you cannot inspect the engine before purchase.  >_<

The cylinder head is a CAM4810.

Attached File  20191117_153112 (Medium).jpg   68.88K   1 downloads

The cylinder head was disassembled and cleaned. Paint was removed and the head was prepared for skimming.

The block was also disassembled and cleaned. Paint was removed and the block was prepared for rebore and skimming.

Attached File  20191117_143408 (Medium).jpg   84.69K   2 downloads

I found that the cylinder size was +.03 oversize, so I decided to go up one size to .04.

I'll also have the workshop replace the camshaft liners, as the old ones was worn.

cam bearing 02.jpg

I'll replace the main bearings, thrust washers and big end bearings as soon as the block gets back from the workshop.

I'm planning on reusing the valves as they look good. There is no wear in the valve guides. I'll replace the valve stem top hat, though.

Block and cylinder head will be painted BMC and MOWOG green. Gear box and clutch covers will be painted alu/silver.


More to come.

Please let me know if I should add more pictures or text. Should I go more in depth with different parts?


Cheers.


#6 SirBallD

SirBallD

    On The Road

  • Noobies
  • PipPip
  • 36 posts
  • Location: Roskilde

Posted 03 April 2021 - 09:22 PM

Attached File  20200730_182641 (Medium).jpg   97.29K   0 downloads

Nice and clean cylinder head, ready to go to the workshop.


Attached File  20210306_133313 (Medium).jpg   91.56K   0 downloads

Block is also ready.

Attached File  20200810_174859 (Medium).jpg   63.53K   0 downloads

Cleaned the cylinders just to check if there were any cracks or other damage. Looked fine, but a rebore will do the magic.


#7 SirBallD

SirBallD

    On The Road

  • Noobies
  • PipPip
  • 36 posts
  • Location: Roskilde

Posted 24 April 2021 - 05:57 PM

While I was waiting for the block and top to come back from the workshop I did a lot of cleaning, checks and painting of the front subframe and components.

The front subframe was very dirty and had a lot of gunk.

20210401_145219-1 (Small).jpg

Result after reducing the weight by 100kg of gunk and dirt  :D

20210403_155855-1 (Small).jpg

Looking good after a splash of primer.

20210405_103119-1 (Small).jpg

And finally two coats of stone chipping. Looking good.

20210406_181307-1 (Small).jpg


Time for a small break  :D

20210409_171611 (Small).jpg


Now it's time to fix the other suspension components. Cleaning, primer and paint of the upper arm. New bearings, rubber grommets and knuckle joints was fitted. Ready to be fitted.

20210413_165652 (Small).jpg  
20210419_174933 (Small).jpg


The lower arms was also cleaned, primed and painted. Replacing rubber bushes. I found that one support shaft had damaged threads so a new support shaft is on order.

20210403_170759 (Small).jpg
20210405_175038-1 (Small).jpg
 
Also the the swivel hubs and the drive shafts got the same treatment. New swivel pins fitted.
20210103_152138-11.jpg

Shiny balls.

20210102_120631 (Small).jpg


Primed and painted. Lubricated and new swivel pin fitted. I've decided to use Lucas Red'n'Tacky in each of the swivel pins. It's nice and gooey. The wheel bearings got a nice splash of Lucas X-tra heavy duty grease.

20210404_185659-11 (Small).jpg
 

Next is the brake calipers.

Attached Files


#8 johnR

johnR

    Up Into Fourth

  • Members
  • PipPipPipPipPipPipPipPipPip
  • 2,253 posts
  • Location: Dorset

Posted 24 April 2021 - 07:00 PM

Your renovation is coming along nicely - it's a lovely feeling when it's all done and you can start bolting it back onto a newly painted shell


#9 SirBallD

SirBallD

    On The Road

  • Noobies
  • PipPip
  • 36 posts
  • Location: Roskilde

Posted 24 April 2021 - 07:49 PM

Your renovation is coming along nicely - it's a lovely feeling when it's all done and you can start bolting it back onto a newly painted shell

Definitely looking forward to the fun bolting everything back together part.  :D


#10 SirBallD

SirBallD

    On The Road

  • Noobies
  • PipPip
  • 36 posts
  • Location: Roskilde

Posted 02 May 2021 - 06:48 PM

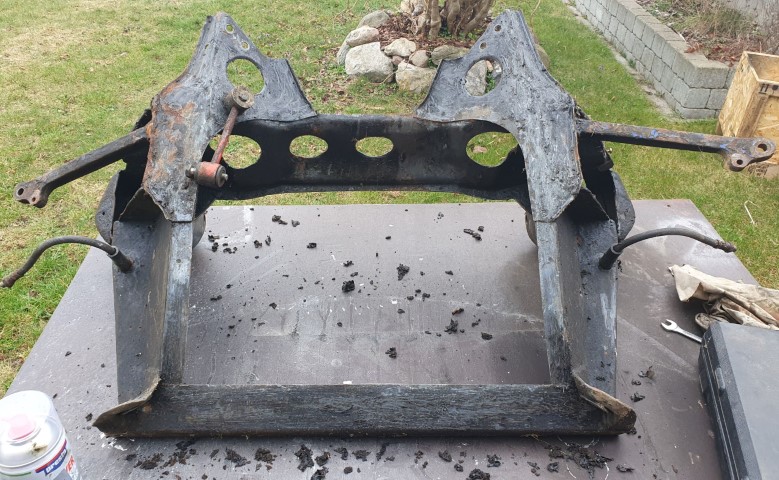
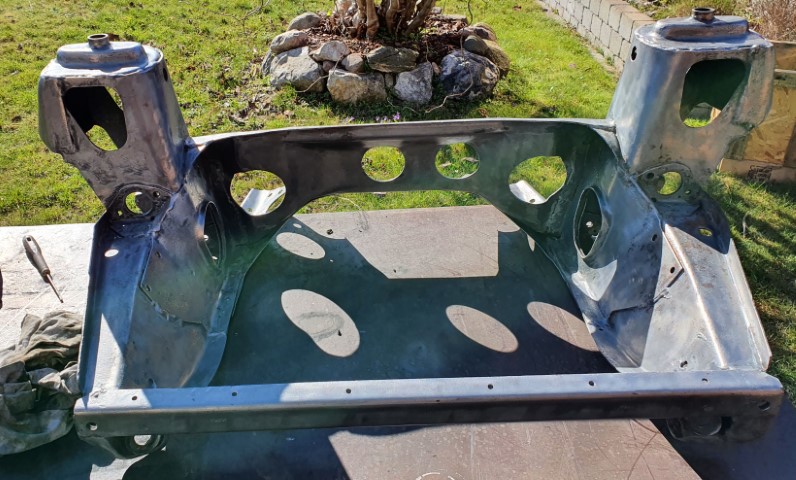
Next stop, gearbox-town  :tumble:

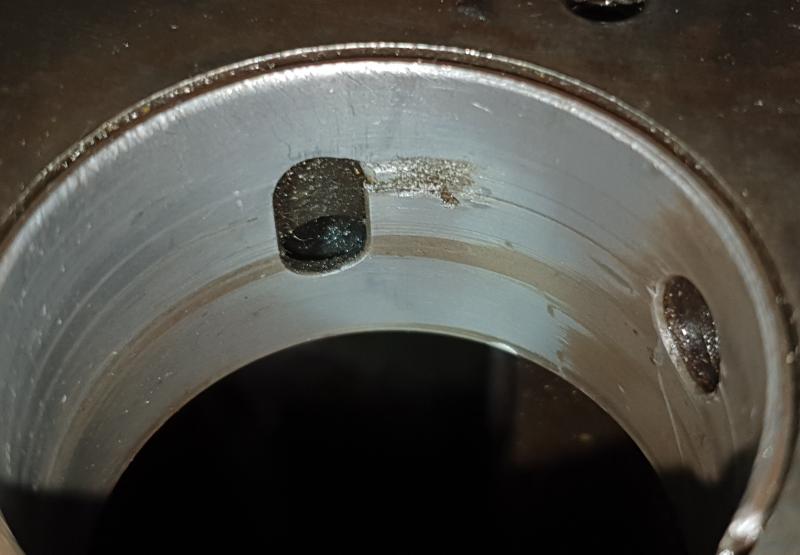
I've never disassembled a gearbox before, but during inspection of the gearbox, I found that the mainshaft double row ball bearing was broken. I also found that that the left output shaft/flange cover was dented so the seal was deformed.


Attached File  Gearbox motion shaft ball bearing cracked (Small).jpg   114.07K   0 downloads

Attached File  Gearbox left (Small).jpg   126.43K   0 downloads

The deformed flange might not be the biggest issue, but I'll replace it with one from another gearbox, so it looks and works good.


I also wanted to replace the standard oil pickup with a central pickup. So I've decided to do the complete strip down of the gearbox.


The gearbox is a DAM 5626 A+.

Attached File  Gearbox rear (Small).jpg   136.98K   0 downloads


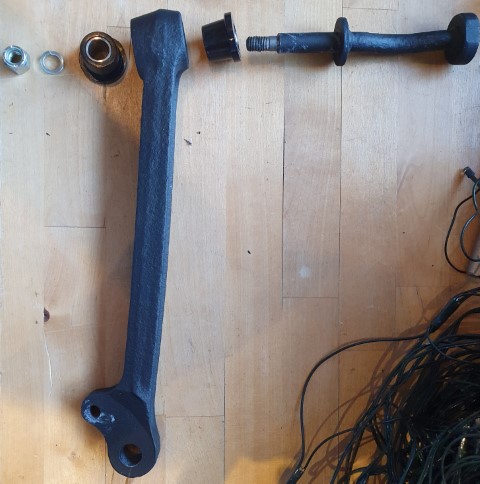
The differential looks good. I think it'll be cleaned and refitted. Two new seals on the output shaft flange will be fitted.


I pulled the speedo drive housing off the gearbox after removing the speedo drive and the spindle.

Attached File  Gearbox left nut (Small).jpg   125.3K   0 downloads

In the picture, the nut is already loose, as I didn't take a picture before loosening it. It was really tough to get loose.

The way I did it, was to completely disengage the rod change mechanism. This takes a little fiddling, but eventually it works out. By doing it this way you are able to engage both 1st gear and 4th gear, locking all motion in the gearbox.

I pulled out the heavy artillery to get the nut off the mainshaft. I used an impact wrench (570Nm), turned up the aircompressor to max (8 bar) and hammered away (sorry to the neighbours). It took a lot of persuasion but finally it gave up and I won.

Then I could remove the retainer for the mainshaft bearing, revealing the small locking plate, locking the idler shaft and layshaft. I left the locking plate in plate for now.

Attached File  Gearbox left reverse and laygear (Small).jpg   168.6K   0 downloads
 

I turned the gearbox around and continued on the other side.

Attached File  Gearbox right (Small).jpg   125.29K   0 downloads

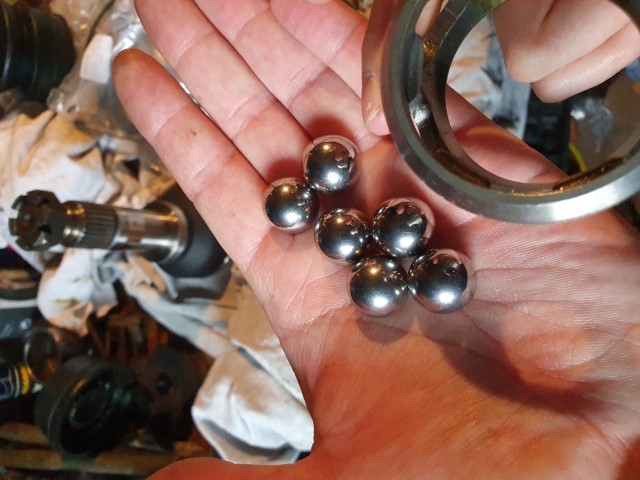
I removed the retaining ring and tried to pry off the bearing very carefully...but of course I broke it. A new bearing will be fitted, but I need to figure out how to get the outer liner out of the clutch housing.


I then removed the nut from the 1st motion shaft and removed the retaining ring holding the large bearing. 

Attached File  Gearbox right bearing clip (Small).jpg   132.67K   0 downloads


Now I removed the locking plate and drove out the layshaft and the idler gear shaft.

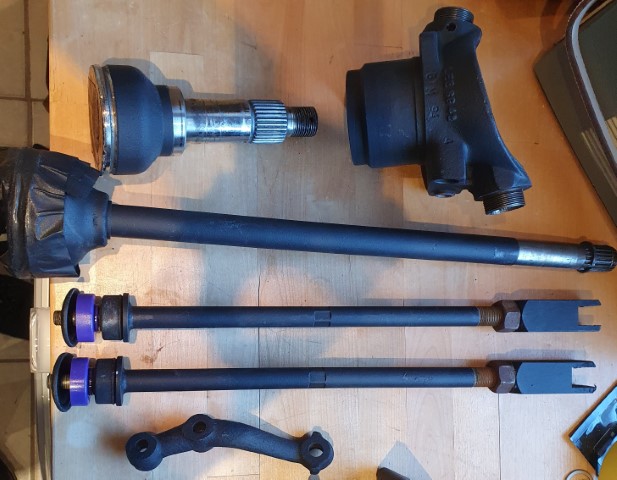
I carefully removed the 1st motion shaft bearing from the gearbox and placed it to the side together with the 1st motion shaft.


I started to drive the mainshaft towards the clutch side of the gearbox to get clearance between the 1st gear and the mainshaft double row ball bearing. I drove the bearing carefully out and could assess the damage.

Attached File  Gearbox motion shaft ball bearing cracked several places (Small).jpg   101.65K   0 downloads


Luckily I have a scavange gearbox that I can use and the mainshaft double row bearing is good.


All the internals  :D

Attached File  Gearbox laygear reverse etc (Small).jpg   48.7K   0 downloads

Attached File  Gearbox 3rd motion shaft complete (Small).jpg   40.98K   0 downloads


Cleaning and checking is next on the list.


1 user(s) are reading this topic

0 members, 1 guests, 0 anonymous users