Jump to content


Photo
- - - - -

Flywheel Balance Questions


Best Answer oh.go.on.then , 05 April 2021 - 08:34 AM


Holes in cover visible.


change of plan for the water routing.
no water pump this side.
Wufc1Bn.jpg
 
but i will put the pump between the block and head inline with the dry deck hoses.
s7Gm8VV.jpg
 
while i was playing with things i got some scales out.
 
a pre-verto flywheel  7.2kg
Qrbl0mB.jpg
 
the complete flywheel assy i am replacing about the same weight.
cdV30U8.jpg
pPjdP7M.jpg


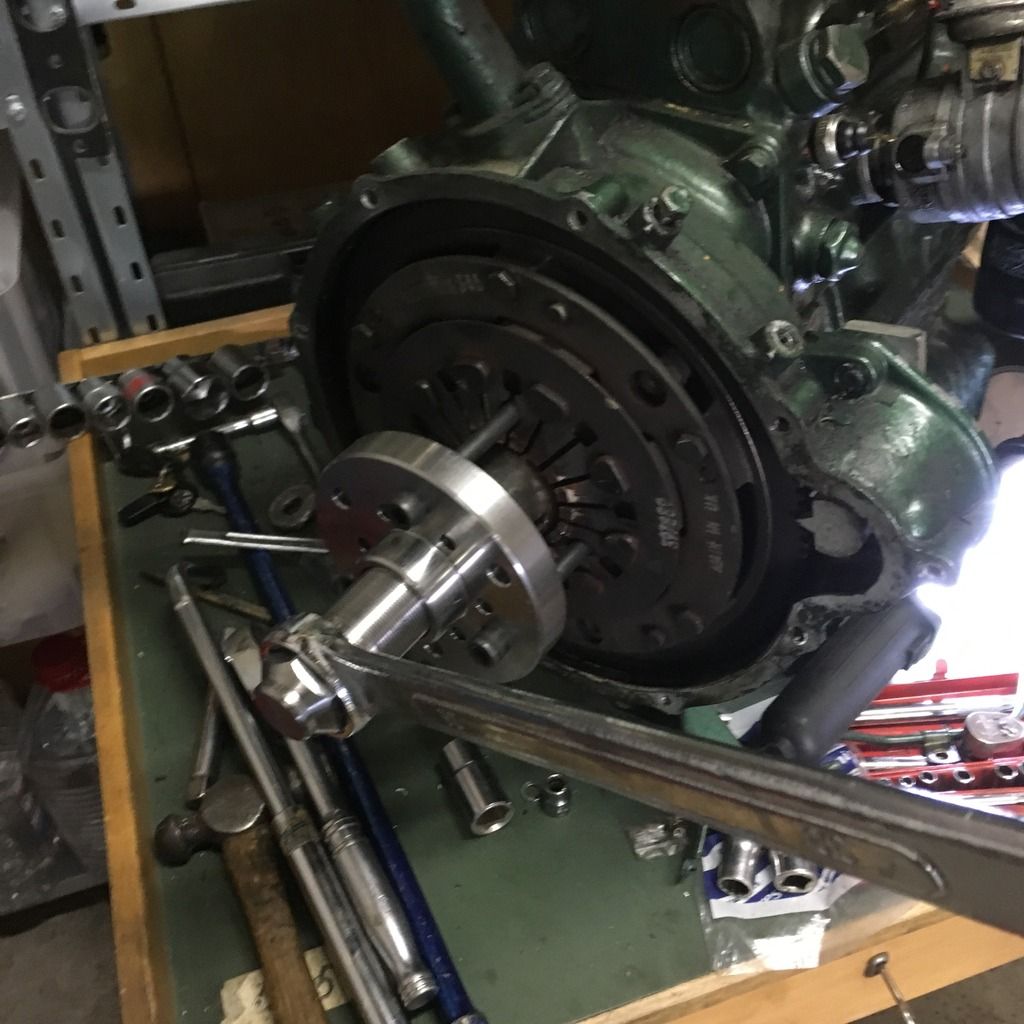
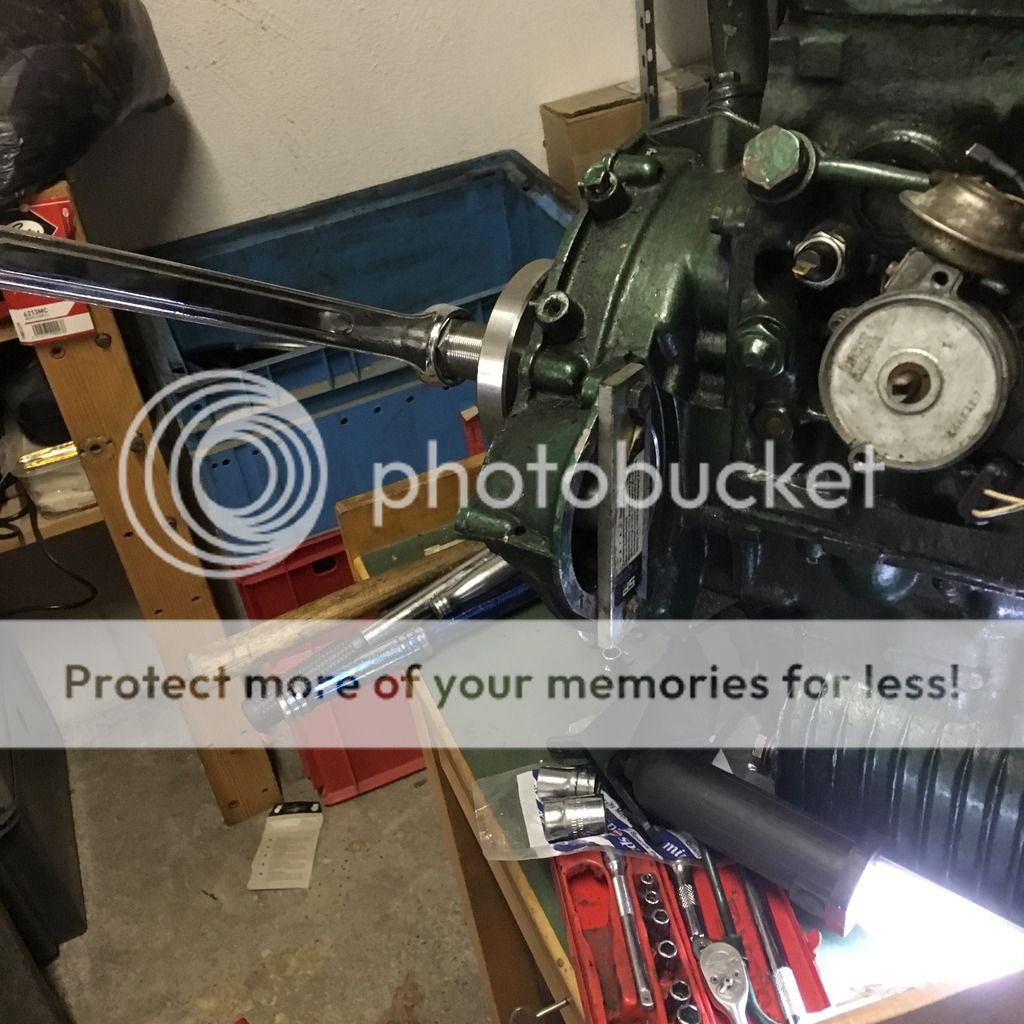
brilliant thank you! That explains it then - that's a big spanner you have on that puller 

Go to the full post


  • Please log in to reply
8 replies to this topic

#1 oh.go.on.then

oh.go.on.then

    Passed Test

  • Noobies
  • PipPip
  • 33 posts
  • Location: Worcester

Posted 04 April 2021 - 08:19 PM

Evening all

I'm building up a new engine and I'm at the point of buying a flywheel package. MED say in there details that the flywheel, backplate, diaphragm and clutch package should be installed without dismantling to maintain the balance otherwise it will need to be re-balanced.


I've watched a video on youtube (can't remember the name of the guy) who was building a race engine. He didn't use a locktab and put the tool through the diaphragm to tighten. What are peoples thoughts on this as otherwise how can you install it all without taking it apart? I don't like the thought of a flywheel spinning by my feet with no locktab to be honest but is this what people do?


Secondly, I want to use the same flywheel etc on another engine I'm building after the summer. Again, how do I get it off without taking the diaphragm off to use a puller?


Cheers all


#2 nicklouse

nicklouse

    Moved Into The Garage

  • TMF+ Member
  • PipPipPipPipPipPipPipPipPipPipPip
  • 17,945 posts
  • Location: Not Yorkshire
  • Local Club: Anonyme Miniholiker

Posted 04 April 2021 - 08:28 PM

No need to disassemble it to fit and lock the lock tab. But some thread lock on the threads will do.


#3 oh.go.on.then

oh.go.on.then

    Passed Test

  • Noobies
  • PipPip
  • 33 posts
  • Location: Worcester

Posted 04 April 2021 - 08:33 PM

No need to disassemble it to fit and lock the lock tab. But some thread lock on the threads will do.

Thanks for the reply. Just been looking at MED flywheel bolt and it gives instructions on what to do and you are right, it list a certain thread lock.


I'm not sure how I would get the flywheel off without affecting the balance though?


MED instructions


1. Install bolt and keyway washer to the crankshaft.

2. Lock engine using your preferred method.

3. Torque bolt to 130lb/ft, to seat flywheel on the crankshaft taper.

4. Undo the bolt.

5. Apply 27-01 thread lock and torque to 130lb/ft.


#4 nicklouse

nicklouse

    Moved Into The Garage

  • TMF+ Member
  • PipPipPipPipPipPipPipPipPipPipPip
  • 17,945 posts
  • Location: Not Yorkshire
  • Local Club: Anonyme Miniholiker

Posted 04 April 2021 - 08:38 PM


No need to disassemble it to fit and lock the lock tab. But some thread lock on the threads will do.

Thanks for the reply. Just been looking at MED flywheel bolt and it gives instructions on what to do and you are right, it list a certain thread lock.


I'm not sure how I would get the flywheel off without affecting the balance though?


MED instructions


1. Install bolt and keyway washer to the crankshaft.

2. Lock engine using your preferred method.

3. Torque bolt to 130lb/ft, to seat flywheel on the crankshaft taper.

4. Undo the bolt.

5. Apply 27-01 thread lock and torque to 130lb/ft.


Easy. Remove spring clip. The contact plate for the release bearing. Tap down/up lock tab. Remove offset key washer. Set slot horizontal, lock flywheel in place. Undo bolt.


there has never been a requirement to split any flywheel assy.


#5 oh.go.on.then

oh.go.on.then

    Passed Test

  • Noobies
  • PipPip
  • 33 posts
  • Location: Worcester

Posted 04 April 2021 - 08:44 PM

Can the flywheel puller be used with the diaphragm in place then? I haven't got one to hand to look if it has holes for the puller to go through?


Edited by oh.go.on.then, 04 April 2021 - 08:45 PM.


#6 nicklouse

nicklouse

    Moved Into The Garage

  • TMF+ Member
  • PipPipPipPipPipPipPipPipPipPipPip
  • 17,945 posts
  • Location: Not Yorkshire
  • Local Club: Anonyme Miniholiker

Posted 04 April 2021 - 08:49 PM

One I did earlier
 

Then I get to play with some tools.
5120CFF6-F240-48AA-A3D1-4D954016BD2E_zps
6E599D1C-0360-41B7-BA81-F76D3EF6EACF_zps
 
Then onto splitting the engine into its parts.

 
and I had to take the diaphragm off as I had to retread the flywheel. Yes there are holes for the puller bolts.

well that was fun. i think the drilling were a tad too big to take the 3/8 helicoils  so went out to 12mm and it is off. now need to think do i keep it or replace it.
Kz1Yjs8.jpg
 
and if i keep it i need to make up some better threads.
 
not seen these babies for quite a few years
se8EKW5.jpg


Edited by nicklouse, 04 April 2021 - 08:51 PM.


#7 nicklouse

nicklouse

    Moved Into The Garage

  • TMF+ Member
  • PipPipPipPipPipPipPipPipPipPipPip
  • 17,945 posts
  • Location: Not Yorkshire
  • Local Club: Anonyme Miniholiker

Posted 04 April 2021 - 08:55 PM

Holes in cover visible.


change of plan for the water routing.
no water pump this side.
Wufc1Bn.jpg
 
but i will put the pump between the block and head inline with the dry deck hoses.
s7Gm8VV.jpg
 
while i was playing with things i got some scales out.
 
a pre-verto flywheel  7.2kg
Qrbl0mB.jpg
 
the complete flywheel assy i am replacing about the same weight.
cdV30U8.jpg
pPjdP7M.jpg


#8 oh.go.on.then

oh.go.on.then

    Passed Test

  • Noobies
  • PipPip
  • 33 posts
  • Location: Worcester

Posted 05 April 2021 - 08:34 AM   Best Answer


Holes in cover visible.


change of plan for the water routing.
no water pump this side.
Wufc1Bn.jpg
 
but i will put the pump between the block and head inline with the dry deck hoses.
s7Gm8VV.jpg
 
while i was playing with things i got some scales out.
 
a pre-verto flywheel  7.2kg
Qrbl0mB.jpg
 
the complete flywheel assy i am replacing about the same weight.
cdV30U8.jpg
pPjdP7M.jpg


brilliant thank you! That explains it then - that's a big spanner you have on that puller 


#9 Spider

Spider

    Moved Into The Garage

  • Admin
  • PipPipPipPipPipPipPipPipPipPipPip
  • 13,929 posts
  • Location: NSW
  • Local Club: South Australian Moke Club

Posted 05 April 2021 - 10:38 AM

I'd strongly suggest marking (stamping) the flywheel, backing plate and diaphragm for indexing to re-assemble.


At some point, you will be removing the flywheel again and if that's for a plate replacement, you'll def need to take it all apart then, Easier and neater to index mark them on the bench while it's all clean.


Also, how do you do the assembly check on the Primary Gear to be sure that it's not getting pinched when the Flywheel is fitted ?


0 user(s) are reading this topic

0 members, 0 guests, 0 anonymous users