Jump to content


Photo
- - - - -

Mini 30 - It Started With 2 Wings.


  • Please log in to reply
16 replies to this topic

#1 Avtovaz

Avtovaz

    One Carb Or Two?

  • Members
  • PipPipPipPipPipPipPip
  • 1,135 posts
  • Location: widnes

Posted 15 December 2021 - 12:17 PM

My mother bought a mini 30 new, it was one owner until  Steph bought it maybe 10 years ago. At the time my mate had a body shop, and i was just starting to build a bmw e36 rally car. i was and still am BIG into Lada;s. My Lada Riva or  Auto VAZ 21057 ( yes thats where my name comes from!) had just been sold on to a guy in Ireland, and i was desperate to build the E36 compact. But, my mother had the mini 30, she went on holiday with my brother for 2 weeks, and asked could i put 2 wings on the mini while she was away... 2 wings became now lol but then i was very depressed about it lol!
 
So this is the story as i was posting on Lada Barati kor forum many years ago, pics had been lost but found the pics and am editing it to post on here.
 
TMF for interest, and for Steph about her car.
 
ok here goes...


#2 Avtovaz

Avtovaz

    One Carb Or Two?

  • Members
  • PipPipPipPipPipPipPip
  • 1,135 posts
  • Location: widnes

Posted 15 December 2021 - 12:21 PM

So as i have posted on LBK these posts maybe a little mixed up to you but this is what i typed:


i dont know if anyone is really interested but my bmw has come to  a halt atm because of my mothers mini amongst other reasons.
 
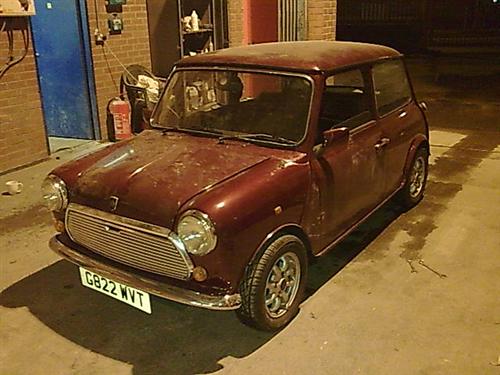
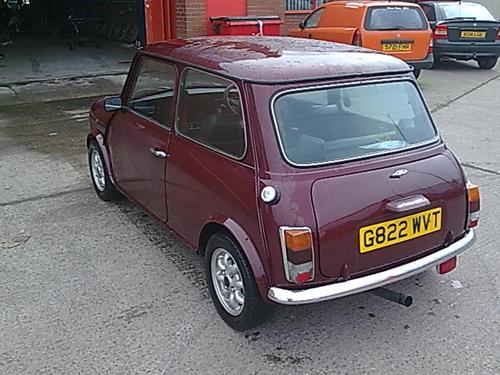
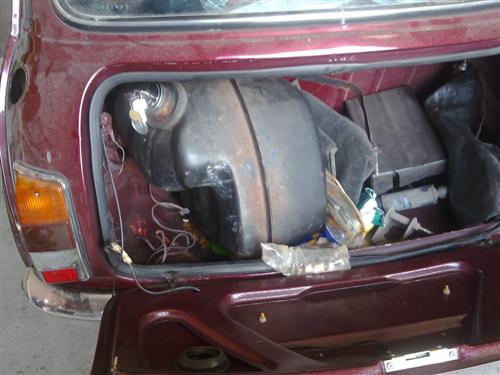
My mother bought this can new in 1989, and she loves it, why i dont know!!!
 
So, i thought i would post about that while it could be of use to someone reading...
 
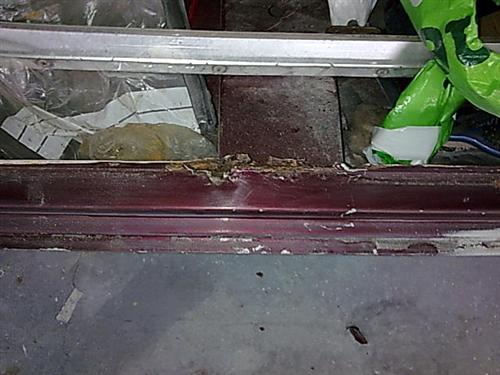
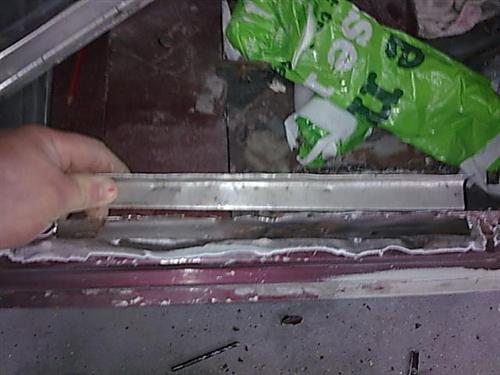
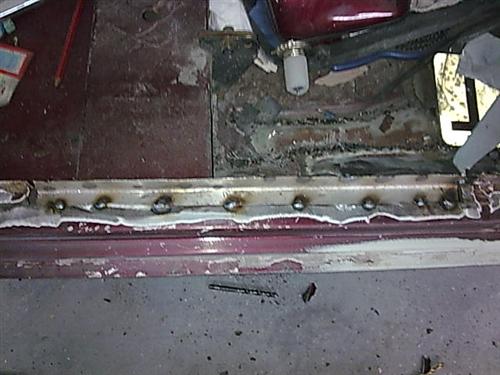
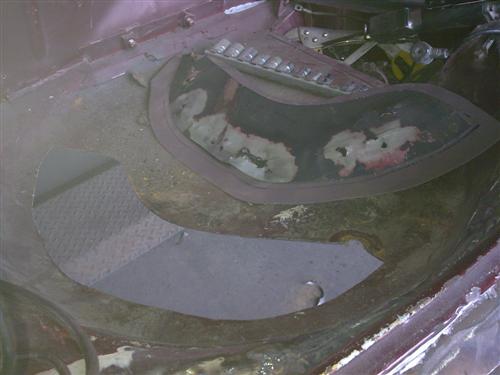
Firstly its had 2 sills, 1/2 a o/s floor pan, 1/2 inner sill both sides...
 
Now it needs and is getting;
 
73.jpg
 
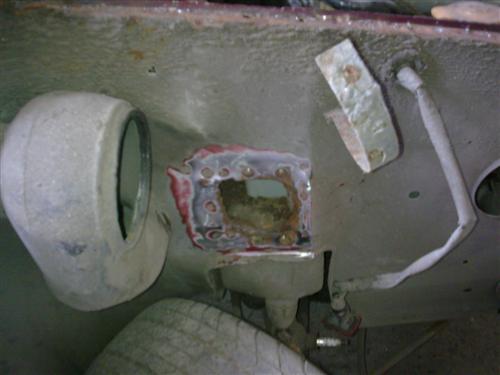
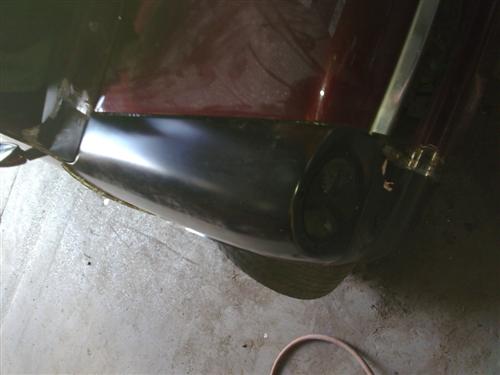
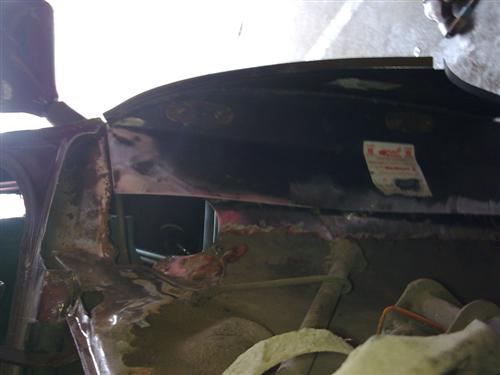
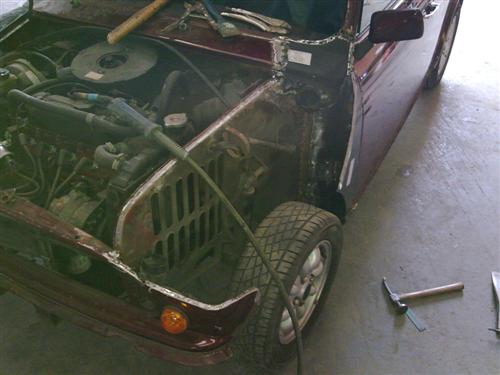
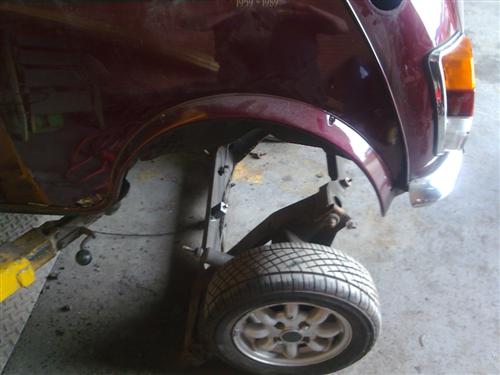
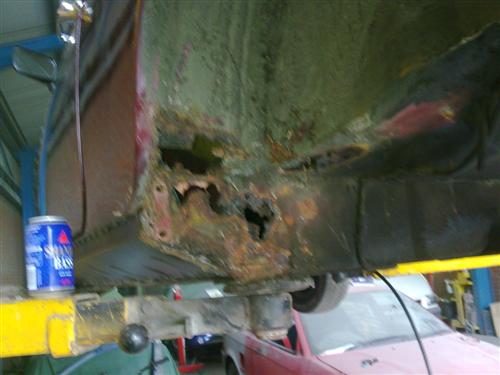
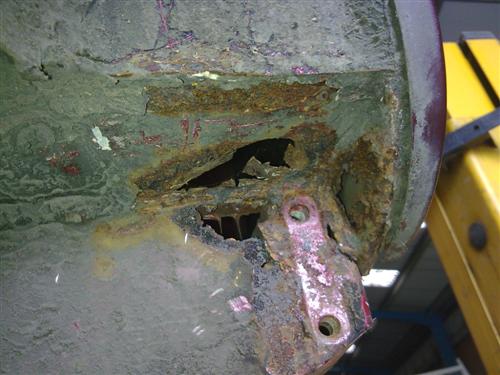
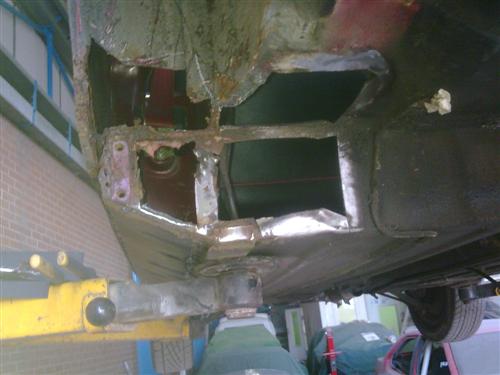
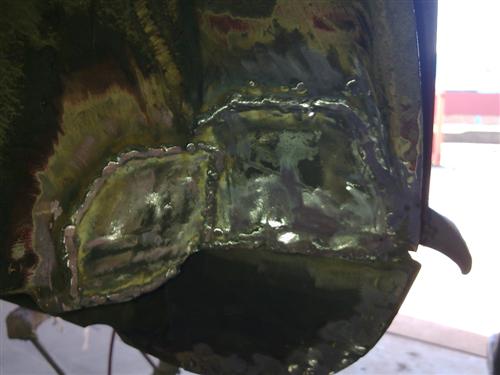
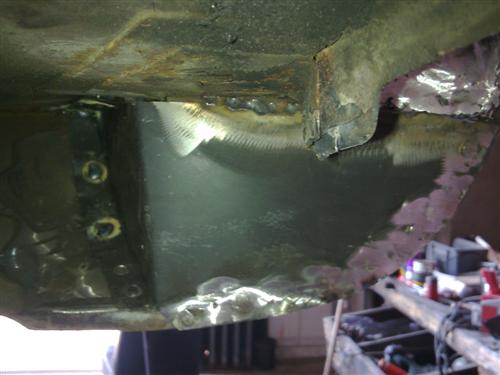
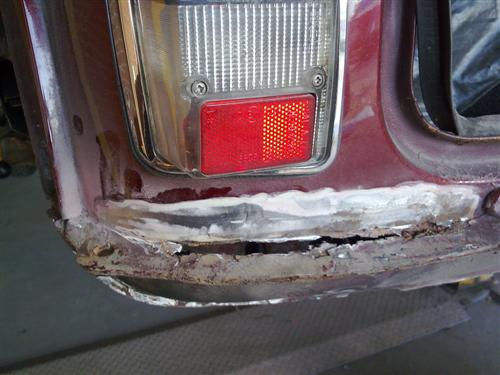
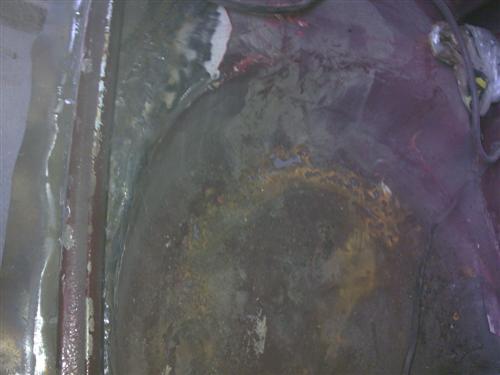
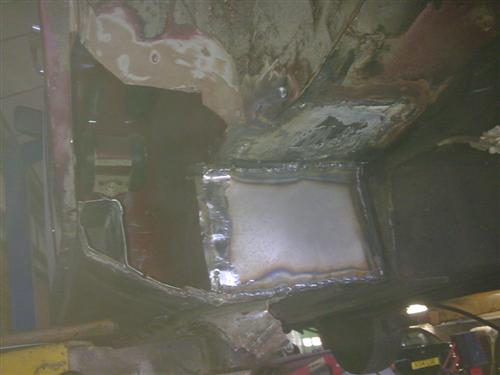
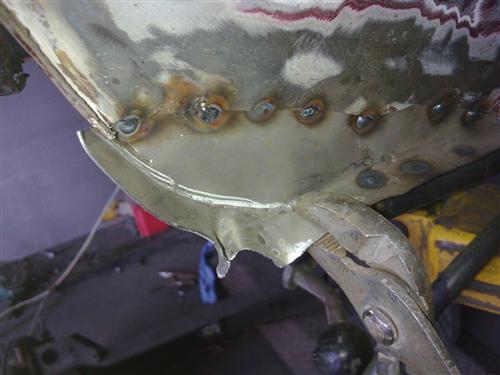
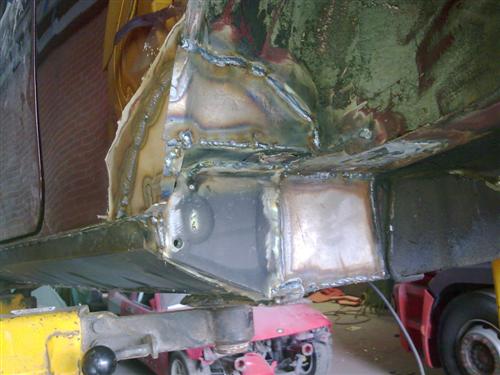
Thats the front shocker mount, rotten behind the mount, that should be solid plate there! So ill have to do something about that.
 
74.jpg
 
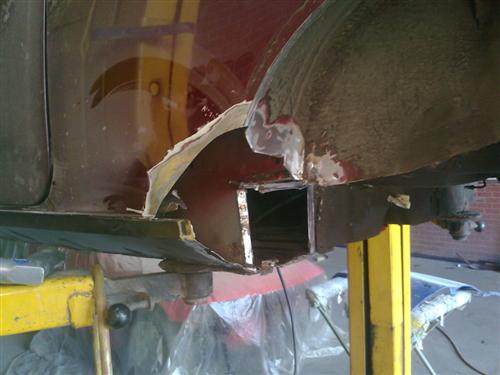
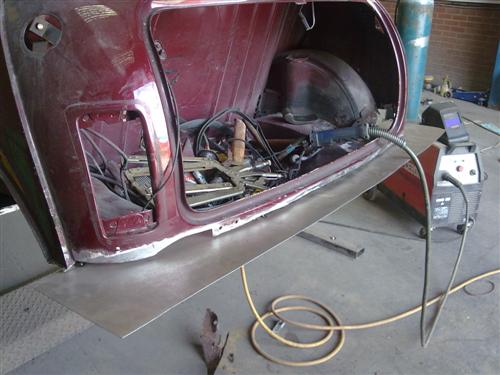
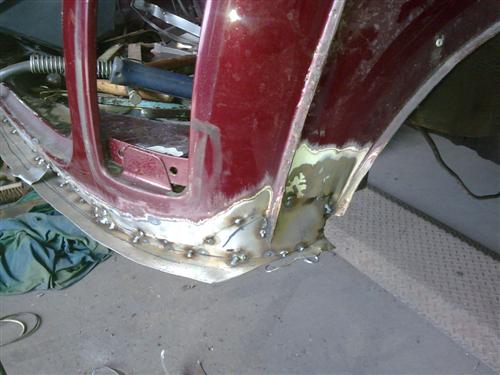
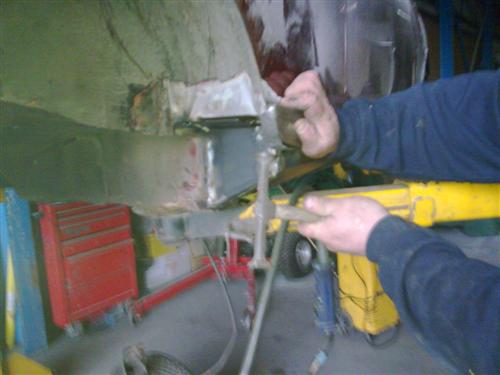
With the wing cut off, it was easier to get to, but my mate wanted to get the wing on and sort the front panel out.
 
76.jpg
 
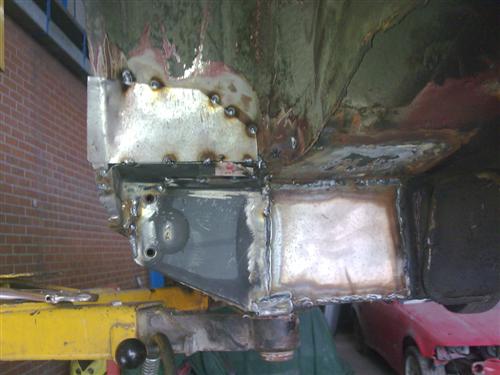
We put the new scuttle panel ontop of the old one, tried the wing on, and made a derision on the front panel, we have 1/4 piece for the o/s it was do we put it all in or just the bit at the top where it was rotten. We went for it all in the end!
 
77.jpg
 
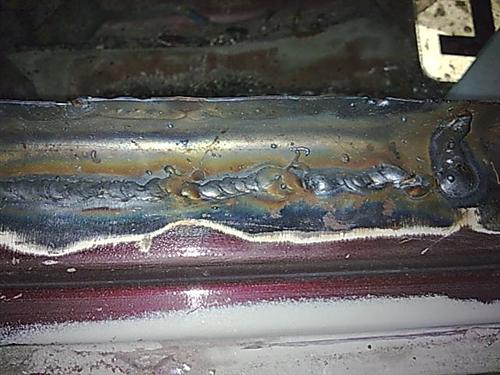
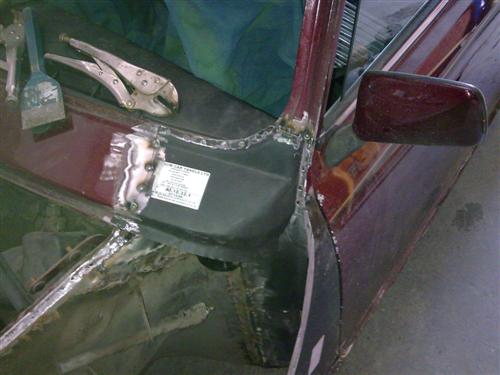
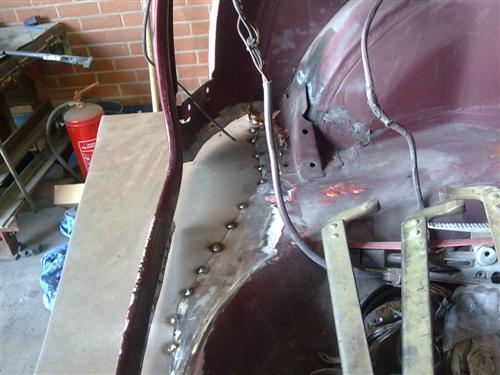
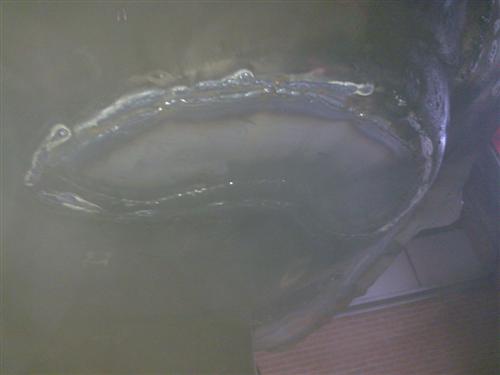
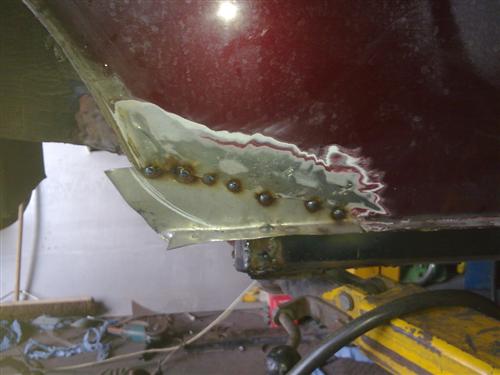
Everything almost lined up so the scuttle piece, it was tek screwed into place, then we used an air saw to cut the two panels as the same time so they fitted perfectly as a but joint. This was then welded in and belt sanded off.
78.jpg
 
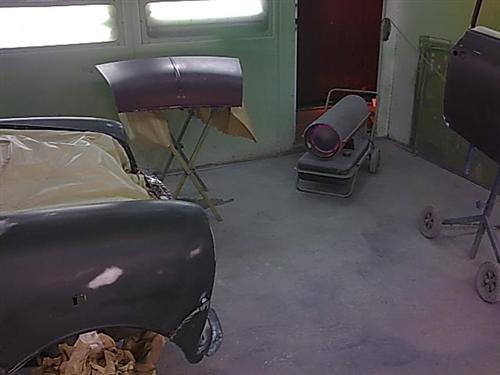
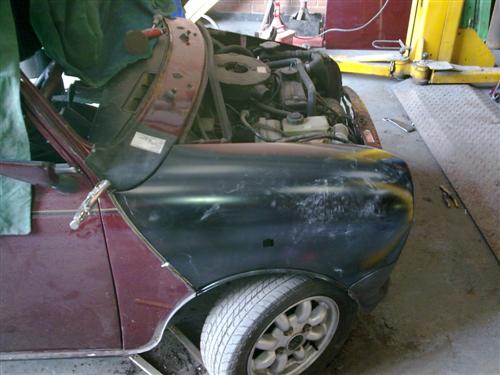
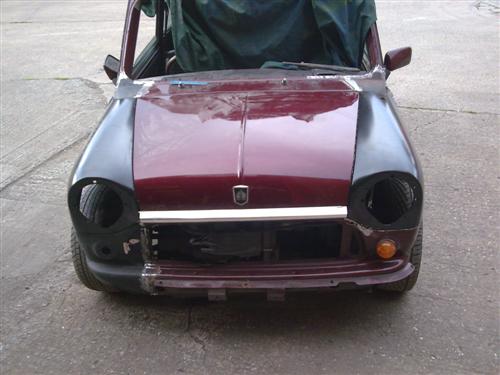
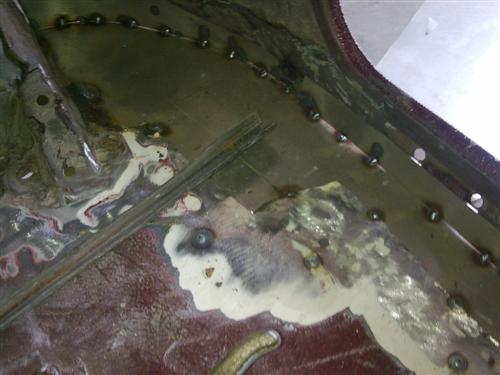
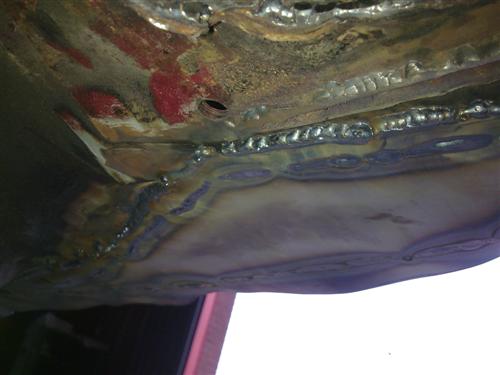
The wing was then put on, we drilled it and plug welded it down the inner wing. We tried the bonnet first though!
 
81.jpg
 
82.jpg
 
 
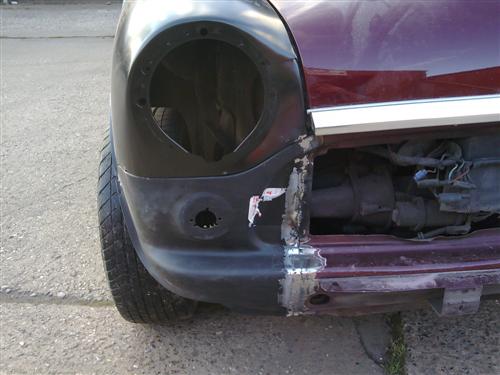
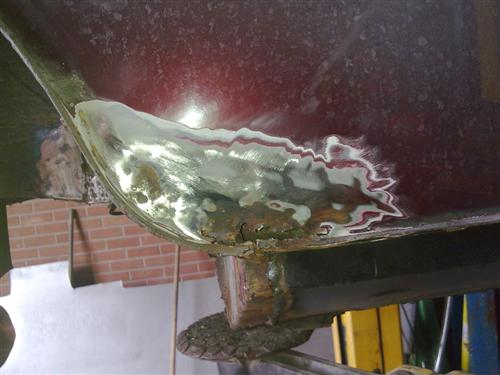
There is 1/4 front panel in, instead of cutting all the old one off and but jointing it on, we cut it just over 1" too bit, knocked int he old panel, and put the new one on top. Seam welded the outside, and then stitched the overlap on the inside. That should make it stronger, not neater. If we were to do it properly, we would have put a full front panel in, but they are £60+vat, and we have limited time to do it also.
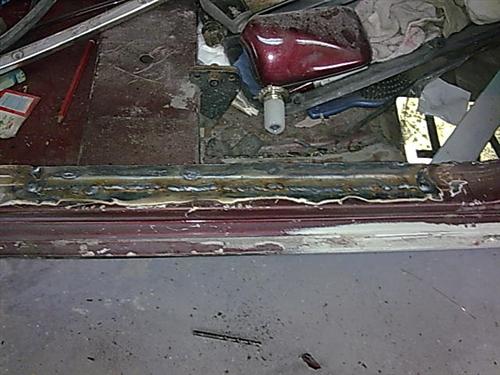
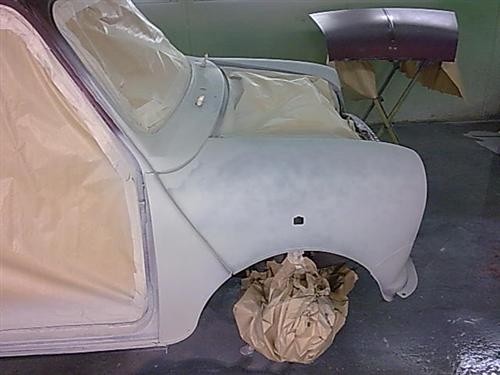
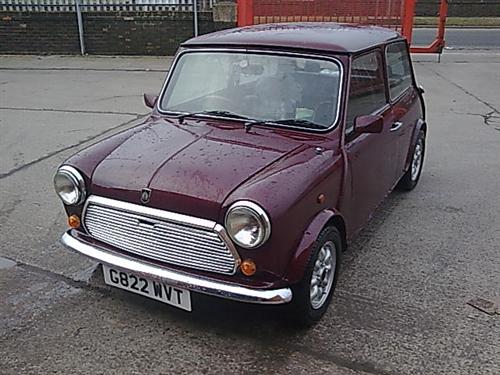
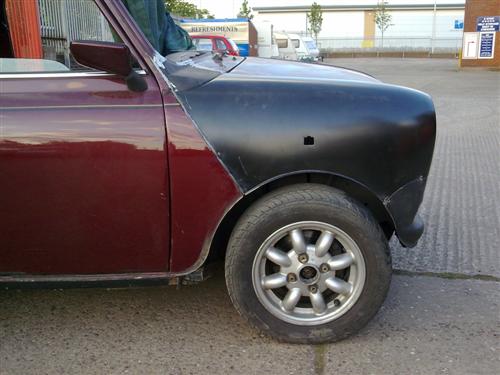
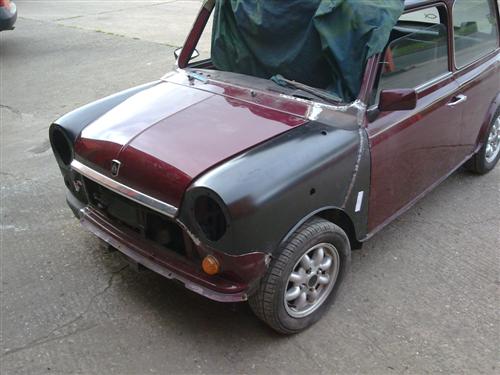
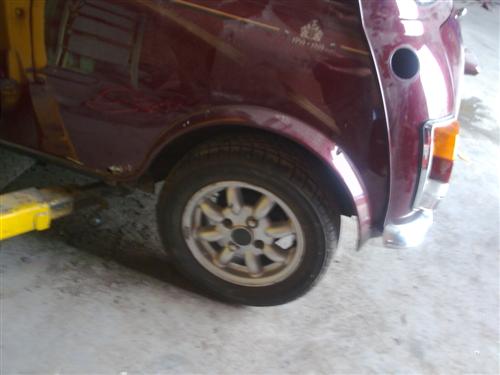
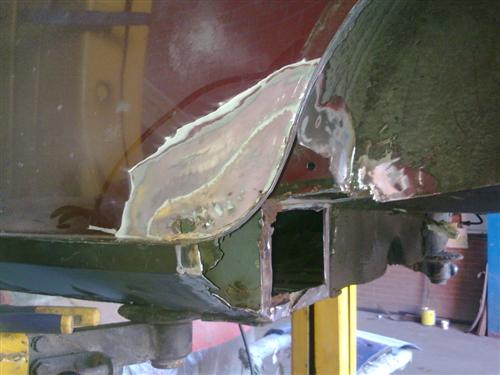
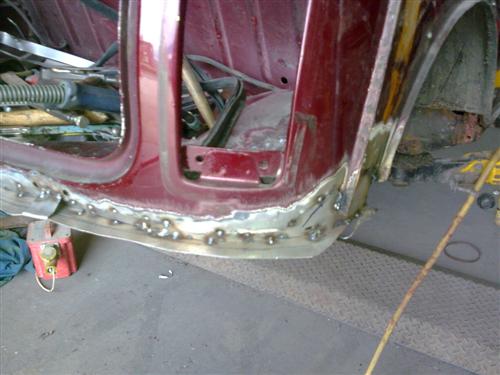
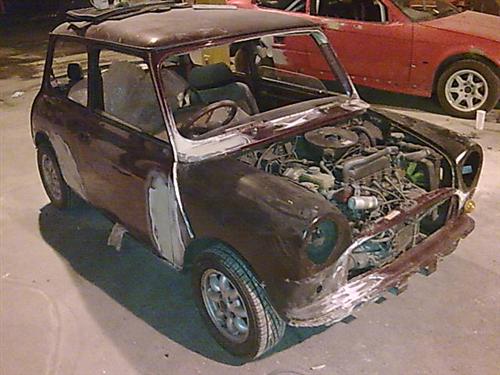
 
83.jpg
 
Side View.
 
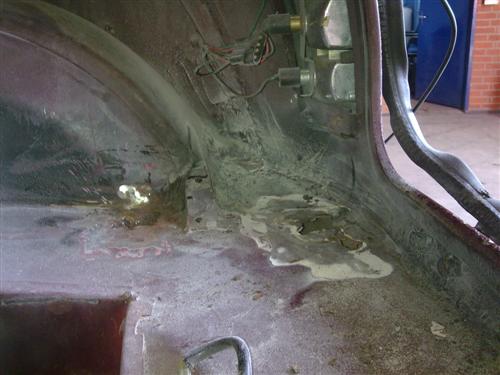
So just need to tidy it up a bit, and seal the bits under the front.
 
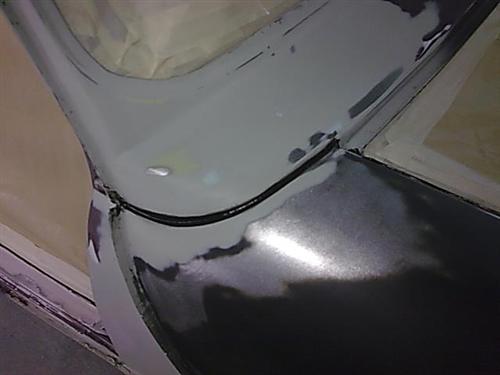
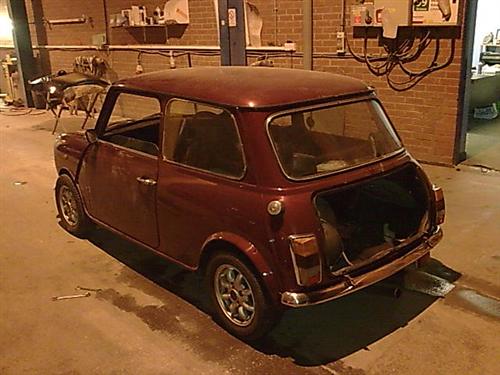
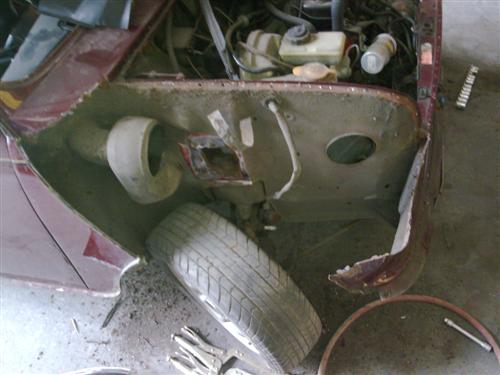
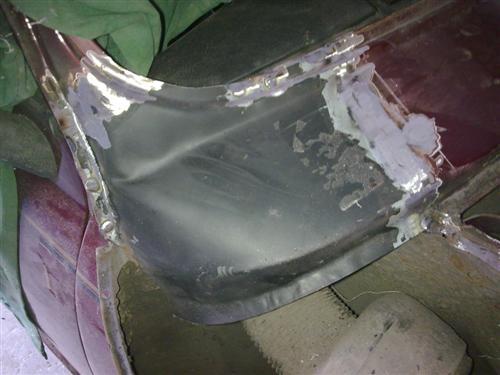
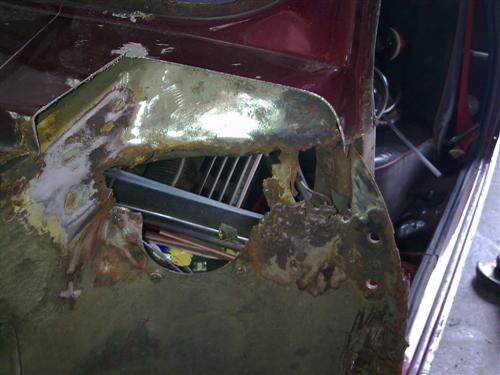
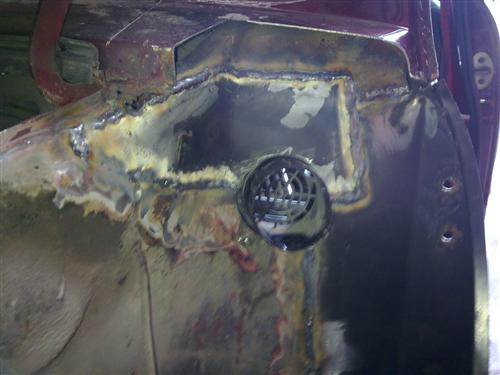
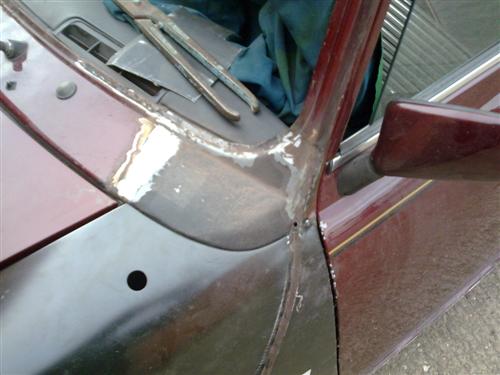
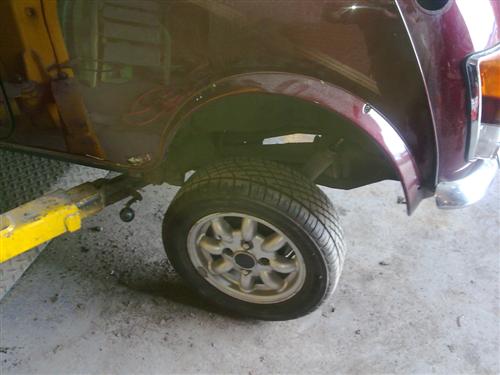
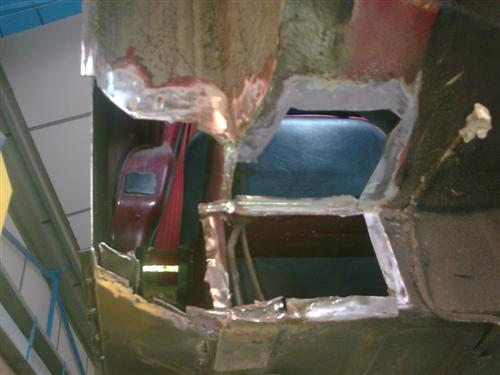
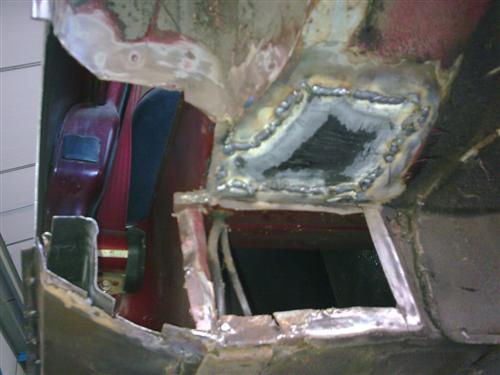
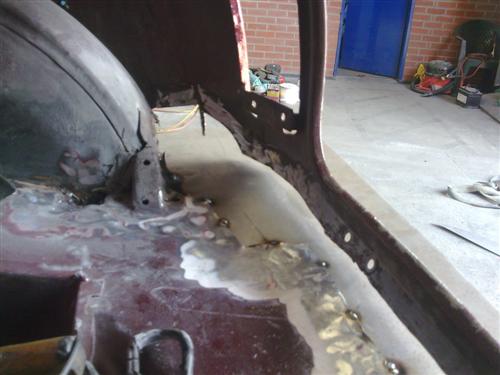
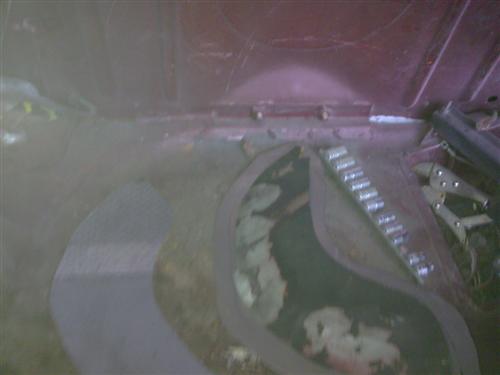
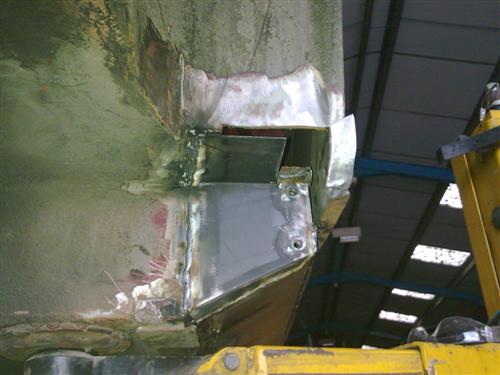
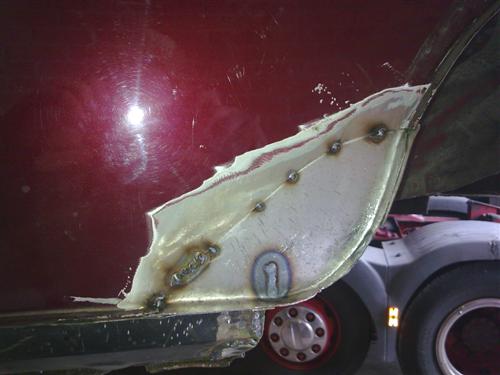
The other side wants a wing and an A panel, and where the heater vent is in the dash, there is a big hole also!
 
75.jpg
 
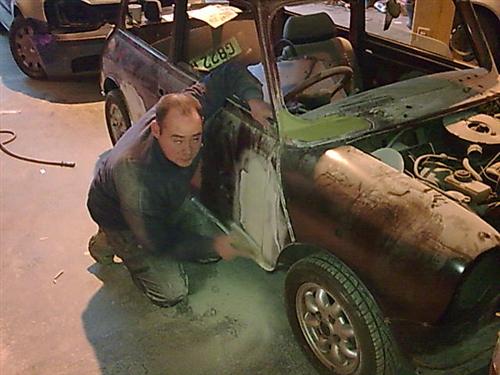
In that pic, you see the n/s, the kick plate is the part that is shiny on the right with the door off, then you see the pillar with two holes in it where the door bolts on, and that hole is where the vent goes, the cut edge is where i roughly cut off the scuttle panel so i can get into weld the vent hole easier...


#3 Avtovaz

Avtovaz

    One Carb Or Two?

  • Members
  • PipPipPipPipPipPipPip
  • 1,135 posts
  • Location: widnes

Posted 15 December 2021 - 08:34 PM

85.jpg
 
Dont know why that is side on pic, but anyway, i had to get a hinge panel repair piece as there was more and more holes appearing. You can see also, that this does not cover all the holes, and also in the middle of the rot goes an air vent  [:[] 
 
86.jpg
 
So, lined the door up, tacked the hinge panel in, then made that other plate that goes right upto the inner wing! Then welded it in, and used a belt sander to make the hole for the vent. The vent was then tiger sealed in. I recon this is why the rot is there in the first place.
 
87.jpg
 
88.jpg
 
New scuttle end plate tacked into place. Fortunately when removing this side i didnt slip with the drill and put a hole in the dash!!! We had positioned the panel when we put the door on, and tried fitting the wing. 
 
88.jpg
 
Everything cleaned up!
 
89.jpg
 
New wing, A panel, and scuttle welded in!
 
90.jpg
 
91.jpg
 
92.jpg
 
For some reason in that pic it looks rusty but it isnt!
 
So more to do tomorrow with my bad eyes!


#4 Avtovaz

Avtovaz

    One Carb Or Two?

  • Members
  • PipPipPipPipPipPipPip
  • 1,135 posts
  • Location: widnes

Posted 16 December 2021 - 07:48 PM

the car has a 1275cc motor from a MG metro, goes ok but modern cars are so much quicker now. Its 73bhp and the old cooper s cars where 75, that is just nothing but was a serious motor in their day!
 
Anyway more today
 
More more more more more more more!!!!!!!!!!!!!!!!!!!!!
 
Been poking...
 
93.jpg
 
Fuel tank out
 
94.jpg
 
Car in 2 post ramp
 
95.jpg
 
car lifted up and some bolts removed.
 
96.jpg
 
Subframe off, only took 20 mins to get it off!!!
 
97.jpg
 
N/s subframe mount... WHERE?????  [:[] 
 
98.jpg
 
O/s subframe mount, just about there...
 
99.jpg
 
O/s rear closing plate on rear valance, or whats left of it..
100.jpg
 
n/s closing plate...
 
 [:^(] 
 
Got stuck into the n/s subframe mount though...
 
101.jpg
 
Cut all the rot out, and started to clean it up. I had to stop early and goto the hospital to get my eye checked out again, fortunately its ok, much better than my mothers mini anyway!
 
Back in work tomorrow so no progress tomorrow i expect..


#5 Avtovaz

Avtovaz

    One Carb Or Two?

  • Members
  • PipPipPipPipPipPipPip
  • 1,135 posts
  • Location: widnes

Posted 18 December 2021 - 12:34 PM

Right was at work today so i didnt have much time to do anything, was only there for an hour...
 
102.jpg
 
Stripped the paint on the quarter panel and it relieved a plate someone has welded in there before, a few years agot he car went to a local garage to have all this work done, looks like they just took my mothers money and ran, as this plate is rotten, it was not painted on the back...
 
So..
 
103.jpg
 
Air haksaw that bit out too!
 
104.jpg
 
Now looking at it with the clean edges it dosnt look that big of a problem does it? The main thing i have to do now is get everything near to where i want it to be, and then put the rear subframe back on to make sure the bolt holes line up...
 
There is one other little problem, inside of the car at the bottom left on that last pic, there is a little panel inside of the car, im not sure how to repair this yet, maybe from inside of the car threw the rear bin....
 
hmm... Oh well...
 
105.jpg
 
106.jpg
 
107.jpg

Edited by Avtovaz, 18 December 2021 - 12:35 PM.


#6 Avtovaz

Avtovaz

    One Carb Or Two?

  • Members
  • PipPipPipPipPipPipPip
  • 1,135 posts
  • Location: widnes

Posted 19 December 2021 - 07:23 PM


So i was not going to post any more about the mini as its not a rally car, however as i seem to be getting a lot of stick about why my car is not finished, some more pics!
110.jpg
 
thats inside of the boot, O/S rear of the back pannel rotten, what i didnt know then is how much!
 
111.jpg
 
Into the boot all along almost, so it wanted 1/2 a boot floor, and most of the back panel, so i got cutting bits out as in the pic and cleaning it up..
 
115.jpg
 
Rear valance although good, came off, and also the closing plate i had welded in off too, it was to the only good bits of boot it appears!! I thought it wasnt rotten i was fooled!!!
 
116.jpg
 
I then cut a sheet the side of the back and some more, and tacked it in place.
 
117.jpg
 
Tac tac tac ;)
 
118.jpg
 
tac tac tac ;)
 
119.jpg
 
Then i cut some plates to make up the back pannel, i thought it would be hard to do it in one, so i did it in 3. 
 
Tac tac tac ;)))
 
120.jpg
 
121.jpg
 
122.jpg
 
Weld weld weld
 
123.jpg
 
weld weld weld..
 
124.jpg
 
same underneath..
 
weld weld weld ;))))))))
 
So now it want the new boot floor shaping properly, the valance welding back on, and the quarter plates too...

Edited by Avtovaz, 19 December 2021 - 07:26 PM.


#7 Avtovaz

Avtovaz

    One Carb Or Two?

  • Members
  • PipPipPipPipPipPipPip
  • 1,135 posts
  • Location: widnes

Posted 05 April 2022 - 08:02 PM

So went to do a bit more today...
 
125.jpg
 
What was a perfectly innocent looking spare wheel well turned out to have loads of little holes in it!
 
So,
 
126.jpg
127.jpg
 
 
Out came the air saw, and a big hole was made! I took the rusty bit, marked around it but slightly bigger onto a sheet of steel, and cut it out with the electric sheers!
 
128.jpg
 
Welded it outside
 
and inside too...
 
130.jpg
 
you cant really see inside, the car was up in the air then, and i just pointed and guessed with the camera.
 
129.jpg
 
Started work on the subframe mounts again, i put that big plate in that is vertical, ill cut down the subframe repair plates, i just think itll be easier...
 
 
... well, not that anything is ever easy with a mini!


#8 Avtovaz

Avtovaz

    One Carb Or Two?

  • Members
  • PipPipPipPipPipPipPip
  • 1,135 posts
  • Location: widnes

Posted 05 April 2022 - 08:04 PM

 
So over to the off side. Not as bad looking, but still there is a lot of rot...
 
139.jpg
 
Its in the quarter pannel too!
 
143.jpg
 
I cleaned everything up, and cut the rot out, i forgot to take pic when it was just cleaned and rot cut out! There i have put the subframe locating pannel on in the same was as i did the other side..
 
So how i did the quarter pannel repair.
 
140.jpg
 
First of all, all the rot was taken out, metal cleaned up, and a plate was bent to havea  90deg return [or lip] on the bottom of it, and then the pannel was cut roughly to size. 
 
It was then tacked into place, and i put the arch on and marked arround where the lip wanted to be..
 
141.jpg
 
Now using a pair of pliers i started to bend the metal up little by little maybe i made 5 passes following the line...
 
As you can see the metal has bunched up in places, but i am not worried about this...
 
142.jpg
 
Now, i used a hammer and a dolly to knock it into shape more, squashing the metal out and making the lip.


I thought i had taken a pic of the finished lip, but i must not have, ill take one tomorrow and show how i then got rid of the metal where it bunched up.
 
For some reason the other side didnt bunch up like that maybe as the lip was a little bit shorter to start with, or maybe i folded it better, not sure.
But, more work will be done tomorrow i think instead of going to the prom.
 
So, just this o/s subframe mount to finish, hole in n/s floor, o/s/f shocker mount to do, rack boot, and yes, **** loads of filler !! LOL!


#9 Avtovaz

Avtovaz

    One Carb Or Two?

  • Members
  • PipPipPipPipPipPipPip
  • 1,135 posts
  • Location: widnes

Posted 05 April 2022 - 08:07 PM

Bit more done if you wish to have a look!
 
133.jpg
 
The bit i didnt want to do!!!
 
I attached the rear subframe to the repair panel, then bolted the subframe on, tacked the plate into place, and then unbolted the subframe.
 
You can see above i have started to shape a plate to cover yet another hole LOL!
 
134.jpg
 
Home made quarter panel! Ill explain how i have done this a bit later on with some pictures.
 
135.jpg
 
Panel welded into place, i put a bit too much heat into it and distorted the quarter panel a bit, but my mate said he can sort that out easily when we get to the filling stage!
 
136.jpg
 
Everything welded up now!!


#10 Avtovaz

Avtovaz

    One Carb Or Two?

  • Members
  • PipPipPipPipPipPipPip
  • 1,135 posts
  • Location: widnes

Posted 05 April 2022 - 08:09 PM


Today went with some tidying up in the garage, and my mate finally doing some the the mini!
 
 
233.jpg
 
I dont know how he knows what he is doing as he isnt looking at what he is doing and has no pupils in his eyes also!
 
 
236.jpg
 
Filler nearly done, just some pinholes to sort out.
 
237.jpg
 
" ginger " who we made cover his hair for this pic  [:D
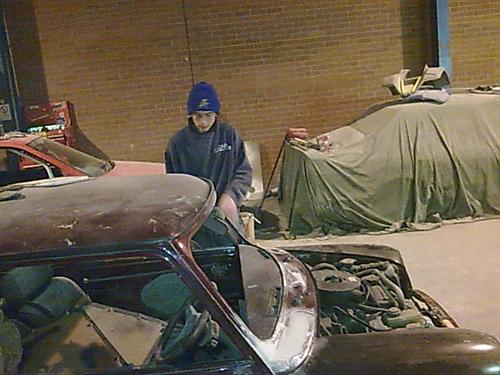
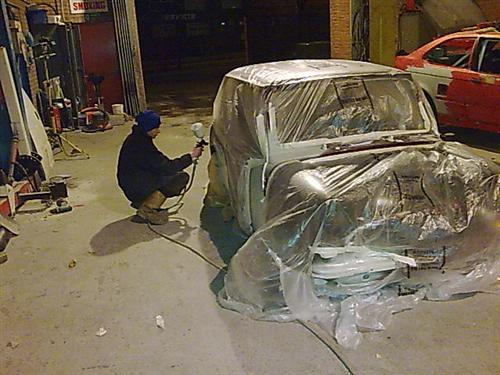
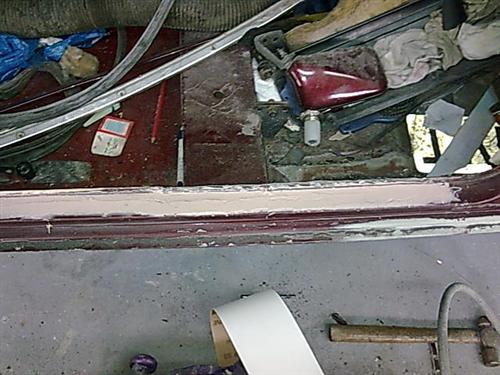
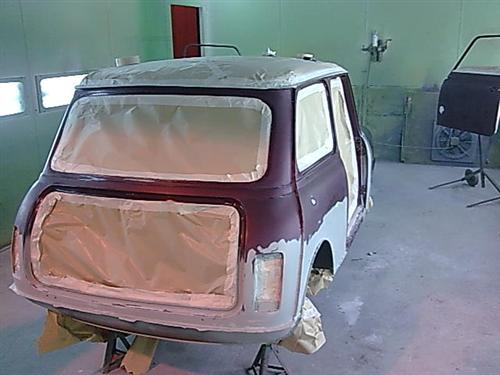
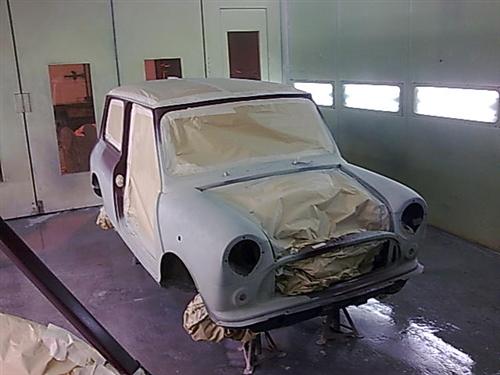
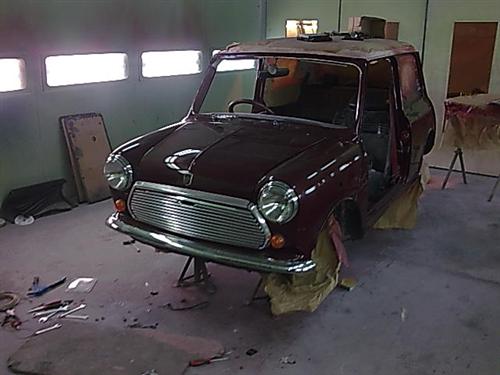
] then started to mask the car for priming the repairs.
 
238.jpg
 
 
Funny, in those pics, it looks like mike is priming the car in the shop with no mask on, but i remember it being in the booth and mike wearing a full air fed mask and paint suit.
 
strange
 
but the primer will be rubbed tomorrow and then into the booth, erm, i mean it has to come out first of cause! 
 
Looking forward to getting the car done, then the bmw can get in there for paint!  [:Y:]


#11 Avtovaz

Avtovaz

    One Carb Or Two?

  • Members
  • PipPipPipPipPipPipPip
  • 1,135 posts
  • Location: widnes

Posted 05 April 2022 - 08:09 PM

i forgot i do have some project news!!
 
Mike aka " ginger " prepped the mini, and masked it in the booth!
 
244.jpg


Mark in that pic is the lad who looks like he is doing something on the car LOL! as if!
 
So, the car was masked up and all sorted for action with the spray gun until we went to mask the drivers door and found

Edited by Avtovaz, 05 April 2022 - 08:12 PM.


#12 Avtovaz

Avtovaz

    One Carb Or Two?

  • Members
  • PipPipPipPipPipPipPip
  • 1,135 posts
  • Location: widnes

Posted 05 April 2022 - 08:13 PM

245.jpg
 
dosnt look much but its a bit of rot we found when removing the door seal.
 
best sort that before paint!
 
So now the car is in the booth, ill weld it tuesday while mark repairs a truck. Im sure im being conned some how into babysitting someone who has to work over christmas otherwise on his own...
but...


#13 Avtovaz

Avtovaz

    One Carb Or Two?

  • Members
  • PipPipPipPipPipPipPip
  • 1,135 posts
  • Location: widnes

Posted 05 April 2022 - 08:14 PM

More progress! 


but on the mini... 


255.jpg
 
The rot was cut out, and a plate was made, all edges cleaned up.
 
256.jpg
 
Tacked into place
 
257.jpg
 
Welded all the way around.
 
258.jpg


Then attacked the welds with a belt sander, knocked the plate down a bit.
 
260.jpg
 
Filled over the top, and then sanded it down, had to do 2 skims, and it was right! 
 
261.jpg
 
Car now masked up and panel wiped
 
262.jpg
 
Where the wings meet the scuttle and the front panel, the gaps were sealed with tiger seal.
 
263.jpg
 
No gas in the booth, so we used the space heater to get everything hot.
 
264.jpg
 
First a coat of primer on the bits that where bare.
 
265.jpg
 
266.jpg
 
Then some base coat, 
 
267.jpg
 
More base coat, that was nibbed off in places, and more base applied...
 
268.jpg
 
lacquered...
 
 
So thats the shell, door and bonnet painted, boot tomorrow as i found more rot ! Just sandblasted it and put some chop strand in it.
 
So itll be getting built up tomorrow hopefully and mot monday.

Edited by Avtovaz, 05 April 2022 - 08:18 PM.


#14 Avtovaz

Avtovaz

    One Carb Or Two?

  • Members
  • PipPipPipPipPipPipPip
  • 1,135 posts
  • Location: widnes

Posted 05 April 2022 - 08:15 PM

 
269.jpg
 
Starting to get back to as it was!
 
Soon ill be able to get the bmw painted and do some rallying!!!

Edited by Avtovaz, 05 April 2022 - 08:19 PM.


#15 Avtovaz

Avtovaz

    One Carb Or Two?

  • Members
  • PipPipPipPipPipPipPip
  • 1,135 posts
  • Location: widnes

Posted 05 April 2022 - 08:17 PM

Fortunately the mini is nearly there, and i mean nearly!
 
291.jpg
 
Looks dirty as it lives in my mates workshop and there is loads of filler dust in the air all the time. Itll just wash straight off so not a problem!
 
Just missing 3 arches, 1 had a crack in it, 1 needed modding, and the other one Ginge knocked off the table when he painted it!  [XXX] 
 
292.jpg
 
No boot lid as there was a repair on it, and the primer is showing threw, its all ready and prepped, will be painted thursday, and on friday!
 
293.jpg
 
294.jpg
 
Well, its done its at home now! Its on my brother to remove and fit new stripes in the correct position and vallet the car also!
 
So all i have to do now is get the bmw painted ;)


1 user(s) are reading this topic

0 members, 1 guests, 0 anonymous users