Clubman Bonnet
#1

Posted 23 April 2024 - 06:51 PM
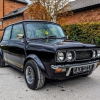
I have a Clubman GT that I got a few months ago (it came to me in bits). Engine is now sorted along with susspension, brakes and most of the body work apart from those pesky wing gaps. One side Ive managed to get pretty much spot on but the othr side is a whole diffrent kettle of fish.
Every thing is hard up against everything, no gaps on inner wings to bulkhead and X member gap at back of bonnet to scuttle looks good aswell.... Anyway aftet almost 2 days on it getting it to the stage its at I'm starting to wonder if the car came with some sort of dodgy aftermarket bonnet that's a bit on the small side. it looked new but had no Heritage stikker on it.
Anyway my question is does anyone know the width of a genuine clubman bonnet, back and front
Cheers All
Bobby
#2

Posted 24 April 2024 - 04:48 PM
Mine measures 108cm across the back and 105.5cm across the front. I am only in York if you want to come and look/check?
#3

Posted 24 April 2024 - 06:05 PM
If it makes any difference i had the same issue on my clubby.
So complete front end including half inner wings and scuttle. L/h side of the bonnet to wing gap was spot on, rear of bonnet to scuttle was good after afew tweaks but the r/h side had a tapering gap. Outer wings to scuttle gaps after some work were also spot on.
Bear in mind before i took everything apart i took measurements especially of the inner wing to inner wing distances etc. So measurement wise everything was good.
Now being a picky bugger i decided to section my replacement bonnet i had bought, i could have used my original but it needed more work than i thought and at the same time i decided to fully strip the replacement bonnet down to its component parts and modify / recitfy as i went. 70 hrs went into that bonnet trying to perfect it but unfortunately the skin got stretched on one of the repairs and i was unable to sort it. Gave it a bloody good go but enough was enough.
I bit the bullet and bought a shiney Heritage one. Well the first was a right shocker and crap. That got returned a replacement was collected. Much better but guess what it still had the bloody taper on the r/h side. So bonnet for bonnet ie original to Heritage dimensionally they are the same.
And yes i did section the r/h side and added a sliver of metal to get rid of the taper.
#4

Posted 25 April 2024 - 06:30 PM
I'm not sure my welbing skills are as good as yours Neil But I am starting to think a bonnet split may be the only way to move forward.
Thanks
Before I take that drastic step can anyone take a look at photo's to see if you can see any other way as this is my firdt time doing this
Attached Files
#5

Posted 25 April 2024 - 06:57 PM
It does look like judging from where the front of the bonnet to wing ends its sitting slightly back, but then your gap is quite large at the rear already. I was going to suggest a slight twist but that wont achieve much. So i think you will need to go down the same route as me i'm afraid.
Your wing to scuttle gap looks spot on so nothing that could be done there BUT is the r/h wing actually welded in place?? If its not then i would try and dress the wing to scuttle return back a little more and maybe tweak the rear edge of the wing to A panel as well as that does look like its sitting forward a touch.
Its bizarre how the taper is exactly the same side on both of our cars. Oh and there is only Heritage bonnets, no aftermarket ie Magnum.
Also having a closer look at your l/h side i would suggest dressing the wing to scuttle return there as well as that could do with a tweak.
Just out of curiosity is the scuttle a Heritage item or Magnum??
#6

Posted 25 April 2024 - 07:18 PM
When you say wing to scuttle return I'm not totaly sure which bit that is? 🤔
All new panels Heritage
#7

Posted 26 April 2024 - 07:44 AM
#8

Posted 26 April 2024 - 10:18 AM
Have you any pictures of how you did the bonnet? ie how far from edge you made the slit, did you cut the bonnet into 2 pieces etc.
Ps. you mentioned bonnet to scuttle looking a bit big... what should i be aiming for?
#9

Posted 26 April 2024 - 07:29 PM
Thanks, totaly get what your sayin now about dressing the wing.
Have you any pictures of how you did the bonnet? ie how far from edge you made the slit, did you cut the bonnet into 2 pieces etc.
Ps. you mentioned bonnet to scuttle looking a bit big... what should i be aiming for?
If you look at my signature you will see Project Paddy, everything you need to see is on there.
#10

Posted 27 April 2024 - 10:24 AM
When you talk about stripping the bonnet bown to its constituant parts and sectioning it, are you saying you totaly removed the V shaped backbone/strengthening support on the underside of the bonnet ore something else?
Ps. As I've never used it before but am planing on using it for this, can you tell me what welding putty you use?
#11

Posted 27 April 2024 - 07:37 PM
Thanks, the Paddy post is very interisting and very helpfull with a wonderfull end result.... though i do have one question.
When you talk about stripping the bonnet bown to its constituant parts and sectioning it, are you saying you totaly removed the V shaped backbone/strengthening support on the underside of the bonnet ore something else?
Ps. As I've never used it before but am planing on using it for this, can you tell me what welding putty you use?
Yes i completely stripped it down to its constituant parts, so fully dissasembled. Was it a wise move, it was to start with as i found hidden rust etc but ultimately things bit me in the backside as my thread will attest to.
The putty used was Frosts Cold Front. However i'm of the opinion wetted down modelling clay would do the job just as well. Its only acting as a heat soak.
1 user(s) are reading this topic
0 members, 1 guests, 0 anonymous users


