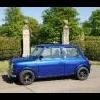
1984 Mayfair rebuild
#61

Posted 21 June 2007 - 08:12 PM
#62

Posted 22 June 2007 - 06:40 PM
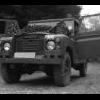
Had a theroputic day. Avoided the Mini as it was raining and power tools and water don't mix. I replaced the valve seals on my Land Rover a while back but the head gasket was naf and I am sure it was leaking after just 50miles. Losing compression randomly on acceleration. It had been in the shed for 6 months though but it was a bit odd. Anyway, to cut a long story short I stripped the head off the Land Rover, stripped the head bare, polished the inlet and outlet ports, re-lapped and cleaned up all the valves, put it all back together and fitted a KN air filter for a bit of extra noise. Man, she files now like a 2ton flying house brick would fly. Next job for the Rover is the new clutch thats been sat on the shelf for the last 9months and fit the reconditioned bargain gearbox I got for £70. Mini's are great but I enjoyed working on the Landy today. I didn't use the angle grinder, welder or bang my head once today! Still got oily though. Pure bliss
#63

Posted 23 June 2007 - 03:37 PM

The main arm bit got painted. . .

and I made up a new plate for the bulkhead, copied like for like only without the rust hole.

Then it rained. . . and it's beer o'clock. . .
#64

Posted 28 June 2007 - 06:20 PM
Collecting my subframes tomorrow. I hope they look good. Slowly collecting another pile of bits to paint or get powder coated. I think my painted radius arm looks nice and yummy!
MiniMag have contacted me seeing if I want it featured in the "On the Job" section of their magazine.
All good stuff. . .
#65

Posted 30 June 2007 - 05:19 PM
I bought some brake pads and springs from Halfords for my Fiesta setup and stripped & cleaned up both calipers this afternoon. Going to need some new seals for the one caliper at least.

#66

Posted 01 July 2007 - 04:53 PM

The subframe is not quite yellow, yellow with an orangy tint. The radius arms are so red Royal Mail would be proud. . . if they were not struggling to catch up after their strike. Not quite sure if the brake bits should be yellow having sprayed them. Looks like Noddies car. lol! More red or proper orange will be better than yellow me thinks. . . any suggestions?
#67

Posted 02 July 2007 - 06:48 PM

 not my shoes but defo my champagne
 not sure on the colours mix yet.
The calipers are wrong I think. Man, I am so worried about the finish of the underside and no damn fool is gonna see it except me.
EDIT: The calipers need to be black or hammer black don't they! I have suddenly become obsessed with colour! Bring on the next rainy day, I have something to work on indoors now.
Edited by gavfoz, 02 July 2007 - 07:15 PM.
#68

Posted 07 July 2007 - 09:03 PM
07/07/07

Steering column and rack finally removed. They just need a smack with a medium weight persuader. Most of the complete inner wing removed using a combination of sharp chisel, the little persuader, spot weld drill and angel grinder. Spot weld drills are excellent.


Count the layers. Yup, 5! The origonal flitch, two patches on the outside, two on the inside.
Tried to photo down the inside of my sills. Man-o-man! What a treat. Origonal sill still visible and rusting away. The inner sill has been

Inside the bulkhead box section is rusty
Despite all my efforts to remove vast amounts of metal from the shell it remains rigid and has not destorted yet sat on its axle stands. At least on the whole its solid.
#69

Posted 07 July 2007 - 09:32 PM
#70

Posted 08 July 2007 - 01:10 PM
So after yesterdays destructive day, today I was productive. Also gives the neighbours ears a rest

Before and after shots of my radius arms. I fitted a new radius arm axle, new rubber seals, new wheel cylinder (to match my Fiesta front brakes), I have a new spacer drum on back order (to match the track of the front Fiesta disks), new clevis pin and everything else cleaned up with an added splash of colour. What a difference. Does not look so "toy town" like with the other bits fitted. . . which is good.
#71

Posted 08 July 2007 - 03:38 PM

Half the bearing race that should be in the hub is welded to the arm.
Its also a bit odd because its got a needle bearing in both ends of the arm. I am sure the other one didn't. Maybe I am wrong but hey.
Off out again for a meal tonight. Get me, eating out two nights in a row! Can you tell a women is involved
Ciao!
#72

Posted 15 July 2007 - 04:36 PM
Finished rebuilding my Fiesta calipers and got some Metro drive flanges, just need hoses to complete the set-up.
Bought a few second-hand shinny bits though and have now spent my monthly pocket money. Luckily its pay day the end of next week!
Getting the retro look is easy. Getting the racer look is also easy. I am finding it difficult getting the retro racer look right in my mind though. Everytime I pick up up a Mini mag I gain some more ideas and so my idea of what I want out of this build evolves slightly further. I just wish my shell was finished and I could call this project 95% done. Next time I will buy a project that has had an MOT in at least the last two years
Anyway, currently thinking about cutting the rear bins out and getting a decent FIA cage fitted, like a roll centre cage or Safety Devices. Also have a problem with running the Mk1 rear lamps that have no fog or reverse due to the age of the shell. I was going to mount two sidelamp-style lights under the rear bumper but have now decided not to run bumpers, just some chrome finishing strip on the trimmed down bumper lips like the yellow mini I spotted in a small photo in Mini Mag. I guess the fog and reverse lamps needed to be frenched into the rear valance. If you could get red fog bulbs I could run clear lenses on each side. . .
#73

Posted 15 July 2007 - 05:53 PM
*edit*
for the rear fog and reverse lamps try mk2 fiesta ones. They have a curved base and fit straight to the mini valance. Failing that have a look at the new beetle - the fog and reverse lamps on that look quite promising as well.
Edited by minivanman, 15 July 2007 - 05:55 PM.
#74

Posted 15 July 2007 - 06:48 PM
*edit*
for the rear fog and reverse lamps try mk2 fiesta ones. They have a curved base and fit straight to the mini valance. Failing that have a look at the new beetle - the fog and reverse lamps on that look quite promising as well.
I should read this through again from the start. It must be a bit contradictory and schizophrenic in places.
The new beetle! Good thinking Watson! They would probably sit flush with the valance as well.
It looks like we are both media whores by the way. It is your van sat on pallets in this months Mini Mag right? Mine will be featured soon. . .
#75

Posted 16 July 2007 - 07:34 PM
I spent months looking at cars to see what has the lights flushed into the rear bumper, and the new beetle was the only one I could see that might possibly work. In the end I gave it up and decided just to put another light under the ones I'm going to put on the van. Yes it is my van in minimag - seems like the web forums are a bit of a hunting ground for Jon Betts! Theres another guy in my club who's just had his van done for this series as well.The new beetle! Good thinking Watson! They would probably sit flush with the valance as well.
It looks like we are both media whores by the way. It is your van sat on pallets in this months Mini Mag right? Mine will be featured soon. . .
2 user(s) are reading this topic
0 members, 2 guests, 0 anonymous users


