Jump to content


Photo
- - - - -

Modifying Flywheel/backing plate and clutch setup


  • Please log in to reply
10 replies to this topic

#1 Bill USN-1

Bill USN-1

    Mini Mad

  • Members
  • PipPipPipPip
  • 260 posts

Posted 31 January 2007 - 07:20 PM

I had tagged on to another thread earlier asking about lightening the flywheel and backing plate.
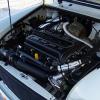
I had read a few articles but there really wasn't anything specific as far as changes in HP or torque curves of the engine or just in general how it helped.

So I read some more articles like the ones listed on Mini Spares.

Flywheel lightening pre-verto

Pressure plate lightening

So armed with this limited knowlege I decided to go for it and do a little modification.

My plan was to keep it basic. The flywheel article states to remove about .200 from the diaphram side and to leave the thickness at least 3/8"(9mm)

So here is the flywheel on the lathe. Also showing the original thickness. I center punched dots where the original timing marks were just in case I need the flywheel for something else later!!

Posted Image

Posted Image


And after the first clean up pass.

Posted Image


Then the finished cut. and thickness.

Posted Image

Posted Image

Then after a little edge clean up and sanding.
Note the .200 will take the surface down to just above the threads in the holes.

Posted Image

Posted Image

#2 Bill USN-1

Bill USN-1

    Mini Mad

  • Members
  • PipPipPipPip
  • 260 posts

Posted 31 January 2007 - 07:20 PM

Then it’s to the backing plate.
The original thickness. Note the line just at the screw holes.

Posted Image

Posted Image

Then after the recommended .110 cut. This is just enough to remove the ridge on the outside.

Posted Image

Posted Image

Then after a little clean up.

Posted Image

#3 Bill USN-1

Bill USN-1

    Mini Mad

  • Members
  • PipPipPipPip
  • 260 posts

Posted 31 January 2007 - 07:20 PM

So now we come to the clutch set up.
This is my first Innocenti(mini) so I had to read the directions a few times.

But basically you don’t want there to be a big gap between the straps and the backing plate. And you don’t want the straps under pressure.

Now I just removed about .200 off the surface of the flywheel so I have to make up for that.
If I had time I was going to machine some spacers but I opted for the 10mm/ 3/8” SS flat washers instead.

The straps already had 1 washer under them that measured .075 and I removed .200 so I would need a total spacer of about .275.

So I started with 4 washers at .075 ea. That’s .300.

A little too much gap.

Posted Image

So I went to 3 washers for .225.

Not enough. Put the straps under tension.

Posted Image

So I found a thinner washer and ended up with .265.

This is about .010 off but I figured the initial break-in of the clutch disc and flywheel surface should set it just right!!!
My angle was a little off on the camera but it is an even gap across the strap.

Posted Image

Posted Image


So now I should be able to assemble and have a lighter, good working clutch.

I do not have a small scale to know the exact weight removal so we will just have to trust the weights listed in the articles!!!

#4 Turbo Nick

Turbo Nick

    Up Into Fourth

  • Members
  • PipPipPipPipPipPipPipPipPip
  • 2,913 posts
  • Local Club: Turbominis.co.uk

Posted 01 February 2007 - 01:30 AM

i did this to my ultralight flywheel and backplate last season and the difference it made was unreal. I had the backplate lugs machined down so that the driving straps were flat and the diaphragm spring was flat when it was bolted up. I run a grey diaphragm and its no heavier now than a std clutch as far as i can remember a std clutch being anyway. Definately worth the time and effort, and a good write up there dude :P

#5 Bill USN-1

Bill USN-1

    Mini Mad

  • Members
  • PipPipPipPip
  • 260 posts

Posted 01 February 2007 - 07:57 AM

Thanks for the feed back.
I am going with a stock green diaphram right now.
Maybe on the next rebuild I will up the power.
I have time right now since I am waiting on parts still, I could machine the .265 off the backing plate lugs.
Might have to shorten the bolt also or extend the shoulder socket in the lugs for the bolt to seat.

I was really hoping there was someone on here that actually had or knew of some dyno numbers to see the difference.
I don't remember anything in the Vizard bible.

Edited by Bill USN-1, 01 February 2007 - 07:58 AM.


#6 Guess-Works.com

Guess-Works.com

    Gearbox Guru

  • Traders
  • PipPipPipPipPipPipPipPipPipPipPip
  • 19,838 posts
  • Local Club: Rugby Classic Mini Owners Club

Posted 01 February 2007 - 08:38 AM

Just one additional.... there is a strong chance you may have un ballanced the fylwheel and back plate.... That should be checked/rectified first.. other than that.. great write up..

#7 Bill USN-1

Bill USN-1

    Mini Mad

  • Members
  • PipPipPipPip
  • 260 posts

Posted 01 February 2007 - 11:51 AM

Just one additional.... there is a strong chance you may have un ballanced the fylwheel and back plate.... That should be checked/rectified first.. other than that.. great write up..


I completely understand the balance issue and I thought long and hard about it.

My thinking is that the ballance holes in the flywheel are left intact. The Flyweel is already 0 balanced.
By turning on the lathe, a reasonable assumption can be made that equal material is being removed around the entire flywheel.

So the only part that would in anyway affect the balance is if the metal itself was more dense in one area of the flywheel.
There is a small possibility of this.

I asked a similar question when it came time to install the diaphram and backing plate, does it reall matter if you line up the A marks on the 3 pieces?

I got no real answer other then if they are there, line them up.

Well what happens if you swap parts around from one motor to another or just surface the worn parts?
Or just replace the flywheel with an ultralight?

Then I checked what Vizard had to say....Basically even when replacing pistons during a rebuild, if it's not an all out race engine...don't spend the money.

So....what's the right answer?

I figured I must be the guinea pig here and just have to try it myself and post the results.
If it was a running motor i could have done a before and after dyno run. But I don't even know how to ask about a dyno in Italian!!! :P

But me personally...if I had a place that spoke english that was close by...I would balance the parts.

#8 Guess-Works.com

Guess-Works.com

    Gearbox Guru

  • Traders
  • PipPipPipPipPipPipPipPipPipPipPip
  • 19,838 posts
  • Local Club: Rugby Classic Mini Owners Club

Posted 01 February 2007 - 12:40 PM

Yep, fair comment and probably workable.... but my assumption is the balance holes are introduced to compensate for material density changes of the flywheel, and hence removing some of that material may have altered the balance...

All items which are supplied, flywheels, back plates etc, are pre balanced and have balance marks on them. Think the exception to this is the Ultralights which should be balanced when built, even minispares put this in their doc for the ultralight..

This flywheel is not balanced so should be before use, along with the prospective clutch assembly.


#9 vasi

vasi

    One Carb Or Two?

  • Members
  • PipPipPipPipPipPipPip
  • 897 posts
  • Local Club: Minis 'n' Oatcakes

Posted 01 February 2007 - 06:51 PM

But I don't even know how to ask about a dyno in Italian!!! :P


dinamometro, apparently

#10 Bill USN-1

Bill USN-1

    Mini Mad

  • Members
  • PipPipPipPip
  • 260 posts

Posted 01 February 2007 - 07:33 PM

But I don't even know how to ask about a dyno in Italian!!! :P


dinamometro, apparently


Or....

Dove è un dinamometro della strada di rolling stazione di collaudo?


Where is a rolling road dynamometer testing station?


I use babelfish!!!

#11 Sprocket

Sprocket

    Great on Injection faults

  • Members
  • PipPipPipPipPipPipPipPipPipPip
  • 7,266 posts
  • Location: Warrington
  • Local Club: Manchester Minis

Posted 01 February 2007 - 08:08 PM

LOL is a Dinamo Metro, a Metro with a clockwork engine :P


1 user(s) are reading this topic

0 members, 1 guests, 0 anonymous users