Hey again guys!
At the minute all ive got keeping my bonnet closed is 2 bonnet straps and im not to keen on the idea of people being able to get into it that easily!
The problem is the previous owner ground the original mechanism off so i cant just stick one of those on as well as straps,
So ive decided that im going to take the straps off and fill the holes and get 4 locking bonnet pins!
My question is how easy is it to fill the holes, what do you use and will i have to respray the whole bonnet?
Cheers guys!!

Filling holes!
Started by
insamoufonyx
, May 07 2007 11:46 AM
13 replies to this topic
#1

insamoufonyx
-
- Members
-

- 1,633 posts
Camshaft & Stage Two Head
- Local Club: NorthSomersetMiniClub.co.uk
Posted 07 May 2007 - 11:46 AM
#2
dklawson
-

- TMF+ Member
-
- 10,923 posts
Moved Into The Garage
- Name: Doug
- Location: Durham, NC - USA
- Local Club: none
Posted 07 May 2007 - 12:21 PM
I will draw criticism for what I'm about to say but....
Holes in a bonnet are one of the places where I prefer lead work to plastic body fillers. Drill out the holes slightly to remove any threads from the old closers such that only bare, clean metal is exposed in the holes. Sand the underneath side of the bonnet and a small area around the hole on the top side. Slightly countersink the holes from both sides and apply tinning butter. Apply gentle heat followed by body solder. File flat, wash with ammonia to neutralize the flux, then prep the bonnet for painting like you normally would. Plan on painting the whole bonnet AFTER you've added the holes for your new pins.
Two places I hate to see plastic filler are bonnets and roofs because both panels vibrate a lot and the filler can crack or pop off over time.
#3
insamoufonyx
-
- Members
-
- 1,633 posts
Camshaft & Stage Two Head
- Local Club: NorthSomersetMiniClub.co.uk
Posted 07 May 2007 - 09:31 PM
bump
#4
vasi
-

- Members
-
- 897 posts
One Carb Or Two?
- Local Club: Minis 'n' Oatcakes
Posted 07 May 2007 - 10:11 PM
Bump?
I think DK answered pretty well.
I think DK answered pretty well.
#5
midridge2
-

- Members
-
- 1,794 posts
Camshaft & Stage Two Head
- Location: north east england
Posted 08 May 2007 - 10:10 AM
lead loading is fantastic if you can do it and have heat but for joe bloggs its beyond them.
grind the paint from around the holes to clean bare steel and countersink the holes, fill with bodyfiller and when hard rub down using a flat block and 80 grade paper, when you just about have the shape change over to 120 wet and dry paper and finish off.
regards painting there is a article on this sight that you should read.
regards painting the full bonnet depends what type of paint you have on.
lead loading has alot of safety issues and should not be done untill you understand them.
#6
The Matt
-

- Admin
-
- 17,229 posts
You don't escape that easily.....
- Name: Matt
- Location: Overton, North Wales
- Local Club: Welsh Border Minis
Posted 26 September 2007 - 02:43 PM
Rather than start another topic, I will add to this one.
I need to fill the holes where I've changed arch type. Problem is that they are about 6-8mm diameter and I've been trying to fill them but can't build up filler (it just falls through to the inside of the panel). Now, what I'm thinking of doing is applying a small coin sized dab of fibreglass filler to the back of the hole, then finishing it off at the front as necessary. Is this a reasonable technique or is Davids p40 generally frowned upon?
I need to fill the holes where I've changed arch type. Problem is that they are about 6-8mm diameter and I've been trying to fill them but can't build up filler (it just falls through to the inside of the panel). Now, what I'm thinking of doing is applying a small coin sized dab of fibreglass filler to the back of the hole, then finishing it off at the front as necessary. Is this a reasonable technique or is Davids p40 generally frowned upon?
#7
The Matt
-
- Admin
-
- 17,229 posts
You don't escape that easily.....
- Name: Matt
- Location: Overton, North Wales
- Local Club: Welsh Border Minis
Posted 26 September 2007 - 02:45 PM
Aaand, I will move it to 'paint and detailing' too.
#8
GraemeC
-

- TMF+ Member
-
- 7,318 posts
Crazy About Mini's
- Location: Carnforth
Posted 26 September 2007 - 02:50 PM
Remind me - fibreglass or metal front?
If metal then, as you will have to paint any repair, I would fill them in with weld and then a light skim of filler to finish off if needed. Although can't see an issue with teh f/glass filler route.
If metal then, as you will have to paint any repair, I would fill them in with weld and then a light skim of filler to finish off if needed. Although can't see an issue with teh f/glass filler route.
#9
The Matt
-
- Admin
-
- 17,229 posts
You don't escape that easily.....
- Name: Matt
- Location: Overton, North Wales
- Local Club: Welsh Border Minis
Posted 26 September 2007 - 02:55 PM
Well, the front is metal at the moment, but it's going to be swapped for an all new metal flip front in a few months, so this is kinda temporary on the front. The back has the same issue too, but I think I'll have to fibrofill those ones, welding in the back will mean taking the tank out and I'm lazy!
Here's what they're like at mo........
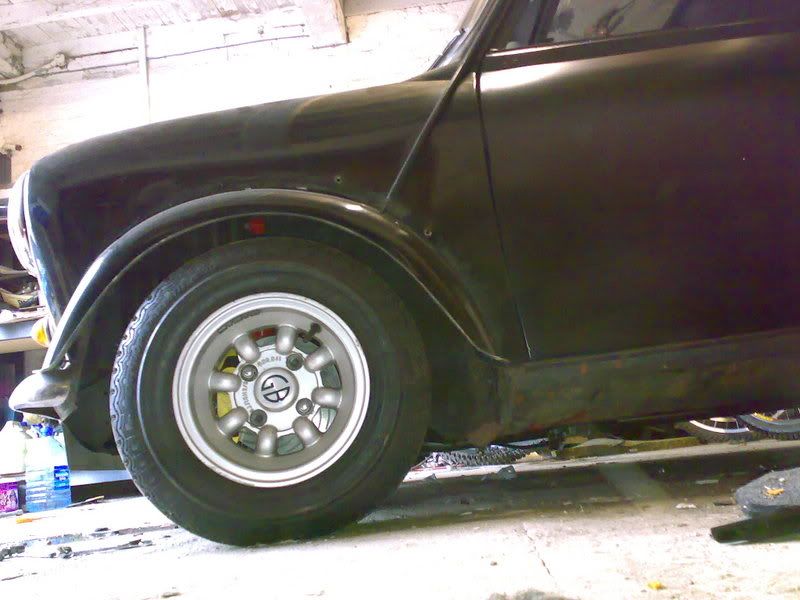
It's a pain to be honest, it was fitted with Sportspap arches and 7 x 13's so there's hardly any original arch left, the group 2 sit way too high but that's the lowest they can go because of the shape of the reformed lip on the wing. The front of them need to go under the bumper, but for the time being, I'm stuck with them as they are.
Here's what they're like at mo........
It's a pain to be honest, it was fitted with Sportspap arches and 7 x 13's so there's hardly any original arch left, the group 2 sit way too high but that's the lowest they can go because of the shape of the reformed lip on the wing. The front of them need to go under the bumper, but for the time being, I'm stuck with them as they are.
#10
dklawson
-
- TMF+ Member
-
- 10,923 posts
Moved Into The Garage
- Name: Doug
- Location: Durham, NC - USA
- Local Club: none
Posted 26 September 2007 - 03:28 PM
Placing a "bridge" of GRP on the backside of holes is a routine practice. Purists don't like it but it's perfectly acceptable on small, non-structural holes. I would only add a cautionary note to remove all the paint, undercoating, and such that are on the back side of the panel before using the fiberglass. You want it to stick well to the panel and once done you want to re-cover the fiberglass from the back (paint, undercoating, etc) so no bare metal or seams are exposed that can trap/collect moisture.
#11
The Matt
-
- Admin
-
- 17,229 posts
You don't escape that easily.....
- Name: Matt
- Location: Overton, North Wales
- Local Club: Welsh Border Minis
Posted 26 September 2007 - 03:45 PM
Okies, cheers DK, points noted. I'm hoping to do it tonight so I've been out and bought some David's P40 stuff. I have used it before, but it always seems like a bodge to me. At the end of the day though, these are only little non-structural holes that need filling. It's way too time consuming to weld a series of little plates on the back of where they are, though I guess that'd be the correct way of doing it. to be honest though, I will need to take the fuel tank out to do the N/S rear ones anyway. I may end up welding plates on the back ones as they are permanent, but I will just fibreglass fill the fronts as the wings are due for a change soon with the flip front.
Thankies everyone, I will get cracking on it tonight!
Thankies everyone, I will get cracking on it tonight!
#12
dklawson
-
- TMF+ Member
-
- 10,923 posts
Moved Into The Garage
- Name: Doug
- Location: Durham, NC - USA
- Local Club: none
Posted 26 September 2007 - 03:58 PM
There is another method if you feel that GRP is a bodge.
Earlier this thread talked about lead work. You can drill out the holes in the wing and A-panel to expose clean, bare metal. Then tin the metal with lead (acid flux will be required). Take a bit of copper wire and coil it into a spiral... so it looks like a tightly wound clock spring. Use the copper wire as a disk/plug and solder it into the hole. After it cools, wash thoroughly with sudsy ammonia to remove the flux and neutralize the acid. File the front flat to blend with the panel and then finish with paint (both sides).
Earlier this thread talked about lead work. You can drill out the holes in the wing and A-panel to expose clean, bare metal. Then tin the metal with lead (acid flux will be required). Take a bit of copper wire and coil it into a spiral... so it looks like a tightly wound clock spring. Use the copper wire as a disk/plug and solder it into the hole. After it cools, wash thoroughly with sudsy ammonia to remove the flux and neutralize the acid. File the front flat to blend with the panel and then finish with paint (both sides).
#13
mk1leg
-

- Members
-
- 9,341 posts
Crazy About Mini's
- Location: Jersey
- Local Club: Mini Club Jersey, MCR
Posted 26 September 2007 - 10:26 PM
clean back to bare metal than mig weld holes, grind back welds and fill where nessasary, sand and prime job done....
job done....
#14
Al*
-
- Members
-
- 1,476 posts
One Carb Or Two?
- Local Club: ERC / SMOA
Posted 30 September 2007 - 12:46 AM
weld the holes then fil if necessary.... even if you lead the holes lead can have a tendency to shrink or "suck in" at times leaving "ghosted" holes after you've refinished the panel... same can be said for filler.... either way can be done but the PROPER wayt is to put metal (weld) back where metal was..... just my 2 cents take it or leave it.... though i am a bodyman... 
Al
Al
Edited by Al*, 30 September 2007 - 12:47 AM.


1 user(s) are reading this topic
0 members, 1 guests, 0 anonymous users


