Yup, just the front.
Some actual paint all over the shell is usually head start over what Rover squirted on the car!!
Looking good though, impressed with the welding on the rear 1/4, I can't usually manage to weld filler!!!
Heh heh


Repairing the mighty 'Beast'
Started by
CharlieBrown
, Aug 09 2007 01:57 PM
103 replies to this topic
#61

Shifty
-

- Admin
-

- 13,154 posts
Sponsored by Fosters (tm)
- Name: Sean
- Location: Shropshire(sunny)
- Local Club: TMF
Posted 28 February 2010 - 10:29 PM
#62
CharlieBrown
-
- Members
-
- 6,587 posts
Crazy About Mini's
- Location: Chester
- Local Club: TMF
Posted 02 March 2010 - 08:01 AM
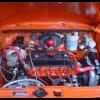
Got a bit more done last night, leaving work early just didn't happen so working in the dark it was:
Carb and inlet manifold off:
Looking a little more naked now:
So hopfully exhaust tomorrow
Carb and inlet manifold off:

Looking a little more naked now:


So hopfully exhaust tomorrow
#63
Sir Cheat
-
- TMF+ Member
-
- 1,171 posts
One Carb Or Two?
- Local Club: Manchester Minis
Posted 05 March 2010 - 12:10 AM
Yup, just the front.
Some actual paint all over the shell is usually head start over what Rover squirted on the car!!
Looking good though, impressed with the welding on the rear 1/4, I can't usually manage to weld filler!!!
Heh heh
Yeah looks like they just used a bit of silicone in the hole and put underseal over it and charged the guy £150

#64
CharlieBrown
-
- Members
-
- 6,587 posts
Crazy About Mini's
- Location: Chester
- Local Club: TMF
Posted 06 March 2010 - 10:59 AM
Indeed they did, the guy was me when I had it last and it was £250!!  not impressed
not impressed
#65
The Matt
-

- Admin
-
- 17,232 posts
You don't escape that easily.....
- Name: Matt
- Location: Overton, North Wales
- Local Club: Welsh Border Minis
Posted 06 March 2010 - 11:05 AM
Name and shame, who did the work Charlie? 
Glad to see you're stripping.... carry on!
Glad to see you're stripping.... carry on!
#66
CharlieBrown
-
- Members
-
- 6,587 posts
Crazy About Mini's
- Location: Chester
- Local Club: TMF
Posted 07 March 2010 - 11:00 AM
Right back to it yesterday.
I worked on it all afternoon until it got dark, it doesn’t look much different but got some minor things done so hopefully I can remove the engine and front subframe today (fingers crossed).
I started on removing the various pipes and wires still attached to the engine.
Heater pipes:
Then it was the exhaust. Separating the y piece from the manifold was a right pain and involved prying it off with a screw driver and hammer.
Nice exhaustless underbelly:
Oh yes, I also managed to get the indicator fittings and arches off after a good soak in WD40, the next step was drilling them out so I’m glad it didn’t get that far.
The next job was removing the brake lines, I read in the Haynes manual that if you put a bag over the top of the reservoir and screw the cap back on it will prevent it all draining out. Good tip. Some of the brake unions were a bit tight and took a bit of persuasion but I manage to get the servo and lines off:
Getting the battery cable off was fairly easy until I got to the front holding clip, trying to get access with the engine in proved to be too tricks so I just ripped the clip off in the end. Any tips for how to do it properly would be appreciated:
So that was about it for the day, just the suspension to disconnect from the body, disconnect the gear leavers, undo the subframe bolts and lift the body off the car....simple.....(I hope):
I just have to see if I have a socket for the tower bolts...not that I haven’t looked already....ops
Charlie
I worked on it all afternoon until it got dark, it doesn’t look much different but got some minor things done so hopefully I can remove the engine and front subframe today (fingers crossed).
I started on removing the various pipes and wires still attached to the engine.
Heater pipes:

Then it was the exhaust. Separating the y piece from the manifold was a right pain and involved prying it off with a screw driver and hammer.

Nice exhaustless underbelly:

Oh yes, I also managed to get the indicator fittings and arches off after a good soak in WD40, the next step was drilling them out so I’m glad it didn’t get that far.

The next job was removing the brake lines, I read in the Haynes manual that if you put a bag over the top of the reservoir and screw the cap back on it will prevent it all draining out. Good tip. Some of the brake unions were a bit tight and took a bit of persuasion but I manage to get the servo and lines off:

Getting the battery cable off was fairly easy until I got to the front holding clip, trying to get access with the engine in proved to be too tricks so I just ripped the clip off in the end. Any tips for how to do it properly would be appreciated:

So that was about it for the day, just the suspension to disconnect from the body, disconnect the gear leavers, undo the subframe bolts and lift the body off the car....simple.....(I hope):

I just have to see if I have a socket for the tower bolts...not that I haven’t looked already....ops
Charlie
#67
Saxo-Fiesta-Mini
-

- Members
-
- 2,889 posts
Up Into Fourth
- Local Club: LCMOC
Posted 07 March 2010 - 11:11 AM
nice work mate your getting it sorted with some gusto nice to see
#68
CharlieBrown
-
- Members
-
- 6,587 posts
Crazy About Mini's
- Location: Chester
- Local Club: TMF
Posted 07 March 2010 - 10:05 PM
Nearly there,
A quick trip to Halfords this morning and I had some new shiny tools. A ball joint splitter, a set of punches and a 33m socket for the tower bolts (it seems I didn’t have one).
First job was to remove the gear rods. Now the Matt had given me a heads up that this could be a real pain without the right tools so I took on board his words of advice (hence the set of punches)...well sort of....decided I’d got the wrong size punches so used an odd sized screw driver, which I then got firmly stuck (don’t try this at home). I then realised that I had actually managed to get the other pin out a bit with the proper punches and swapping between the little one and big I managed to remove it, hurrah!
I then used the punch to remove the screwdriver...
Then it was the track rods but I hit a bit of a problem...the wheel nuts!! They were on as tight as a very tight thing. The silly little mini wrench was just not up to the job and the sockets I had would only fit on the nuts if I took the chrome covers off. Now these little things were a nightmare to get off. One I had to completely destroy and even used the chisel that came with my punches (oh and my drill – yes it was that bad).
Which lead me onto the track rod ends finally; one came off with a little tap the other needed the ball joint splitter on it.
Next came the suspension, this was fairly easy, made a nice change:
Then came removing the subframe bolts, the rear floor bolts came off ok but the front two bolts were a bit of a pain. One of them was really difficult to get a socket on (as I assume the bush had perished a bit) but even when I did get a socket on it just wouldn’t budge I took me ages to get if sorted, so much so it started getting dark..
I call this on the desperate man:
The culprits:
I tried out setting up the crane but it was getting a bit late and I thought it best to leave the actual removal to tomorrow when I could actually see things. [I wouldn’t be able use the crane like this as moving it back would hit the subframe so I may have to have the crane coming in from the back of the engine/side of the mini.
Today’s top tips:
Tightening and loosening can help undo a tight nut.
WD40 is still your friend.
Don’t use some cheap silly screwdriver to knock out a pin
A quick trip to Halfords this morning and I had some new shiny tools. A ball joint splitter, a set of punches and a 33m socket for the tower bolts (it seems I didn’t have one).
First job was to remove the gear rods. Now the Matt had given me a heads up that this could be a real pain without the right tools so I took on board his words of advice (hence the set of punches)...well sort of....decided I’d got the wrong size punches so used an odd sized screw driver, which I then got firmly stuck (don’t try this at home). I then realised that I had actually managed to get the other pin out a bit with the proper punches and swapping between the little one and big I managed to remove it, hurrah!

I then used the punch to remove the screwdriver...
Then it was the track rods but I hit a bit of a problem...the wheel nuts!! They were on as tight as a very tight thing. The silly little mini wrench was just not up to the job and the sockets I had would only fit on the nuts if I took the chrome covers off. Now these little things were a nightmare to get off. One I had to completely destroy and even used the chisel that came with my punches (oh and my drill – yes it was that bad).

Which lead me onto the track rod ends finally; one came off with a little tap the other needed the ball joint splitter on it.

Next came the suspension, this was fairly easy, made a nice change:

Then came removing the subframe bolts, the rear floor bolts came off ok but the front two bolts were a bit of a pain. One of them was really difficult to get a socket on (as I assume the bush had perished a bit) but even when I did get a socket on it just wouldn’t budge I took me ages to get if sorted, so much so it started getting dark..
I call this on the desperate man:

The culprits:

I tried out setting up the crane but it was getting a bit late and I thought it best to leave the actual removal to tomorrow when I could actually see things. [I wouldn’t be able use the crane like this as moving it back would hit the subframe so I may have to have the crane coming in from the back of the engine/side of the mini.

Today’s top tips:
Tightening and loosening can help undo a tight nut.
WD40 is still your friend.
Don’t use some cheap silly screwdriver to knock out a pin
#69
mighty mini jack
-

- Members
-
- 5,095 posts
Mighty Before a Pint
Posted 07 March 2010 - 10:15 PM
Nice work there charlie! Getting firmly stuck in!
#70
CharlieBrown
-
- Members
-
- 6,587 posts
Crazy About Mini's
- Location: Chester
- Local Club: TMF
Posted 12 March 2010 - 09:32 PM
Well the Monday just gone I did actually manage to remove the front subframe and engine, I have only just got round to posting it.
So a bit more thought on how best to have the crane and I ended up coming in from the back (so to speak). Just a bit dark when I got to it:
I got the lift started but the starter motor was catching so had to encourage the shell past it, then it was fine.
Then I was able to push the crane and the shell back:
Then I lowered the car down onto two old tyres, job done:
Now just need to arrange pick up of the shell
So a bit more thought on how best to have the crane and I ended up coming in from the back (so to speak). Just a bit dark when I got to it:

I got the lift started but the starter motor was catching so had to encourage the shell past it, then it was fine.


Then I was able to push the crane and the shell back:


Then I lowered the car down onto two old tyres, job done:

Now just need to arrange pick up of the shell
#71
Bean
-

- Members
-
- 8,054 posts
Queen of 'shoppin, Voted Miss TMF 2011
- Name: Jean
- Location: Malvern
Posted 12 March 2010 - 09:45 PM
Oh - You do make me laugh, Charlie!! 

Looks superb, though!! Really well done and I'm vewy impwessed!!
That way of taking the shell off is MUCH easier than the way that we did it with Reggie, lol. We jacked it up on blocks of wood then lifted it by hand the rest of the way, lol.
Looks superb, though!! Really well done and I'm vewy impwessed!!
That way of taking the shell off is MUCH easier than the way that we did it with Reggie, lol. We jacked it up on blocks of wood then lifted it by hand the rest of the way, lol.
#72
CharlieBrown
-
- Members
-
- 6,587 posts
Crazy About Mini's
- Location: Chester
- Local Club: TMF
Posted 15 March 2010 - 08:17 AM
While I’m waiting to the mini to be picked up i got on with some more removal of bits yesterday.
Now this involved laying upside down to get the switch panel off, one fiddly job but it went surprisingly easily (this time).
I then got the bottom dash cover off fairly easily and had another go at getting the top dash rail. One of the nuts sheared off last time on the left side. Tried the right and that was stuck solid. After a few goes to get it off that sheared as well, but the central nut came off nice and easily.
I could then take the plastic vents out and the instrumentation bracket:
The dash looking all naked:
The next job was the pedal box but that is a touch rusted in, so had to stay put:
The mini in the sunshine:
Hopefully it will be picked up soon
Now this involved laying upside down to get the switch panel off, one fiddly job but it went surprisingly easily (this time).
I then got the bottom dash cover off fairly easily and had another go at getting the top dash rail. One of the nuts sheared off last time on the left side. Tried the right and that was stuck solid. After a few goes to get it off that sheared as well, but the central nut came off nice and easily.
I could then take the plastic vents out and the instrumentation bracket:

The dash looking all naked:

The next job was the pedal box but that is a touch rusted in, so had to stay put:

The mini in the sunshine:

Hopefully it will be picked up soon
#73
998dave
-

- TMF+ Member
-
- 4,566 posts
998cc's Of Dave Goodness
- Name: Dave
- Location: Essex
Posted 15 March 2010 - 01:00 PM
Bloomin 'eck, you're working harder on this one Charlie, does it mean nothing's happening to the Fibreglass Sprint though?
Ruth's 30 wouldn't start yesterday, think it's only crud in the needle valve, but will see when I get a chance to strip the carb down.
Dave
Ruth's 30 wouldn't start yesterday, think it's only crud in the needle valve, but will see when I get a chance to strip the carb down.
Dave
#74
daemonchild
-

- Members
-
- 2,341 posts
Up Into Fourth
- Location: Pontypridd
- Local Club: Unknown
Posted 15 March 2010 - 01:42 PM
Nice one Charlie! Keep at it!
#75
arris
-

- Noobies
-
- 80 posts
Stage One Kit Fitted
- Local Club: Will be when its on the road
Posted 15 March 2010 - 05:28 PM
Great work, any progress on the fibreglass sprint?


1 user(s) are reading this topic
0 members, 1 guests, 0 anonymous users


