Jump to content


Photo
- - - - -

Project Frk- For Road & Track


  • Please log in to reply
114 replies to this topic

#31 guywithvan

guywithvan

    One Carb Or Two?

  • Members
  • PipPipPipPipPipPipPip
  • 1,081 posts
  • Local Club: MedwayMiniClub

Posted 13 January 2009 - 06:33 PM

just a quick update managed to get a few bits done,so far interior is completly stripped and i've started to paint with some black hammerite.i decided to do this as i stripped all the bitumen sound deadening off the floor and rear seat,not too fussed about the colour as i intend on getting dynamat or similar and recovering the areas again.

Posted Image
Posted Image

i've left the arches as i will be tubbing them when the weather gets better,and seemed a waste to have to re-paint them,got most of the rear floorpan done just need to do the front.

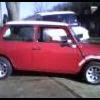
i also decided to try my f/g bonnet for size
Posted Image

does'nt look to bad but im going to need to play with it a bit
Posted Image

i think once pin's are fitted and a little trimming i should be able to sort this,shame considering the other side is fine
Posted Image

hopefully get some pin's and strap's ordered for the bonnet,and a mate is getting me some brackets so i can start work on fitting the miglia arches


i got my front subframe out the shed and started building it up,got so far and im now stuck as i'll be using some bits which are still on FRK.

so far subby has got
(i'll add a pic later :thumbsup: )
- powdercoated in blue
-new cones
-adjusta ride's
-recon top arms
-new bump stop's
-subframe mounts on rear
-braided hoses for brakes

i would like to get a solid mounting kit from mini spares,and some 1.5 - camber lower arms and adj tie rods would be nice so need to earn some cash fast!.

#32 ferrox_666

ferrox_666

    Mini Mad

  • Noobies
  • PipPipPipPip
  • 126 posts
  • Local Club: you tell me !

Posted 13 January 2009 - 11:54 PM

I would like to recomend adjustable lower arms man.
Also 'Fatmat' is a product identical to dynamat but half the price and just as bling lol. Google it.
Ill take the first secret engine guess 998Turbo?
;D

#33 guywithvan

guywithvan

    One Carb Or Two?

  • Members
  • PipPipPipPipPipPipPip
  • 1,081 posts
  • Local Club: MedwayMiniClub

Posted 14 January 2009 - 12:02 AM

I would like to recomend adjustable lower arms man.
Also 'Fatmat' is a product identical to dynamat but half the price and just as bling lol. Google it.
Ill take the first secret engine guess 998Turbo?
;D


yay i get a reply!lol,if i can afford i'll prob get adj lower arms (more than likely a full car kit,tie rods/arms/rear camber brkt's)i'll have a look for the "fatmat" im not to fussed belongs it does the job and if it saves a few penny's then sweet.


mmm 998 turbo good guess but not quite right ;D

#34 tedmcedd

tedmcedd

    Up Into Fourth

  • Traders
  • PipPipPipPipPipPipPipPipPip
  • 2,751 posts
  • Location: Huddersfield

Posted 14 January 2009 - 12:07 AM

sounds like a good project!

the bonnet may fit better on the FG front so dont trim it all til its all together!

supercharged 998??

#35 guywithvan

guywithvan

    One Carb Or Two?

  • Members
  • PipPipPipPipPipPipPip
  • 1,081 posts
  • Local Club: MedwayMiniClub

Posted 14 January 2009 - 12:16 AM

sounds like a good project!

the bonnet may fit better on the FG front so dont trim it all til its all together!

supercharged 998??


true it does fit better on the f/g front,i might just have to lift the good side to match when i fit bonnet pins,im sorry not going to be supercharged i sold my charger!,keep guessing ;D

#36 guywithvan

guywithvan

    One Carb Or Two?

  • Members
  • PipPipPipPipPipPipPip
  • 1,081 posts
  • Local Club: MedwayMiniClub

Posted 12 February 2009 - 07:31 PM

:thumbsup: this afternoon i've mostly been...........


chopping up my mini! :genius: dont worry not for the scrap man just removed my front end ready for removable f/g front end,and to be honest im pleasantly suprised as the only welding i'll be doing is bracing the a panels and covering up the holes for air vents!!,only very minor surface rust in small places

#37 guywithvan

guywithvan

    One Carb Or Two?

  • Members
  • PipPipPipPipPipPipPip
  • 1,081 posts
  • Local Club: MedwayMiniClub

Posted 12 February 2009 - 07:40 PM

first off i cleared the drive

Posted Image

after removing the bonnet and lights i started by cutting along the a-panel

Posted Image

and around the scuttle,being careful not to go too deep!and risk cutting into the scuttle closing panels

Posted Image

then using a spotweld drill bit i removed the welds down the inner wing

Posted Image

cut the weld on the front panel to wing join

Posted Image

to make things easier i drilled out these spotwelds

Posted Image

and cut the brackets front panel to inner wing

Posted Image


so with a sharp chisel and large hammer i set upon the panels and with a little persuasion

Posted Image

and chiseled off the excess

Posted Image
Posted Image


by then it was getting dark so called it a night as it was beginning to snow :thumbsup:


Posted Image

Edited by guywithvan, 12 February 2009 - 07:53 PM.


#38 Saxo-Fiesta-Mini

Saxo-Fiesta-Mini

    Up Into Fourth

  • Members
  • PipPipPipPipPipPipPipPipPip
  • 2,889 posts
  • Local Club: LCMOC

Posted 12 February 2009 - 07:44 PM

lol sounds goood / obinus good progress

#39 daemonchild

daemonchild

    Up Into Fourth

  • Members
  • PipPipPipPipPipPipPipPipPip
  • 2,341 posts
  • Location: Pontypridd
  • Local Club: Unknown

Posted 12 February 2009 - 08:25 PM

first off i cleared the drive

Posted Image

after removing the bonnet and lights i started by cutting along the a-panel

Posted Image

and around the scuttle,being careful not to go too deep!and risk cutting into the scuttle closing panels

Posted Image

then using a spotweld drill bit i removed the welds down the inner wing

Posted Image

cut the weld on the front panel to wing join

Posted Image

to make things easier i drilled out these spotwelds

Posted Image

and cut the brackets front panel to inner wing

Posted Image


so with a sharp chisel and large hammer i set upon the panels and with a little persuasion

Posted Image

and chiseled off the excess

Posted Image
Posted Image


by then it was getting dark so called it a night as it was beginning to snow :thumbsup:


Posted Image


You know what, that's exactly the sort of photos I've been looking for!
In one minute of looking at those, I'm about 10 times more clued up at what to expect and where to cut!
(Have you got any more....? Wider angles so I can see where exactly...?)

#40 guywithvan

guywithvan

    One Carb Or Two?

  • Members
  • PipPipPipPipPipPipPip
  • 1,081 posts
  • Local Club: MedwayMiniClub

Posted 15 February 2009 - 05:22 PM

cheers for the reply's so far fellas i need as much encouragement as possible at the moment,weather is *melon* i have hardly any money and i want my mini back on the road!!.

managed to get a couple of hours tinkering this afternoon-

first off i jacked up the drivers side and removed my wheel to gain better access to the inner wing/flitch panel,removed duct for fresh air to the heater and had a poke around with a screwdriver,so far looking good! :D

with my cordless drill and wire brush attachment i removed all the road grime then removed 90% the paint with a fibre disc (will show pic's later)and i ended up with a reasonably clean panel

Posted Image

it was then i thought about behind the top damper mount as most mini's rust there and all the ones i've had usually have a big rotten hole behind!and you guessed it :D

Posted Image

a few pokes with a screwdriver and i was suprised it seemed pretty solid so a quick blast with the drill...

Posted Image

the scuttle closing panels were all solid too which was a great suprise and i think i removed the front end just in time before any major rust set's in,the only other bit which needs attention is on the lower part of the flitch panel (bit which closes the cill section)and i found a little hole about the size of a five pence piece!

Posted Image

the hinge panel has a little pitting and some surface rust but nothing bad so i'll weld that hole up and thats about it

because i keep FRK on the drive outside and dont have the luxury of a garage at this time thought it best to give the whole area a good coat of red oxide to protect it from the weather.

Posted Image

#41 guywithvan

guywithvan

    One Carb Or Two?

  • Members
  • PipPipPipPipPipPipPip
  • 1,081 posts
  • Local Club: MedwayMiniClub

Posted 15 February 2009 - 05:36 PM

next few jobs on the list are

-as above clean up/repair and paint passenger side inner wing/flitch panel

-remove engine -brake master cylinder
-wiper motor
-washer bottle bracket
-pull loom back into interior(keep it dry)
-drop subframe and running gear
-remove steering rack

-strip engine bay/toe board and cut back inner wings

-coat engine bay and toe board with red oxide

once im happy that everything is solid im going to stone chip and possibly paint,im thinking maybe just the stone chip?

#42 guywithvan

guywithvan

    One Carb Or Two?

  • Members
  • PipPipPipPipPipPipPip
  • 1,081 posts
  • Local Club: MedwayMiniClub

Posted 17 February 2009 - 08:32 PM

been thinking tonight and im going to get a 1275 lump for the time being untill i carry out my full plans for the engine,i know where there is a 91 cooper engine for reasonable money so i'll give the bloke a ring tomorrow and see if he's still got it.

slowly clearing out my spare parts so once i've got some cash in i can order up the bits i need for my front subframe and fixings for the f/g front end im hoping things will get moving quicker soon.

#43 daemonchild

daemonchild

    Up Into Fourth

  • Members
  • PipPipPipPipPipPipPipPipPip
  • 2,341 posts
  • Location: Pontypridd
  • Local Club: Unknown

Posted 17 February 2009 - 08:56 PM

Keep going fella!
More pictures as you go please. :P

#44 RowenBlaineSkinley

RowenBlaineSkinley

    Super Mini Mad

  • Members
  • PipPipPipPipPipPip
  • 641 posts

Posted 21 February 2009 - 02:23 AM

looking good Guy! keep up the good work :P

Pleased with the bonnet, cheers mate, solid as a nut!

What paint did you paint your rocker cover in?

#45 guywithvan

guywithvan

    One Carb Or Two?

  • Members
  • PipPipPipPipPipPipPip
  • 1,081 posts
  • Local Club: MedwayMiniClub

Posted 24 February 2009 - 01:29 PM

looking good Guy! keep up the good work :P

Pleased with the bonnet, cheers mate, solid as a nut!

What paint did you paint your rocker cover in?


good to hear,you have big plans for your mini by the sound of it,i just used rattle can from halfords matched to FRK's paint code of "targa red" cleaned the cover rubbed it down 2 coats of primer and about 3 of colour,it did react first off and i had to do it again.


as for FRK i got the engine out over the weekend with the help of a couple of mates,damn auto lumps are well heavy!,in the process the mech fuel pump decided to squirt petrol in my eyes :thumbsup: it stung like a *woman of ill repute* good i was with someone who quickly washed my eyes out with milk to dilute the petrol.

so now engine is out and most of the bay is stripped of parts it just needs a good clean and prep ready for stone chip and paint,inner wings i'll get cut back tomorrow once i've picked up some cutting disc's.


1 user(s) are reading this topic

0 members, 1 guests, 0 anonymous users