Hi there.
Really interested to see what you started with and how its progressing. Looks like you have a real steal if its only cost you a few hundred quid. What stage is the engine in?
Take care
Andy
Hi Andy
Thanks for looking, the engine is complete and does run and it is a genuine 998 cooper with twin SU's and a genuine gearbox all the serial numbers tally, however I am going to be stripping it down and rebuilding as it seem's a bit silly re-building the car and putting an unknown engine in, plus it gives me the option to tweek various components to get the maximum performance from the old girl. And yes I am doing all the welding myself.
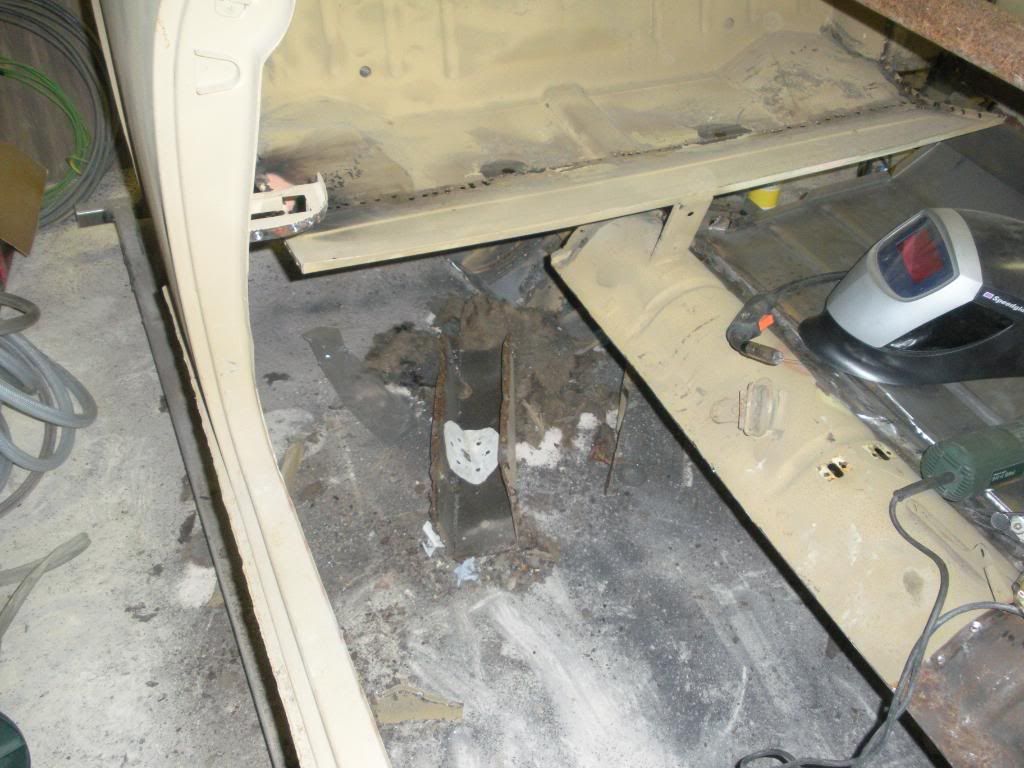
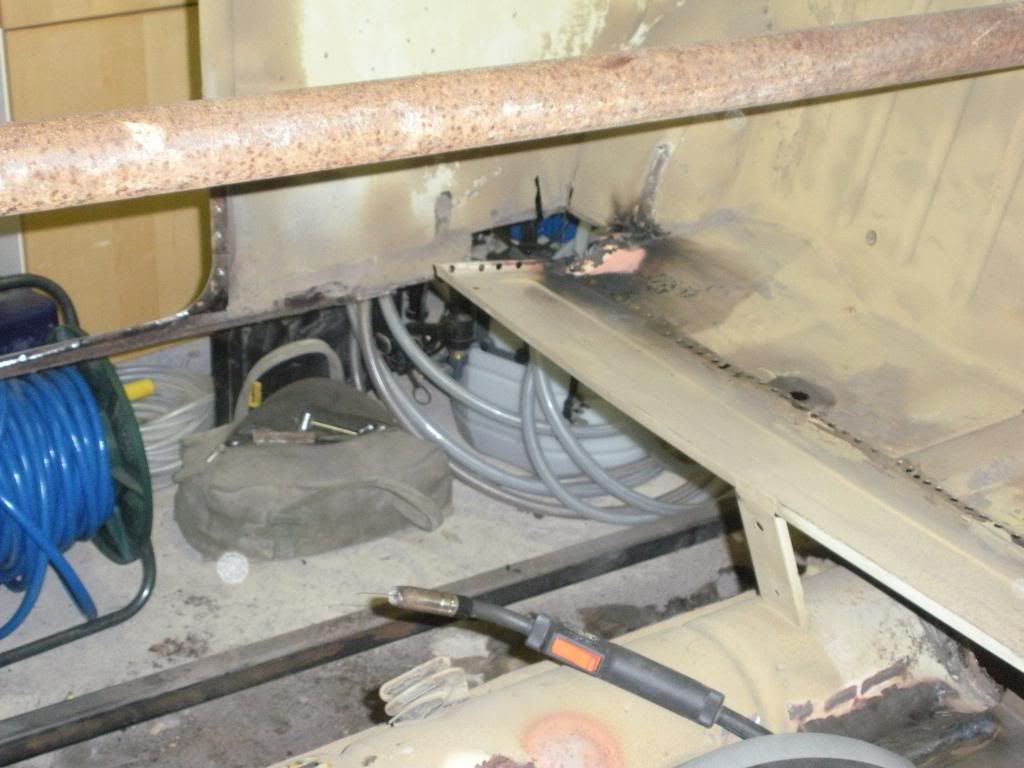
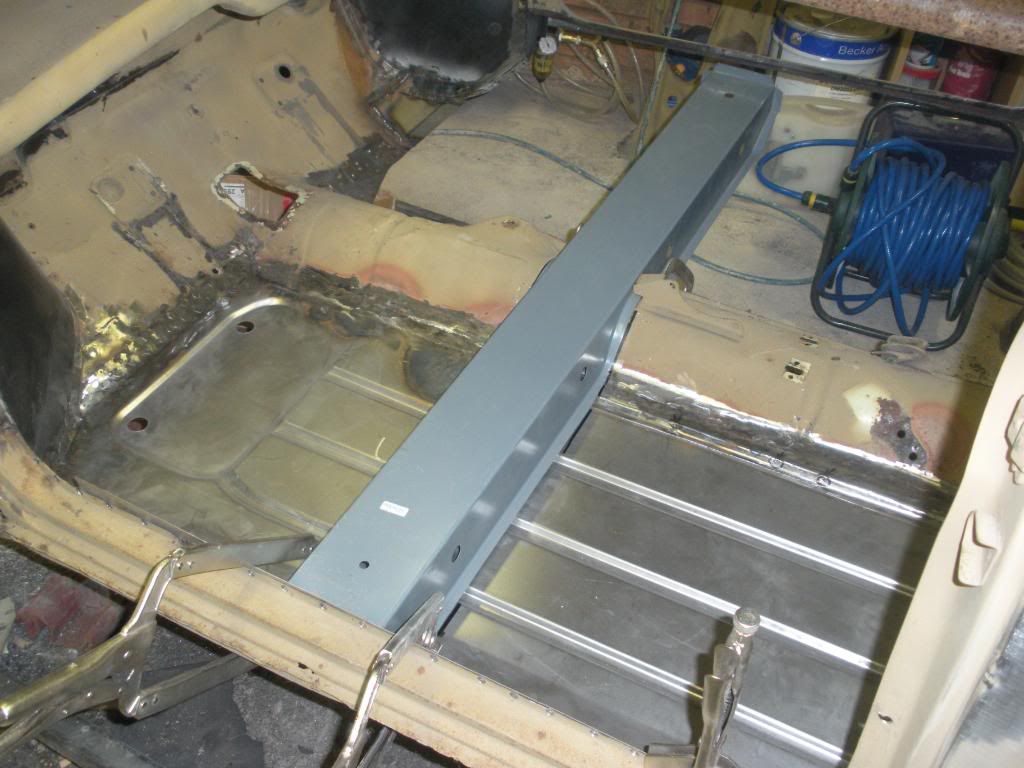
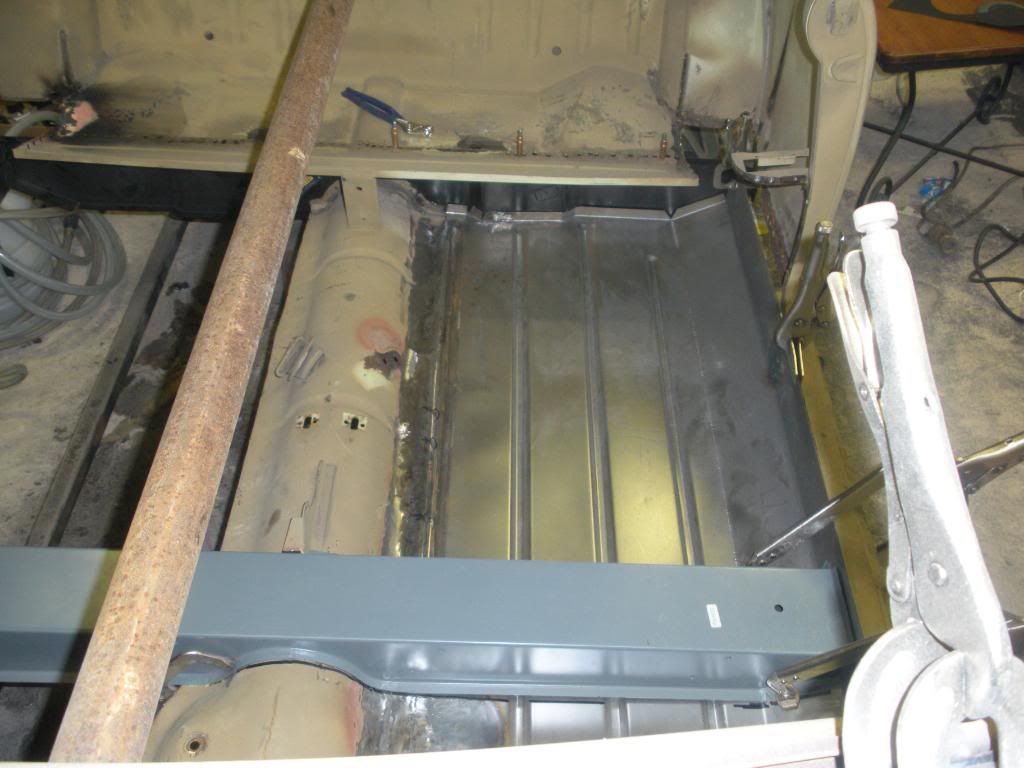
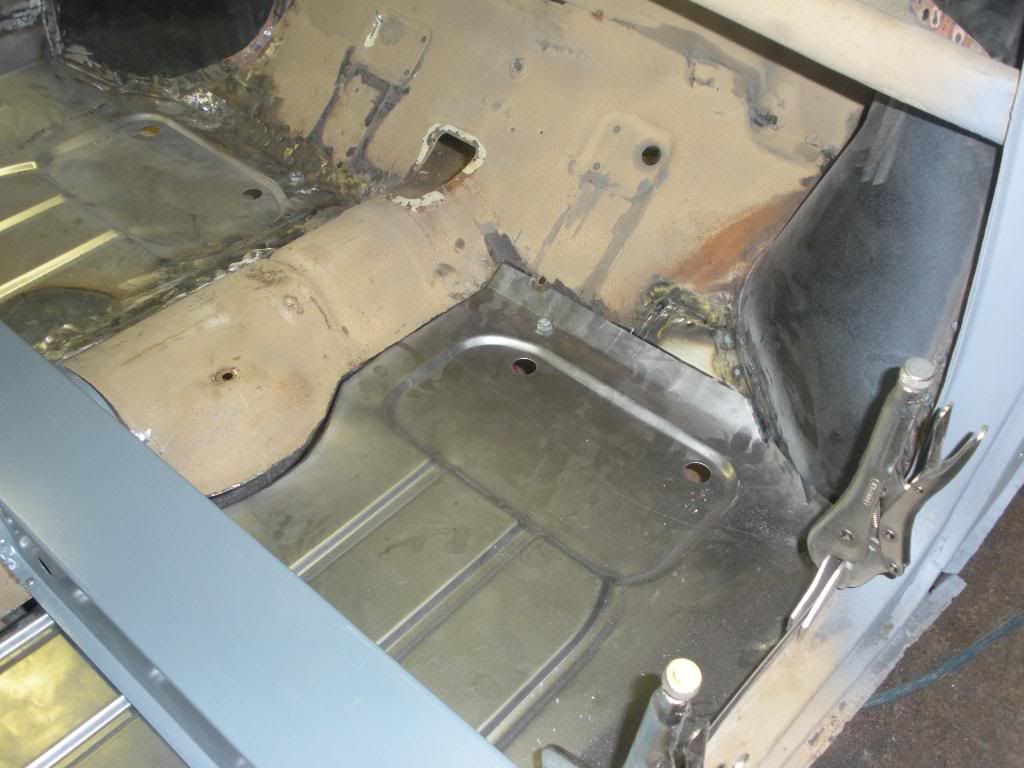
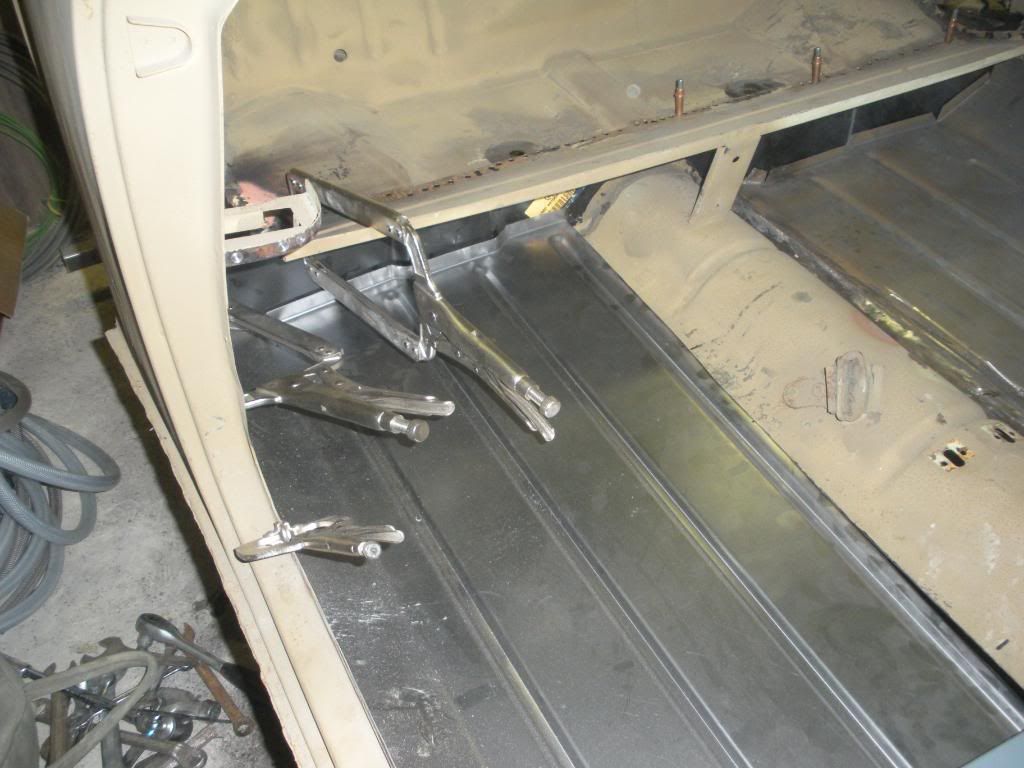
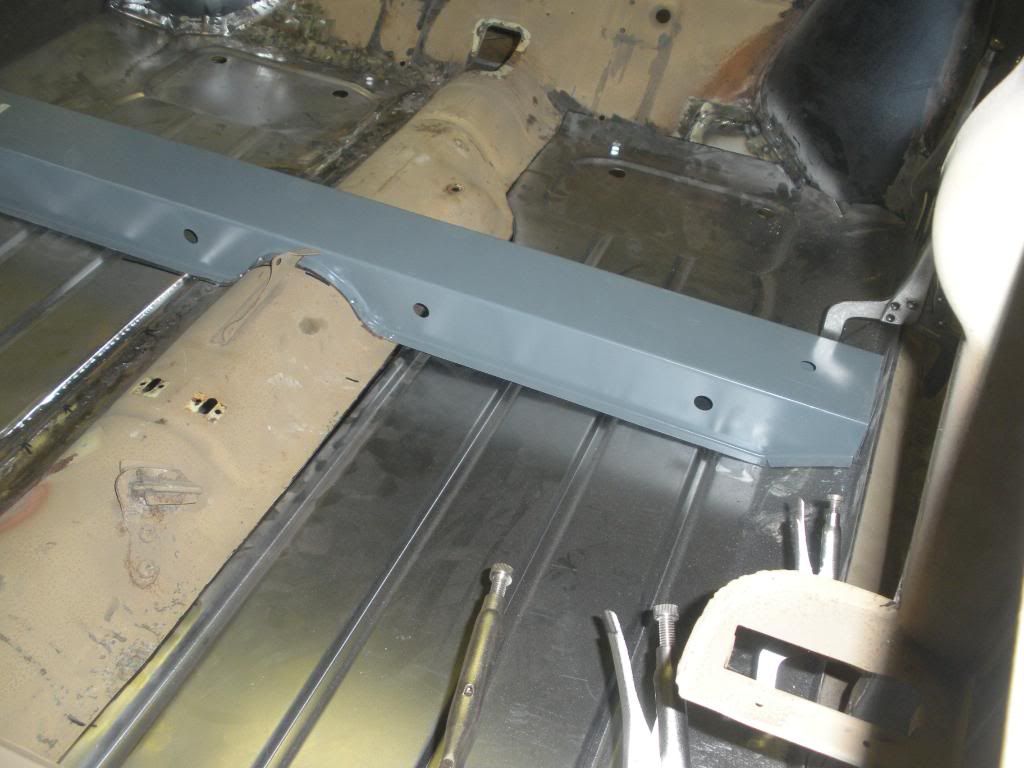
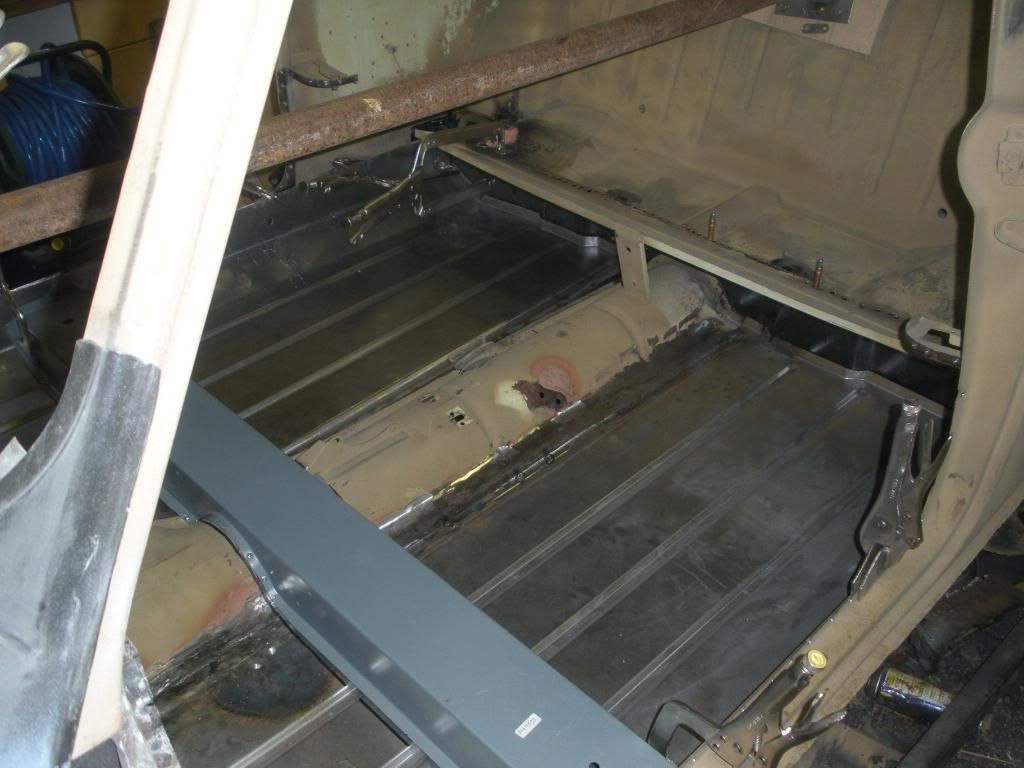
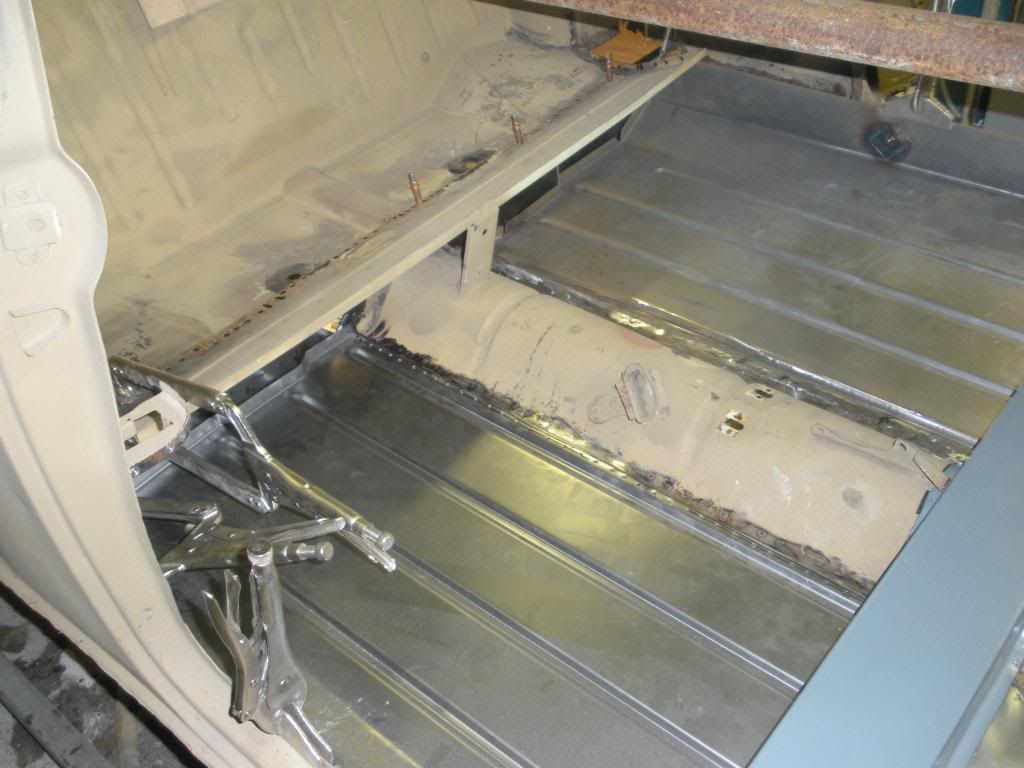
Hello everyone just a quick update on the weekends progress, I cut the drivers floor out on Saturday and started to prep it ready for the new floorpan, Had to do Family stuff in the afternoon so progress wasn't brilliant.
Checked all the dimensions this mornig just to make sure the old girl was still square and hadn't twisted on me, everything was fine so offered up the new floorpan and marked it ready for cutting, did a rough cut to fit floor pan into position and fit new crossmember temporarily so as to make sure I cut floorpan right. Marked up floor pan for final and did the deed , quite impressed fits really well, me thinks I need a Plasma cutter got lots more to cut out yet!!!!!!!!!!!
Run out of time today but floorpan is dry fitted ready to weld next weekend so here's some pictures of what I've done this weekend


My First Ever Re-build A 1963 Mk1 Cooper
Started by
Mini Basher
, Jan 18 2009 12:35 AM
515 replies to this topic
#16

Mini Basher
-
- TMF+ Member
-

- 424 posts
Speeding Along Now
- Location: Forest of Dean
- Local Club: Mini Foresters
Posted 26 January 2009 - 12:33 AM
#17
scrippo
-

- TMF+ Member
-
- 535 posts
Super Mini Mad
- Location: Bromley
Posted 26 January 2009 - 06:06 PM
Looks great!
What are the plans for colour etc?
What are the plans for colour etc?
#18
Mini Basher
-
- TMF+ Member
-
- 424 posts
Speeding Along Now
- Location: Forest of Dean
- Local Club: Mini Foresters
Posted 28 January 2009 - 10:51 PM
Looks great!
What are the plans for colour etc?
Hi,
Thanks for looking, plans so far are to bring the braking system up to a more modern standard as I intend to fit disc's all round, going to strip engine and get it balanced and lightened, high lift cam and roller rockers, fit oil cooler and convert to negative earth system so that I can put a descent audio/video system in hopefully with integrated sat nav.
Going to run it all on 12" anthracite minilites, not sure on colour yet but idea's at moment are either blue with white roof, yellow with black roof or red with black roof
#19
Mini Basher
-
- TMF+ Member
-
- 424 posts
Speeding Along Now
- Location: Forest of Dean
- Local Club: Mini Foresters
Posted 31 May 2009 - 08:25 PM
BUMPLooks great!
What are the plans for colour etc?
Hi,
Thanks for looking, plans so far are to bring the braking system up to a more modern standard as I intend to fit disc's all round, going to strip engine and get it balanced and lightened, high lift cam and roller rockers, fit oil cooler and convert to negative earth system so that I can put a descent audio/video system in hopefully with integrated sat nav.
Going to run it all on 12" anthracite minilites, not sure on colour yet but idea's at moment are either blue with white roof, yellow with black roof or red with black roof
#20
England_expects
-

- Noobies
-
- 120 posts
Mini Mad
- Local Club: A-Serious & BOGMOG
Posted 01 June 2009 - 10:21 PM
£250 ! what an absolute steal!!
You've done well with the welding very impressive, I picked up a 1960 car on Saturday for my son and its a 100 times worse than yours, could have my work cut out on it!
Keep up the good work Another one saved for the future!
You've done well with the welding very impressive, I picked up a 1960 car on Saturday for my son and its a 100 times worse than yours, could have my work cut out on it!
Keep up the good work Another one saved for the future!
#21
JordanRaisbeck
-

- Members
-
- 408 posts
Speeding Along Now
- Local Club: NEMC
Posted 02 June 2009 - 07:06 AM
Great project mate, i love mk1s, make sure ya put it in cream with a black roof, and 10x5 weller wheels lol  thats my ultimate fav look good luck with rest of project mate.
Jordan.
thats my ultimate fav look good luck with rest of project mate.Jordan.
#22
deemo
-

- Members
-
- 185 posts
Mini Mad
- Local Club: LCMOC
Posted 02 June 2009 - 02:01 PM
Great project! Are you a welder or a fabricator (well, seeing as your restoring a mini your both.) because that is some high standard work there 
Really impressive for a first ever rebuild. It's good to see it all being done properly.
Your using clecos, first other person I have seen using them on here.
What a find! £250 for a mk1.
It's probably not a good idea to put a timescale on such a big project, I extend mine on a weekly basis.
Great work, keep it up.
#23
Mini Basher
-
- TMF+ Member
-
- 424 posts
Speeding Along Now
- Location: Forest of Dean
- Local Club: Mini Foresters
Posted 06 June 2009 - 10:18 PM
Hi everyone, sorry for the long delay in updating this project but work has been really manic at the moment. Thanks for all your comments on the work so far, although I've been busy working Ive still had a little time to to do bits and pieces as the pictures below should show.
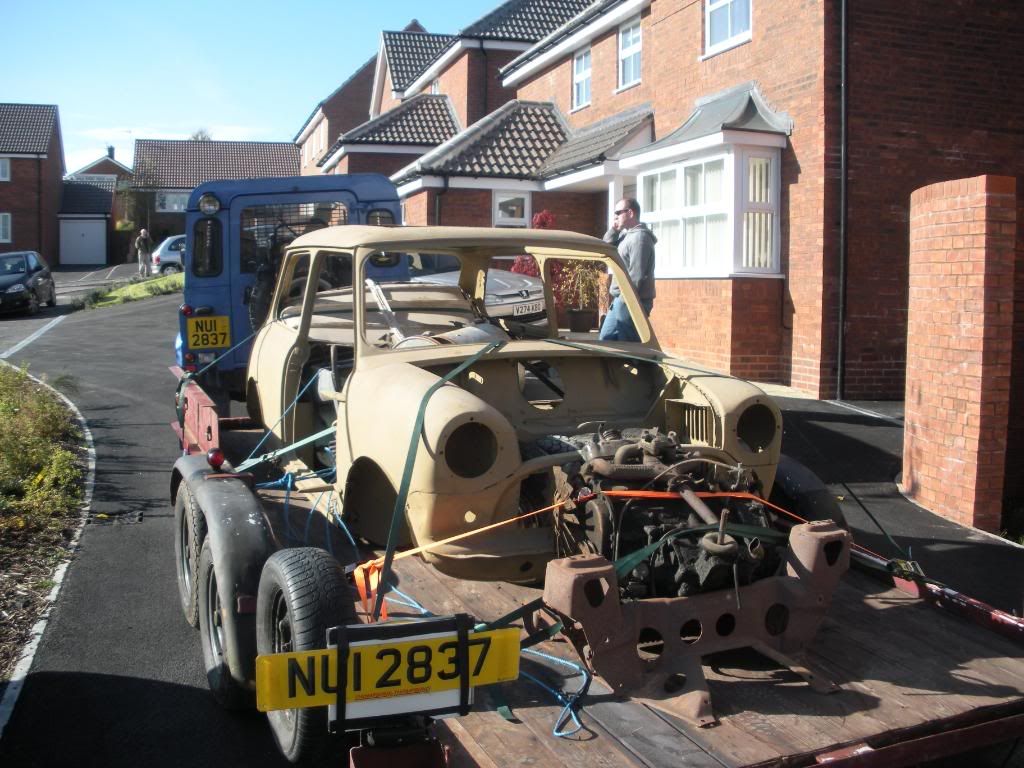
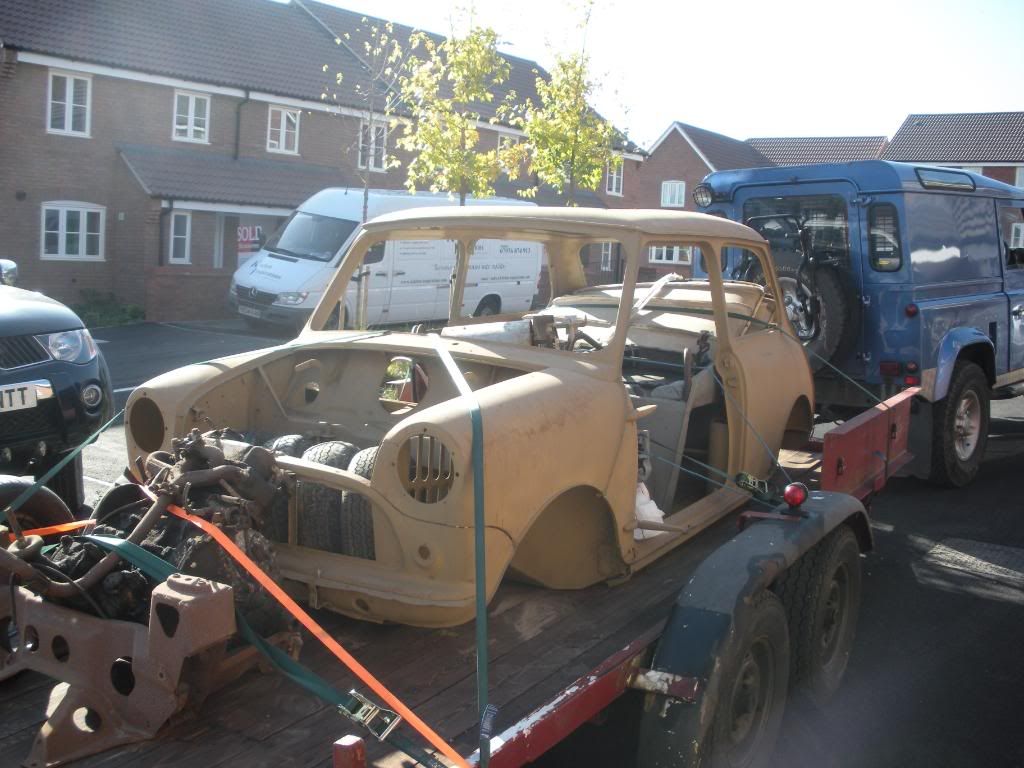
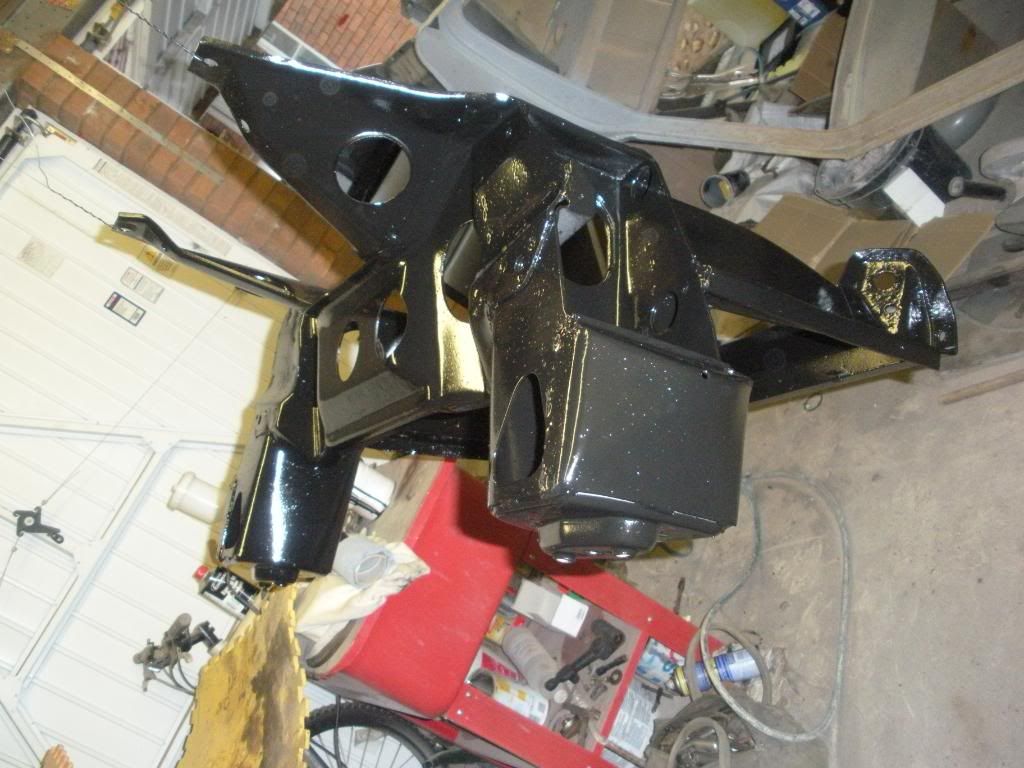
Front subframe on trailer as it was
After spending about 10 hours sand blasting the subframe it was sprayed with galvanised spray to help protect against the dreaded worm, after this the subframe was coated with Eastwoods Epoxy Primer (highly recommended)
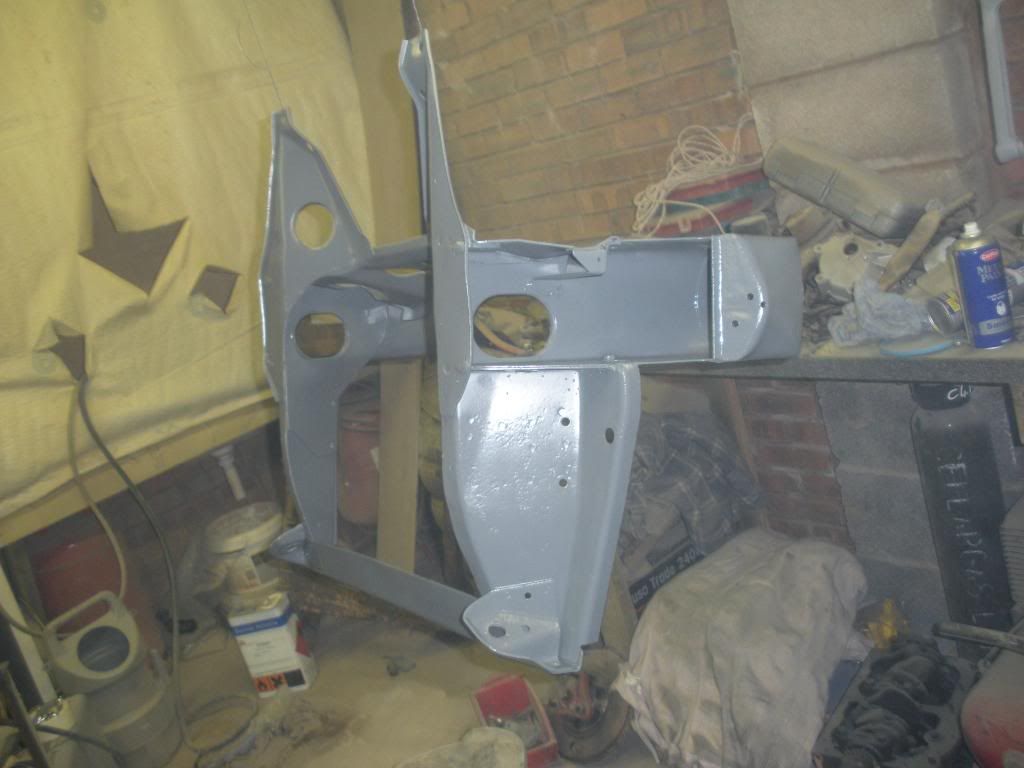
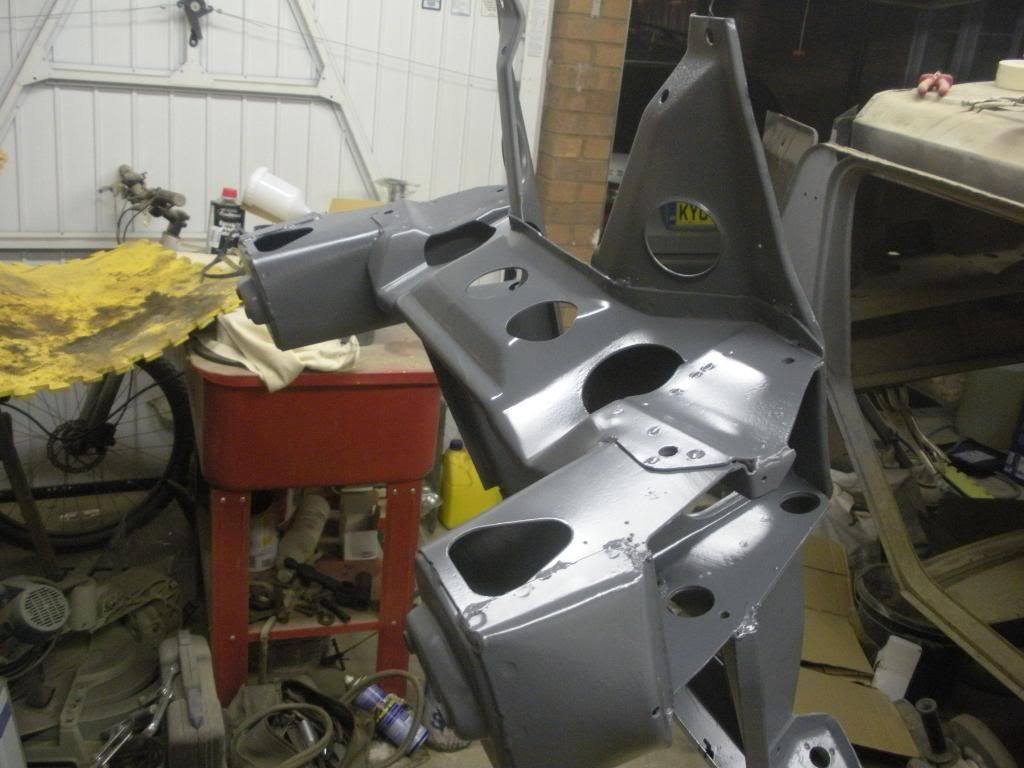
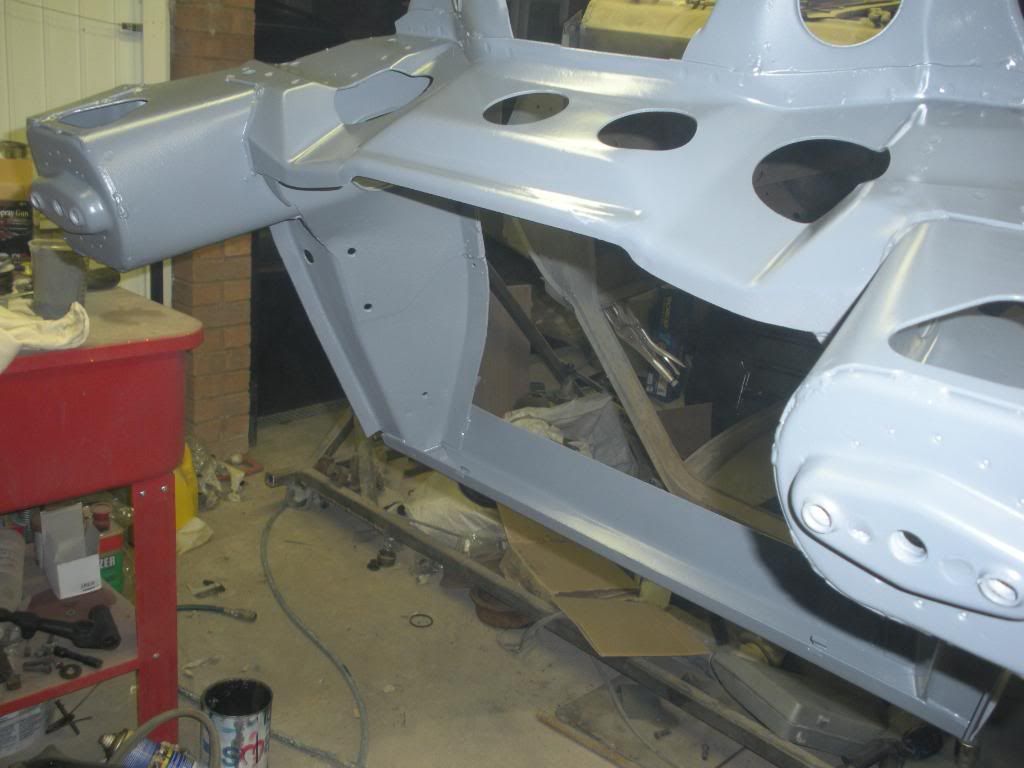
Next stage was a final coat using Eastwoods Ceramic Chassis paint
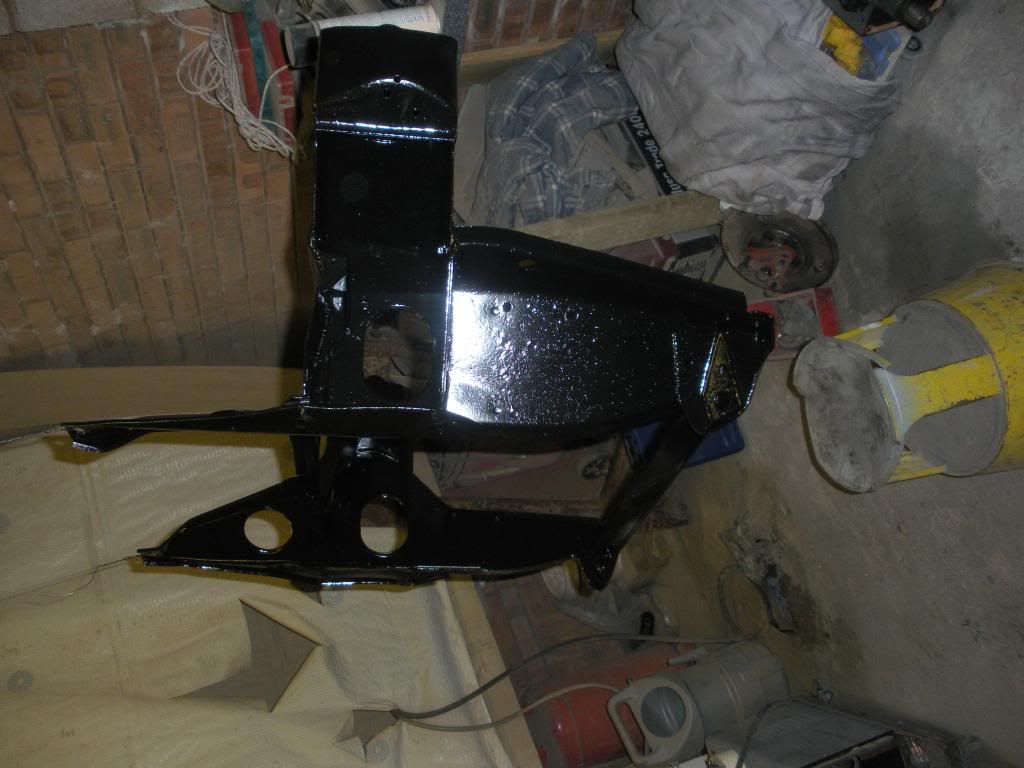
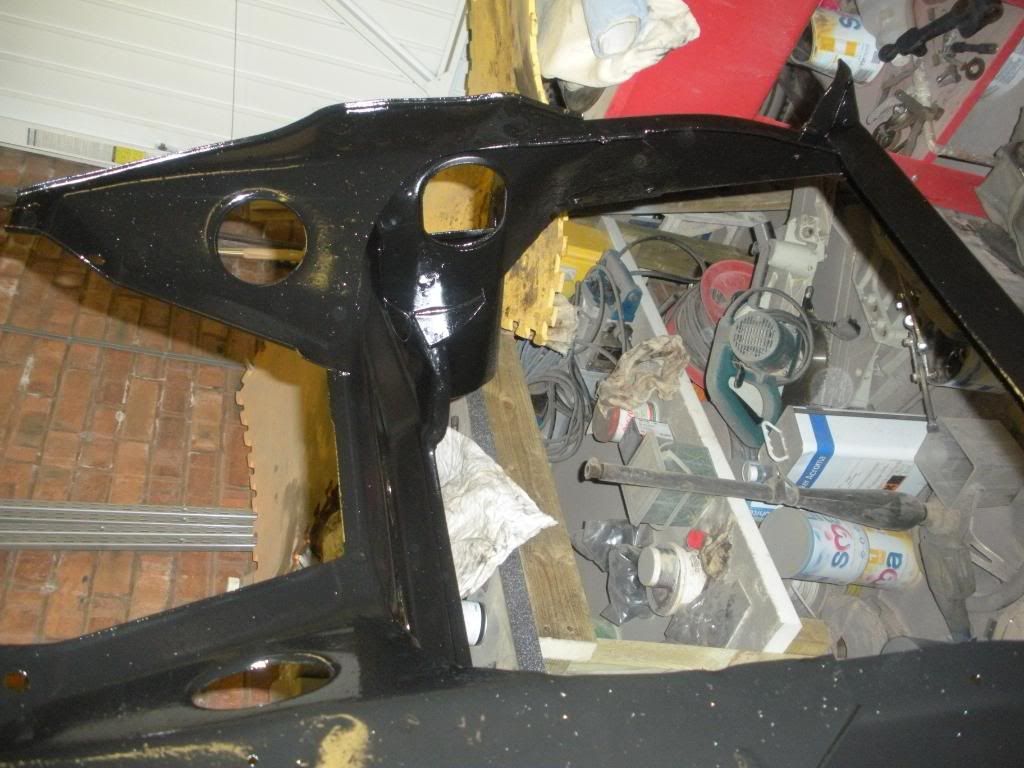
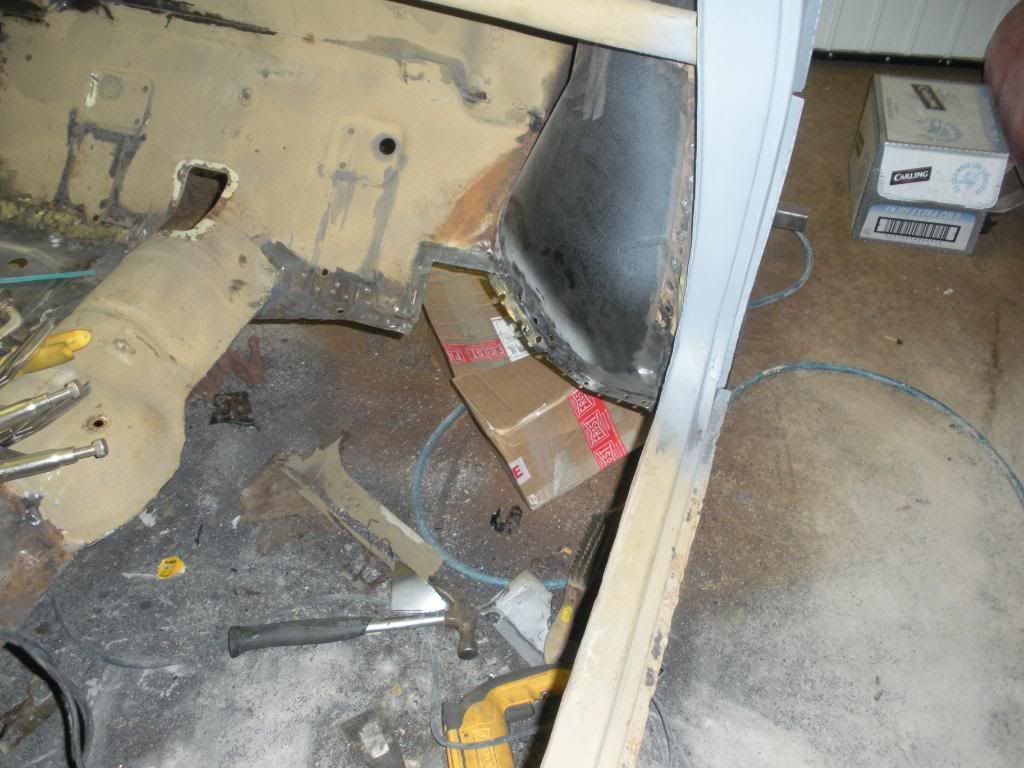
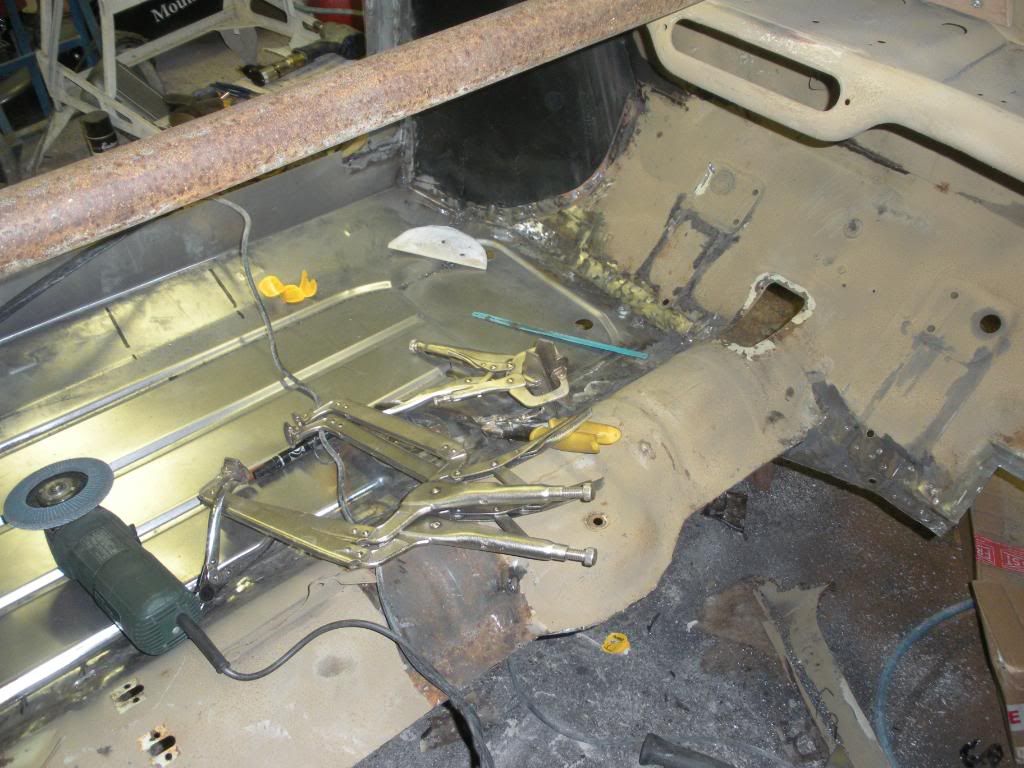
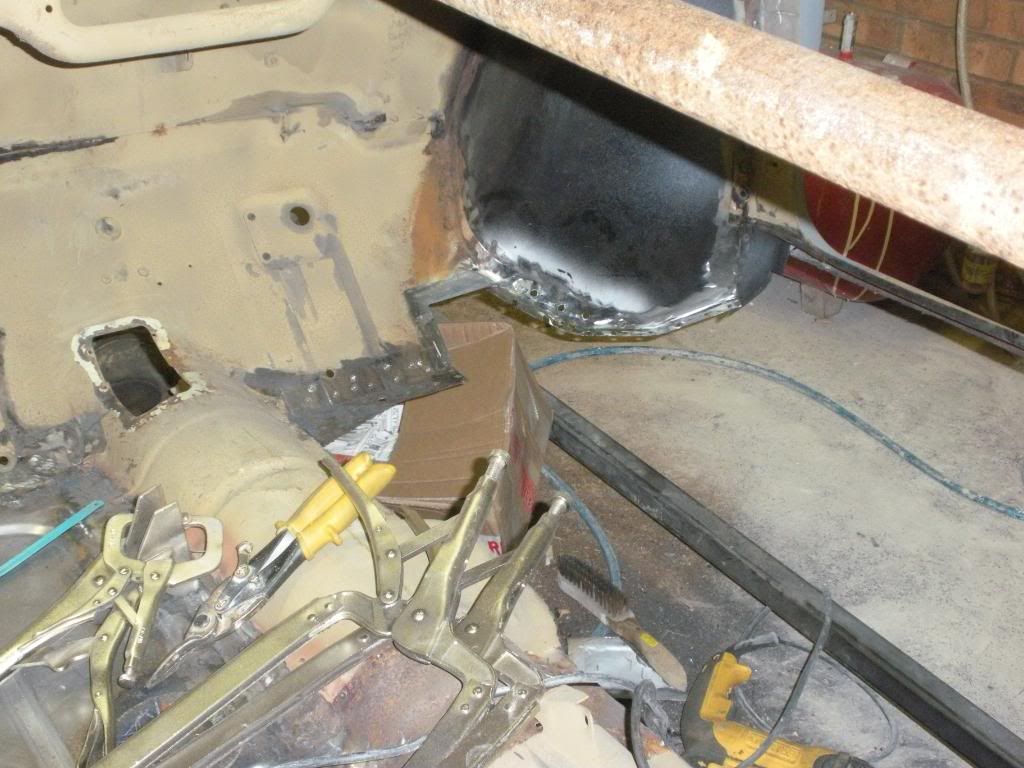
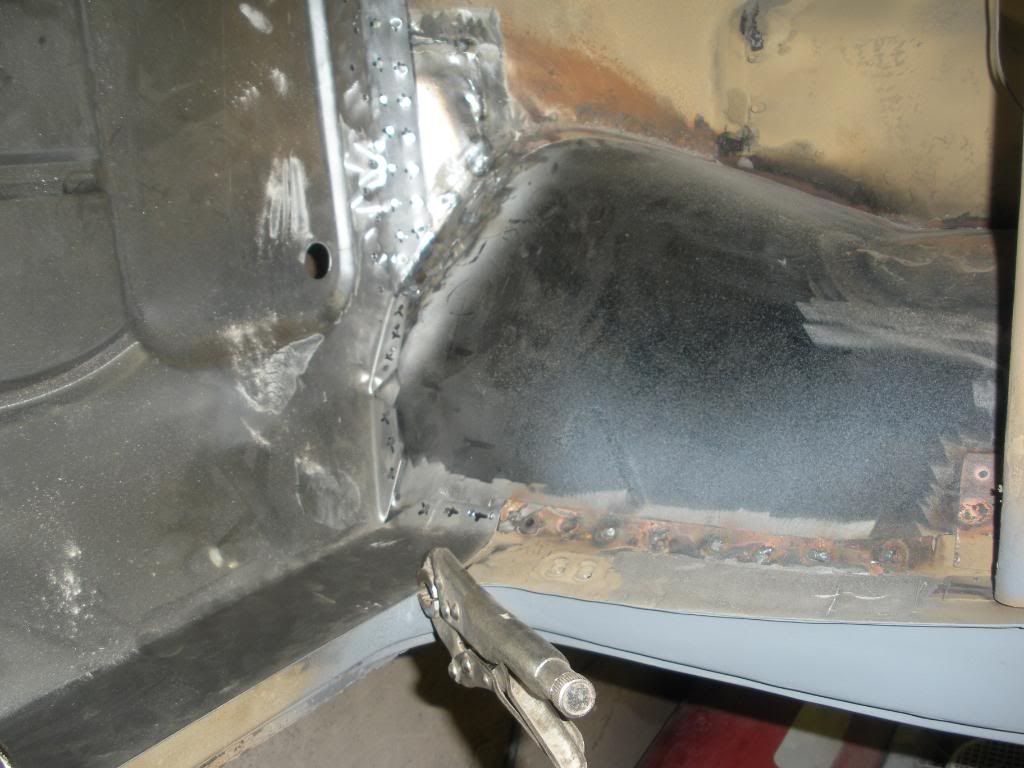
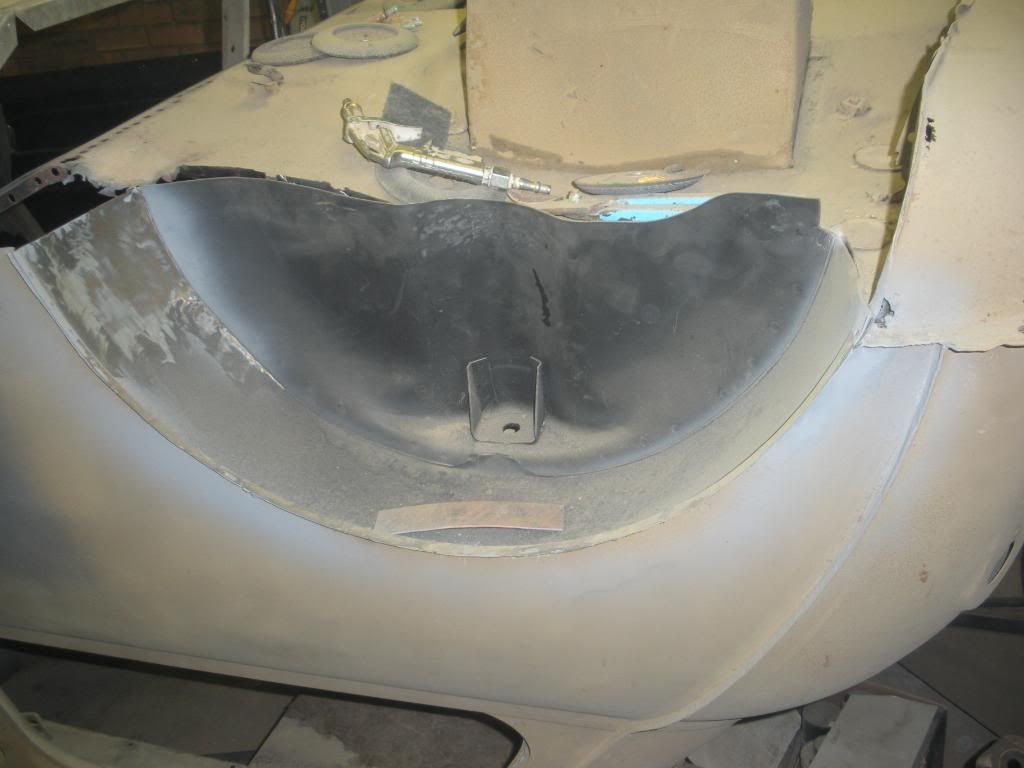
I've also removed the offside rear wheelarch and replaced with new
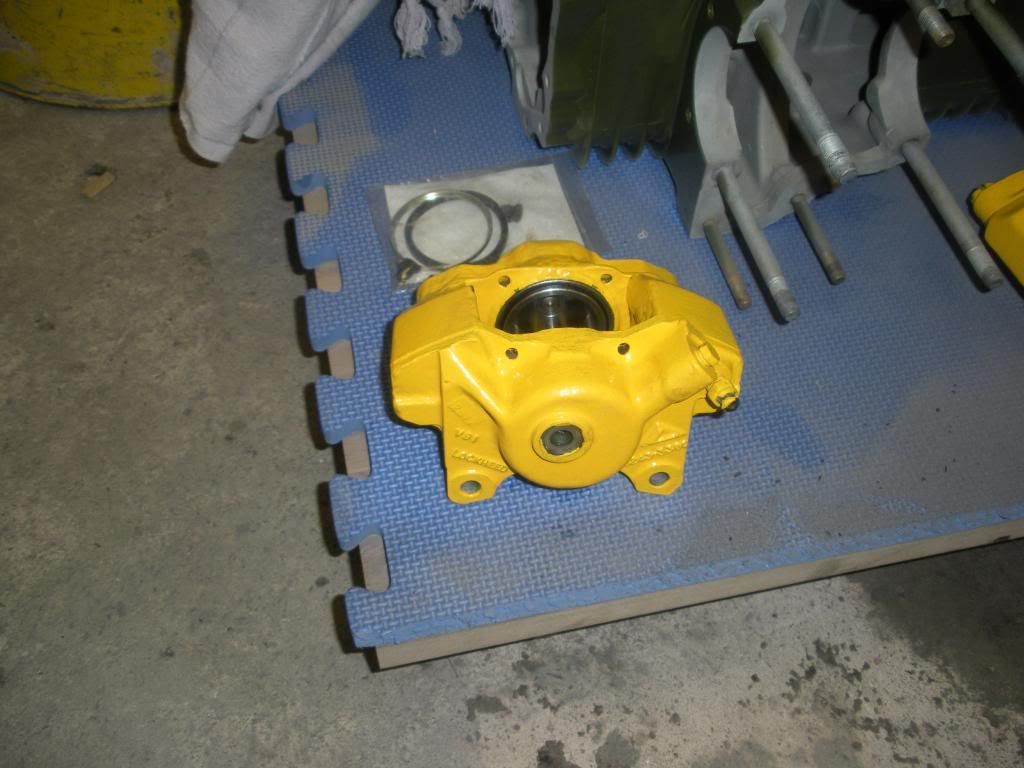
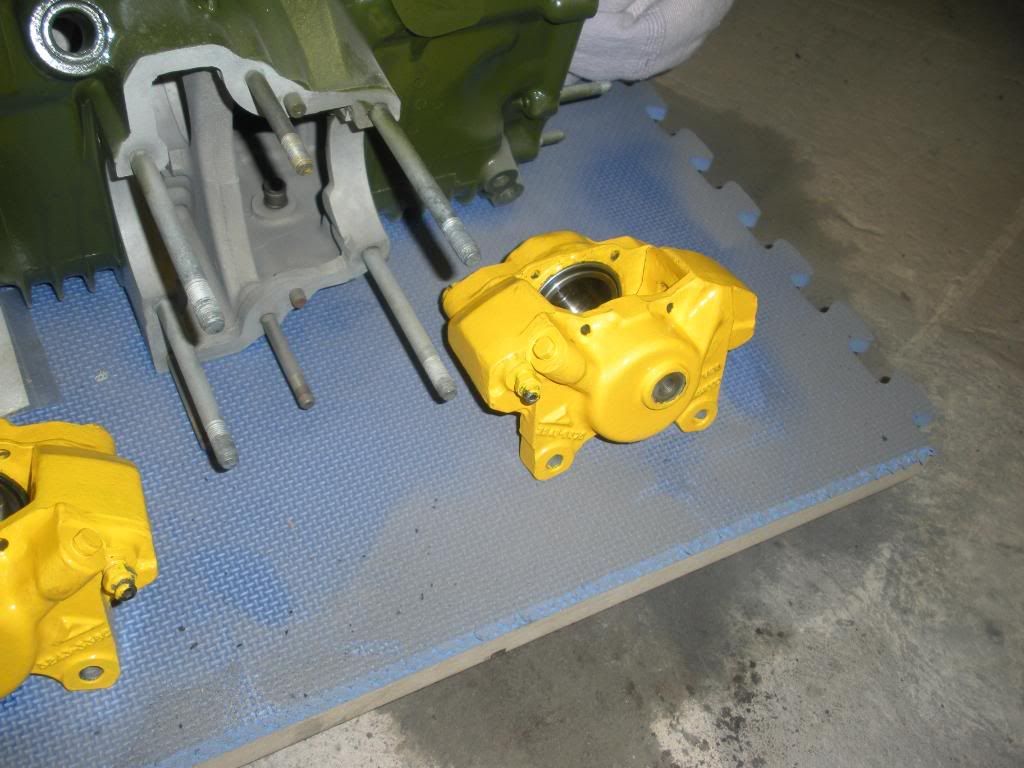
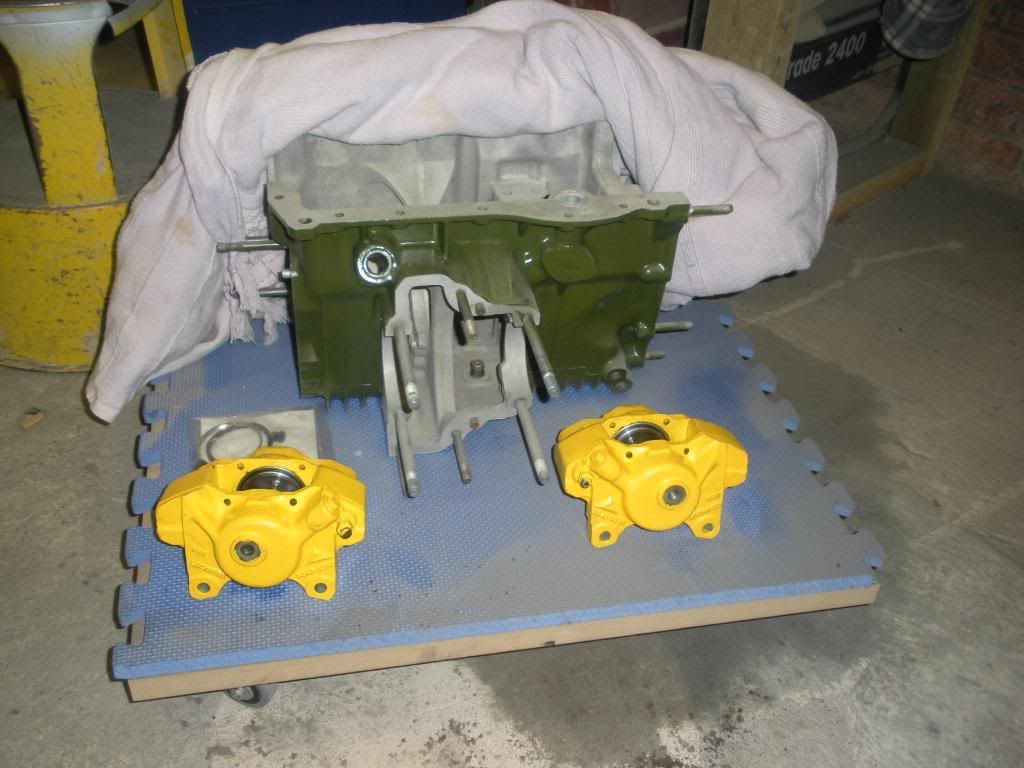
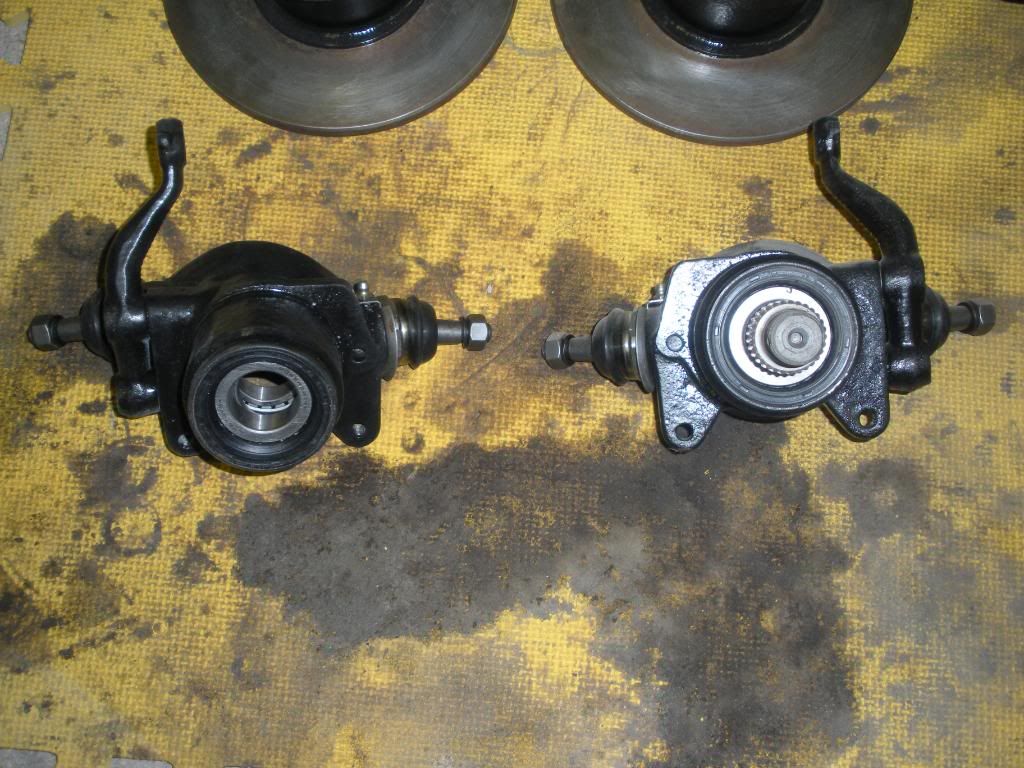
Along with the front subframe I've also sandblasted all the front suspension components, primed and topcoated them, split down and re-built the brake calipers and painted them ready for assembly. The front hubs have had new bearings and seals fitted and the CV joints have been completely stripped cleaned and re-assembled. I've fitted new disc's to the hubs and completely stripped down the gearbox and cleaned and painted


Hope you all enjoyed the update and shall try to keep the updates coming now on a more regular basis
Front subframe on trailer as it was
After spending about 10 hours sand blasting the subframe it was sprayed with galvanised spray to help protect against the dreaded worm, after this the subframe was coated with Eastwoods Epoxy Primer (highly recommended)
Next stage was a final coat using Eastwoods Ceramic Chassis paint
I've also removed the offside rear wheelarch and replaced with new
Along with the front subframe I've also sandblasted all the front suspension components, primed and topcoated them, split down and re-built the brake calipers and painted them ready for assembly. The front hubs have had new bearings and seals fitted and the CV joints have been completely stripped cleaned and re-assembled. I've fitted new disc's to the hubs and completely stripped down the gearbox and cleaned and painted
Hope you all enjoyed the update and shall try to keep the updates coming now on a more regular basis
Edited by Mini Basher, 24 October 2009 - 07:36 AM.
#24
Goopster
-

- Noobies
-
- 128 posts
Mini Mad
Posted 06 June 2009 - 10:29 PM
FANTASTIC WORK! You are doing a brilliant job - this one's gonna be a minter! Keep it up - i'll be watching this thread with interest!
Regards, Goops
Regards, Goops
#25
Mini Basher
-
- TMF+ Member
-
- 424 posts
Speeding Along Now
- Location: Forest of Dean
- Local Club: Mini Foresters
Posted 07 June 2009 - 09:28 PM
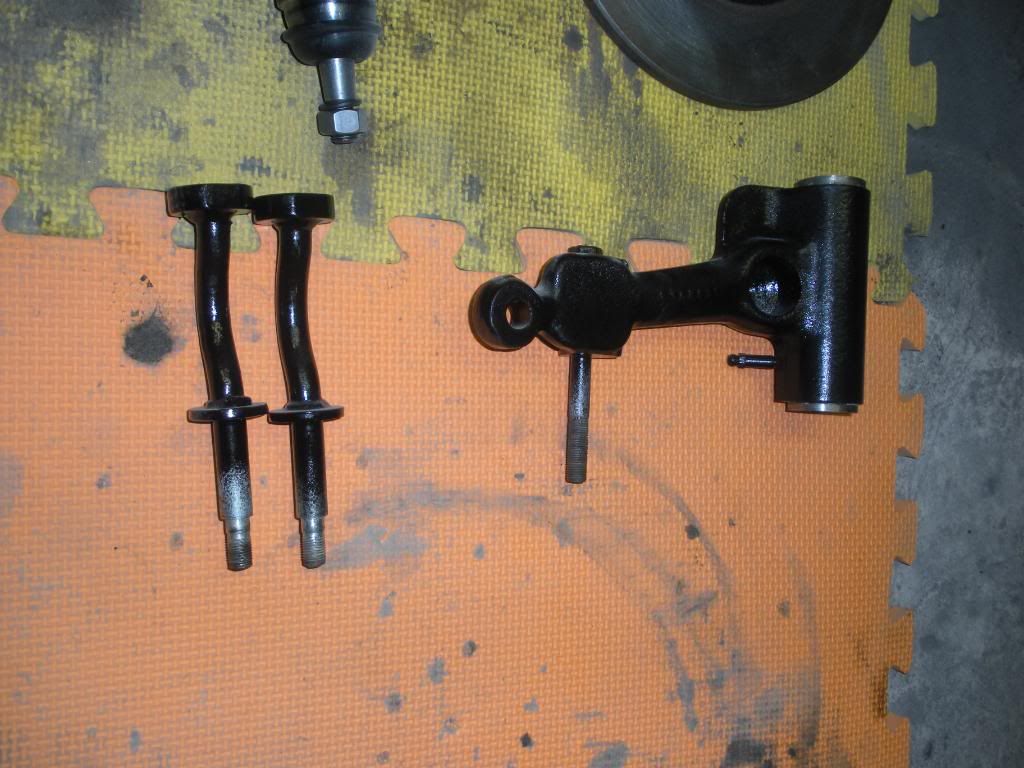
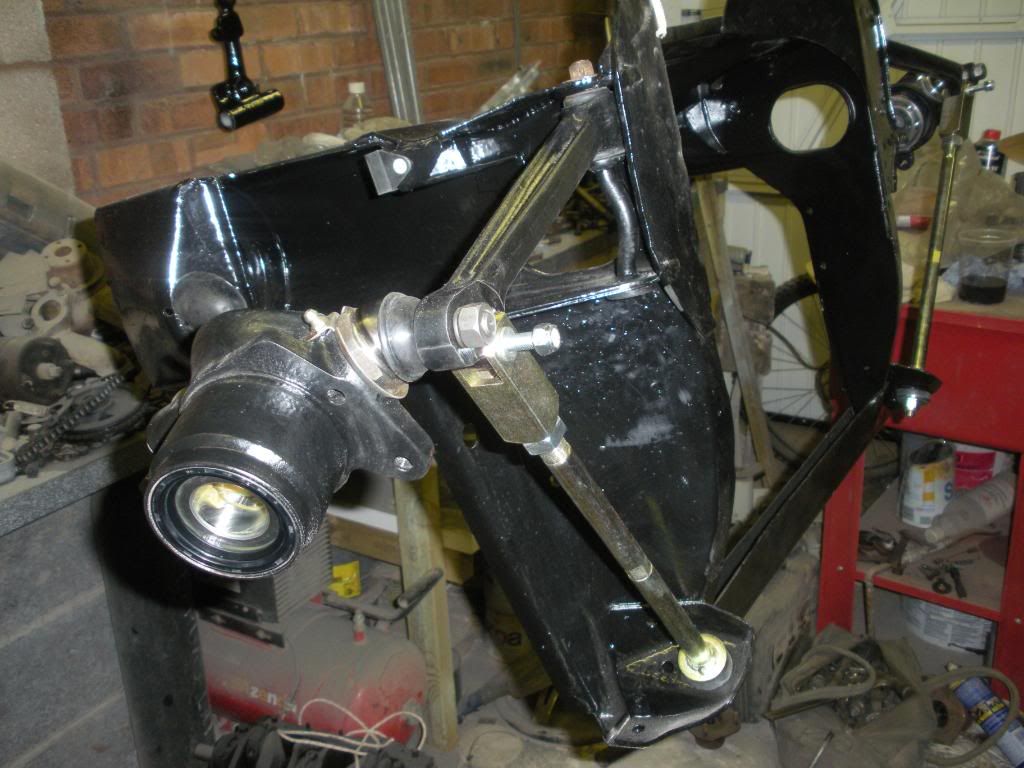
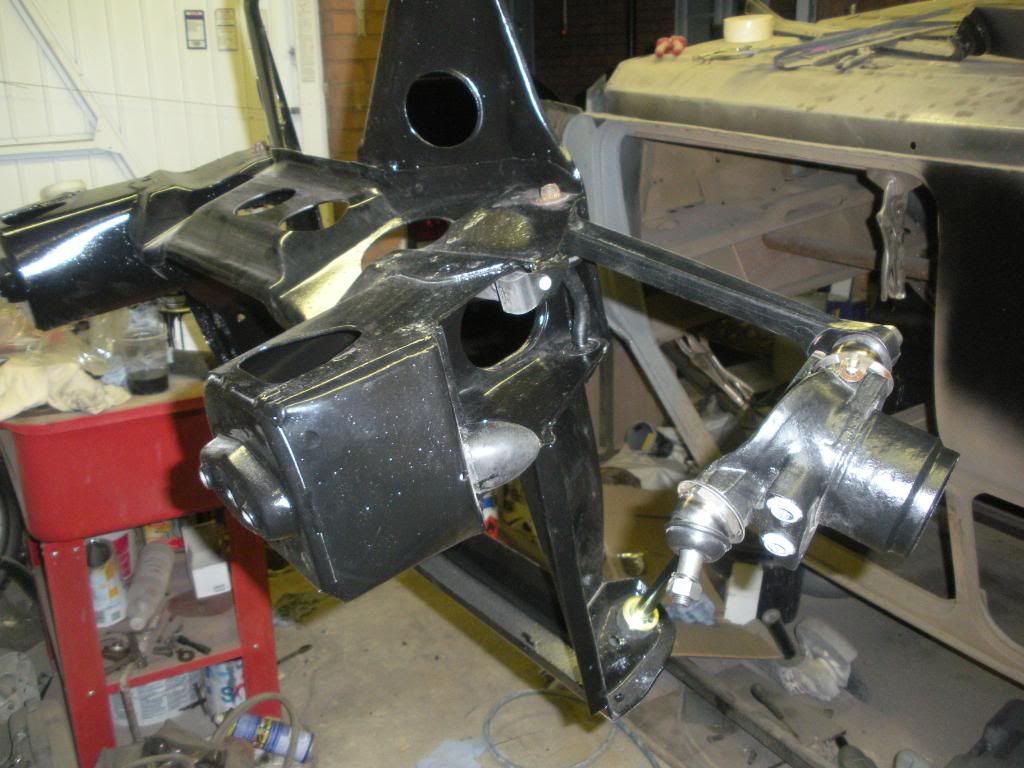
Thanks for your comments Goopster, well I didn't get a great deal done today as we had the Outlaws round for dinner, but as soon as they went it was of to the garage for me. I need to get the front subframe assembled so I can stick some wheels on it and get it down to my workshop as I am drastically running out of space, so today I started to assemble the front subframe, I've fitted the two bottom arms, front tie bars and loosely fitted the front hubs. I can't fit the top arms yet as I am waiting for some top arm re-build kits to arrive, the bearings and shaft in one arm were totally shot and the other looked a bit suspect so I thought I'd change both to be on the safe side. Those neddle bearing casings are a right SOB to remove but I have found a way thats really easy.
I'm off to work for the week now but should have more updates for you at the weekend
I'm off to work for the week now but should have more updates for you at the weekend
#26
Mini Basher
-
- TMF+ Member
-
- 424 posts
Speeding Along Now
- Location: Forest of Dean
- Local Club: Mini Foresters
Posted 13 June 2009 - 09:30 PM
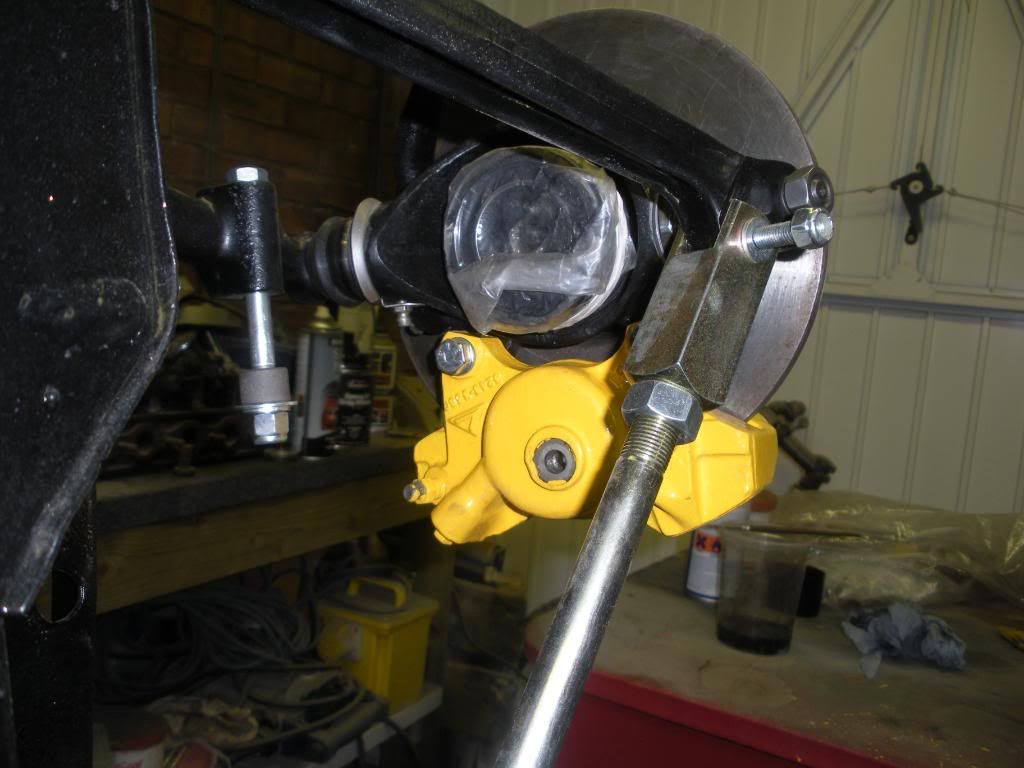
Hi Guys, well I got back from London late on Thusday night to find this waiting for me,
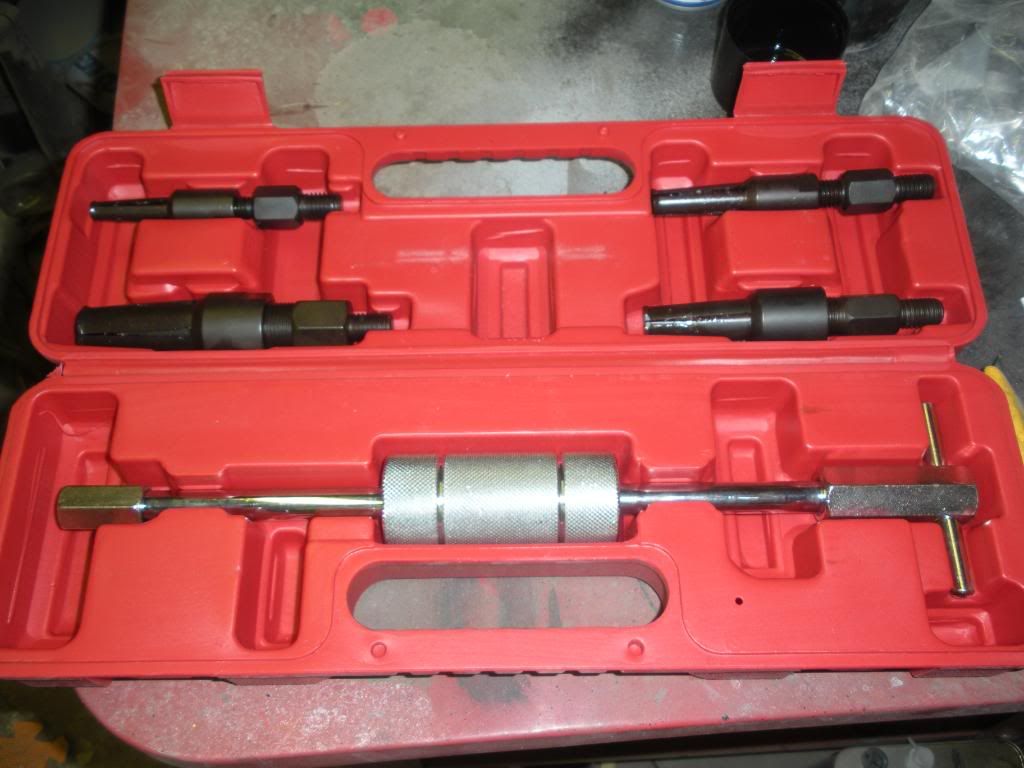
It's a blind bearing puller for removing bearings in awkward places, I'm going to use it to remove the final two bearings in my other top arm.
First thing Friday morning I dropped of the Baby at nursery and then shotdown to the Post Office to collect my top arm repair kits from Mini Spares, then back to the garage to play.
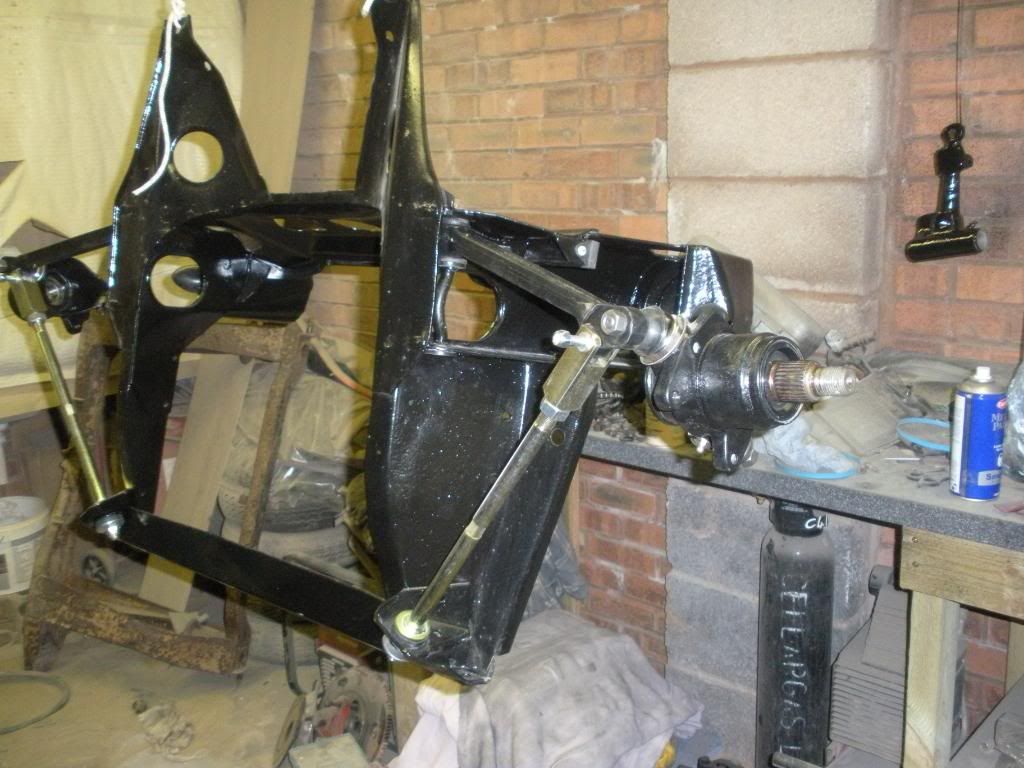
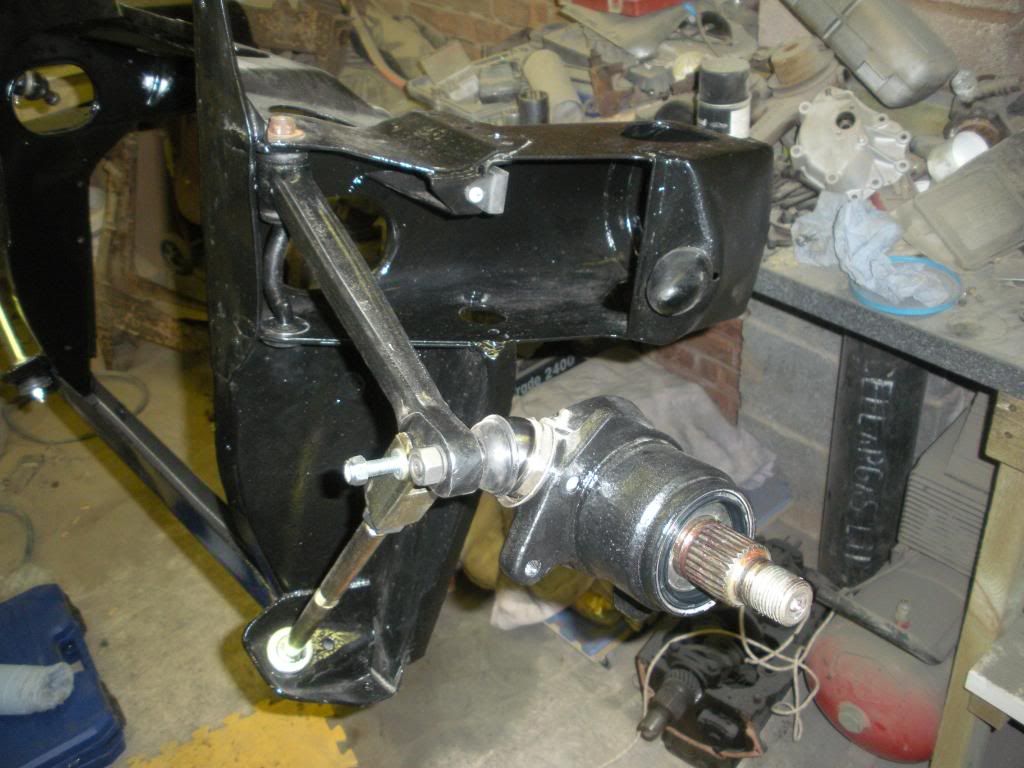
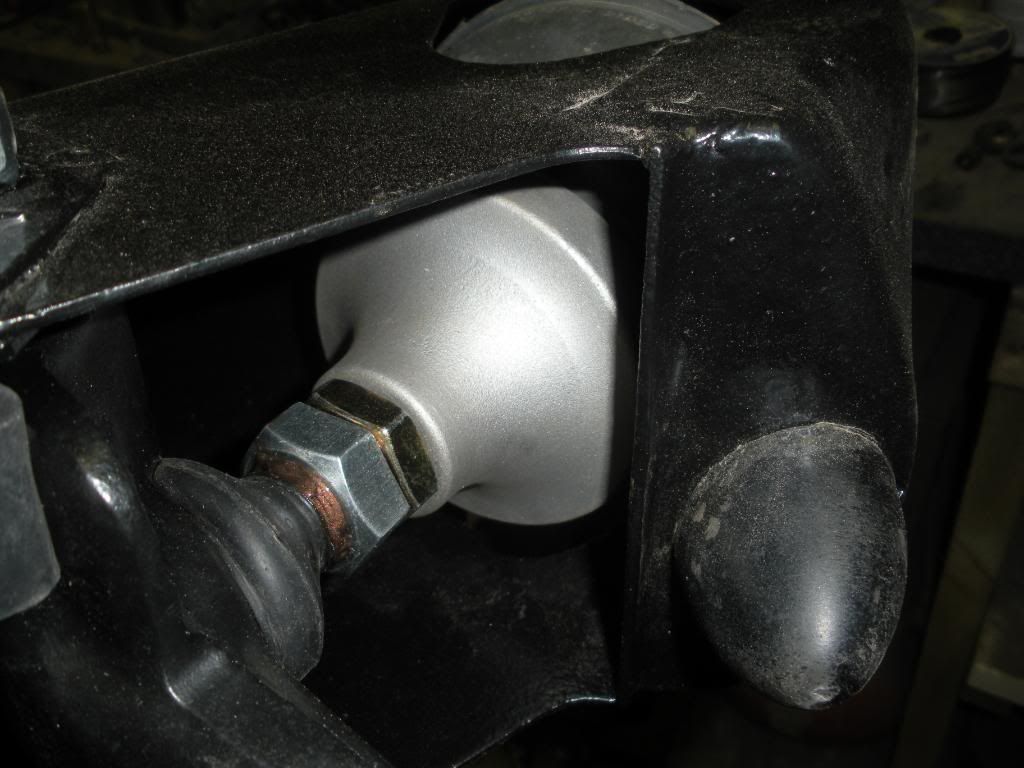
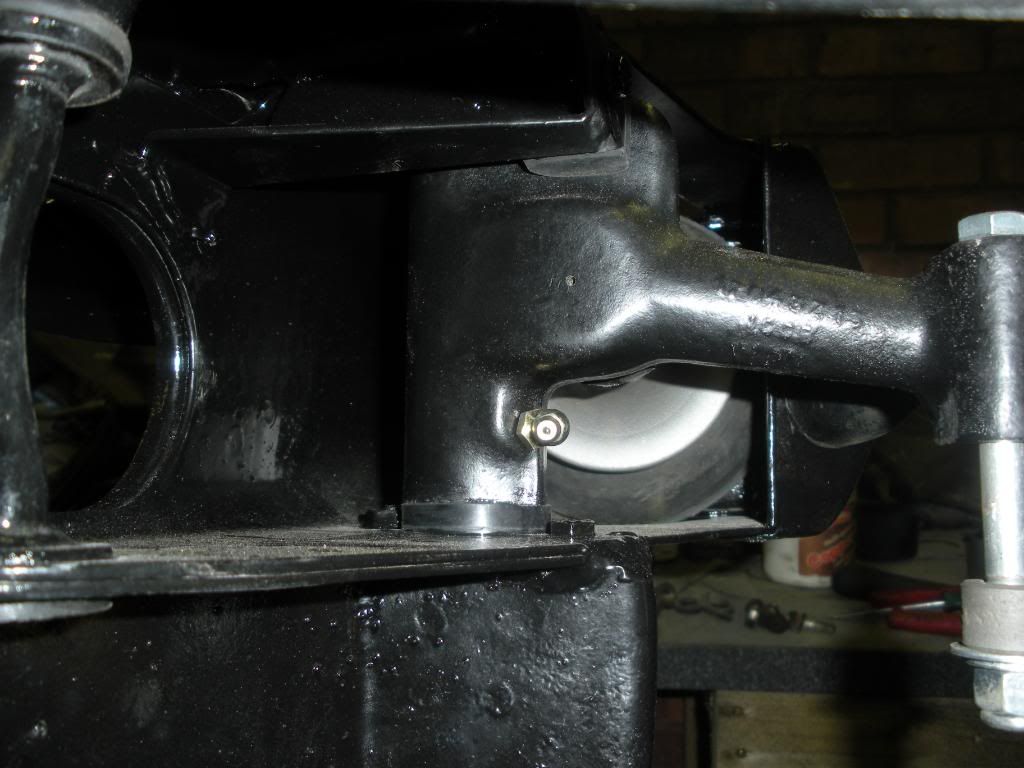
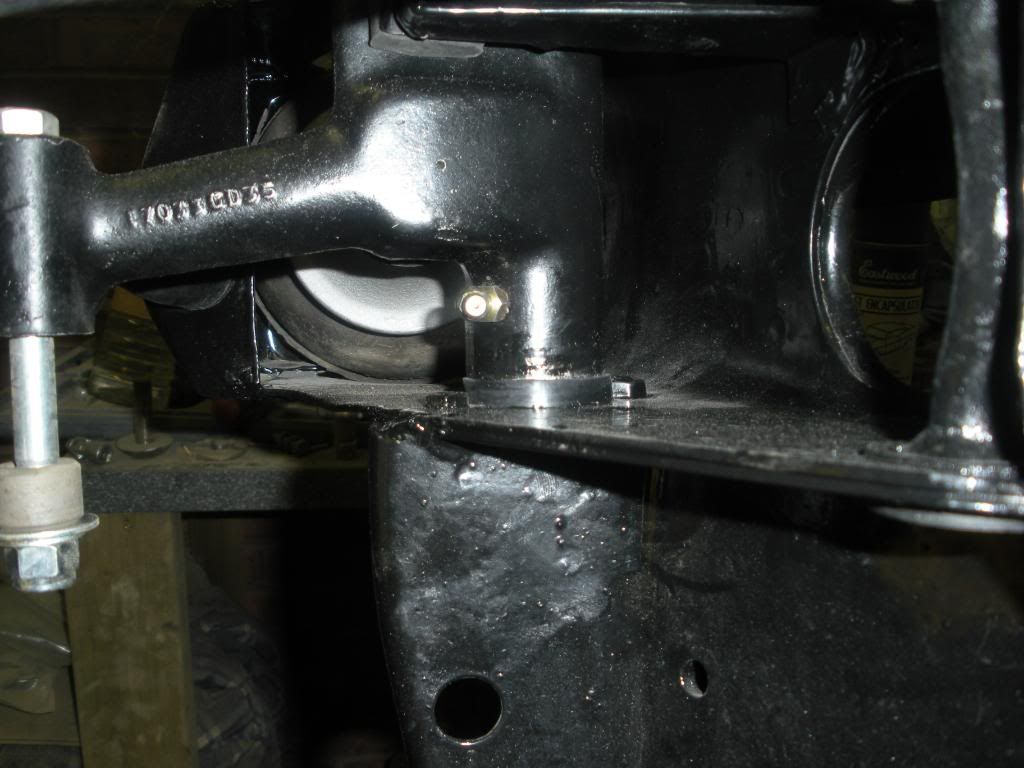
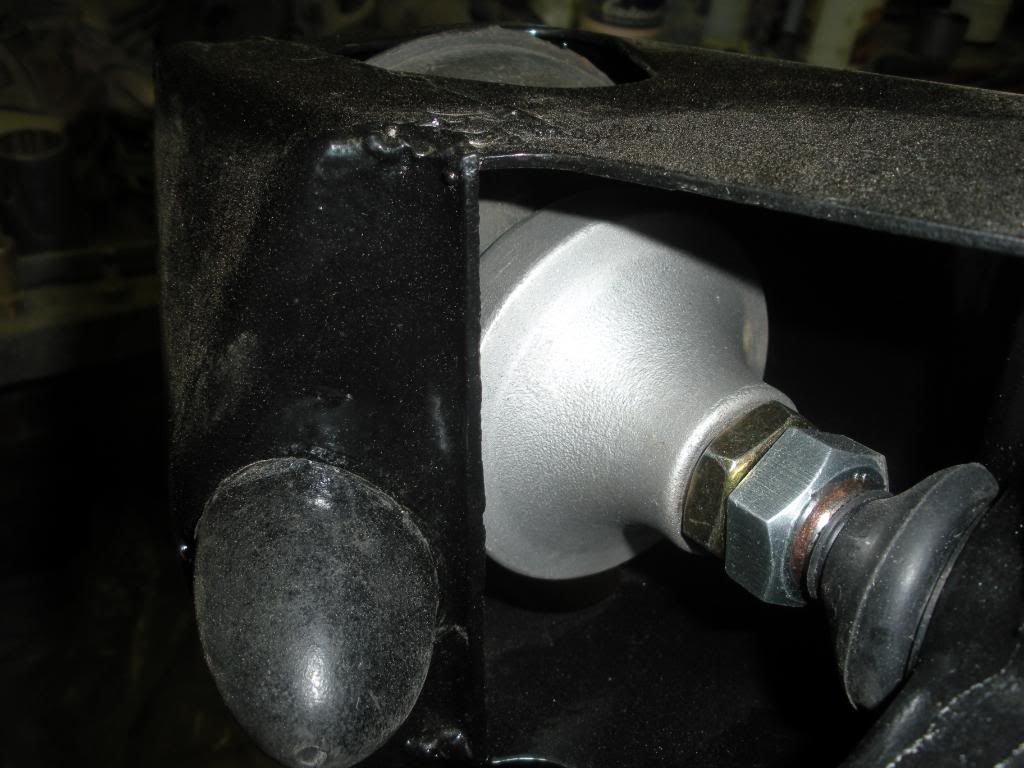
I removed the old needle bearings in the remaining top arm and then cleaned it all up removing any trace of the old grease, I then dressed in the new bearings, greased them up and installed new grease nipples.
Everything was going fine until I came to fit the top arms to the subframe, I had loooooads of trouble trying to get the rubber dust cover to seat properly once the top arm was in place, to the degree that I started at about 11.30am and actually closed the garage door at 1.49am this morning, JOB DONE.
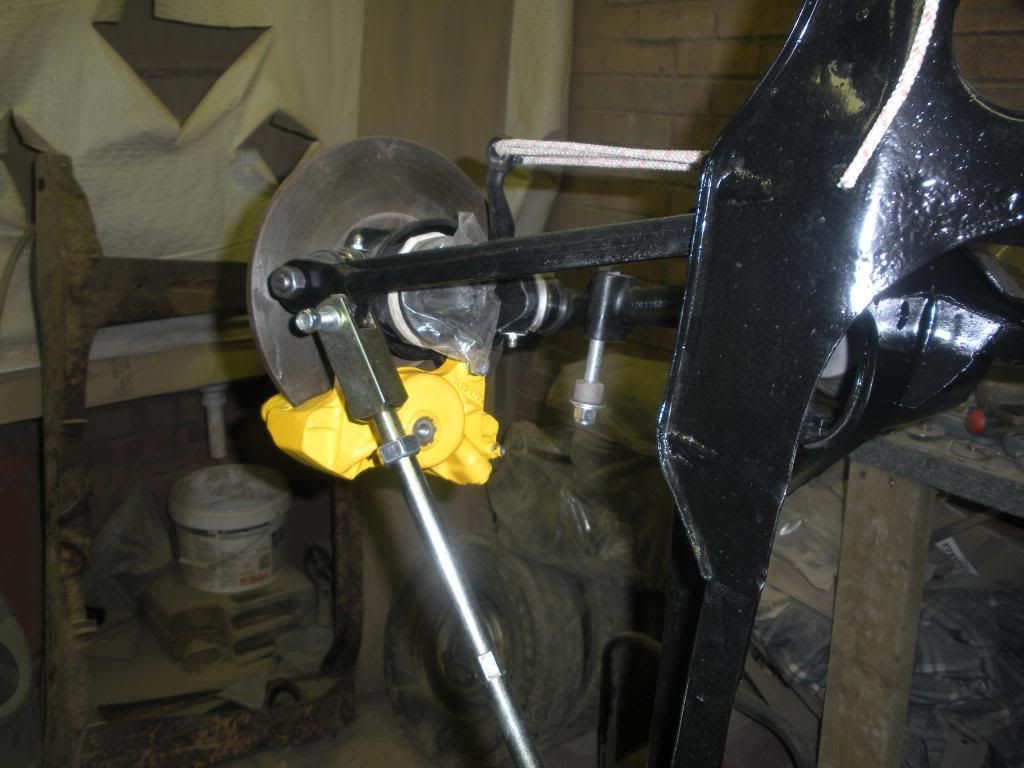
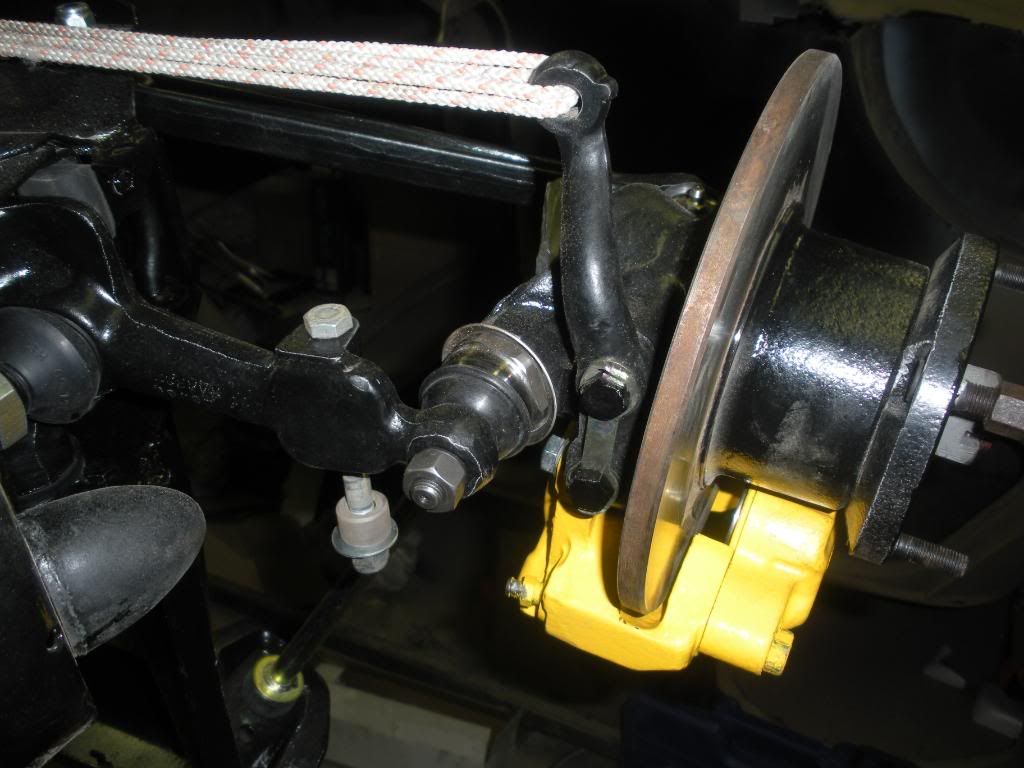
Got up late this morning, so had a cuppa and then off to the garage, all I had to do was fit the Hi Lows front discs and calipers and the subframe could go down to my workshop out of the way until needed.
Cant get the Hi Lows in So had to remove top arm assembly and start from scratch but this is the result of Two days pain and suffering
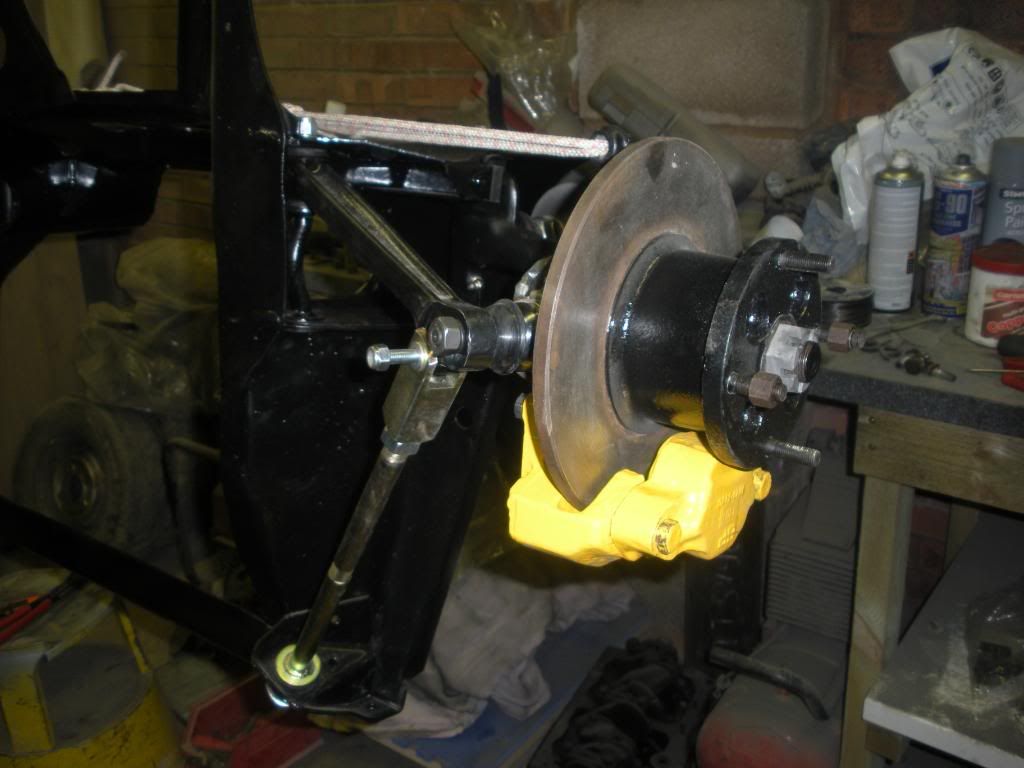
Hi Low finally fitted
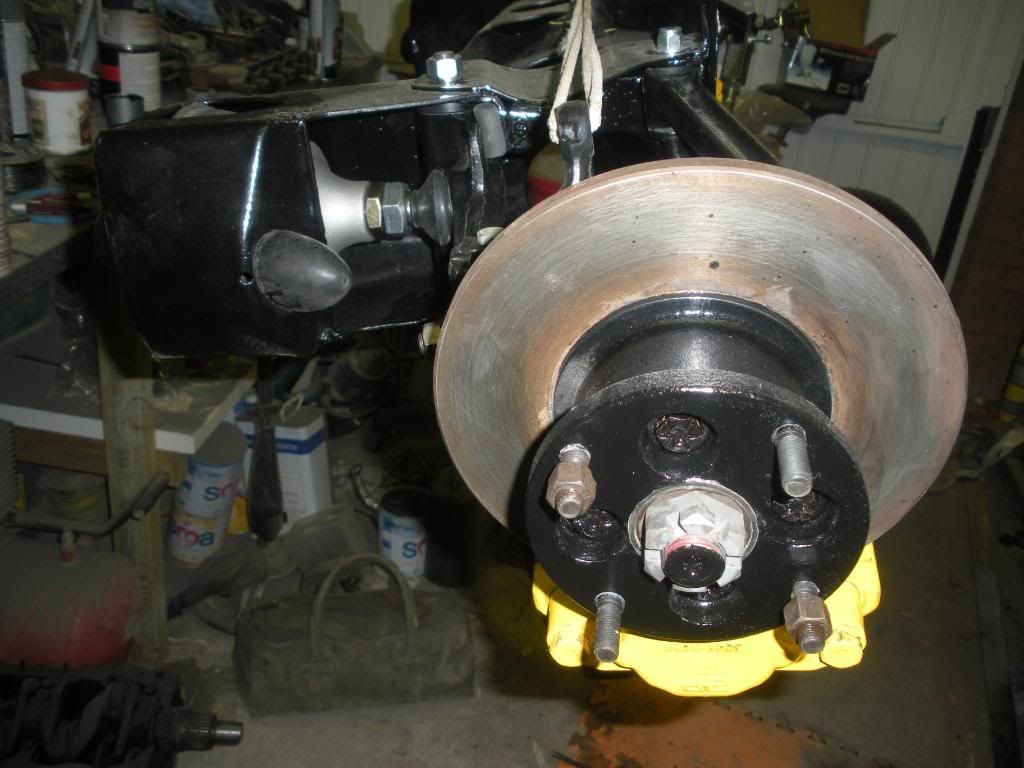
Hi Low on other side
Right, the plan for tomorrow is to throw some old wheels on the subby, put it in the van and get it to the workshop for safe keeping and then back to the welding, got lots of body work to do still, I'll post another update tomorrow before I go off to work
It's a blind bearing puller for removing bearings in awkward places, I'm going to use it to remove the final two bearings in my other top arm.
First thing Friday morning I dropped of the Baby at nursery and then shotdown to the Post Office to collect my top arm repair kits from Mini Spares, then back to the garage to play.
I removed the old needle bearings in the remaining top arm and then cleaned it all up removing any trace of the old grease, I then dressed in the new bearings, greased them up and installed new grease nipples.
Everything was going fine until I came to fit the top arms to the subframe, I had loooooads of trouble trying to get the rubber dust cover to seat properly once the top arm was in place, to the degree that I started at about 11.30am and actually closed the garage door at 1.49am this morning, JOB DONE.
Got up late this morning, so had a cuppa and then off to the garage, all I had to do was fit the Hi Lows front discs and calipers and the subframe could go down to my workshop out of the way until needed.
Cant get the Hi Lows in
So had to remove top arm assembly and start from scratch but this is the result of Two days pain and sufferingHi Low finally fitted
Hi Low on other side
Right, the plan for tomorrow is to throw some old wheels on the subby, put it in the van and get it to the workshop for safe keeping and then back to the welding, got lots of body work to do still, I'll post another update tomorrow before I go off to work
#27
mk1leg
-

- Members
-
- 9,341 posts
Crazy About Mini's
- Location: Jersey
- Local Club: Mini Club Jersey, MCR
Posted 13 June 2009 - 09:59 PM
Hi..your one lucky chap finding a mk1 shell and what a great job you are doing keep up the good work...............
#28
bald jimbo
-

- Noobies
-
- 1 posts
Starting My Mini Up
Posted 08 July 2009 - 10:40 PM
I've just read your thread from start to finish, looks like your gonna end up with a stunning car when its all done, any idea's on a colour scheme yet and what power unit are you going to use.
#29
GreaseMonkey
-

- Members
-
- 3,663 posts
Has Ratchet, Will Make Noises
Posted 08 July 2009 - 10:58 PM
That is some amazing work there
#30
tony kenobi
-

- Members
-
- 381 posts
Speeding Along Now
- Location: Perth, Western Australia
- Local Club: Mini Owners Club of WA
Posted 12 July 2009 - 06:07 PM
ah, so much of this is reminding me of my rebuild. Keep it up. And enjoy it all, even when the going gets tough, because when its finished, the sun is shining and your driving it turning heads as you go, itll be worth it all!


0 user(s) are reading this topic
0 members, 0 guests, 0 anonymous users


