Jump to content


Photo
- - - - -

1979 Rust Heap Clubman Rebuild


  • Please log in to reply
625 replies to this topic

#16 Boycie

Boycie

    Camshaft & Stage Two Head

  • Members
  • PipPipPipPipPipPipPipPip
  • 1,978 posts
  • Location: Kent/ East Sussex border

Posted 22 August 2010 - 10:07 PM

Nice work!
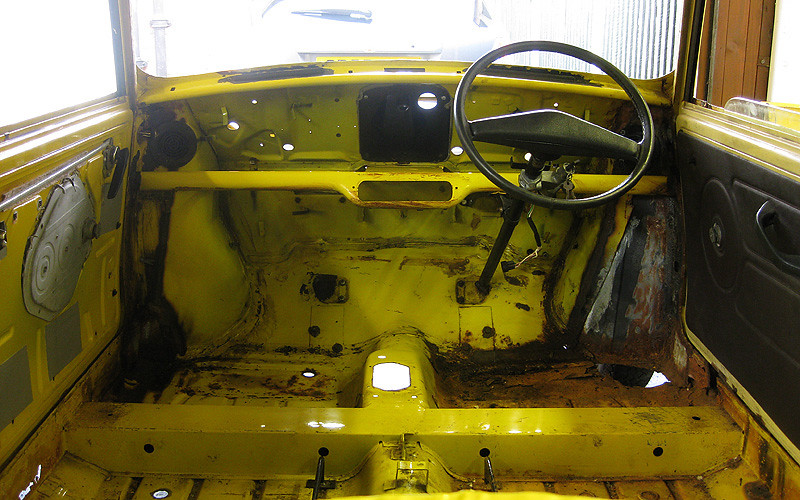
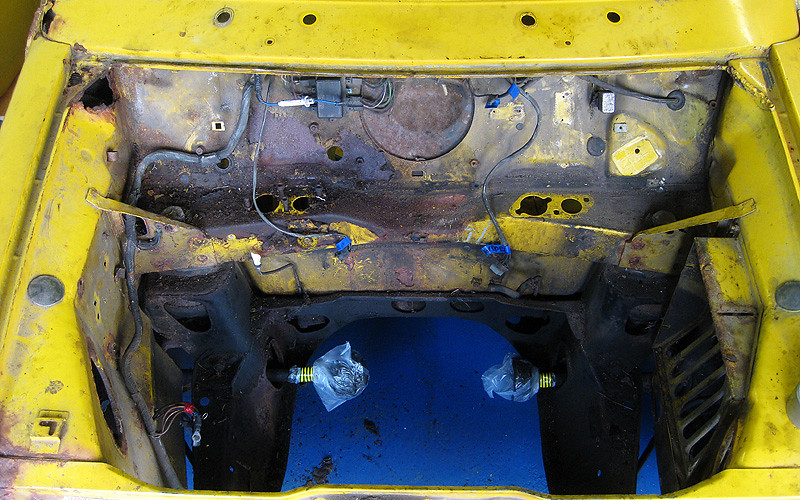
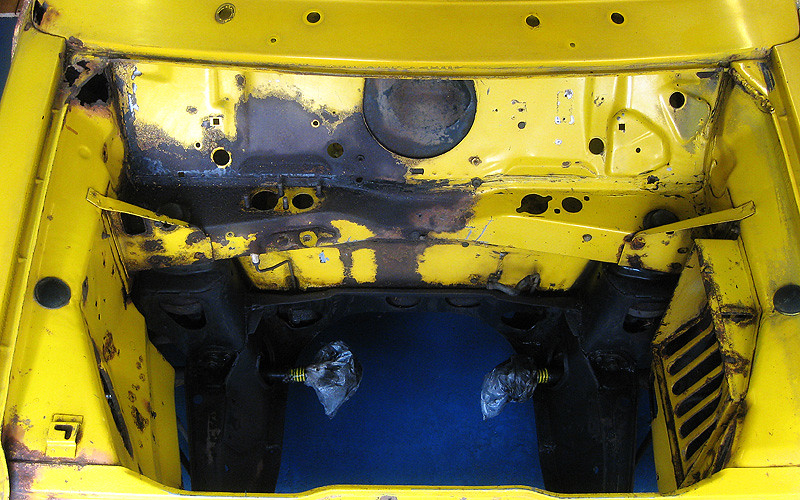
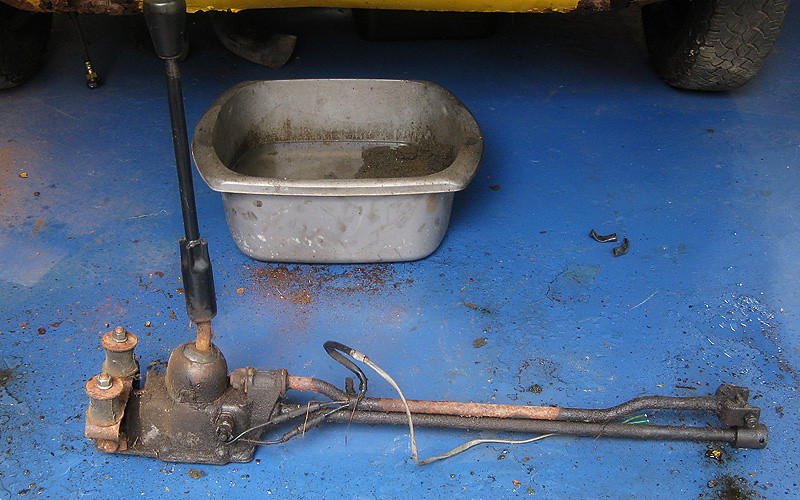
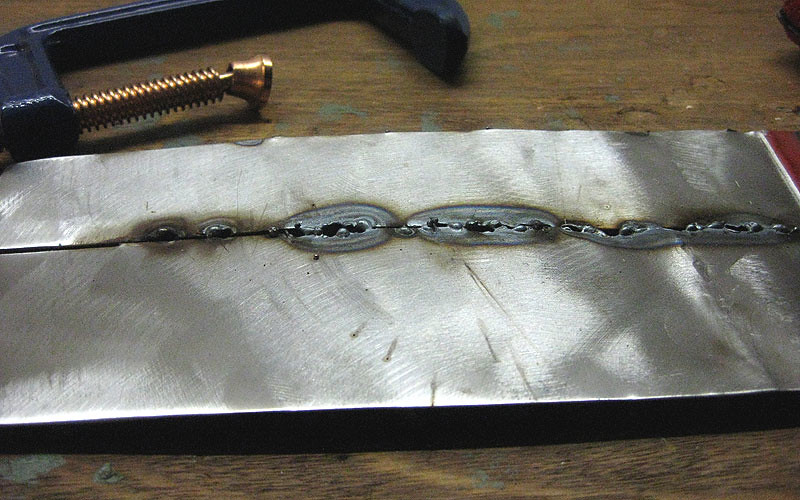
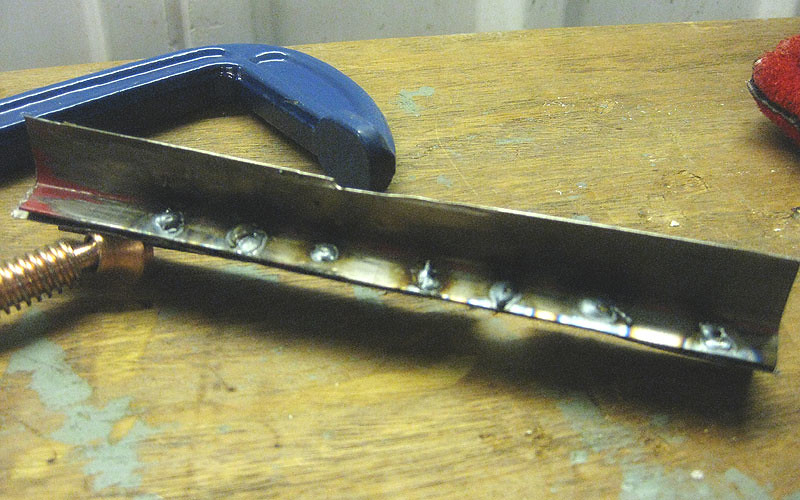
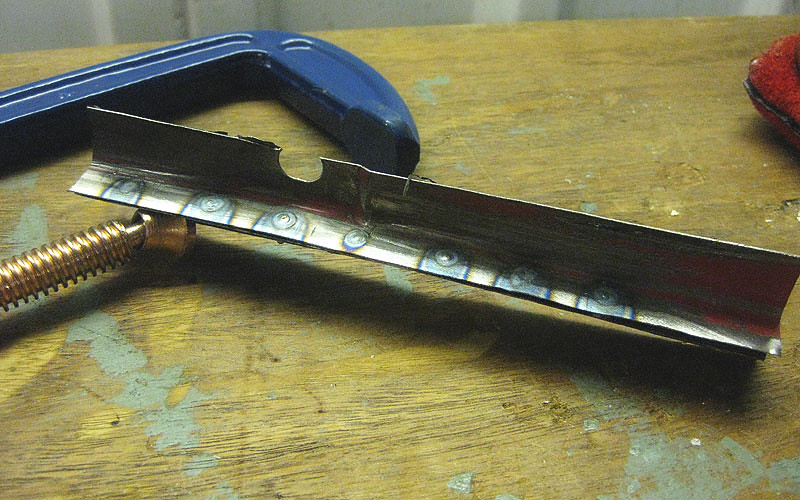
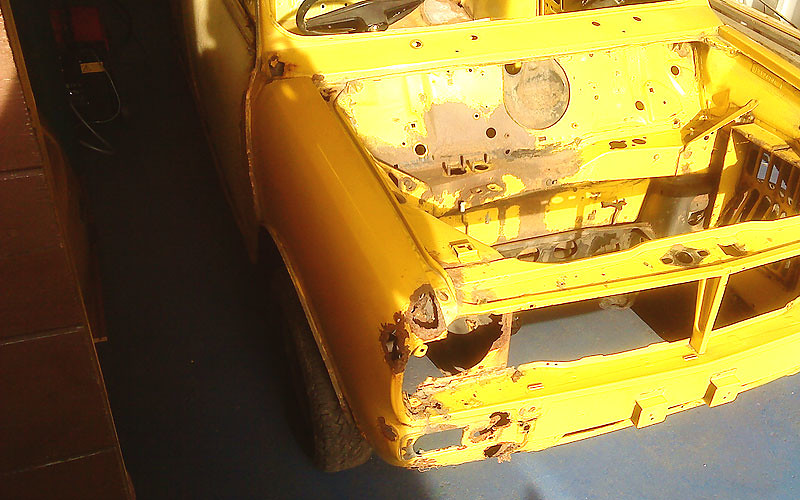
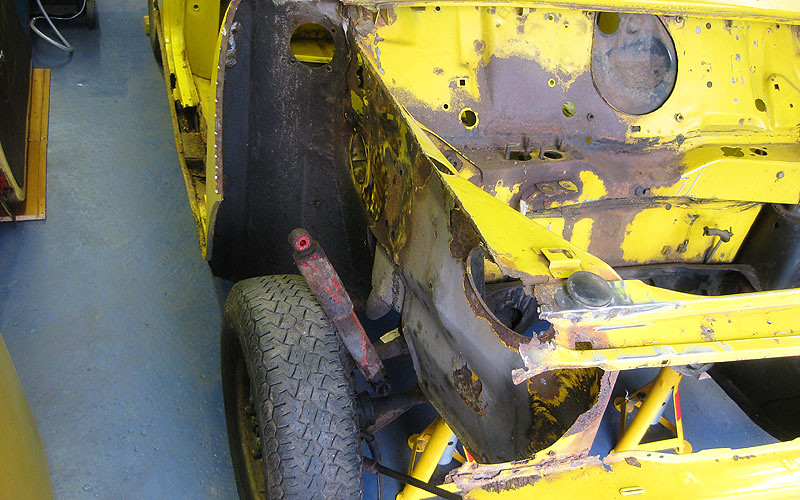
You'll find the rust is a lot less daunting when you can get at both sides of it- ie no oily bits in the way! You'll be sorting out the grot in no time :D

#17 rich2

rich2

    Speeding Along Now

  • Members
  • PipPipPipPipPip
  • 351 posts

Posted 04 September 2010 - 05:00 PM

Hello! Another day of not-very-exciting progress, so I thought I'd post some pics of my cleaning efforts! :)

Almost everything is stripped out of the interior now. I'm leaving the steering in until I take the front subframe out in case I need to move the car.
Posted Image

I gave the engine bay a bit of a wipe so that I could better assess the magnificent rust damage. Here is the before...
Posted Image

...and after.
Posted Image

Apparently a drop or two of brake fluid has found its way onto the paintwork over the years. Haha. The loom is also out of the car now. I cannot for the life of me get the bolts off the hubs that hold the drive shafts on. Is there a knack to this? I whacked it a few times with an impact socket driver, but the socket fouls the ring underneath it...


The gear change mechanism has been lying around the garage in a filthy state since it came out...
Posted Image

So I attacked it with degreaser.
Posted Image

Headlining is now out. Is the stuff in this pic for sound deadening? There are sheets of it on the quarter panels too. Should I just scrape it off?
Posted Image


SO, I think its time to start seriously thinking about bodywork. Arghh! :D

First of all I am going to buy a mig welder and start practising on scrap. However, I have no idea about where to start on the car, as just about every panel apart from the roof needs attention. I'm inclined to tackle the front end first as that looks to be the most straight-forward. If anyone has an opinion on the best order to do things, please shout up! Is it worth me buying something like the haynes bodywork manual, or something similar? Any other recommendations? So far, my entire knowledge of the subject comes from reading this forum! :)

One thing I have come to realise is that life will definitely be easier if the car is on a spit roast jig, so if anyone has one to sell please get in touch!

#18 olds_kool_lews

olds_kool_lews

    Up Into Fourth

  • Traders
  • PipPipPipPipPipPipPipPipPip
  • 3,601 posts

Posted 04 September 2010 - 09:05 PM

best way to start a project is pick a starting point, be it front or back, and work your way through it, this is what ive done, i started at the front, and im now in the process of finishing off the passenger floor before i tackle the rear end/heal board/subframe etc try not to start 1 job, then get bored and move onto another, as this way it'll seem to take 3 times as long!

as for the black stuff it is sound deadening (kind of, it stops larger panels from sounding tinny and hollow), it can melt in the heat of summer and drop off onto the inside of your headlining, staining it, id scrape it off and spray stonechip in the roof, it will take alot of the "tinny"-ness out the roof, and provide sound deadening to a higher level than the black stick on pads!

read up what ever books/threads etc you can about welding and body work, and practice as much as you can before tackling your car, as you dont want a car that will fall to bits comedy style in an accident lol

good luck with it!

#19 rich2

rich2

    Speeding Along Now

  • Members
  • PipPipPipPipPip
  • 351 posts

Posted 06 September 2010 - 07:42 AM

Thanks for your help! Thats good advice. :D

#20 rich2

rich2

    Speeding Along Now

  • Members
  • PipPipPipPipPip
  • 351 posts

Posted 10 October 2010 - 05:55 PM

Right then! Its been ages since my last update because I've spent a month getting everything together to start on the bodywork. Despite spending more money on tools than I did buying the car in the first place, I'm still not ready, (I haven't done any metal work before, ever.) but at least I have some new toys :)

Posted Image

Almost needed a change of underwear when I fitted the regulator to the BOC cylinder... The instructions say "open the cylinder valve briefly first to get rid of any impurities", so I open the valve a bit expecting a little hiss. It turns out that 230 bar escaping makes more of a deafening roar. Whoops. Then spent most of the day setting up the welder, garage, workbench etc to make sure it was all as safe as possible. Was still convinced everything would catch fire/explode/worse when I actually had my first go. Anyway, I didn't die, but I made my first extremely shoddy practice welds!

Posted Image

Hopefully I can do better than this when I'm working on the car...
Posted Image
I don't really understand at the moment how to do a good butt weld. Leaving a little gap as I have read just means loads of blowing holes. Hmm. Back to the drawing board.

Was quite pleased with my first go at plug welding, but plenty of room for improvement...
Posted Image
Posted Image

At least I look the part!
Posted Image

Our washing machine died a death this week so I butchered it for more practice material. Stripped the paint of this side piece with a flap disc ready for another go tomorrow night.
Posted Image

I'm sure you will agree my collection of bits of metal is well exciting. Soon I might even do something mini related!

#21 RS##BAM

RS##BAM

    On The Road

  • Noobies
  • PipPip
  • 36 posts

Posted 10 October 2010 - 06:09 PM

loving this thread already keep practising lol , best on scrap rather than making a mess on the mini , good on you .
Ive just started my mini (see Bams mini 30 thread) . I started at the front and will do that before moving on to the next bit. so just pick a point and attack .


p.s. good look fella
Bam.

#22 Sir Cheat

Sir Cheat

    One Carb Or Two?

  • TMF+ Member
  • PipPipPipPipPipPipPip
  • 1,171 posts
  • Local Club: Manchester Minis

Posted 10 October 2010 - 06:15 PM

All them parts for £35 was well worth it. Really like yellow Clubmans..

#23 grahama

grahama

    Up Into Fourth

  • Members
  • PipPipPipPipPipPipPipPipPip
  • 2,442 posts
  • Location: Warrington
  • Local Club: None in my area !!

Posted 10 October 2010 - 06:16 PM

Hi,

just where I am upto with the welding, getting better everytime I practice, so you'll pick it up quick enough. Car looks in not too bad nick, like mine, but I too am not ready to blow more holes in it just yet. Keep going.

Graham

#24 rich2

rich2

    Speeding Along Now

  • Members
  • PipPipPipPipPip
  • 351 posts

Posted 17 October 2010 - 03:43 PM

More welding practice this weekend. Behold my gallery of little bits of metal!

For the sake of comparison, this was about the standard I was at last week (ie. crap):
Posted Image

This weekend's mission was to work out how to do a decent butt weld. This was my process... (Experts, please feel free to critique. I'm all ears!)

I was trying to join these two pieces of 0.9mm steel...
Posted Image

Clamped up as closely as possible.
Posted Image

Tack welds in place.
Posted Image

Stitch welded, jumping from one area to another to avoid heat build up. Still blew a few holes, and the metal got really distorted in the process.
Posted Image

Ground down the welds on the reverse around the holes and taped on copper coins, so that I could fill the holes
Posted Image

All welded up and dressed down.
Posted Image

So am I doing this right? I still don't understand how using intergrips are supposed to be used. Whenever there is the slightest gap between the join, I immediately blow holes. Can anyone shed any light?

I'm finding plug welding much more straight forward...
(front)
Posted Image

(back)
Posted Image

So now I should really start ordering a few panels! There's a newark autojumble next weekend, so I might see what I can find there. =] 
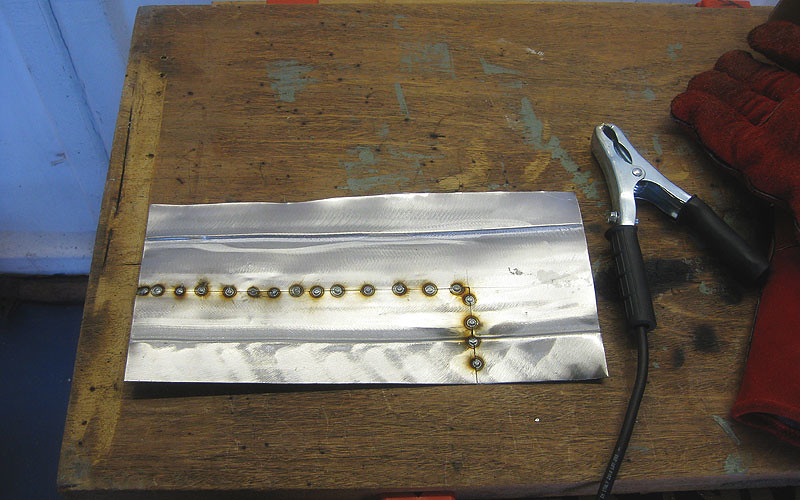
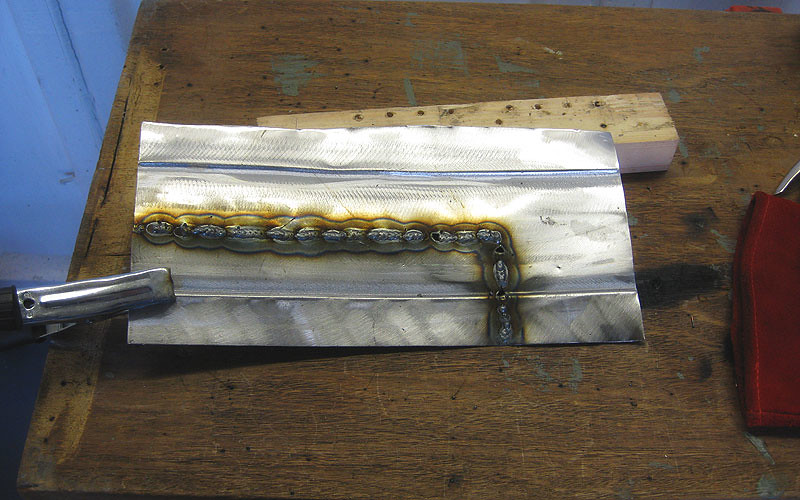
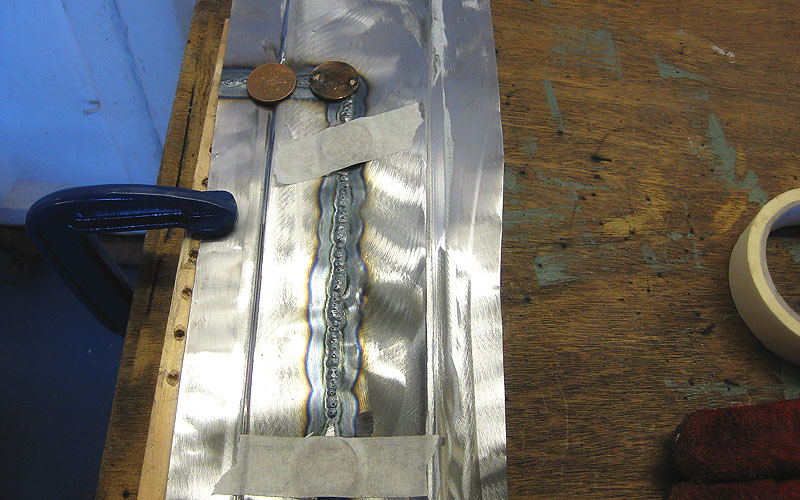
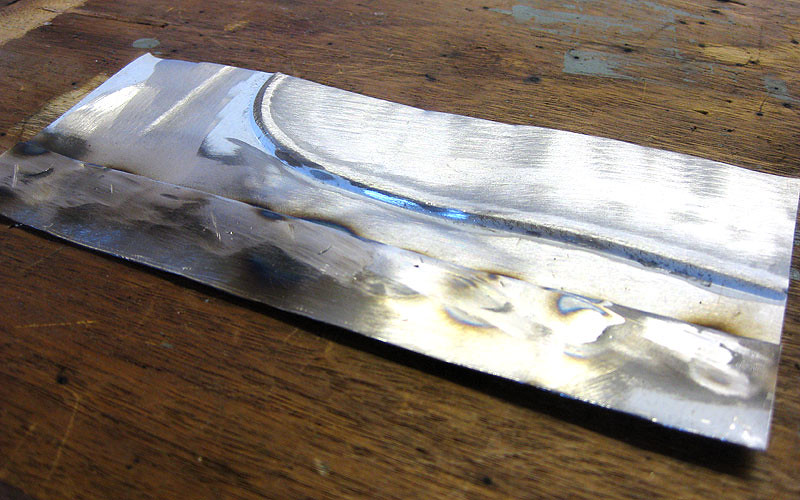
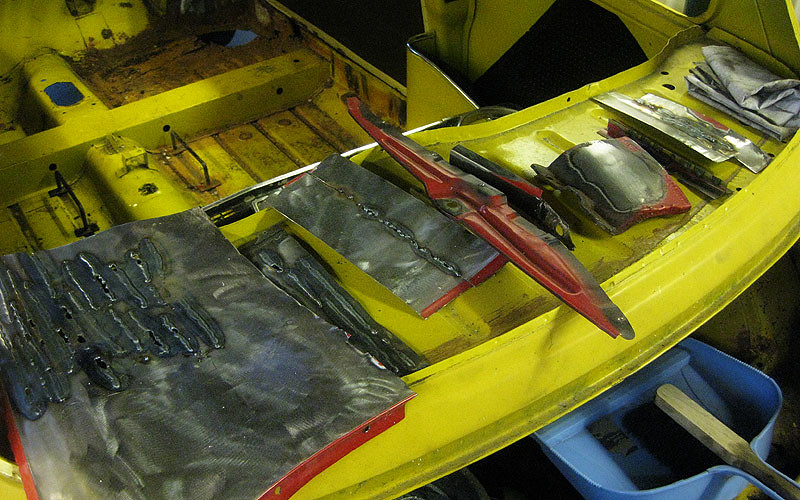
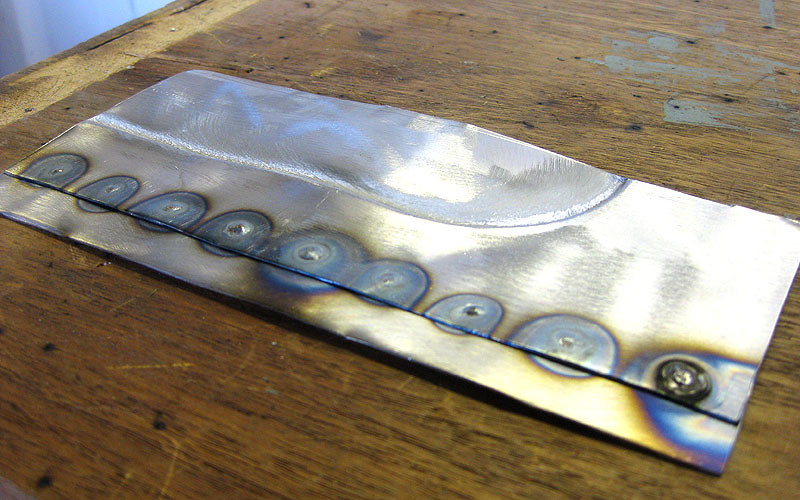
I really regret not buying a pair of really cheap rust-free doors I saw last time!

#25 sonikk4

sonikk4

    Twisted Paint Polisher!!!

  • Admin
  • PipPipPipPipPipPipPipPipPipPipPip
  • 15,899 posts
  • Name: Neil
  • Location: Oxfordshire

Posted 17 October 2010 - 04:10 PM

Too much power or you are not moving the torch fast enough. The welds you have got now are fine and a little more practise they will be spot on. To try and lessen the amount of warping try having a damp rag to hand. Do your tacks but just place the rag over the weld straight away, keep doing this especially when you start to seam weld.

Your other option is to take a piece of copper pipe, slot it hammer it flat and then clamp it to the back of the area you are going to weld. This will then act as a heat soak.

The intergrip problem is straight forward to sort, you need to make sure the gap is the thickness of the intergrip plate when you clamp them up. Then tack weld an inch or so apart then between each tack when you are welding move the torch side to side instead of holding the torch over the gap or you can rotate the head of the torch while moving it back. That should cure your problem.

You will still get the odd blow through, it happens especially if you hold the torch in the same place for too long.

#26 rich2

rich2

    Speeding Along Now

  • Members
  • PipPipPipPipPip
  • 351 posts

Posted 18 October 2010 - 04:27 PM

Cheers for the pointers. I suspected I might be keeping it in the same place too long, but I suppose the fine balance of moving on in time while also getting decent penetration is a matter of more practice. The machine is already on its lowest power setting. I will definitely give the wet rag and copper pipe tactics a go next time.

#27 Glenn S

Glenn S

    Stage One Kit Fitted

  • Noobies
  • PipPipPip
  • 50 posts

Posted 18 October 2010 - 07:26 PM

Rich I have just completed a 1976 Clubman restoration, someone gave it to me 3 years ago it was not as bad as yours though but nearly,at least you have got 1 newish wing, £90 is not cheap but thats the dearest panel you need.
Where abouts in Nottts are you I would love a templet of your radiator rubber suround. Got no pictures of mine except one on my facebook page.

Take your time get it right.

Glenn Stockton

#28 rich2

rich2

    Speeding Along Now

  • Members
  • PipPipPipPipPip
  • 351 posts

Posted 30 October 2010 - 02:58 PM

Rich I have just completed a 1976 Clubman restoration, someone gave it to me 3 years ago it was not as bad as yours though but nearly,at least you have got 1 newish wing, £90 is not cheap but thats the dearest panel you need.
Where abouts in Nottts are you I would love a templet of your radiator rubber suround. Got no pictures of mine except one on my facebook page.

Take your time get it right.

Glenn Stockton


If you mean the flap of rubber that seals the rad to the cowling, I'm afraid I've already binned it because it was manky and perished! Sorry! I'm just outside mansfield, by the way.

#29 rich2

rich2

    Speeding Along Now

  • Members
  • PipPipPipPipPip
  • 351 posts

Posted 30 October 2010 - 03:08 PM

Today I grew some balls and the car went from this:
Posted Image

to this:
Posted Image

As you can see, the spot welds on the A panel were not exactly substantial.

Took a trip to P&L minis in Rotherham and ordered a heritage right inner wing. That seems like a sensible place to start on the grand front end overhaul. When it arrives and I will have a much better idea of how to proceed with the destruction.

#30 sonikk4

sonikk4

    Twisted Paint Polisher!!!

  • Admin
  • PipPipPipPipPipPipPipPipPipPipPip
  • 15,899 posts
  • Name: Neil
  • Location: Oxfordshire

Posted 30 October 2010 - 03:22 PM

I have got the very same welder as you and my settings are as follows, wire speed 6-7 power setting 1 and 2 (thats as you look at the switches) i use this setting for tacking and seam welding.
For plug welding i use wire speed 9 and switches in 2 and 2 position.

For the gas setting i just have a gentle hiss coming from the nozzle as that is plenty any more and you will soon empty your gas bottle. You may find the tin from the washing machine is thinner than the metal on a mini hence the blow through.

Hope this helps

Neil.


2 user(s) are reading this topic

0 members, 0 guests, 0 anonymous users


    Bing (2)