Jump to content


Photo
- - - - -

1979 Rust Heap Clubman Rebuild


  • Please log in to reply
625 replies to this topic

#31 rich2

rich2

    Speeding Along Now

  • Members
  • PipPipPipPipPip
  • 351 posts

Posted 30 October 2010 - 07:30 PM

I have got the very same welder as you and my settings are as follows, wire speed 6-7 power setting 1 and 2 (thats as you look at the switches) i use this setting for tacking and seam welding.
For plug welding i use wire speed 9 and switches in 2 and 2 position.

For the gas setting i just have a gentle hiss coming from the nozzle as that is plenty any more and you will soon empty your gas bottle. You may find the tin from the washing machine is thinner than the metal on a mini hence the blow through.

Hope this helps

Neil.


Cheers neil. I'll give your settings a try. I had been using power 1 and 'min', wire speed 4ish, and a random hiss of gas. Now that I have the scrap wing to play with, I can at least do some trials on the correct thickness of metal. :thumbsup:

#32 Glenn S

Glenn S

    Stage One Kit Fitted

  • Noobies
  • PipPipPip
  • 50 posts

Posted 31 October 2010 - 06:27 AM

Rich From what I can see you are doing really well,and in the right order. I bought a lot of parts for my Clubman from P L Minis including 2 front wings.

Mine is a 1976 but it was not as bad as yours just 2, wings 2 sills, rear valance and fillers, and front floor pans ( cut to suit ) and a bit of welded plates to the inner sills

I did not take the engine out of mine though, but I will be doing over Christmas to paint the bulkhead and inner wings etc.

P&L yes a good place to go but I also bought a load of bits from Nottingham Minibits in Bulwell

Pity about the rubber rad suround but I will have to fit a standard mini one to mine

Attached Files


#33 rich2

rich2

    Speeding Along Now

  • Members
  • PipPipPipPipPip
  • 351 posts

Posted 31 October 2010 - 07:02 PM

Glenn: awesome car! I was not aware of this place in bulwell. I'll have to give it a look!

#34 rich2

rich2

    Speeding Along Now

  • Members
  • PipPipPipPipPip
  • 351 posts

Posted 21 November 2010 - 09:41 PM

Not much positive progress AGAIN! So while I was waiting for my inner wing to be delivered, The penny dropped that I wouldn't be able to fit it with I the front subby in place. DUH! Needed the obligatory massive socket for that; so in the meantime, I had a go at the rear... :wub:
Posted Image

The bolts to the heel board might as well have been welded on, so I ended up chopping them off with the grinder as the whole area is a tragic mess anyway.
Posted Image

I must have swept up bucket loads of rotten mini!
Posted Image

Voila. Subframes!
Posted Image

I'd always thought the rear subframe was in pretty awful nick to my amateur's eye, but it turned out to be quite recent. Check out the heritage sticker still stuck to it. ^_^ Hopefully the subframe can be rescued with a bit of light surgery.
Posted Image

Finally I get the call that my panel has arrived from BMH. Woohoo! So it was off to this awesome place...
Posted Image

Ta da! Lots of prep still to do, but can't wait to get started on this. After reading Erm's thread I'm now wondering if I should really be top coating joins before sticking them together. That would mean deciding on a final colour, of course. Hmmmmmmmm.
I also picked up the sheet steel in the background - 2sq meters of 1.9mm and a thicker gauge which I can't remember, and some lengths of angle for bracing the shell. I've already welded in a length across the middle.
Posted Image

So this is how the mini stands at the moment. I got two awesome pallets from someones skip which I got unreasonably excited about. (Yes I did ask before I took them!) Really glad I fitted some extra lighting in the garage because it seems to be dark outside whenever I get to work on the car nowadays!
Posted Image

#35 clubby_1275gt

clubby_1275gt

    Mini Mad

  • Noobies
  • PipPipPipPip
  • 132 posts

Posted 22 November 2010 - 10:54 AM

very good project . urs is nowhere near how bad mine was when i got it . the front panel had disintagrated the head lights was non existant and few other bits but look it up its clubman 1275gt and check it out ill be keeping an eye on this

#36 rich2

rich2

    Speeding Along Now

  • Members
  • PipPipPipPipPip
  • 351 posts

Posted 28 November 2010 - 06:26 PM

SURGERY!

Posted Image

Posted Image

#37 Mini-Mad-Craig

Mini-Mad-Craig

    Crazy About Metro's

  • Members
  • PipPipPipPipPipPipPipPipPipPip
  • 9,298 posts
  • Location: Travelling in a fried out Kombi

Posted 28 November 2010 - 06:53 PM

Looks like a very daunting project, but you're doing amazing.

Keep us updated and well done.

#38 clubby_1275gt

clubby_1275gt

    Mini Mad

  • Noobies
  • PipPipPipPip
  • 132 posts

Posted 04 December 2010 - 06:52 PM

looking good my freind . any idea with colour when finished
please tell me u keeping it standard yellow like mineq

#39 rich2

rich2

    Speeding Along Now

  • Members
  • PipPipPipPipPip
  • 351 posts

Posted 18 December 2010 - 05:03 PM

looking good my freind . any idea with colour when finished
please tell me u keeping it standard yellow like mineq

I don't know! I'm 50/50 about whether to keep it yellow, or go for a kind of greenish grey which I really like...


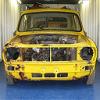
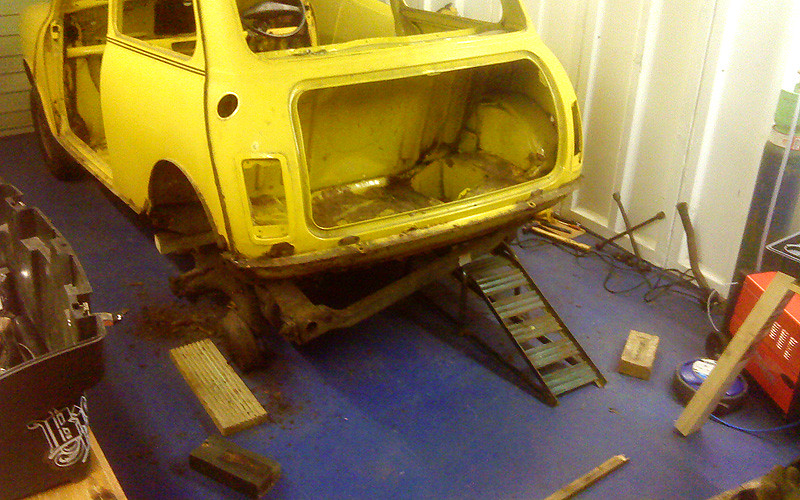
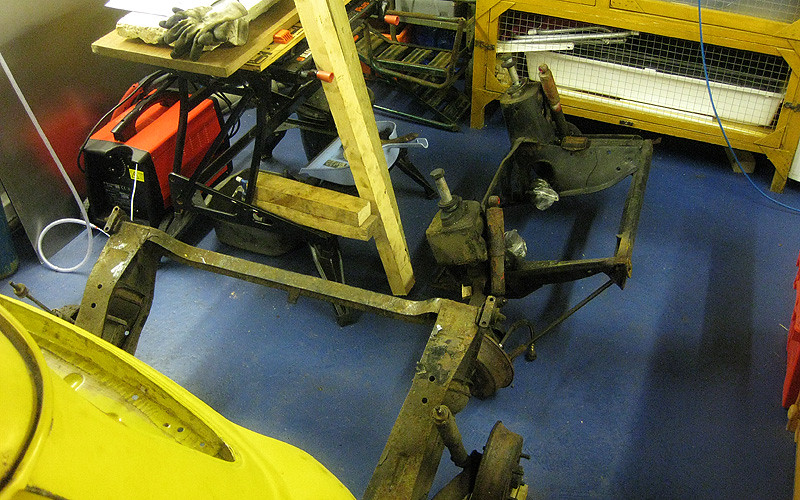
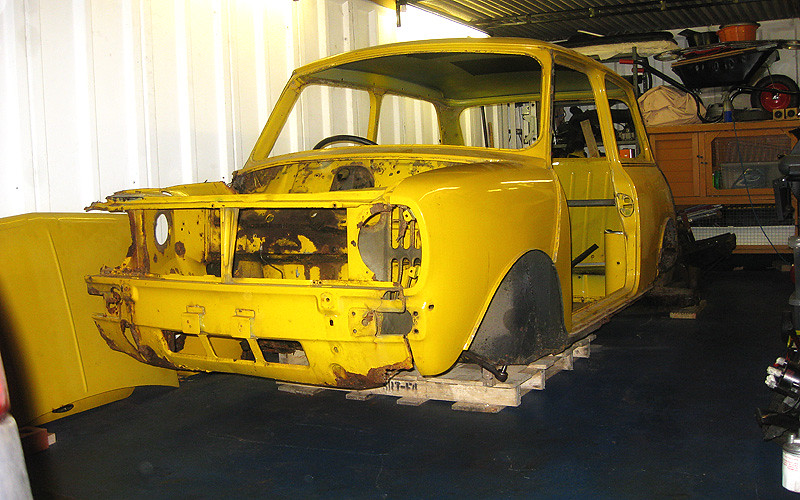
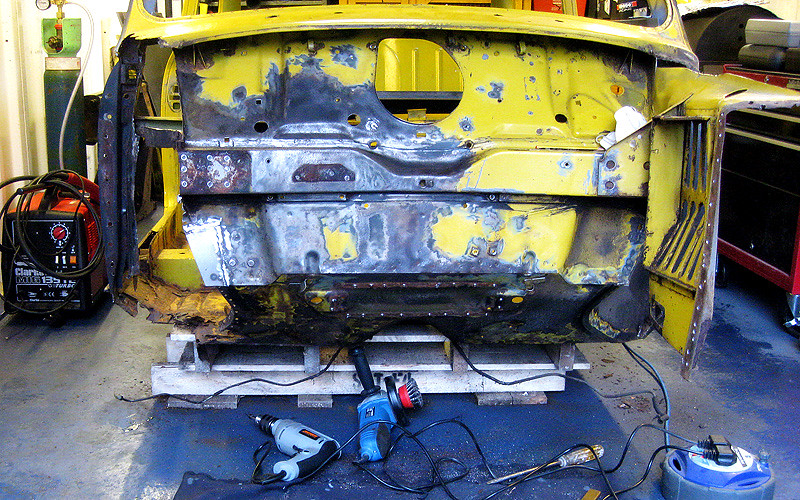
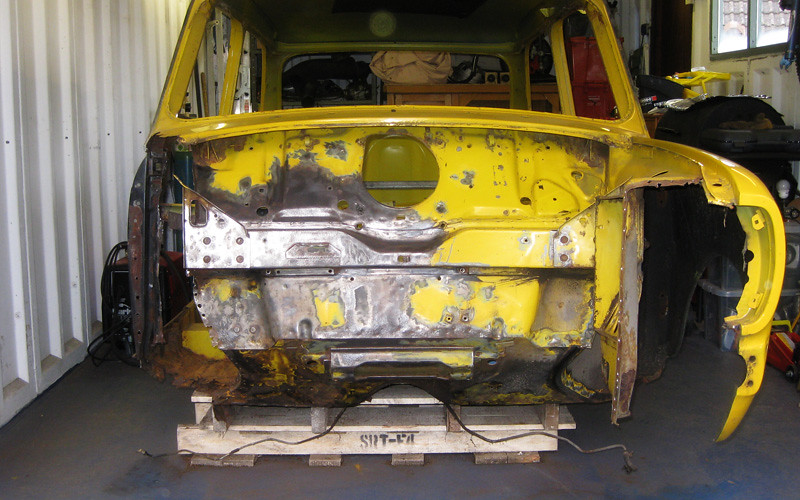
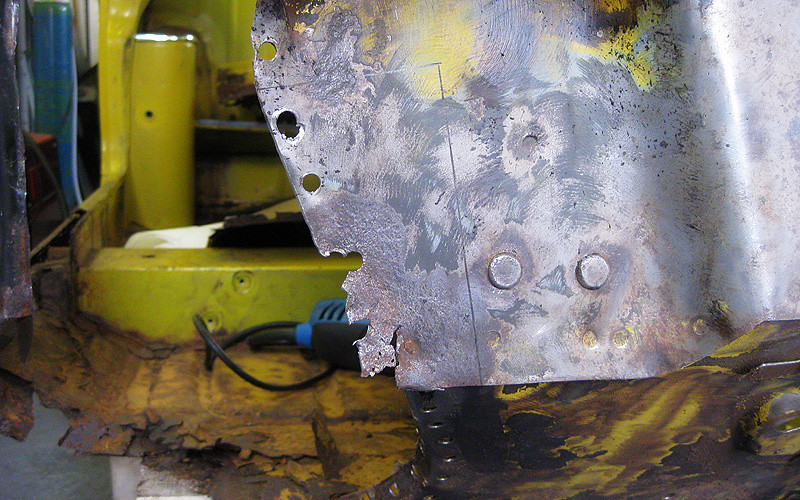
Today, the old front panel was in my way, so it got the chop. Yes it would have been a good idea to remove the fuel and brake lines before lowering the car onto the pallets. Live and learn.

Posted Image

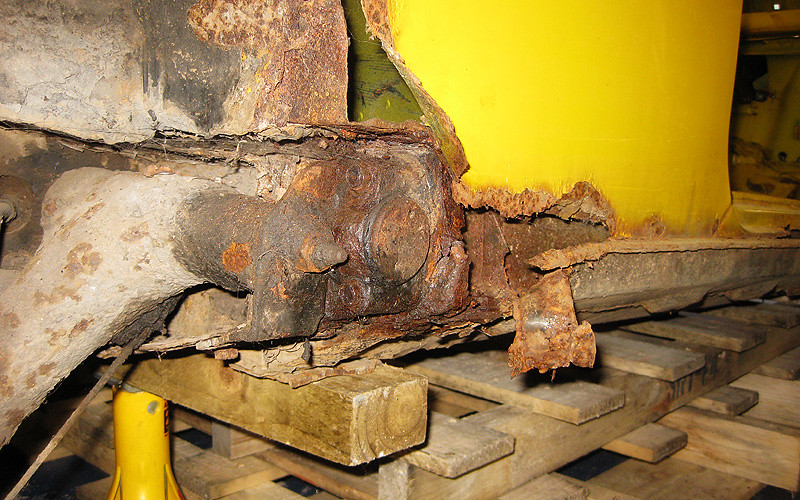
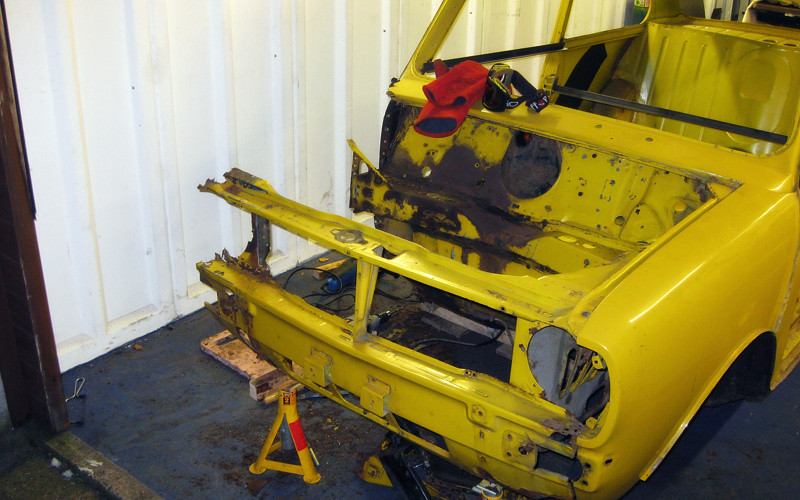
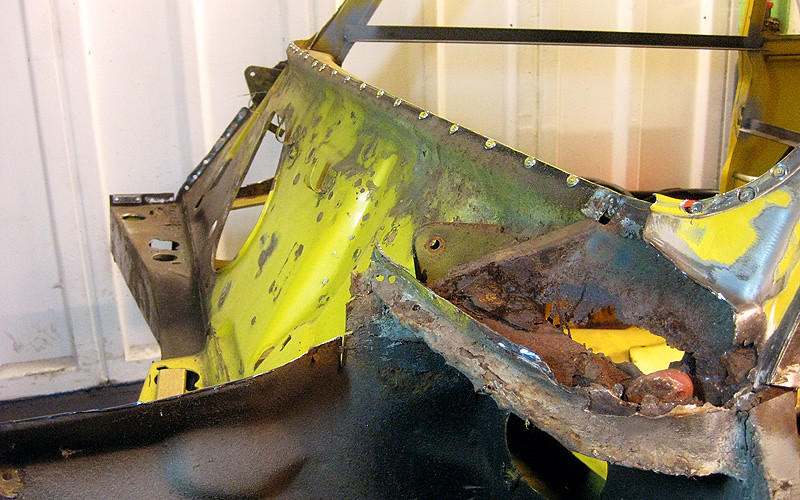
Now I need some advice! I started wire brushing the areas of the bulkhead that had been corroded by brake fluid and rust over the years, and it now looks like this...
Posted Image
Posted Image

My question is: if I clean off all the visible surface rust and treat the metal (kurust), will that be enough, or is this area doomed? The surface of the metal is a bit rough and pitted, but it doesn't appear to be excessively thinned. I don't want to have to replace the bulkhead for obvious reasons, but I'm a bit worried that if there is rust in all the nooks and crannys its just going to come back to haunt me pretty quickly. WHAT DO YOU THINK, TMF? I've noticed some people have taken off the braces to the inner wing and engine damper mount just to clean off the rust behind them. Would I be daft not to do this too?

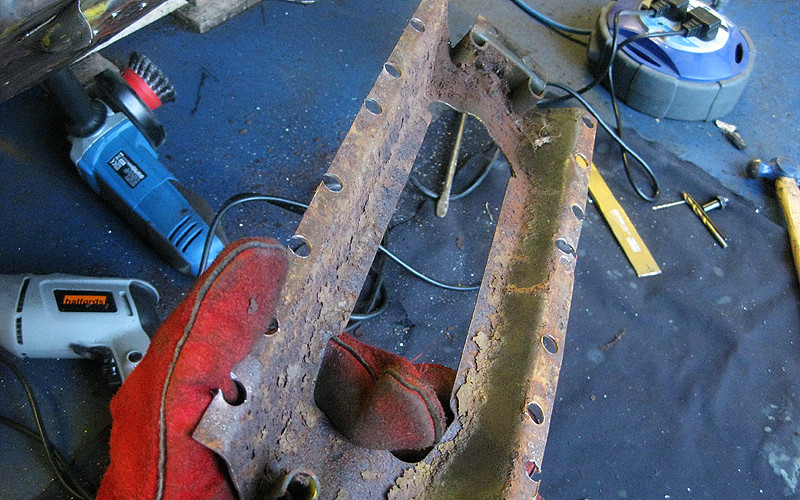
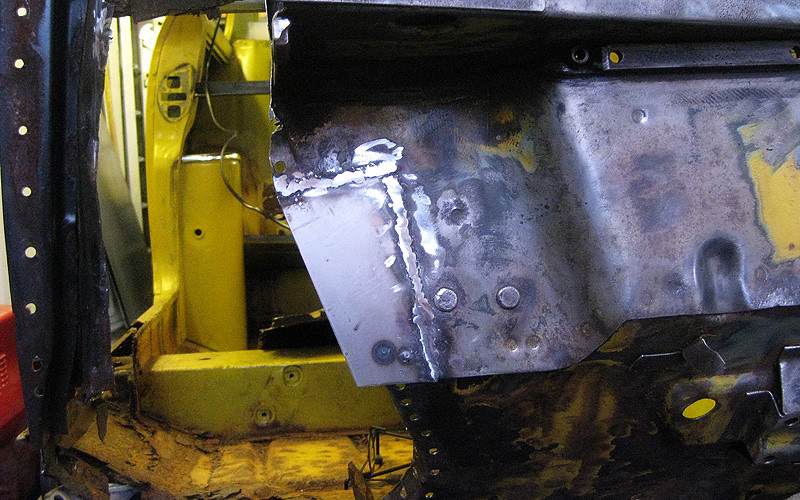
In the meantime while I was getting stressed about that, I made my first sheet metal repair! Whoop!
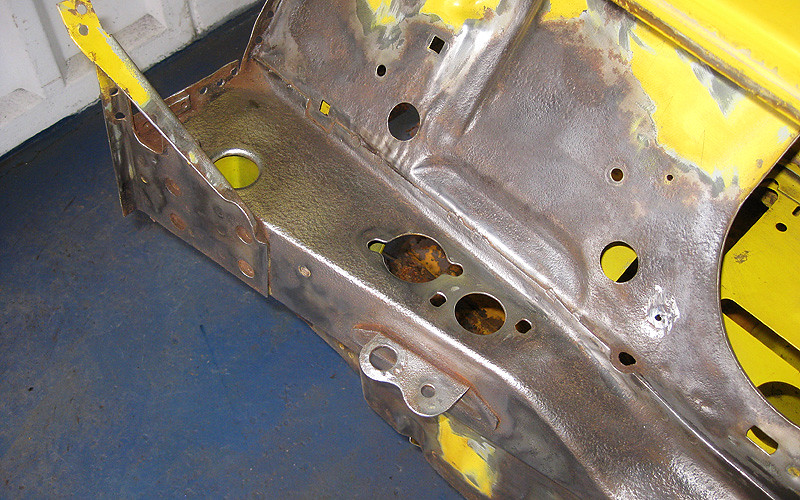
Offending area marked to be cut:
Posted Image

Chop chop!
Posted Image

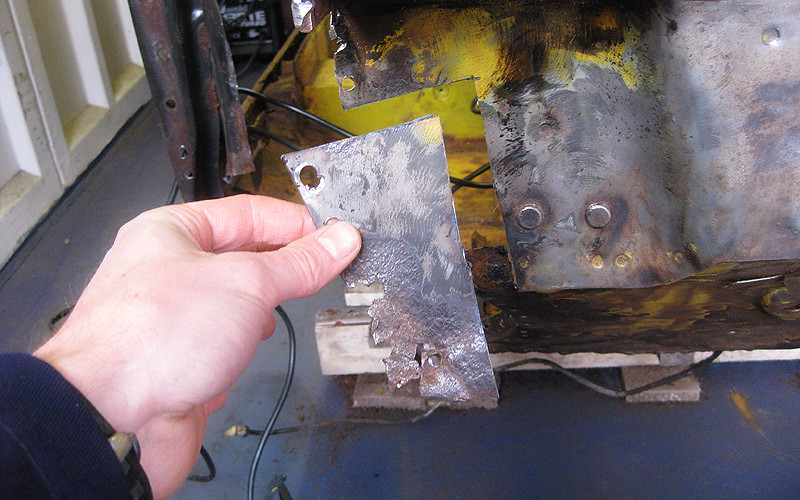
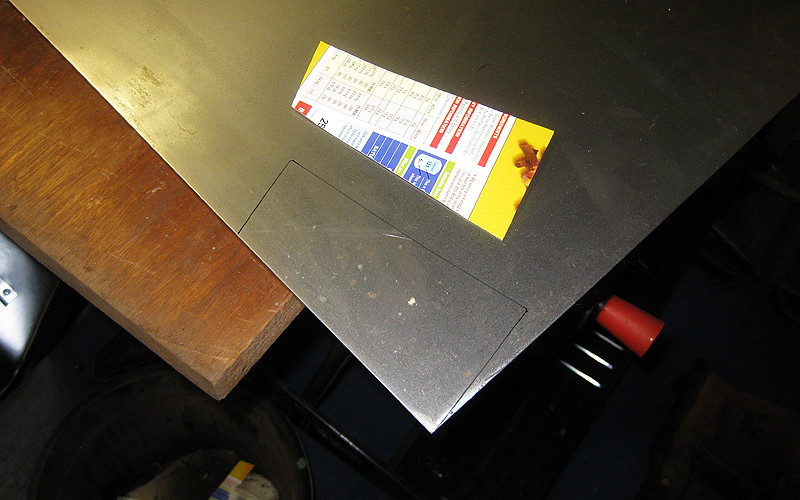
Pro-style card template made and sheet marked out:
Posted Image

Repair section dry-fitting:
Posted Image

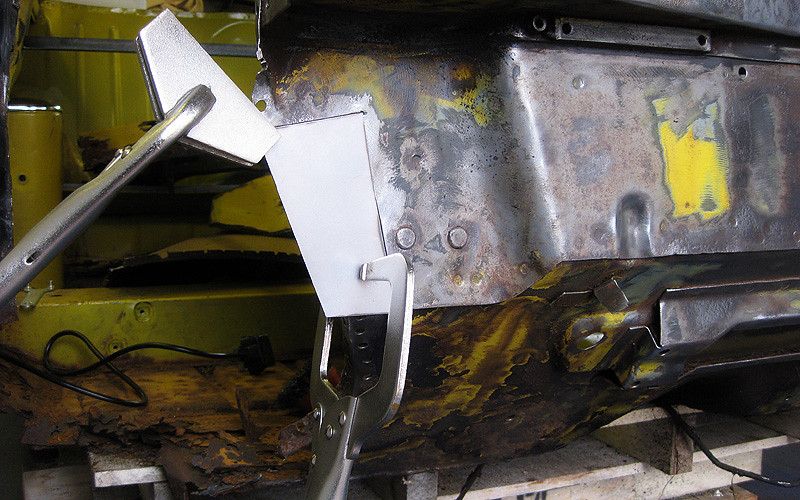
Tacks! (Note the old floor in the background. There must be about 10 layers!)
Posted Image

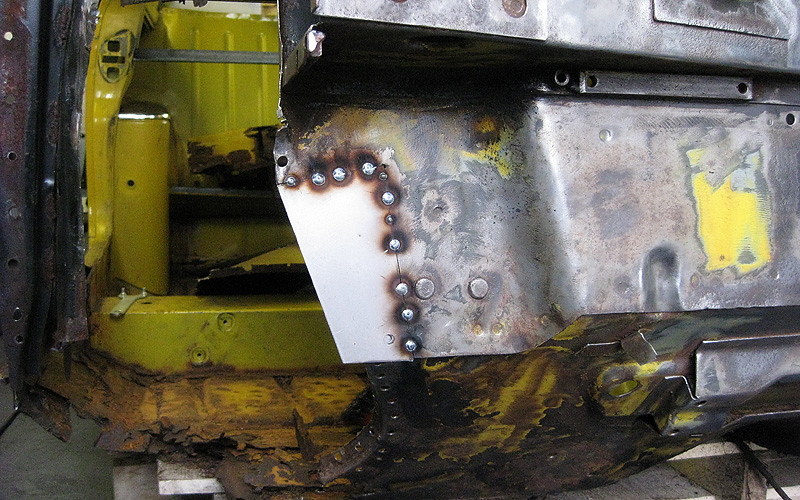
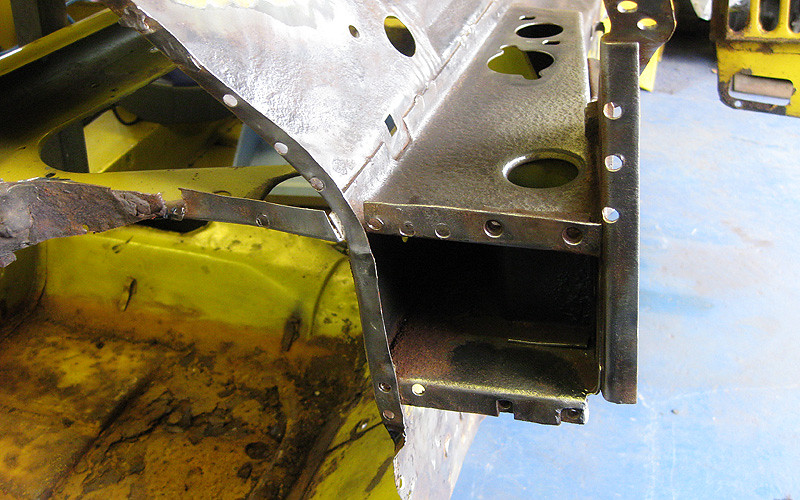
Slightly rough but functional seam weld:
Posted Image

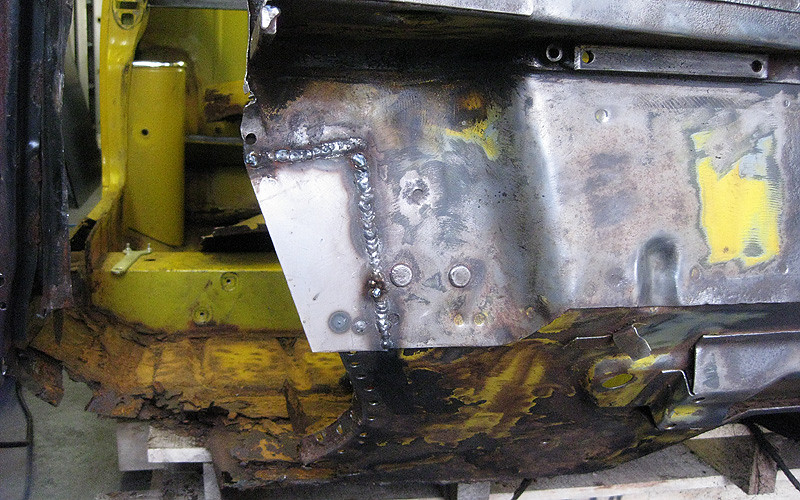
Dressed down a bit, but not immaculately, as it won't be seen. (Not on this side anyway.)
Posted Image


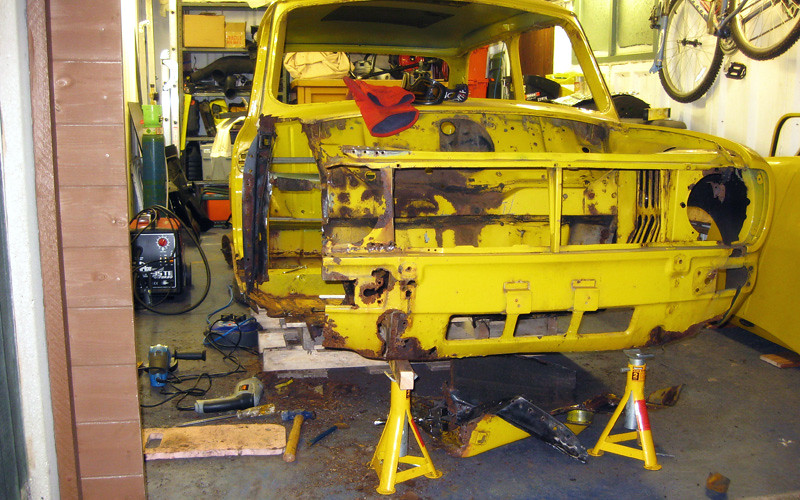
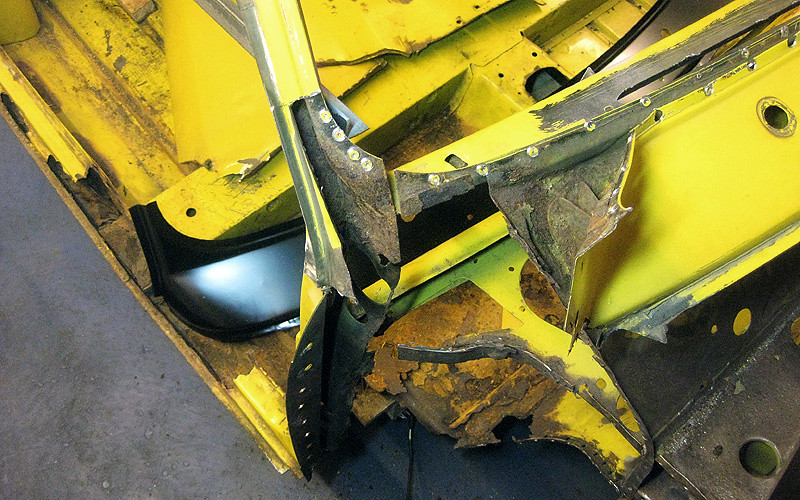
As for what to do next, I really need to get rid of the knackered OS scuttle corner to be able to even test-fit my new inner wing. The old door post is also in a worrying mess (dodgy bare welds badly rusted) so that might have to go too, which will require much more bracing if I'm to have any hope of keeping the car mini-shaped. I will also need to source (or fabricate? lol!?) a bonnet hinge bracket and surrounding area as that rotten too.

#40 willyg

willyg

    Mini Mad

  • Noobies
  • PipPipPipPip
  • 136 posts
  • Local Club: AMOC

Posted 22 December 2010 - 05:04 PM

nice work dude, enjoyed reading this and look forward to more, as you seem to in a very similar position to me but with a lot more work to do! erk :S. but i have work to do on a one i have bought and have the only thing i have done to a mini so far is adjust the hi-los so much reading is required to learn how to do the rest. But it would seem you have a good bit of confidence to have a go anyway!! nice one!

#41 willyg

willyg

    Mini Mad

  • Noobies
  • PipPipPipPip
  • 136 posts
  • Local Club: AMOC

Posted 22 December 2010 - 05:04 PM

i have a clubby too, another reason why i like this... :lol:

#42 myredmini

myredmini

    My Mummy Says It's OK

  • TMF+ Member
  • PipPipPipPipPipPipPipPipPip
  • 3,211 posts
  • Name: Dan
  • Location: Teesside
  • Local Club: BOG MOG

Posted 22 December 2010 - 05:27 PM

Looking good, glad your saving it, keep up the brilliant work :lol:

Dan..

#43 malcs_miniturbo

malcs_miniturbo

    Super Mini Mad

  • Members
  • PipPipPipPipPipPip
  • 602 posts
  • Location: swindon

Posted 22 December 2010 - 06:39 PM

nice work mate im in the middle of doing mine welding ect so no how hard it is brill work

#44 rich2

rich2

    Speeding Along Now

  • Members
  • PipPipPipPipPip
  • 351 posts

Posted 30 December 2010 - 09:20 PM

OS wing off! Steering rack bracket off! Other little rust traps OFF! (santa brought me a spot weld drill bit for christmas)
Posted Image

mmmm. crusty. I plan to clean bits like this up, kurust and paint, then stick them back on.
Posted Image

This is my first piece of sheet metal fabrication. I think it went quite well for a total amateur!
Posted Image

It was becoming clear that the scuttle had to come off to fit the inner wing. I'd been umming and arring about just getting repair panels for the corners, but in the end I splurged the extra cash on a full heritage scuttle so that I wouldn't have to risk any welds in the middle not being perfect. At this stage, I've got absolutely not idea how I'm going to treat the rust in the windscreen pillar! eek.
Posted Image

This is where I left it today. Hopefully this will be the last major chunk to come off before I can start rebuilding the near side.
Posted Image

#45 ryan22_lgm

ryan22_lgm

    One Carb Or Two?

  • Traders
  • PipPipPipPipPipPipPip
  • 1,478 posts
  • Location: woolacombe, north devon
  • Local Club: north devon mini register

Posted 30 December 2010 - 11:02 PM

i love projects like this plenty of pictures and good descriptions cant wait for the next update! ps i like the colour of this clubby :P


0 user(s) are reading this topic

0 members, 0 guests, 0 anonymous users