Jump to content


Photo
- - - - -

1982 Austin Mini - Project Who?


  • Please log in to reply
848 replies to this topic

#121 JonnyAlpha

JonnyAlpha

    Up Into Fourth

  • Members
  • PipPipPipPipPipPipPipPipPip
  • 2,744 posts
  • Location: North Devon
  • Local Club: Exmoor Minis

Posted 24 August 2014 - 04:28 PM

Thought I'd add a little more on the Electrolytic Rust Removal, a quick search on Google will bring up loads of informative guide so I won't go into the detail suffice to say with a bucket, some wire, a battery charger, water, soda crystals (Washing Soda) and some scrap metal the results are fantastic.

Just ensure that you get the positive and negative connections the correct way around or you will scrap the piece you are trying to clean.


Here's the set up at the end of the second phase:


IMAG6462_zps30d82a79.jpg


Here's the rust and grunge build up on the waste metal:


IMAG6464_zpsea44c332.jpg


And here are the brackets that fit on the back of the backplates and the backplates after an overnight session in the vat:


IMAG6465_zps19d43fbb.jpg


IMAG6466_zps7da4dbc0.jpg


IMAG6467_zpsed39f402.jpg


And here is the backplate after being washed off in cold water and scrubbed with a nylon brush, with a little work with a wire brush. The wire brush is used to remove the bits that have lifted but not fallen off:


IMAG6468_zps95a8d9b4.jpg


Really impressed with the results, back to good clean metal. There is a little area under and around where the Brake Cylinder fits in so another couple of hours will probably remove that.


Here is a close up of the area concerned, it also shows how the rust deep in the pits gets shifted, absolutely impossible with a wire brush and even if it was you would remove so much good metal along the way.


IMAG6469_zps072839aa.jpg


As I didn't have time to bung them in again once they where dried off off sprayed them up with WD40 (very prone to rust in this state) wrapped them in a poly bag and newspaper and stashed them away.


Here are the brackets, good enough to paint:


IMAG6471_zps9923e08b.jpg


And here is a pic of the waste metal showing all the crap that has come off of the Backplates, i'll clean it off and re-use it on the next batch:


IMAG6472_zpscd744d9a.jpg


Edited by JonnyAlpha, 24 August 2014 - 05:19 PM.


#122 Down&Out

Down&Out

    The King Of Retro Cool

  • Traders
  • PipPipPipPipPipPipPipPipPip
  • 4,833 posts
  • Location: -

Posted 24 August 2014 - 07:22 PM

All you need is a skip and the worlds biggest battery charger and you could dip an entire shell!


#123 JonnyAlpha

JonnyAlpha

    Up Into Fourth

  • Members
  • PipPipPipPipPipPipPipPipPip
  • 2,744 posts
  • Location: North Devon
  • Local Club: Exmoor Minis

Posted 25 August 2014 - 07:26 AM

All you need is a skip and the worlds biggest battery charger and you could dip an entire shell!

Don't give me ideas :-)


#124 JonnyAlpha

JonnyAlpha

    Up Into Fourth

  • Members
  • PipPipPipPipPipPipPipPipPip
  • 2,744 posts
  • Location: North Devon
  • Local Club: Exmoor Minis

Posted 25 August 2014 - 07:02 PM

Not a good day today, raining for most of it so as I could not empty the garage working conditions were very cramped.

I kept bumping into things, banging my head and knocking things over, oh and don't ever leave an open container of old thinners and paint laying around as no matter where you put it you will knock it over, which I did. Worst thing was some of it landed on one of the drums I paint yesterday stripping some of the paint off!!!!!


Anyway I laughed all of these mishaps off as you do :-)


So on with the Battery Tray.


Cut and fitted the front end:


IMAG6504_zps8ec2e411.jpg


Then I measured out the piece needed for the sides, after I cut the piece out and started to straighten up the edges it was a little short at one end by about 5mm so I had to tack on an extra bit:


IMAG6505_zps3b0b80f4.jpg


Here it is welded on and dressed:


IMAG6506_zpscc1c6657.jpg


Next using a Non Woven Fleece Disc I cleaned off the paint (it used to be a security cabinet) and made the first couple of folds:


IMAG6507_zps9f04784f.jpg


Before I started folding I had gone to great lengths to mark up the fold lines making a rectangle box to fit only to realise that the Battery Box is not rectangular with right angled edges it tapers!!! So making this will be more tricky than I first thought.


First test fit:


IMAG6508_zps881e608b.jpg


Then I marked out the indentation in the bottom, I decided not to drill any drain holes:


IMAG6510_zpsb84624bc.jpg


Then using my DIY beating bag I started to form the indentation.

When you start this kind of fabrication it looks a mess but it all works out in the end, here's the piece after the first session with a Ball Pein Hammer:


IMAG6511_zpsbef4cacb.jpg


Then using my bender I started to define the edges:


IMAG6513_zps9e38642b.jpg


Here's the finished edges:


IMAG6514_zps6da9a1b1.jpg


Then I flattened down the area around the edges:


IMAG6515_zps03137d9e.jpg


Then using a round bar I formed the curved ends:


IMAG6516_zps3b77712a.jpg


And here's the finished product ready to fold and fit:


IMAG6517_zpsaee84cec.jpg


 Then I had to finish to pick up the missus from work :-)


Edited by JonnyAlpha, 25 August 2014 - 07:09 PM.


#125 JonnyAlpha

JonnyAlpha

    Up Into Fourth

  • Members
  • PipPipPipPipPipPipPipPipPip
  • 2,744 posts
  • Location: North Devon
  • Local Club: Exmoor Minis

Posted 26 August 2014 - 06:55 PM

Couple of jobs left on the Boot, Battery Box, Rear Valance and Closing Panels and the Fuel Tank Securing Bracket.

Target today was to get the Battery Box completed and try and finish the Rear Valance :-)


I did manage to finish the Batter Box, apart from dressing down and in between times made a start on the Rear Valance.


First of all I ground flush the rear of the Rear Arches and then cleaned off the old Underseal from the Rear Valance with my Heat Gun and then bolted in the Rear Valance Closing Panels and test fitted it:


IMAG6518_zps5635c4f7.jpg 

The LH side fitted fine but the inside of the RH side Closing Panel was way out?

After a lot of head scratching and adjusting the panel one way I reset it and re-folded the top of the inner closing part to get the thing to sit forward and that did the trick.


I then took it all apart and focused on the Battery Box.


I test fitted and rather than trim down my repair piece I trimmed down the old Battery Box to use as all the new materiel as poss, then I drilled all the Spot Weld holes and painted the inside of the folds with Weld Through Primer:


IMAG6523_zpsd9091c9e.jpg


Then holding the new piece in place with my 1 x Panel Clamp (I really need to make more) I started the Butt Welding, I decided to Butt Weld as I am more confident with my welding now even on the 1mm stuff and it would save gas and welding wire and time.


IMAG6524_zps6c40e937.jpg


Before Welding I decided I needed to hold the ends tighter so drilled a few holes through the Spot Welds and used some Self Tappers:


IMAG6529_zpsea26bae3.jpg


As you can see there is one piece missing, this came in handy for inserting a small pair of Mole Grips.


Then I tacked the piece in place adjusting along the way where required:


IMAG6526_zps7ba106ae.jpg


Then gradually going around the piece I joined up the dots and Spot Welded the Ends:


IMAG6530_zps8abf6dc1.jpg


IMAG6532_zps7ad3d4a2.jpg


Last job was to make a small triangle piece for the missing bit and weld it in place, here's the finished product, well happy with the end result but took a lot longer than anticipated but then it always does:


IMAG6535_zps05c06354.jpg


And no more rusty Battery Box :-)


IMAG6534_zpsa3d7de83.jpg


#126 JonnyAlpha

JonnyAlpha

    Up Into Fourth

  • Members
  • PipPipPipPipPipPipPipPipPip
  • 2,744 posts
  • Location: North Devon
  • Local Club: Exmoor Minis

Posted 01 September 2014 - 09:36 PM

Had a couple of days working on the Mini on and off between family visits. 

After test fitting the Rear Valance I marked up the position of the Spot Weld Holes and drilled them:


IMAG6562_zps4008a2ba.jpg


Then I started to give the Rear Valance a final clean for painting, it had several rusted areas that needed attention as well:


IMAG6563_zps602213d2.jpg


IMAG6564_zps16076ab5.jpg


 IMAG6568_zps67ee47dc.jpg


IMAG6569_zps5b8a2676.jpg


I also had to repair an area that got damaged when I was removing the remnants of the Boot Floor from the Valance:


IMAG6570_zps2c5e0047.jpg


Using a piece of flattened Copper Pipe as a heat sink I welded it:


IMAG6571_zps13f94cb5.jpg


And dressed it:


IMAG6572_zps9612e51c.jpg


Also had to check on my parts that had been cooking in Citric Acid (latest rust removal test):


IMAG6573_zps4ab412aa.jpg


Initially they looked pretty good, but still some rust that I wanted rid of:


IMAG6578_zps338e2326.jpg


IMAG6579_zpsc60f30dd.jpg


The Handbrake Cable Brackets came up fine:


IMAG6580_zps5382b9f4.jpg


I also tried the end of the Rear Valance that I was not happy with:


IMAG6581_zps60def323.jpg


This stuff really works, there were a few areas along the same edge but I didn't have a bucket big enough to hold the valance so I improvised using some shelving, cardboard, wood and polythene sheet:


IMAG6590_zps3d69d35f.jpg


IMAG6586_zpsca235663.jpg


The results after a couple of hours were fabulous:


IMAG6587_zps33f4526e.jpg


IMAG6588_zpsc567e666.jpg


All rust removed!!


Then I masked it up and sprayed up the mating areas with Weld Through, the other areas will be painted with Epoxy Primer, Stone Chip and Top Coat:


IMAG6594_zps266c2316.jpg


Today I set myself the task of cleaning up the inside of the boot and the underside ready for primer, I really need to get some paint in it as time is running out and all my repairs are starting to rust.


These two tasks took most of the day especially as I also had to weld up some pin holes that appeared as a result of dressing down some welds: 


Here are the before shots


IMAG6597_zpsb56e7947.jpg


IMAG6598_zpsc19ac4e6.jpg


And here is one after shot (showing two holes in the floor that I have now welded up:


IMAG6602_zpsc2263931.jpg


There are still a couple of rusty areas under the boot which I will attack with Bilthamber Deox Gel and I still need to sort out some clips / attachments for the Fuel / Brake Pipes and the Battery Cable.

I also was not happy with 4 x Metal Plugs that are located in the seat so I popped them out and I need to weld some patches over them.


Still need to remove the black paint from the underside of the Arches and Boot Floor Repair Panel, this stuff on the Magnum Panels wipes off with Thinners.


After shining my Halogen Work Lamp underneath here are the pin holes marked with chalk:


IMAG6603_zps41e9ab91.jpg


Had a bit of a blow through that I could not weld shut so I had to make a patch:


IMAG6604_zps1dcf9408.jpg


IMAG6605_zpse879b361.jpg


IMAG6606_zps08a07935.jpg


I ran out of time today and could not get any paint on, I can't get back at it for a couple of days so to avoid any flash surface rust I dusted the bare metal down with a light mist of Acid Etch (This should clean off with Thinners so I can Epoxy)


Here's a pic of the boot:


IMAG6607_zps385decbc.jpg


And here's a shot of the back end:


IMAG6608_zpse355d5a7.jpg


I still need to fit the Valance, but need to work out whether to fit it before painting or paint with it off then weld it on? But I need to paint inside the closing panels with Epoxy and Top Coat? 


What I may do is clean up the Closing Panels (Magnum Black Paint) test fit again and weld the Closing Panels in place, paint and then fit the Valance after the first coat of Primer?


#127 Ben_O

Ben_O

    Mill Road Garage

  • Paint Doctor
  • PipPipPipPipPipPipPipPipPipPip
  • 9,781 posts
  • Location: Isle of Wight

Posted 02 September 2014 - 09:11 PM

this is shaping up really well!


What did you soak the valance in? Vinegar or actual citric acid?


Ben


#128 JonnyAlpha

JonnyAlpha

    Up Into Fourth

  • Members
  • PipPipPipPipPipPipPipPipPip
  • 2,744 posts
  • Location: North Devon
  • Local Club: Exmoor Minis

Posted 02 September 2014 - 09:51 PM

this is shaping up really well!


What did you soak the valance in? Vinegar or actual citric acid?


Ben

Ben;


Its Citric Acid Powder, I got it from a local Hardware Shop, cheaper from Ebay. Its used in Homebrew and cooking? Basically 1 x Teaspoon is equivalent to a whole Lemon :-)


#129 Ben_O

Ben_O

    Mill Road Garage

  • Paint Doctor
  • PipPipPipPipPipPipPipPipPipPip
  • 9,781 posts
  • Location: Isle of Wight

Posted 02 September 2014 - 10:01 PM

so how much would you need in a builders bucket for instance?


I am very interested in this as i tried vinegar and although it works ok, it's slow and not too through 


#130 JonnyAlpha

JonnyAlpha

    Up Into Fourth

  • Members
  • PipPipPipPipPipPipPipPipPip
  • 2,744 posts
  • Location: North Devon
  • Local Club: Exmoor Minis

Posted 03 September 2014 - 04:40 PM

so how much would you need in a builders bucket for instance?


I am very interested in this as i tried vinegar and although it works ok, it's slow and not too through 


When I researched it on the Web I found varying ratios suggested from 3% to 10%, I bought a 500 Gram packet from my local Hardware Shop which cost me £4.80.

A 10% solution is 100 Grams per 1Litre of Water, in the end I opted for a 5% solution which worked out at 50 Grams in 1 Litre. 


The stronger the solution the faster it works but I found a 5% solution seemed to work fine but have had to keep at it for a few days to get rid of all the rust, so 10% would have been better.

My Backplates are soaking again now justing getting rid of the last few stubborn bits :-) Once you see it work you want to keep at it.


After its been soaking in the Citric Acid Solution you need to get it out and scrub it with a wire or nylon brush in clean water to remove the grey covering and dry immediately (I used a Hot Air Gun).


Once dry you should paint it soon after to prevent rusting.


#131 Rocket.

Rocket.

    One Carb Or Two?

  • Members
  • PipPipPipPipPipPipPip
  • 1,441 posts
  • Location: UK

Posted 03 September 2014 - 04:52 PM

Nice work ! watching this :D


#132 JonnyAlpha

JonnyAlpha

    Up Into Fourth

  • Members
  • PipPipPipPipPipPipPipPipPip
  • 2,744 posts
  • Location: North Devon
  • Local Club: Exmoor Minis

Posted 03 September 2014 - 05:04 PM

Ok;


I was determined to get some paint on the boot as I have already cleaned up twice to paint but never managed to complete it. First up I had to finish up some last minute welding that had appeared!!


The plugs in the Rear Seat which I had removed last session, here's why I took them out:


IMAG6615_zps000f4152.jpg


I could have renewed them but they are not doing anything so weld them up!!


First I had to remove the sound proofing:


IMAG6613_zps915bc6b4.jpg


IMAG6614_zps136f2b82.jpg


Forgot to take a pic of the welding as my wire ran out!!!


I had to get cracking but it was too late to get any wire so I made a decision to carry on with the painting and weld later, it would mean that a couple of areas of paint would have to be re done but this was only the first coat.


I started to clean the underside and then got called away, when I returned I knew I would only have time to do the inside so this meant the underside would probably flash rust AGAIN !!!!


Cleaning the boot ready for painting took an age, first I had to finish keying all the bare metal and existing paint, then I hoovered and picked out all the crud from the many recesses then wiped with thinners to clean of all the dust coat of primer. And once dry it was ready for painting.


IMAG6616_zpsf6797eb0.jpg


I mixed up 150ml of Epoxy Paint and 25ml of hardener, left it to react for 10 minutes and them brush painted (the recommended method for the first coat on bare metal) I also used a mini roller to get a nice smooth finish.


I didn't cover all of the existing paint as this would have been a waste of time hence the patchy look.


Half way through the painting a Moth appeared (it was dark outside) that was the last thing I needed, I despatched the Moth and closed the Garage Door and Window, but then remembered that this stuff is hazardous!! So even though I had a better than recommended mask I had to open the window and doors  and hope for the best. I should not have worried as I spent a lot of the time chasing brush hairs!!


Anyway at 11:00PM I finished, I was pretty happy with the finish and glad that I managed to finally get some paint on.


Finally some real progress in the right direction :-)


IMAG6617_zps550cc19b.jpg

Oh and today the postman delivered probably the latest few bits for a while, some mirrors and wipers, bought via this Forum, just need to fixing bits for the mirrors:


IMAG6610_zps6072e728.jpg

I have a garage available for the next couple of days so I may actually finish spraying the rest of the Subby and bits finished :-)


#133 JonnyAlpha

JonnyAlpha

    Up Into Fourth

  • Members
  • PipPipPipPipPipPipPipPipPip
  • 2,744 posts
  • Location: North Devon
  • Local Club: Exmoor Minis

Posted 03 September 2014 - 05:05 PM

Nice work ! watching this :D

Thanks Rocket


#134 JonnyAlpha

JonnyAlpha

    Up Into Fourth

  • Members
  • PipPipPipPipPipPipPipPipPip
  • 2,744 posts
  • Location: North Devon
  • Local Club: Exmoor Minis

Posted 07 September 2014 - 09:56 PM

Well its 07 Sep 14 and I have now started my new Job which includes a spell at Uni so the project has had to be laid up for a while.

In order to get to a natural point to halt proceedings I have had to work like 10 men for the last week and although I did not achieve everything that I wanted to I am happy ish with what I have done.


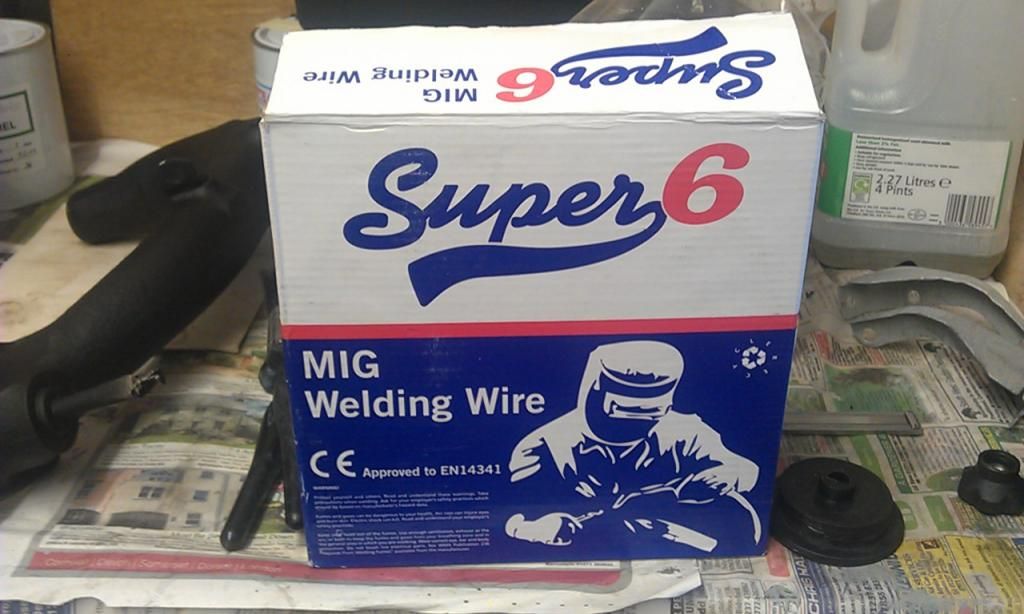
Since the last post I have had two days and late nights hard slog, but working at this rate it is easy to make mistakes and things have been against me. During the last batch of work my welding wire ran out so I had to get some locally, I could get another roll of 0.7Kg Hobby Wire, which is what I have always used, but I thought I'd see if I could use a larger roll, its more expensive but better value for money.


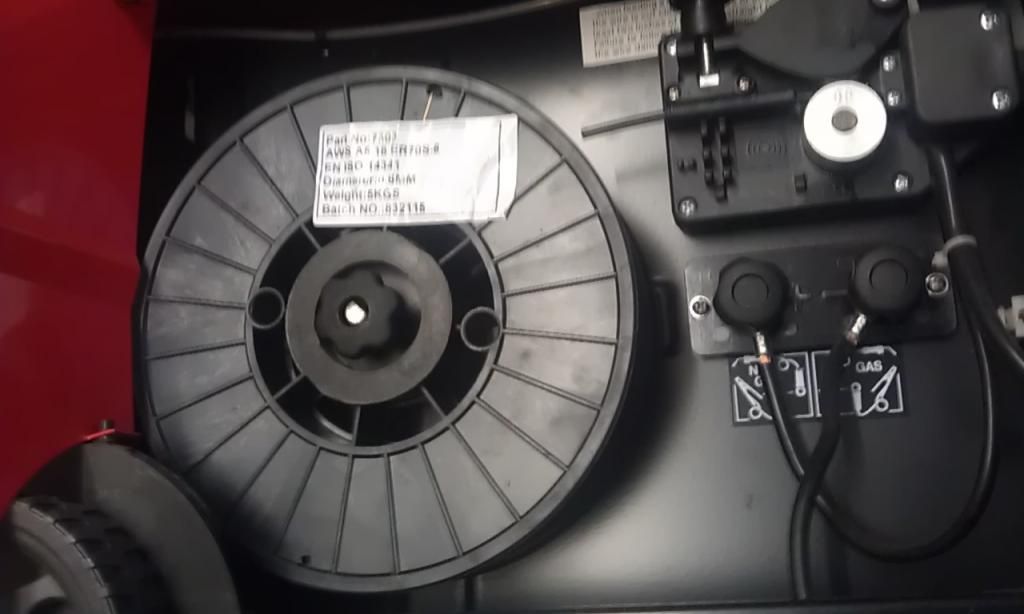
Whilst asking for advice on the Mig Welding Forum on what other brands of welding wire I could use in my Clarke 160EN I was advised of a mod that would allow 5Kg rolls to be used. The mod involved cutting an empty 0.7Kg roll in half and using it as a guid for the larger roll.


The Clarke Hobby Welders take a roll with a centre spool diameter of 15-16mm but the larger rolls have a 50mm hub diameter. As long as the external diameter of the empty roll (where the wire wraps onto) is 50mm you can use an empty roll as an insert.


So armed with a 5Kg roll of Super 6 I set to task:


IMAG6673_zps2a7bd326.jpg


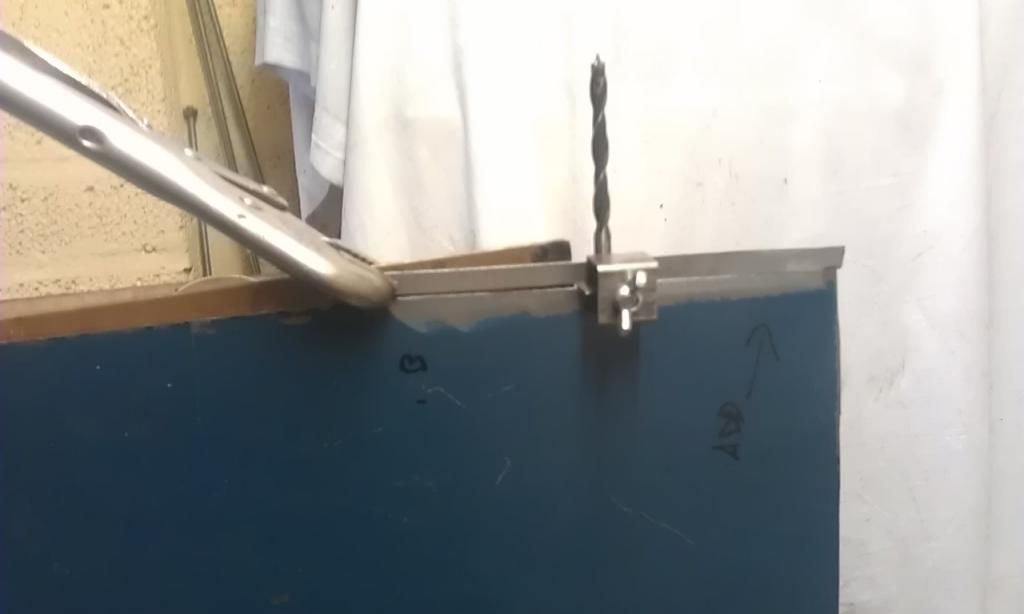
Here's the internal diameter of the Super 6:


IMAG6674_zpse8eb64b2.jpg


And here's the external diameter of the Clarke 0.7Kg Hobby rolls that I have been using:


IMAG6672_zps452064e7.jpg


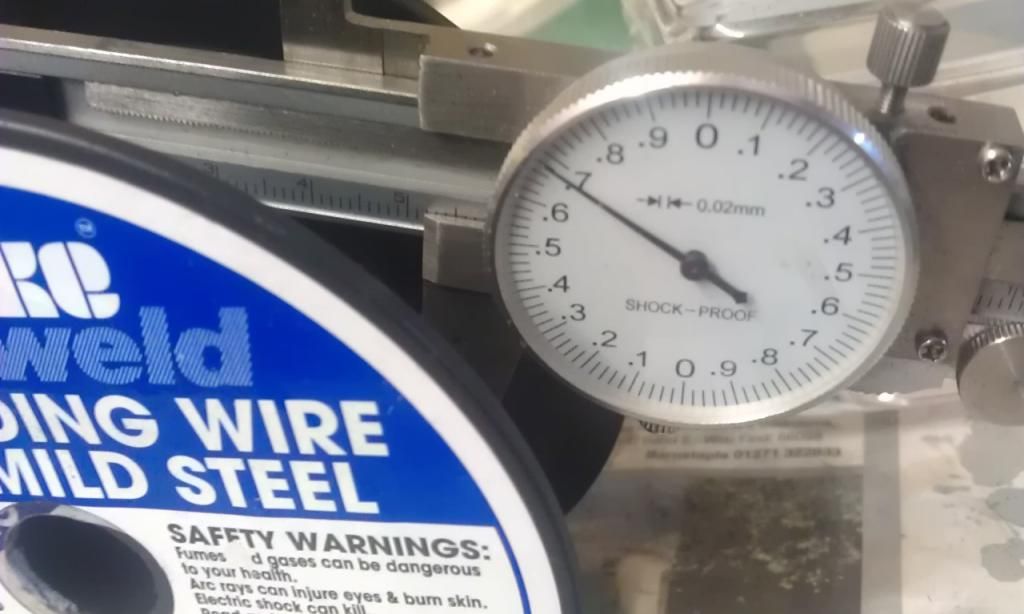
Near enough matched so I cut the empty roll in half:


IMAG6676_zps5fc07118.jpg


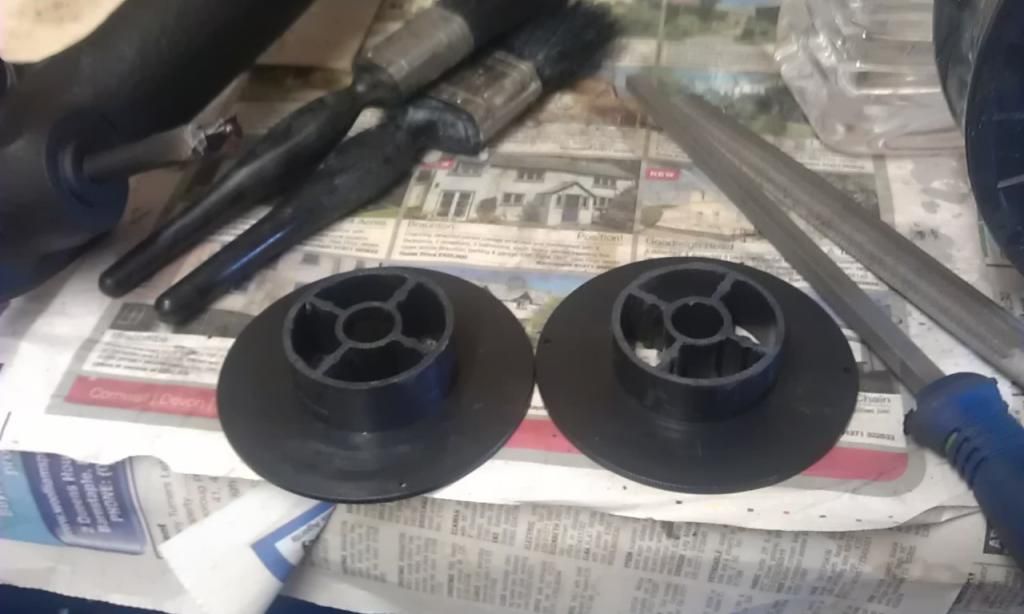
And using the old roll as a guide inserted into the new roll it fitted nicely:


IMAG6678_zps9db43f32.jpg


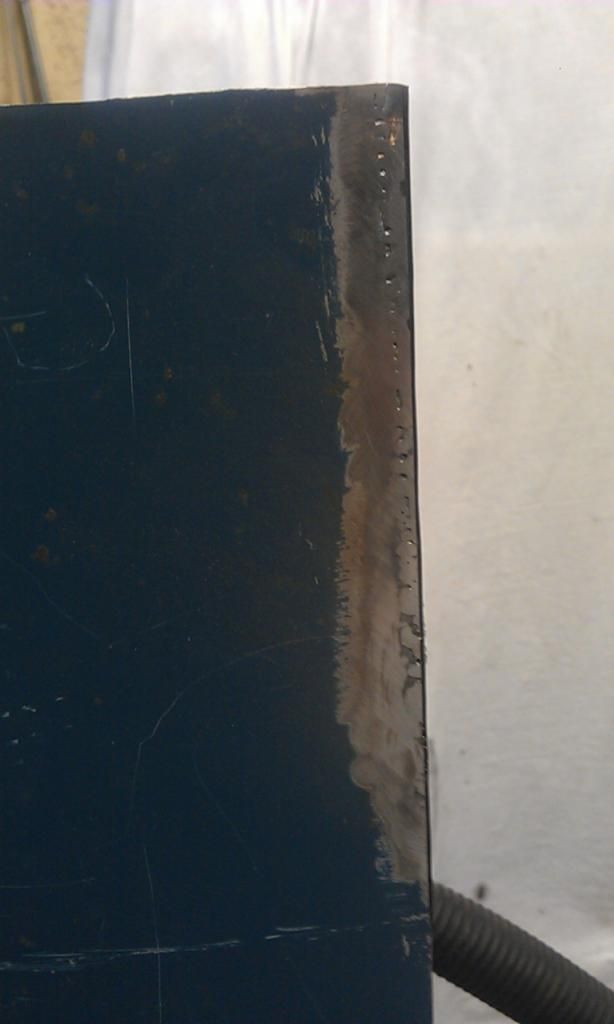
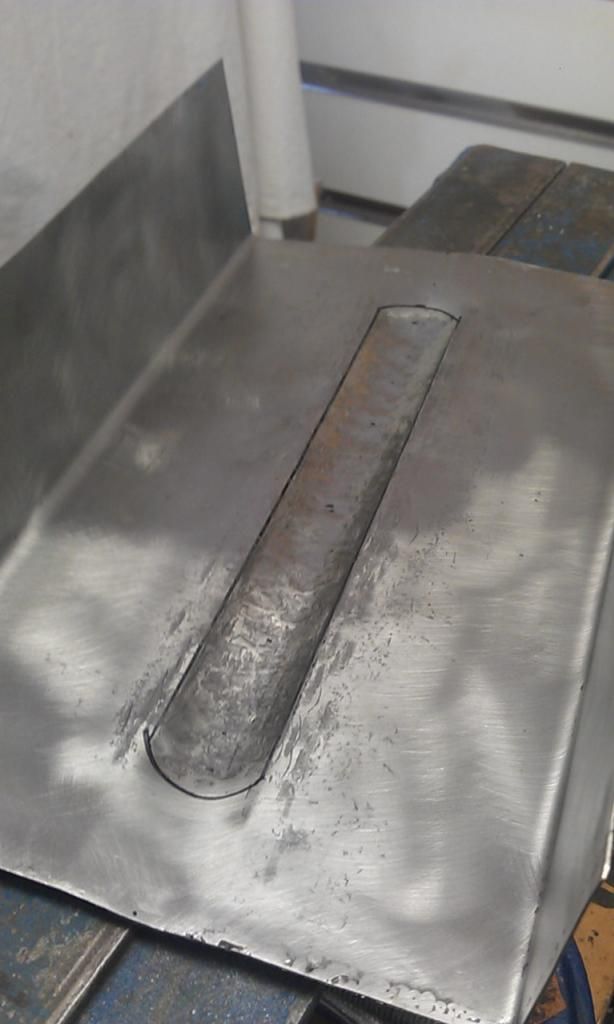
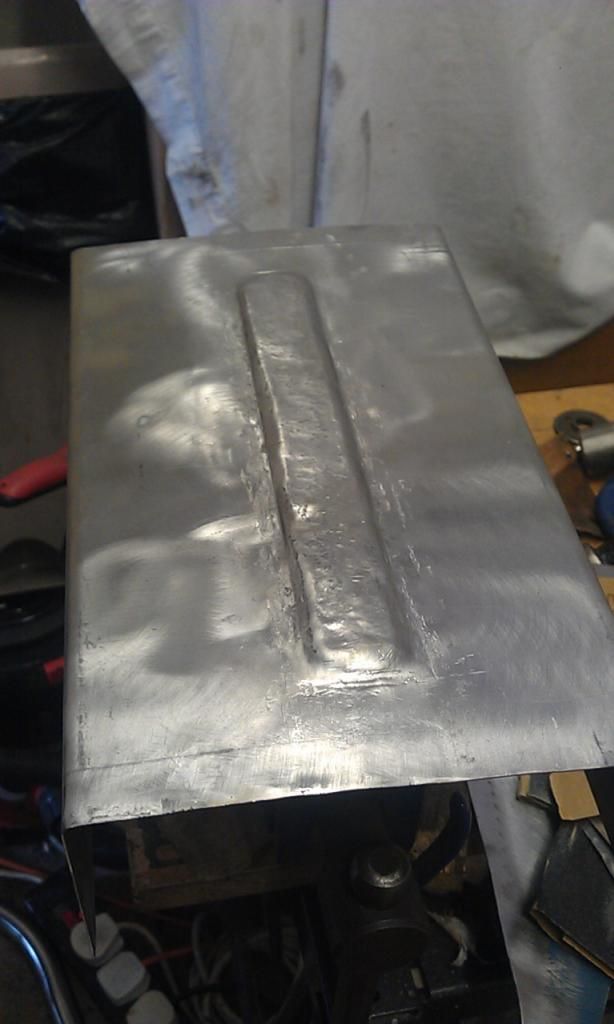
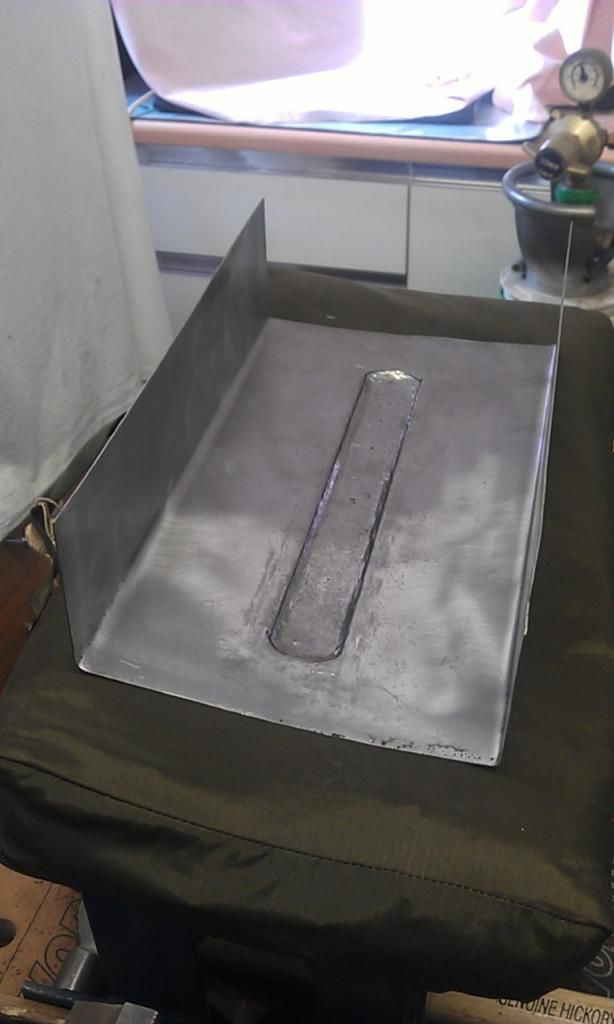
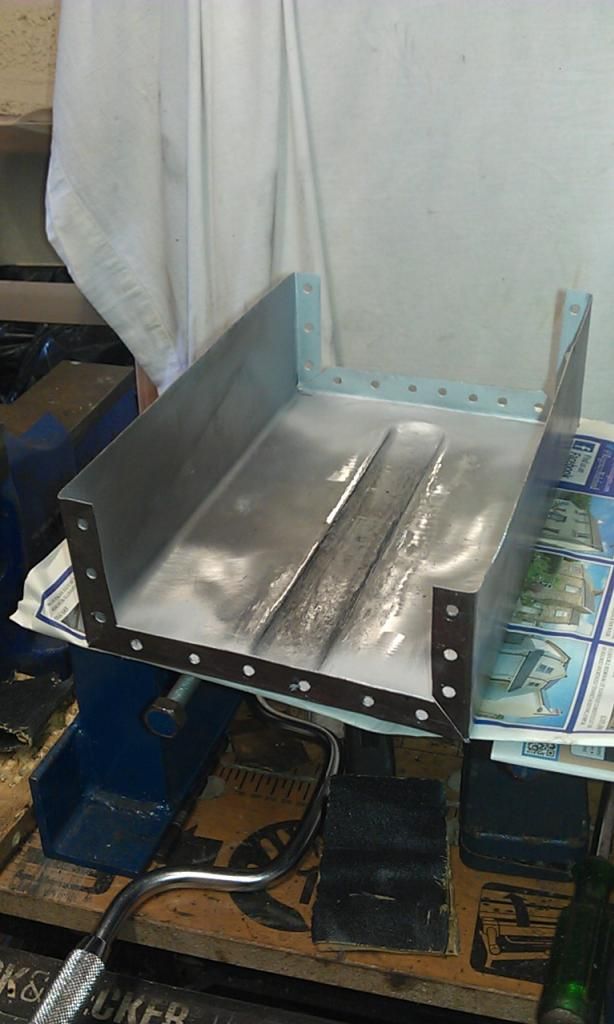
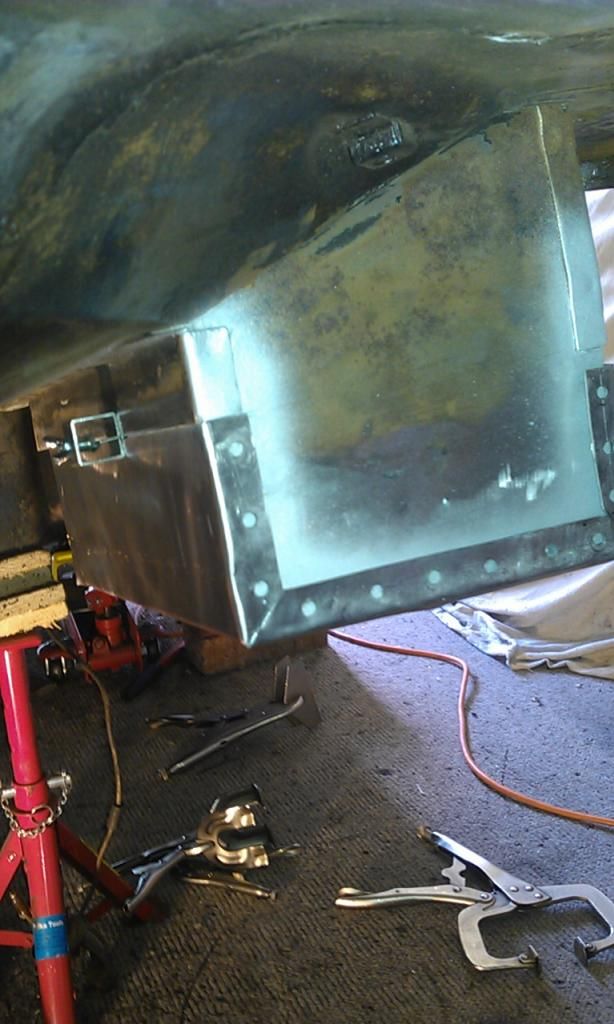
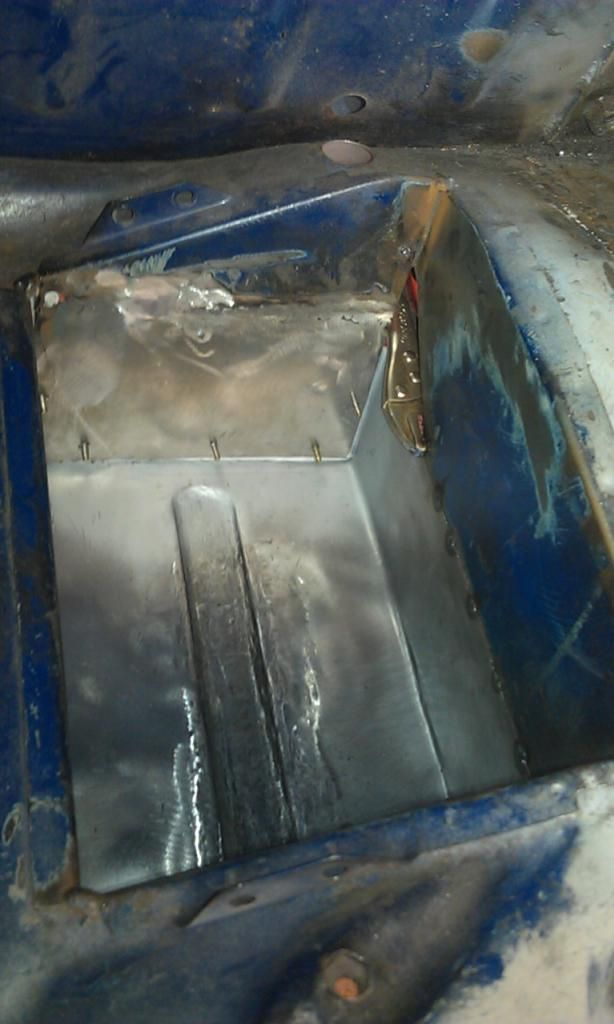
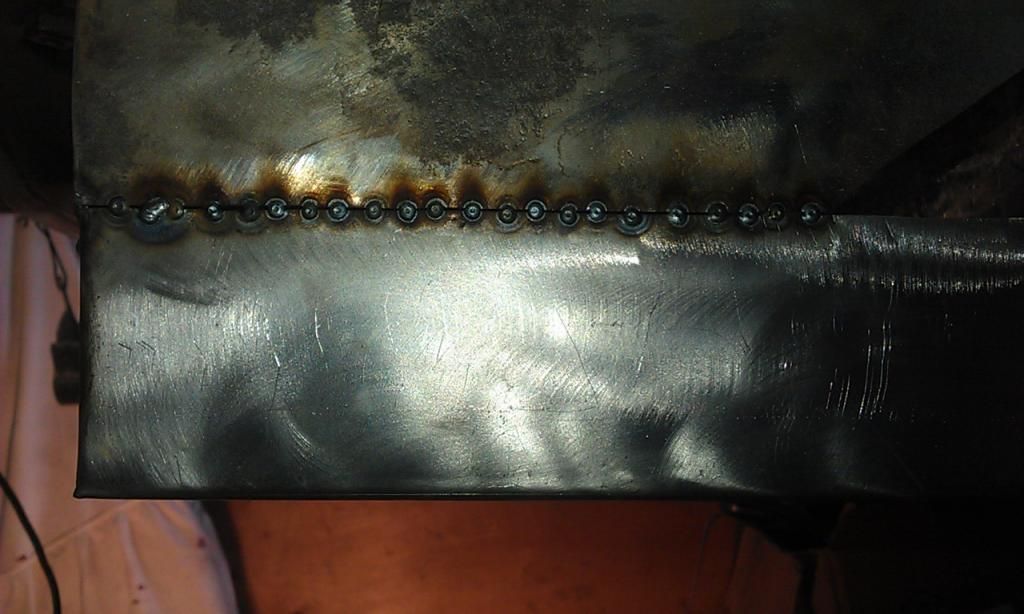
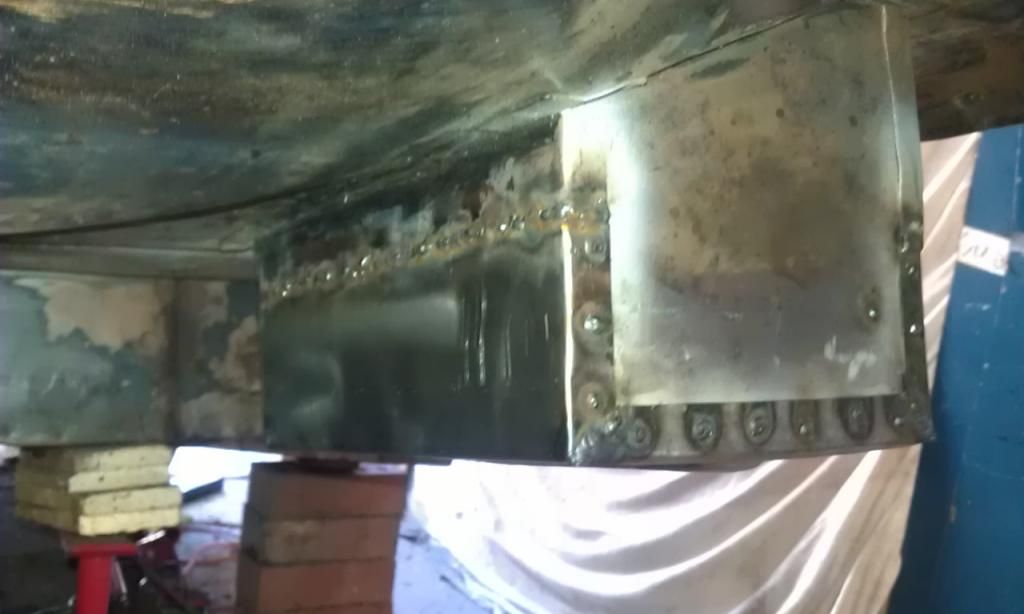
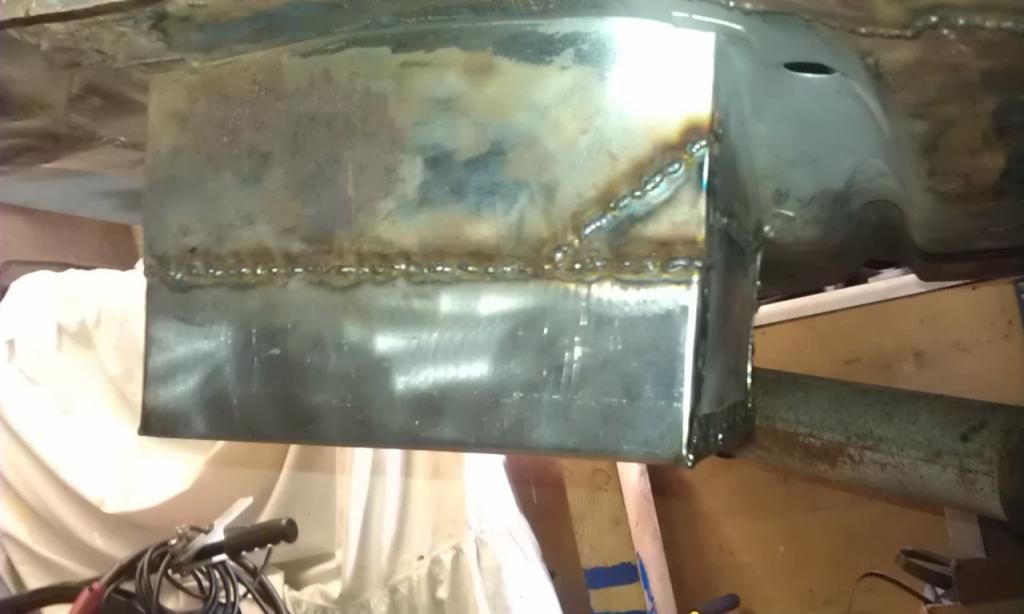
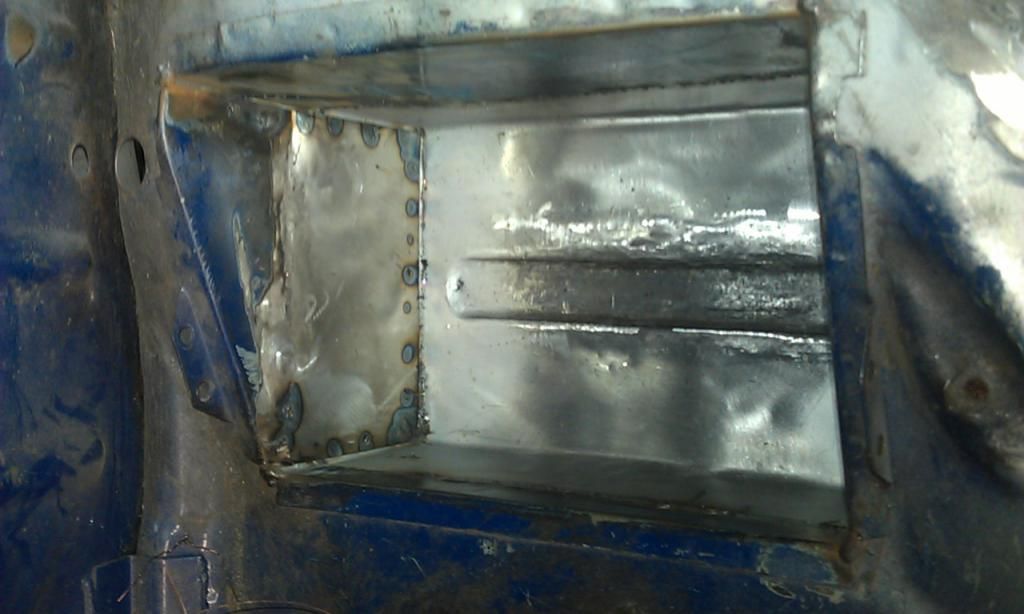
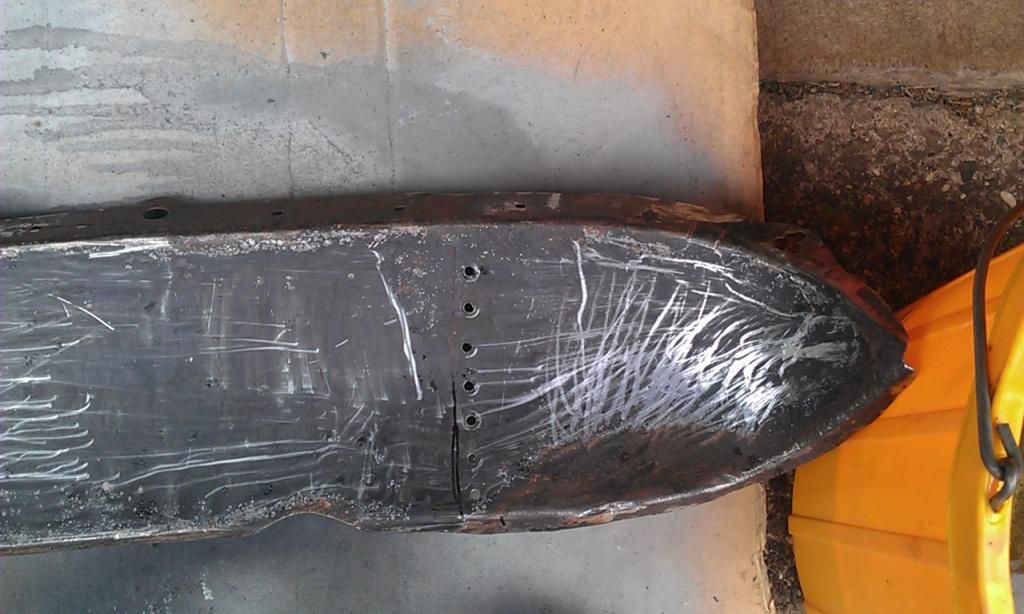
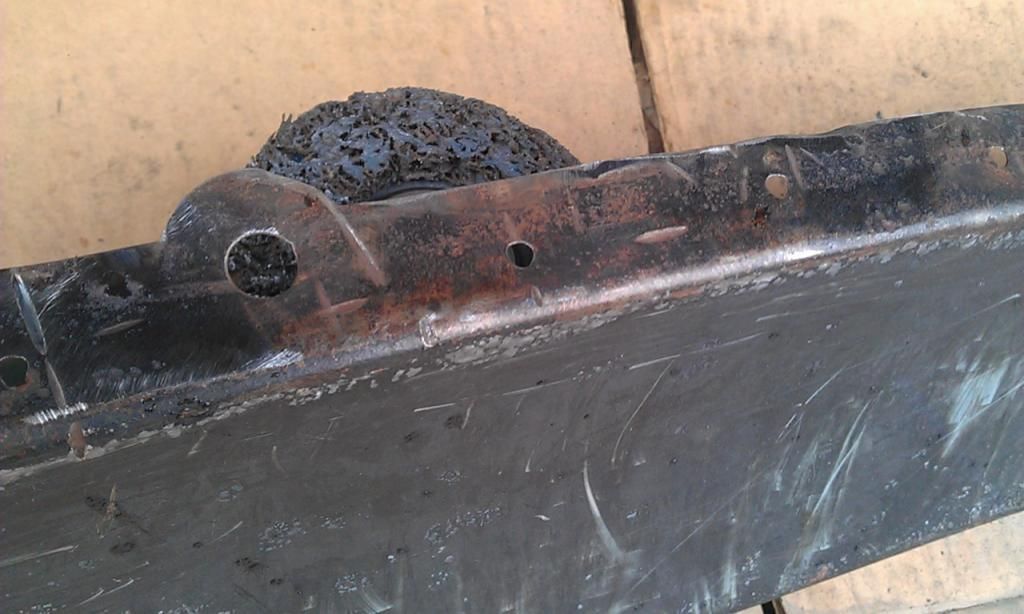
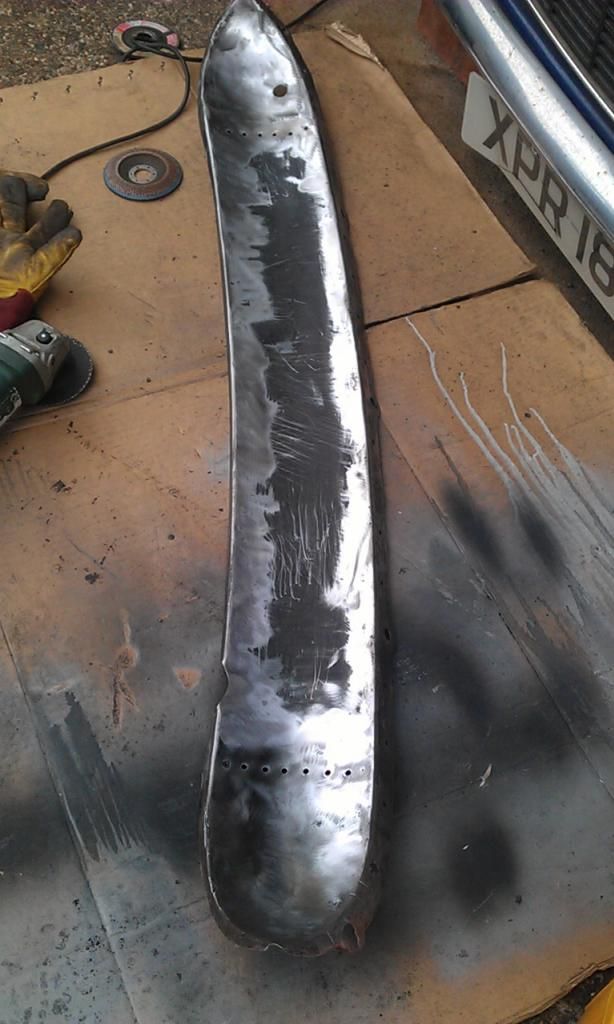
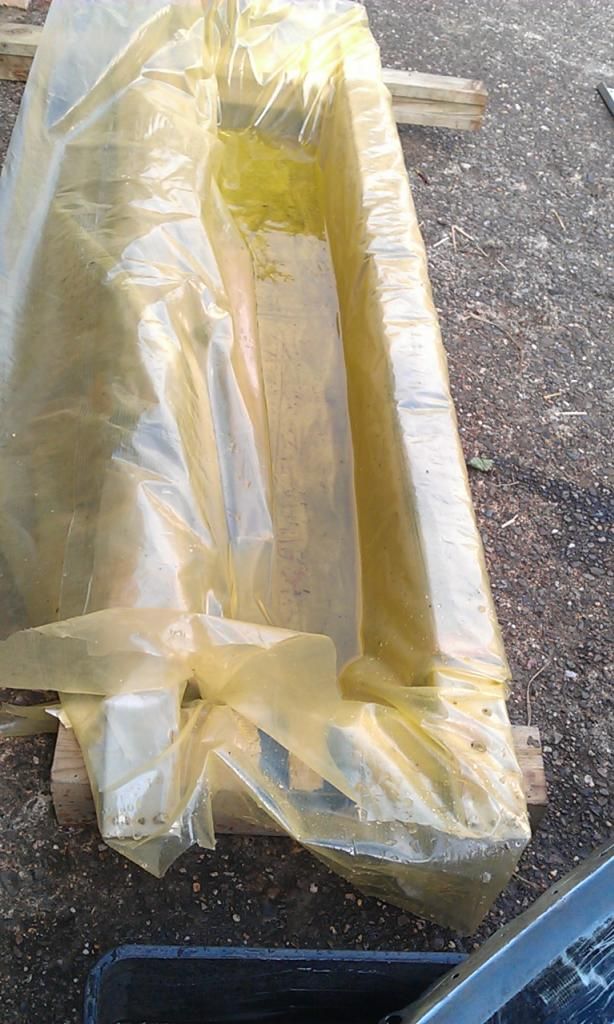
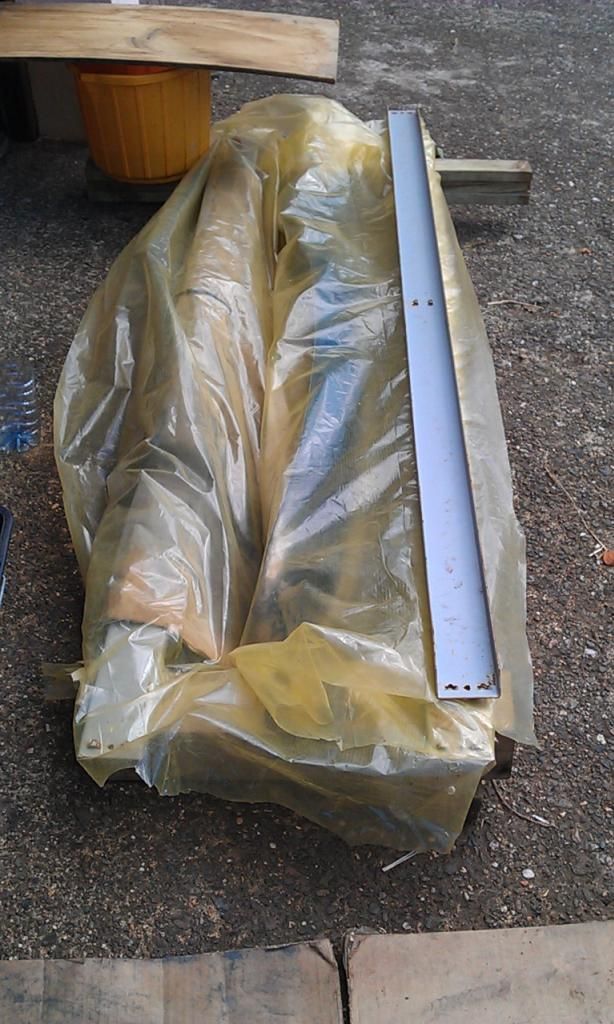
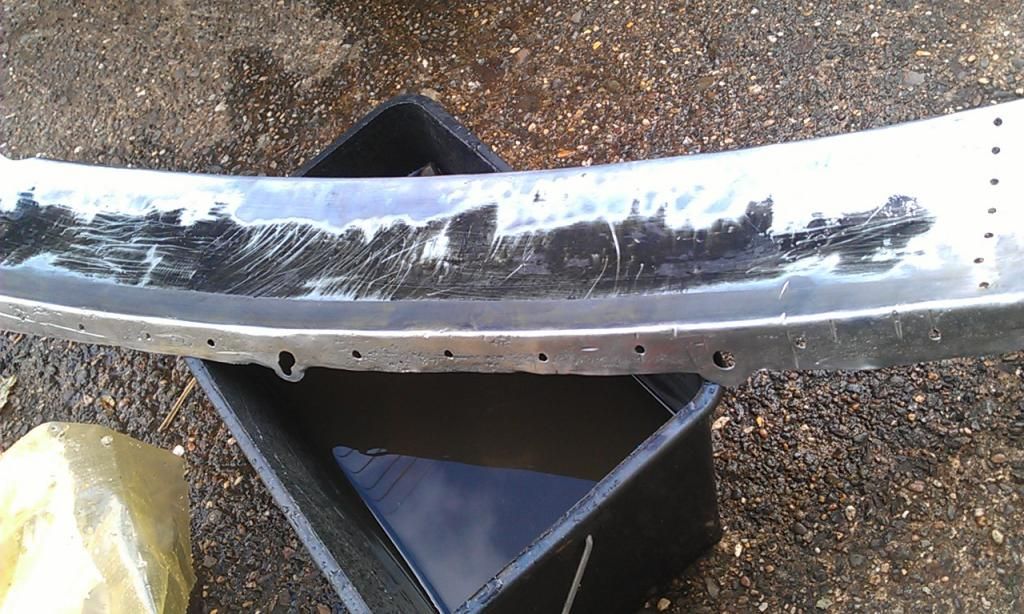
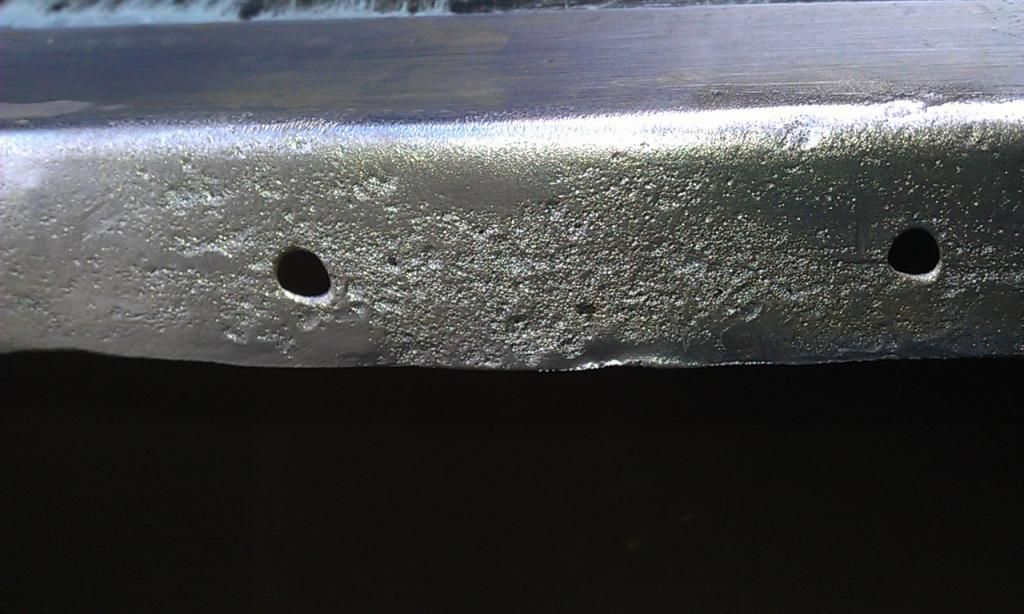
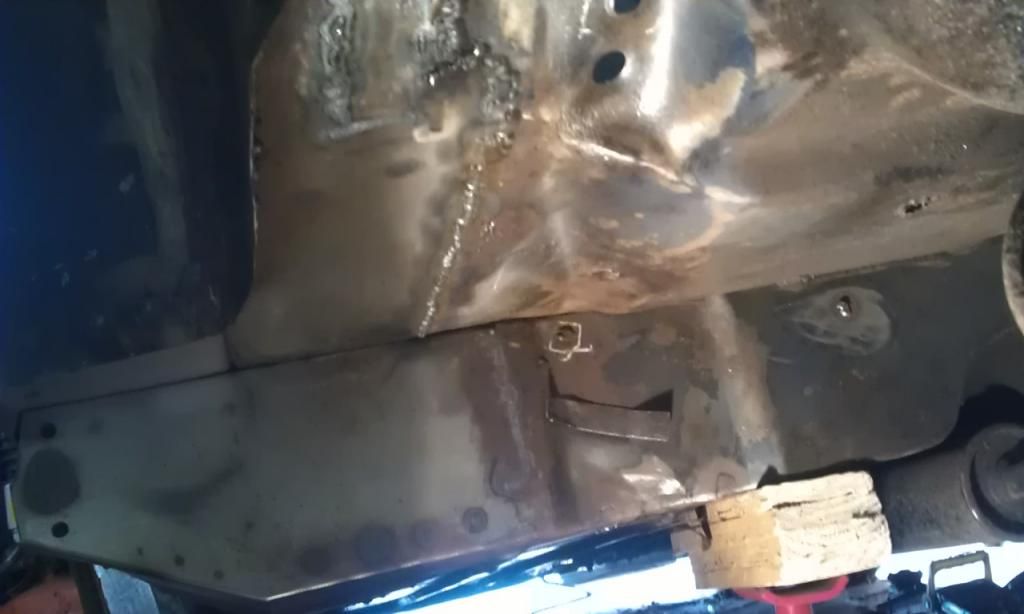
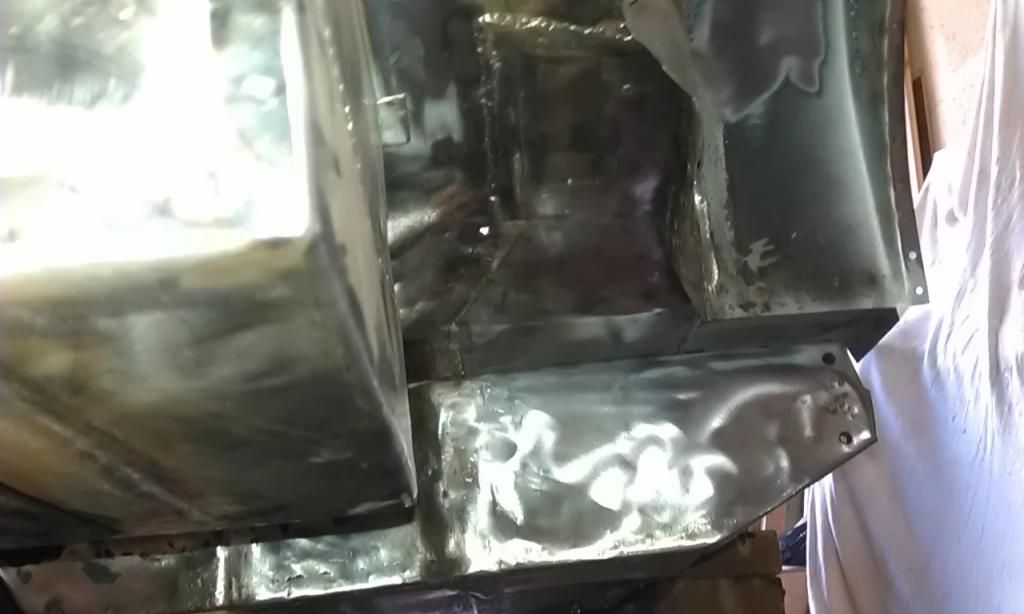
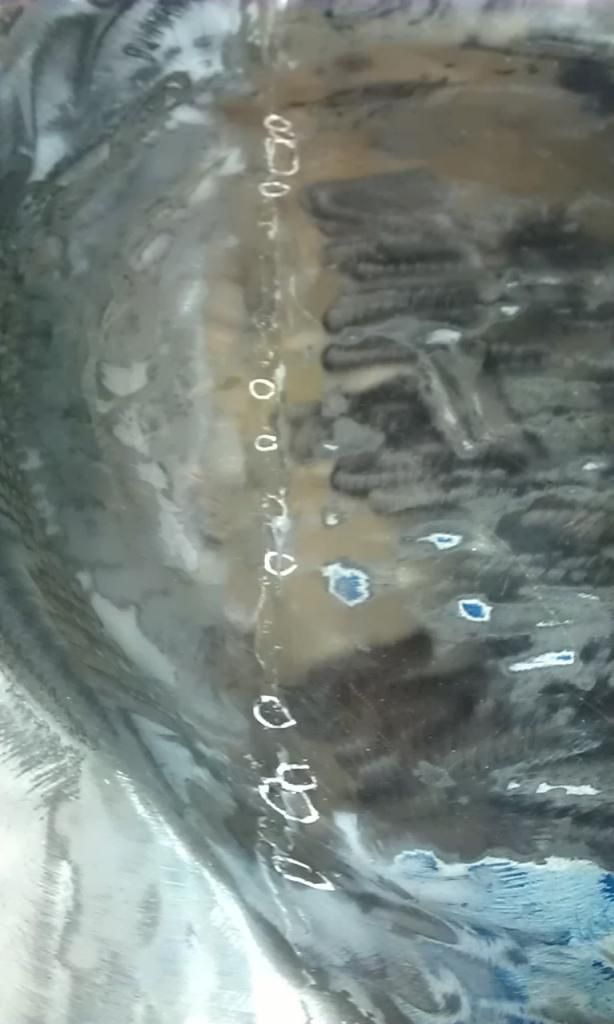
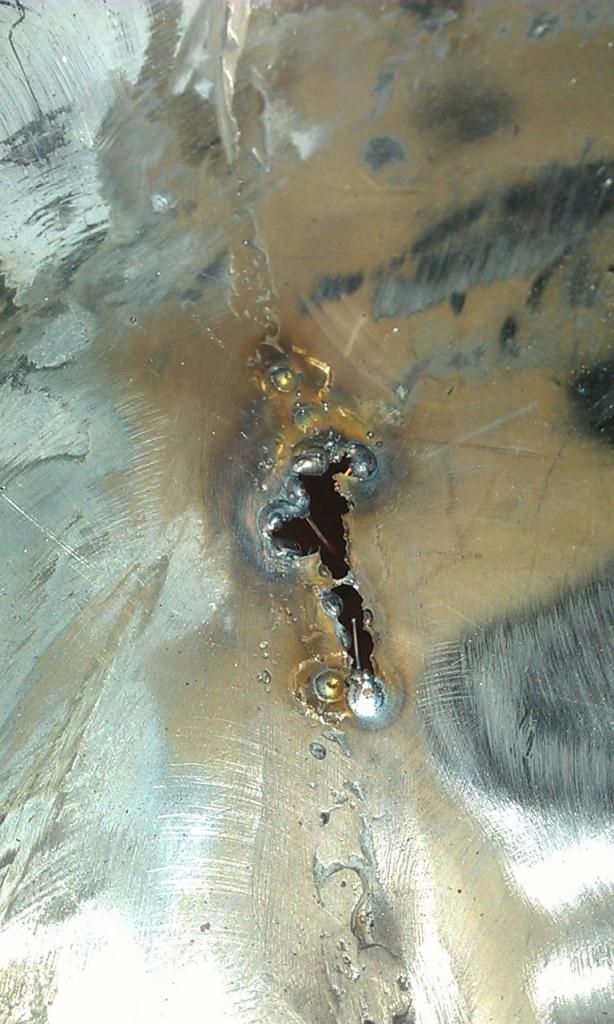
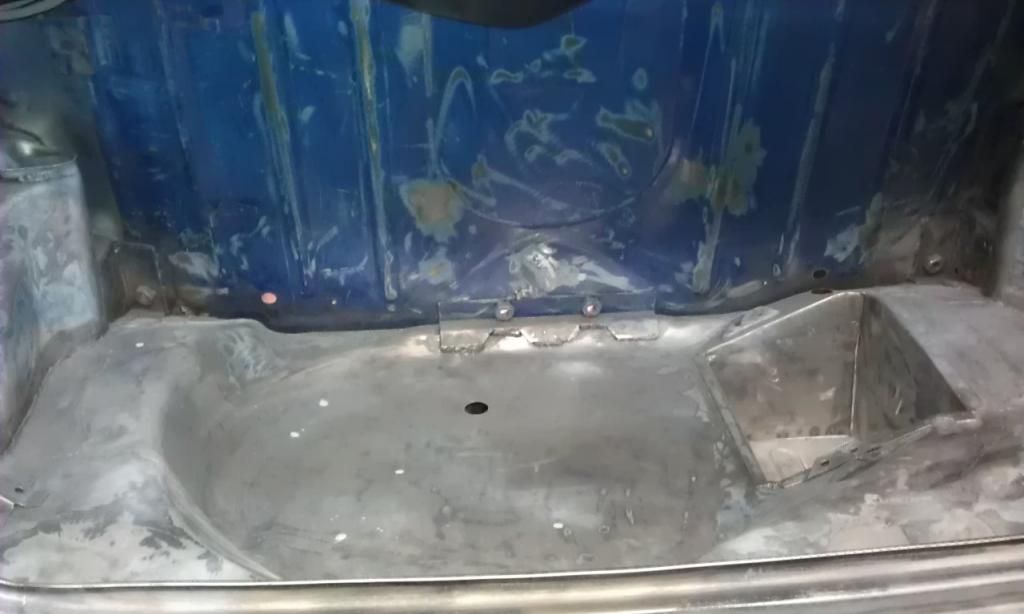
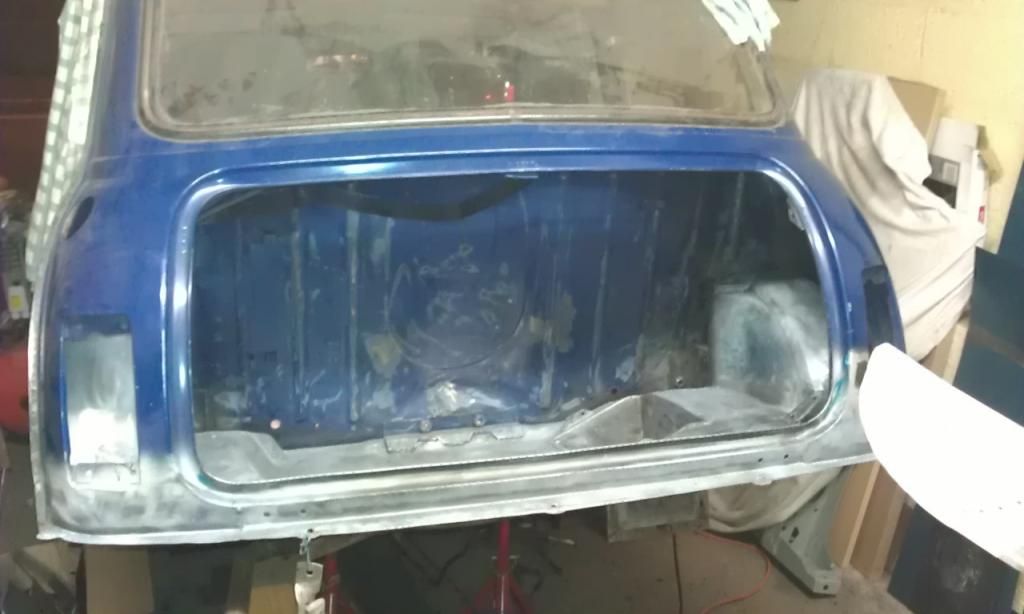
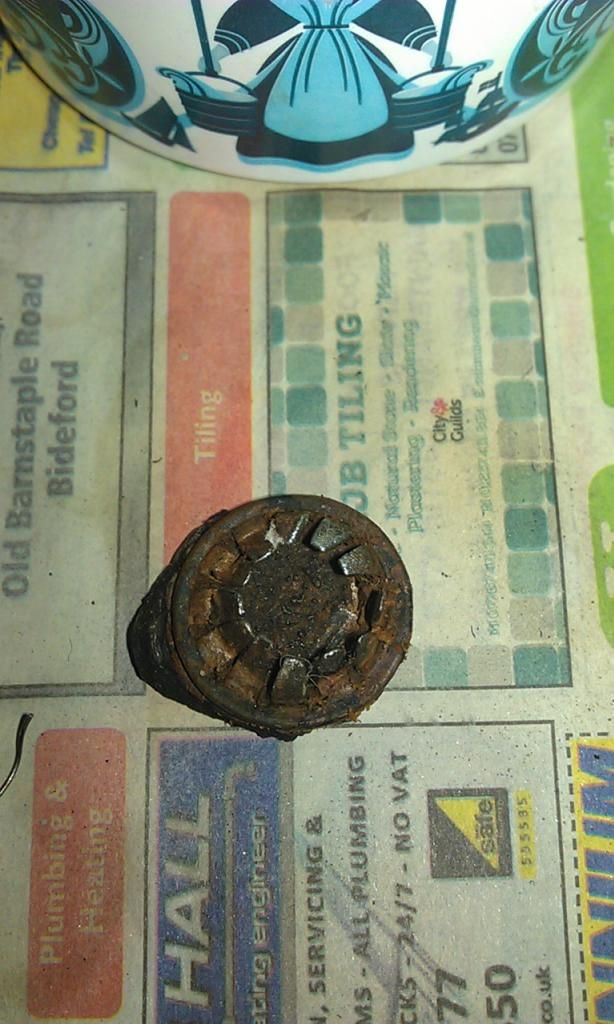
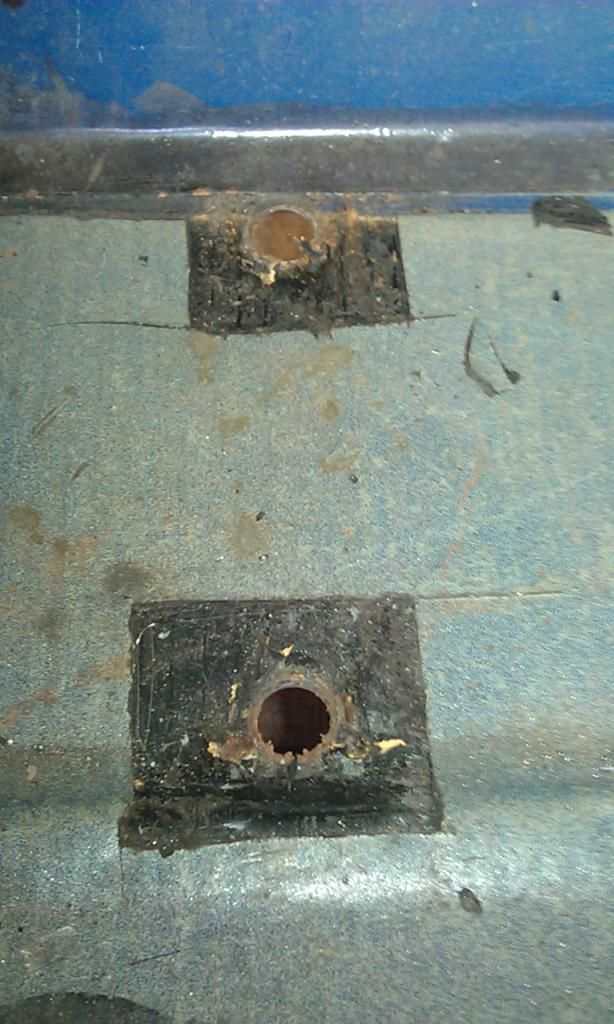
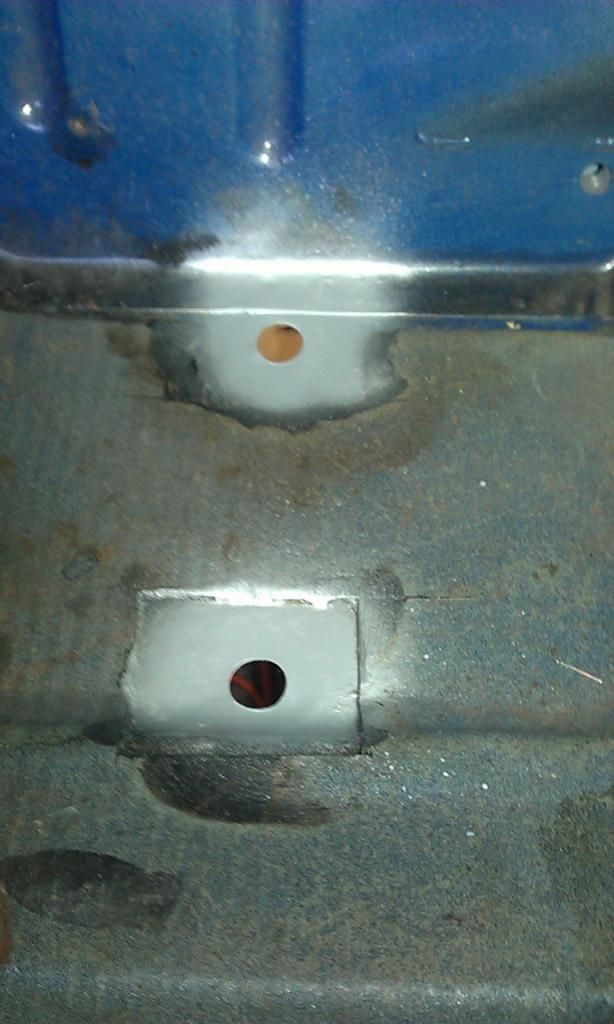
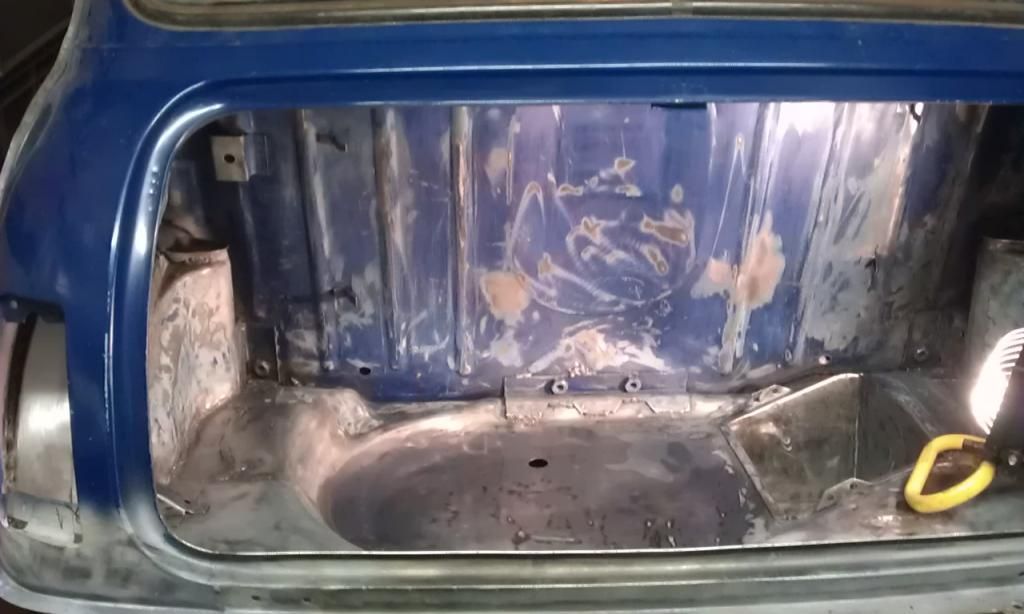
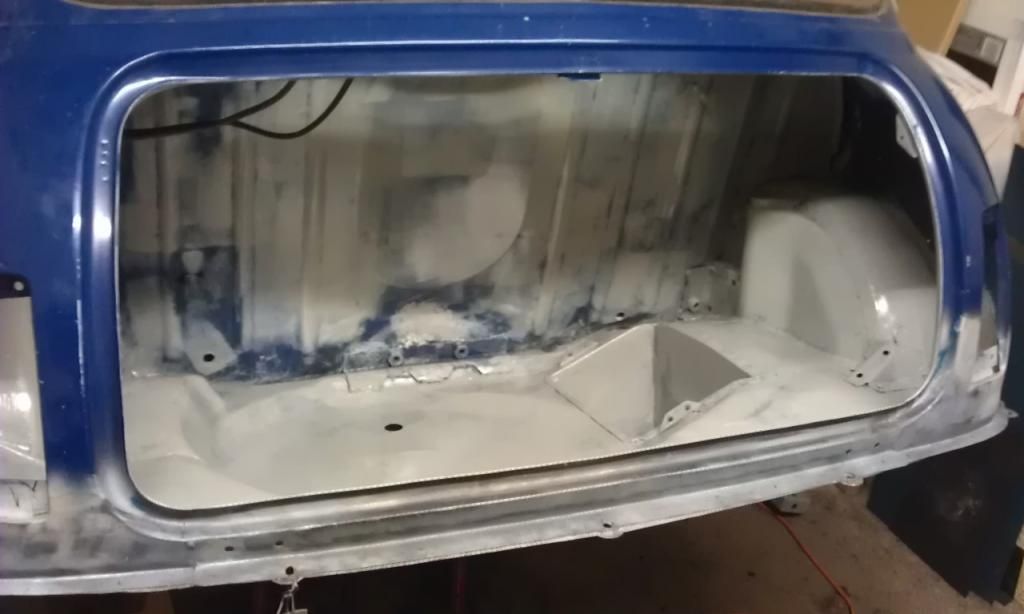
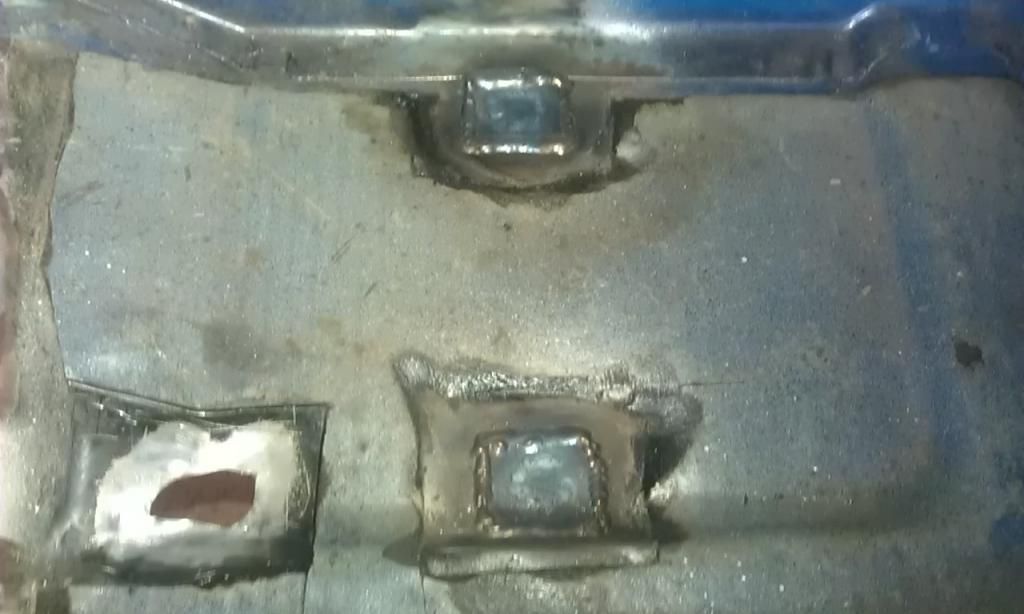
So I welded up the 4 x plug holes in Rear Seat:


IMAG6682_zps73940430.jpg


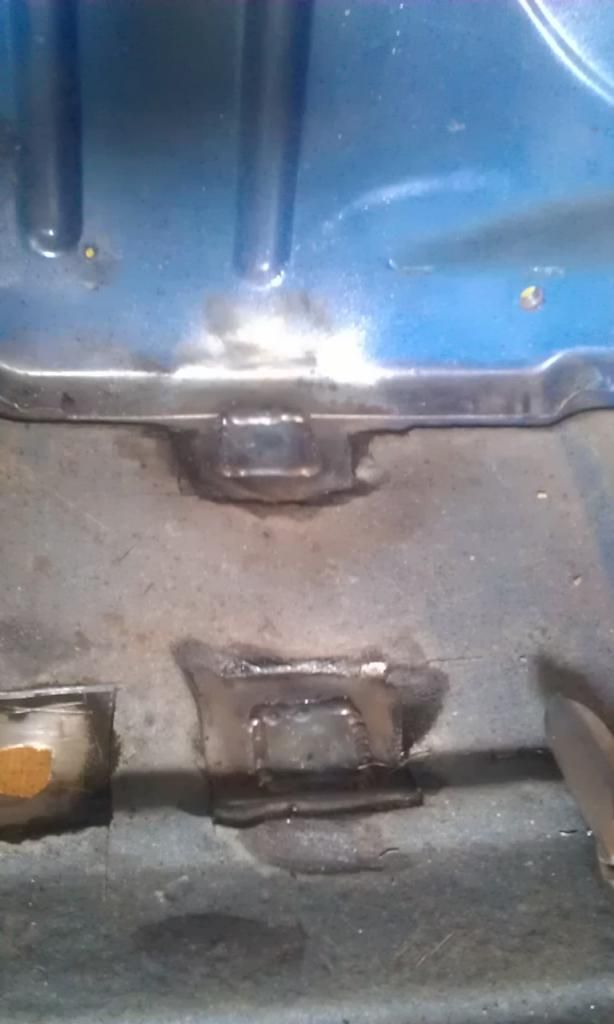
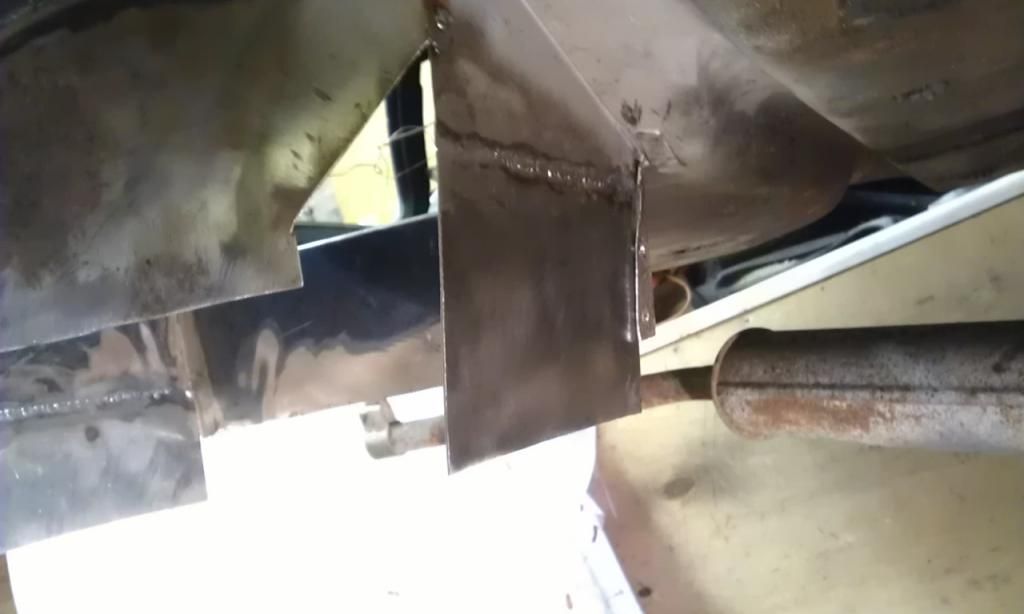
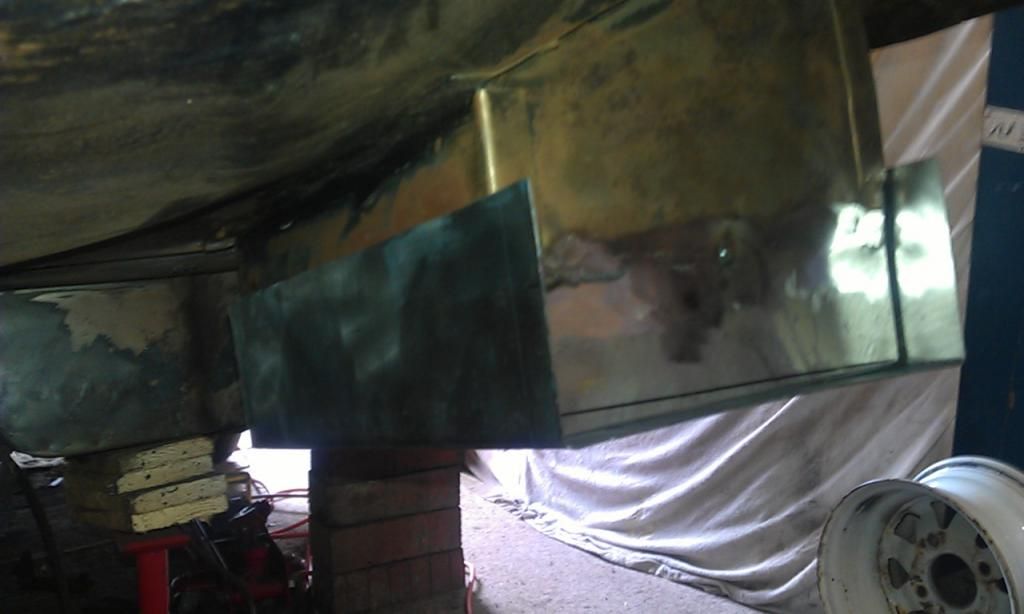
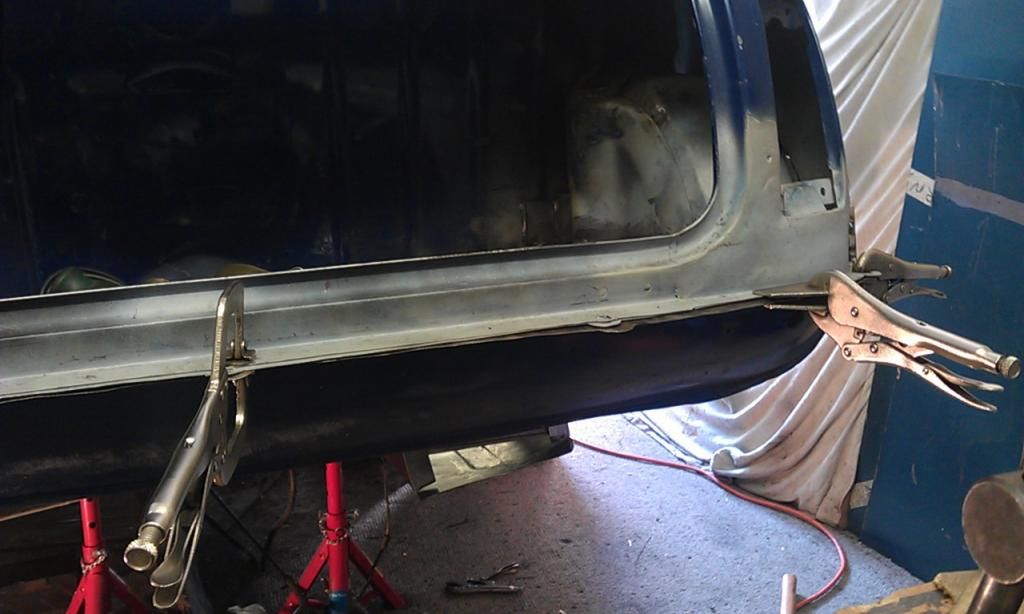
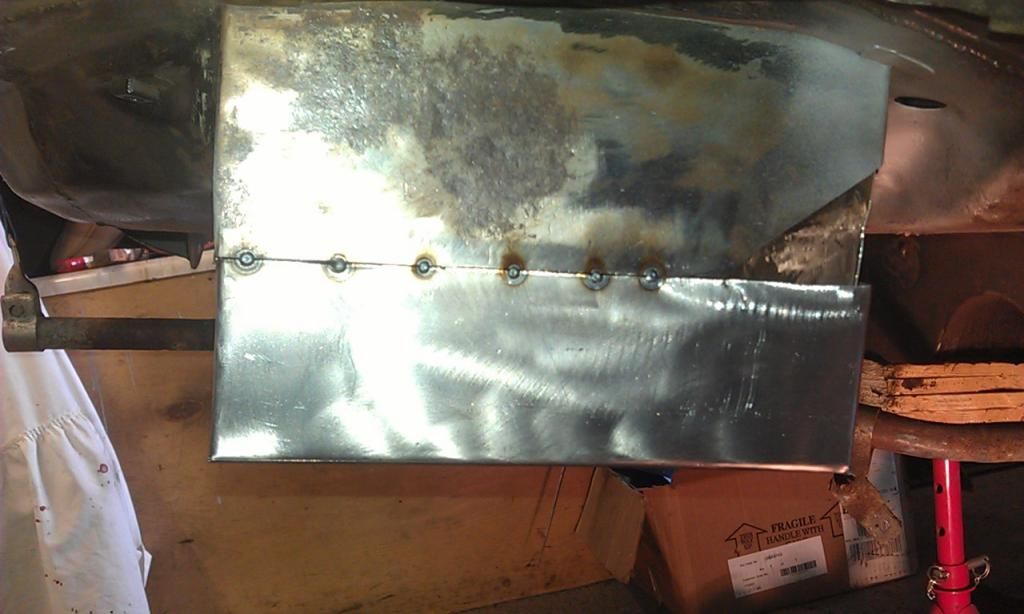
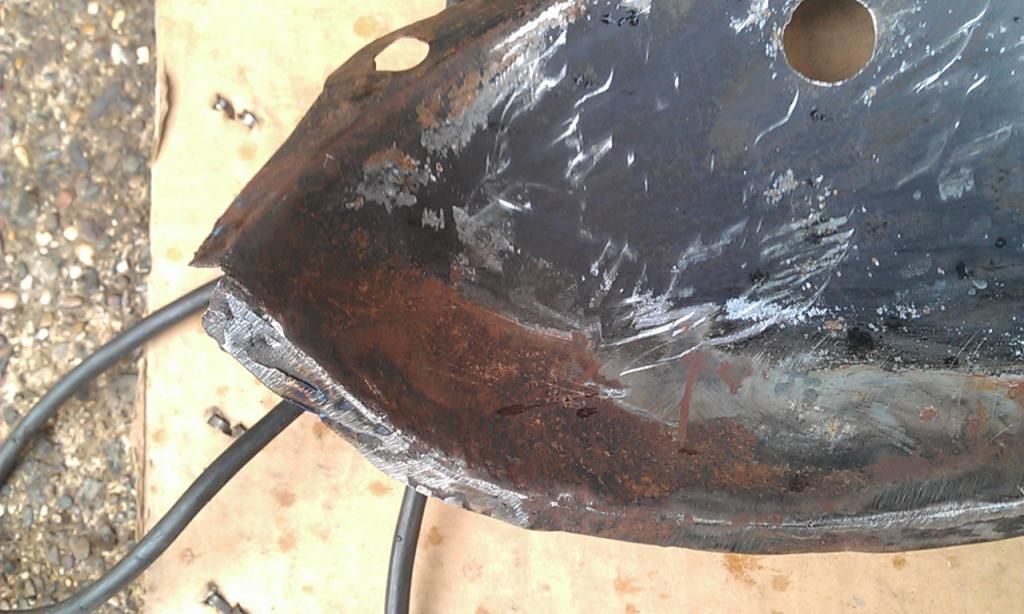
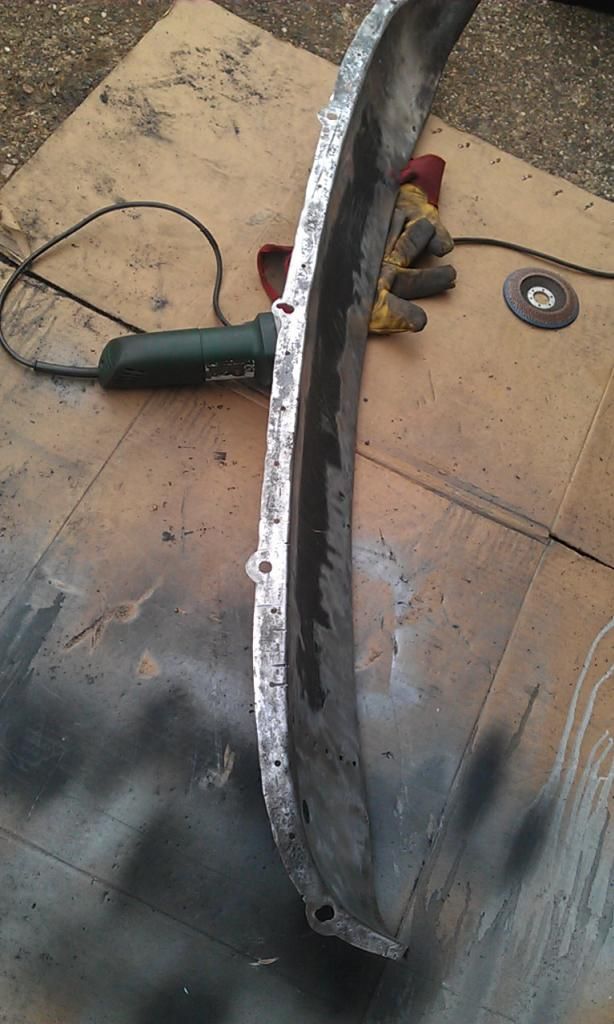
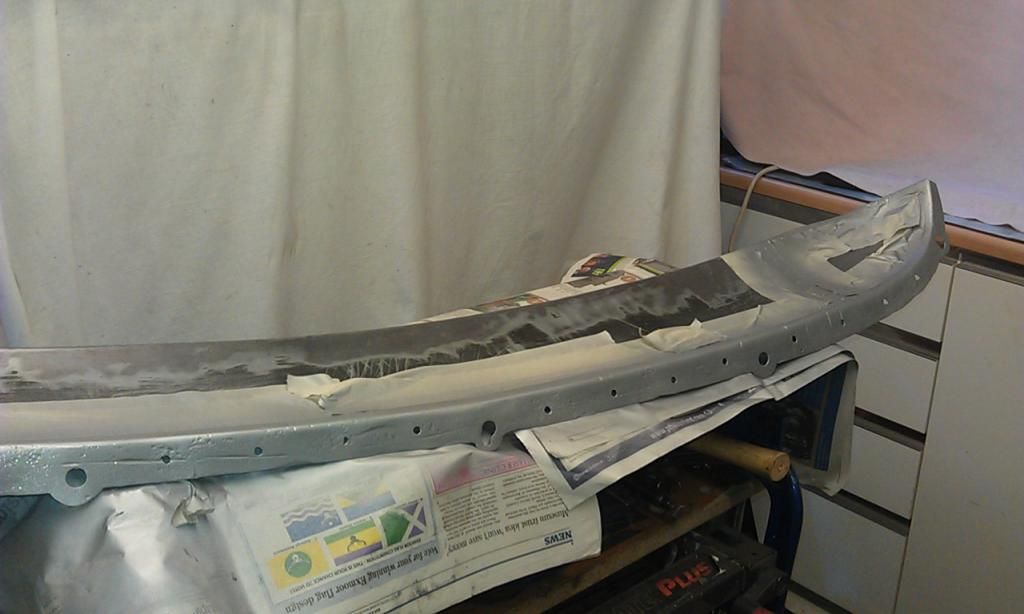
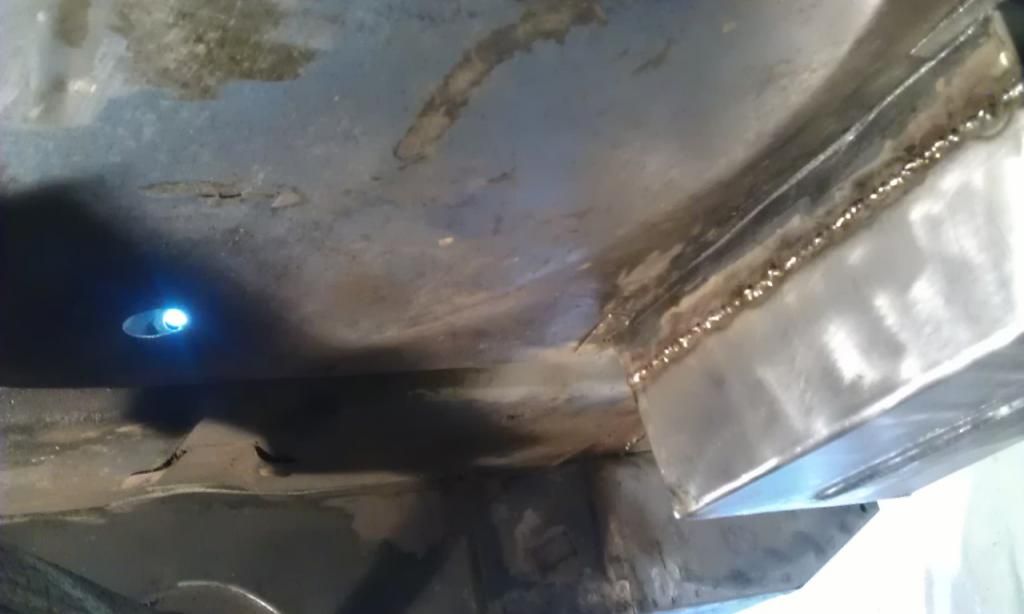
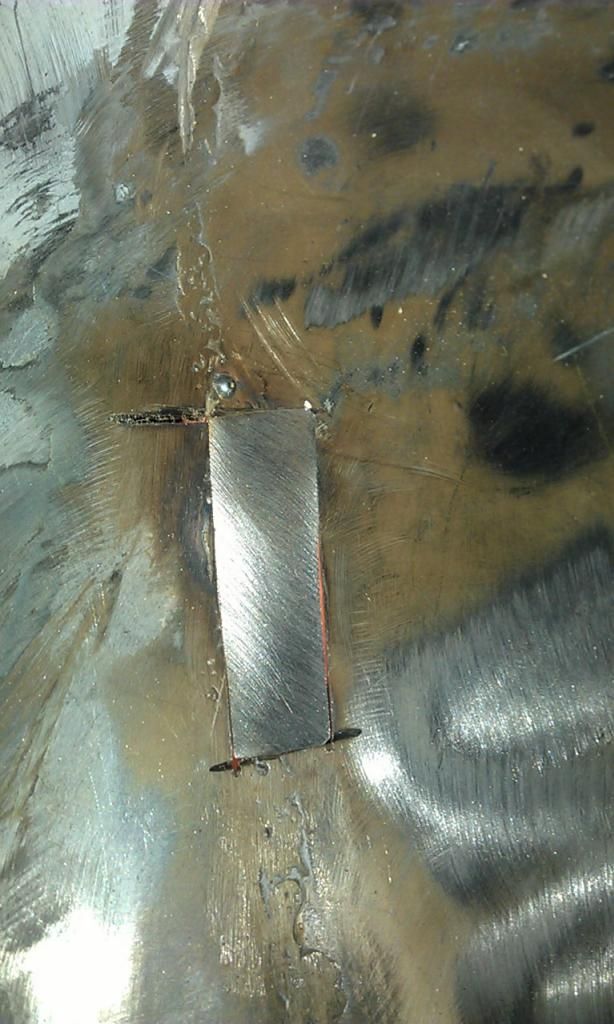
And after some additional cleaning on the underside came across another area that needed a patch, was I ever going to get the underside painted with all these set backs:


IMAG6683_zpsd670aba9.jpg


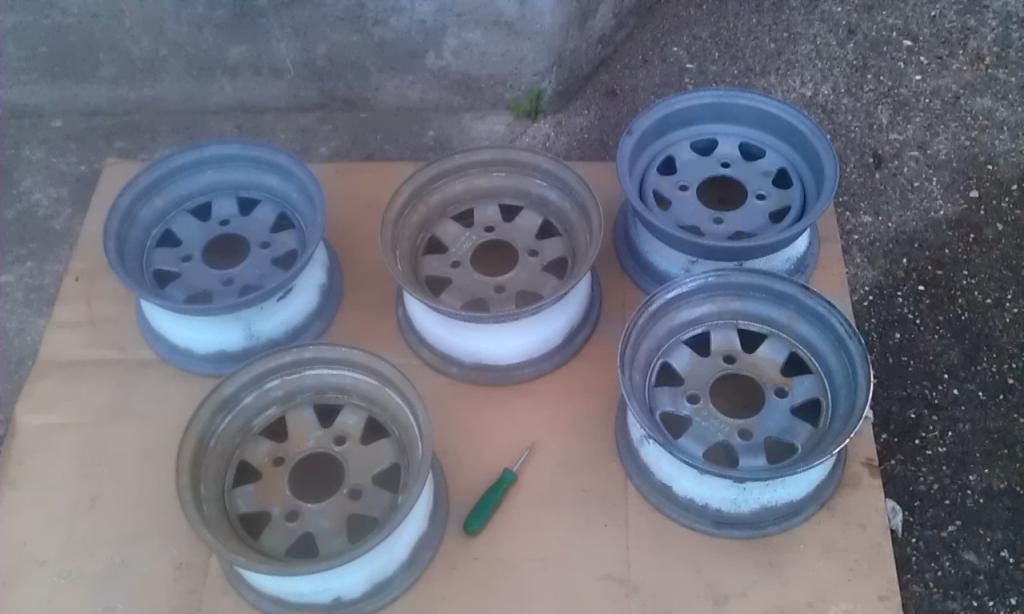
In the mean time I recieved a call from the Shot Blaster to say that he could finish my wheels but it would cost more than £50 that he first envisaged :-( it ended up being a little less than his second quote and came in at £64 for 5 wheels. He did a pretty good job but having OCD I spent another hour manually digging out the paint from the internal recess and obtained several blisters in the process!!


IMAG6684_zpsd8baf95b.jpg


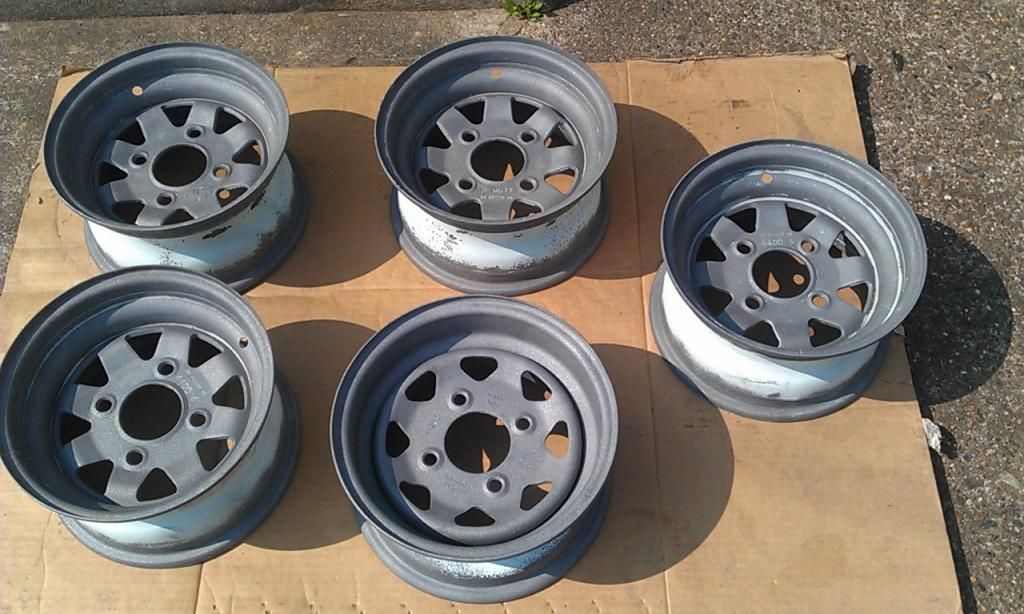
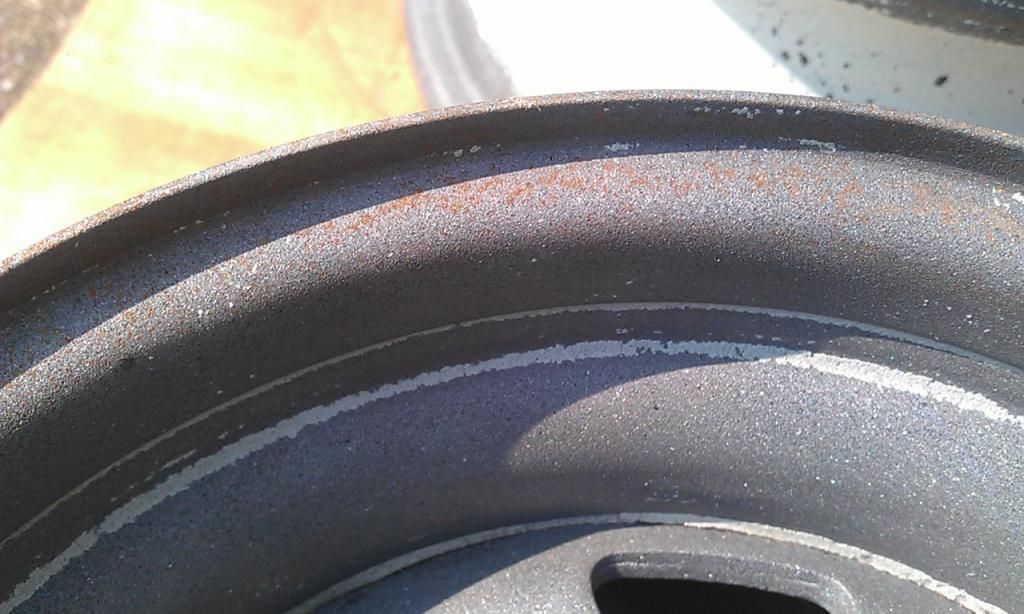
One of the wheel had already started to re-rust so time was precious:


IMAG6685_zpsbd11d8f3.jpg


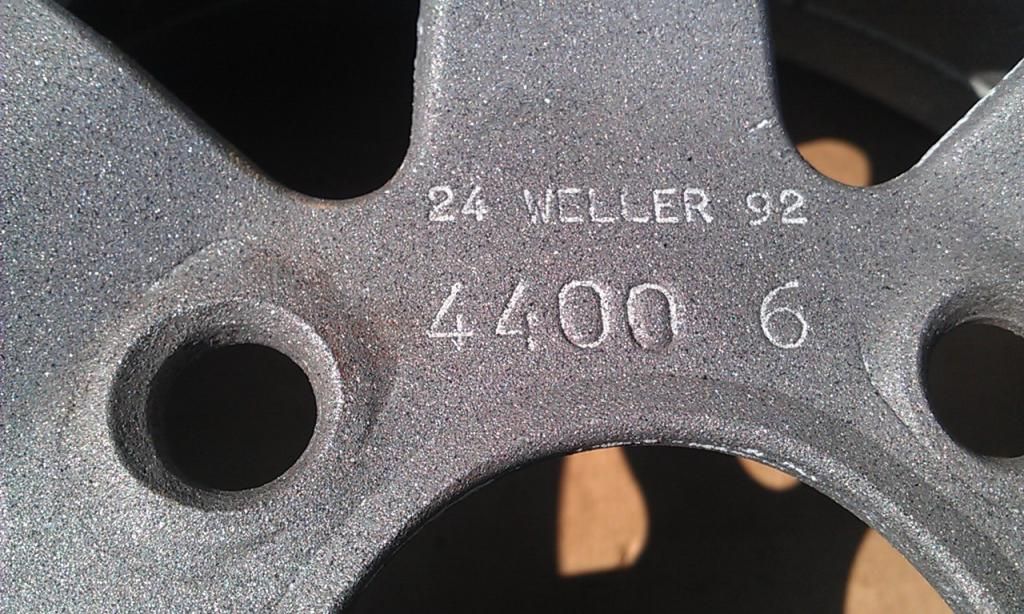
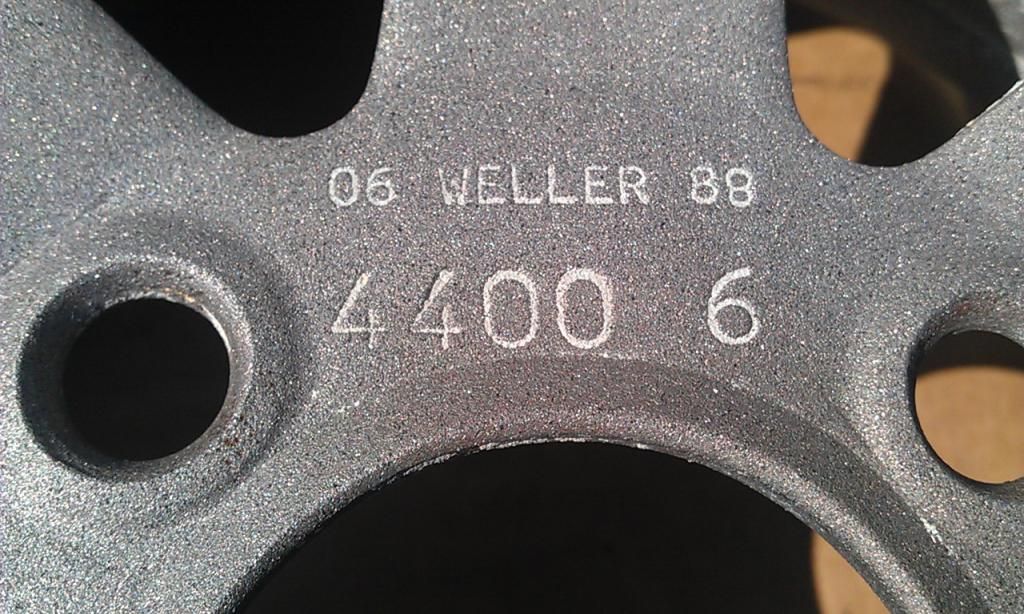
Iv'e got 2 different serial numbers of Wellers, what do the numbers dictate YOM?


IMAG6686_zps985ac778.jpg


 IMAG6687_zps626f02db.jpg


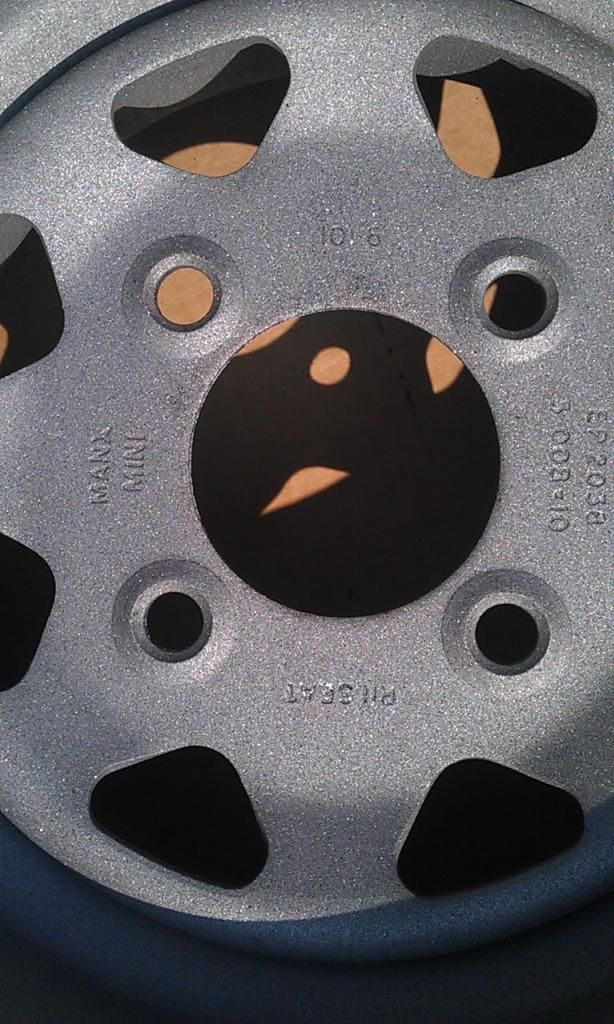
And the spare is a Manx Weller copy:


IMAG6688_zps0b9b8682.jpg


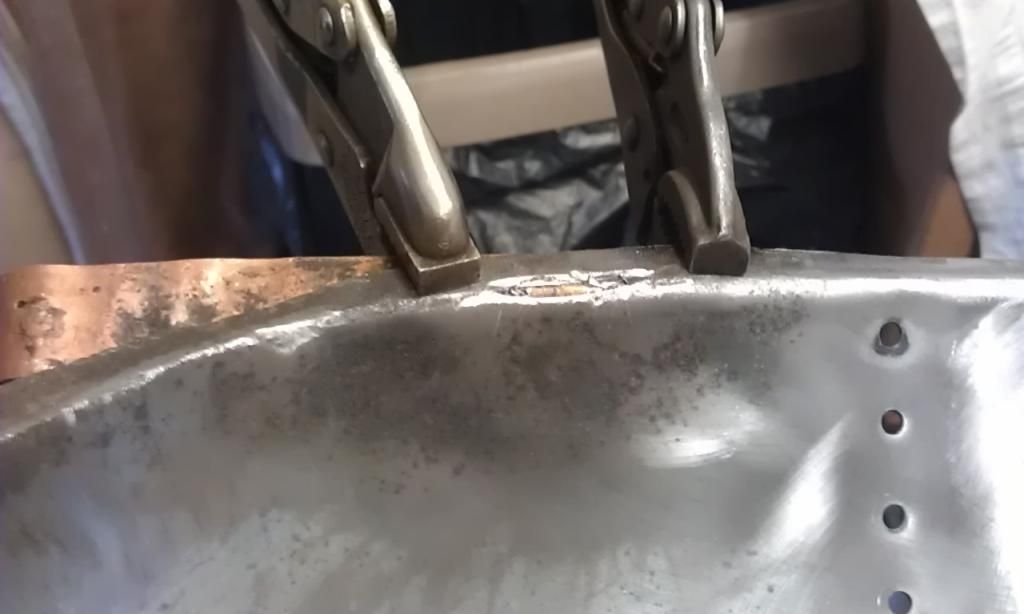
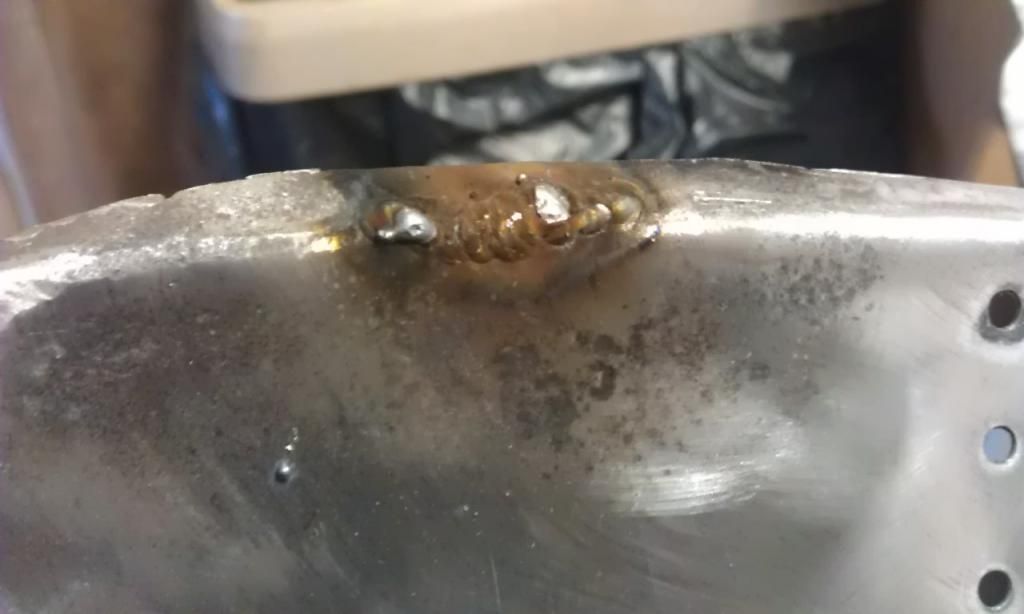
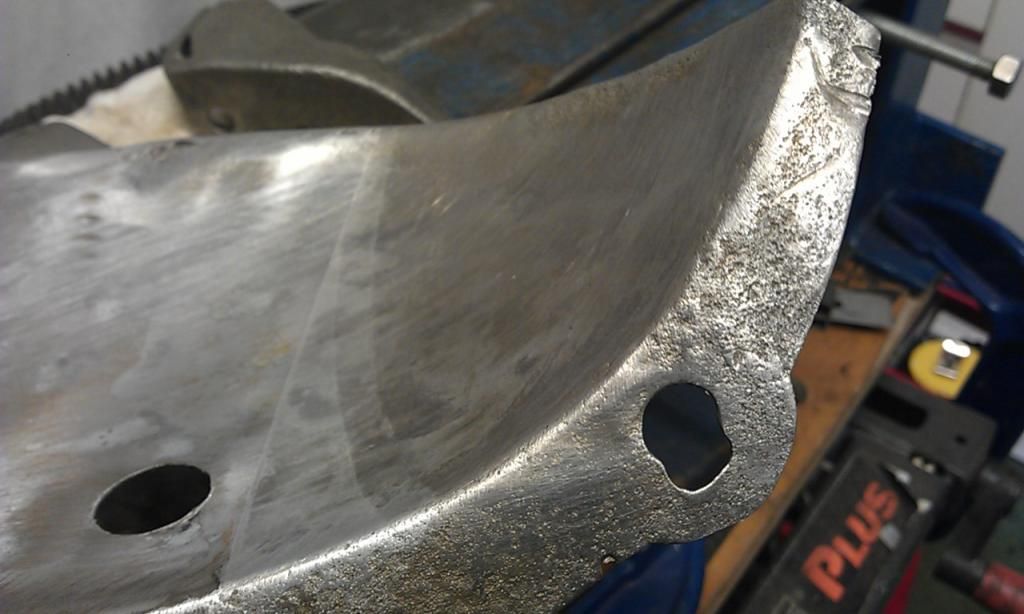
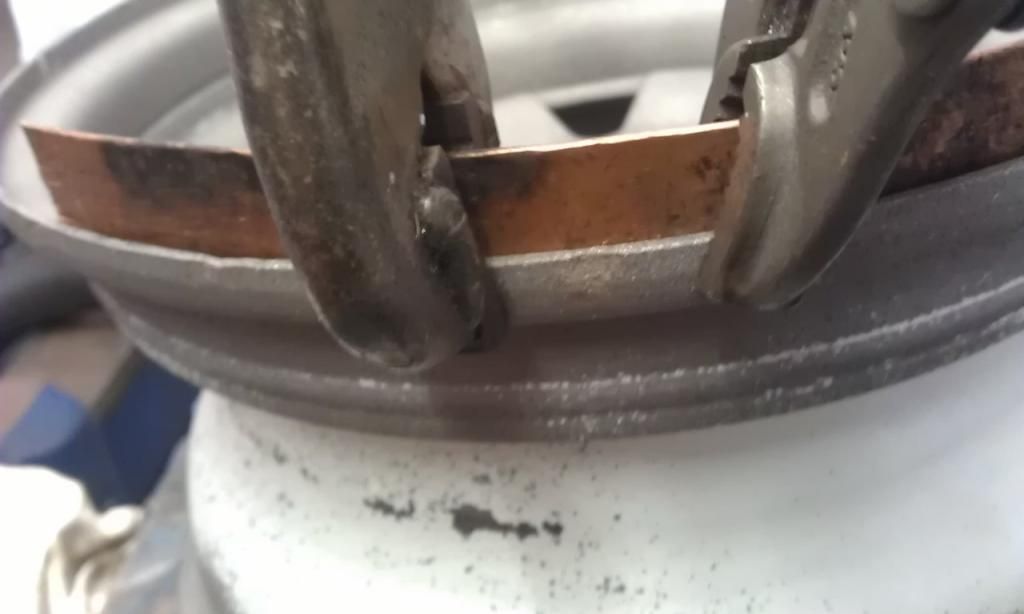
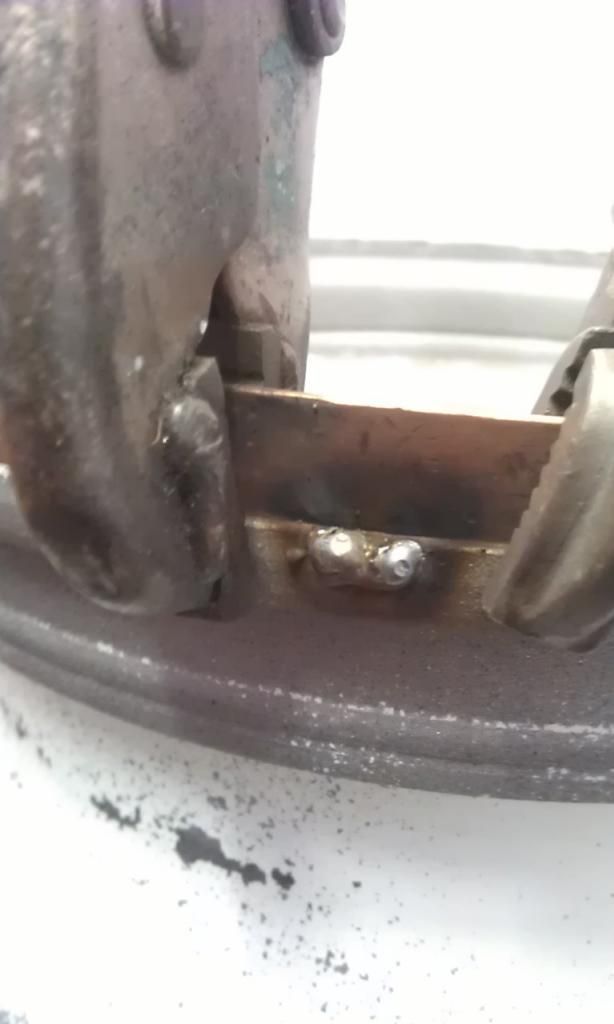
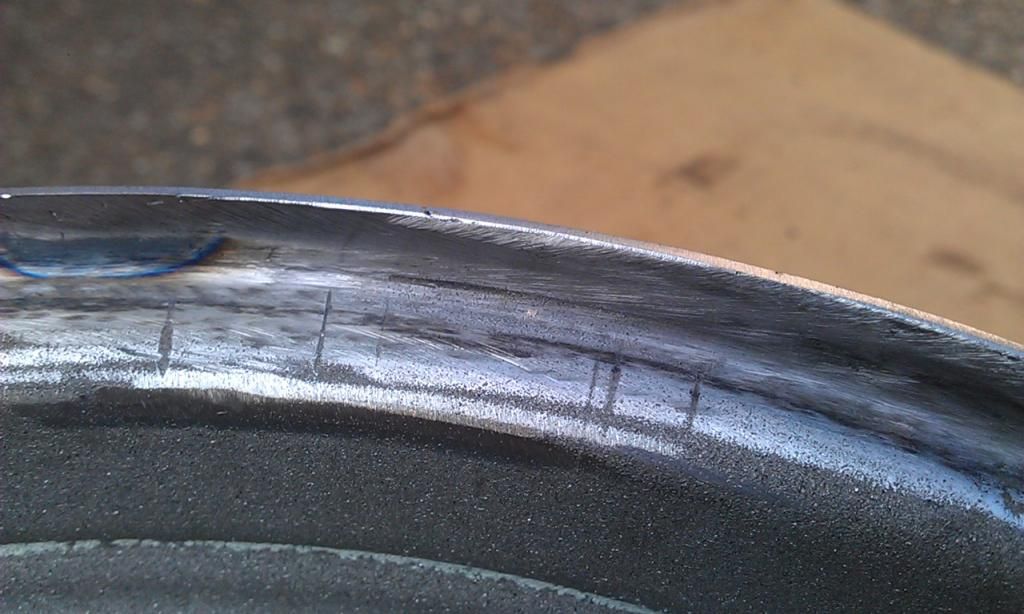
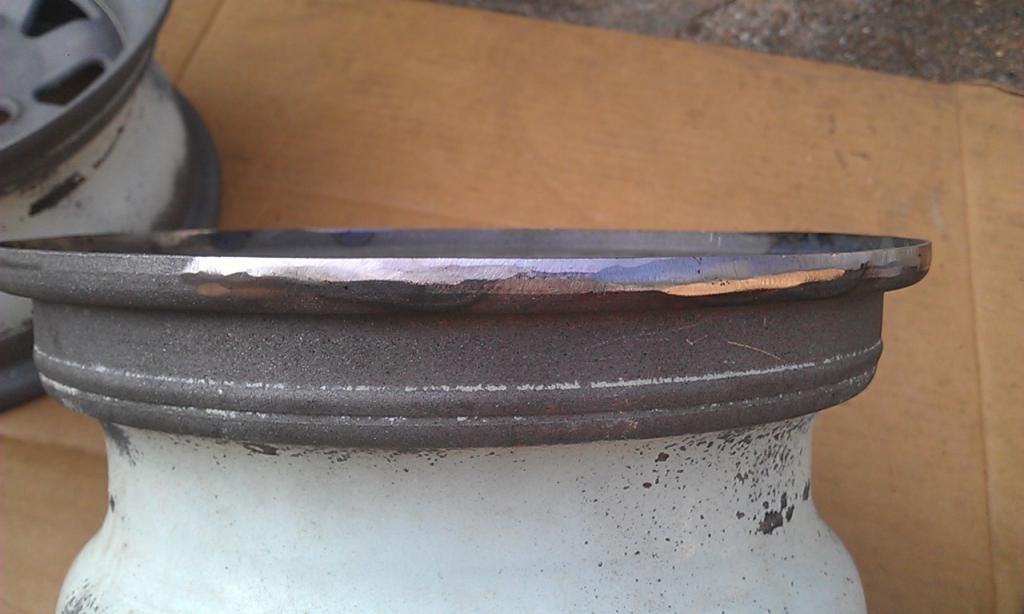
One of the wellers had some bad curbing which I had already planned to repair, the basic idea was to build up the dents and rust damaged areas with weld and sand down using a Flap Disc, I also used copper to prevent overweld to minimise what needed to be ground down:


IMAG6689_zpsd56b471e.jpg


IMAG6690_zps444ad09f.jpg


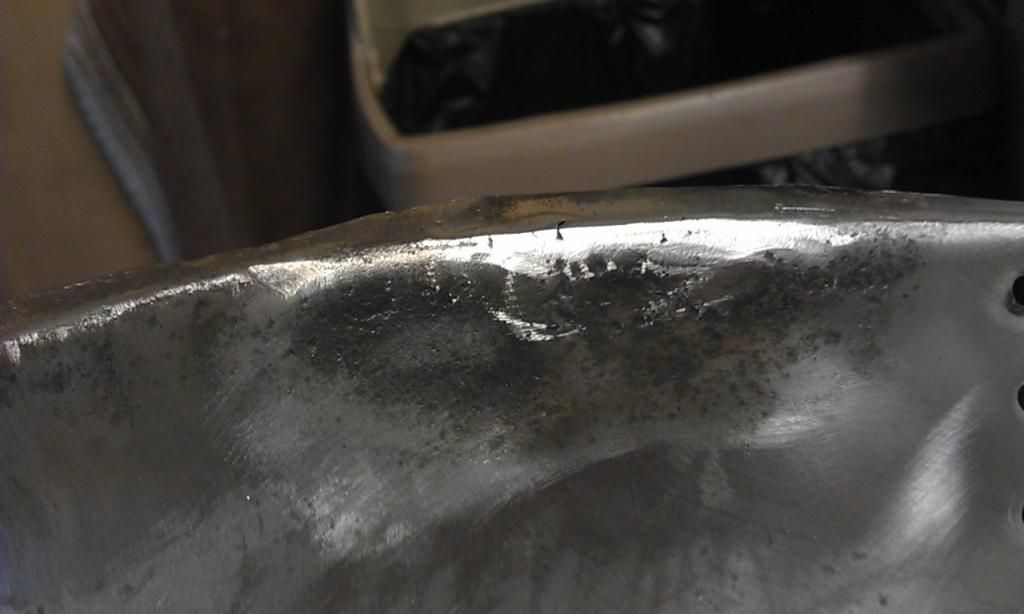
This part of one of the rims had a lot of minors dents but after some welding and gentle grinding:


IMAG6697_zps0c80185c.jpg


IMAG6698_zpsf824a806.jpg


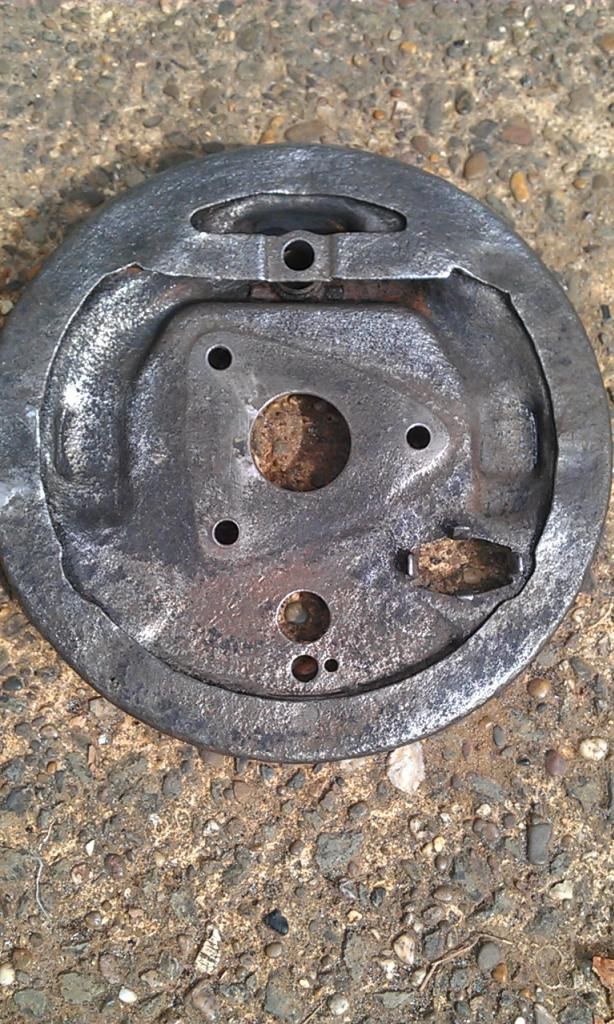
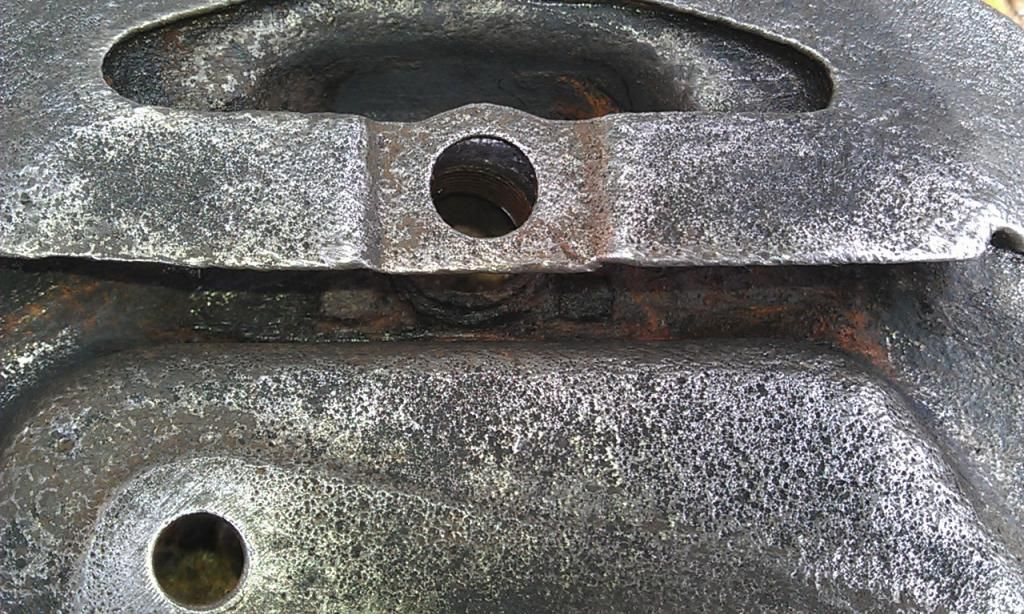
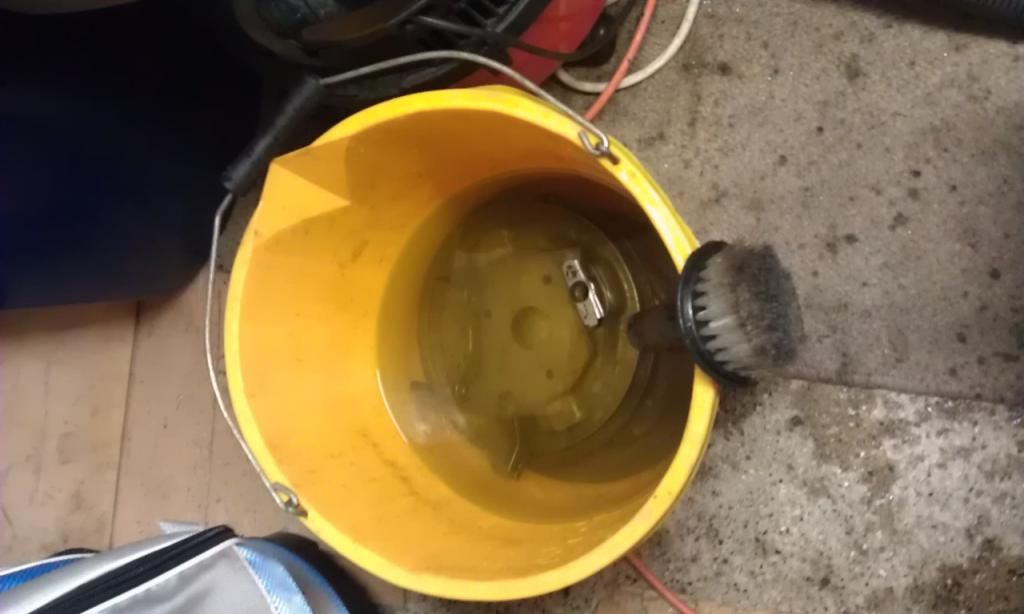
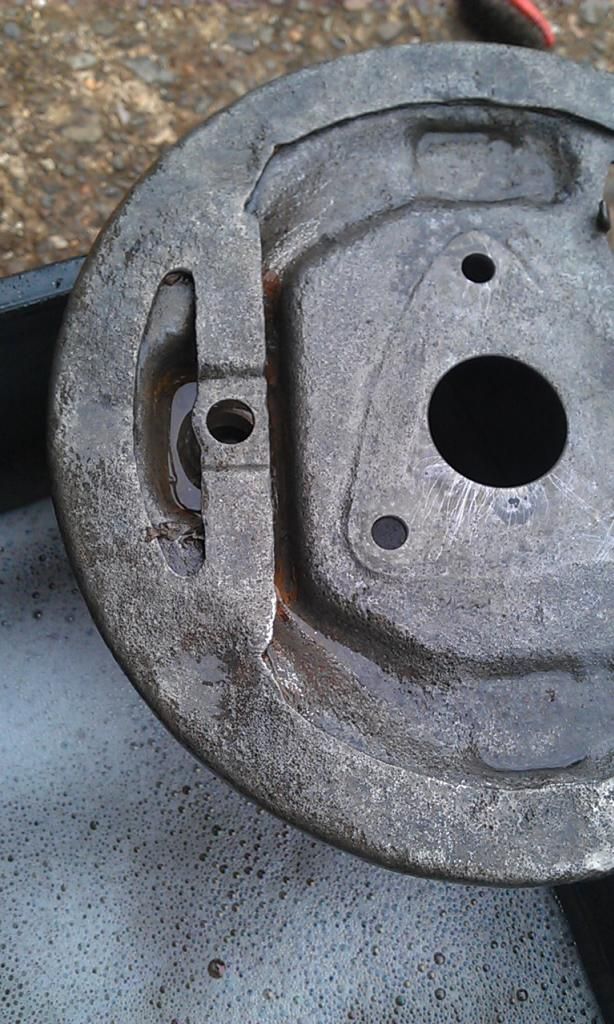
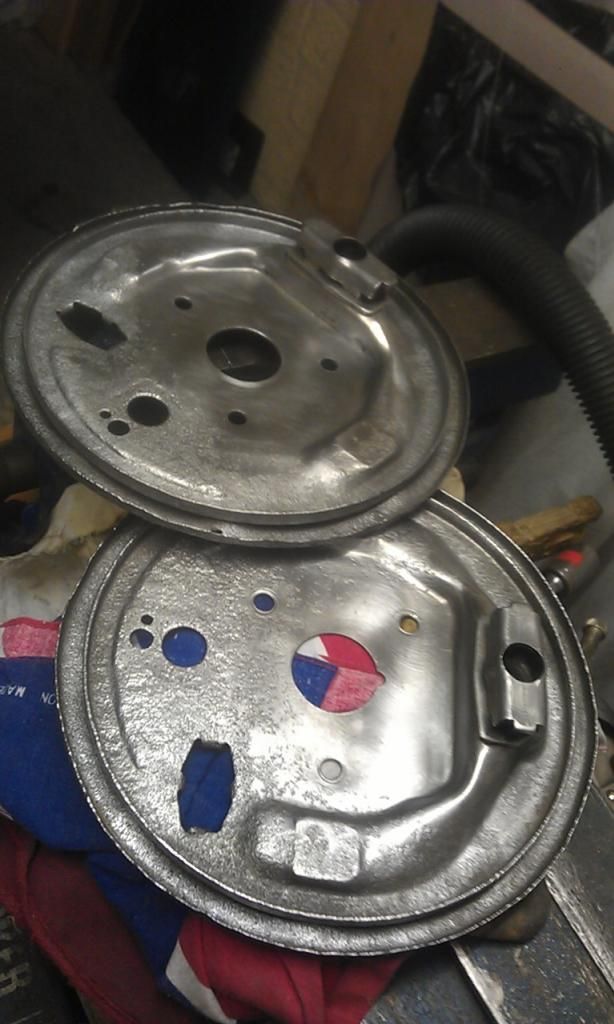
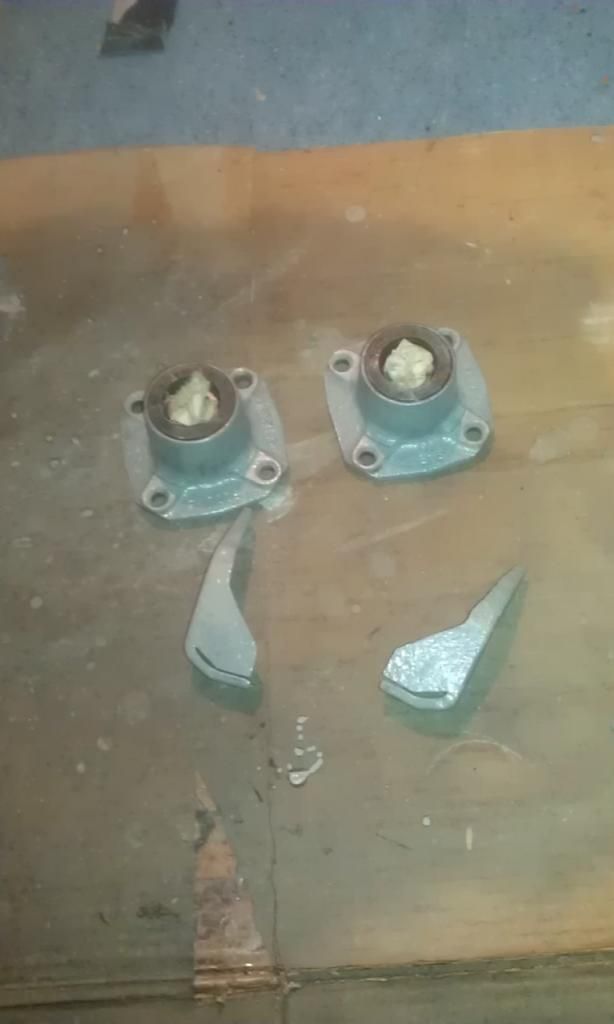
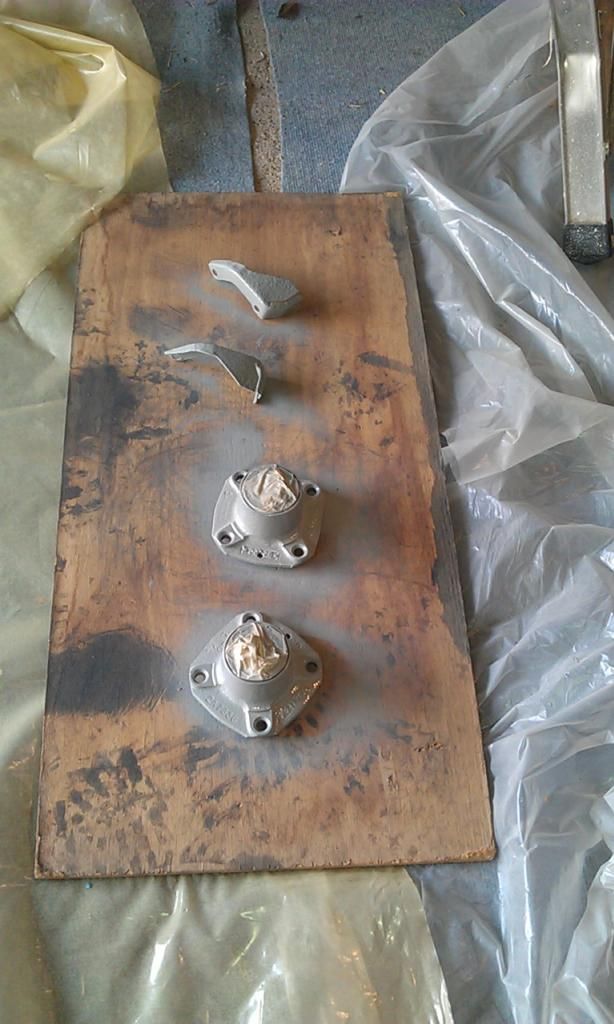
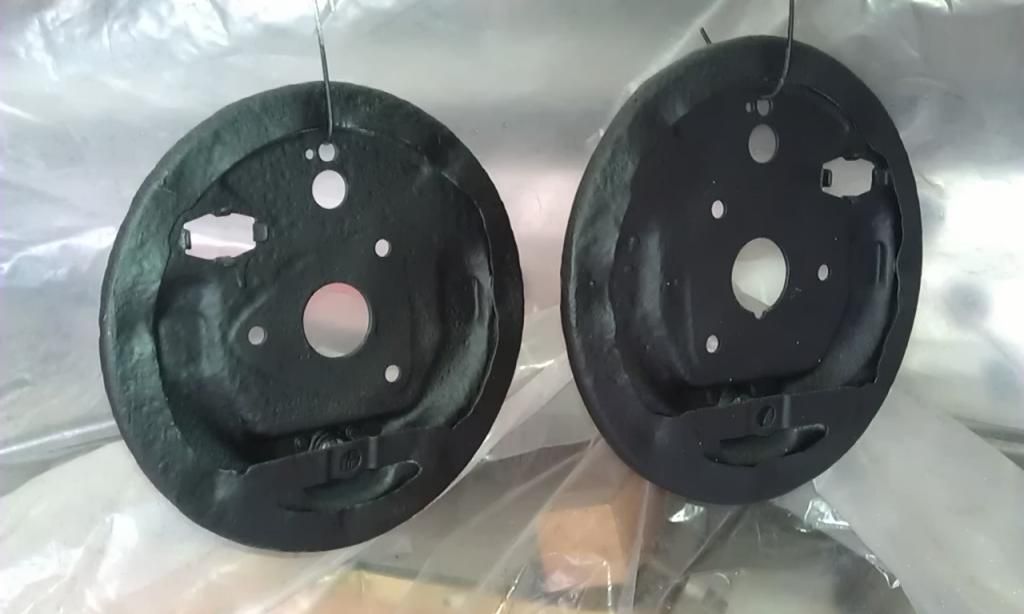
Also after several spells in the Citric Acid Bath here are the Backplates:


IMAG6699_zps0bb25e8c.jpg


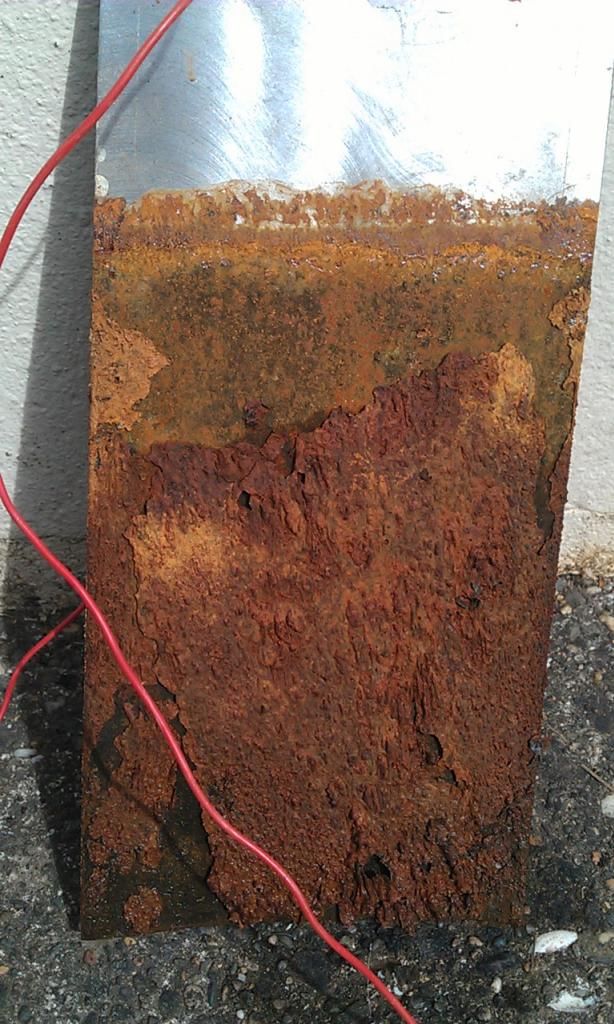
Next after cleaning up the paint from inside the wheel rims I noticed some rust that needed a bit of treatment, I thought I remove it by a gentle soak in citric Acid, big mistake I ended up causing some major surface rusting that now needed to be manually cleaned, this took me another hour, a delay that I could have done without, still it was a nasty lesson learned!!!


IMAG6700_zps62900ceb.jpg


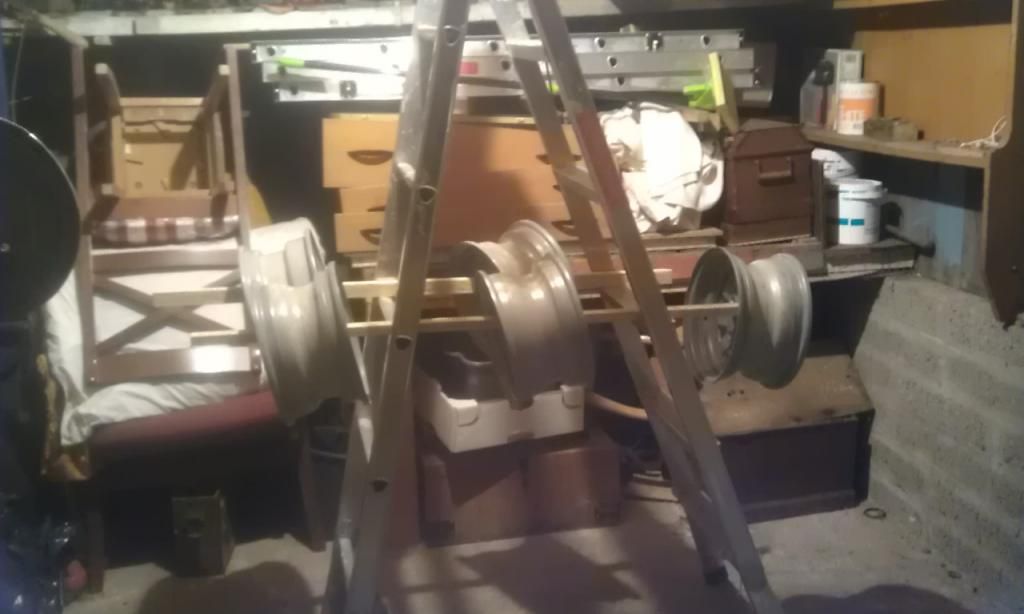
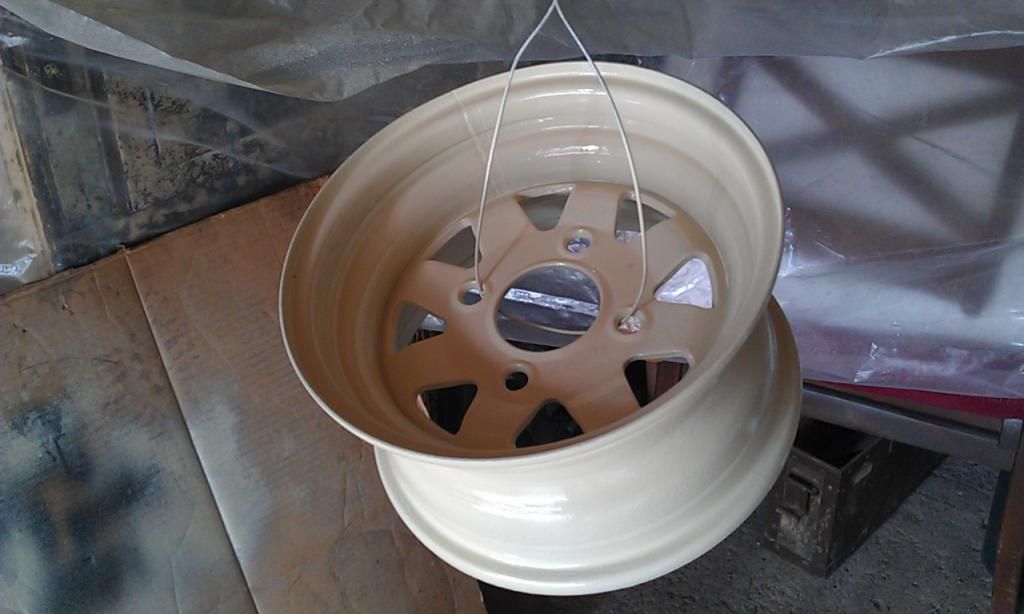
After cleaning up AGAIN I was scratching my head trying to work out how to mount the wheels after I had given them their first coat of Epoxy. I couldn't lay them on the floor as they would have been painted so came up with the idea of mounting them through their centres on pieces of wood held across the steps of a ladder:


IMAG6702_zpsf6bf640a.jpg

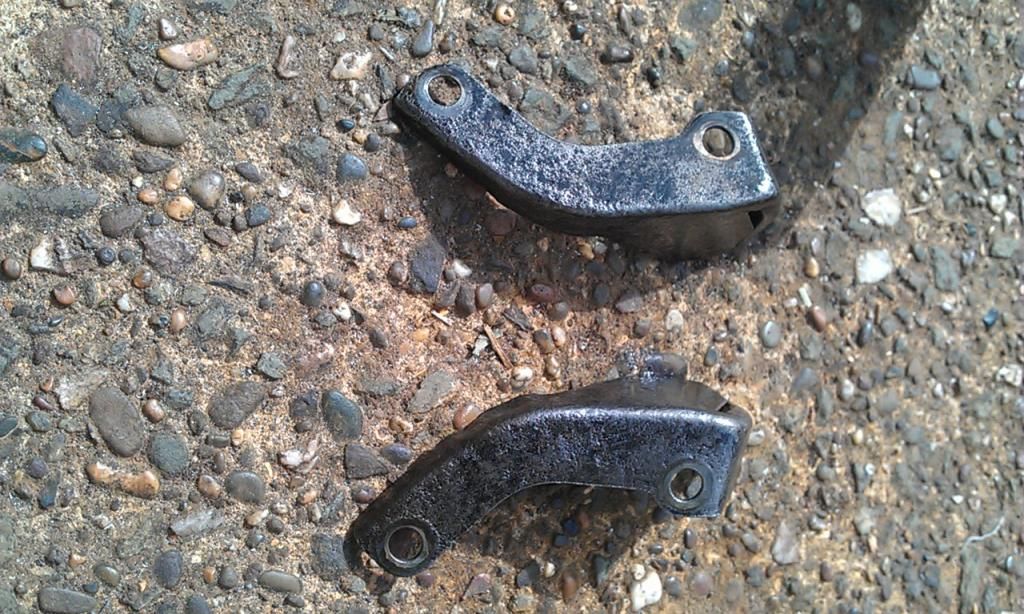
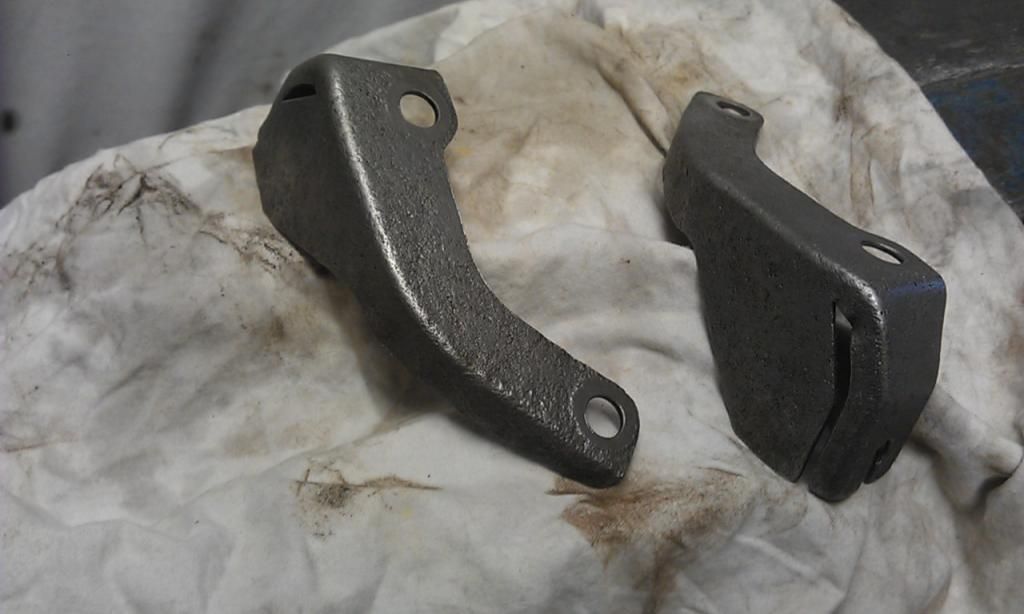
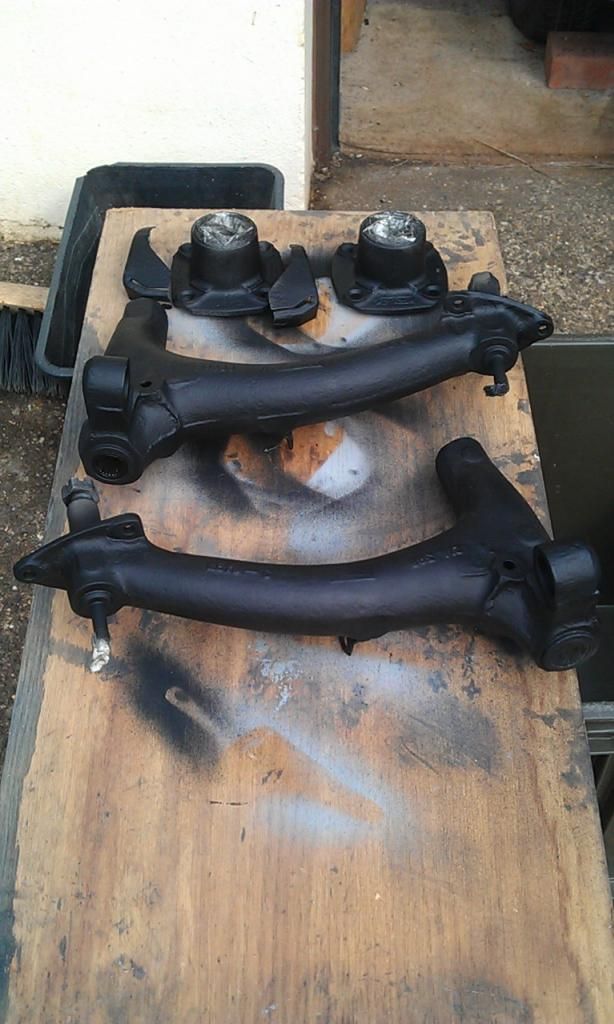
I also primed the Rear Hubs and Handbrake Cable Brackets:


IMAG6703_zps31c27c21.jpg


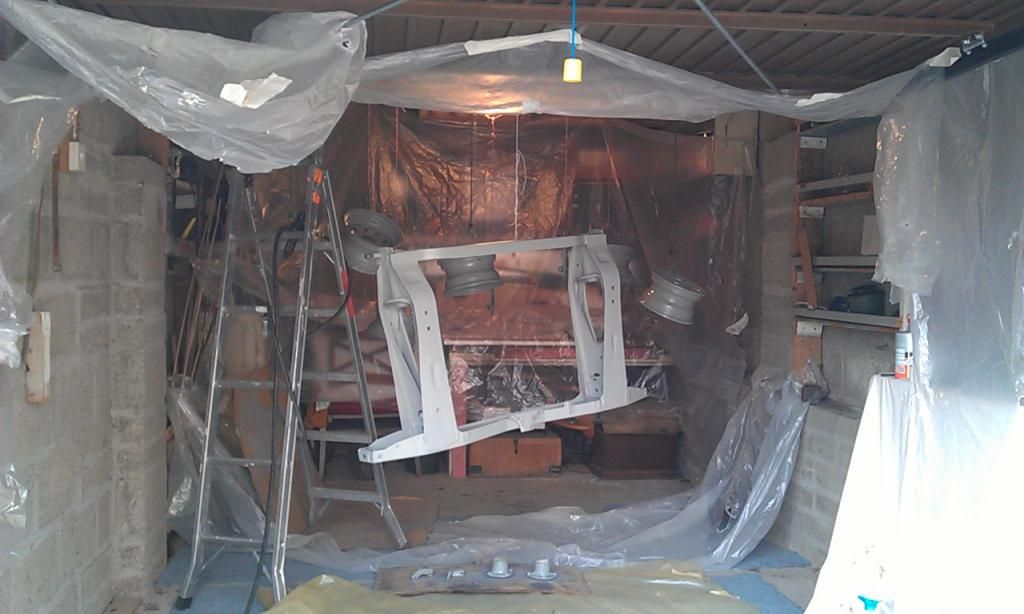
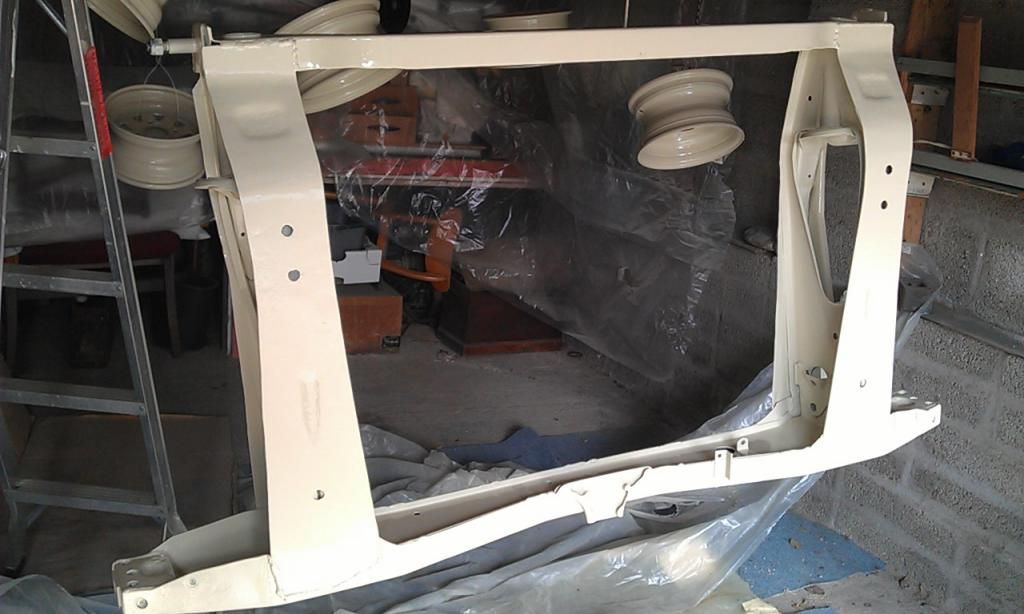
During the same late night session I applied the last layer of Primer to the Rear Subframe, after cleaning up the Spray Equipment I finally sacked it at 02:00!!!


In the morning I got some better photo's of the temporary spray shop and the wheels having had a second coat of Epoxy, this time sprayed on.


IMAG6708_zps95a7e1fe.jpg


IMAG6710_zpsc92cf82e.jpg


IMAG6711_zpsdb0a7496.jpg


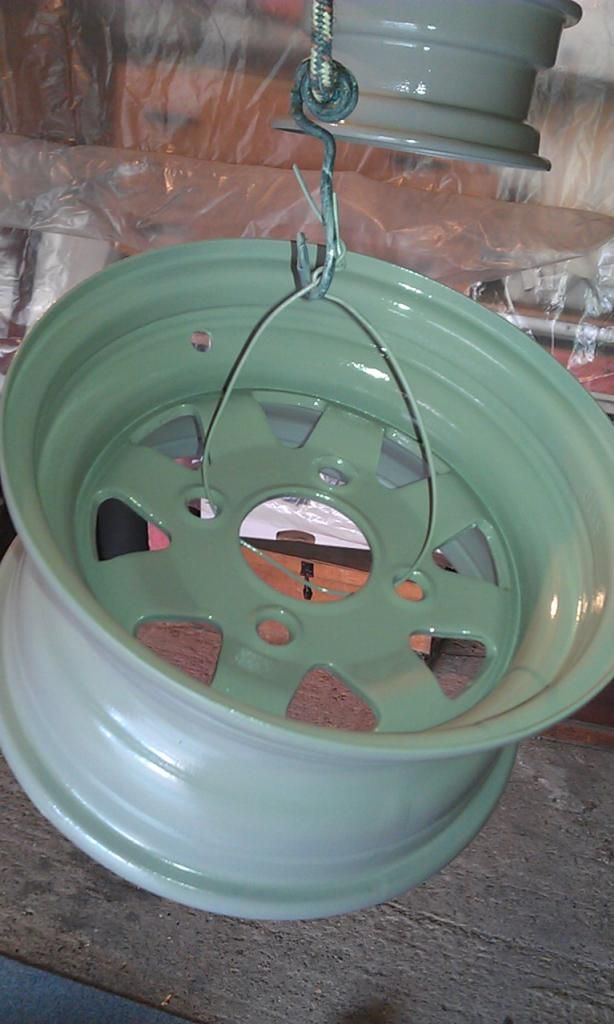
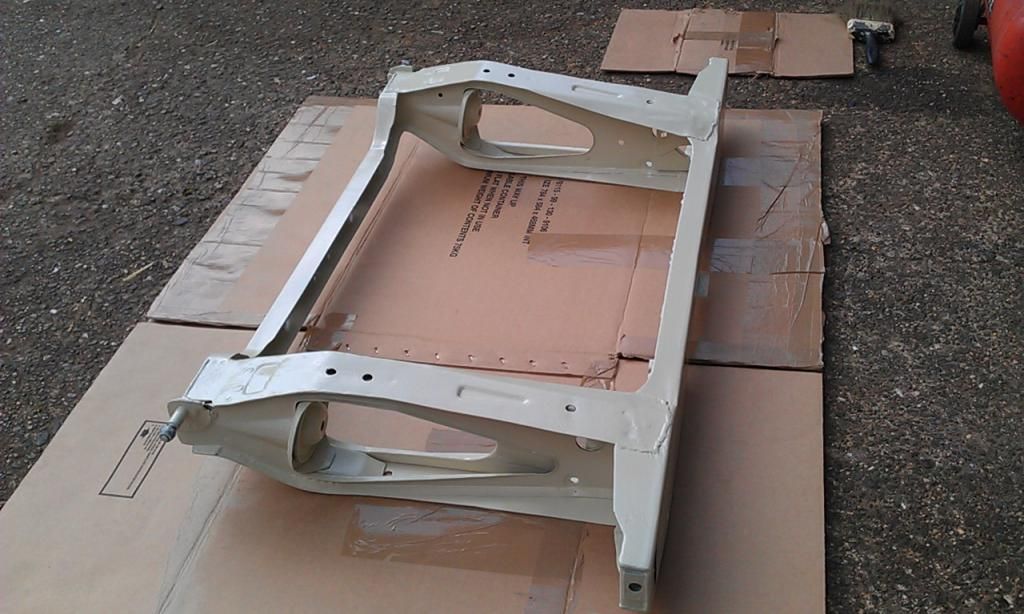
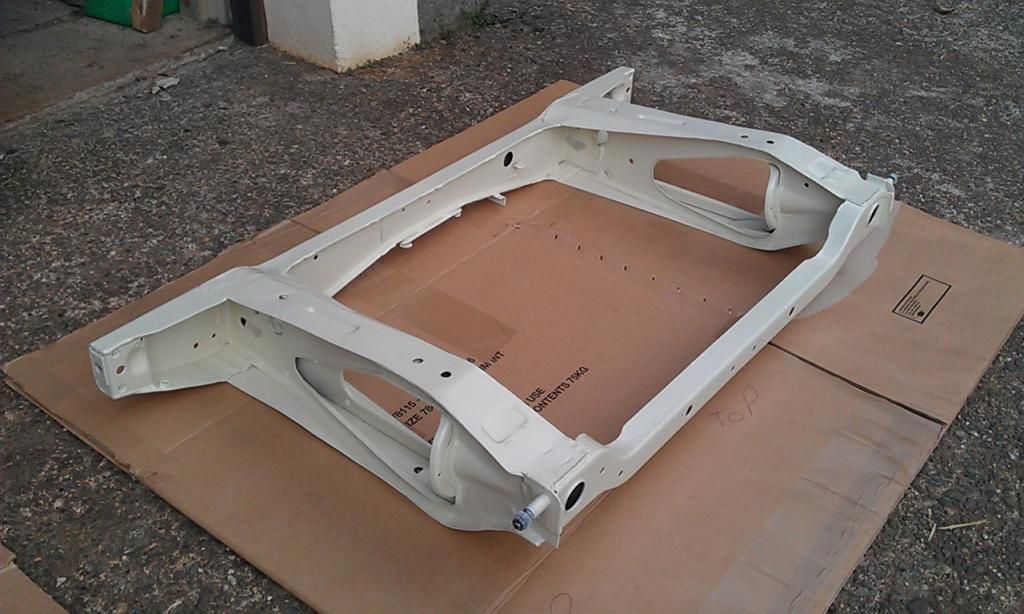
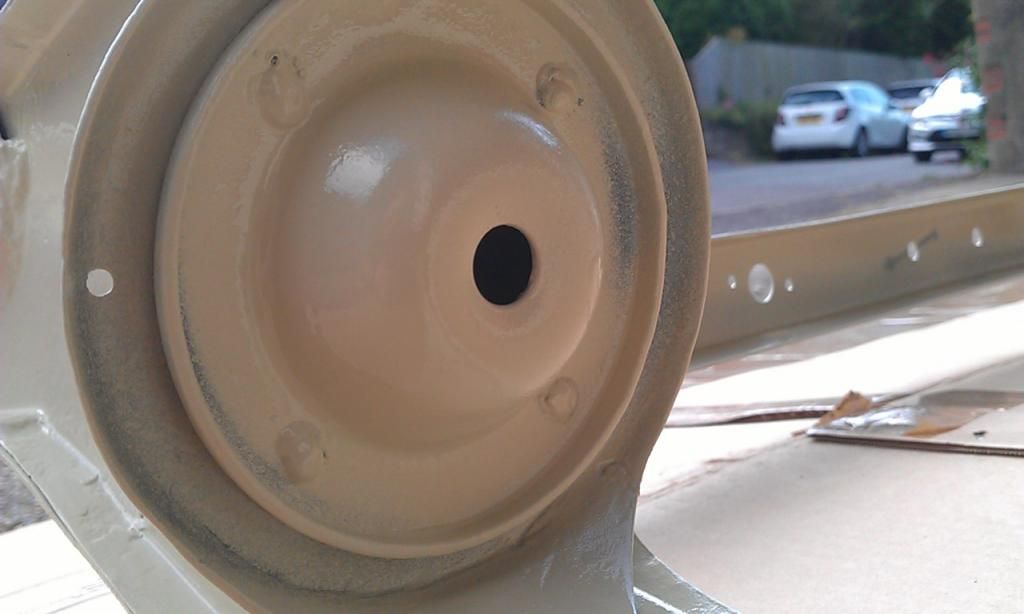
The following day and nights progress involved giving the Wheels, Subframe, Hubs, Backplates and Brackets two coats of Fast Engine Enamel:


IMAG6717_zps6fa78286.jpg


IMAG6718_zpsc831dd03.jpg


IMAG6719_zpsdb9d9f92.jpg


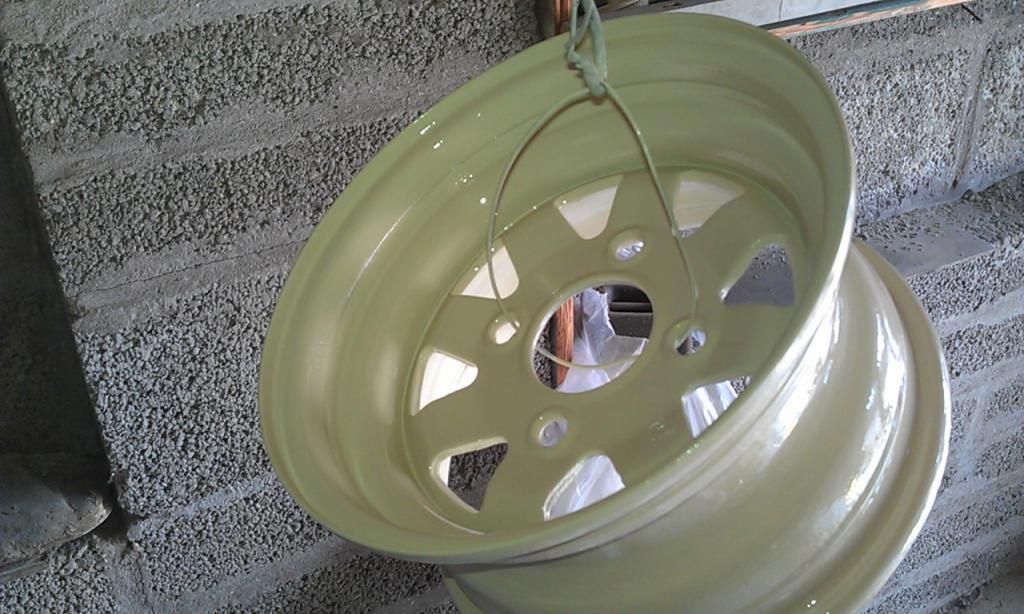
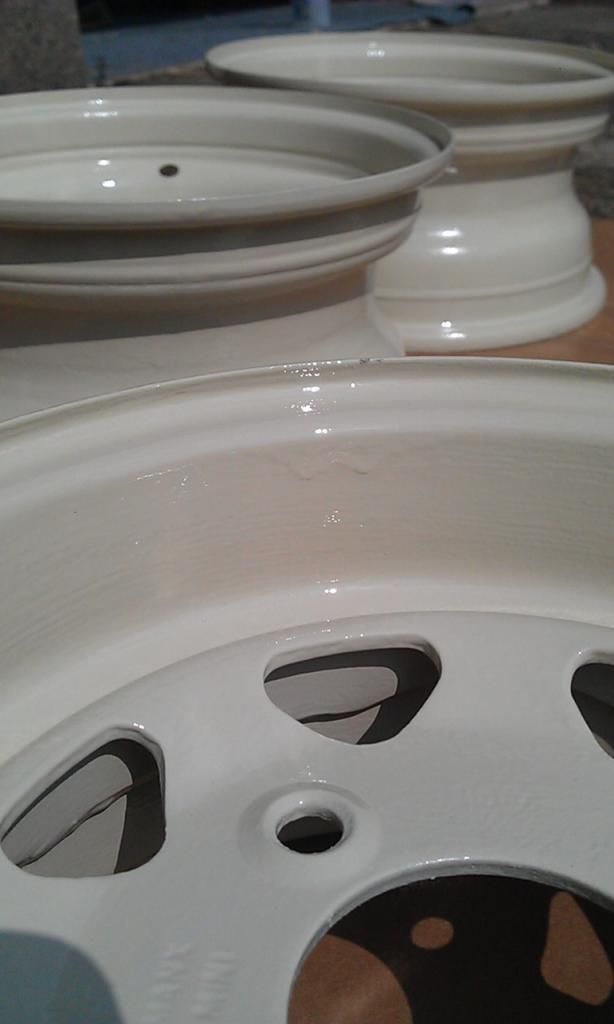
Here are the wheels, at this distance they look the Dog's:


IMAG6724_zps948405a2.jpg


IMAG6720_zps4bb7abc0.jpg


IMAG6712_zps34d6450c.jpg


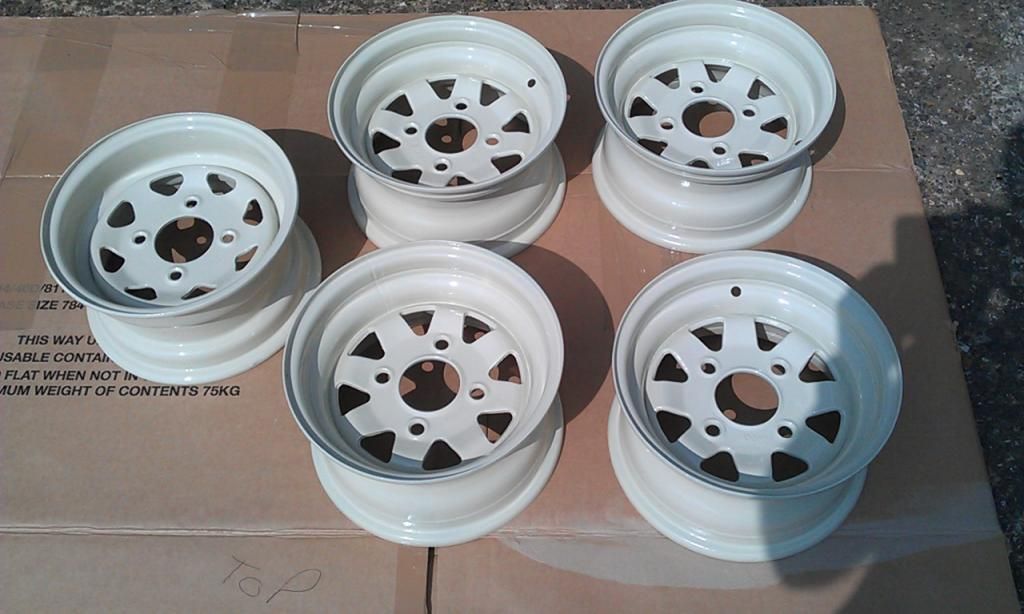
When you spray at night however you are bound to miss a few bits so these will need a touch up, as will a couple of the wheels:


IMAG6722_zps0c8c0af1.jpg


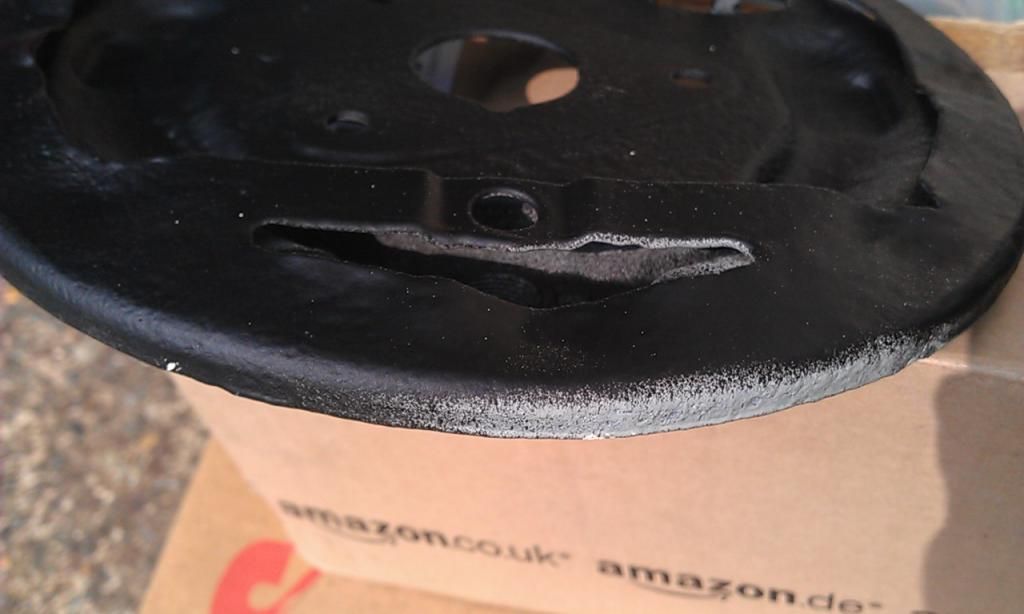
You can just see the primer on the inside radius:


IMAG6727_zpsea8c52e4.jpg


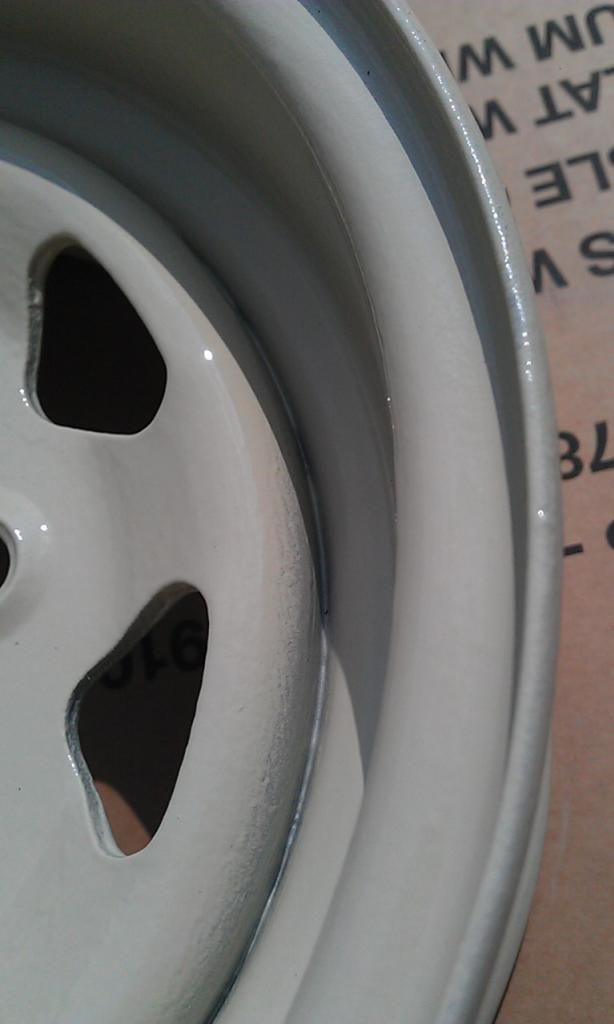
And a couple of drips:


IMAG6731_zps0d40e18f.jpg


The Subframe has a few imperfections but apart from that it's SWEET AS!! Do you like the OEW?


IMAG6732_zps888512ee.jpg


IMAG6733_zpsad44a9b0.jpg


Only missed parts of the insides of the Rear Rubber Support Cups:


IMAG6734_zps7fe951e6.jpg


So the rest of the morning involved cleaning up the garage and packing away the good work to avoid it getting trashed:


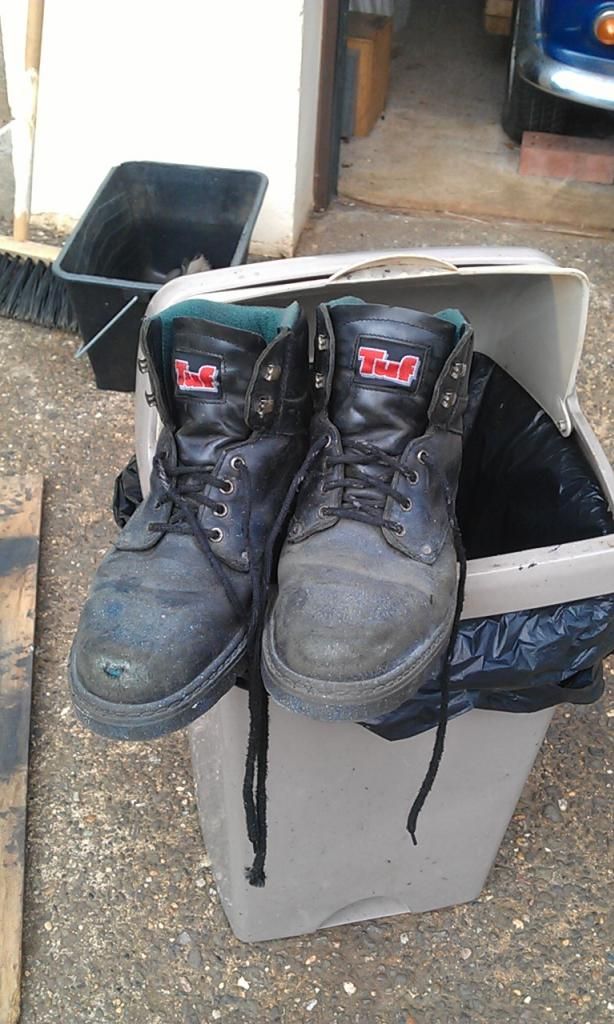
My old faithful safety boots had to go, (not safe anymore as the soles have disintegrated):


IMAG6723_zps23b8d688.jpg


And so the project is packed up ready for an intermission, who knows when I will managed to get stuck in again, I may manage the odd day here and there but I anticipate another 2 - 4 weeks solid work will be required,  :-(


Until next time................


#135 Ben_O

Ben_O

    Mill Road Garage

  • Paint Doctor
  • PipPipPipPipPipPipPipPipPipPip
  • 9,781 posts
  • Location: Isle of Wight

Posted 07 September 2014 - 11:22 PM

Some nice progress here mate. I know what you mean when you say that working on it too much causes some mistakes.


Shame to hear that your project is going to be laid up for a while but perhaps it will allow you to come back to it with a fresh head.


Good luck with the new job


Ben


0 user(s) are reading this topic

0 members, 0 guests, 0 anonymous users