Ahh hot dodge ball swerved then hopefully Jonny, if you need any measurements from B-post the B-post or similar just send us a message of what you need bud.


1982 Austin Mini - Project Who?
Started by
JonnyAlpha
, Mar 28 2011 04:20 PM
852 replies to this topic
#91

rally515
-

- Members
-

- 3,848 posts
Up Into Fourth
- Location: Lancashire
Posted 01 August 2014 - 12:24 PM
#92
JonnyAlpha
-
- Members
-
- 2,749 posts
Up Into Fourth
- Location: North Devon
- Local Club: Exmoor Minis
Posted 01 August 2014 - 02:09 PM
Ahh hot dodge ball swerved then hopefully Jonny, if you need any measurements from B-post the B-post or similar just send us a message of what you need bud.
Thanks - talking of missing hot balls, I was just laying on my back welding on the LH Heelboard Corner and saw out of the corner of my eye a ball of molten metal whizzing past, luckily it hit the floor and melted the carpet and not my head!! I knew there was a reason not to weld directly overhead 
Just PM'd you back about the Wellers.
#93
JonnyAlpha
-
- Members
-
- 2,749 posts
Up Into Fourth
- Location: North Devon
- Local Club: Exmoor Minis
Posted 01 August 2014 - 04:53 PM
More (SLOW) progress, even slower as its now raining and when its raining I can't empty my garage to work :-(
Like the increasing pile of wheels and tyres, I'm collecting 10 Inch Steels:
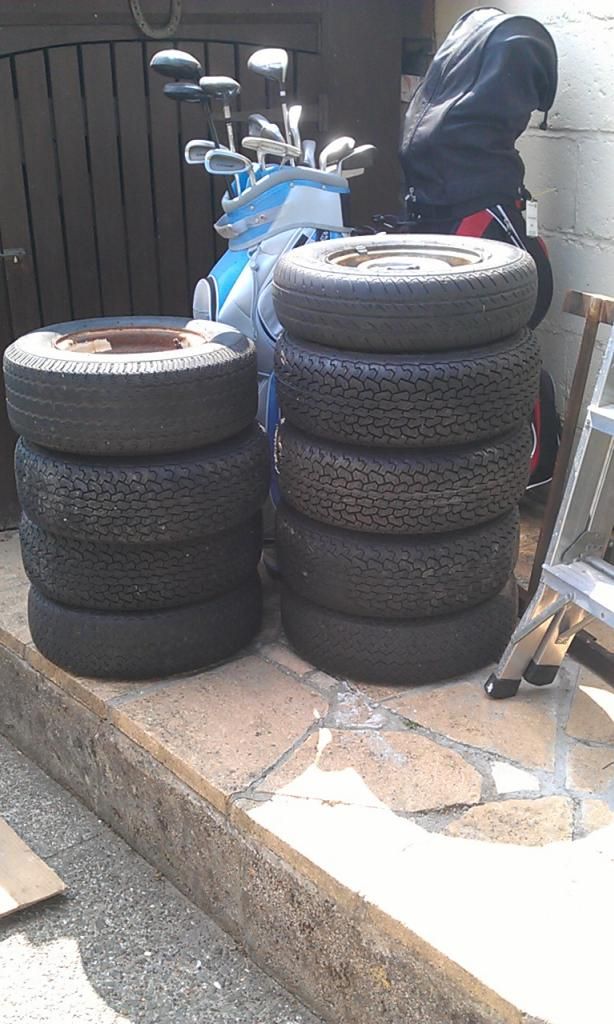
Just bought another two Wellers so hopefully i'll have a matching set now, just need a couple more tyres.............. isn't that all I needed before I started buying wheels??
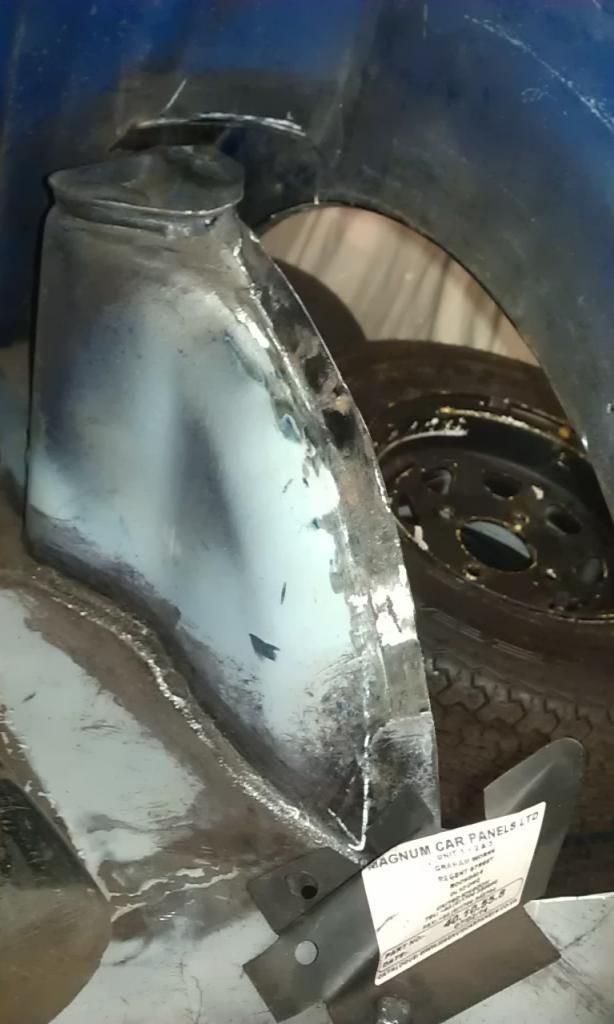
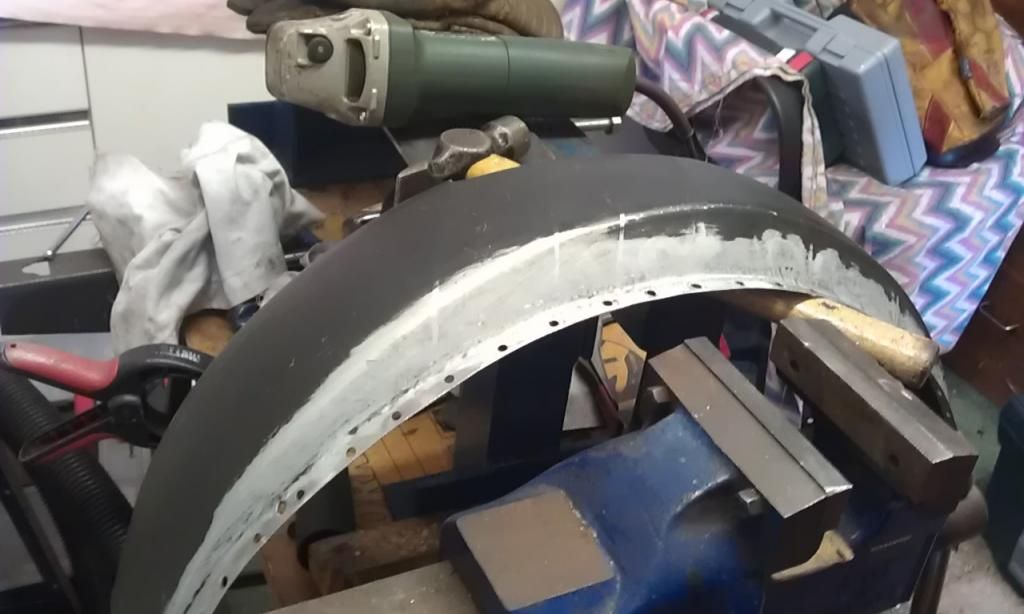
Cleaned up the LH Rear Arch and prepped the Replacement Mudguard ready for fitting, had to do a repair the the outer edge of the Inner Arch on the inside of the Mini:
While I was doing all this work, without noticing the LH Subframe Mount and surround gave way and the LH side of the Mini dropped by an inch or so. Think I managed to save the day by placing a Jack under the Drivers Seat Belt Mount.
With this problem I thought I had better getting a jiggy on and sort out the Heelboards so next I switched to the LH Heelboard Repair. Here it is test fitted in place, its an M-Machine one, just working out what and where to trim.
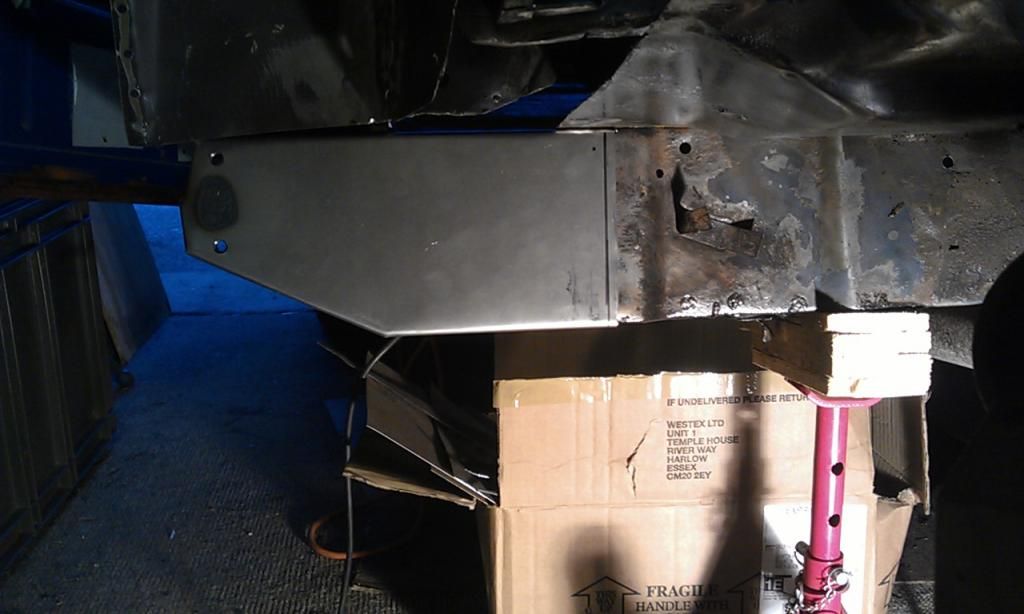
Once it fitted nice and the Subframe Mount Bolts where in place through the Jig I removed it to drill the Spot Weld holes in the Sill / Floor and the Repair Panel and gave all internal mating sides a coat of Zinc Weld Through Primer.
To get this one to fit I had to make an adjustment to the home made Inner Sill as it was sticking out about 5mm too far and preventing the Heelboard Panel from fitting. I cut a horizontal line to allow the Sill to move in, this will be welded shut once finished:
For added strength I decided to put a joddle along the edge where it meets the original Heelboard, this joddled edge will sit under the rear seat so it will be out of sight:
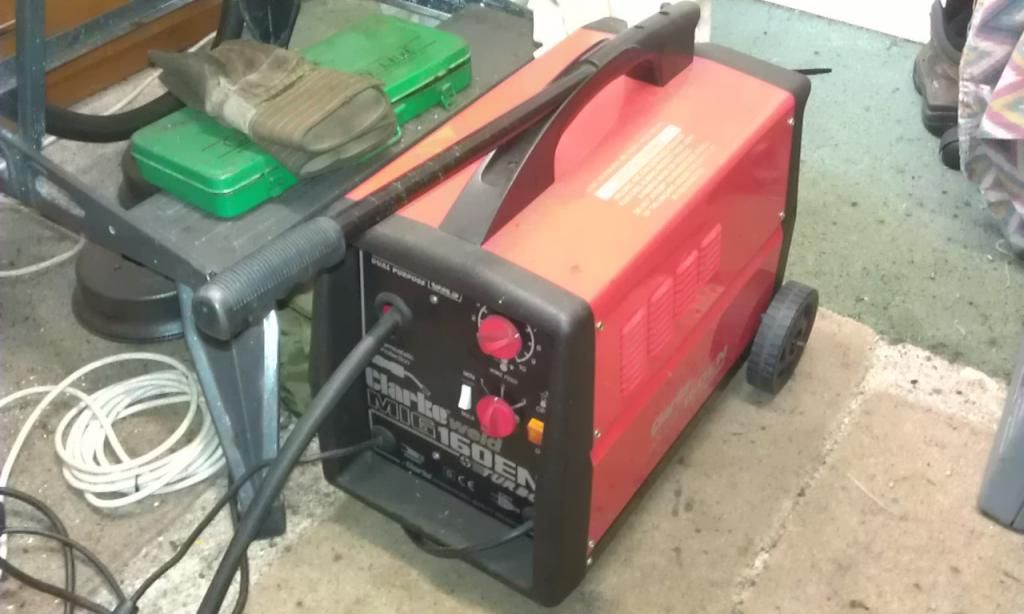
Here's my welder
Once everything lined up with the Jig tightly in place and the Subframe Mounting Bolts moving Freely, I tightened up the Subframe Mounting Bolts and tack welded the Repair Panel in place:
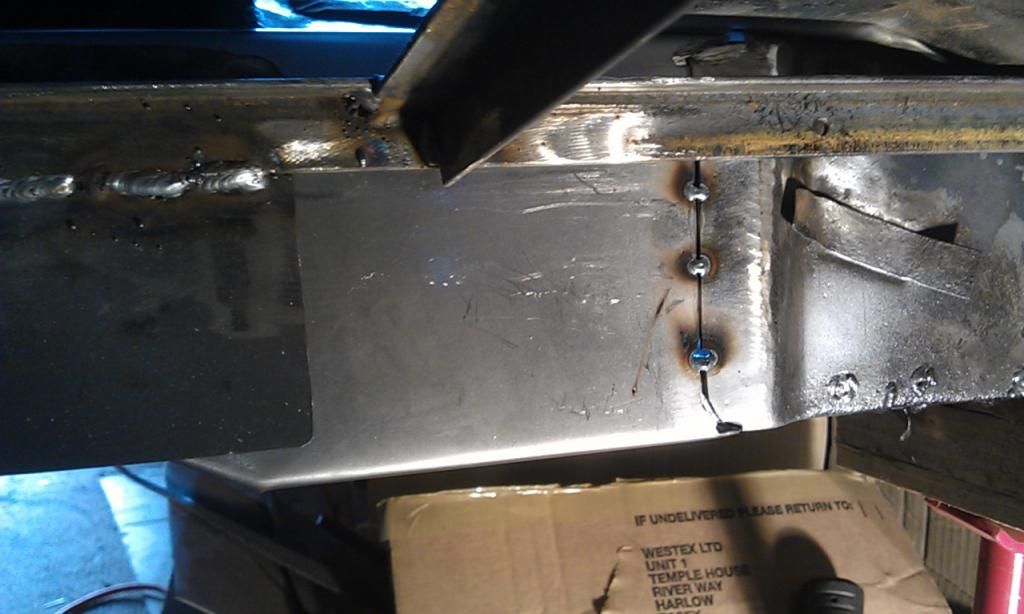
Then I removed the Jig and did all the plug / spot and Seam Welds and dressed them down:
I have also tack welded the Subframe Mount Bracket to the Inner Sill Still but need to seam weld it in place and do the plug welds inside the Mini but here its is solid!!
I really want to finish the Boot and Heelboards then I can throw a couple of coats of Primer on them to stop surface rust and painting means nearing completion
All that's left in the Boot now is the RH Outer Arch (Which is prepped ready to drill and weld), the Fuel Tank Strap Bolt Bracket (New one arrived with the M-Machine bits) I also need to weld the Rear Arch Subframe Mounting Brackets and have also just received some Rear Valance Closing Panels and along with the Rear Valance (which needs a refurb) all need to be welded in place before I prime otherwise I'll be going backwards again!!
Edited by JonnyAlpha, 01 August 2014 - 05:07 PM.
#94
JonnyAlpha
-
- Members
-
- 2,749 posts
Up Into Fourth
- Location: North Devon
- Local Club: Exmoor Minis
Posted 01 August 2014 - 05:23 PM
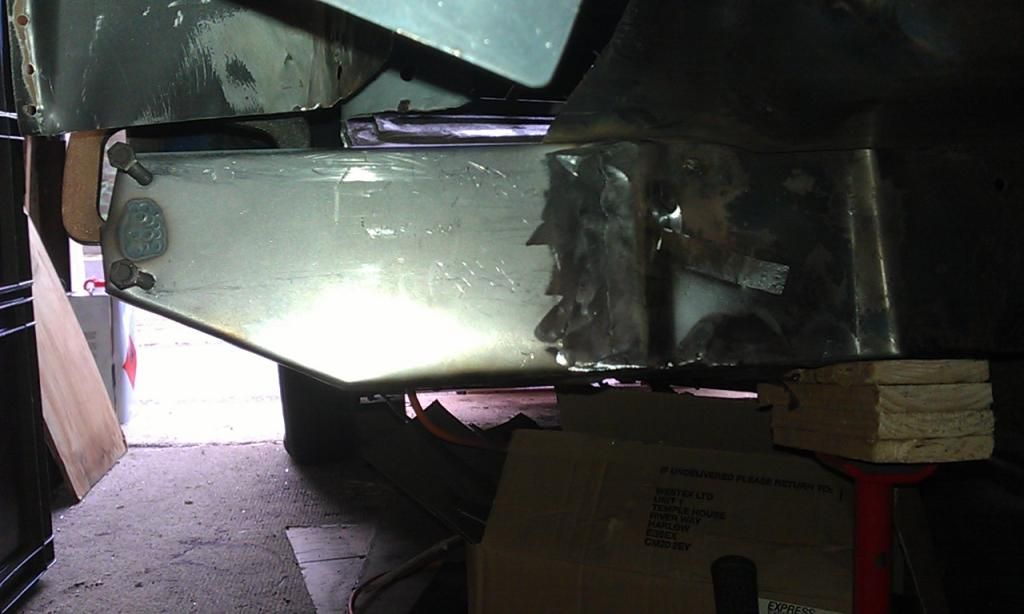
For my sanity I thought I'd compare a before and after:
BEFORE:
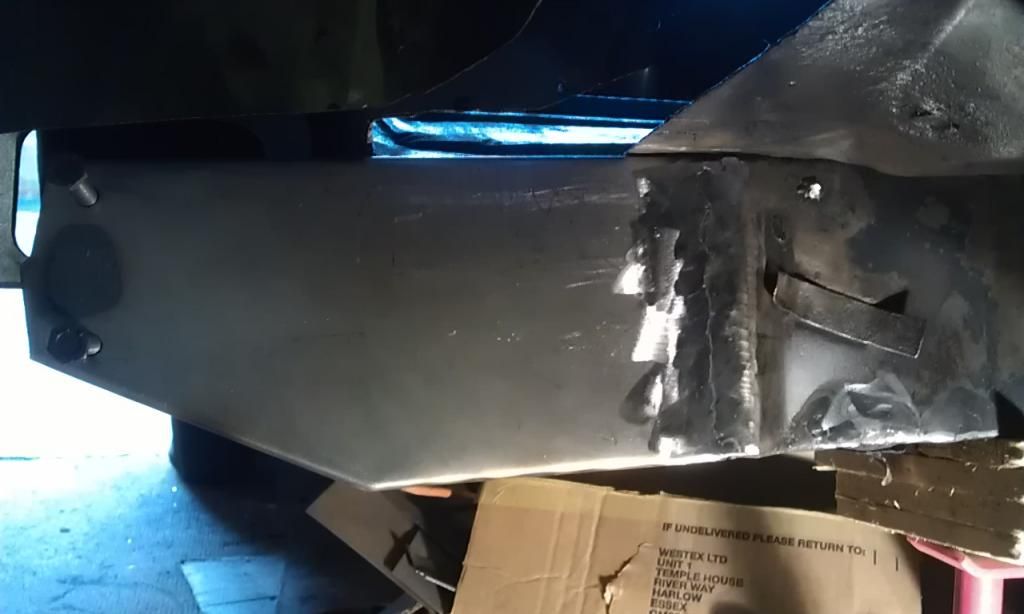
AFTER:
I feel better now
#95
Daz1968
-

- Members
-
- 2,058 posts
Up Into Fourth
- Location: Dudley
Posted 01 August 2014 - 06:18 PM
Getting there now, your work is very good
#96
JonnyAlpha
-
- Members
-
- 2,749 posts
Up Into Fourth
- Location: North Devon
- Local Club: Exmoor Minis
Posted 02 August 2014 - 05:57 PM
Getting there now, your work is very good
Thanks Daz
#97
JonnyAlpha
-
- Members
-
- 2,749 posts
Up Into Fourth
- Location: North Devon
- Local Club: Exmoor Minis
Posted 02 August 2014 - 06:27 PM
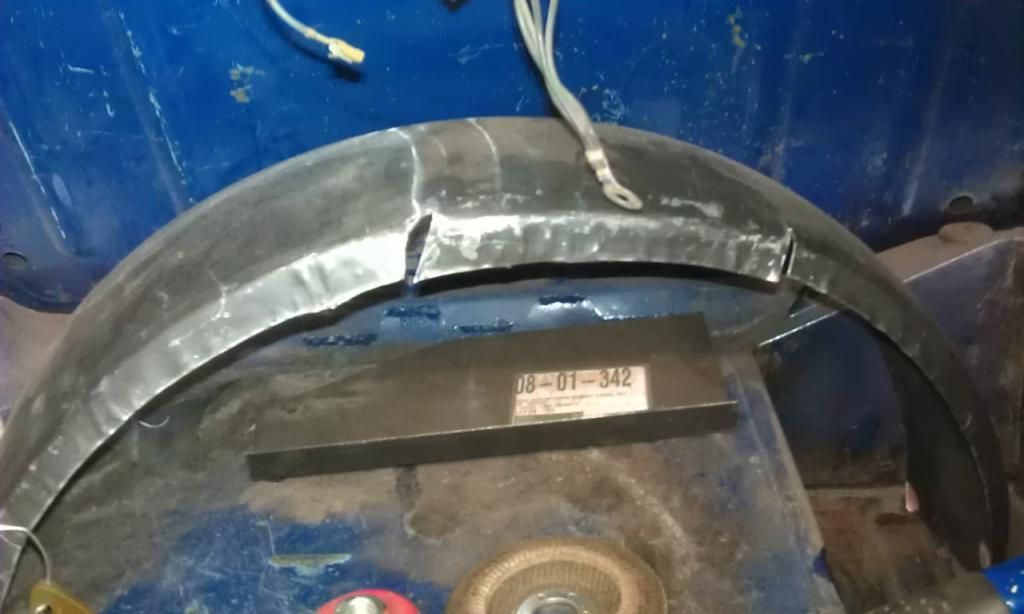
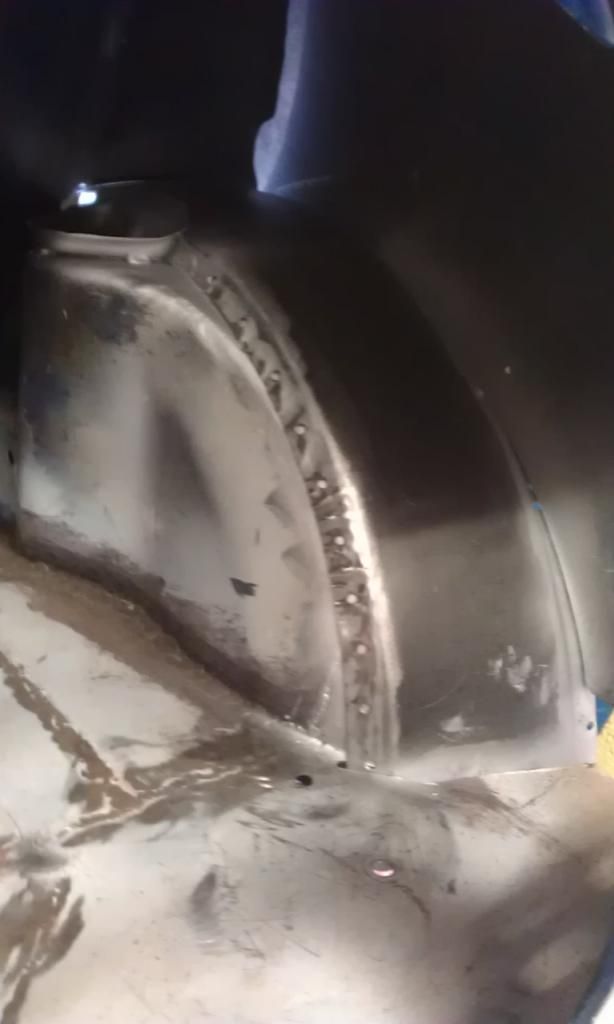
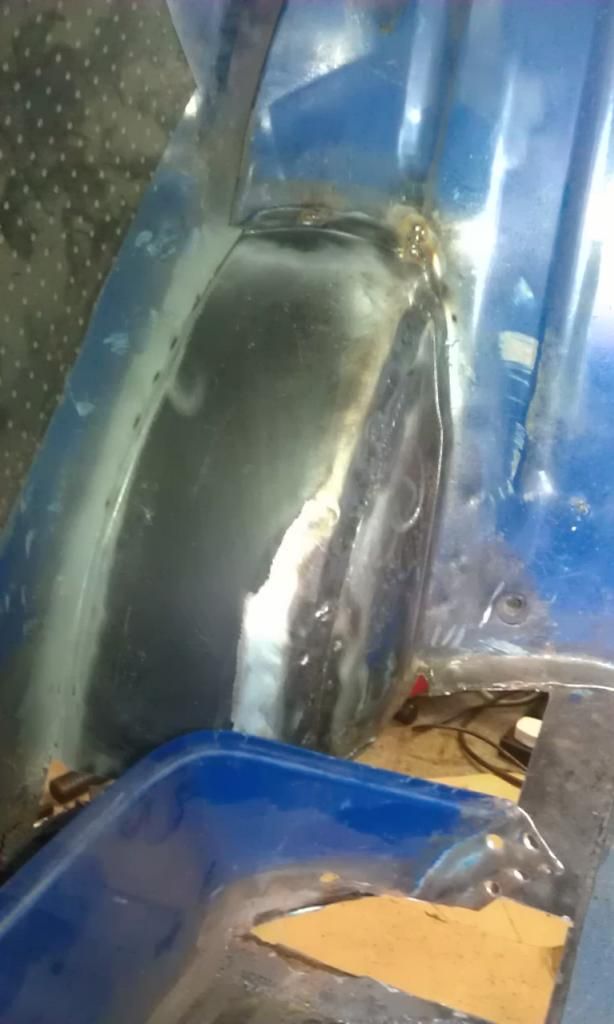
Still slogging away trying to get the boot finished, here's the LH Companion Bin welded back to the rear arch:
Sorry about the poor quality of photo, my phone does not take good photos indoors and when the garage door is open I get a blast of sunlight which does not help.
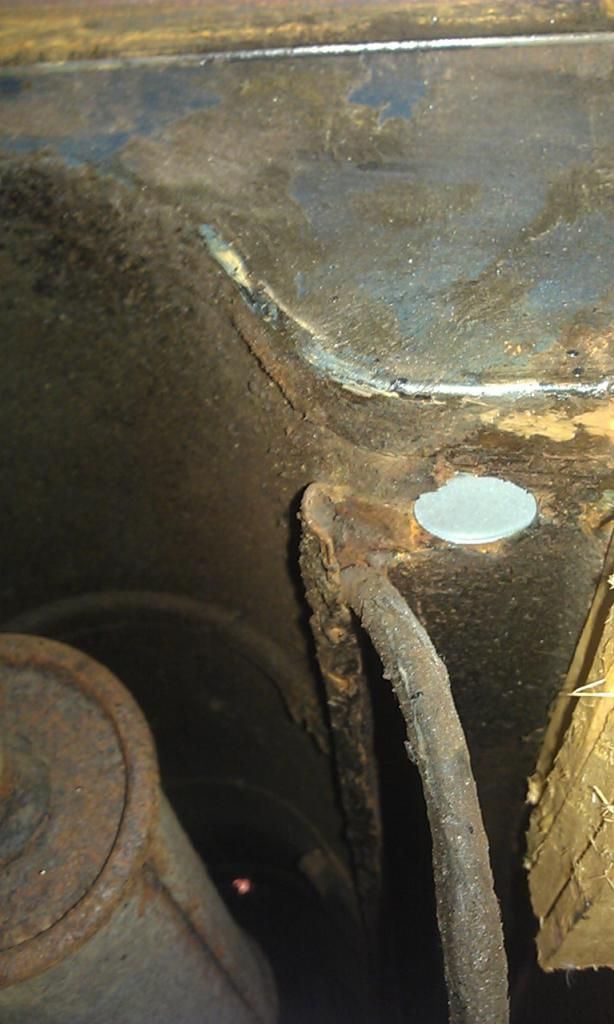
Next up I finally got around to making a repair panel for the missing piece of the Rear Seat and the bottom corner of the Boot just behind the Seat Belt Mount.
Before I made and fitted it I tidied up the bottom of the rear inner arch and cleaned up and treated the inside of the Rear Seat Belt Mount Support Bracket.
First I made a cardboard template and cut out some sheet steel, made the folds:

Marked and drilled the Spot Weld holes:
Then held it in place with some Mole Grips and Tacked it in:
Stopped for Dinner and now off to the Cinema - I do have a life outside of the Garage
#98
JonnyAlpha
-
- Members
-
- 2,749 posts
Up Into Fourth
- Location: North Devon
- Local Club: Exmoor Minis
Posted 05 August 2014 - 08:21 AM
I am really desperate to be able to spray the boot inside and underside but need to ensure that all the welding is complete otherwise it will be pointless.
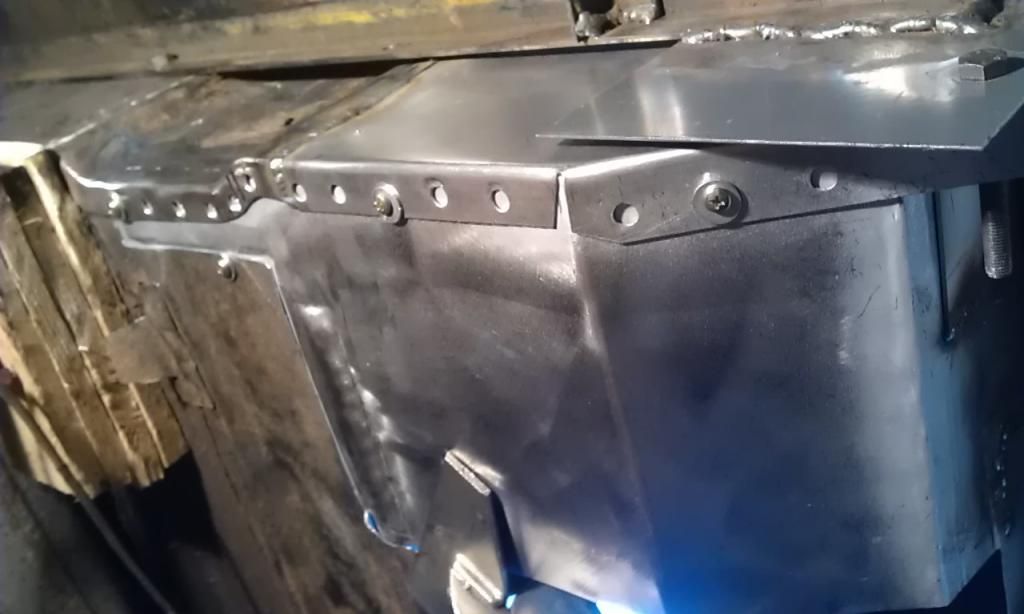
To start with I have just finished fitting the RH Arch / Mudguard (apart from dressing the welds).
First of all I had to repair the edge of the inner arch:
Then after test fitting the arch and marking where the spot weld holes needed to go I drilled out the spot weld holes, re-sharpening my drill bit on my bench grinder and then using a Thinner Trick removed the Black Paint.
Then I sanded down the mating areas to be sprayed with U-POL Weld Through Primer using 320 Grit W&D and then sprayed them up.
Here it is test fitted:
And here it is welded in place:

Now in order to finish and spray the boot, the areas that need completing are the last panel that I fitted in the Inner LH corner and the same (not so bad) problem in the Inner RH corner, I also need to patch up where the Boot Floor meets the back of the Arches, fit the Rear Arch to Boot Floor Brackets and the Rear Valance - quite a bit to do.
I cant' patch the rear corner as it is part of the rear seat and I can't do that until the RH Heelboard has been done and the Heelboard can't be fitted until I repair the Floor and the Inner Sill.
So upshot is I better get cracking, staring with the RH Heelboard!!

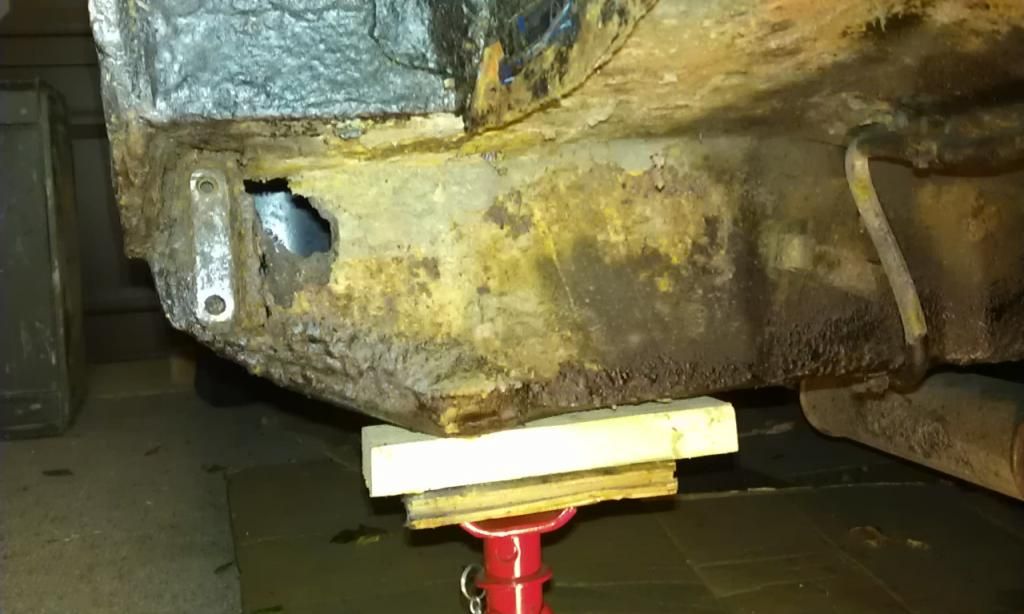
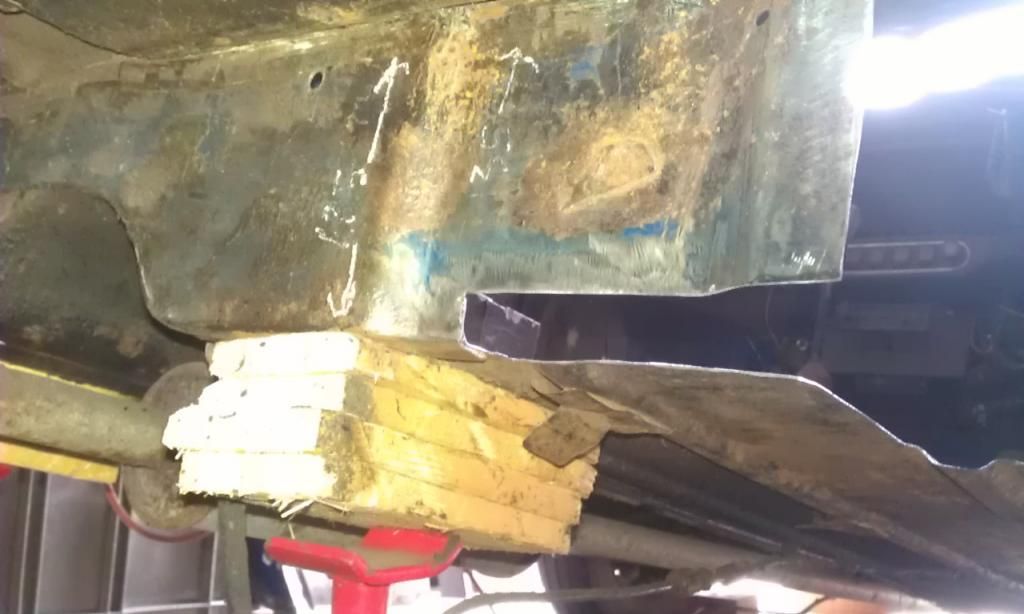
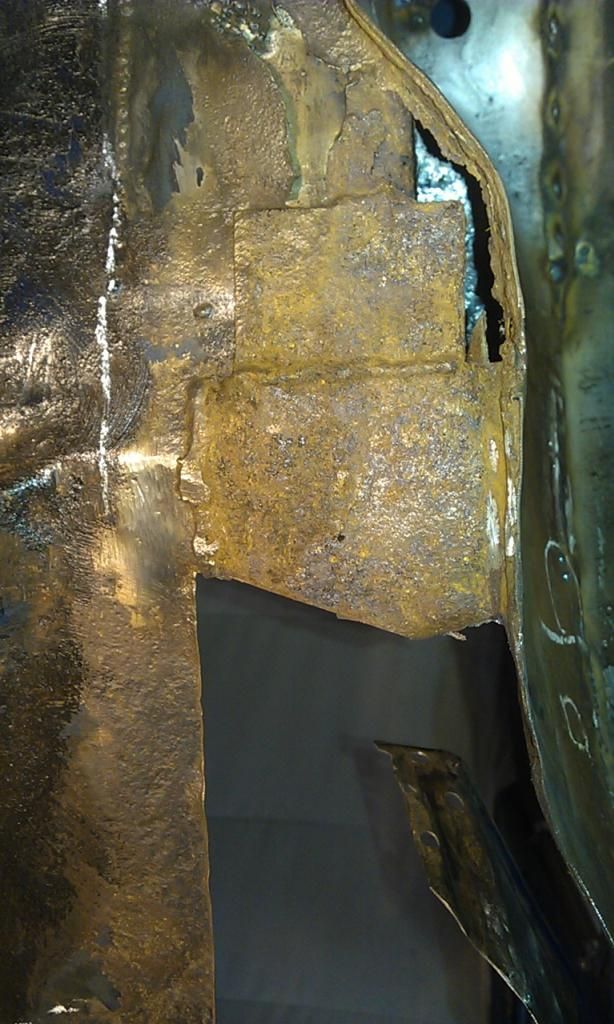
What a mess this one was, it was actually worse than the LH side, when I remove the Over Sill and Original Sill someone had filled the area around the Subframe Captive Nuts with Expanding Foam and behind the lower captive nut which was a replacement I found the original captive nut still hanging off to one side surrounded by the remnants of the rusted Heelboard are that had been repaired in the past - shocking!!!
In the pic I have already started to cut the rotten Floor Out and the Heelboard is marked with chalk for the chop. I'll be doing the same as the LH side. Making a repair panel for the rear corner and triming back the old inner sill to good metal to but weld it to.
Again I have got two layers of old sills welded to the door step to grind away!!!
Edited by JonnyAlpha, 08 August 2014 - 07:14 PM.
#99
JonnyAlpha
-
- Members
-
- 2,749 posts
Up Into Fourth
- Location: North Devon
- Local Club: Exmoor Minis
Posted 08 August 2014 - 07:12 PM
Had my Son and Grandson staying over for a few days so no real progress until today. I did manage to get the old Heelboard and Floor out ready to start assessing what need doing.
The bottom rear of the Companion Bin will need some work, as will part of the Floor up to and including the first flute and a little more further in to the second flute up against the Heelboard.
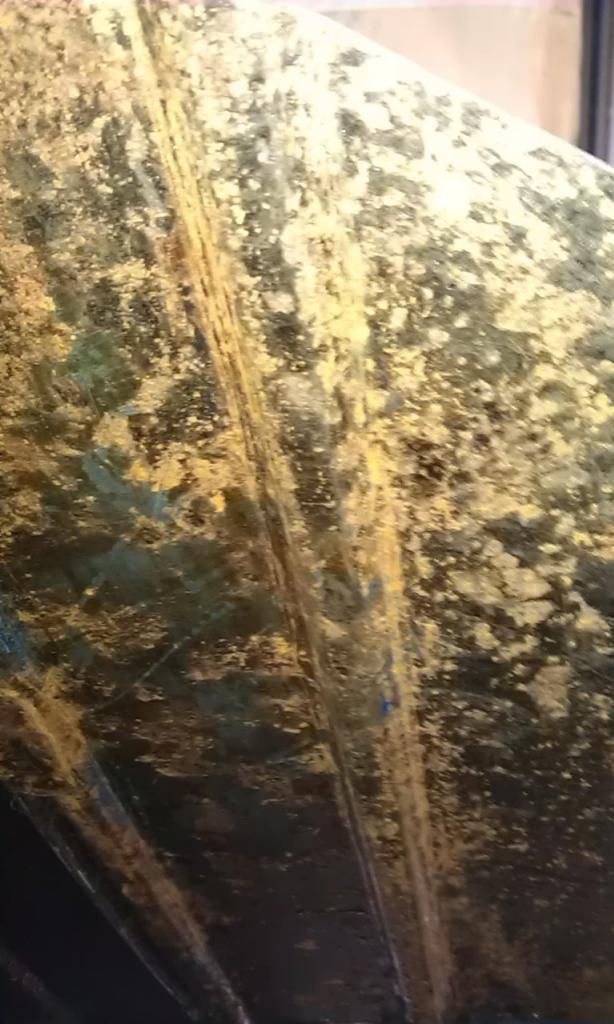
Apart from some surface rust in areas the floor inside is OK:
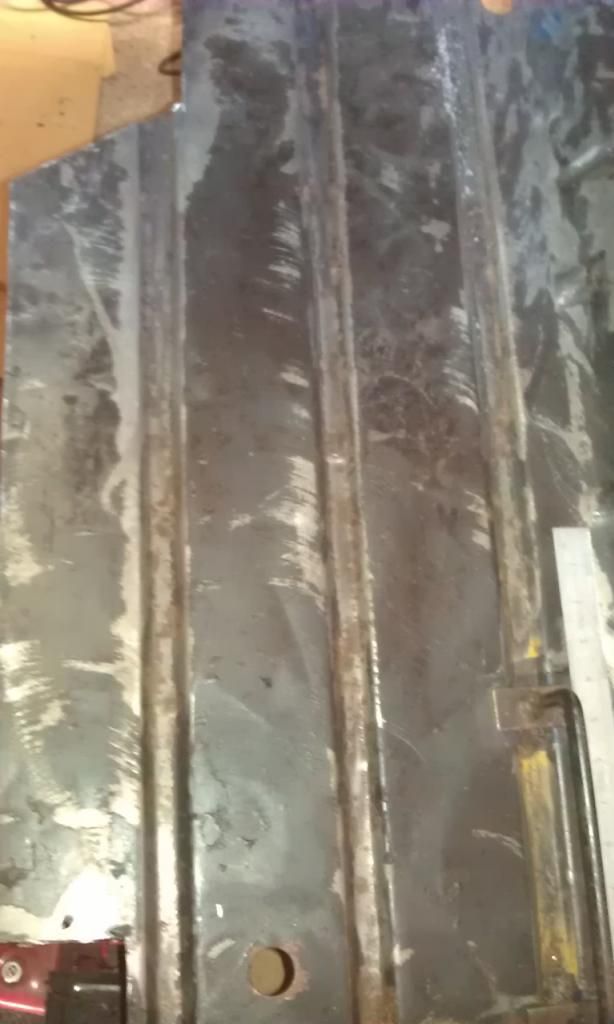
But underneath (under the Undersill) its pretty tatty :-(
I am going to clean it up with Twisted Knot Brush and have also just ordered some Bilt Hamber Deox Gel, never used it before so I'll see how it turns out on the rusted areas?
When I cleaned up the Floor up against the Heelboard I noticed a rotted area a little further in, this became more apparent when I split the Floor from the Heelboard up to the second Flute in order to clean up the joint and get some Zinc Spray in there.
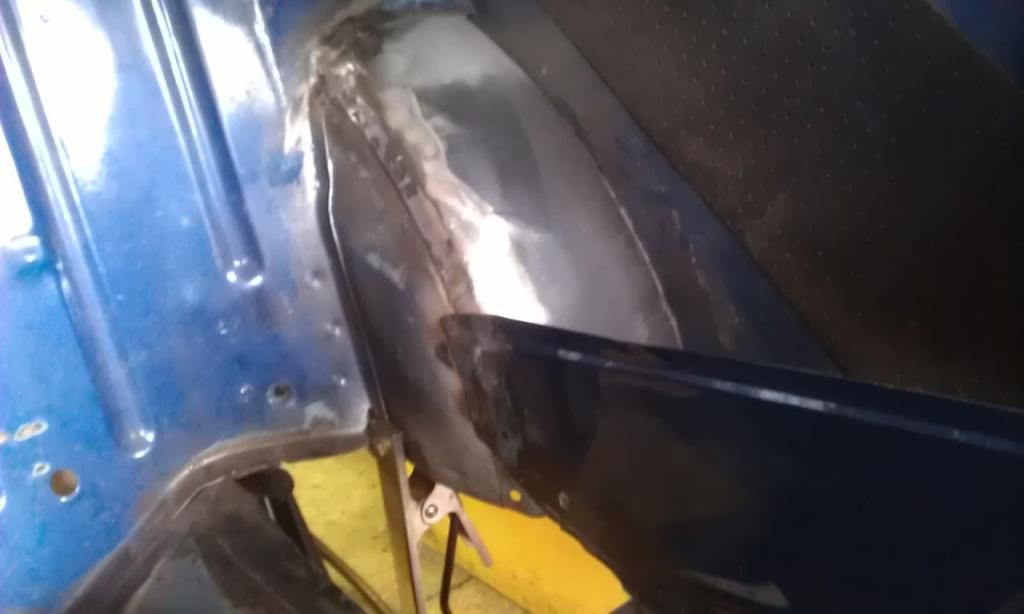
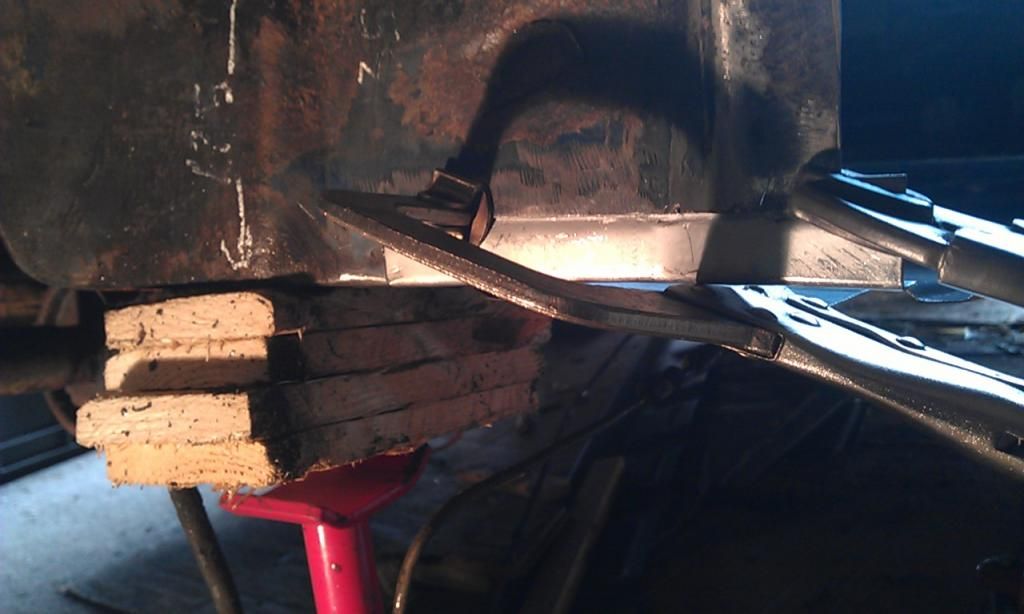
Also the bottom edge of the Heelboard is very thin and pitted so I decided it needed some attention, out with the chalk and grinder:
First up I cut out the damaged area:
Don't worry that Axle stand is not taking any weight at the moment, the Mini is held up elsewhere
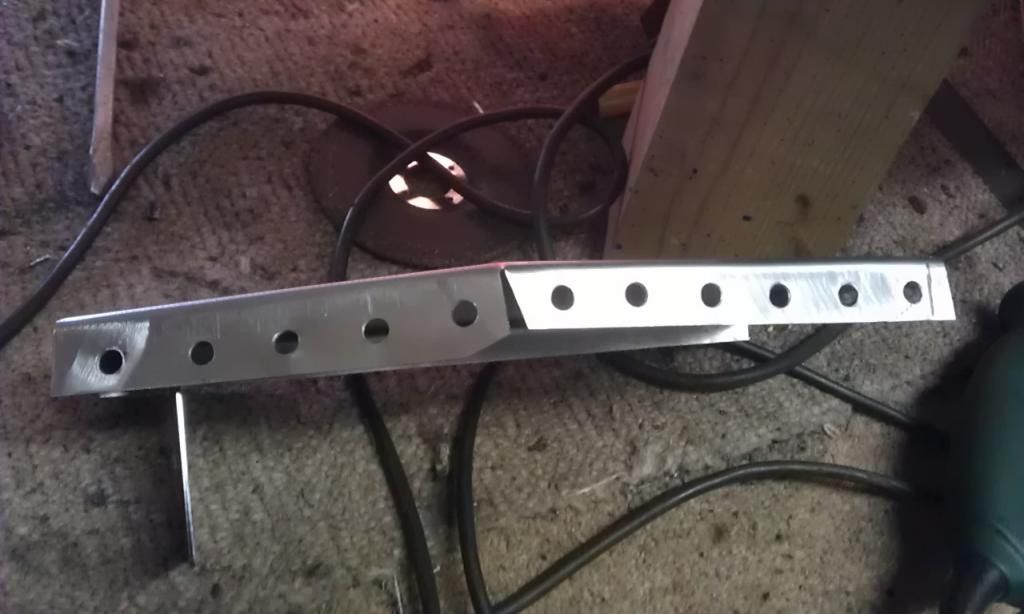
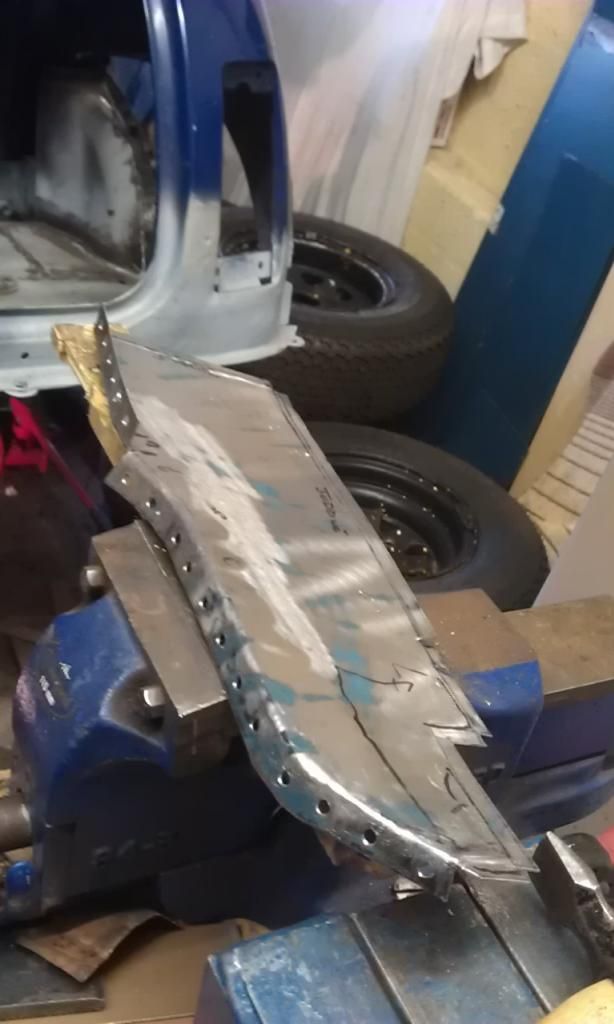
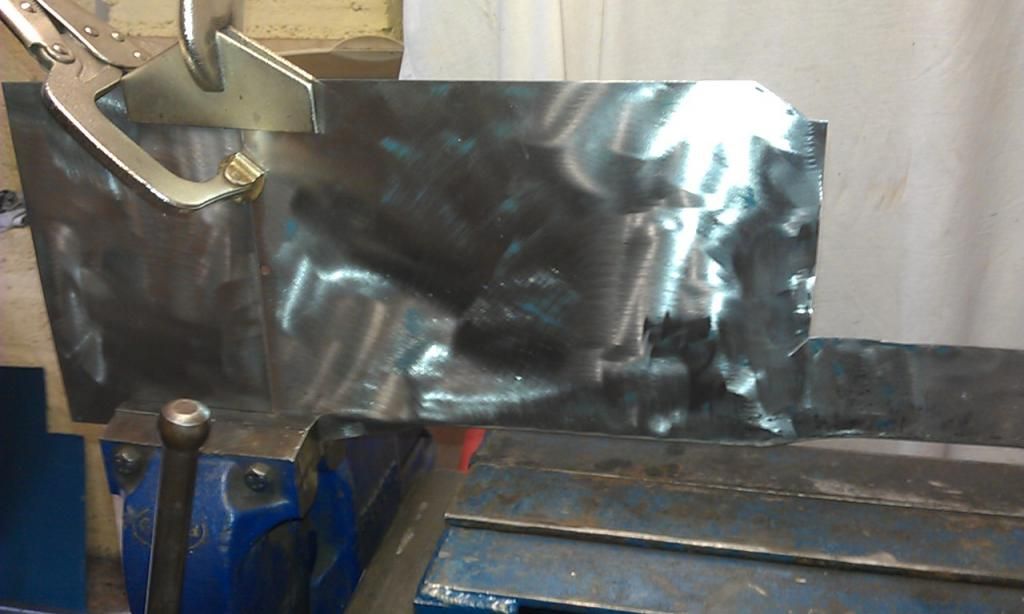
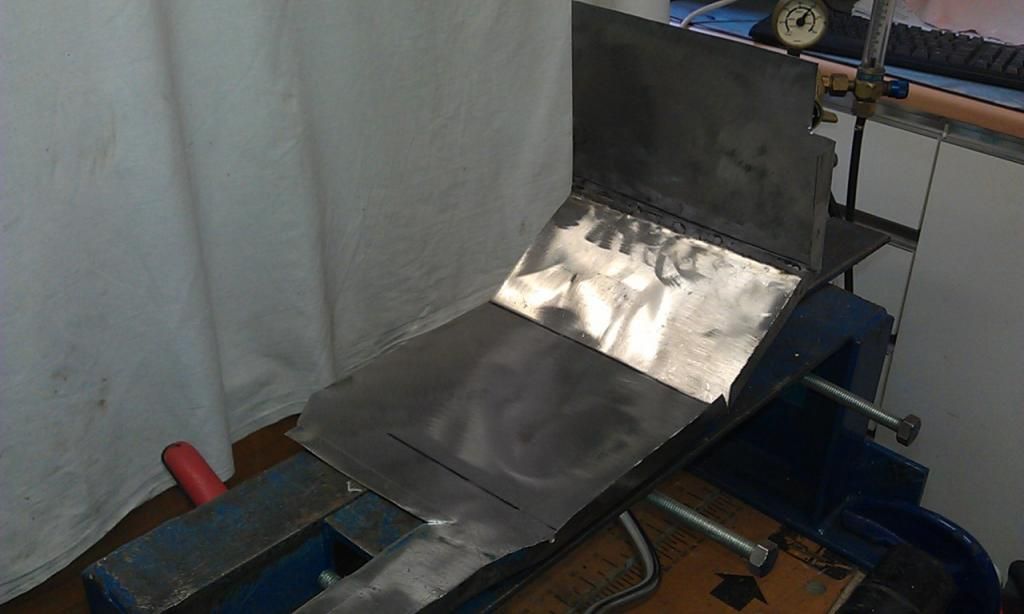
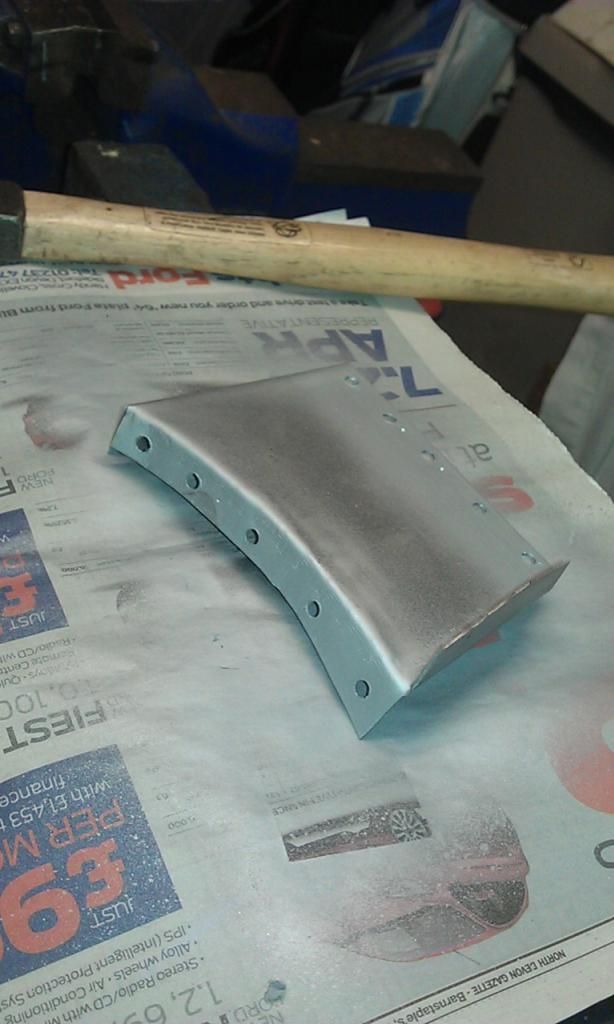
Then I made a repair panel, the folds along the curve where cut and welded, a lot easier and quicker than folding along a curved line. I also decided for strength to Joddle the top edge.
Here's the piece finished:
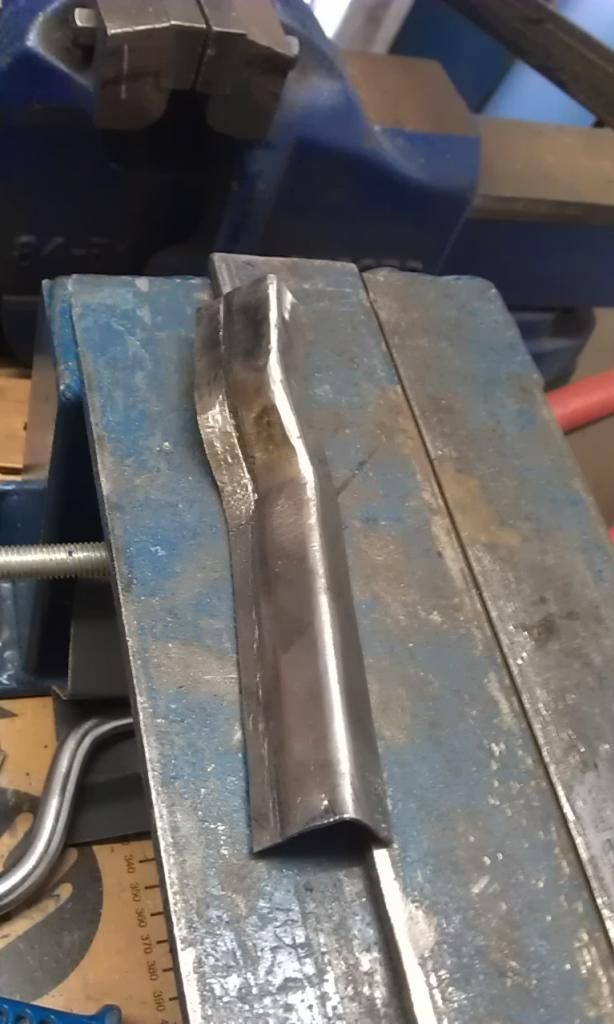
It's 1.2mm sheet metal so did not want to Joddle using the Edge Setter that I borrowed, so I had to improvise, using some 1.2mm scrap, Hammer and Chisel .
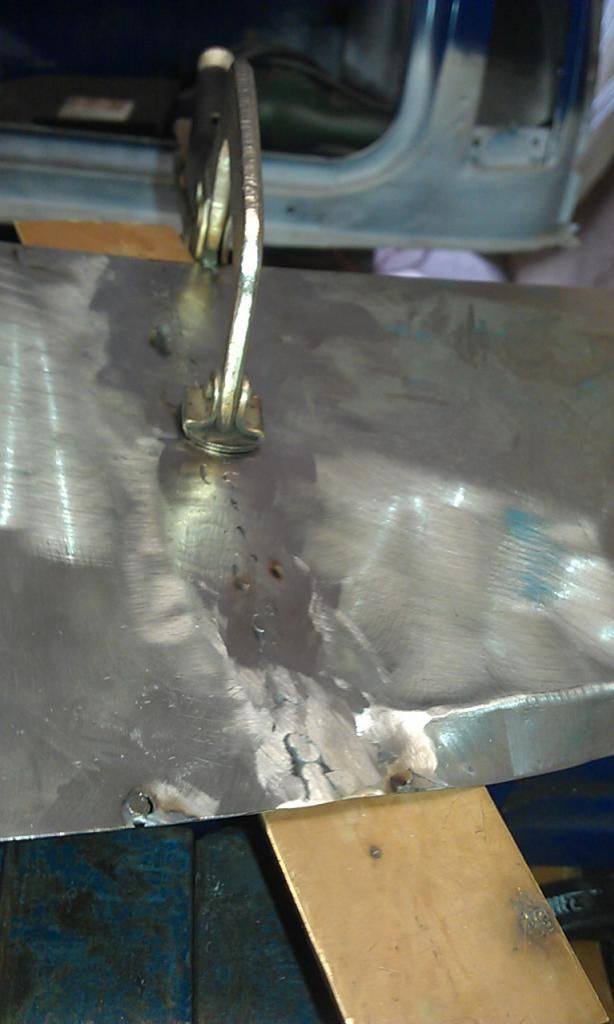
After test fitting and spraying the inside mating edges with Weld Through Primer I then clamped it in place ready for welding, making sure that from top to bottom measured 135mm so that it would match the Heelboard Repair Panel.
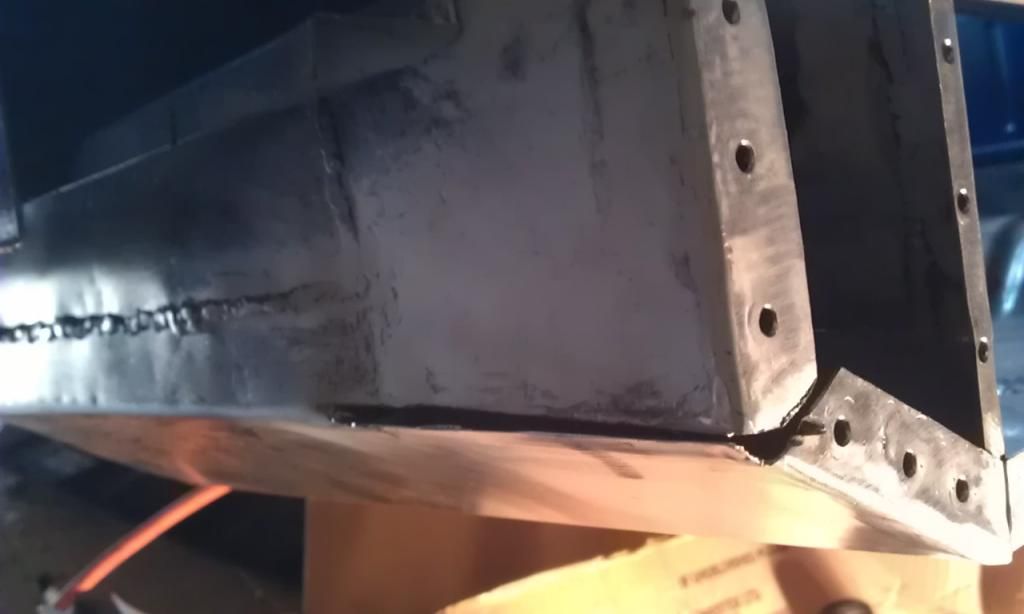
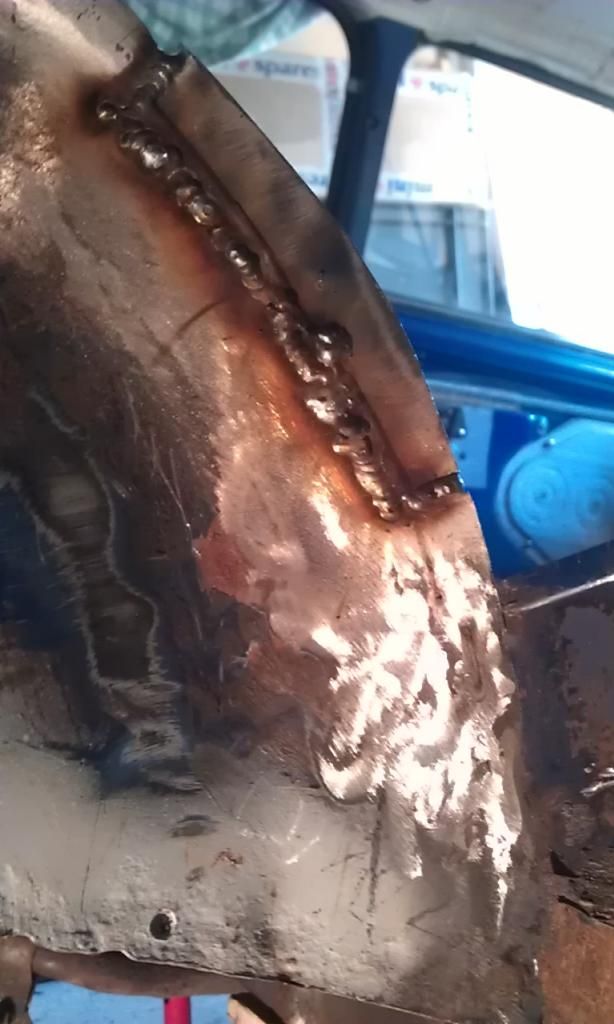
Here's the back welded up:
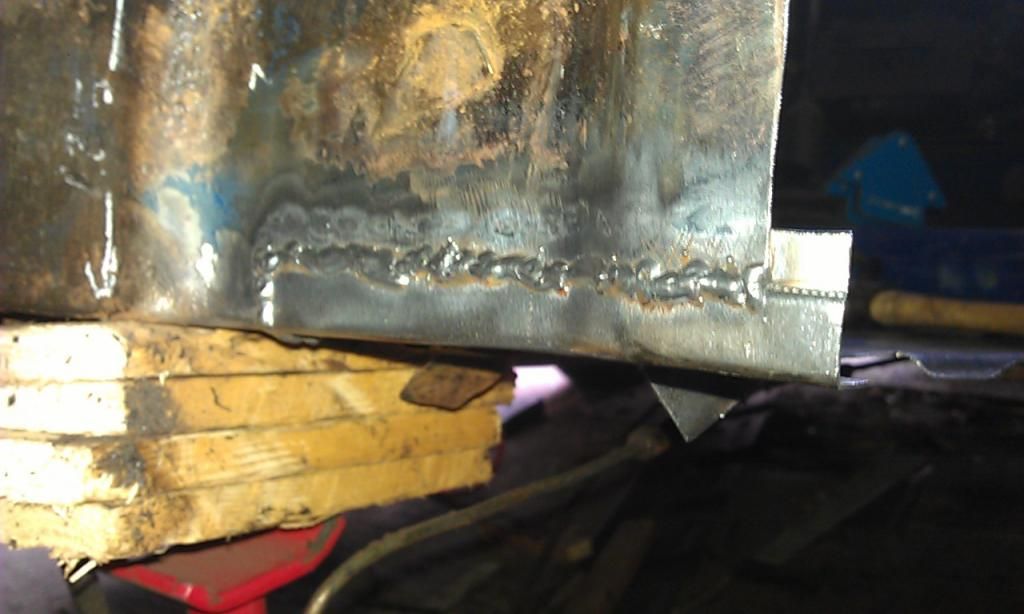
And the front:
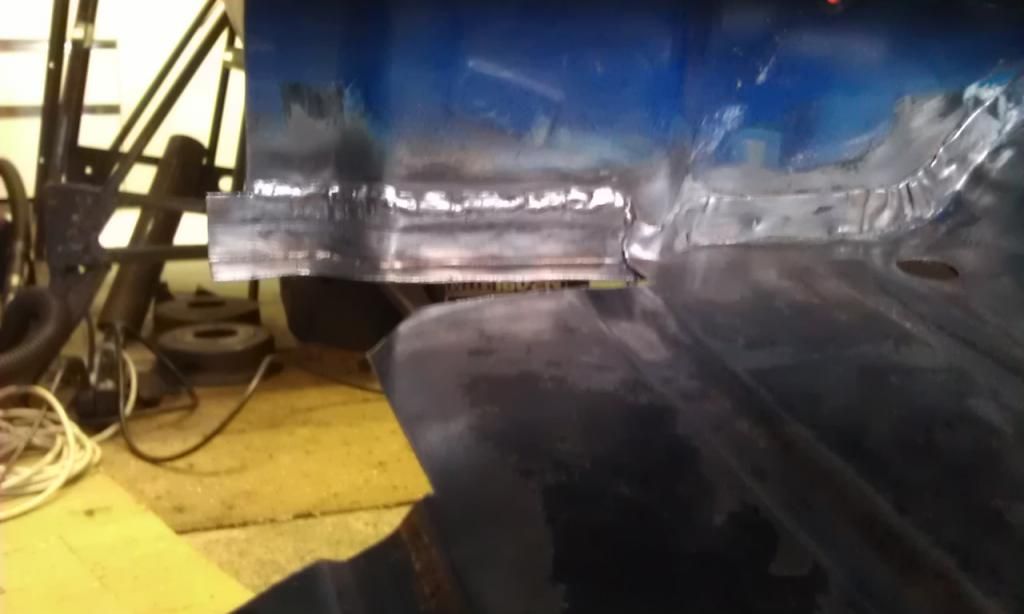
Sorry about the shaky photo, the welding inside was pretty sweet and the Heelboard is now solid!!
Here it is with the welds dressed down on the outside (I will leave them as they are on the inside again for strength, they are above where the Floor will fit so as not to interfere and also hidden under the Rear Seat and Carpet).

I then cut off the overlap on the repair piece I had just fitted and measured up the Heelboard Repair Panel and cut it to fit using my Subframe Jig as a guide:
That took me from about 11:30am to approximately 17:00 (5 1/2 hours work for what seem very little progress, but I am happy that its going in the right direction.
Not decided what order to do the next bit, wether to weld in the Heelboard and then do the Floor / Inner Sill or the other way around?
Also have to consider fixing the bottom of the Companion Bin which will need the Floor in place but not welded as a reference to height?
I suppose if you were just renewing a floor you would do it with the Heelboard in place but I will be making my own repair pieces and it will be easier if I can keep removing the Heelboard until the folds and curves on the floor are finished, it will also help with the companion bin?
On the LH side I did the Floor first and ended up having to cut it when I fitted the Heelboard, but then again I did have to renew the Heelboard Repair Panel :-(
I reckon I'll not weld anything and just clamp in place, make the Floor and the Companion Bin Repair and then Clamp up and Weld once they are all finished and fitting nice.
My son is back Tues and I bet him that I would have the Subframe on and have the Mini rolling again..............clocks ticking!!!
Edited by JonnyAlpha, 08 August 2014 - 07:25 PM.
#100
JonnyAlpha
-
- Members
-
- 2,749 posts
Up Into Fourth
- Location: North Devon
- Local Club: Exmoor Minis
Posted 09 August 2014 - 06:47 PM
Bit more progress today, like I said yesterday thought I'd trim and test fit the Heelboard but before welding it in place I thought I'd make the rear corner repair panel for the floor.
So first up I trimmed the end of the Heelboard Repair Panel where it meets the Heelboard and decided to leave an overlap to Joddle the edge, here it is clamped in place:
Also making sure that the Jig was filly secured.
Next I used the template from the LH side by turning it upside down and made a few modification so it would fit the RH side. This panel was going to be smaller for three reasons,
(1) I don't have any sheet metal long enough to make the whole repair piece in one go.
(2) The Mini is supported by chocks under the Drivers rear seat belt mount (due to some slippage caused when I cut away the rotten Heelboard).
(3) Its easier to make and fit it in pieces (unless of course you have a pre made panel which I don't).
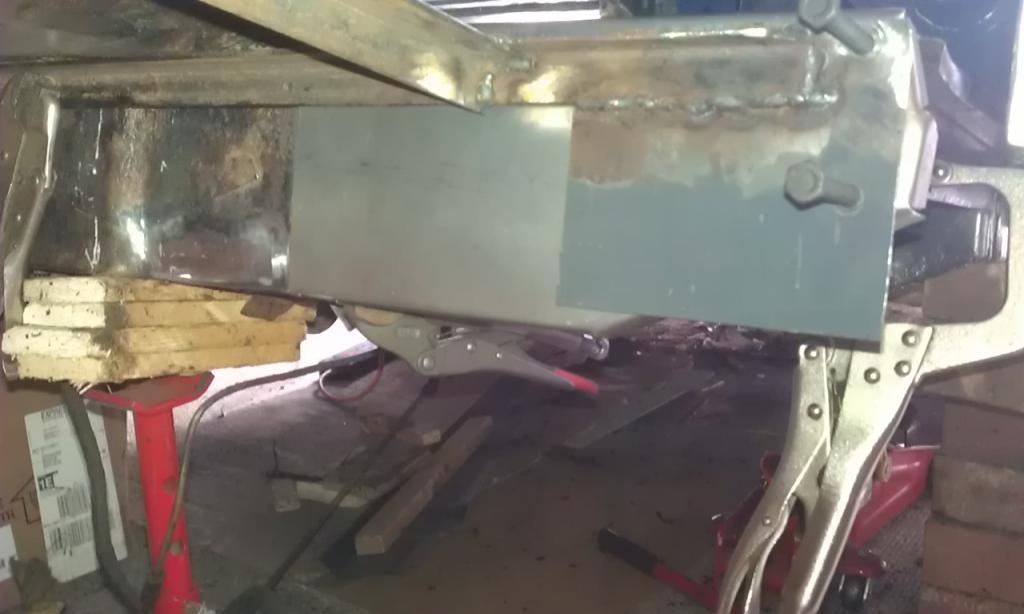
After I made the repair piece and did a first test fit before introducing the horizontal folds I noticed that I had cut it too short!!!
So rather than start again I decided to have a go at butt welding an extra piece in.
#101
JonnyAlpha
-
- Members
-
- 2,749 posts
Up Into Fourth
- Location: North Devon
- Local Club: Exmoor Minis
Posted 09 August 2014 - 07:46 PM
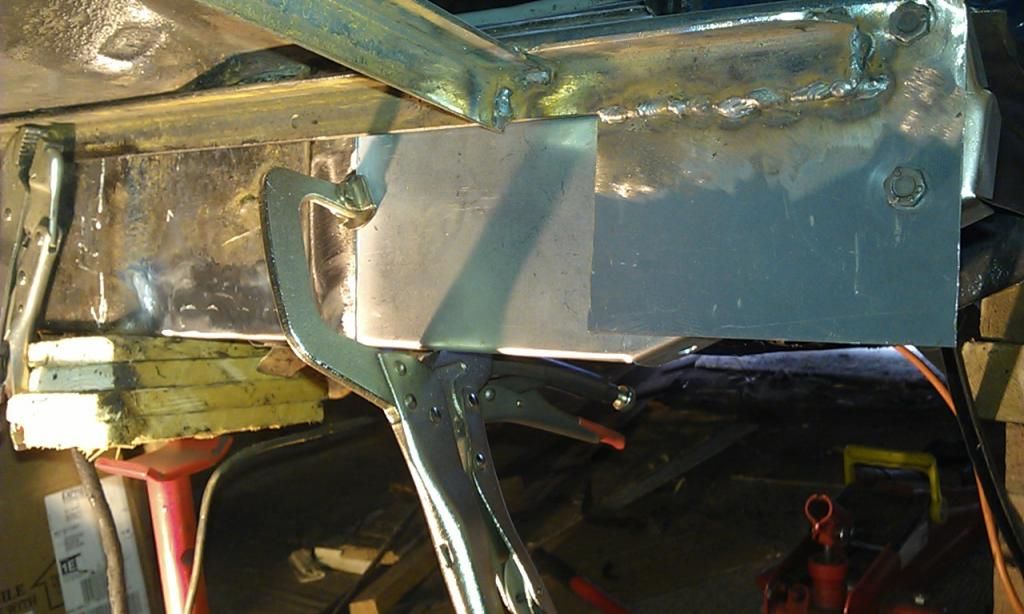
Here's the extra piece clamped in place:
And here it is stitch welded:

And dressed down:
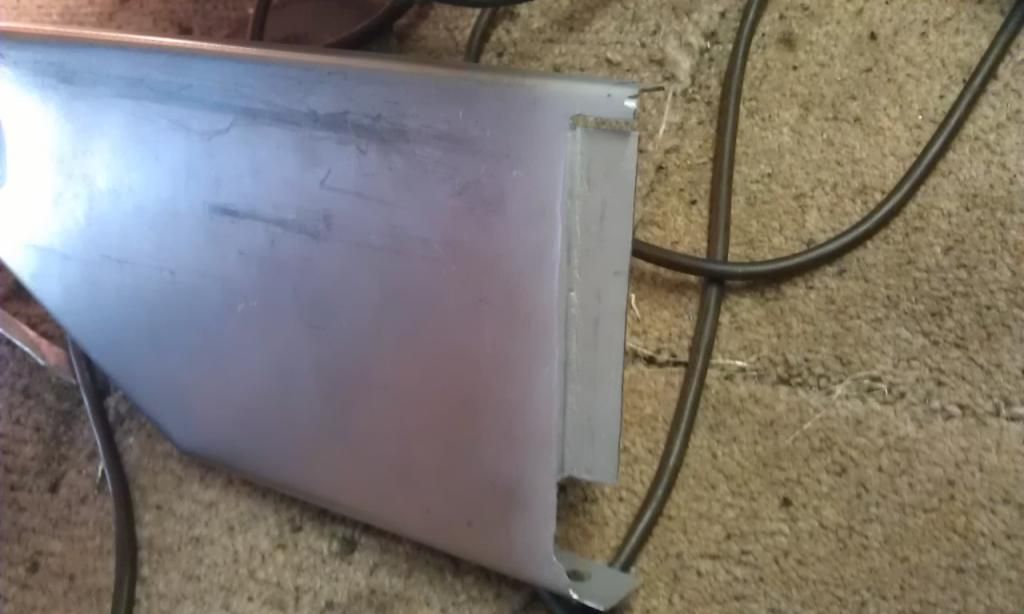
Next using the template and the Heelboard Repair panel as a reference I then made the folds where the floor meets the Companion Bin and becomes the Outer Sill:
Here it is folded:
After test fitting and adjusting the Floor piece it was now time to weld in the Heelboard, first I prepped the panel by drilling the holes for the plug welds that will weld up to the underside of the floor and sprayed mating areas with Weld Through Primer.
I had to clean up the M-Machine Heelboard Panel as it comes un-painted and had already surface rust had started to appear. I also sprayed some Zinc Rich Primer around the Subframe Mounting Point.
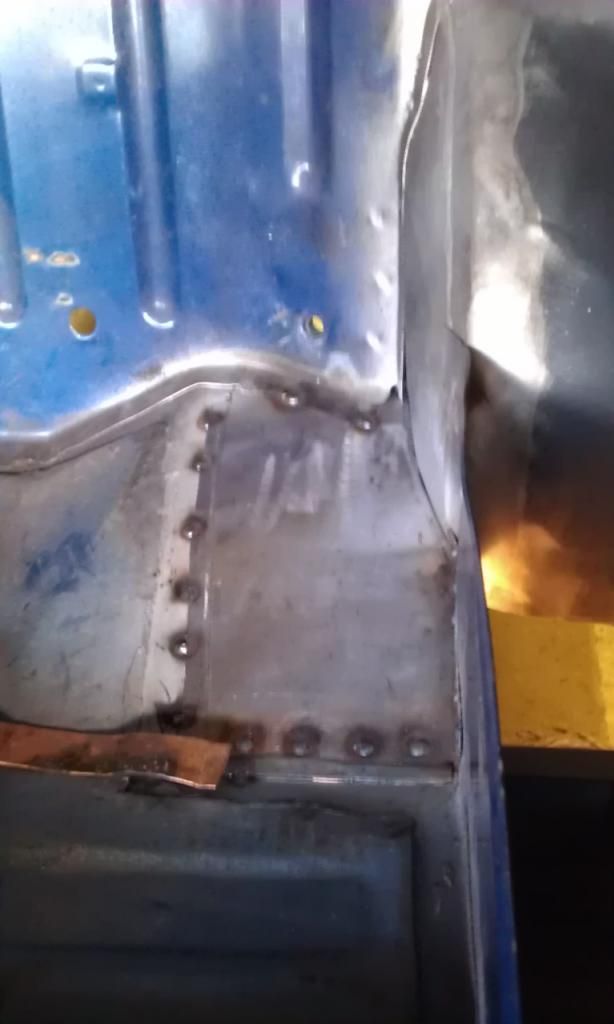
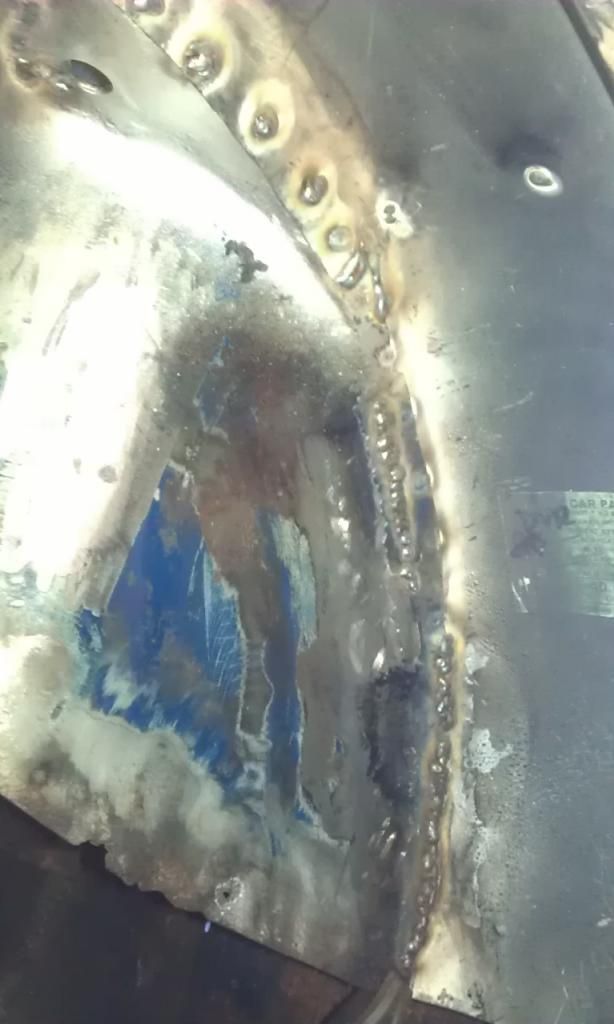
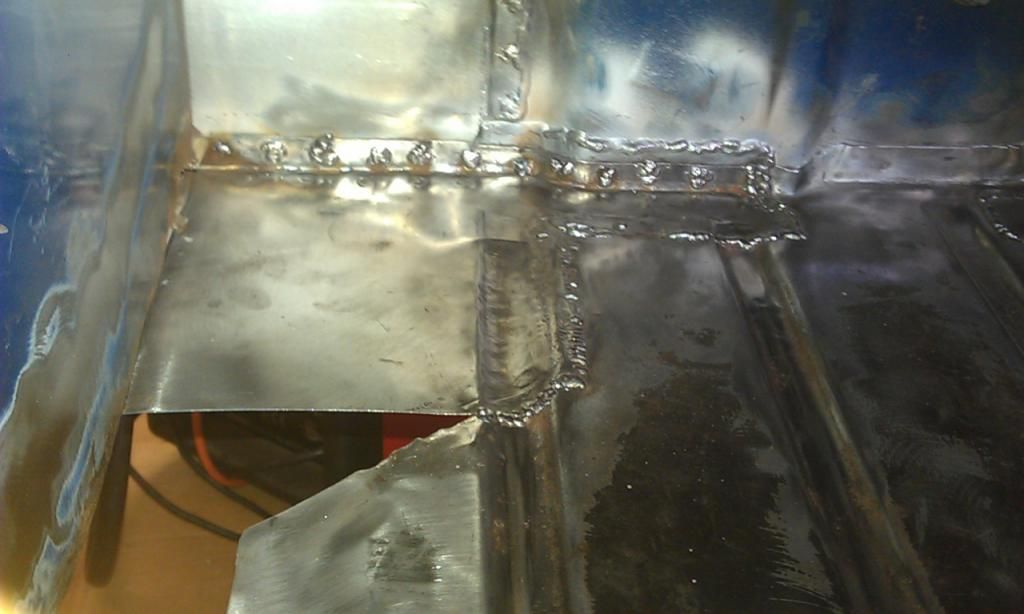
Here are the welds on the inside, at the point where the repair panel met the original heelboard it was seam welded either side of the Joddled edge and plug welded in the middle.

Not a great pic but here it is welded in place, just need to remove the Jig and finish welding the very top and bottom.
That was it for the day, i'll finish welding the Heelboard in tomorrow and then fit the floor piece and the hopefully I'll be able to finish off the Boot and get the back end painted up.
#102
Coxie
-

- Members
-
- 461 posts
Speeding Along Now
- Location: North devon
Posted 09 August 2014 - 07:59 PM
Proper job, as they say in the shire.
Looking good bud
Looking good bud
#103
JonnyAlpha
-
- Members
-
- 2,749 posts
Up Into Fourth
- Location: North Devon
- Local Club: Exmoor Minis
Posted 09 August 2014 - 08:08 PM
Proper job, as they say in the shire.
Looking good bud
Thanks mucker, target is get the rear end finished and sprayed up and have a rolling chassis by Tues but the weather is gonna play havoc!!
#104
JonnyAlpha
-
- Members
-
- 2,749 posts
Up Into Fourth
- Location: North Devon
- Local Club: Exmoor Minis
Posted 10 August 2014 - 08:36 PM
I managed to get into the Garage after lunch with the intention of finishing the Heelboard and Rear Floor Corner.
It took me what seem like forever to get the Floor Piece to fit snug, on, off, trim, on and off again etc etc........ anyway once I had a good fit I took it off and drilled in the Plug Weld holes that will go up against the Heelboard, I also had to drill a few more holes in bottom of the Heelboard as I had missed them yesterday.
After spraying the mating areas under the Joddled edges with Weld Through Primer, giving it time to dry, I re-fitted the Floor Piece and using a trick I learnt from this Forum I nipped up the Floor to the Heelboard by drilling some 3mm holes into the floor through the Plug Weld holes and a couple through the Joddles and screwed in some Self Tappers, it worked really well:
Once it was all nice and tight it was time to start welding:
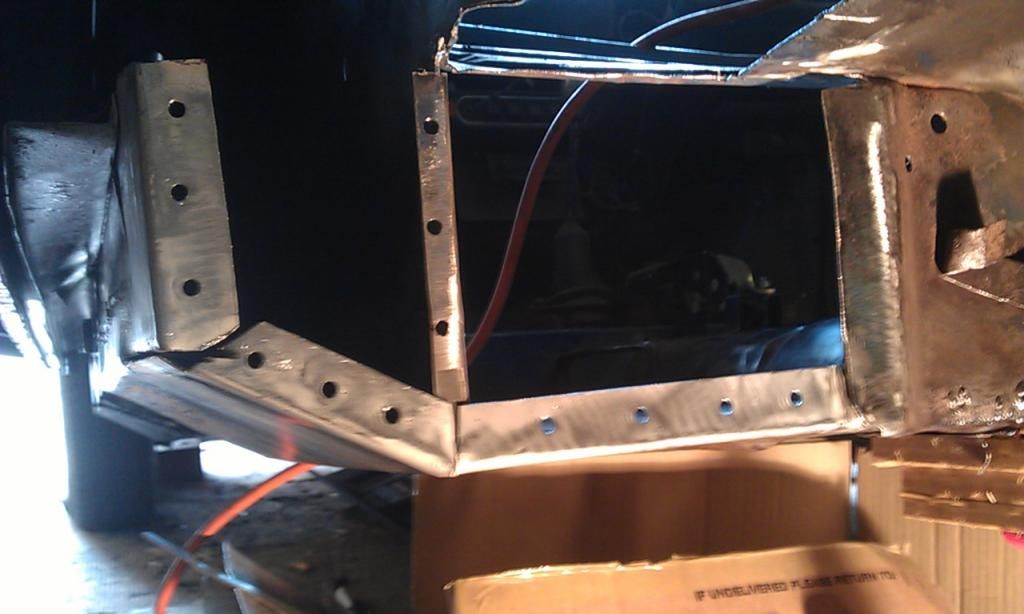
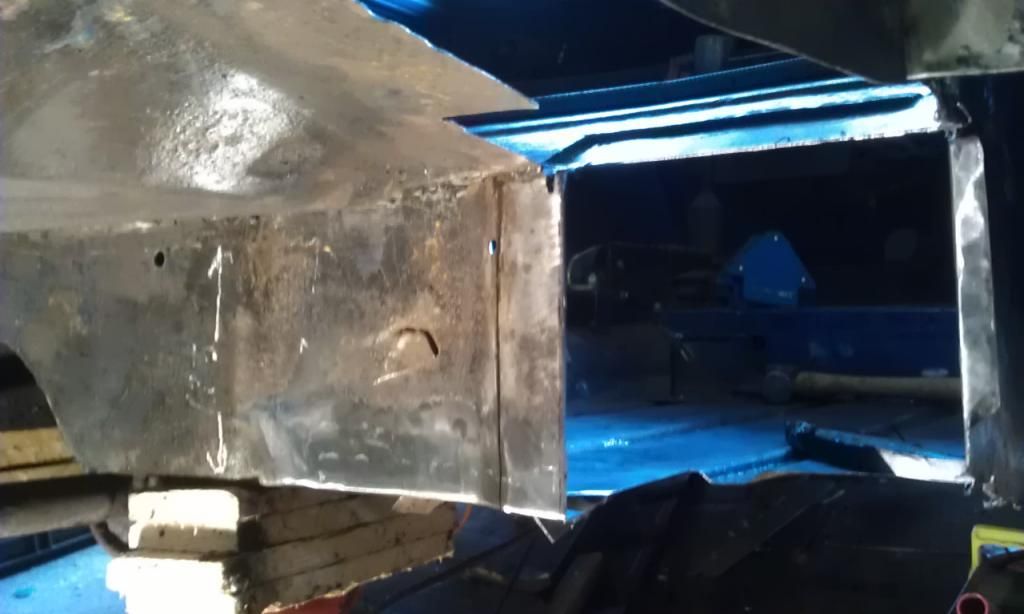
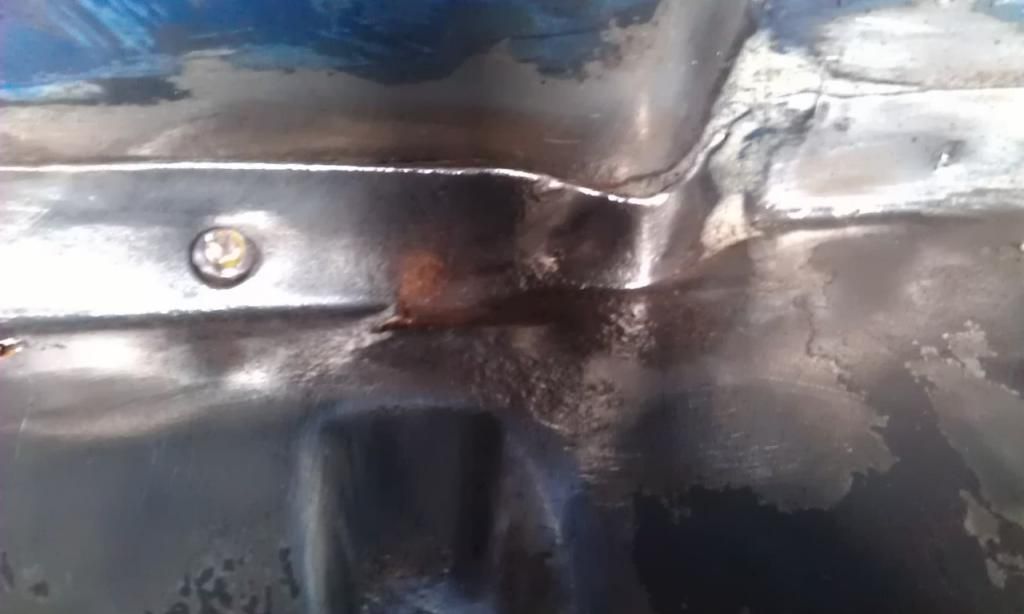
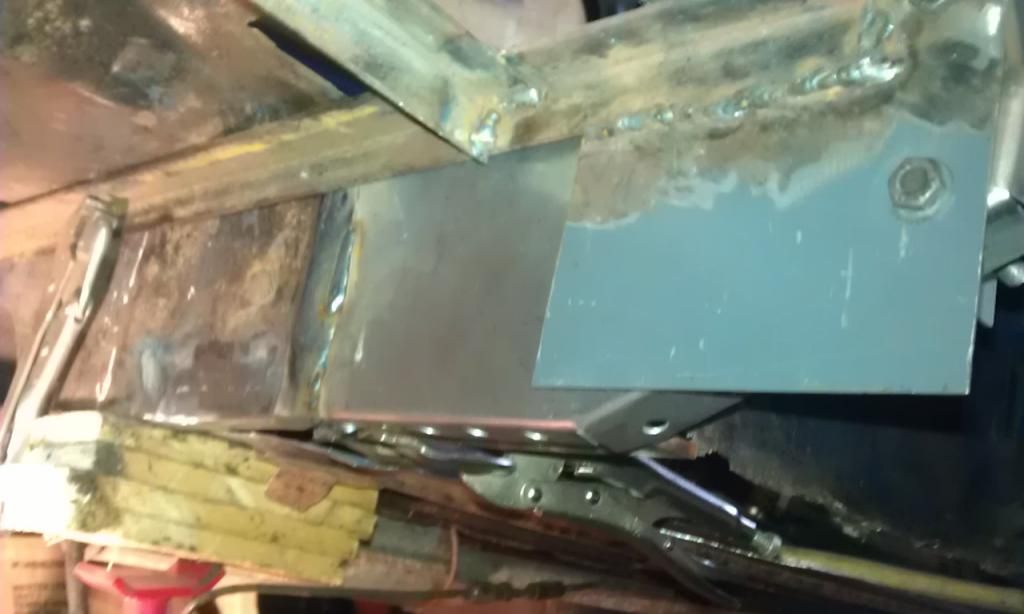
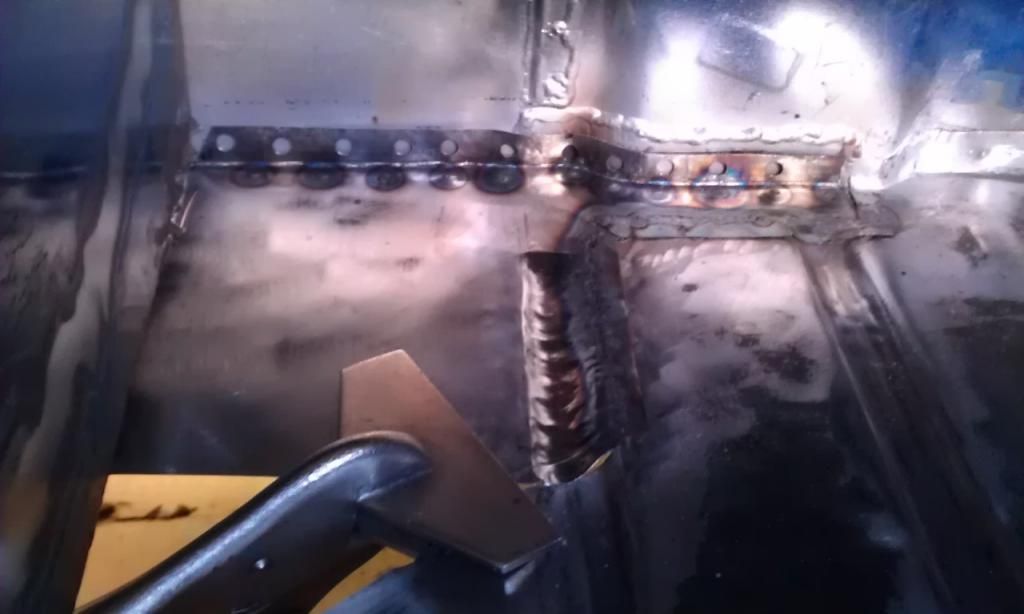
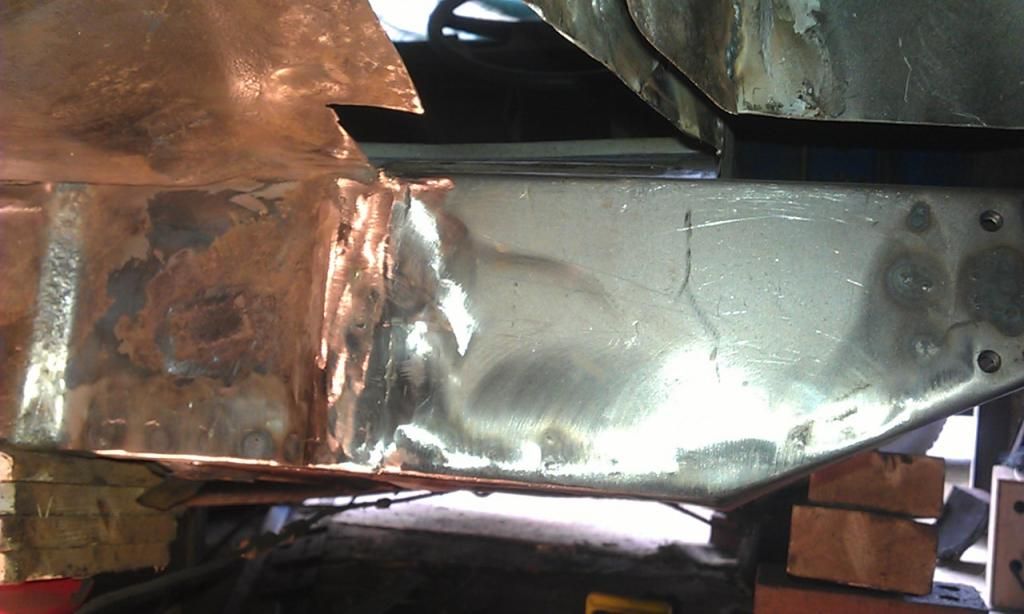
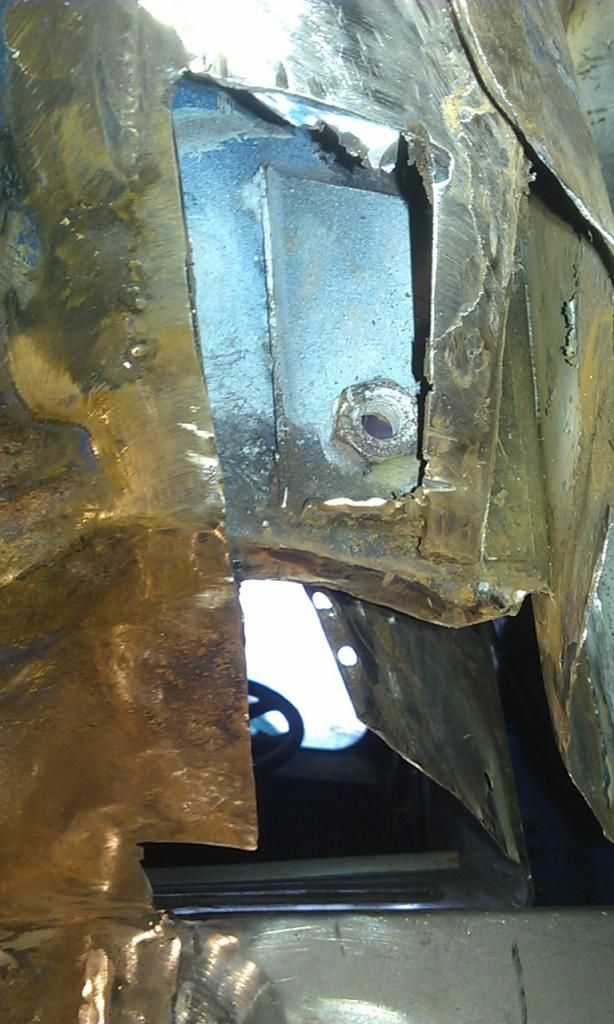
Here's the the RH side where the new Floor Piece Inner Sill meets the Subframe Mounting Bracket:
The welds had not been cleaned up and in this photo I still need to weld the top and bottom of the Subframe Mounting Bracket but wanted to remove the Bolts First to avoid getting any weld spatter on them as they are in the way. In the top RH corner you can see where the new Inner Sill meets the old one, I decided to Joddle the edge here.
I also drilled a couple of holes in the Inner Sill to Subframe Closing Panel Stiffener to Plug Weld it to the new Inner Sill piece.
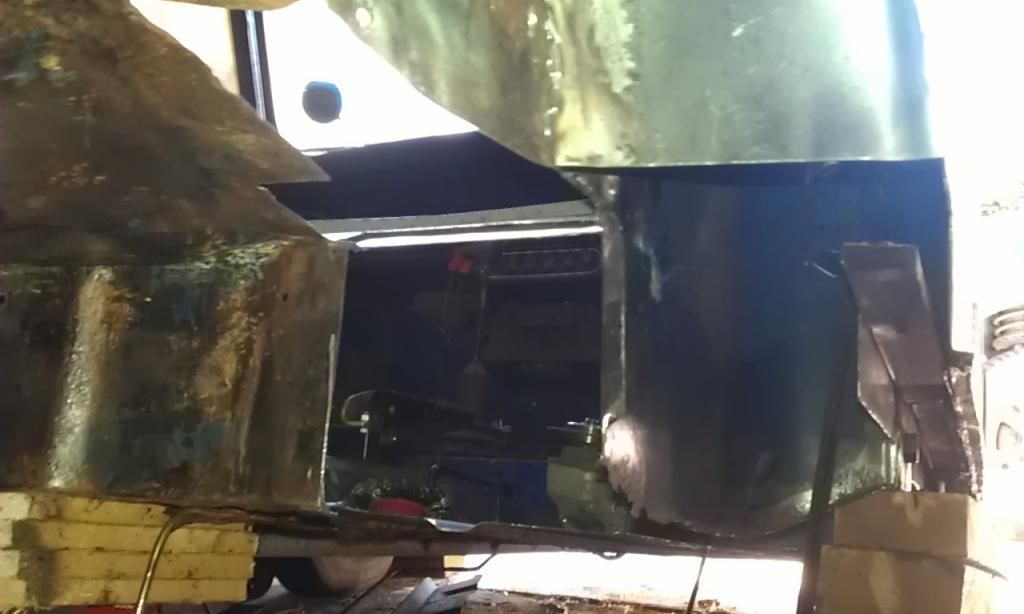
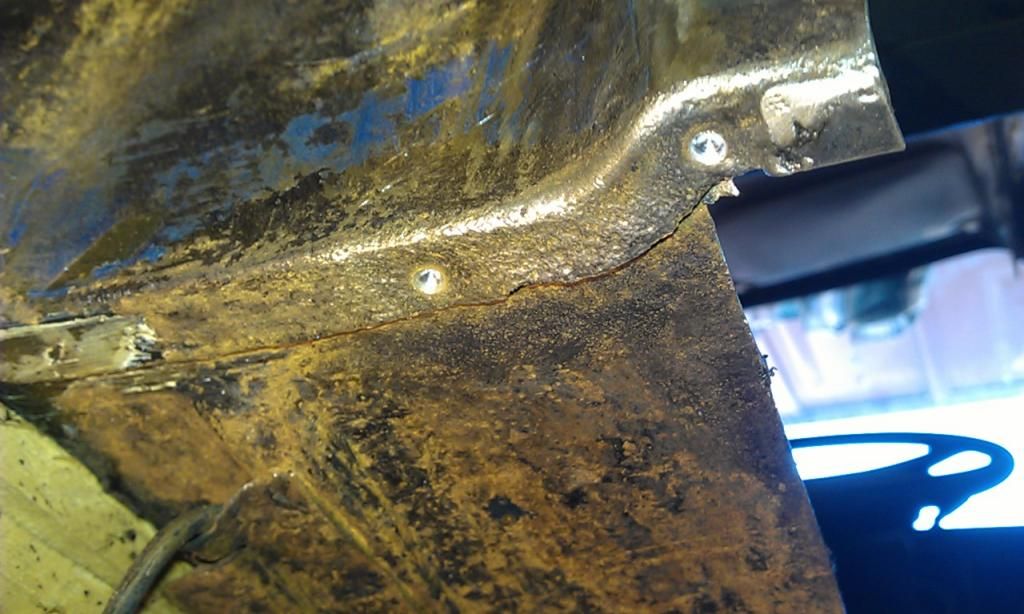
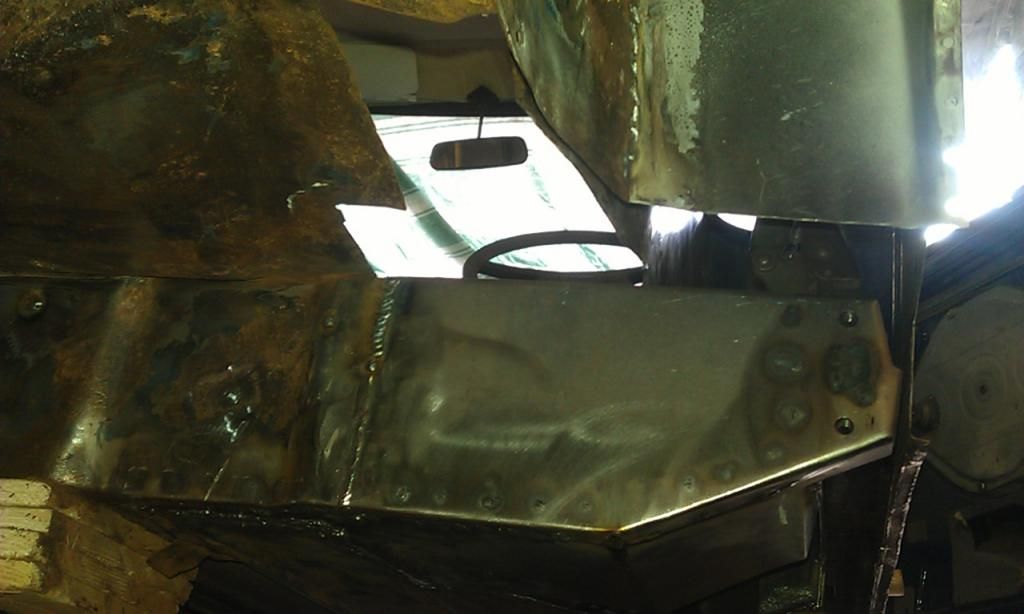
I forgot to take a pic of the outside, but apart from a join in the Heelboard a couple of tiny holes and the are under the Jig, its all welded in. Here is a pic of the inside:
Just need to weld the plug welds where the Floor meets the Heelboard and the top side of the joddled edge. I spotted a couple of pin holes and marked them with chalk so I remember to weld them up.
Here's a pic of the inside of the Companion Bin, still got some welding to do in here, that'll be fun!!!:
I wanted to get the Heelboard and this Floor piece completed today but at 7PM I had to call it a day
Edited by JonnyAlpha, 10 August 2014 - 08:39 PM.
#105
JonnyAlpha
-
- Members
-
- 2,749 posts
Up Into Fourth
- Location: North Devon
- Local Club: Exmoor Minis
Posted 12 August 2014 - 08:19 AM
So another full day in the Garage (All stops in Sep so I have to make the most of it!!).
Everything just takes longer than you plan!!
Weather was hit and miss but managed to get the Garage cleared out for long enough in the afternoon to get to the LH side of the Mini.
First up I finished off welding the Rear RH Floor section in that I tacked in the day before:
Then I took off the Subframe Jig for the last time ever YIPPEEE, progress. And finished the welding on the Heelboard:
I also welded up the bolt holes that I made for the Jig and welded up the Plug Welds where the Floor meets the Heelboard inside the Companion Bin, that was interesting with only a small section of the rear quarter removed, ended up holding the torch in some real weird positions and doing some of the welds blind!!
Here's the finished article:
The redness in the pic is mostly from the Flap Disc where I wore it out!!
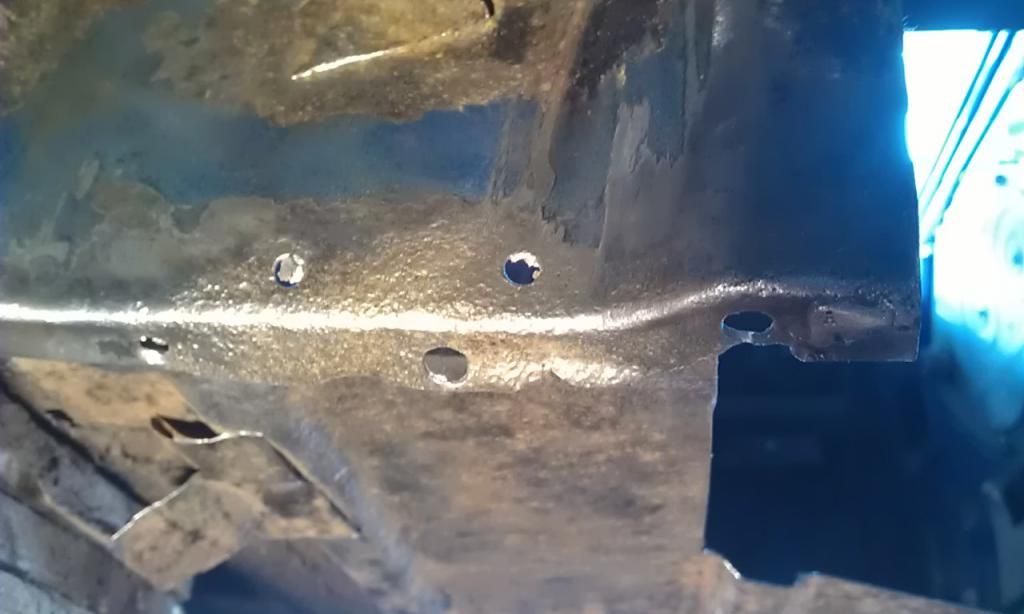
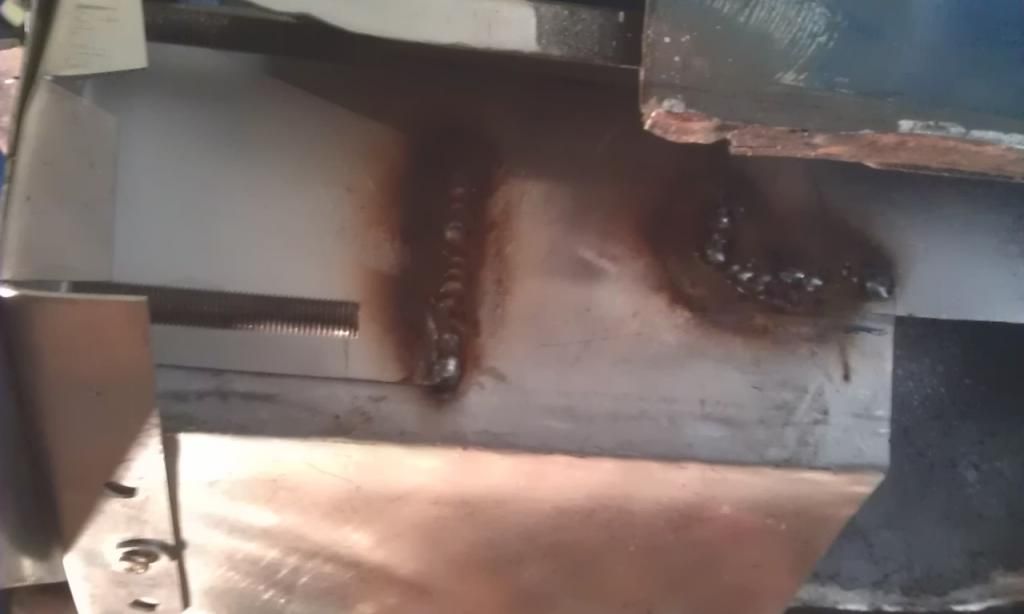
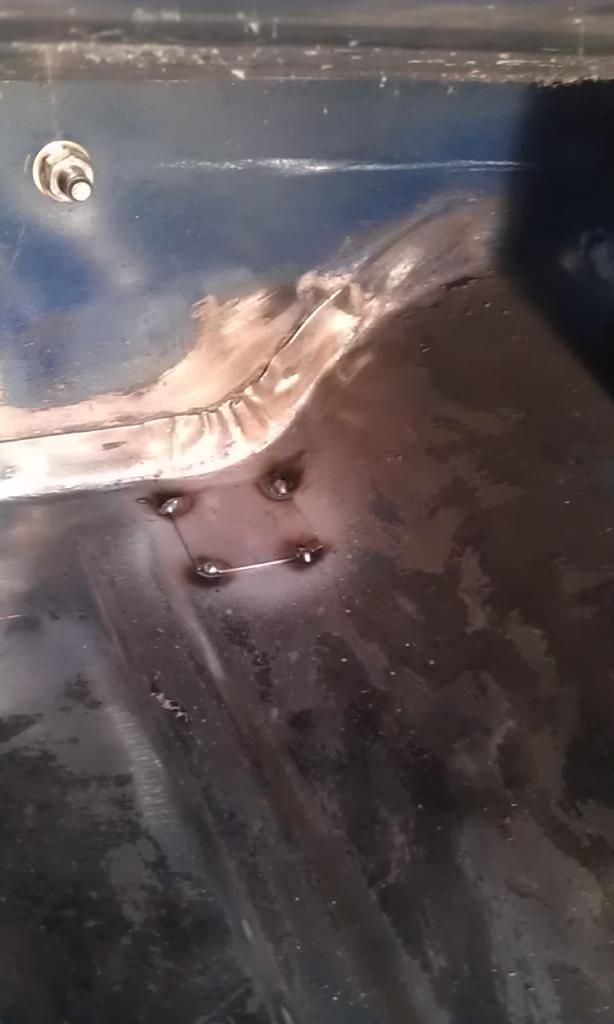
Next up it was time to weld up the drain holes in the floor at the rear, after cleaning them up removing all traces of rust I sprayed the edges with weld through primer:
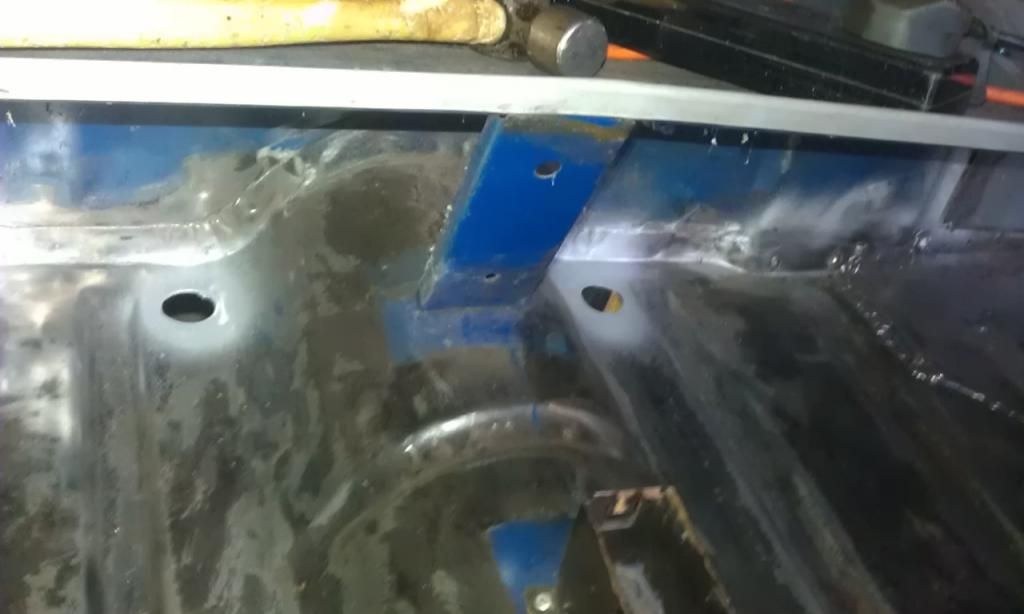
I was about to weld when I thought I'd better check the underneath. Low and behold I was about to weld right next to the positive cable that runs from the Battery to the Engine:
That cable holder is a rust trap and I am considering doing away with it and running the lead through the inside of the Mini, one less hole in the boot floor!!
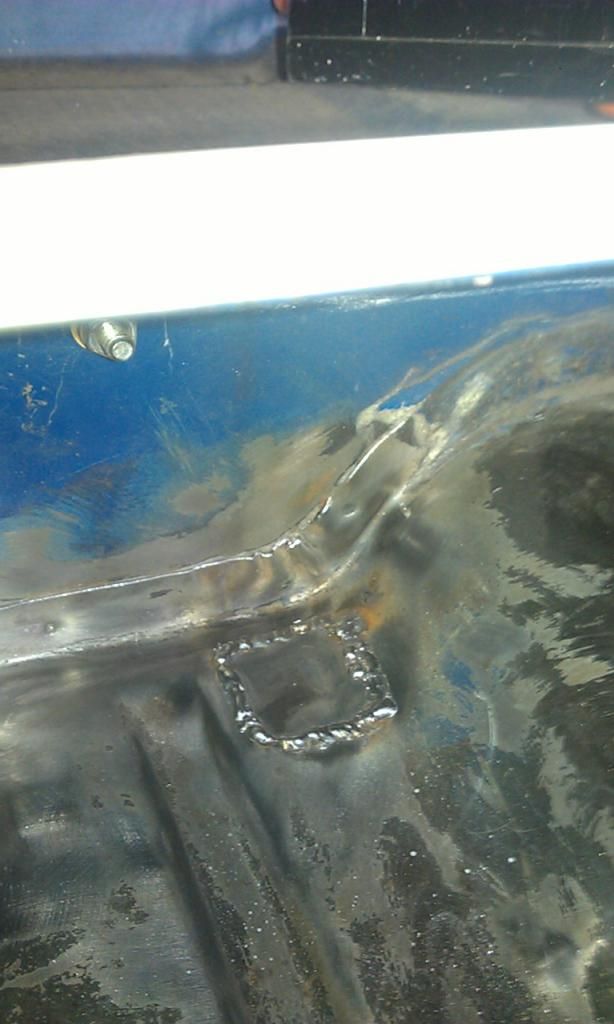
Next I tacked the plates in tapped down the centre to get some protrusion and welded them up:
I then completed the welds around the LH and RH Subframe Mount to Inner Sill Support Bracket and welded up the cut I had made in the RH Inner Sill.
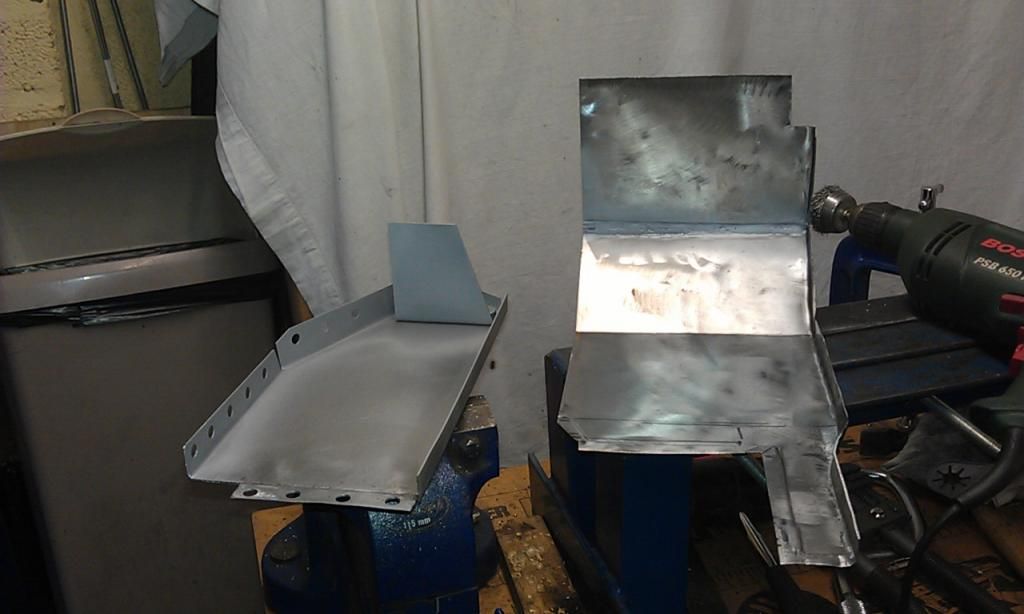
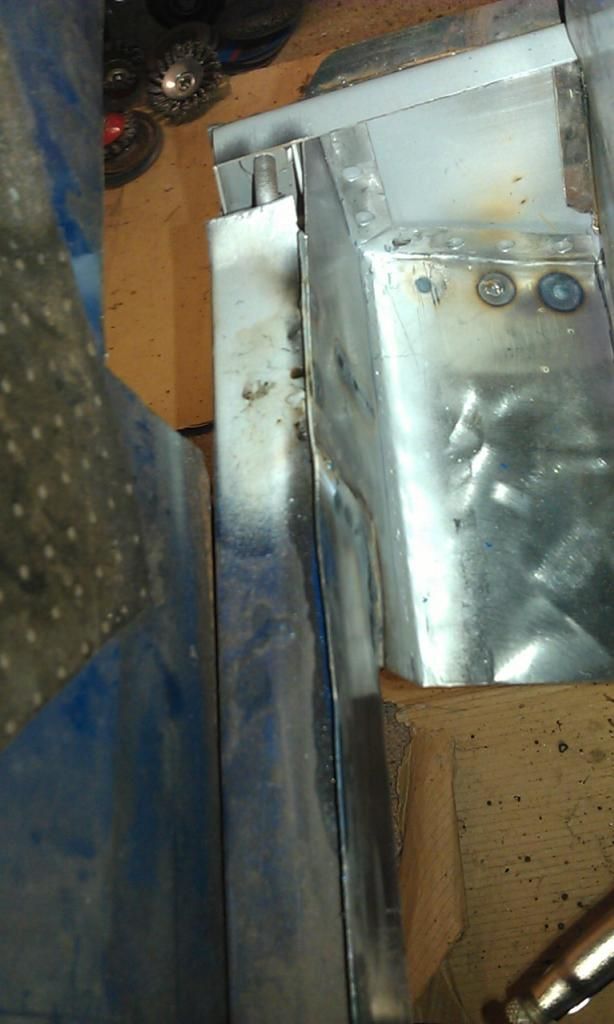
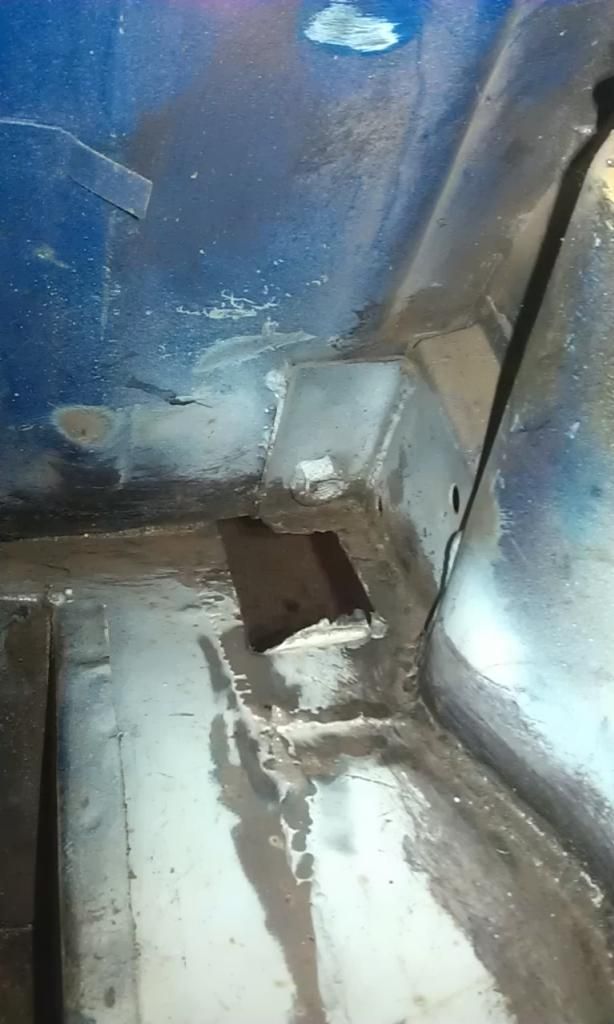
Whilst I had the RH side clear I made up the Subframe Mount Rear Arch Closing Plate, having never seen a real one (mine were completely rusted out) I used some pics that were posted on a thread I made a while ago about Heelboard Repairs as well as technical drawings from M-Machine and Product pictures from Minispares as a guide.
I measured up the area and made a cardboard template and this was the result:
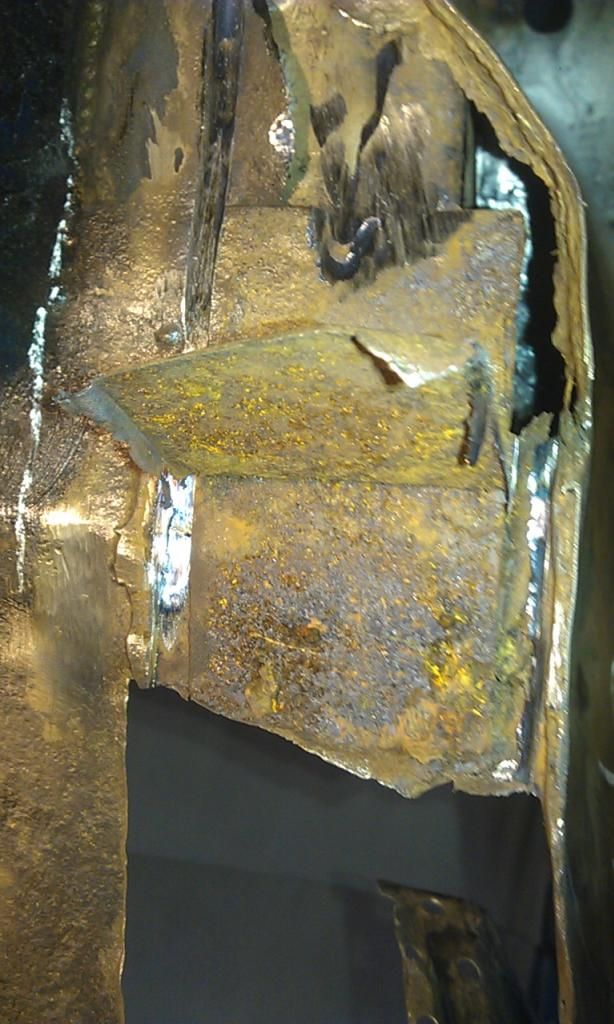
Next job was to cut out the last bit of rot in the boot ready to make a repair piece that will also fix the rear seat:
I had already cut part of it out and the remainder was some really bad previous repairs, as you can see in the pic some of it wasn't even welded up completely and they hadn't patched under the Rear Arch / Rear Seat Stiffener!!!
I cut up the first layer and found this between the metal:
And here it is all out, taking care to avoid cutting through the Rear Seat Belt and Rear Seat Reinforcement Brackets just needs a final clean and spray before the repair piece goes in.
Oh and the Post Man delivered my Deox Gel, this will be used on the underside of the Boot and Main Floor where I cannot remove rust


2 user(s) are reading this topic
0 members, 2 guests, 0 anonymous users


