Jump to content


Photo

What Do You Need Tool Wise For Welding


  • Please log in to reply
185 replies to this topic

#1 sonikk4

sonikk4

    Twisted Paint Polisher!!!

  • Admin
  • PipPipPipPipPipPipPipPipPipPipPip
  • 15,884 posts
  • Name: Neil
  • Location: Oxfordshire

Posted 14 June 2011 - 07:09 PM

Well i have been asked several times what tools do you need to do welding/bodywork on a Mini so here is a basic list of tooling and pictures plus some basic welding techniques.

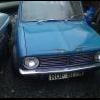
1:- 4 1/2" angle grinder, straight cut tin snips, stainless steel cutting disc 1mm, standard metal cutting disc, standard metal grinding disc, twisted wire cup (please note there should be a guard fitted to the angle grinder.)
Posted Image
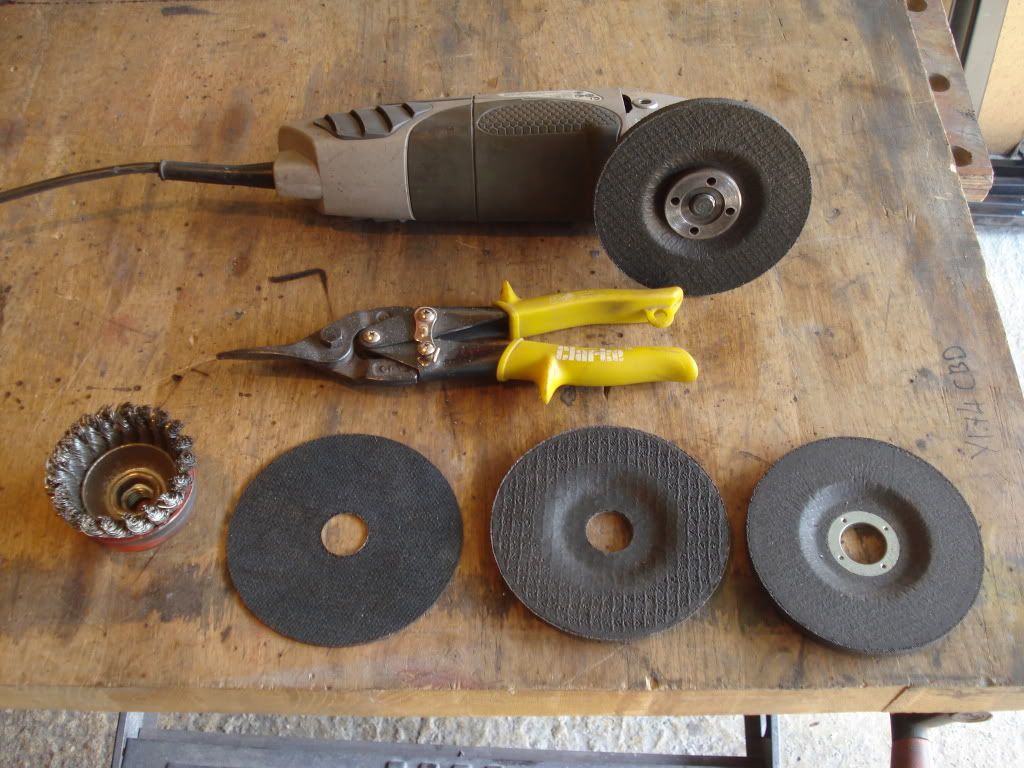
Close up of the various disc's
Posted Image
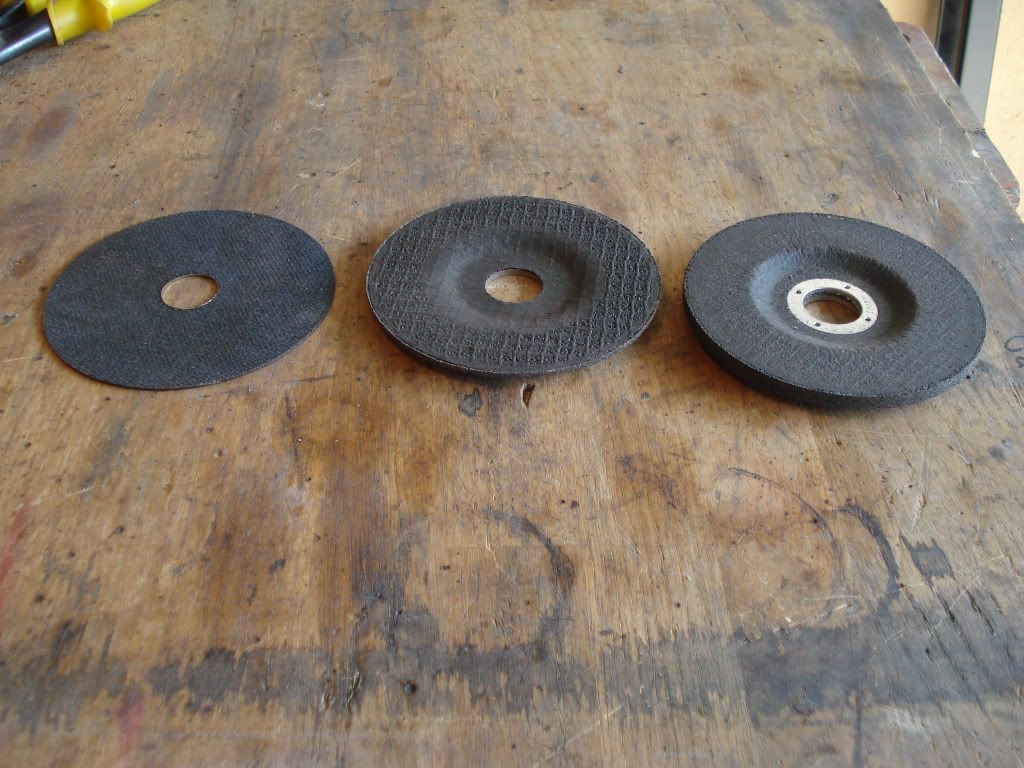
Forgot to add this a Flapper disc less intrusive than a grinding disc
Posted Image

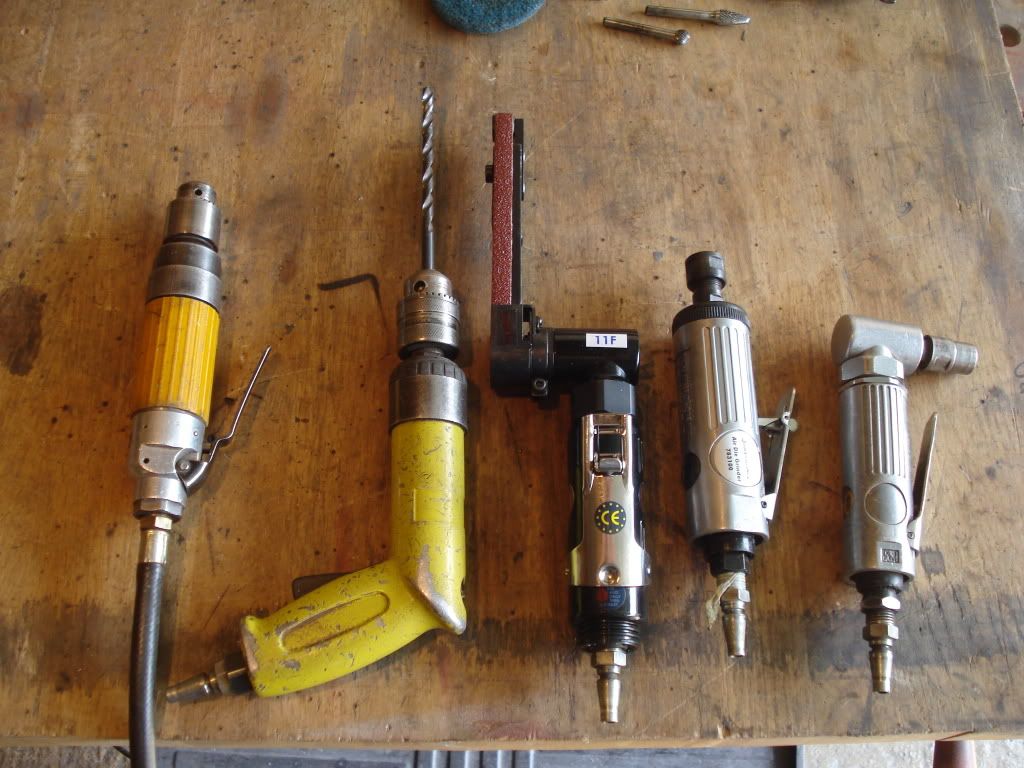
2:- Air driven tools, Straight drill, pistol drill, right angled grinder, straight grinder, small air file.
Posted Image

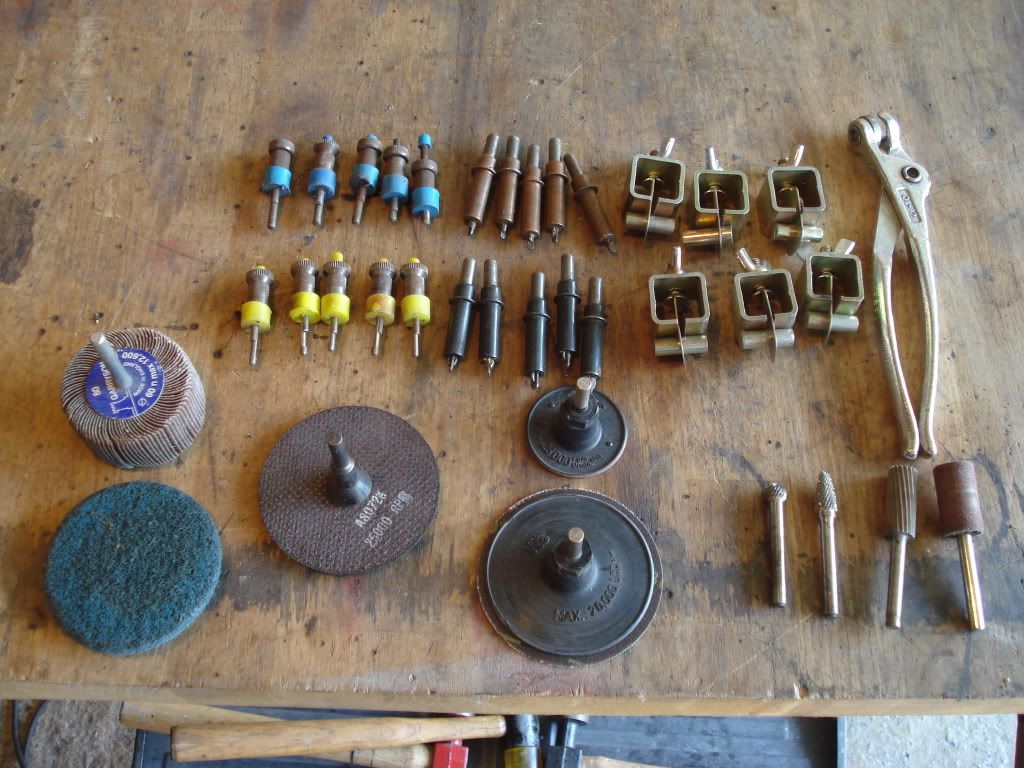
3:- Grinding burrs, 3" and 1" Roloc holders, 3"cutting disc holder and disc, skin pins 1/8th and 5/32, Cleco pins, 1/8th, 5/32, Cleco pliers, inter grips.
Posted Image

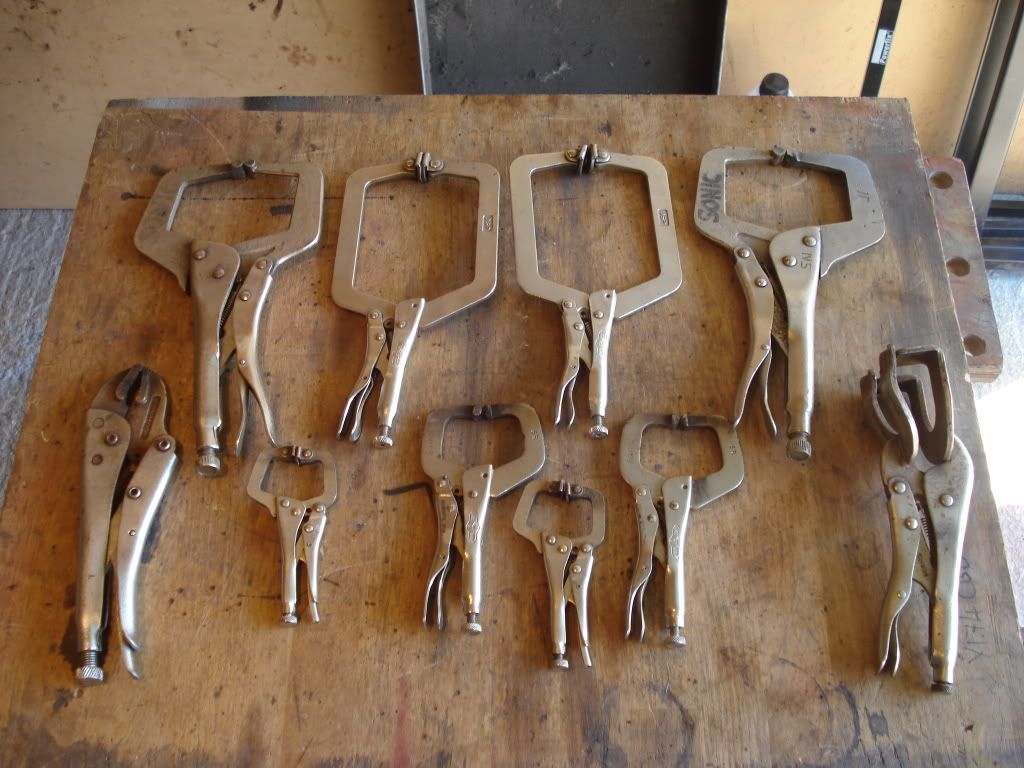
4:- Clamps various, 'C' clamps small and large, mole grips, welding clamp.
Posted Image

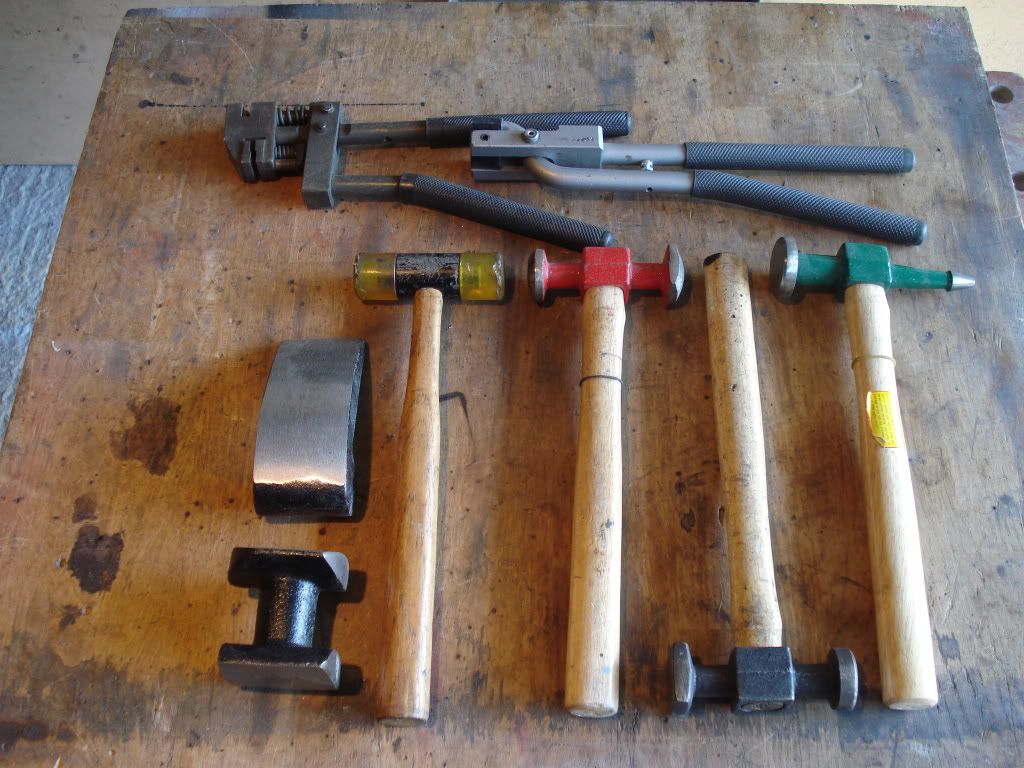
5:- Hammers various, door skin/ A panel flange folding tool, hole punch / joggling tool, various dollies.
Posted Image

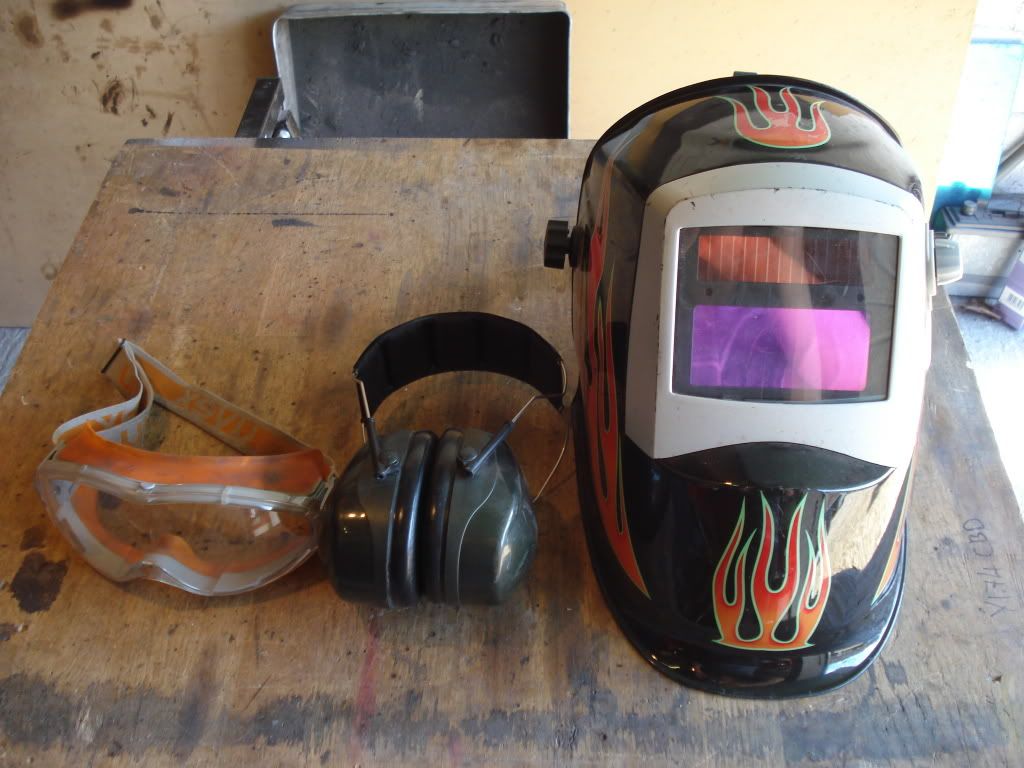
6:- Eye and ear protection, Reactive welding mask.
Posted Image

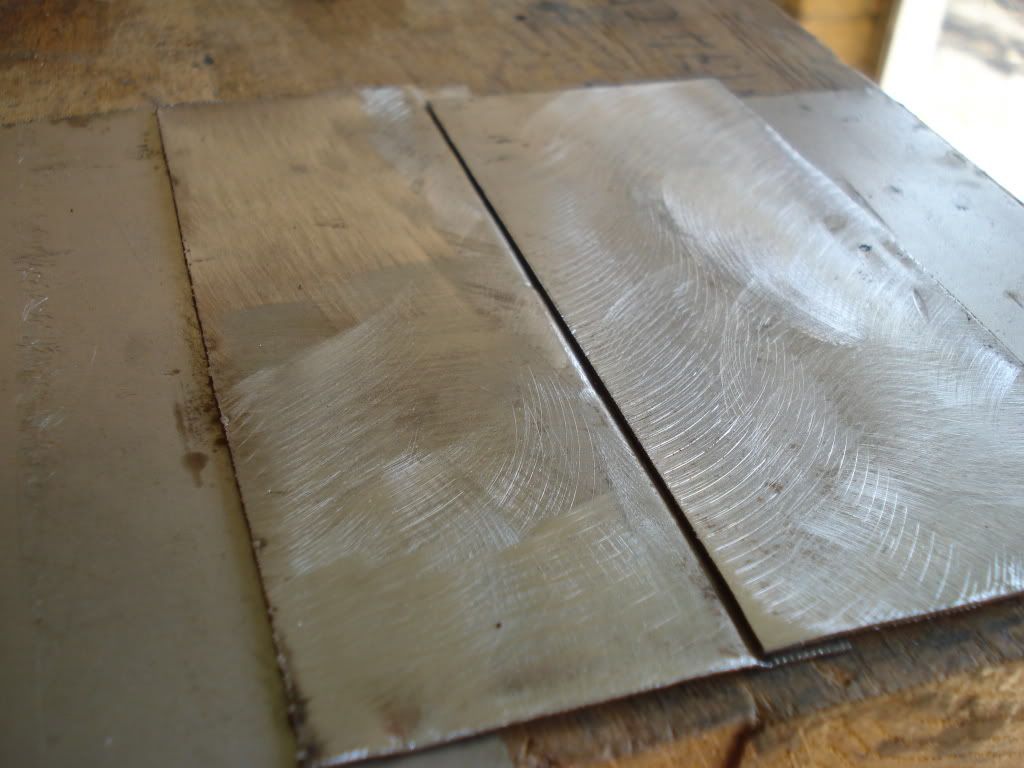
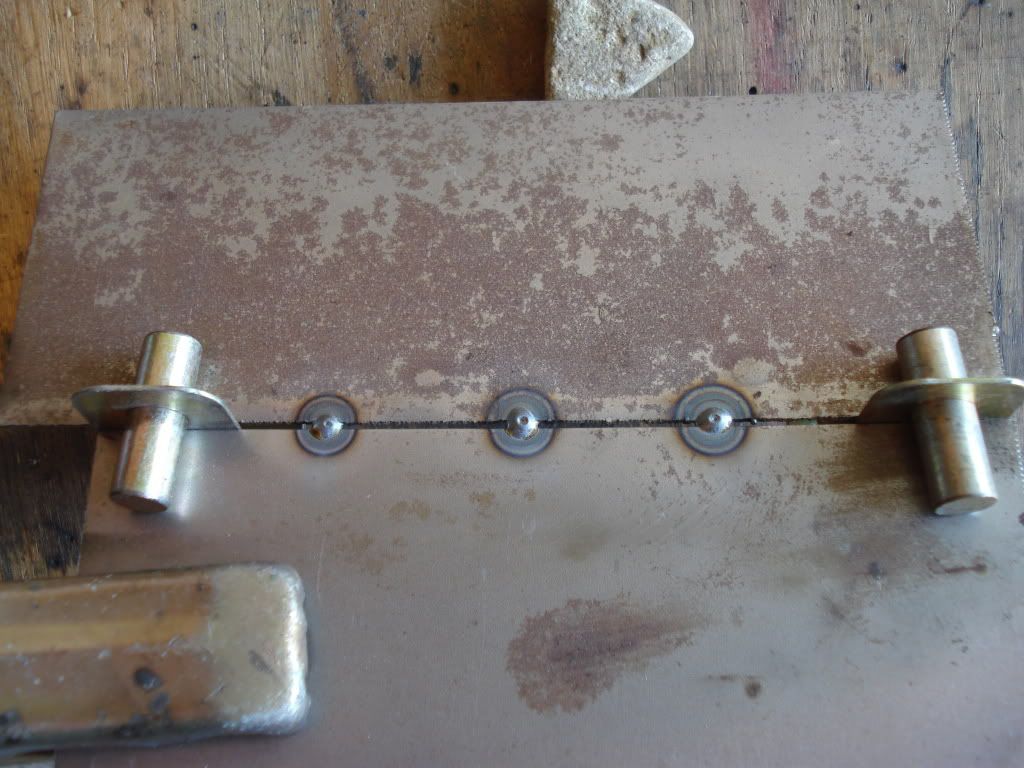
7:- Joggled edge on steel plate, ideal for doing small insert repairs to door skins, wheel arches etc
Posted Image
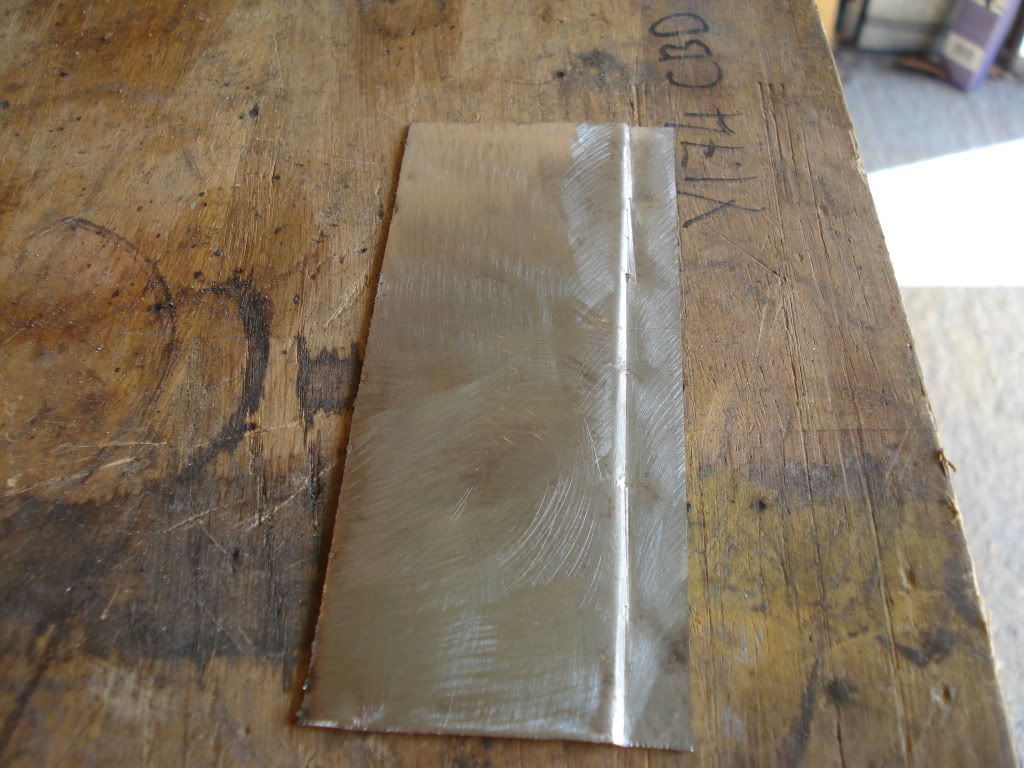
Joggled piece with new section laid in place creating a flat surface
Posted Image

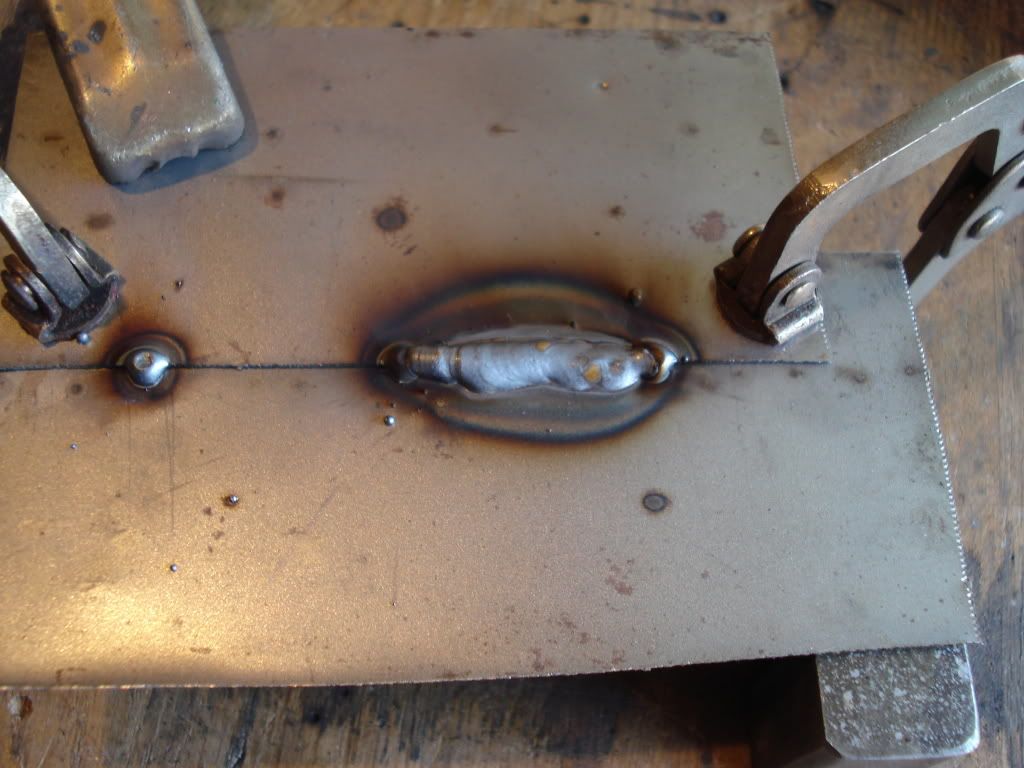
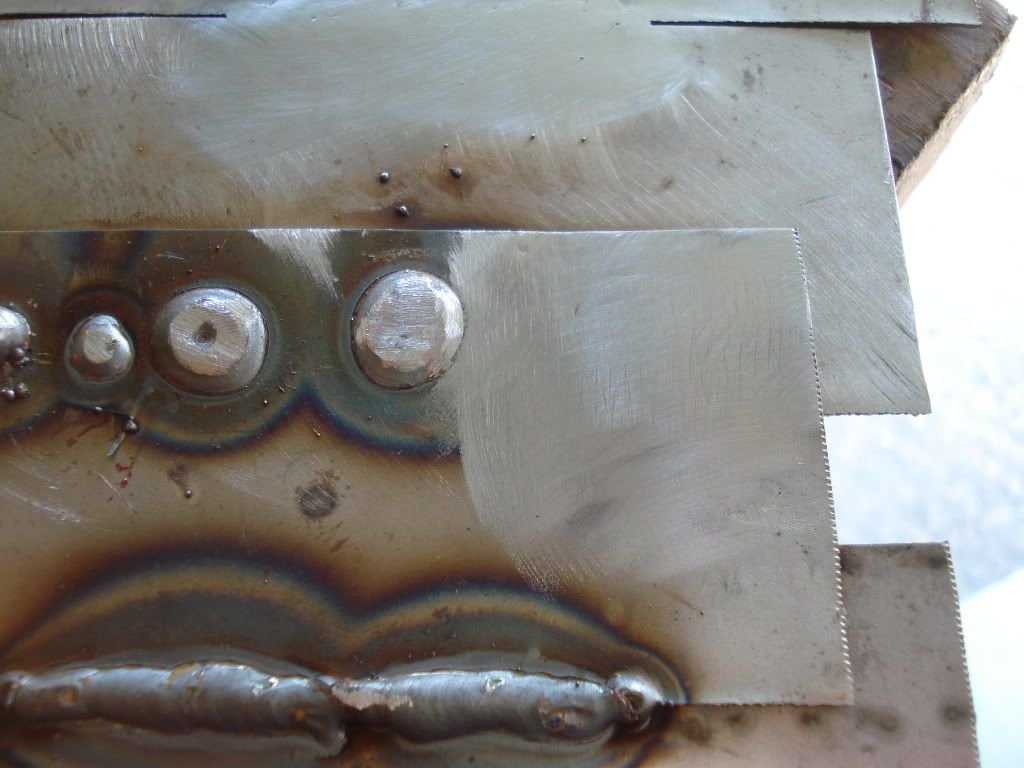
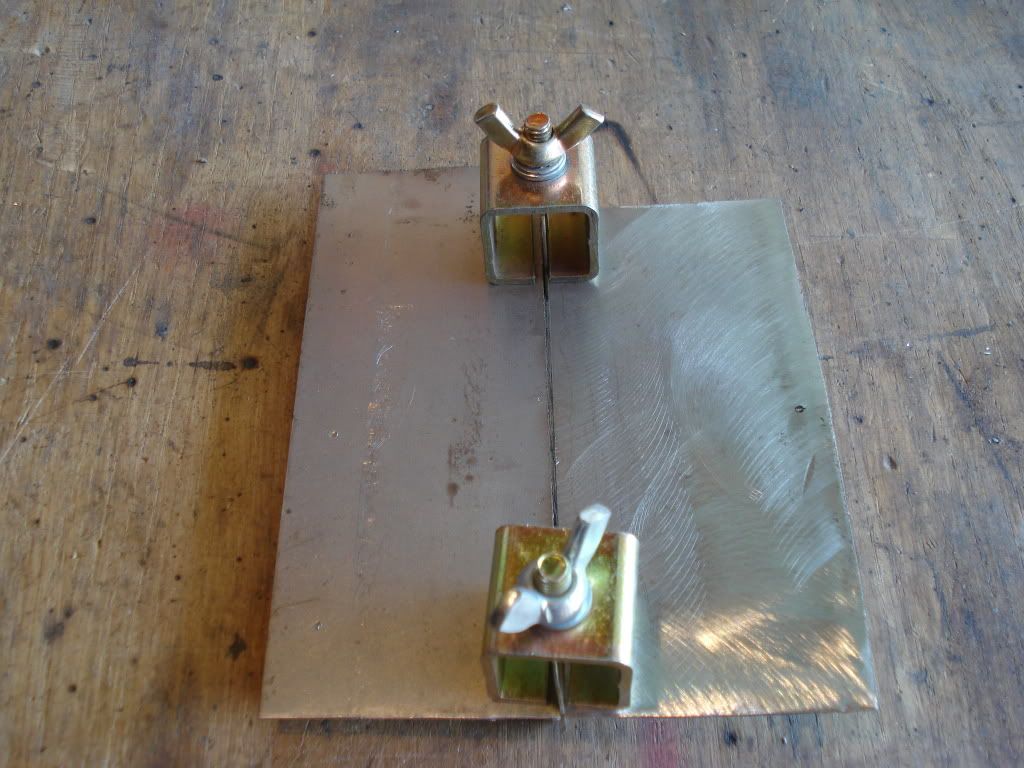
8:- Tack welding using Inter grips to clamp the two pieces. One tack every inch.
Posted Image
Posted Image

Edited by sonikk4, 01 July 2011 - 03:26 PM.


#2 sonikk4

sonikk4

    Twisted Paint Polisher!!!

  • Admin
  • PipPipPipPipPipPipPipPipPipPipPip
  • 15,884 posts
  • Name: Neil
  • Location: Oxfordshire

Posted 14 June 2011 - 07:10 PM

More info

9:- Pulse welding, fill in one inch at a time but miss an inch weld an inch
Posted Image
Penetration
Posted Image
Rough grind down good strength ideal in hidden areas.
Posted Image
Polished up, ideal for door skin / rear quarter repairs etc minimal filling.
Posted Image

10:- Lap joint seam welding
Posted Image
Posted Image

11:- Plug welding 1/4" holes and clamped in place using Cleco pins. Ideal for A panels, wings, rear quarters, sills etc
Posted Image
3 holes welded using high power and high speed wire feed the fourth is on a lower power setting and it shows the difference.
Posted Image
Cleco holes welded up
Posted Image
And one plug weld ground down and polished.
Posted Image

12:-Power setting on a Clarke 135 TE Turbo, this setting is for pulse welding and seam welding on .8mm steel sheet
Posted Image

13:- Gas setting for above power setting
Posted Image

Hopefully these will be of use and if possible can this info be pinned please Admin team. This is basic info but certainly enough to get people started. i have no doubt this will be added too.

Thanks. Neil

Edited by sonikk4, 14 June 2011 - 07:14 PM.


#3 BusheyTrader

BusheyTrader

    Speeding Along Now

  • TMF+ Member
  • PipPipPipPipPip
  • 481 posts
  • Location: Bushey
  • Local Club: Nope

Posted 14 June 2011 - 08:03 PM

Hi,

In the 2nd picture on section 9 there are some pinholes left in the weld. I assume that caused by the wire being withdrawn.

I get this sometimes in my welding. Usually the holes disappear when grinding down the weld but sometimes they go a bit deeper. I've been filling them with weld and grinding them down again. Is this how you treat them or can they be left alone?

Adam

#4 sonikk4

sonikk4

    Twisted Paint Polisher!!!

  • Admin
  • PipPipPipPipPipPipPipPipPipPipPip
  • 15,884 posts
  • Name: Neil
  • Location: Oxfordshire

Posted 14 June 2011 - 08:09 PM

That's exactly how i do it, any pin holes i fill with weld. A good trick for doing any panel you can get behind with is to use a light source to check for any pin holes. It shows them up really well.

#5 BusheyTrader

BusheyTrader

    Speeding Along Now

  • TMF+ Member
  • PipPipPipPipPip
  • 481 posts
  • Location: Bushey
  • Local Club: Nope

Posted 14 June 2011 - 08:17 PM

Cool, I've been using a torch to do this.

As my welding improved I went from starry nightscape to the odd pinhole. :)

#6 zebidee

zebidee

    Speeding Along Now

  • Members
  • PipPipPipPipPip
  • 444 posts

Posted 14 June 2011 - 08:32 PM

Very useful, thanks for taking the time to do all the photos and such! :)

#7 sonikk4

sonikk4

    Twisted Paint Polisher!!!

  • Admin
  • PipPipPipPipPipPipPipPipPipPipPip
  • 15,884 posts
  • Name: Neil
  • Location: Oxfordshire

Posted 14 June 2011 - 08:41 PM

Very useful, thanks for taking the time to do all the photos and such! :)


No problem. :gimme:

#8 grahama

grahama

    Up Into Fourth

  • Members
  • PipPipPipPipPipPipPipPipPip
  • 2,442 posts
  • Location: Warrington
  • Local Club: None in my area !!

Posted 14 June 2011 - 10:00 PM

Niel,

haven't got anywhere near that toolset. Doing fine with the grinder though !!

Have just got two burrs as you have but find they don't work too well in a dill, time consumong, but ok. Probably the drill speed ???

Graham,


Great post

Edited by grahama, 15 June 2011 - 08:23 AM.


#9 Deathrow

Deathrow

    Have you tried turning it off and on again?

  • TMF IT Specialist
  • PipPipPipPipPipPipPipPipPipPip
  • 5,734 posts
  • Name: Adam
  • Location: Manchester, UK

Posted 14 June 2011 - 10:33 PM

Pinned!

Great thread Neil!

#10 Sam Walters

Sam Walters

    Up Into Fourth

  • Members
  • PipPipPipPipPipPipPipPipPip
  • 2,765 posts

Posted 14 June 2011 - 10:52 PM

Good post.

One thing i will note on, flap disks are awfully useful!

Also bugger me you have a high wire speed! This may be where im going slightly wrong.....Low speed meaning i work slower perhaps inducing more heat into areas

Edited by Sam Walters, 14 June 2011 - 10:54 PM.


#11 1964Woody

1964Woody

    Mini Mad

  • Members
  • PipPipPipPip
  • 201 posts
  • Location: Calgary, Alberta

Posted 14 June 2011 - 11:23 PM

Excellent guide. Thank you. I am just working on my skills before I go near the car and this is a great help.

#12 sonikk4

sonikk4

    Twisted Paint Polisher!!!

  • Admin
  • PipPipPipPipPipPipPipPipPipPipPip
  • 15,884 posts
  • Name: Neil
  • Location: Oxfordshire

Posted 15 June 2011 - 02:09 PM

Good post.

One thing i will note on, flap disks are awfully useful!

Also bugger me you have a high wire speed! This may be where im going slightly wrong.....Low speed meaning i work slower perhaps inducing more heat into areas


Clean forgot about the Flapper disc and i had one out ready for a picture as well so i have added it under the various disc's

Thanks :cry:

#13 Sam Walters

Sam Walters

    Up Into Fourth

  • Members
  • PipPipPipPipPipPipPipPipPip
  • 2,765 posts

Posted 15 June 2011 - 03:52 PM

Good post.

One thing i will note on, flap disks are awfully useful!

Also bugger me you have a high wire speed! This may be where im going slightly wrong.....Low speed meaning i work slower perhaps inducing more heat into areas


Clean forgot about the Flapper disc and i had one out ready for a picture as well so i have added it under the various disc's

Thanks :cry:


I find the switchable electro-magnetic clamps good.

Edited by Sam Walters, 15 June 2011 - 03:52 PM.


#14 sonikk4

sonikk4

    Twisted Paint Polisher!!!

  • Admin
  • PipPipPipPipPipPipPipPipPipPipPip
  • 15,884 posts
  • Name: Neil
  • Location: Oxfordshire

Posted 15 June 2011 - 06:16 PM

Good post.

One thing i will note on, flap disks are awfully useful!

Also bugger me you have a high wire speed! This may be where im going slightly wrong.....Low speed meaning i work slower perhaps inducing more heat into areas


Clean forgot about the Flapper disc and i had one out ready for a picture as well so i have added it under the various disc's

Thanks :cry:


I find the switchable electro-magnetic clamps good.


Like i first mentioned this is a basic set up, obviously the air tools are optional but worth it in the long run. The whole idea of this was to give as much information to anybody setting out to weld/restore their Mini.

The more tools/ideas mentioned the better and if you have photo's of them then please add them and if possible where you purchased them from.

A lot of Noobies will have no idea of what we are talking about on some of their threads so pictures, where we bought them etc will point them in the right direction

To add to this i bought all of my Air tools either from Ebay or Machinemart, the C clamps, Cleco's from Ebay although the skin pins i have collected over the years along with some more specialised Cleco's. (Aviation industry)
Virtually everything i have listed you can get from the following places

Machinemart
Ebay
Frosts
Cromwell Tools

Neil

#15 dossy

dossy

    Mini Mad

  • Members
  • PipPipPipPip
  • 271 posts
  • Location: North Yorks
  • Local Club: Suggestions for North Yorks?

Posted 15 June 2011 - 06:20 PM

Excellent read, thanks! I've been starting to compile my tools ready for the big day when the welding begins and there were plenty of bits there I forgot about!!


0 user(s) are reading this topic

0 members, 0 guests, 0 anonymous users