I agree, epic work !!
take it you have a spot welder to speed things along ?? Very neat work, love it !!
Graham


Leyland Mini 1000 1980 Restoration Project
Started by
minifcd
, Aug 27 2011 08:59 PM
393 replies to this topic
#31

grahama
-

- Members
-

- 2,442 posts
Up Into Fourth
- Location: Warrington
- Local Club: None in my area !!
Posted 01 November 2011 - 07:04 PM
#32
minifcd
-
- Members
-
- 246 posts
Mini Mad
- Location: Stamford
Posted 02 November 2011 - 08:27 PM
Thanks Hugh and Graham. Yes took about 3 days to do inner sill/floor repair. Constantly fitting and removing panel, triming and refitting to get it right before welding in. The spot welder is the best bit of kit I have bought for working on the mini. Its a Clarke CSW6T spot welder from Machine Mart that I got about 4 years ago when they had a VAT free week. Even with the VAT discount it was about £260 (a lot more now though) and I can't tell you how long it was before I finally hit the "Pay Now" button, but it was a scary moment. Best buy ever though, saves a lot of time, no mess grinding down welds, and gives that factory original finish.
#33
grahama
-
- Members
-
- 2,442 posts
Up Into Fourth
- Location: Warrington
- Local Club: None in my area !!
Posted 02 November 2011 - 10:00 PM
I thought, reading on web, that using a spot welder took much more care and attention in relation to cleaning metal etc before the weld, is that so or does it just 'work' ??
Edited by grahama, 02 November 2011 - 10:00 PM.
#34
Davie Boy
-

- Noobies
-
- 25 posts
Passed Test
Posted 02 November 2011 - 10:59 PM
Hi. Loving the project! I have just got to removing my over-sills and finding exactly the same as you! Very interesting what you are doing as this is my first project and mini. Keep up the good work and look forward to updates to give me more of an idea of what on earth I do.....
Dave
Dave
#35
minifcd
-
- Members
-
- 246 posts
Mini Mad
- Location: Stamford
Posted 03 November 2011 - 07:41 PM
Hi Graham, yes for the spot weld to work well, you need clean metal with no paint, as paint will not conduct the electricity. However, weld through zinc primer will as it has a high concentration of zinc which conducts. So I clean down both sides of each panel where the spot welds will be and prime the two touching surfaces with zinc primer only, leaving the two outer surfaces where the electrodes touch as bare metal. This will allow for the best possible conduction of electricity to start welding. I only do 3 spot welds and then leave for a couple of minutes so spot welder doesn't over heat, before doing another 3. The copper electrodes get pretty hot!! The spot welder buzzes when working, quite loudly, but if you hit a bit where you haven't cleaned all of the paint off, it buzzes quietly and does not weld, so just clean a bit beter and retry. Takes about 1 second to do each weld between pulling trigger, to the auto cut off time. Then etch prime the outer bare metal surfaces. Simples!
Hi Davie Boy, thanks for the interest. Those over sills are nasty things! They don't let the inside of the sills breath and trap any moisture in. Both of my minis had them and the first had a piece of masking tape on inside (in perfect condition) with the name of the garage who fitted them on it, but the panel had rusted around it!
Hi Davie Boy, thanks for the interest. Those over sills are nasty things! They don't let the inside of the sills breath and trap any moisture in. Both of my minis had them and the first had a piece of masking tape on inside (in perfect condition) with the name of the garage who fitted them on it, but the panel had rusted around it!
#36
Davie Boy
-
- Noobies
-
- 25 posts
Passed Test
Posted 03 November 2011 - 09:27 PM
Suppose the over-sills did the job as far as mot's go but pretty unsafe I would have thought if the inner sill rots away t.e seat belt mount!
Hope you don't mind me asking but you but out all the inner sill. Took the floor out all the way from front to back. Did you already have the panel to know where to cut and just marked it out? Or did you just cut out the rust. Then see what you have left? Also once cut out did the mini hold Shape ok without extra support?
If yet could help that would be great!
Dave
#37
minifcd
-
- Members
-
- 246 posts
Mini Mad
- Location: Stamford
Posted 04 November 2011 - 07:57 PM
Hi Dave, I already had the panel, so knew how much new metal I had to play with. I cut the old floor just below the first groove so leaving plenty of the original floor. Then when the panel was trial fitted and clamped in place, I could work out where I needed to trim the new floor and cut the old floor to get the best compromise between new metal and removing the worst of any rust. I joined the new to the old just about 1 inch above the second groove, as the groove, being rigid, helps to keep the new floor straight. I didn't brace it, (would have been better to) but I took plenty of measurements before and after and everything still lines up perfectly. The reason I cut the heal board out half at a time, was to keep the shell rigid and help align the new heal board with the subframe.
#38
minifcd
-
- Members
-
- 246 posts
Mini Mad
- Location: Stamford
Posted 04 November 2011 - 11:59 PM
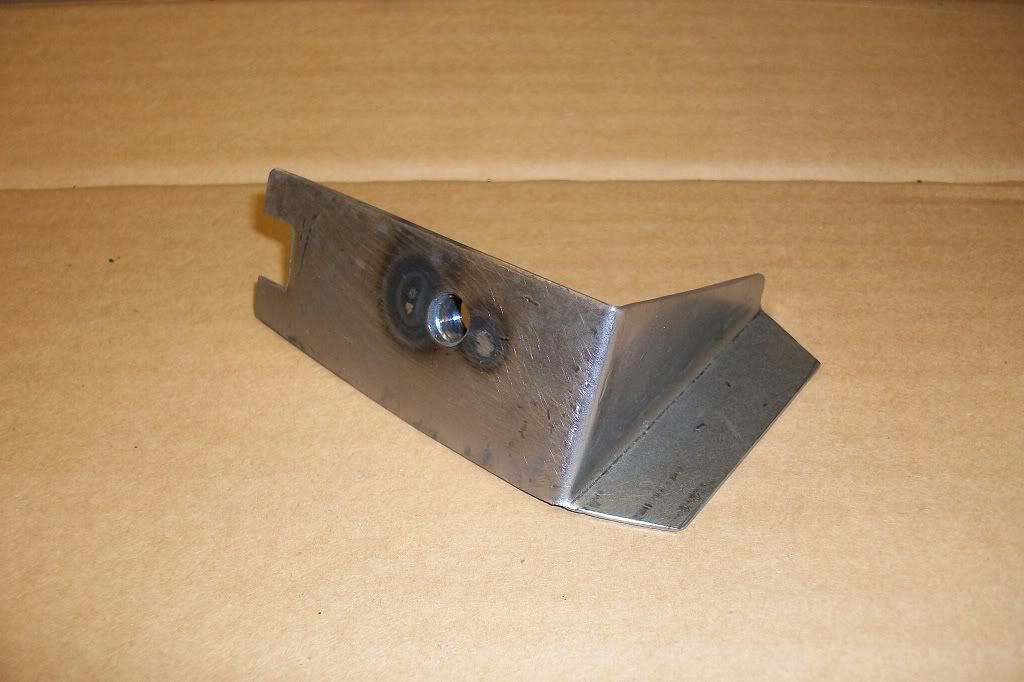
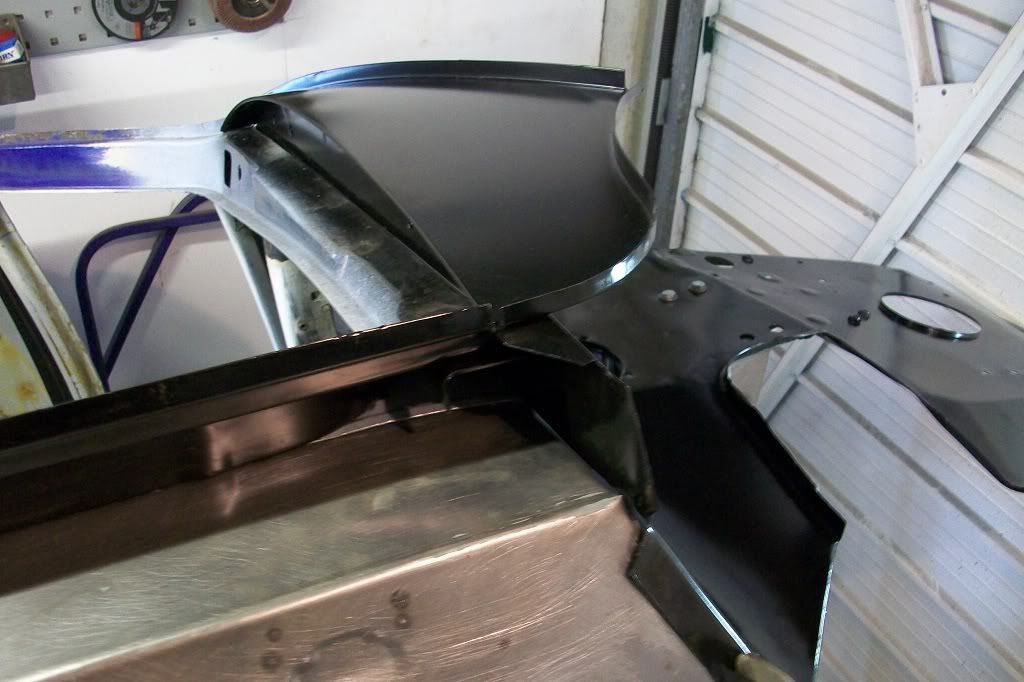
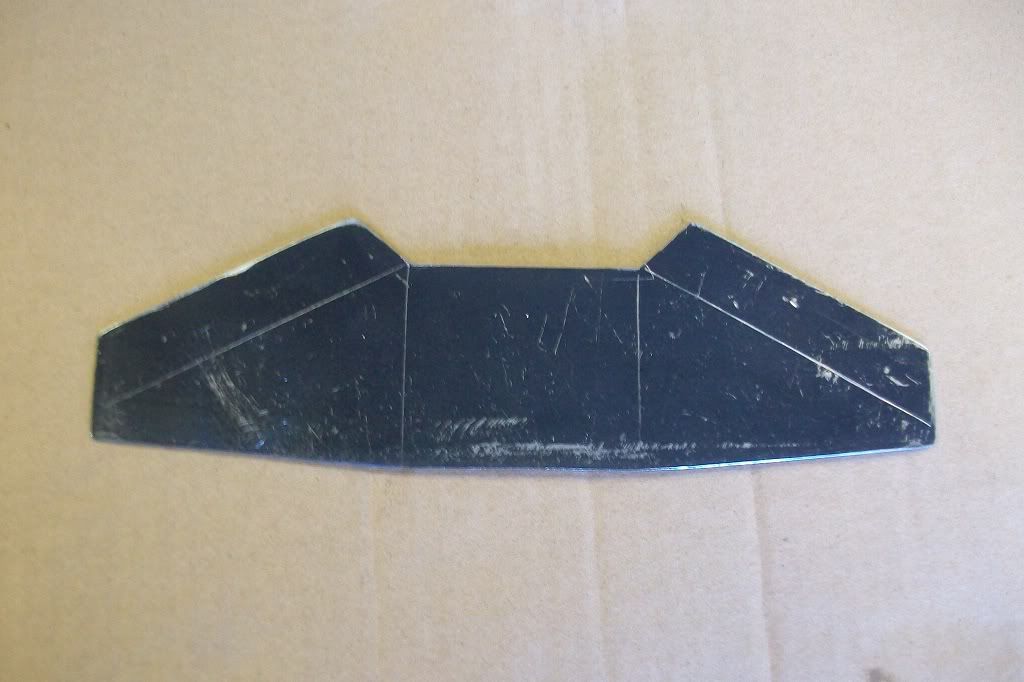
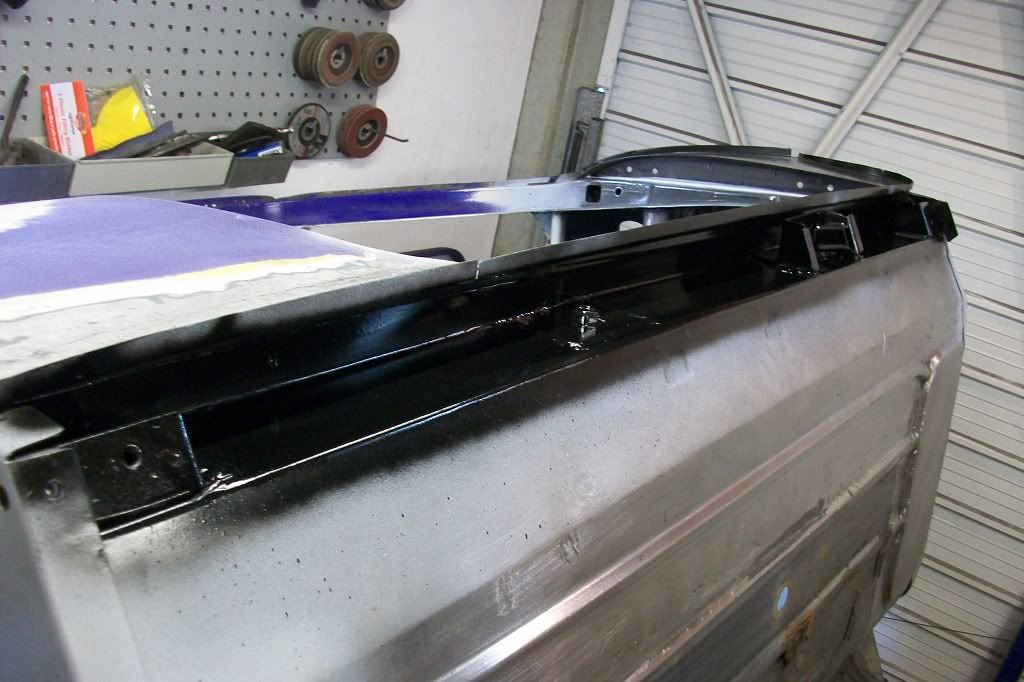
Hi, here are a few more photos of the repairs to the floor/sill. First I fabricated a sill reinforcing bracket. I believe the purpose of these were to secure slings at the factory along with the slinging brackets under the floor and aren't really needed, but if they were there from new, I will be replace them whether they're seen or not!
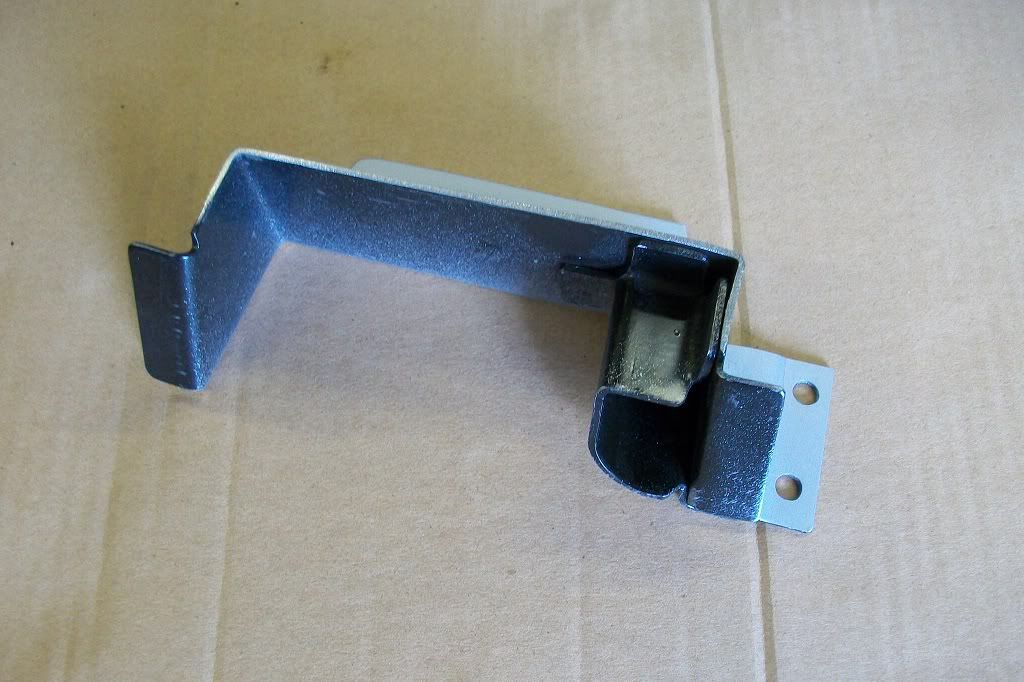
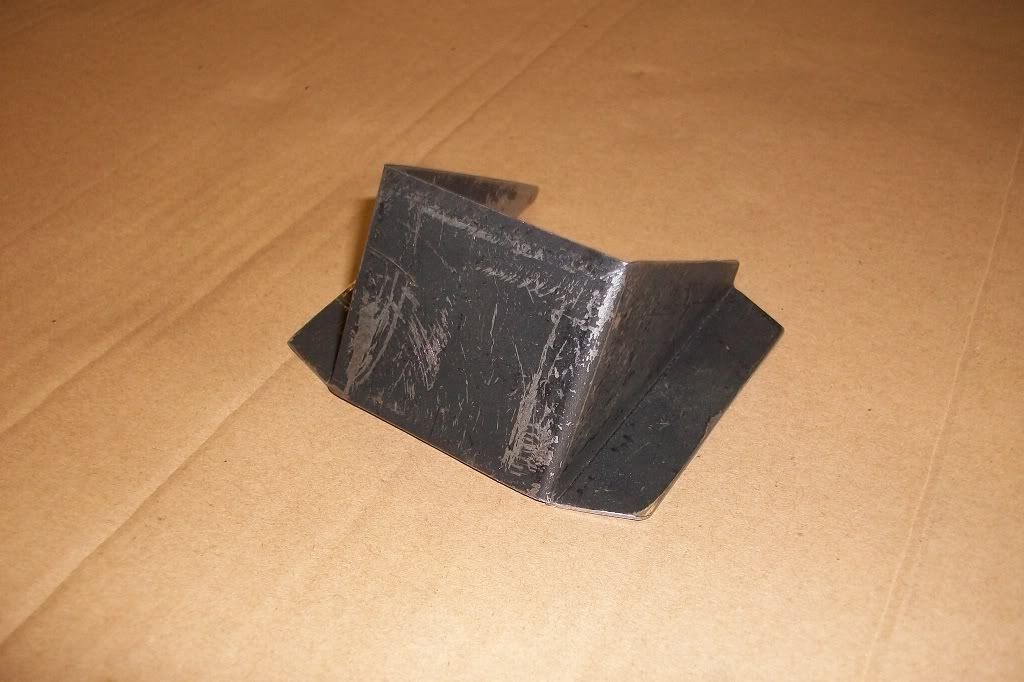
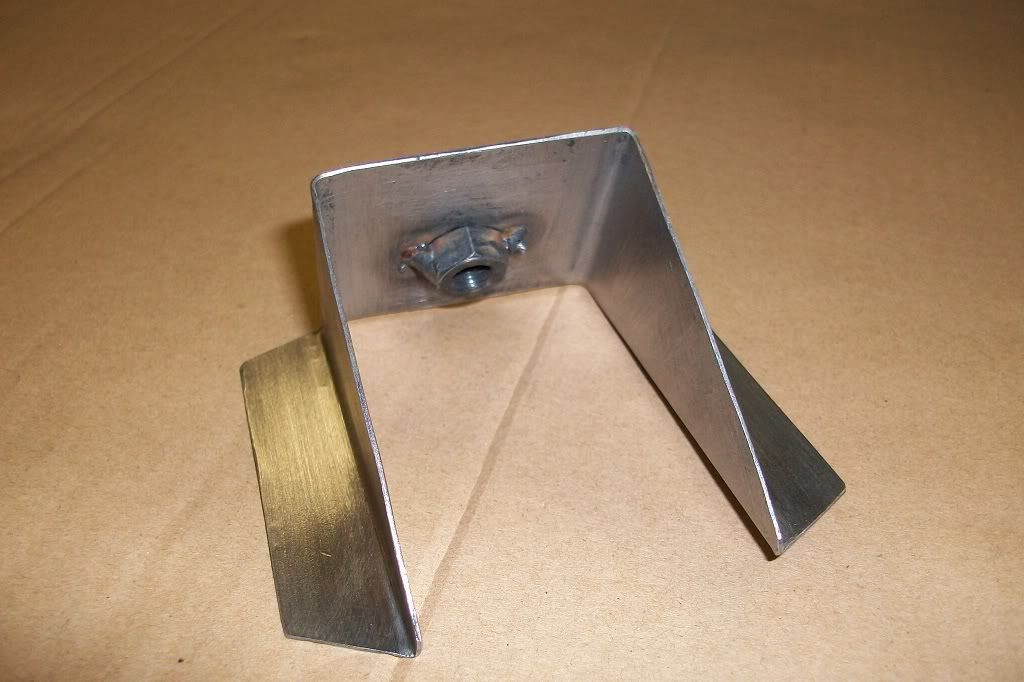
Rear bracket.
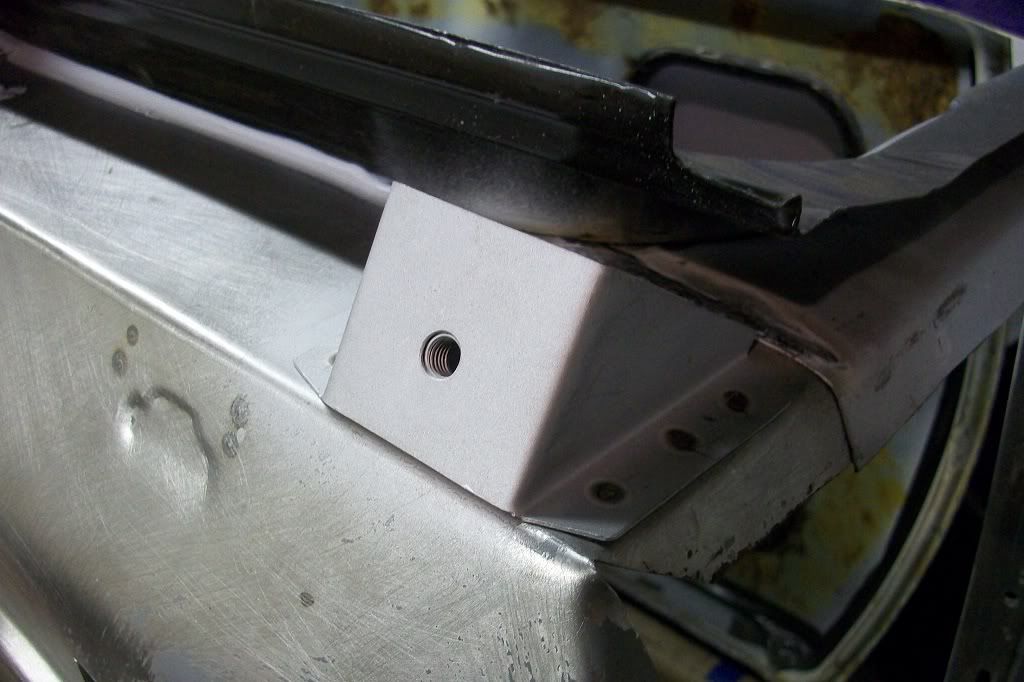
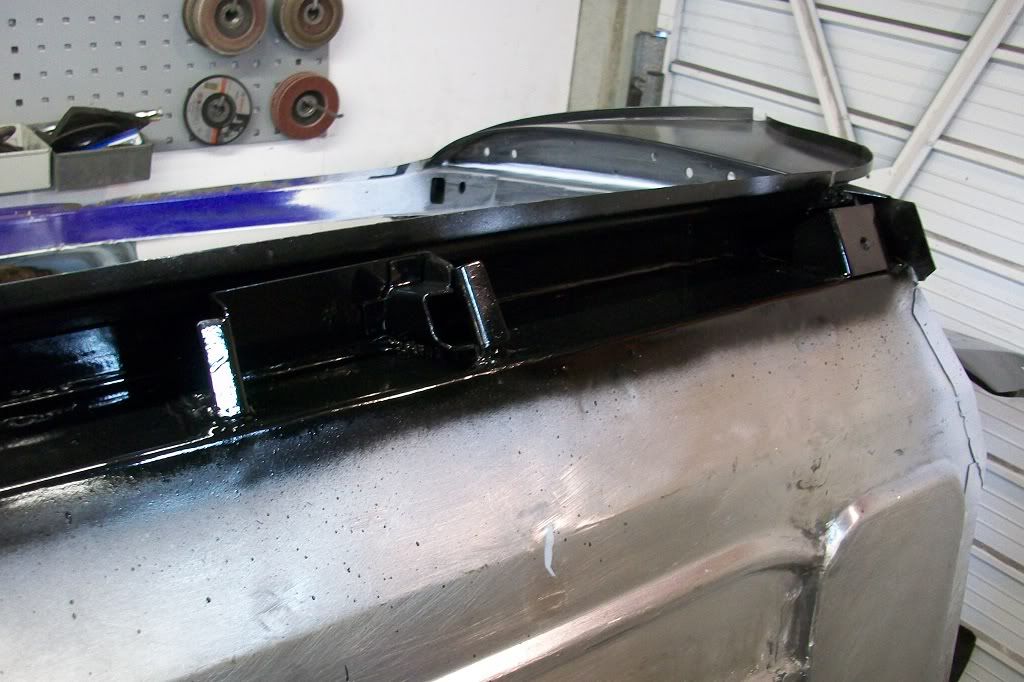
Rear slinging bracket fitted. This is a heritage part 24A42 for right hand.
Drilled the spot welds out of the right hand inner wing and removed.
Right hand footwell removed.
Offered up the new inner wing, complete with A panel, to check fit. Heritage panel ABD36006 for right hand.
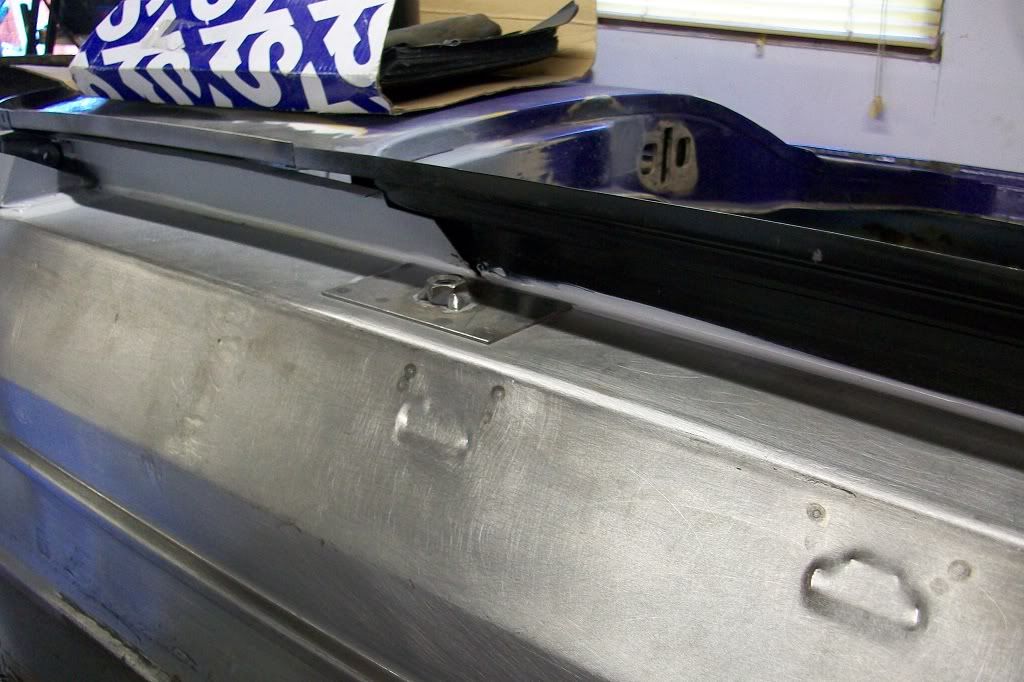
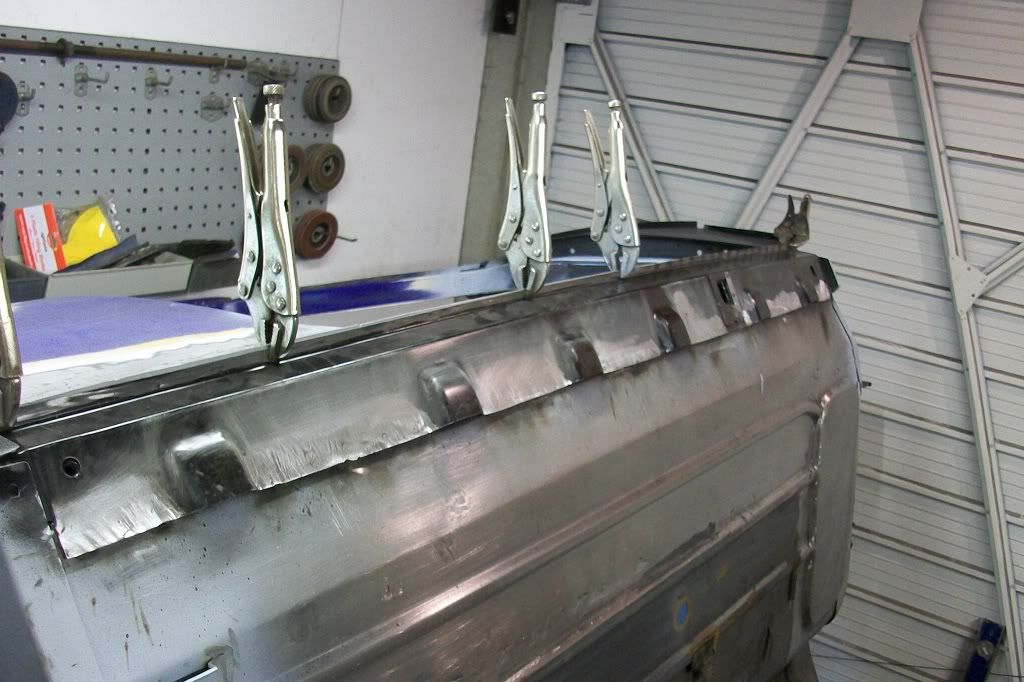
With the inner wing in place, I used the new outer sill to line up the jacking point, removed the outer sill and welded in the jacking point. Heritage part 14A8374 right hand.
Seam sealed inside sill.
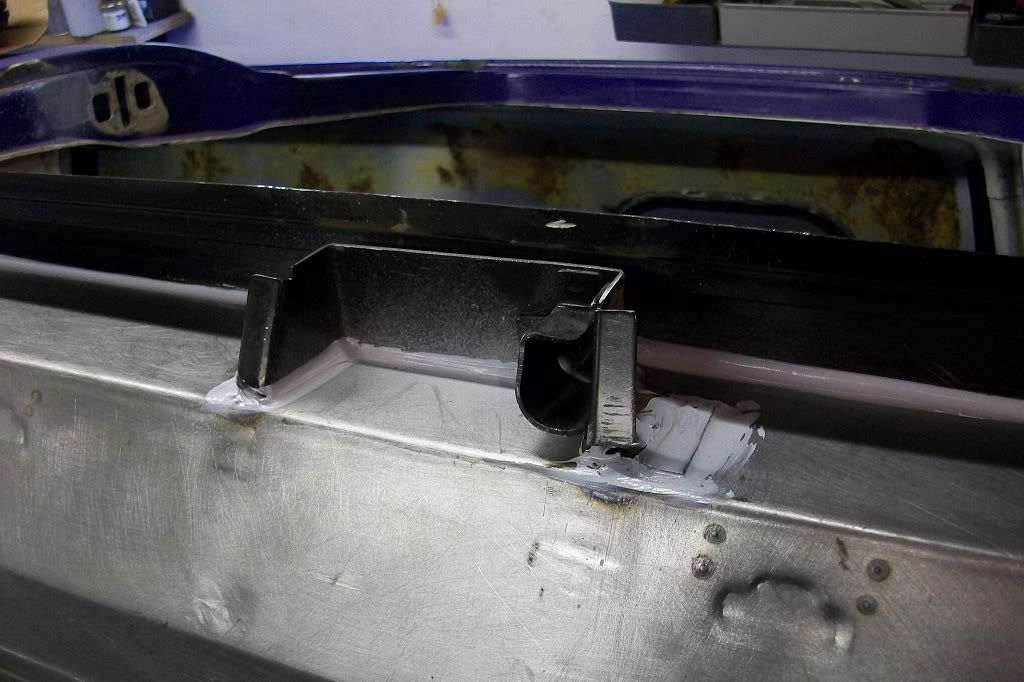
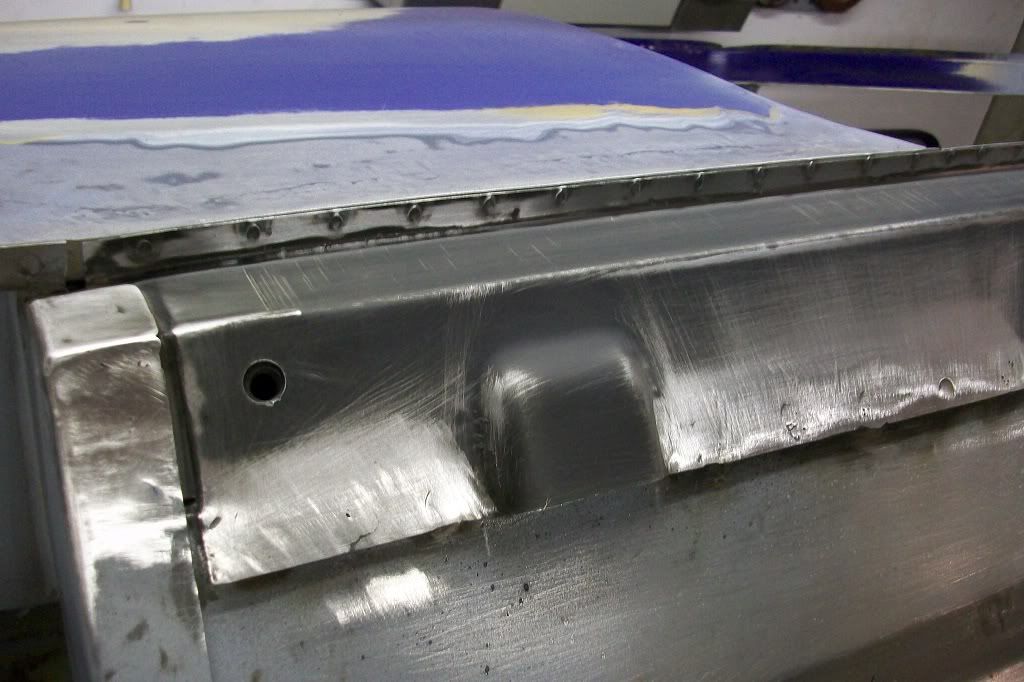
Fabricated the front reinforcing bracket from a cardboard template of the old bracket.
And spot welded in whilst I could gain access with the inner wing removed.
Thats it for now, thanks.
Rear bracket.
Rear slinging bracket fitted. This is a heritage part 24A42 for right hand.
Drilled the spot welds out of the right hand inner wing and removed.
Right hand footwell removed.
Offered up the new inner wing, complete with A panel, to check fit. Heritage panel ABD36006 for right hand.
With the inner wing in place, I used the new outer sill to line up the jacking point, removed the outer sill and welded in the jacking point. Heritage part 14A8374 right hand.
Seam sealed inside sill.
Fabricated the front reinforcing bracket from a cardboard template of the old bracket.
And spot welded in whilst I could gain access with the inner wing removed.
Thats it for now, thanks.
Edited by minifcd, 05 November 2011 - 12:03 AM.
#39
LukeMoss
-

- Noobies
-
- 398 posts
Speeding Along Now
- Location: Manchester
- Local Club: TGSOC
Posted 05 November 2011 - 12:56 AM
Amazing work, looking forward to seeing the rest of the project
#40
BusheyTrader
-

- TMF+ Member
-
- 481 posts
Speeding Along Now
- Location: Bushey
- Local Club: Nope
Posted 05 November 2011 - 10:41 AM
Amazing progress......
Does that the new inner wing, complete with A panel prevent some of the adjustment needed when fitting the front wings, bonnet, doors etc? Is the A panel already welded to the inner wing?
I ask since I had to beat the A post forward a bit to enable enough clearance for the rear of the driver's door. The A panel can slide across the A post before welding to allow some adjustment. An all-in-one ready welded panel might not allow this. I'm thinking in advance of the passenger side.
Thanks,
Adam
Edited by BusheyTrader, 05 November 2011 - 10:42 AM.
#41
Davie Boy
-
- Noobies
-
- 25 posts
Passed Test
Posted 05 November 2011 - 03:40 PM
thanks for the information!
So i guess you always buy the panels (or you make them) before you cut them out?
Must say you really do make it look easy!
Keep up the good work. the car is really taking shape now!
Fantastic to see how to do it properly!
So i guess you always buy the panels (or you make them)
before you cut them out?Must say you really do make it look easy!
Keep up the good work. the car is really taking shape now!
Fantastic to see how to do it properly!
#42
hughJ
-

- Members
-
- 727 posts
Soldiering Along
- Location: Highlands, Scotland
Posted 05 November 2011 - 04:36 PM
I don't know, I really don't know how you do it. That's like another two months work!! And its fantastic work. I just have so much respect and just a hint of jealousy. Keep up the great work and keep letting us know. These fabricated pieces are beautiful - like shop made!
Hugh
Hugh
#43
minifcd
-
- Members
-
- 246 posts
Mini Mad
- Location: Stamford
Posted 06 November 2011 - 11:09 AM
Thanks Luke, glad you like. Thanks Adam, yes the A panel comes spot welded to the inner wing A post and does in my opinion make fitting so much easier. I have fitted two of these inner wings to my first mini and two to this mini with no trouble. Providing you keep trial fitting them and correcting any problems that may prevent the panel fitting correctly, you can't go wrong. I get the inner wing in place and clamped and then fit the door to check fit before welding in.
Thanks dave, yes I buy, (or make) any panels before cutting out, the old so as not to go wrong.
Hugh thanks for your kind words, I'll post the next two months work in the next few days!!
Thanks dave, yes I buy, (or make) any panels before cutting out, the old so as not to go wrong.
Hugh thanks for your kind words, I'll post the next two months work in the next few days!!
#44
minifcd
-
- Members
-
- 246 posts
Mini Mad
- Location: Stamford
Posted 10 November 2011 - 07:22 PM
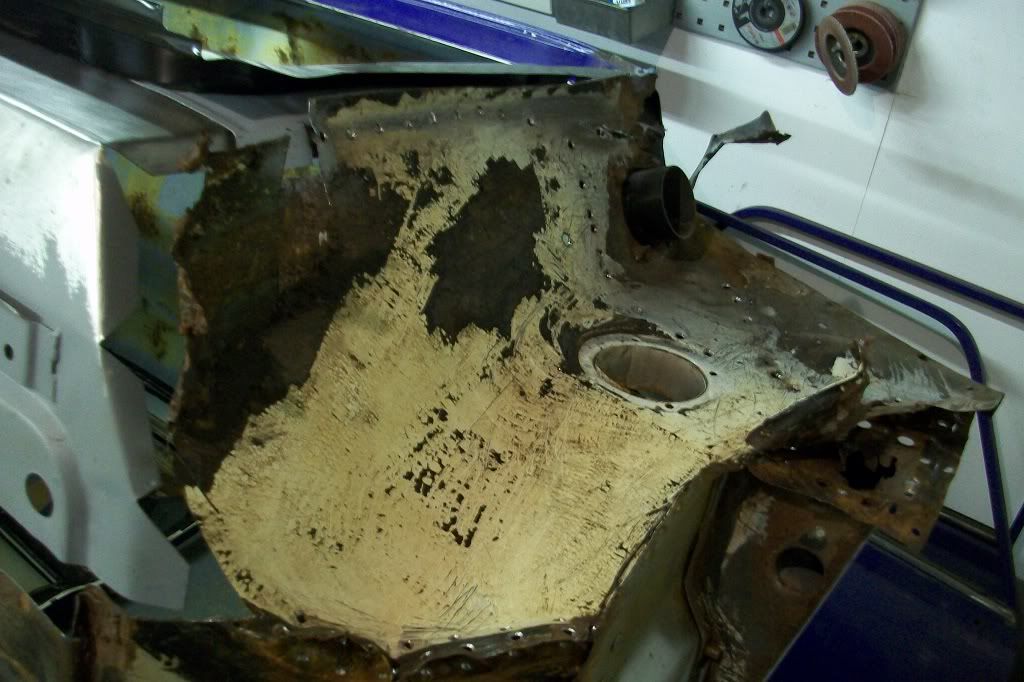
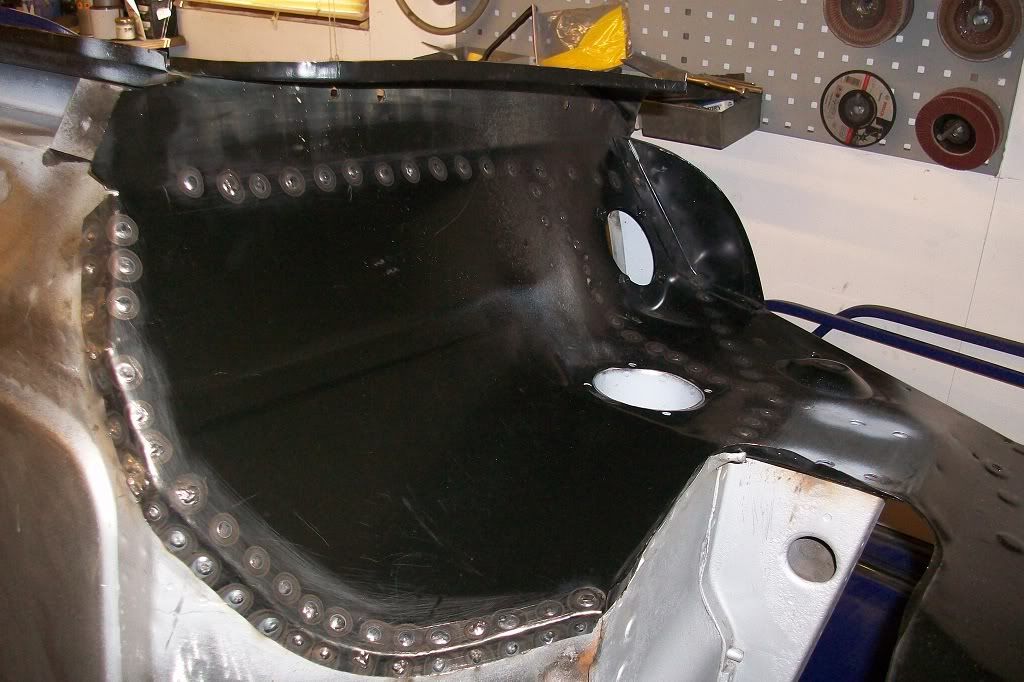
Hi all, next update. Repair to the drivers side footwell. For this I used MS25R, which is an over panel but works if all you need is the floor impression. The panel was cut to the required size and shape and tacked in place. The grooves aren't quite the right shape as those in the original floor but they line up and so were opened up a bit with a hammer!
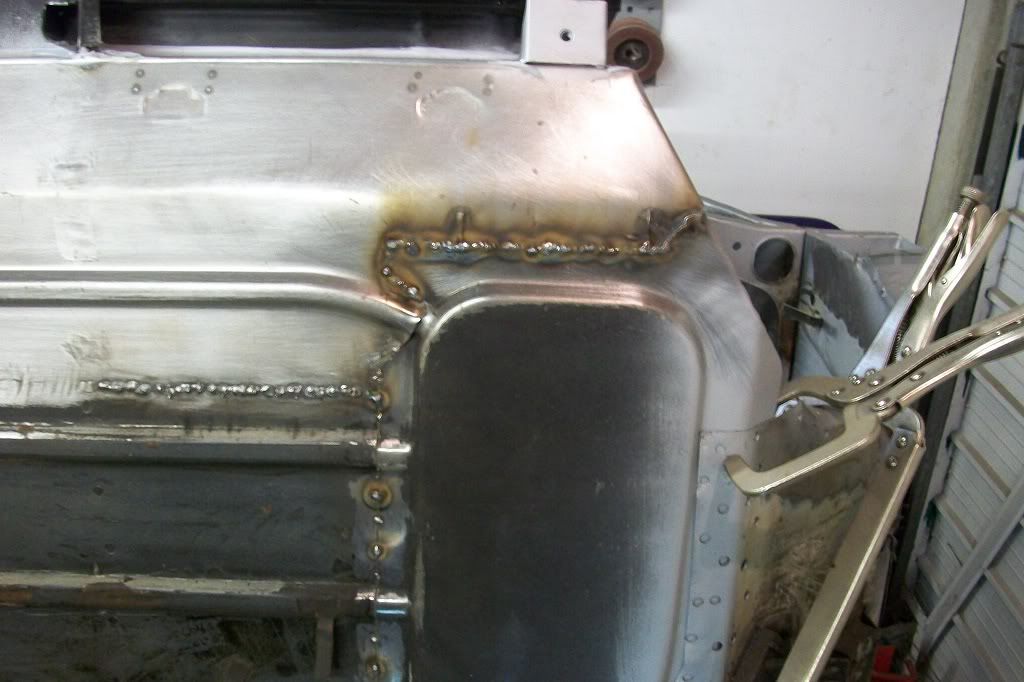
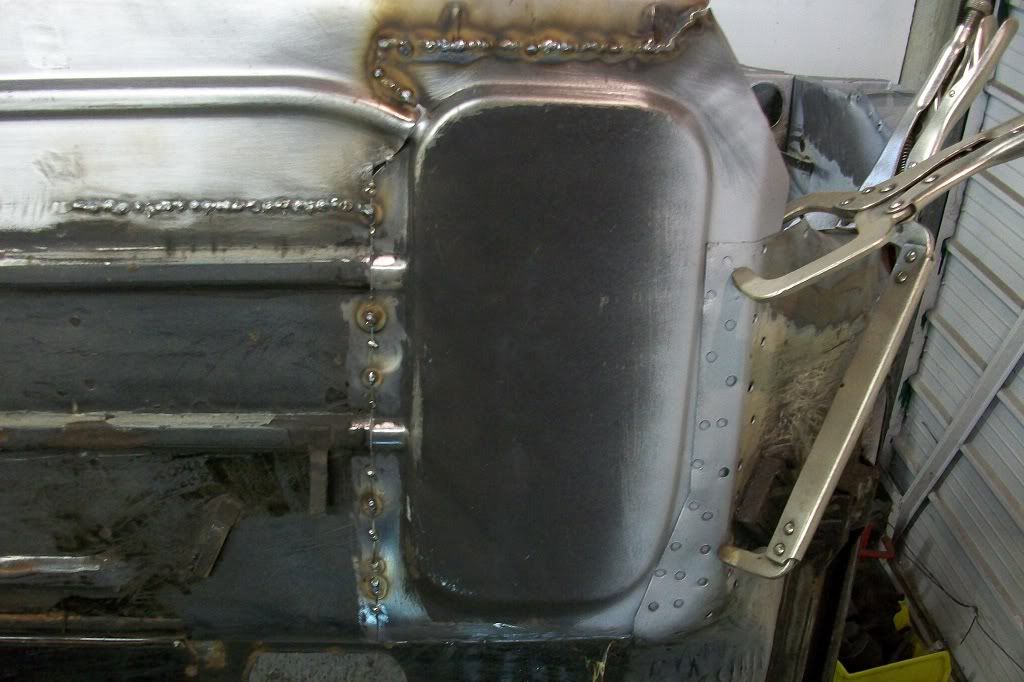
A repair piece had to be made for the corner of the toe board and welded in.

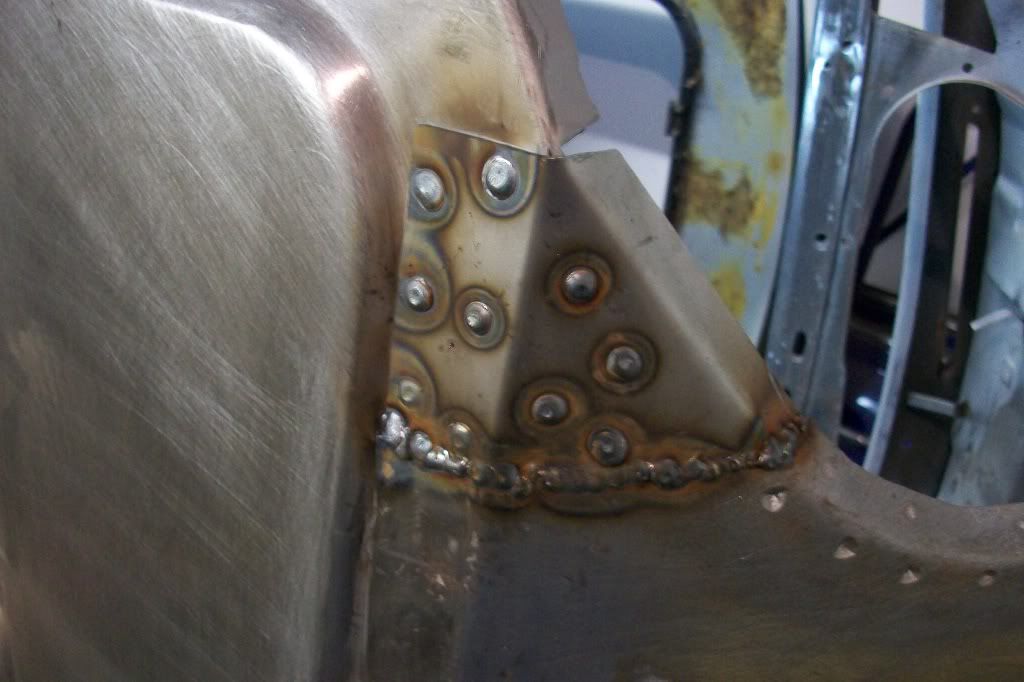
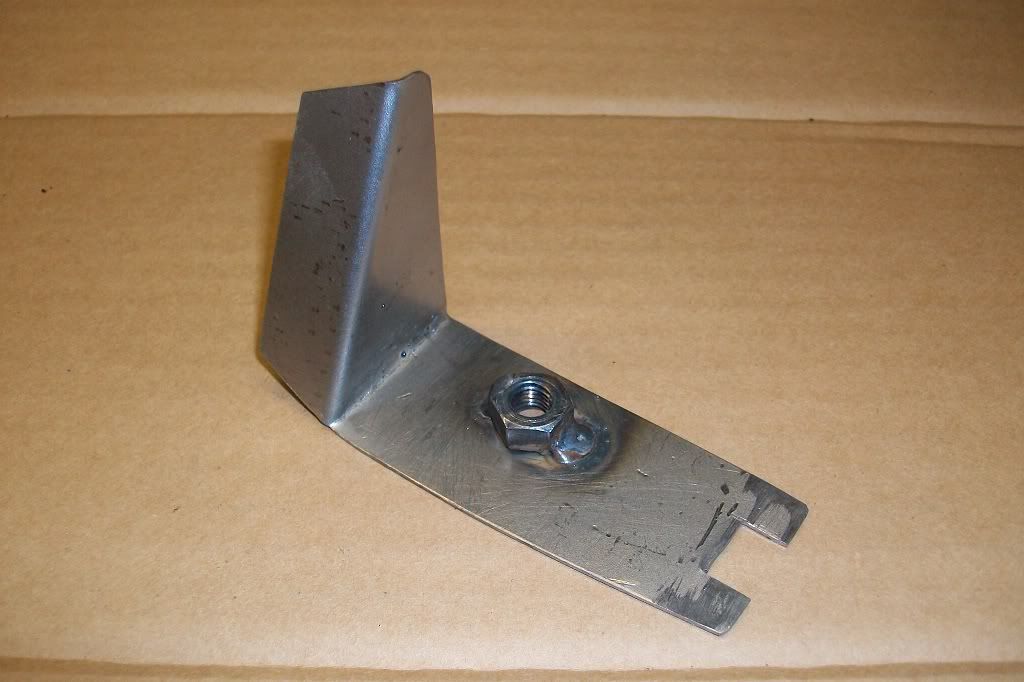
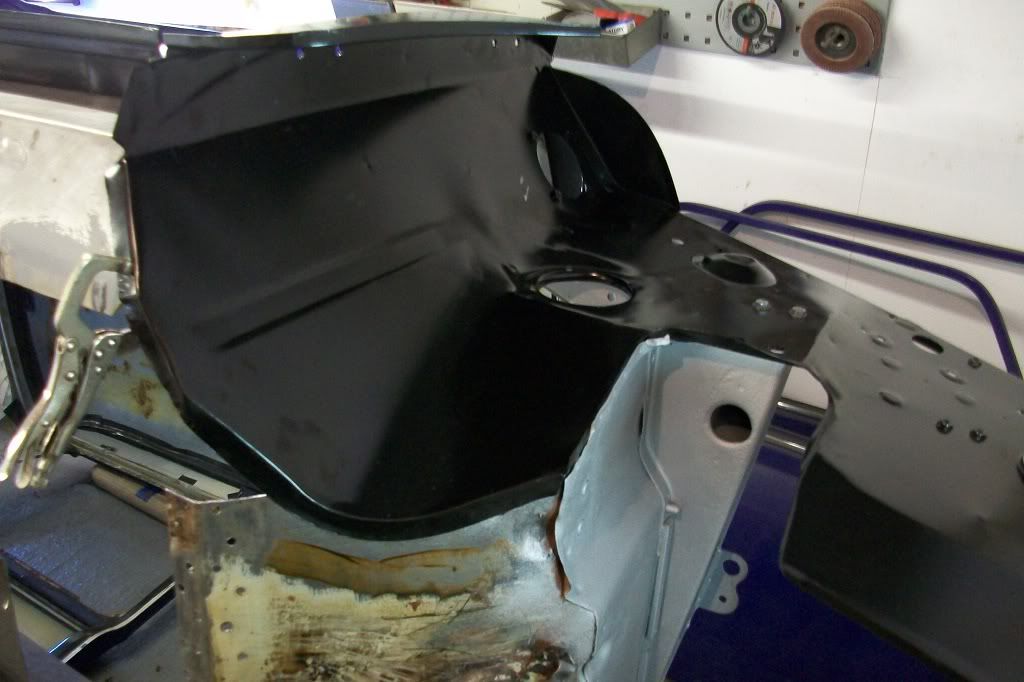
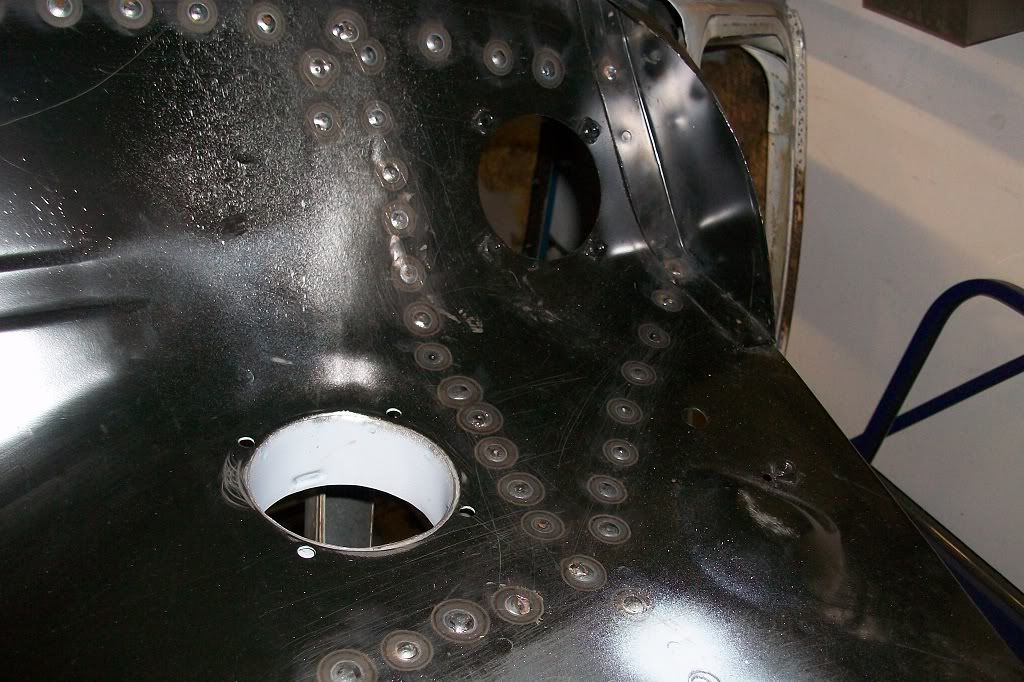
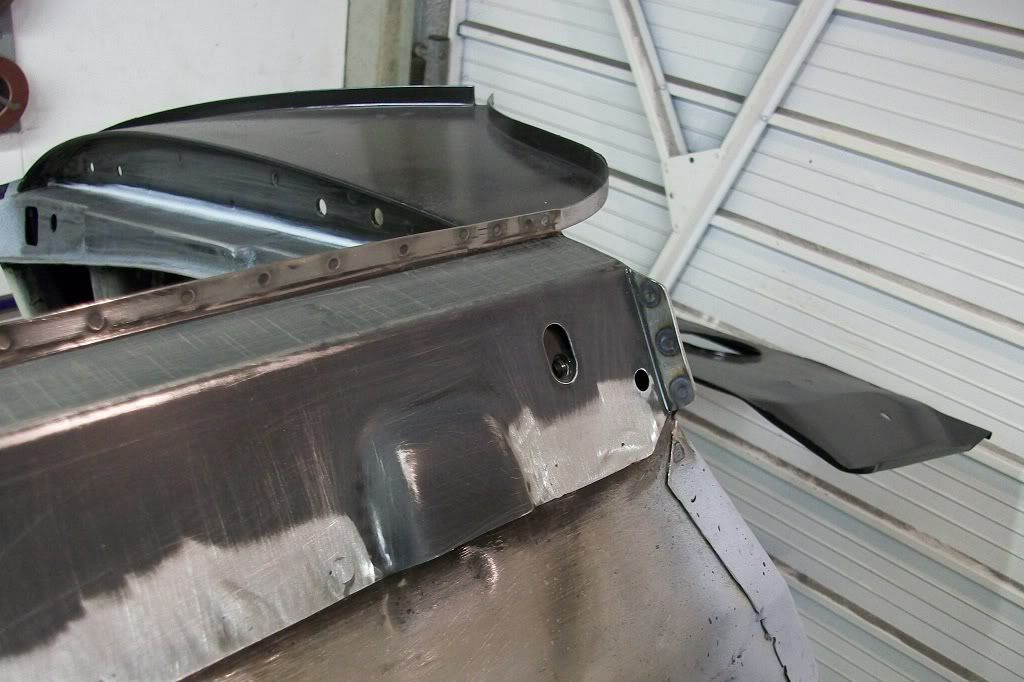
Before the inner wing was fitted I had to make a new piece for the heater ducting to fit to, as the new panel does not come with it and the old panel was too badly corroded to re use. A measurement was taken from the old piece and a template was made from card. This was transfered to metal and three impressions were added at the correct distance, using the end of a panel pin hammer and a large hammer, to punch the shape into another piece of thicker metal below, with an oval shaped hole in it.
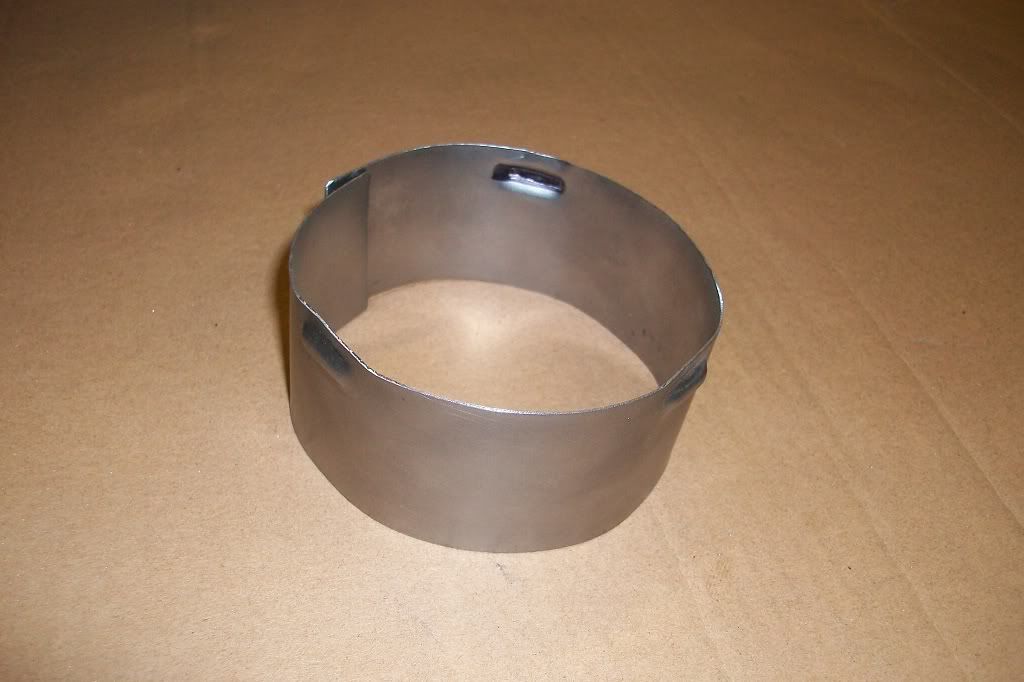
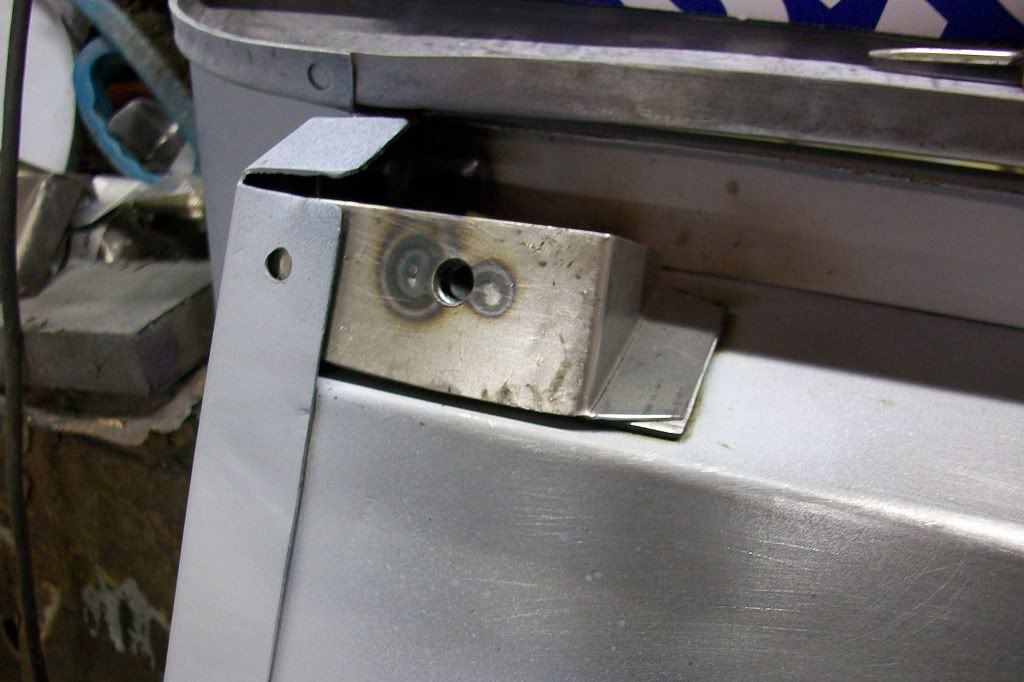
Spot welded to new panel.
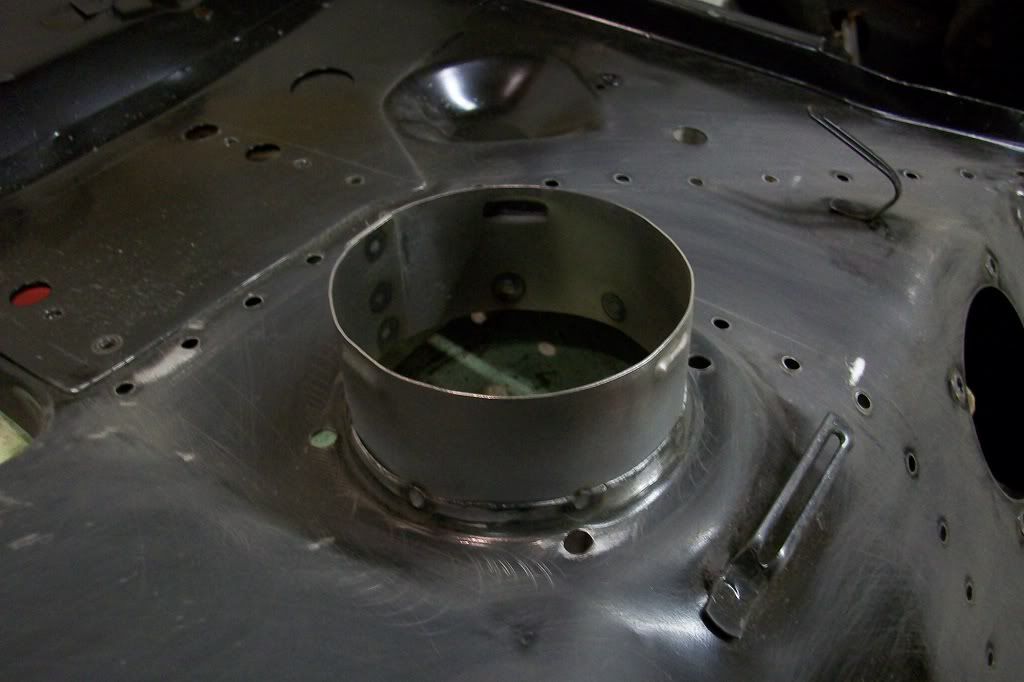
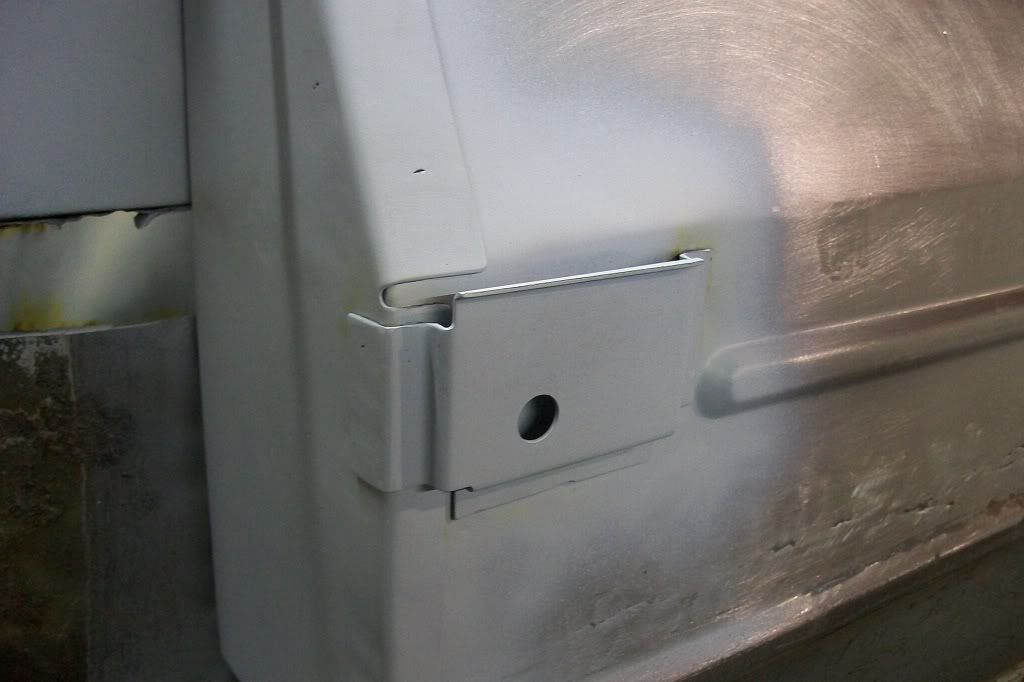
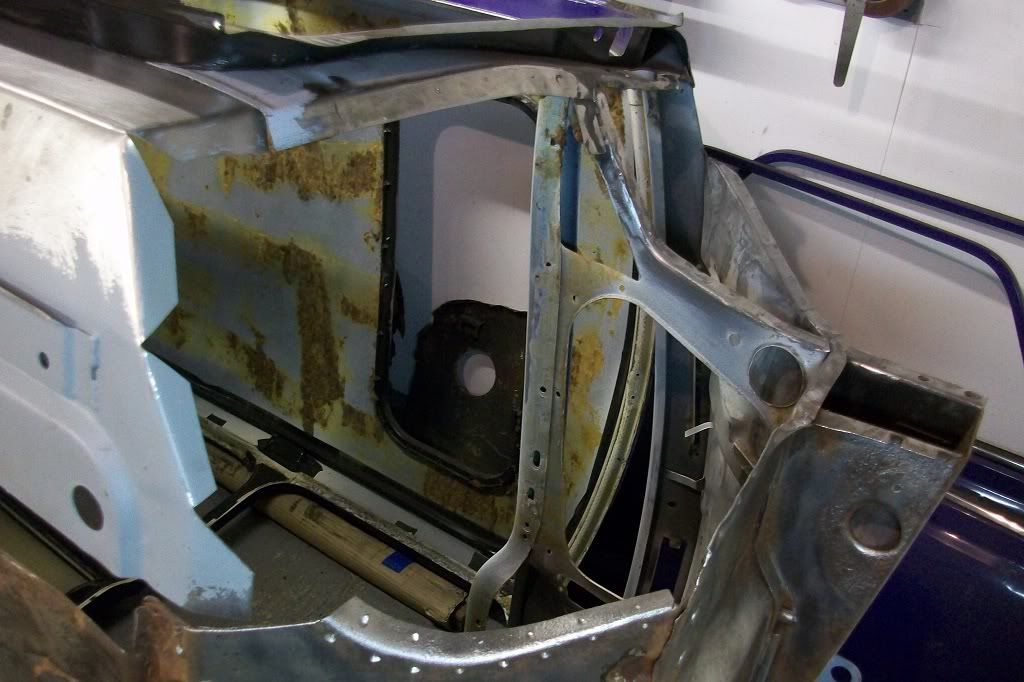
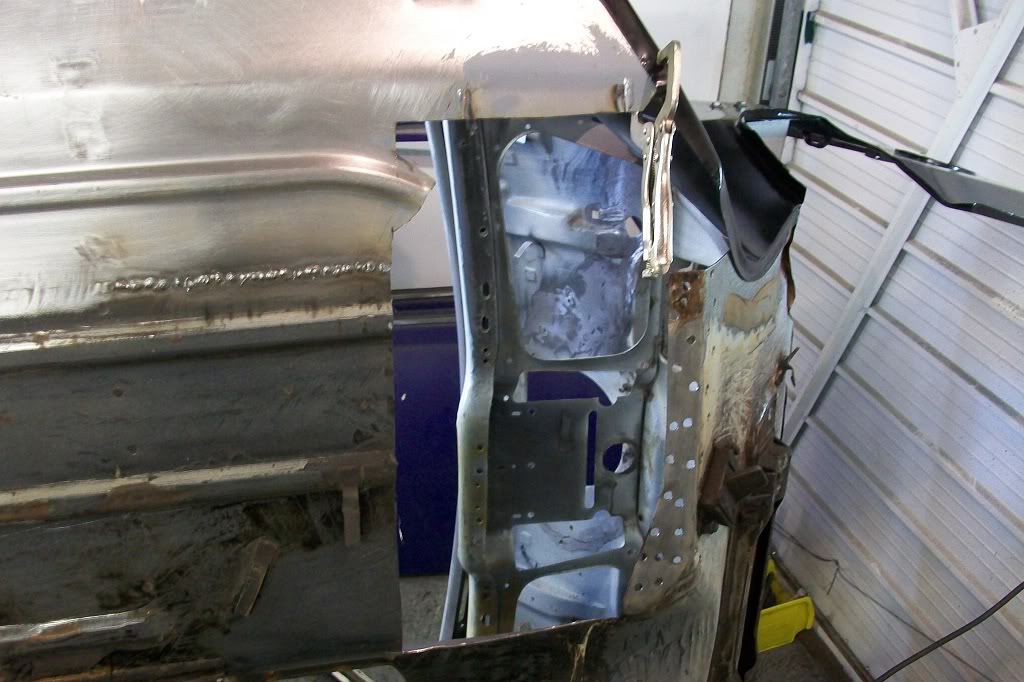
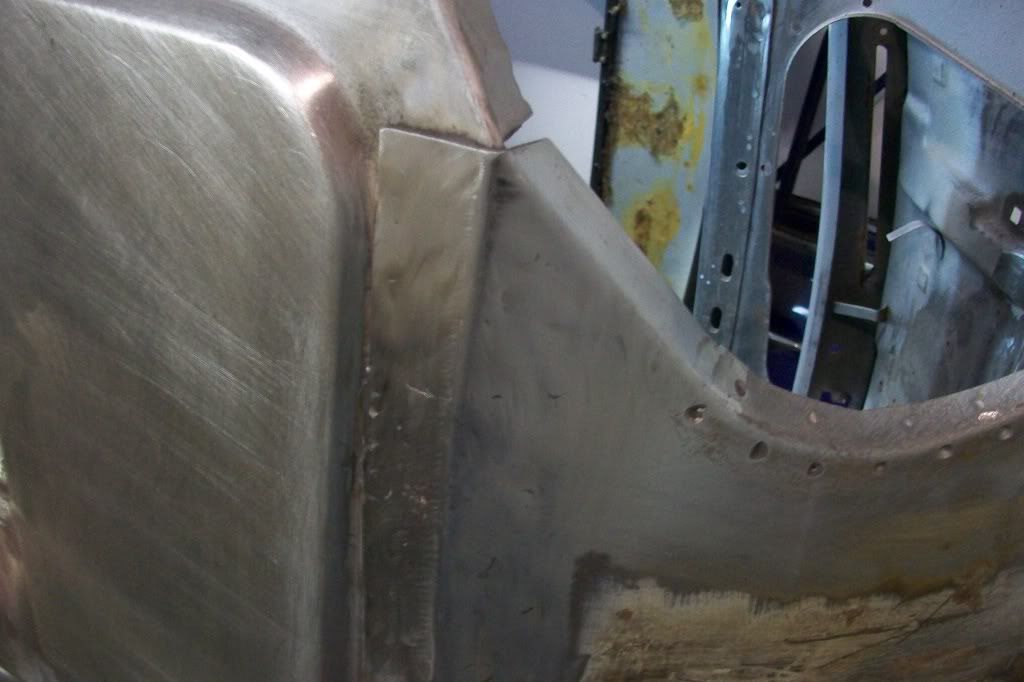
The inner wing was then fitted and plug welded into place.
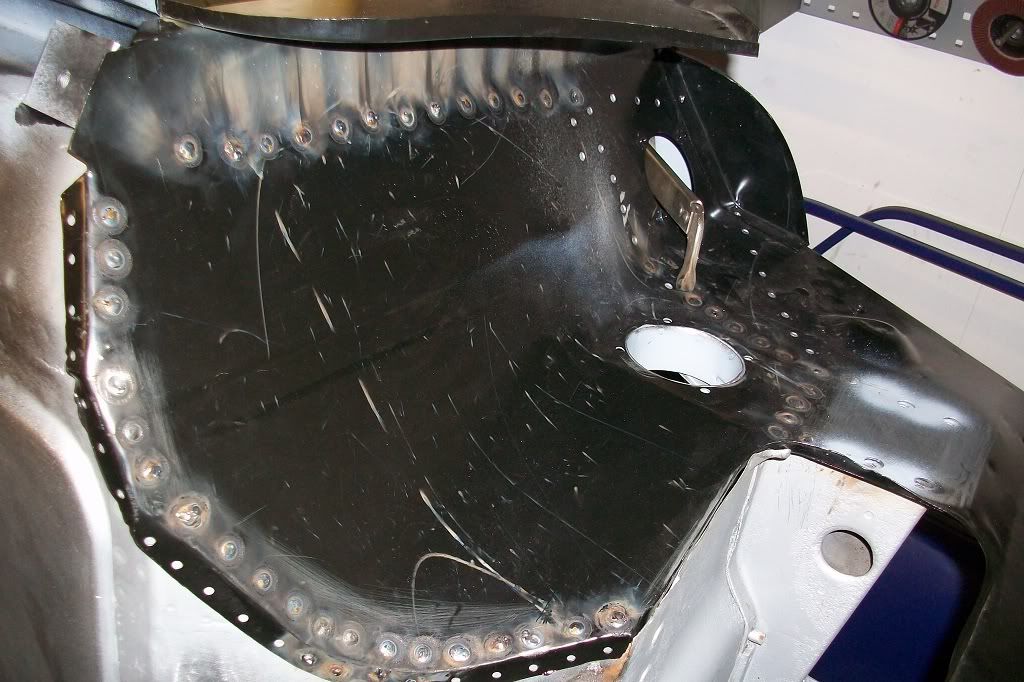
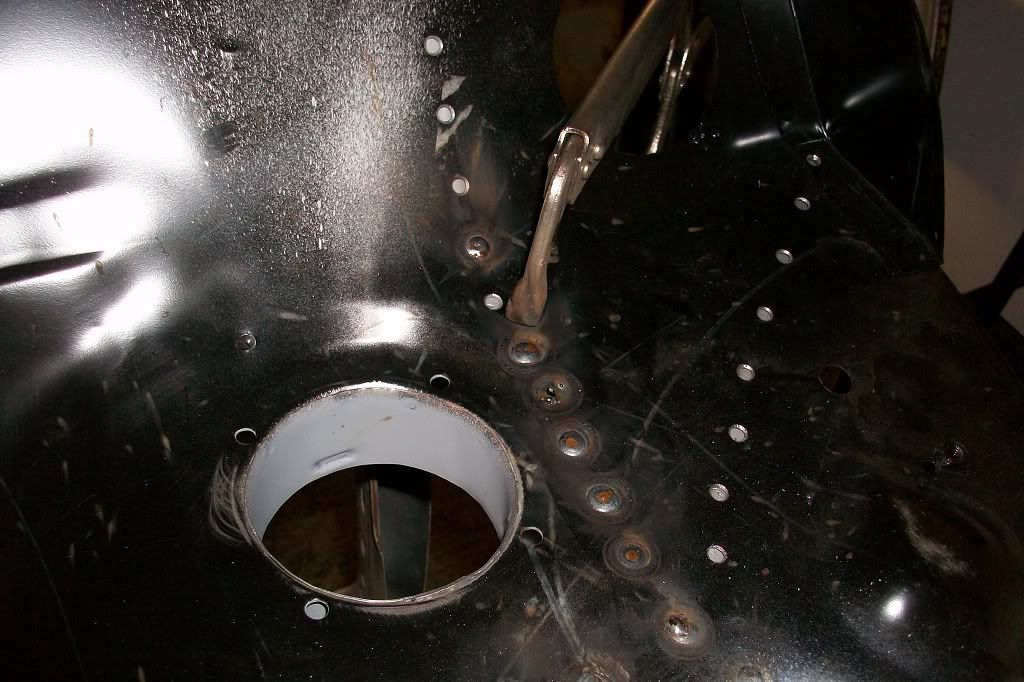
Welded at the A post,
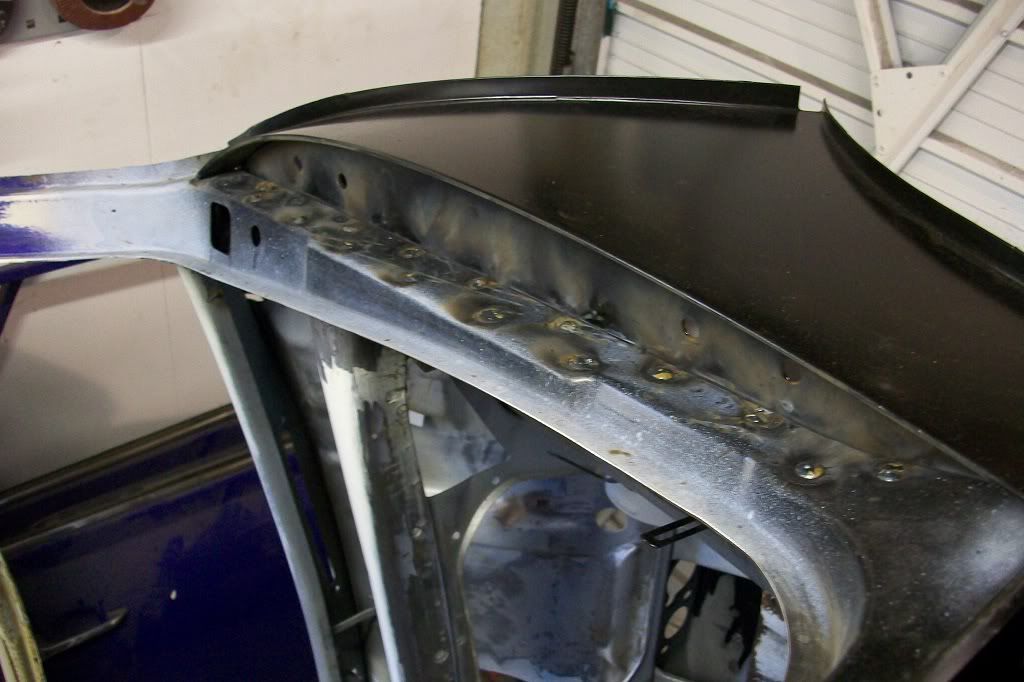
and ground down.
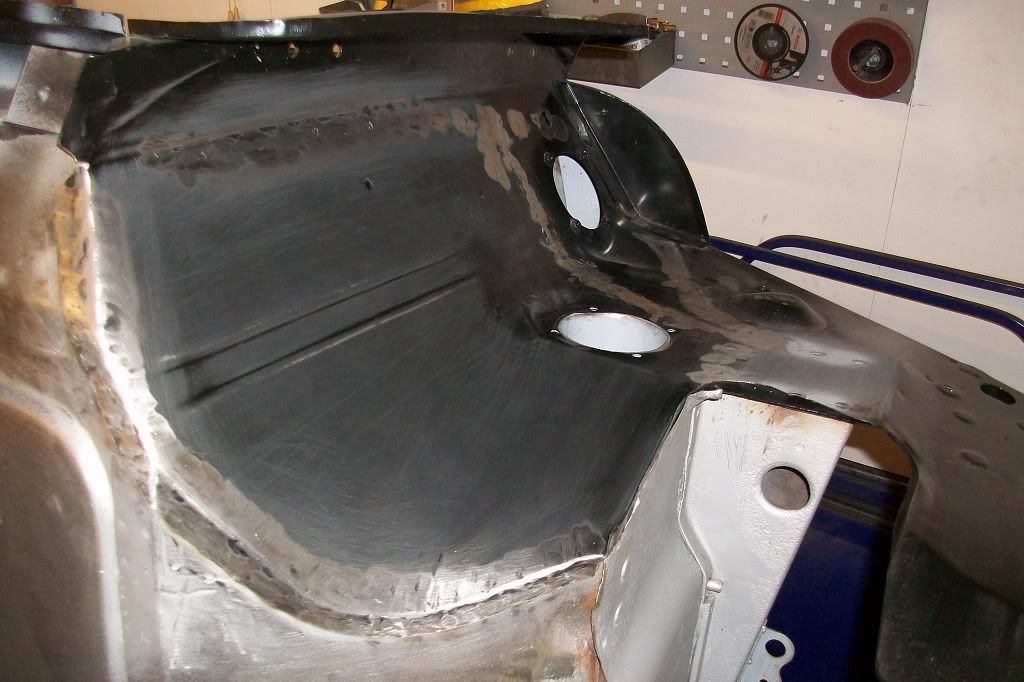
With the footwell and inner wing done, I then painted the inside of the inner sill.
The outer sill was then welded on. A heritage panel 14A9534, plug welded to the inner sill and spot welded to the door step and rear quarter.
Thats it for now. Thanks.
A repair piece had to be made for the corner of the toe board and welded in.
Before the inner wing was fitted I had to make a new piece for the heater ducting to fit to, as the new panel does not come with it and the old panel was too badly corroded to re use. A measurement was taken from the old piece and a template was made from card. This was transfered to metal and three impressions were added at the correct distance, using the end of a panel pin hammer and a large hammer, to punch the shape into another piece of thicker metal below, with an oval shaped hole in it.
Spot welded to new panel.
The inner wing was then fitted and plug welded into place.
Welded at the A post,
and ground down.
With the footwell and inner wing done, I then painted the inside of the inner sill.
The outer sill was then welded on. A heritage panel 14A9534, plug welded to the inner sill and spot welded to the door step and rear quarter.
Thats it for now. Thanks.
#45
grahama
-
- Members
-
- 2,442 posts
Up Into Fourth
- Location: Warrington
- Local Club: None in my area !!
Posted 10 November 2011 - 09:40 PM
Bloody hell your work is neat, got to get me a spot welder, however your plug welds are nearly as good !!


0 user(s) are reading this topic
0 members, 0 guests, 0 anonymous users


