Jump to content


Photo

My 75 Mini Pickup Project In Bolivia


  • Please log in to reply
68 replies to this topic

#31 domdee

domdee

    Formally known as dominicdee

  • Members
  • PipPipPipPipPipPipPip
  • 1,183 posts
  • Location: hull
  • Local Club: hull clubs on FB

Posted 29 October 2013 - 12:19 PM


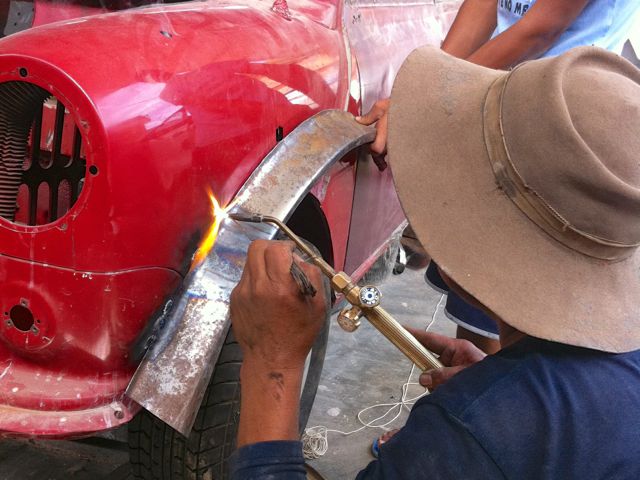
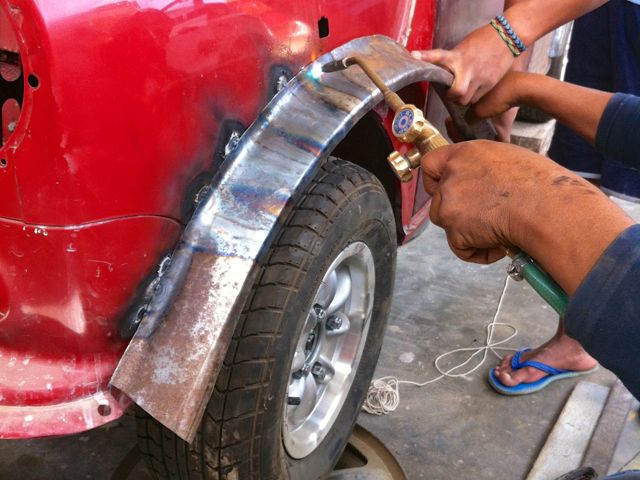
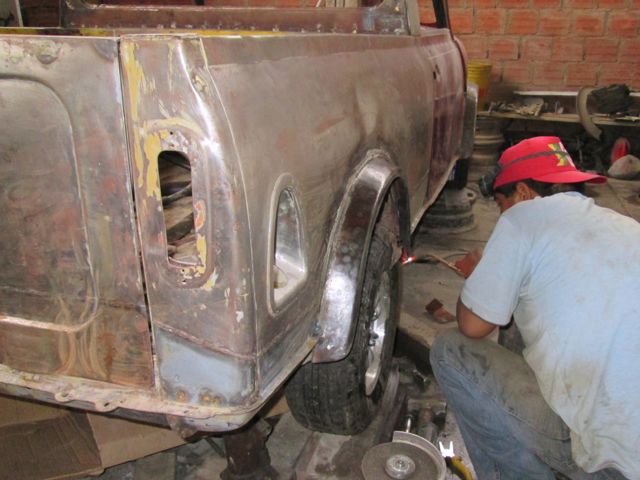
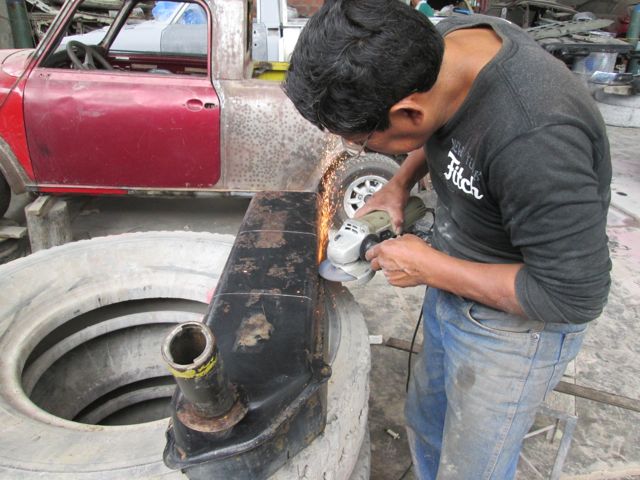
i cant believe this guy welds with gas! what a talent that is!


There are only a few of us left in the UK that still use Oxy gear for welding LOL. Mind you, i do use Mig, stick and brazing too, it all depends on the job in hand. 


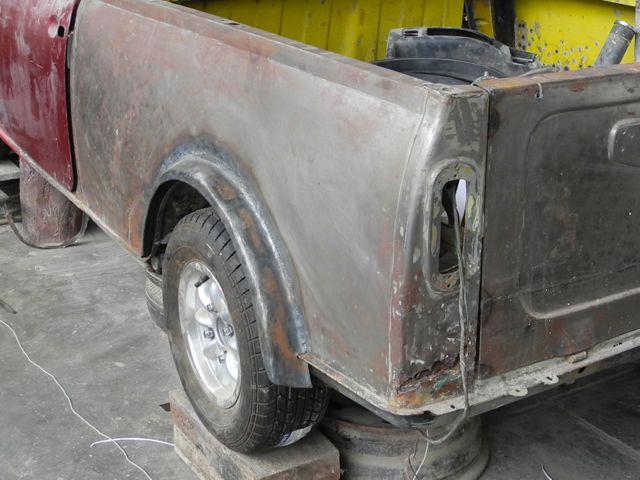
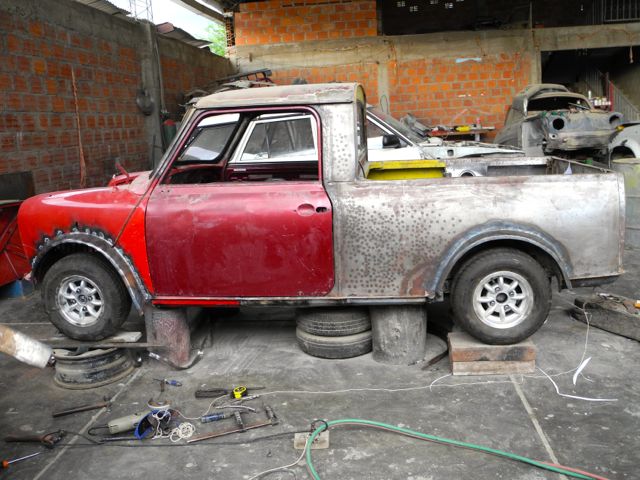
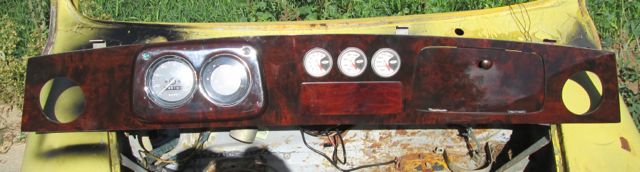
I will continue to follow this thread as it reminds me of how we did things years ago. How many new panels have been used so far?    


er, try NONE!


 Love it.


i use tig, oxy, stick and brazing too, job dependant, but not to weld up 2 halves of a mini... thats class!


Edited by domdee, 29 October 2013 - 12:22 PM.


#32 Richard1

Richard1

    Stage One Kit Fitted

  • Noobies
  • PipPipPip
  • 53 posts

Posted 01 January 2014 - 01:04 PM

In the weekend I just spent in Tarija I got a few things done. 
 
First put the rear wheels with 3/4" spacers on. From there we could see what needed to happen to finish the design of the flares, bringing the rear in closer to the wheel well and narrowing it a bit so it just passes the tire position. What you see here is the final design (except it is missing a little tail piece in the front.
 
Then the front discs. They will set the track 6 cm wider in front than the rears with the spacers, so the flares needed to be 3 cm wider than the rears on each side.
 
So a little forming, welding, forming, etc. In these pics the front one still needs some rounding, plus forming of the ends. But you get the idea. Then we will add the inner liner, welded to the inner wheel well.
 
 
Final design
final_flare_design.jpg
 
 
starting_flare.jpg
forming_flare.jpg
starting_front_flare.jpg
 
heating to bend to wheel well
heating_to_bend.jpg
 
 
side_view_front_flare_started.jpg


#33 bpirie1000

bpirie1000

    Up Into Fourth

  • TMF+ Member
  • PipPipPipPipPipPipPipPipPip
  • 2,119 posts
  • Location: Aberdeenshire
  • Local Club: Amoc

Posted 01 January 2014 - 02:29 PM

Well done.. Looks good..

Love the fact that your shaping panels... AND doing it in flip flops.... Health and safety will have a fit with that...

Anyways like the arches... Different.....

#34 Nossedout

Nossedout

    Mini Mad

  • Members
  • PipPipPipPip
  • 160 posts

Posted 01 January 2014 - 08:42 PM

great work! love the build! post more photos!!


#35 Archived2

Archived2

    One Carb Or Two?

  • Archived
  • PipPipPipPipPipPipPip
  • 1,093 posts

Posted 10 January 2014 - 06:26 PM

great work! love the build! post more photos!!

+1


#36 DugganC17

DugganC17

    Speeding Along Now

  • Members
  • PipPipPipPipPip
  • 359 posts

Posted 10 January 2014 - 09:53 PM

great work and love the fact your doing it the old skool way of making your own panels and using good oxy welding keep up th egood work


#37 Richard1

Richard1

    Stage One Kit Fitted

  • Noobies
  • PipPipPip
  • 53 posts

Posted 09 February 2014 - 08:11 PM

Today's update, finishing the flared fenders and cutting away the insides, 

right_front_flare.jpg left_front_flare.jpg right_rear_flare.jpg


This week I've stolen a few hours away from work to get into details, as we approach the painting stage. Putting in the seats I found that the steering wheel is too far inboard to center on the ones I bought with the arm rests, so I went to the used auto parts store and picked up a couple of u-joints, relocating the steering column a few inches to the outside.
u-joints_steering_column.jpg
steering_installed.jpg
 
Also decided that the little chain and pin on the tailgate were not of the quality I wanted on the finished truck, so I bought some plastic coated stainless cable and a couple of stainless bolts, chopped off the threads, inserted the cable, etc.
Tailgate_pins.jpg
 
And painted all the little parts that would need it. Here is the brake booster.
brake_booster.jpg
 
Finally I got the wooden dash from MiniSport out and modified it to receive the dash cluster from the 94 Rover, adding a tach, oil temp, and oil pressure gauges. 
 
dash_assembled.jpg 


#38 domdee

domdee

    Formally known as dominicdee

  • Members
  • PipPipPipPipPipPipPip
  • 1,183 posts
  • Location: hull
  • Local Club: hull clubs on FB

Posted 14 February 2014 - 09:47 AM

those wheel arches look fantastic


#39 1293gt

1293gt

    Speeding Along Now

  • TMF+ Member
  • PipPipPipPipPip
  • 306 posts
  • Local Club: nonw

Posted 14 February 2014 - 11:49 AM

Those arches look ace!


#40 greenwheels

greenwheels

    Super Mini Mad

  • Members
  • PipPipPipPipPipPip
  • 672 posts
  • Location: Gloucestershire
  • Local Club: Mini Fixers

Posted 14 February 2014 - 12:15 PM

Those arches look ace!

+1


#41 newenglandmini

newenglandmini

    Super Mini Mad

  • Members
  • PipPipPipPipPipPip
  • 646 posts
  • Location: Connecticut

Posted 14 February 2014 - 12:56 PM

Richard, I just happened upon this thread, though I see it was started in 2011.  I'm Corey in Connecticut, you may remember me from the Corvair forum.  I restored a  1962 Corvair convertible, which I completed several years ago.  I remember your postings on your Corvair sedan, and when you posted pictures of your recently purchased Mini pickup.  I can see from the thread that you've been as meticulous with your Mini restoration as you were with your Corvair.  Here are pictures of my Corvair and my current Mini project.


Attached File  DSCN2341.JPG   82.55K   5 downloads


Attached File  DSCN4713.JPG   126.15K   10 downloads


#42 Club-MAN

Club-MAN

    Stage One Kit Fitted

  • Noobies
  • PipPipPip
  • 84 posts

Posted 19 February 2014 - 08:09 AM

Lovely little pickup, some unique feature. Keep up the good work.


#43 Richard1

Richard1

    Stage One Kit Fitted

  • Noobies
  • PipPipPip
  • 53 posts

Posted 03 March 2014 - 08:56 PM

Took the engine to the body shop to install and it won't fit the subframe. They apparently shipped me a manual transmission subframe. Now I have to get them to send me the right one (and tell them how to identify it.

loading_engine.jpg


Also cleaned up the gas tank to install an in-tank pump.

  cutting_gas_tank.jpg gas_pump.jpg interior_tank.jpg rust_removal.jpg tank_cleaned.jpg

#44 Richard1

Richard1

    Stage One Kit Fitted

  • Noobies
  • PipPipPip
  • 53 posts

Posted 12 April 2014 - 11:46 PM

i found another sub chasis to measure, and modified mine to fit the automatic.


And the body shop finally got moving again. Here is this week's progress


right_rear_fender_primed.jpg right_side_fender_primed.jpg left_rear_fender_primed.jpg cowl_straightened.jpg roof.jpg

#45 minimikej

minimikej

    Speeding Along Now

  • Members
  • PipPipPipPipPip
  • 346 posts
  • Location: Derbyshire

Posted 13 April 2014 - 11:15 AM

Fantastic work, keep the updates coming!


0 user(s) are reading this topic

0 members, 0 guests, 0 anonymous users