But what colour to go??

My 75 Mini Pickup Project In Bolivia
Started by
Richard1
, Aug 28 2011 05:49 PM
68 replies to this topic
#46

bpirie1000
-

- Area Managers
-

- 2,346 posts
Up Into Fourth
- Location: Aberdeenshire
- Local Club: Amoc
Posted 13 April 2014 - 12:34 PM
#47
Ben_O
-

- Paint Doctor
-
- 9,794 posts
Mill Road Garage
- Location: Isle of Wight
Posted 21 April 2014 - 12:48 AM
This is fantastic! How many of us can say we restored our car with it propped up on some old barrels and carried out the work in a straw hat and flip flops!
Seriously though there is some serious craftsmanship going on here. The cut and shut method is not legal in this country as we know but that aside, you can hardly call it cobbled or bodged but done the propper way!
I used to laugh at this old boy at work who used to sit and weld with the oxy torch while the rest of us were using modern Mig and mig braze machines, but then he used to laugh at us too for not being good enough to do it the proper way. Thing is, i reckon he was right! Although modern car construction has no place for a oxy torch! lol
Love the style too with the arches and internal door hinges.
Look forward to the future updates.
Ben
#48
Richard1
-
- Noobies
-
- 56 posts
Stage One Kit Fitted
Posted 22 April 2014 - 12:25 AM
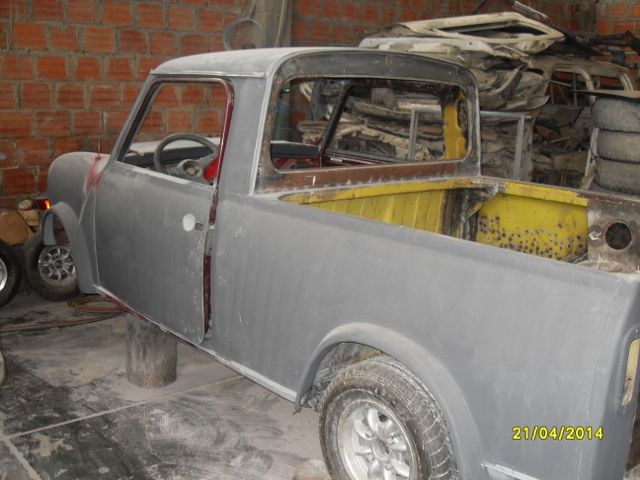
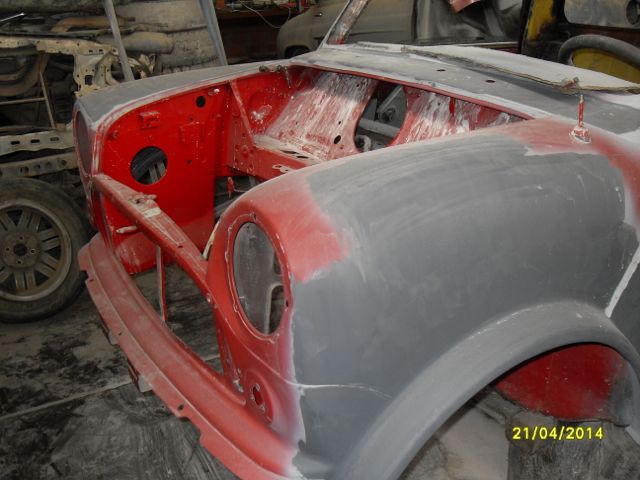
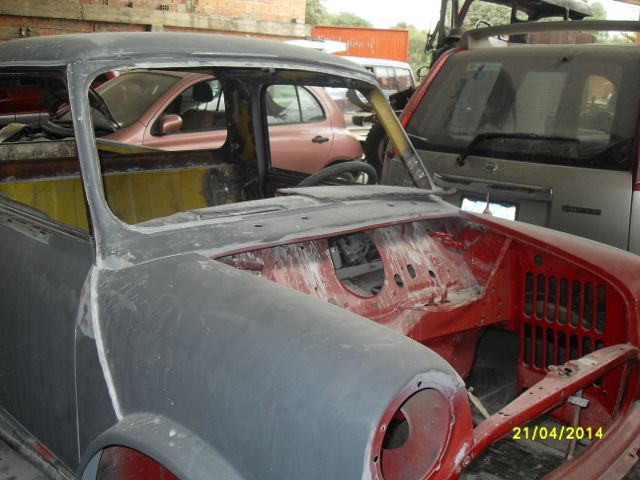
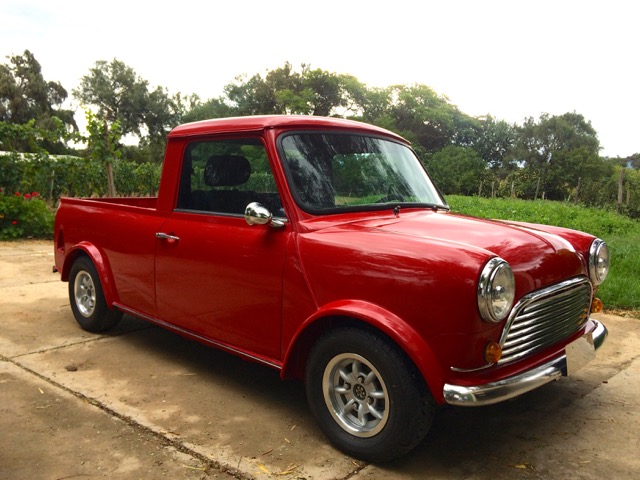
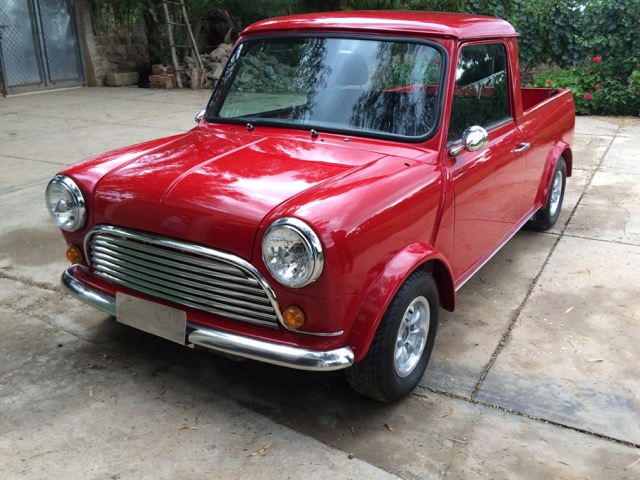
Getting closer. Mirror holes in fenders and doors, plus light rust in doors are filled, cowl is fixed, and windshield frame now has final touches. Although it has drippings from sanding, the engine compartment is the final color - Flame Red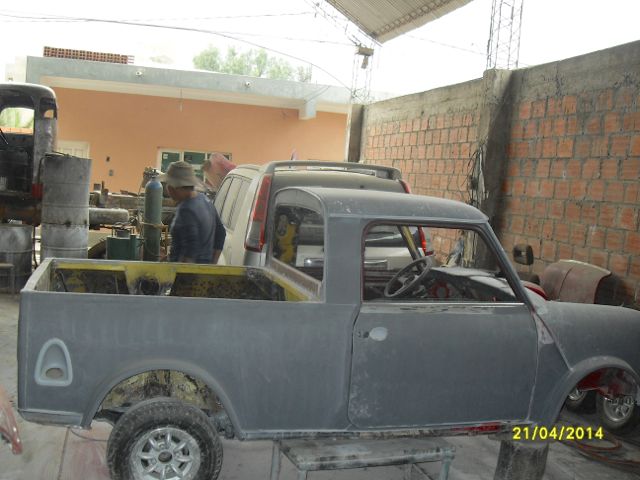
#49
Richard1
-
- Noobies
-
- 56 posts
Stage One Kit Fitted
Posted 03 April 2015 - 12:00 PM
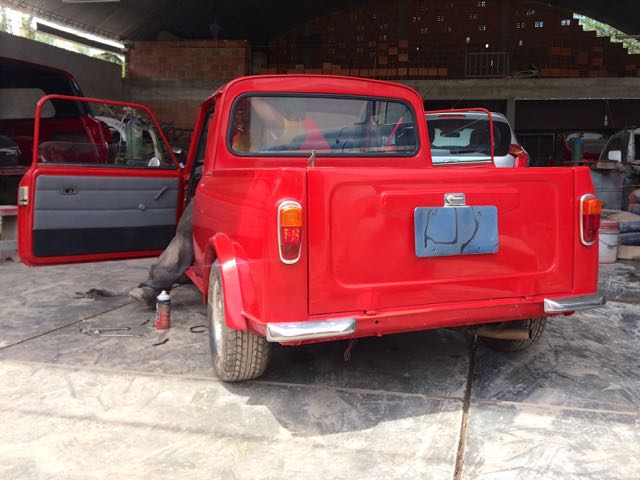
Looks like I forgot to post the progress, so while more details are on my site (signature), here is the latest. Much of this was a few weeks ago when on two trips I camped out in the body shop working on little things to keep the pressure (by my presence) on my body guy until he finished.
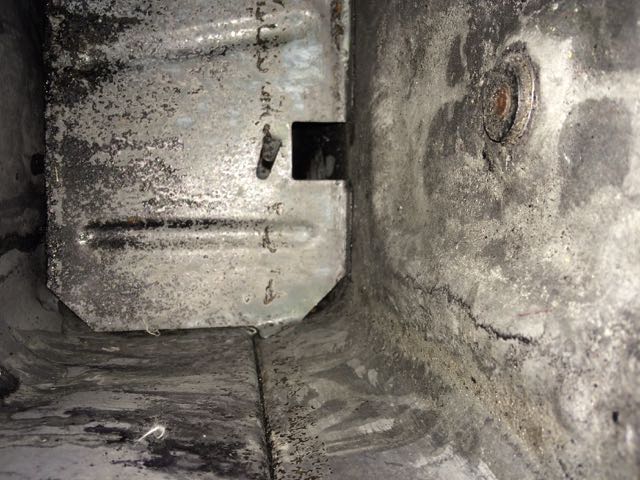
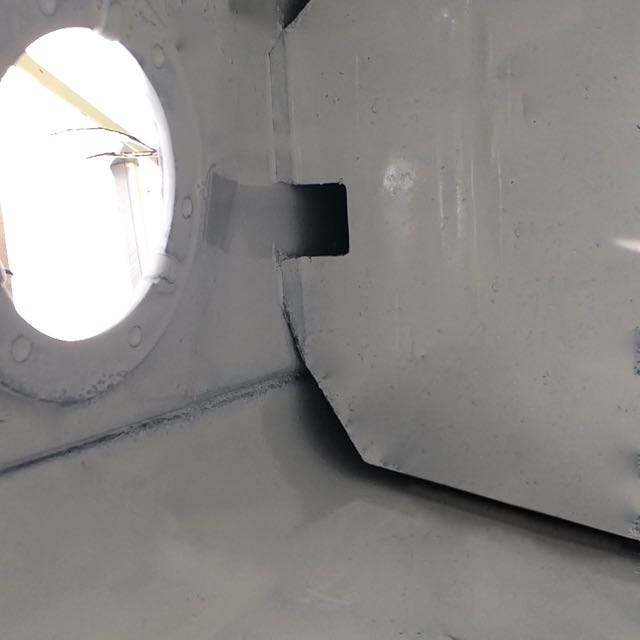
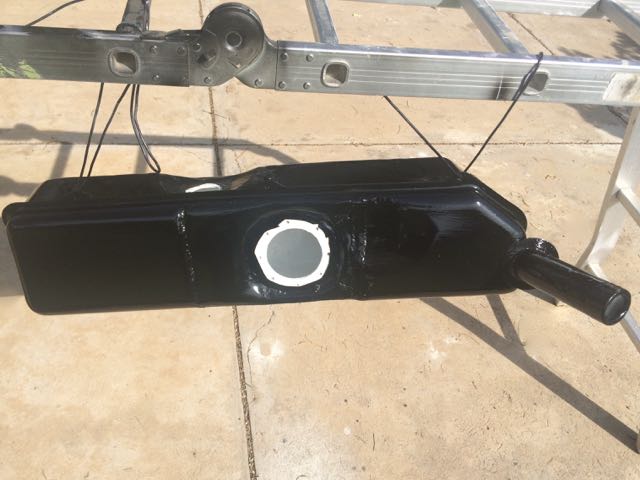
After adapting the fuel pump to the tank, I cleaned it again and sealed it with epoxy.
Put in the LED lights

And finally, after sealing the edges of the bed with foam, the paint:
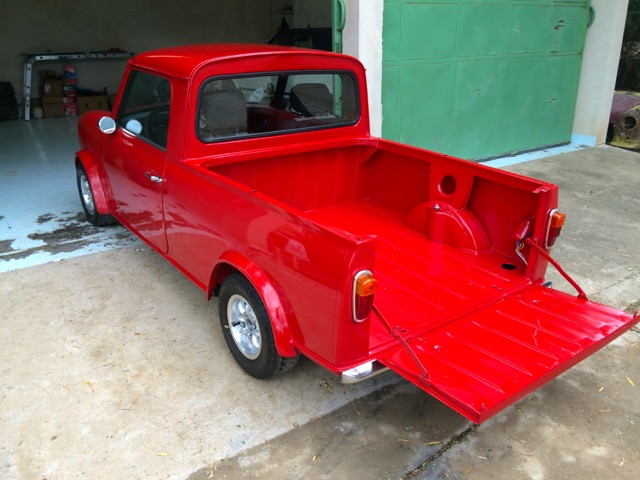
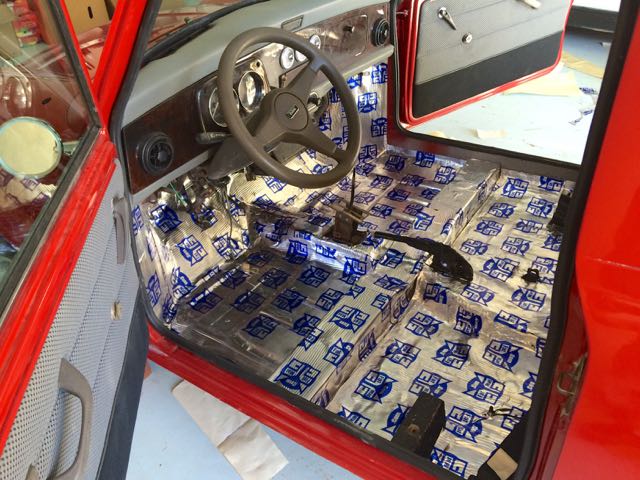
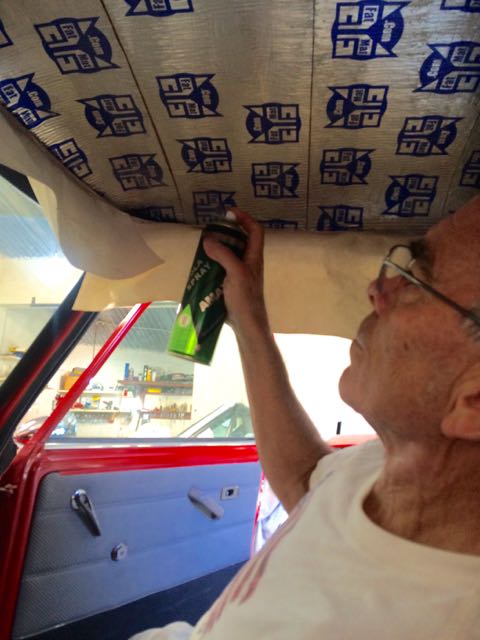
Then I added Fatmat to the roof and floor,
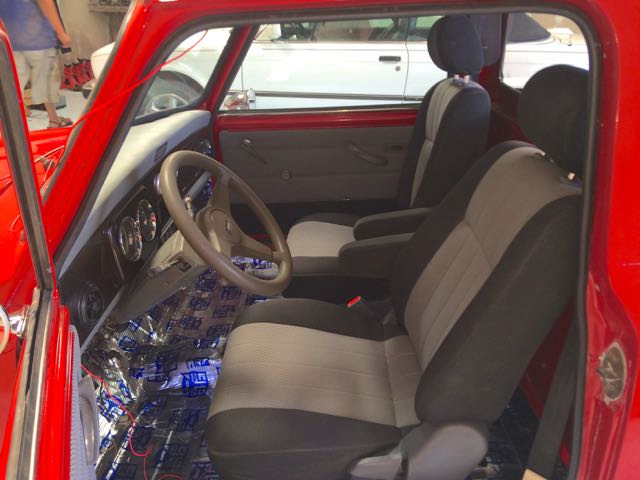
I put the seats in temporarily to see the fit
#50
slidehammer
-

- Members
-
- 1,196 posts
One Carb Or Two?
- Location: Surrey
- Local Club: LSMOC
Posted 05 April 2015 - 07:13 AM
Great looking project, love the quality of the fabrication and the final colour.
#51
Jared Mk3
-

- Members
-
- 1,974 posts
Has a small thing but it does make a difference
- Location: Kokstad, South Africa
- Local Club: MOCKZN
Posted 05 April 2015 - 07:45 AM
All I can say is, WOW! Stunning job, made even more stunning by the lack of available parts. Great job.
#52
megamini_jb
-

- Members
-
- 5,491 posts
Crazy About Mini's
- Name: Jamie
- Location: -
Posted 05 April 2015 - 07:56 AM
Great build! Looks super, now enjoy which I'm sure you are 
#53
One step at a time
-

- Members
-
- 282 posts
Mini Mad
- Location: Staffordshire
Posted 05 April 2015 - 08:26 AM
This is another fantastic build with serious great fab work. Love the little mods, what's your final plans?
#54
Richard1
-
- Noobies
-
- 56 posts
Stage One Kit Fitted
Posted 21 July 2015 - 12:37 AM
I guess I should update a bit.
After getting the wiring and module for the computer, I found someone who could diagnose the computer and replace a diode. The engine runs great, but putting it in gear spat out oil from around the filter. After widening the groove and using a thicker gasket, it still refused to move the wheels--just spitting oil.
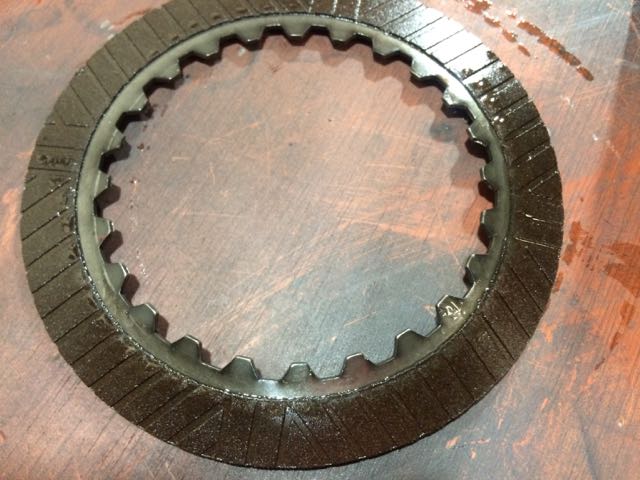
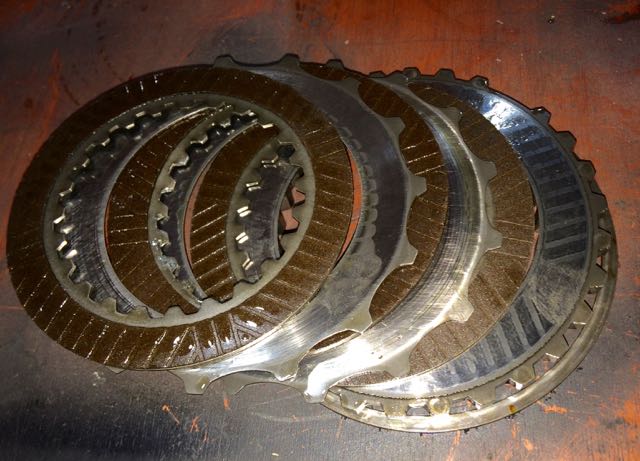
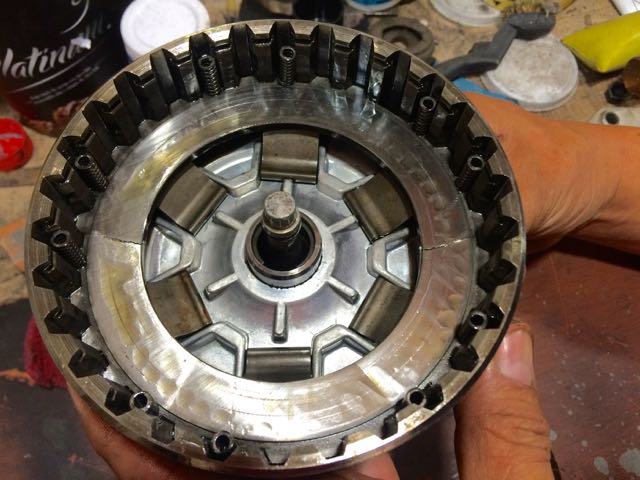
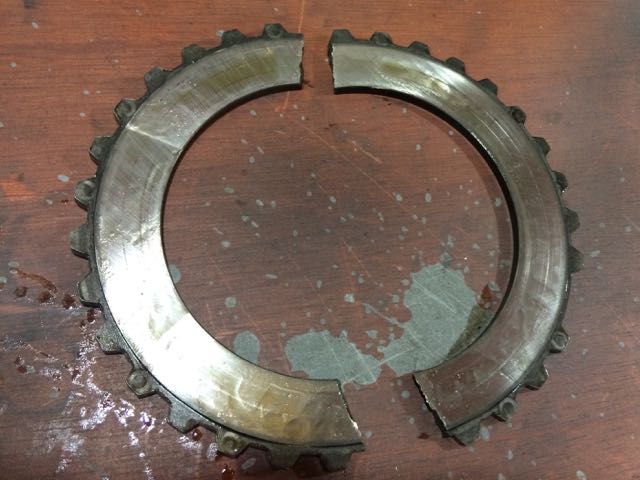
So I pulled the power train again and checked the valve block, not finding anything wrong. Then started on the clutch pack and found the presure plate broken in pieces and the discs bent. So at the moment I'm waiting on parts from KM Precision Engineering.
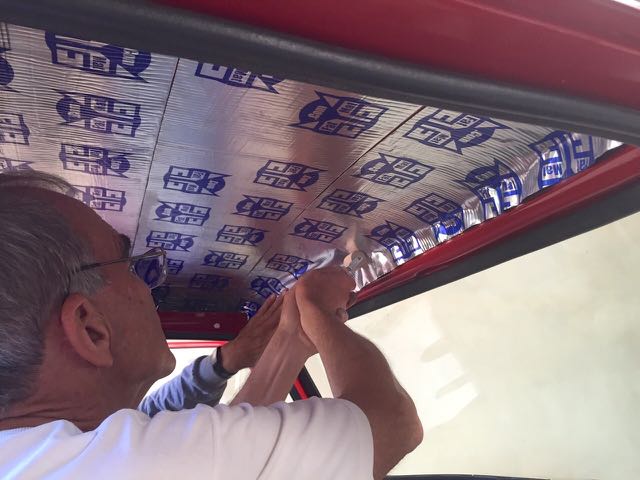
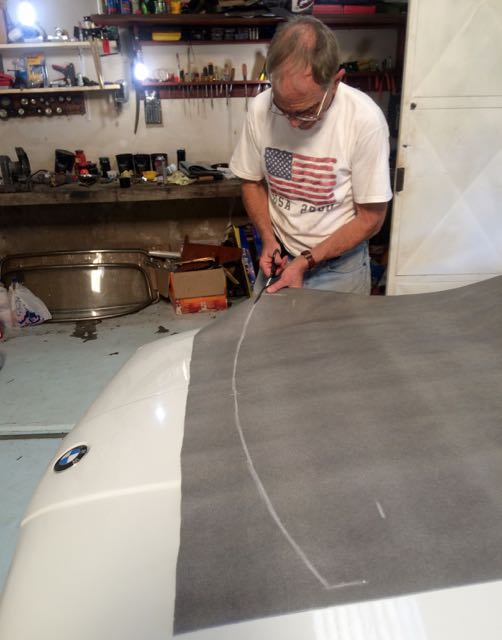
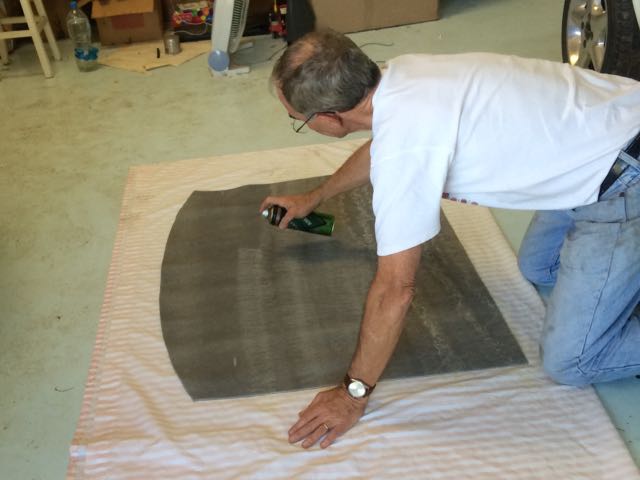
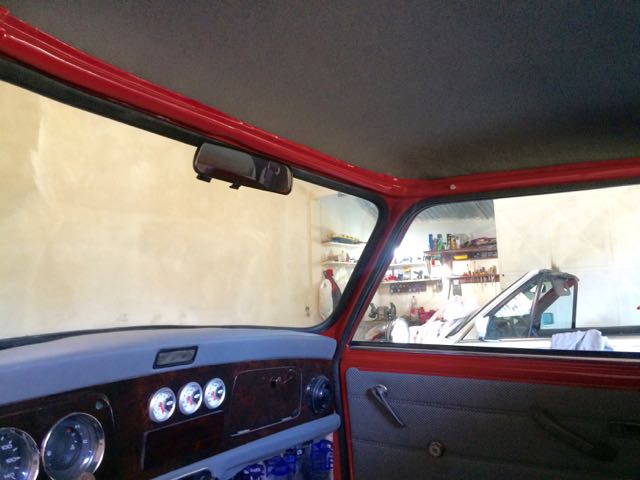
While waiting I upholstered the roof
And installed the third brake light
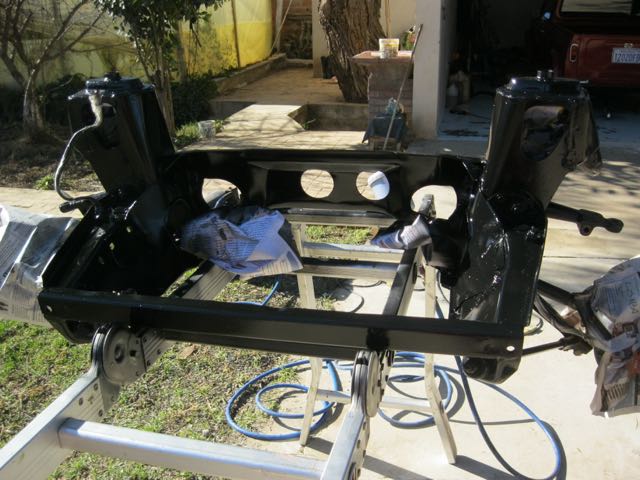
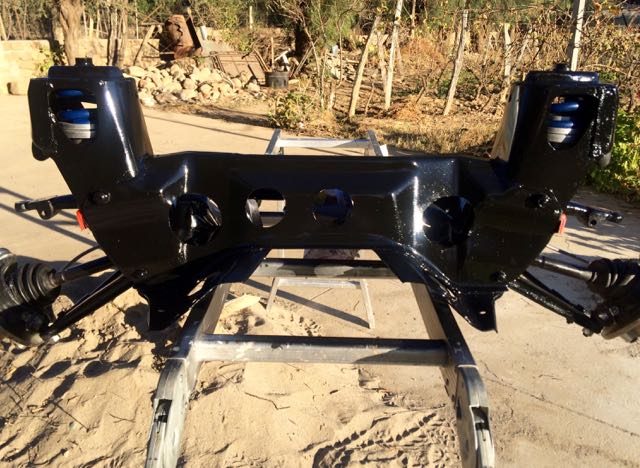
And did some more modifications to the frame so the automatic transmission would fit easier, then sanded and painted it again.
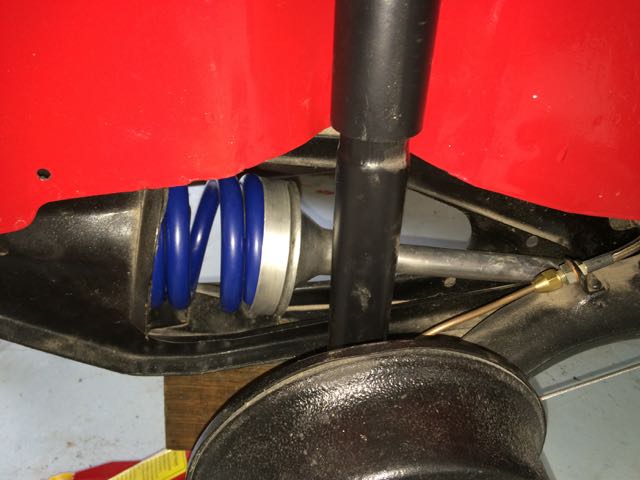
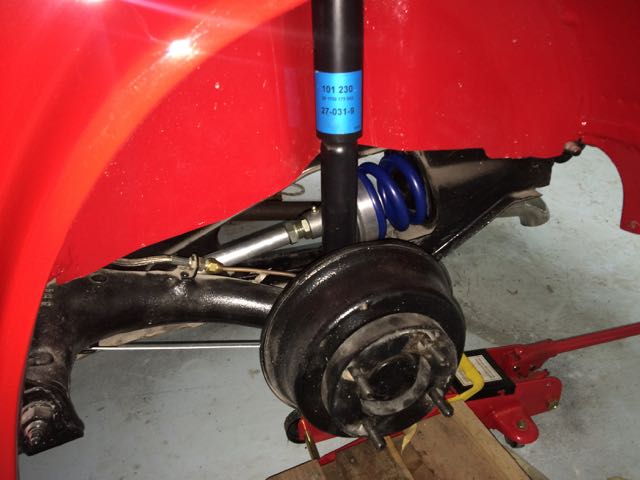
Also replaced the rubber cones with springs that will be better on our cobblestone streets.
#55
frodmyster
-

- Members
-
- 213 posts
Mini Mad
Posted 29 July 2015 - 09:39 PM
How did you get the rear alloy trumpets to that mirror finish ? Excellent thread this is 👍👍👍 top work
#56
Richard1
-
- Noobies
-
- 56 posts
Stage One Kit Fitted
Posted 29 November 2015 - 09:45 PM
How did you get the rear alloy trumpets to that mirror finish ?
On the original trupets I polished as I do with all aluminum or stainless, starting with sandpaper (often start with 220, but if no big scratches, 360 or so, working my way up to 1000 grit, then buffer with compound.
On the new adjustables, they came nice. I sold the trumpets.
#57
Richard1
-
- Noobies
-
- 56 posts
Stage One Kit Fitted
Posted 29 November 2015 - 09:48 PM
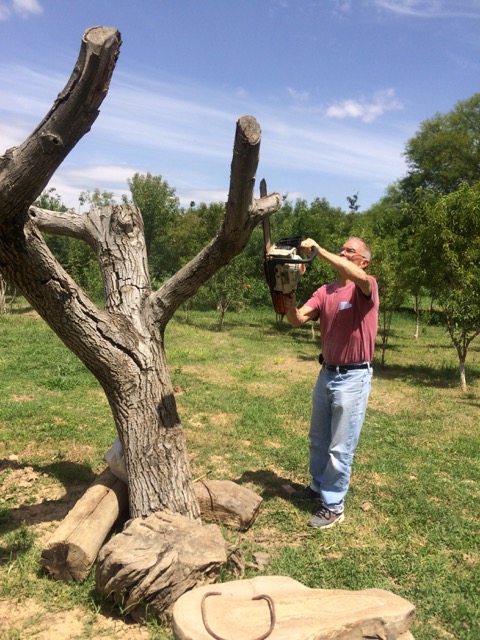
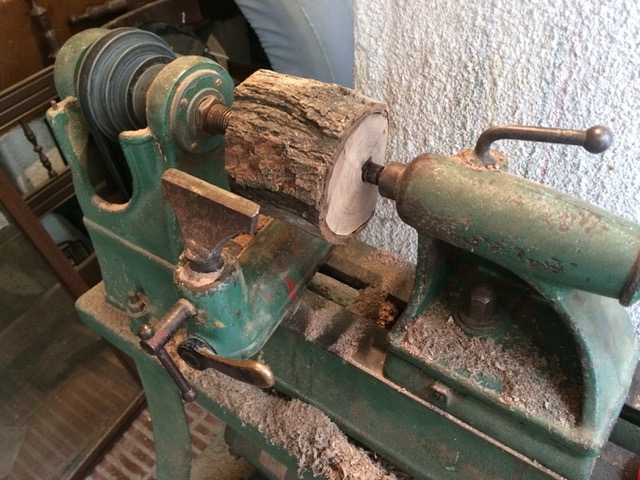
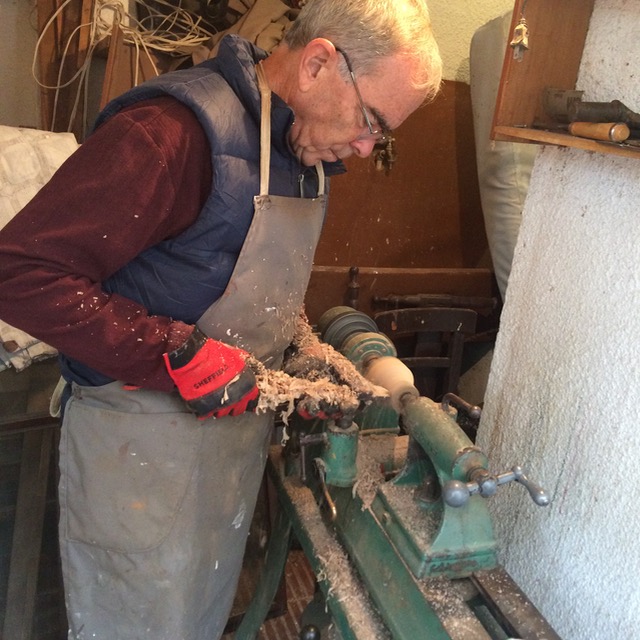
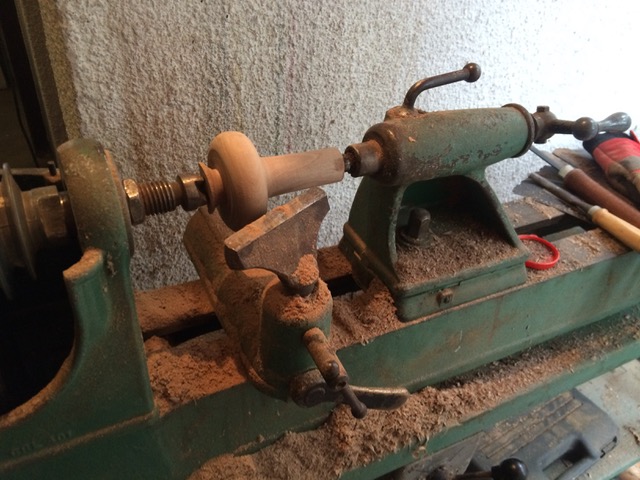
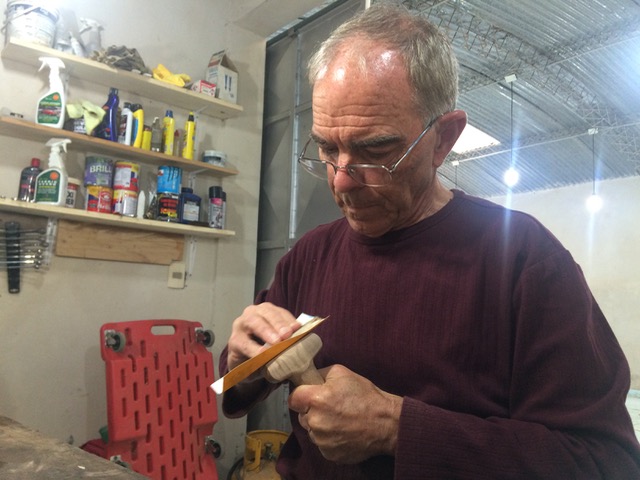
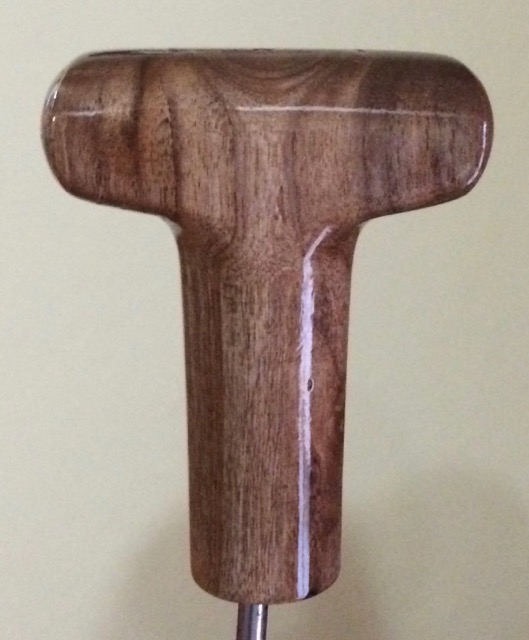
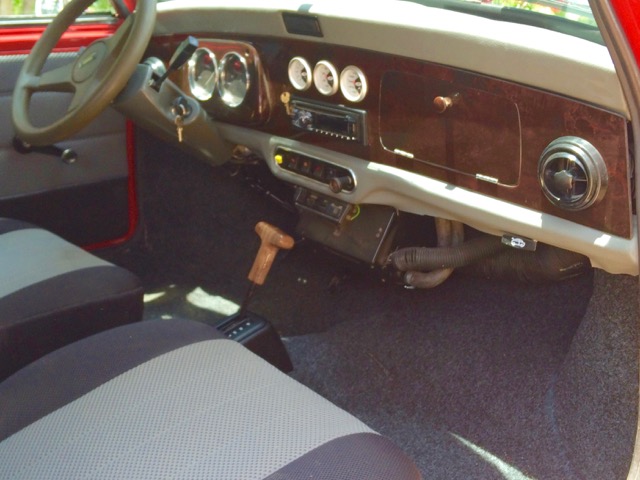
Last month I got back and installed all of the transmission parts, reinstalled the engine, wired it, etc. It runs nicely now, so I drove it to the body shop for the touch-up. He had promised to finish Thursday, so I flew back, and of course it was not ready. Now says tomorrow or Tuesday. So I started on the carpet, then took yesterday morning off to makd a handle/knob for the transmission using the dead walnut tree in my back yard.
#58
java gt
-

- Just Joined
-
- 120 posts
Mini Mad
- Local Club: Irish Mini Owners Club
Posted 30 November 2015 - 02:01 PM
Love the internal hinges on this pickup,it is a credit to you and your bodyshop.
#59
David128
-
- Members
-
- 644 posts
Super Mini Mad
- Location: Rochdale
Posted 30 November 2015 - 02:51 PM
Awesome skills particularly loved the welding so old school.. Brought back some of my best memories.
#60
Richard1
-
- Noobies
-
- 56 posts
Stage One Kit Fitted
Posted 05 December 2015 - 05:28 PM
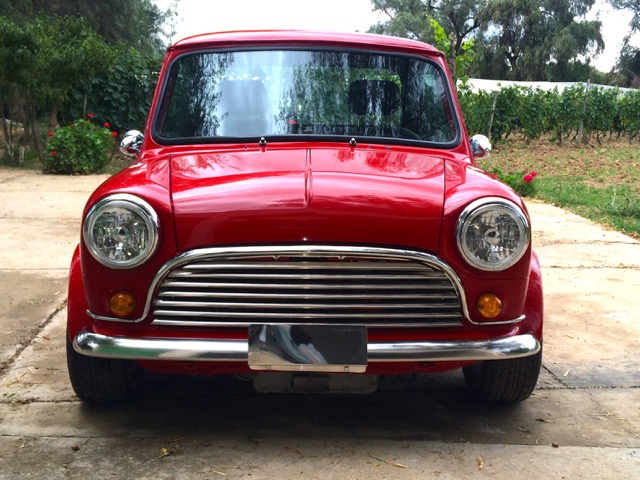
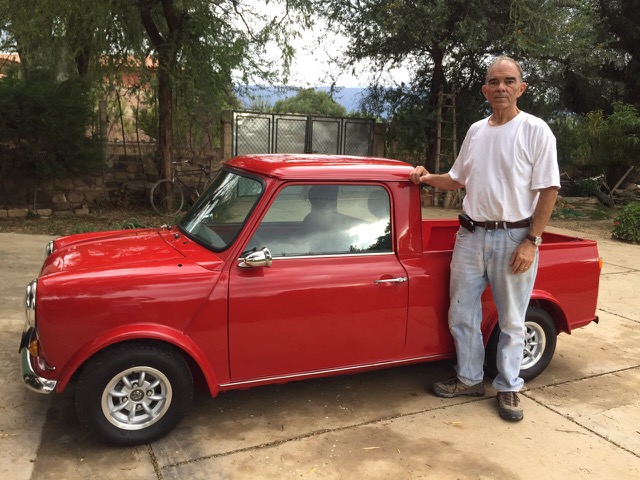
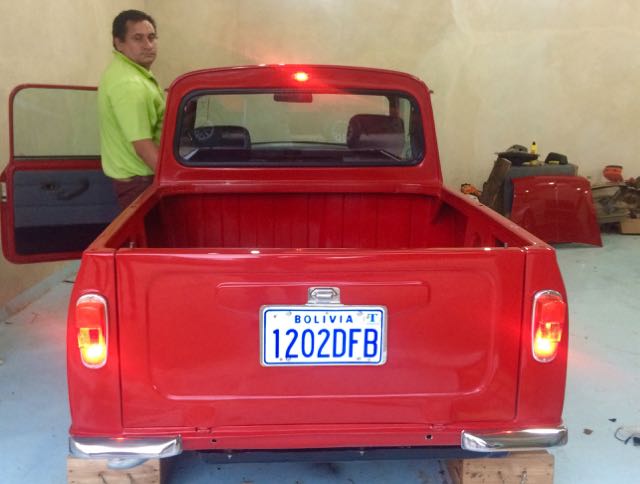
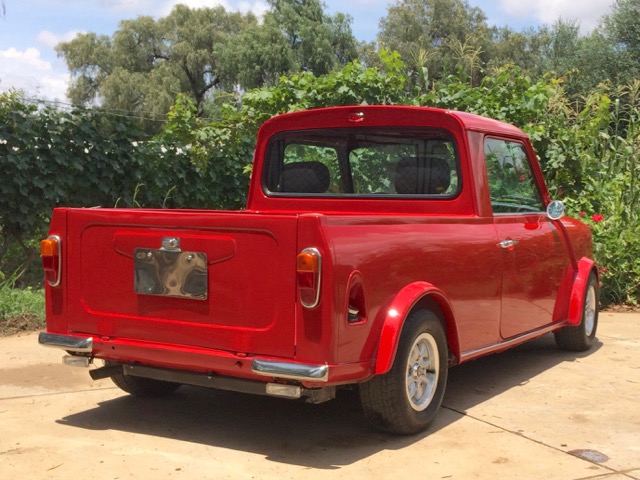
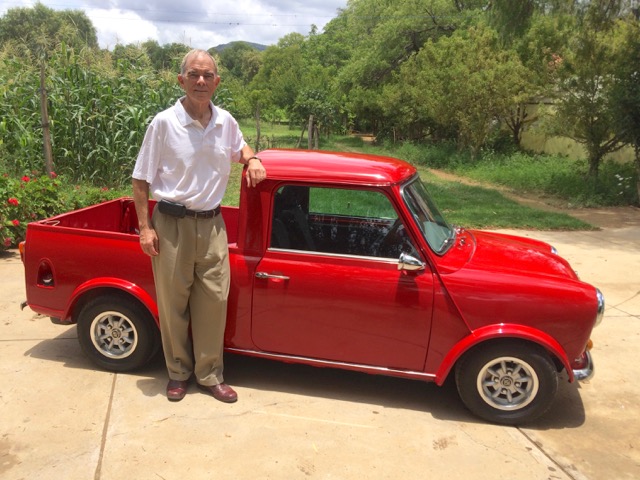
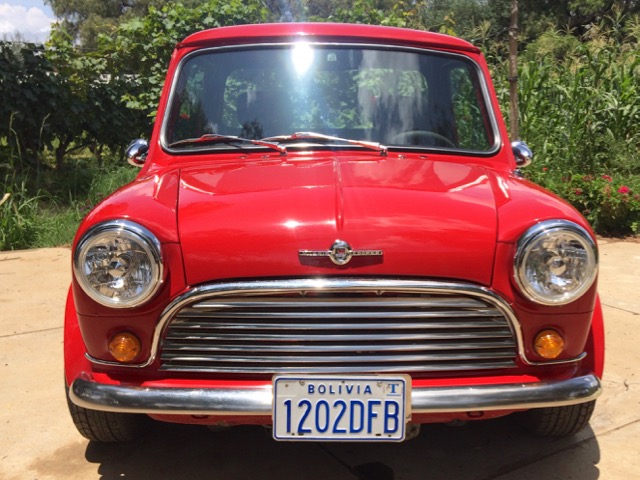
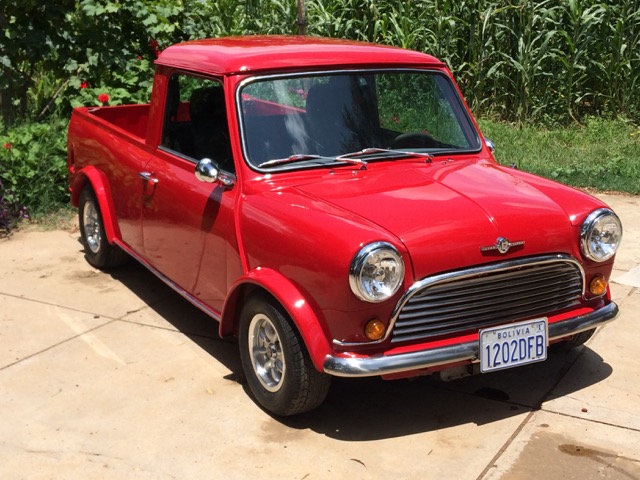
The day has come. 99% finished...... Just have to go back to work for a week before my Christmas trip to DC.


0 user(s) are reading this topic
0 members, 0 guests, 0 anonymous users


