Hi
I'm thinking of going the megajolt route for my 1275 build, but it makes sense (to me anyway), to get it all set up and working on the current 998, so that when the engine eventually goes in, it's one less new addition (potential problem) to worry about.
I've been doing lots of reading on here, Autolabs & other sites, and I think I know where I'm heading. I'm going to build the parts package up myself and have a few bits on the go already.
What I would like to know is where have you put / mounted the parts? Any ideas, suggestions, pictures, do's & dont's etc etc. In particular the coil pack as I want to keep the wiring neat & don't really want long HT leads trailing everywhere.
I thought I had one idea which included the MJ unit in the engine bay, but Autolabs advise against this so may have to put it in the car.
I read that the EDIS benefits from a heatsink. Have you / haven't you?
Also, how big is the unit? I can find all sorts of specifictaions, but unless I have missed it, nothing that gives the actual physical size. Anyone have the dimesions?
Any other hints & tips appreciated.
Thanks in advance
Steve


Megajolt Mounting - Show Me Yours!
Started by
stevede
, Jan 15 2012 10:09 AM
19 replies to this topic
#2

mini93
-

- Members
-

- 8,615 posts
He's just too casual!
- Location: Warwick
- Local Club: Medievil minis of Warwickshire
Posted 15 January 2012 - 10:35 AM
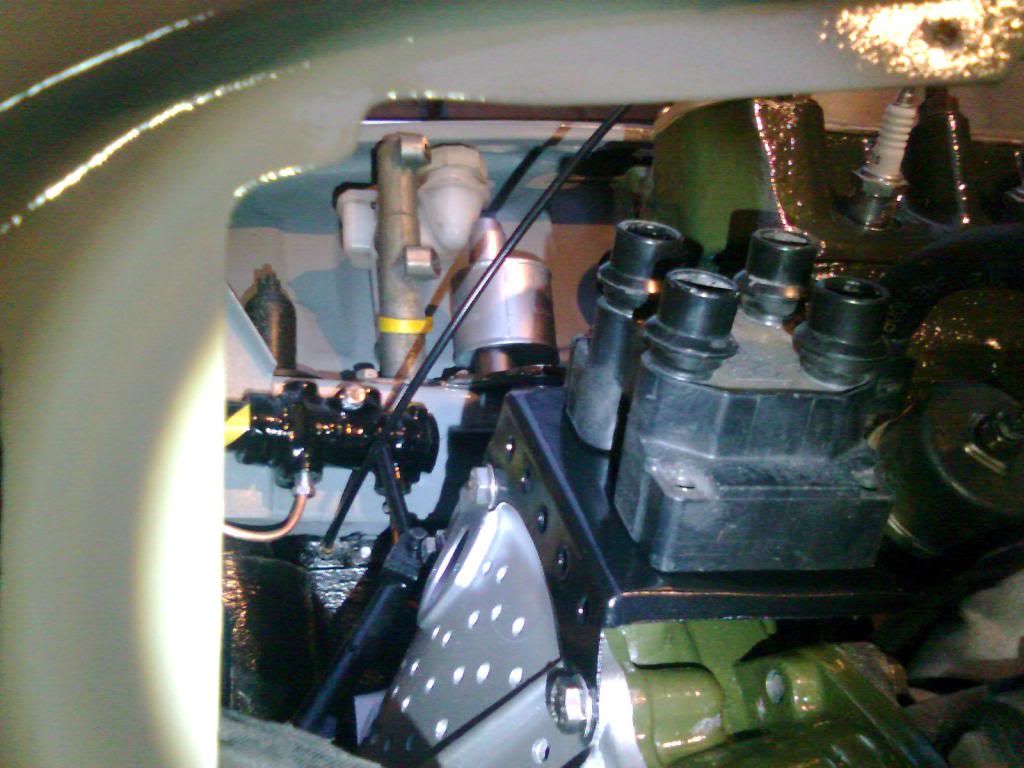
I have some pics of where mine is, tho i doubt its going to be helpful unless you have a big bulkhead box... ignore how rough it was, didnt have any paint 

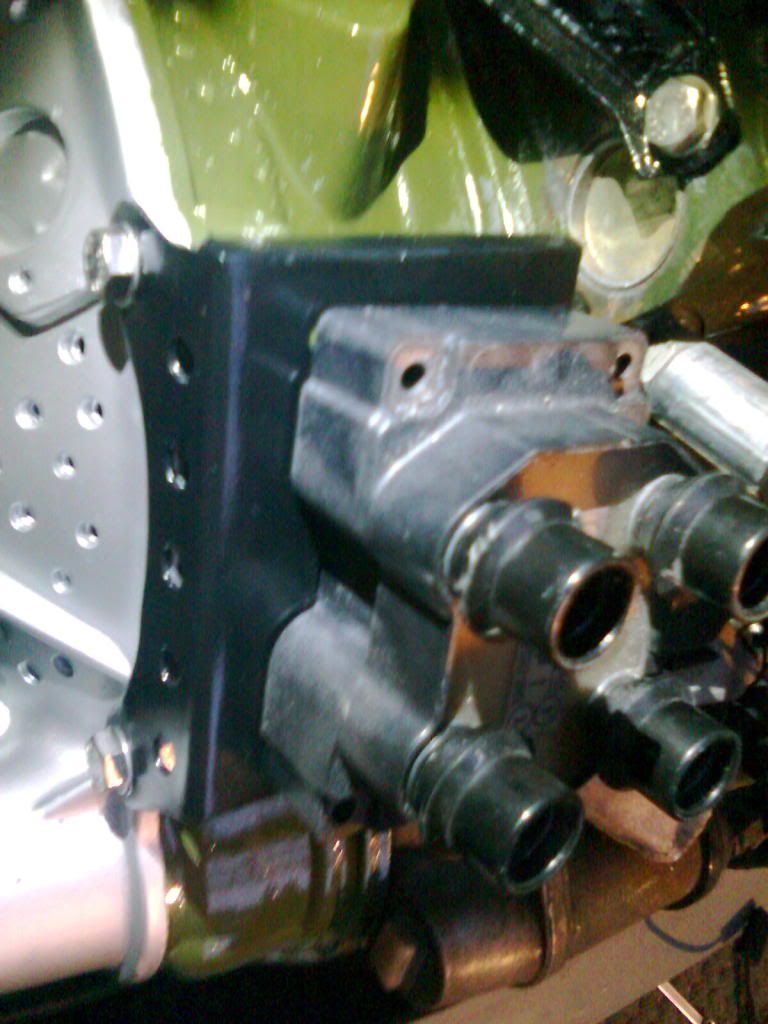
The coilpack has to sit off-of the bulkhead because the mountings arent flush, theres moulded section under it.
The EDIS i put on the same bracket because its heater plus the air being around it might be better heat-sink style


And just to show off where the leads sit, its not too bad i think

The coilpack has to sit off-of the bulkhead because the mountings arent flush, theres moulded section under it.
The EDIS i put on the same bracket because its heater
plus the air being around it might be better heat-sink styleAnd just to show off where the leads sit, its not too bad i think
#3
stevede
-
- Members
-
- 1,164 posts
As seen on TV
- Local Club: None
Posted 15 January 2012 - 10:41 AM
Thanks for that, much apprecaited.
Did you put the main MJ unit in the car?
Did you put the main MJ unit in the car?
#4
mini93
-
- Members
-
- 8,615 posts
He's just too casual!
- Location: Warwick
- Local Club: Medievil minis of Warwickshire
Posted 15 January 2012 - 10:58 AM
I did yes, but i havent got a picture, which is unusual for me
Its also not very helpful being as its bolted to the back of my bulkhead box to the side of my fuse box

can see where my fuses are just below the dash rail... its just to the right of that hidden from view (but where i can still get to the com port)
Its also not very helpful being as its bolted to the back of my bulkhead box to the side of my fuse box
can see where my fuses are just below the dash rail... its just to the right of that hidden from view (but where i can still get to the com port)
#5
stevede
-
- Members
-
- 1,164 posts
As seen on TV
- Local Club: None
Posted 15 January 2012 - 11:02 AM
Thanks once again.
#6
Ouster
-

- TMF+ Member
-
- 2,986 posts
Up Into Fourth
- Local Club: Looking
Posted 15 January 2012 - 11:08 AM
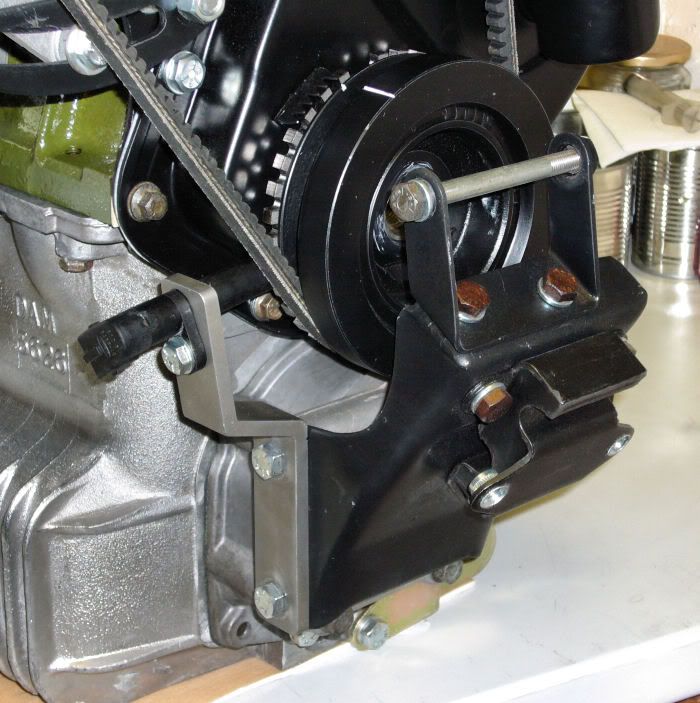
Here's the bracket:
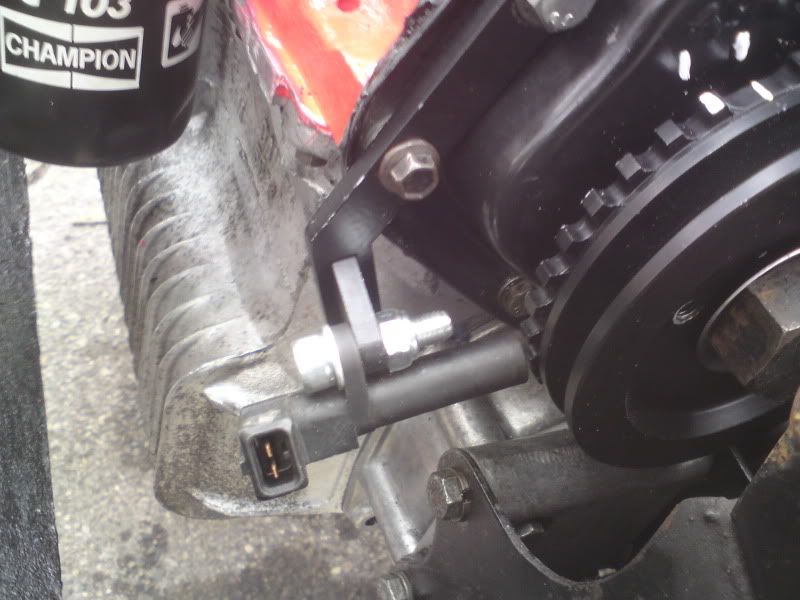
Here's the unit:
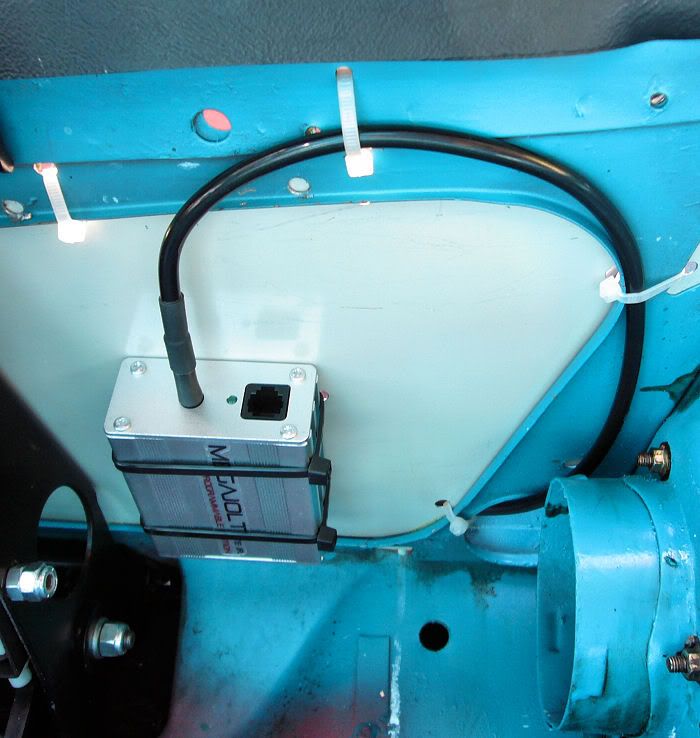
I mounted the EDIS units on the bulkhead:
Tidiest installation ever
I miss my mini
Here's the unit:
I mounted the EDIS units on the bulkhead:

Tidiest installation ever
I miss my mini
Edited by Ouster, 15 January 2012 - 11:09 AM.
#7
stevede
-
- Members
-
- 1,164 posts
As seen on TV
- Local Club: None
Posted 15 January 2012 - 11:14 AM
Thanks Ouster.
The main unit looks small enough to hide under the dash.
I especially like the sensor bracket, looks as though I could make something similar and save a few quid. As Tesco say...............
Regards
Steve
The main unit looks small enough to hide under the dash.
I especially like the sensor bracket, looks as though I could make something similar and save a few quid. As Tesco say...............
Regards
Steve
#8
SolarB
-
- Members
-
- 1,406 posts
One Carb Or Two?
- Location: Surrey
Posted 16 January 2012 - 08:54 AM
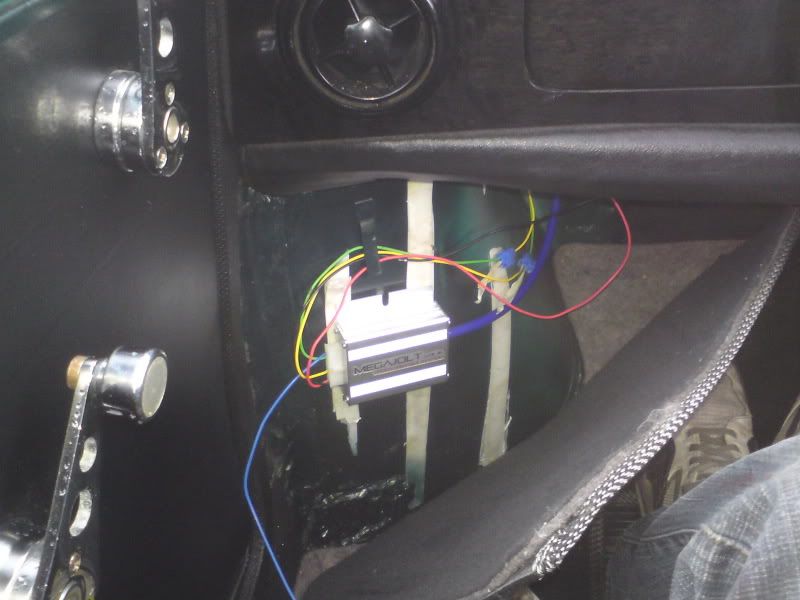
This is how I ended up mounting the various components.
This mount has been trouble free and doesn't vibrate.
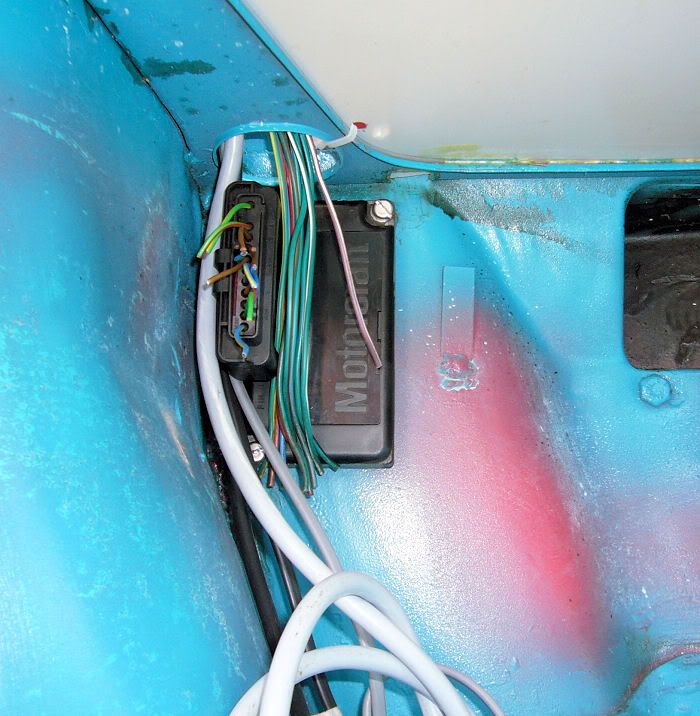
Under the dash (passenger side).
Under the dash (drivers side).

Simple mounting but works. Coil pack needs to come out for starter motor removal but it's not difficult to do that.
Coil pack location gives me nice short HT leads.
This mount has been trouble free and doesn't vibrate.
Under the dash (passenger side).
Under the dash (drivers side).
Simple mounting but works. Coil pack needs to come out for starter motor removal but it's not difficult to do that.
Coil pack location gives me nice short HT leads.
#9
t@z
-

- TMF+ Member
-
- 1,712 posts
Camshaft & Stage Two Head
- Local Club: www.turbominis.co.uk
Posted 16 January 2012 - 11:48 AM
mines mounted on the underside of the dash where the heater matrix would be right under the centre clocks. just drilled 2 holes up through that thin sheet of metal get some rubber gromets and bolt and nuts. its good as its hidden up behind the switches in the centre but easily accessable.
obviously down side to this is i have no heater matrix. but its tidy and i can earth it to the dash as well :)
obviously down side to this is i have no heater matrix. but its tidy and i can earth it to the dash as well :)
#10
stevede
-
- Members
-
- 1,164 posts
As seen on TV
- Local Club: None
Posted 16 January 2012 - 06:41 PM
This is how I ended up mounting the various components.
This mount has been trouble free and doesn't vibrate.
Under the dash (passenger side).
Under the dash (drivers side).
Simple mounting but works. Coil pack needs to come out for starter motor removal but it's not difficult to do that.
Coil pack location gives me nice short HT leads.
Thanks Solar B, Much appreciated
Another idea for the VR bracket that looks straightforward to make. I notice on both yours and Ousters, that the trigger wheel is inboard of the pulley. I had thought of using a stadard ring & machining to fit but guessed it would always be on the outside. Can I ask how you have fitted it. (machined flange, weld bolt etc). Did you start with a standard pulley? (Ousters looks slightly different)
Loving the idea of the coil mounting plate, may have to copy that idea if you don't mind.
Not sure I can get the EDIS in the car (under dash is quite full already) but my idea of possibly on the offside inner wing would keep the wiring shorter & neat. Will have to make room for the MJ unit inside though it would seem.
Lovely looking car you have.
Kind regards
Steve
#11
stevede
-
- Members
-
- 1,164 posts
As seen on TV
- Local Club: None
Posted 16 January 2012 - 06:44 PM
mines mounted on the underside of the dash where the heater matrix would be right under the centre clocks. just drilled 2 holes up through that thin sheet of metal get some rubber gromets and bolt and nuts. its good as its hidden up behind the switches in the centre but easily accessable.
obviously down side to this is i have no heater matrix. but its tidy and i can earth it to the dash as well :)
t@z, many thanks for your reply.
The space in the centre of my dash is quite full with all the extra bits I have & the savage switches. I'm thinking I may be able to get it to mount under the dash on the drivers side if I move a couple of relays that are there at the moment.
Will be a bit easier when I get the box and see the cable exit etc.
Kind regards
Steve
#12
superman
-

- Traders
-
- 736 posts
One Carb Or Two?
- Local Club: Dorset Mini Club
Posted 16 January 2012 - 06:56 PM
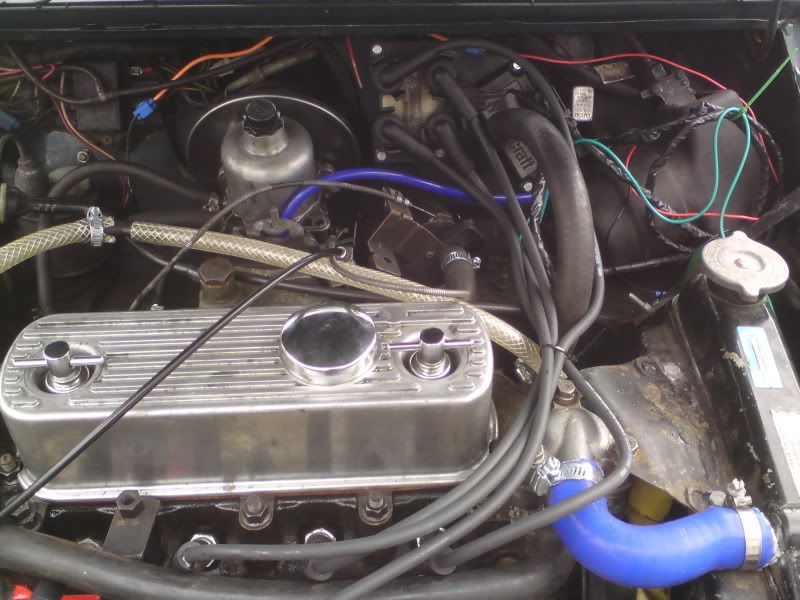
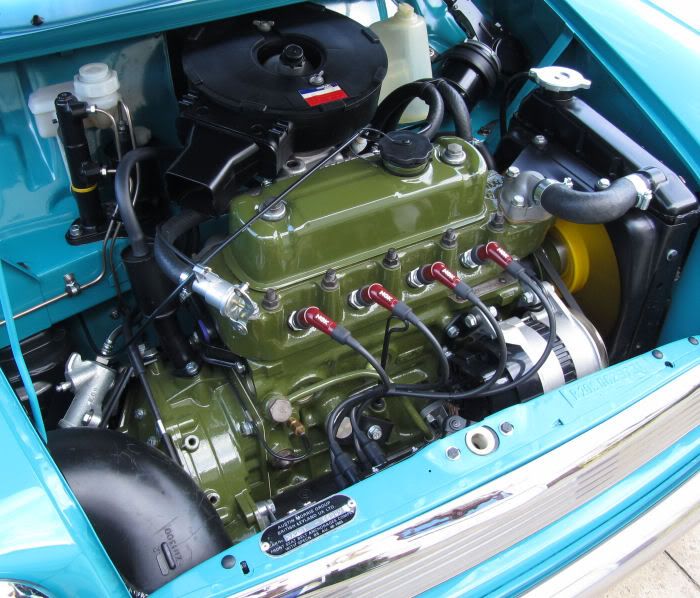
Here's my coil pack mounted over the flywheel, the edis 4 and megajolt (when i get one) will be mounted inside hidden away
#13
stevede
-
- Members
-
- 1,164 posts
As seen on TV
- Local Club: None
Posted 16 January 2012 - 07:44 PM
Thanks Superman
Another neat idea on the coil pack
Lots of options to think about
Regards
Steve
Another neat idea on the coil pack
Lots of options to think about
Regards
Steve
#14
SolarB
-
- Members
-
- 1,406 posts
One Carb Or Two?
- Location: Surrey
Posted 16 January 2012 - 08:10 PM
My trigger wheel is held onto a standard pulley with six M4 stainless screws passing through the wheel and into tapped holes in the damper weight. The trigger wheel can go on the other side of the pulley, but it turns fan belt replacement from a 5 minute job into an hours fight as there isn't enough room to fit the belt between the trigger wheel and the engine mount. If you mounted the wheel on the outside of the pulley to replace the belt you'd have to split the engine from the mount.I notice on both yours and Ousters, that the trigger wheel is inboard of the pulley. I had thought of using a stadard ring & machining to fit but guessed it would always be on the outside. Can I ask how you have fitted it. (machined flange, weld bolt etc). Did you start with a standard pulley? (Ousters looks slightly different)
#15
t@z
-
- TMF+ Member
-
- 1,712 posts
Camshaft & Stage Two Head
- Local Club: www.turbominis.co.uk
Posted 16 January 2012 - 08:14 PM
mines mounted on the underside of the dash where the heater matrix would be right under the centre clocks. just drilled 2 holes up through that thin sheet of metal get some rubber gromets and bolt and nuts. its good as its hidden up behind the switches in the centre but easily accessable.
obviously down side to this is i have no heater matrix. but its tidy and i can earth it to the dash as well :)
t@z, many thanks for your reply.
The space in the centre of my dash is quite full with all the extra bits I have & the savage switches. I'm thinking I may be able to get it to mount under the dash on the drivers side if I move a couple of relays that are there at the moment.
Will be a bit easier when I get the box and see the cable exit etc.
Kind regards
Steve
no worries, like i say its the best place for me as i dont have a heater matrix and my dash just has the std switches on the front and a centre clock. other than that its pretty standard.
regarding my edis and coil. you can see my edis mounted in the top left of my bulk head and the coil on the front wing where the solenoid would be on the wing. i take the live off the coil feed so from a layout point of view in my mind it makes sense to have things where i have placed them. (by the way my wiring has been tidied up a lot since this piccy!)
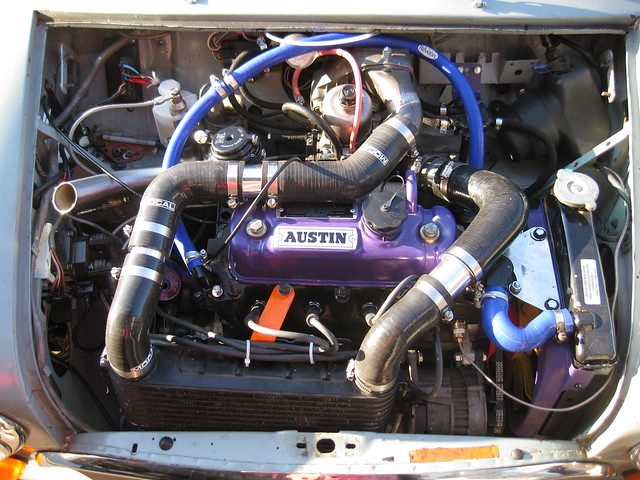
engine_setup by lilpinkiy, on Flickr
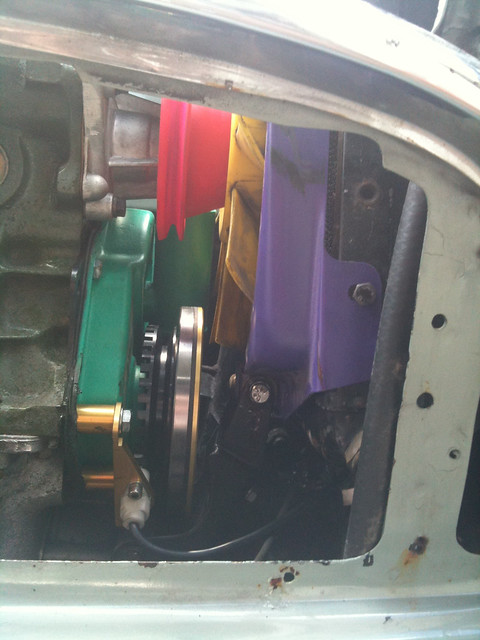
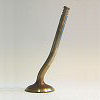
pulley by lilpinkiy, on Flickr
good luck :)
Edited by t@z, 16 January 2012 - 08:15 PM.


1 user(s) are reading this topic
0 members, 1 guests, 0 anonymous users


