oh and yes i am being lazy and not painting inside the turrets on the subframe lol


The Wifes Worst Nightmare 83 Full Resto
Started by
Minidarren83
, Jul 17 2012 08:57 PM
920 replies to this topic
#61

Minidarren83
-
- Members
-

- 1,207 posts
One Carb Or Two?
- Location: Stanford Le hope
Posted 10 September 2012 - 05:18 PM
#62
Minidarren83
-
- Members
-
- 1,207 posts
One Carb Or Two?
- Location: Stanford Le hope
Posted 11 September 2012 - 05:38 PM
Got a bit more done today only quiet work though got the gearbox all cleaned out and re-oiled the gears and bearings all looks to be in good condition althought i did find some metal bits in the bottom of the casing so will need to investigate a little more maybe take the diff off as all the gears are intact with hardly any wear to the teath or the dogs of the selector drums but it could of easily come from any of the worn bits in the engine
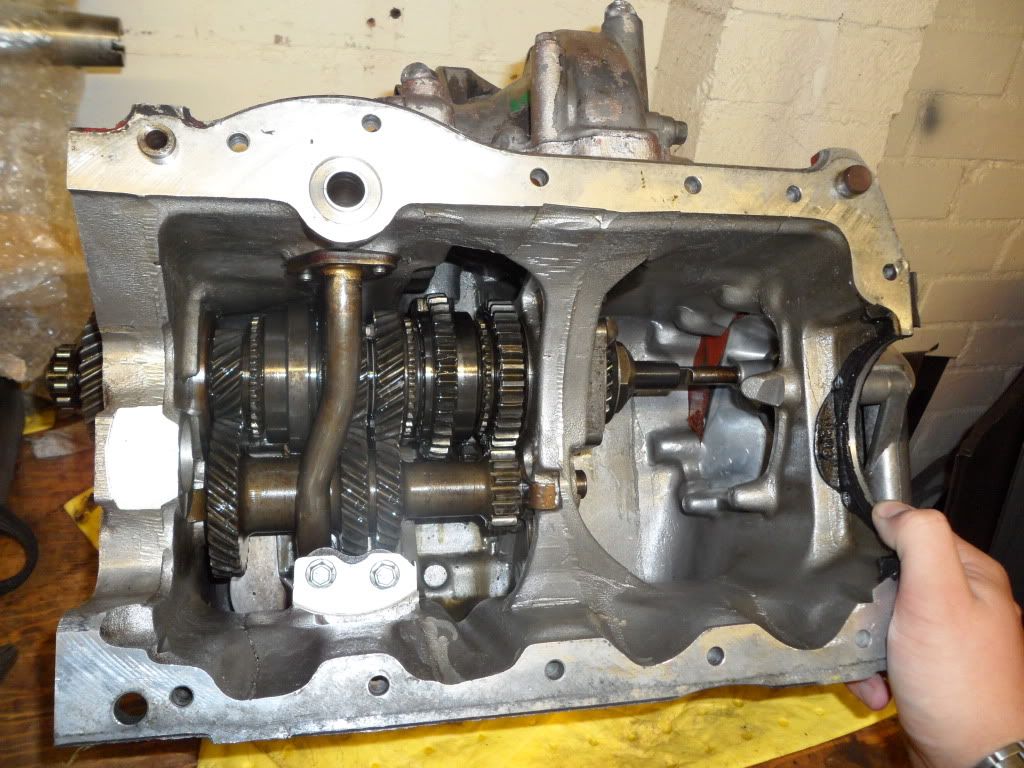
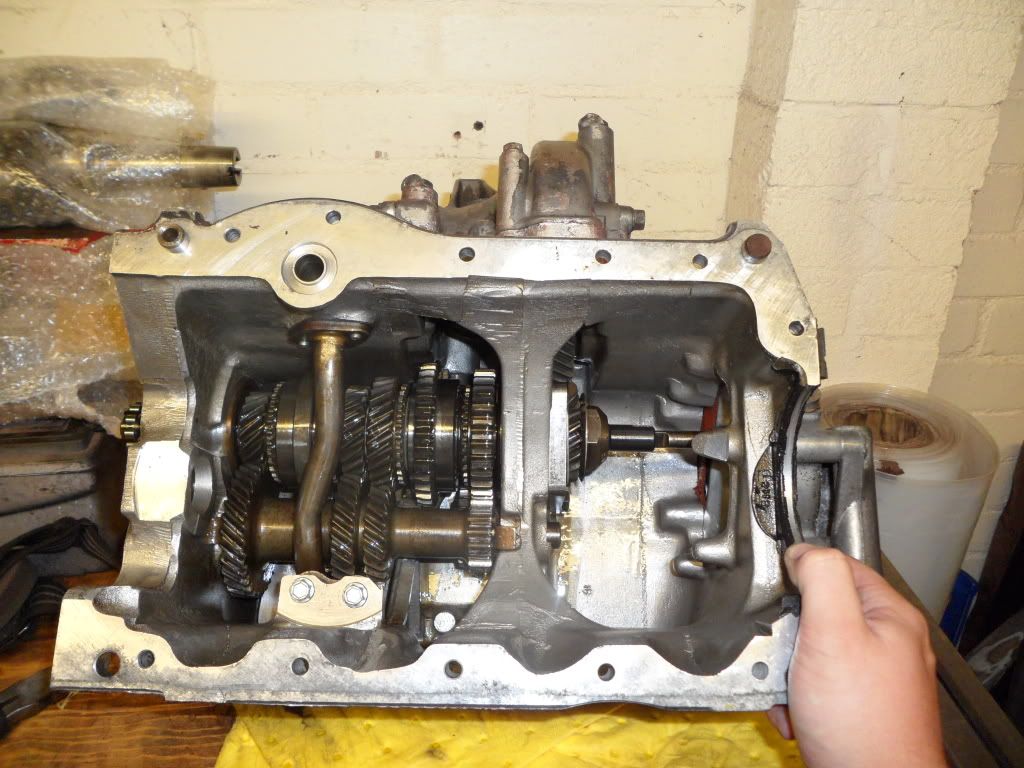
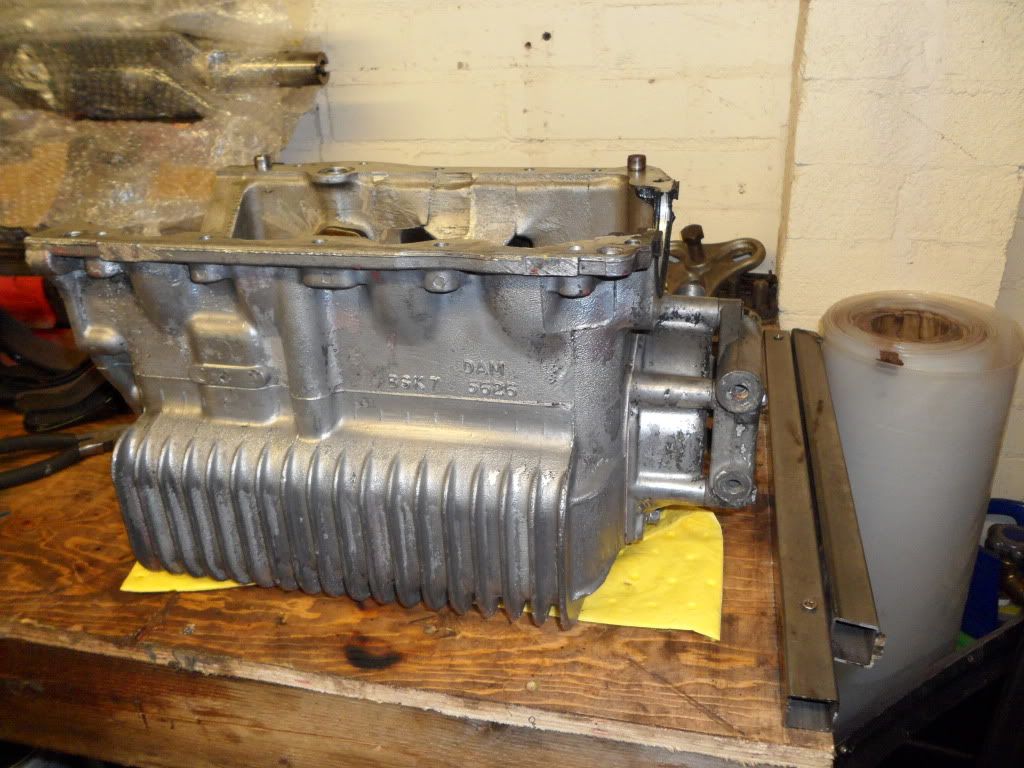
also gave the outside of the casing a good scrub and is ready for some silver now
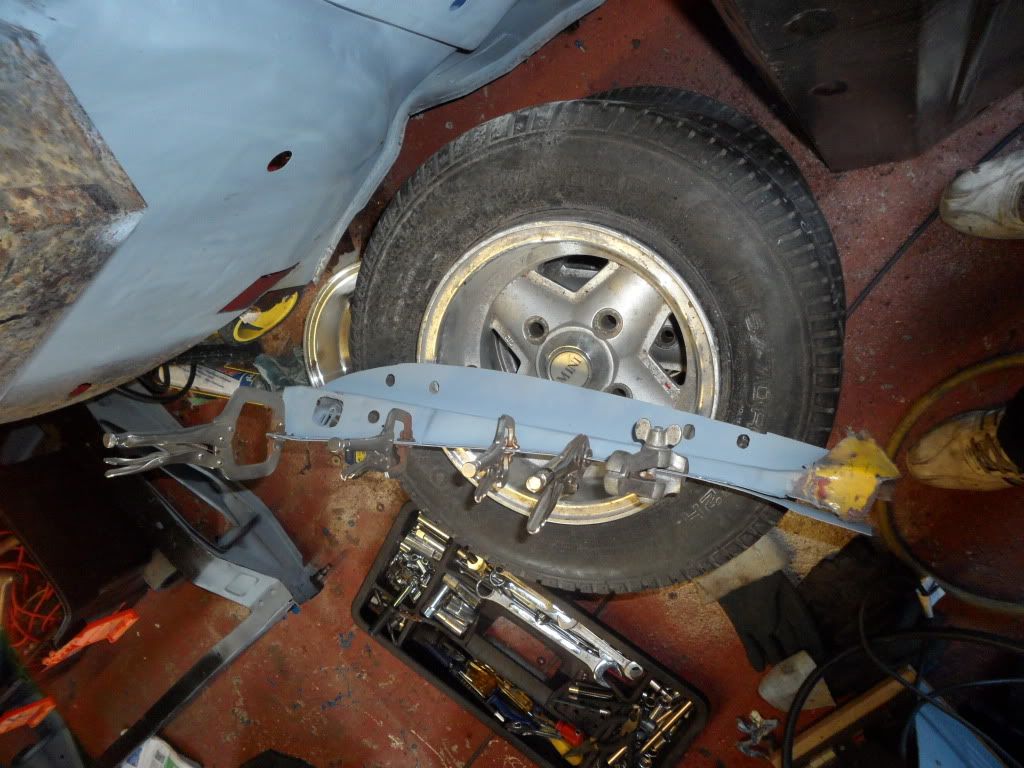
after that i got the final coat on the front subby but no pic as its just the same as the last post i should be able to start building that up soon as ive got most of the bits including my fiesta brake conversion just need new bearings for the hubs then its all complete
this could be my last update for a while as i have to send my laptop away for repair or maybe ill just update with my phone and put the pics on later or something but more soon maybe lol
darren
also gave the outside of the casing a good scrub and is ready for some silver now
after that i got the final coat on the front subby but no pic as its just the same as the last post i should be able to start building that up soon as ive got most of the bits including my fiesta brake conversion just need new bearings for the hubs then its all complete
this could be my last update for a while as i have to send my laptop away for repair or maybe ill just update with my phone and put the pics on later or something but more soon maybe lol
darren
#63
miniyellowmini
-

- Members
-
- 595 posts
Super Mini Mad
- Location: My Mini
- Local Club: British Mini Club
Posted 11 September 2012 - 06:54 PM
Great job you're doing there. Some impressive work  Keep it up. Reminds me I should crack on with mine
Keep it up. Reminds me I should crack on with mine
#64
grahama
-

- Members
-
- 2,442 posts
Up Into Fourth
- Location: Warrington
- Local Club: None in my area !!
Posted 11 September 2012 - 07:11 PM
Hi Darren,
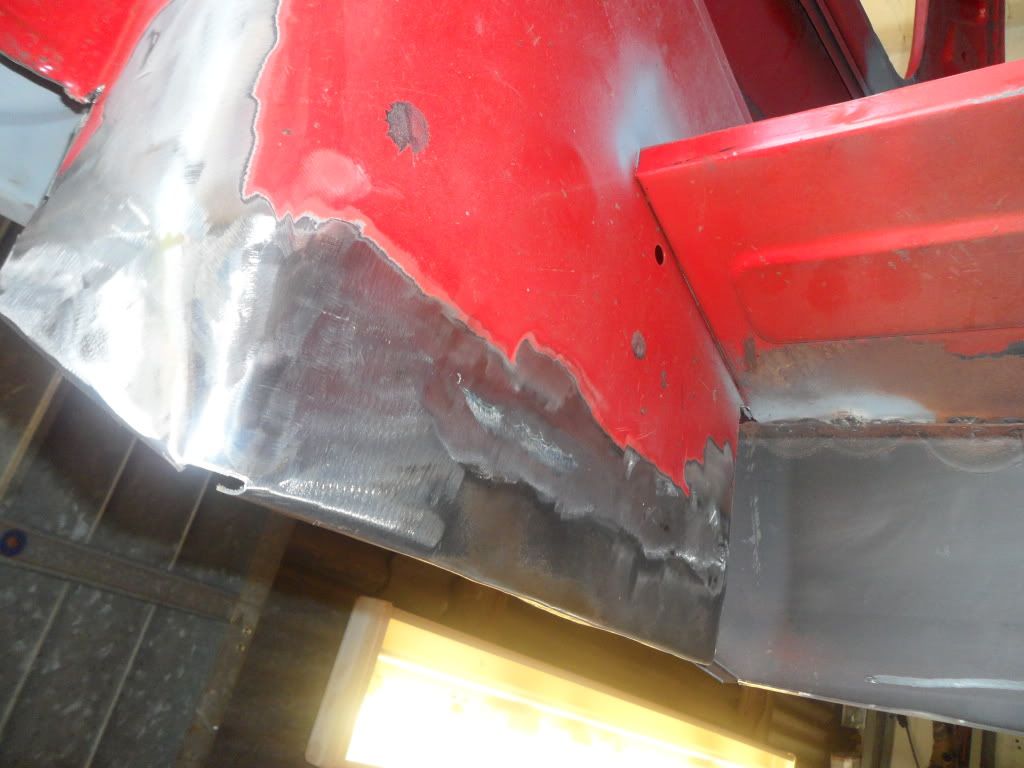
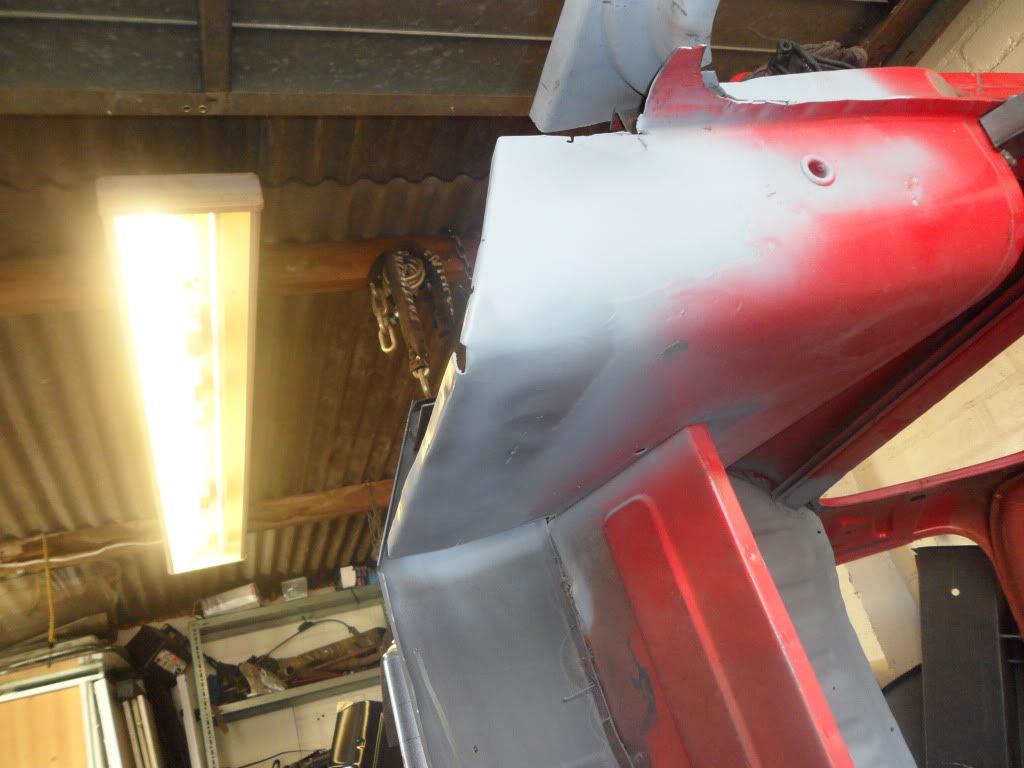
nasty looking over sill you have there, but you are getting so good at fabrication and welding that it will be fine soon. The gearbox looks nice, Have you had a very close look at the dog teeth on all synchro sides to check for wear, just in case. As for the block, the bores look pretty good where the pistons have been and unless you are going to over bore it then try a home honing tool. I did with mine and the bores came up very nicely. Are there any ridges on the bore walls??
Graham
#65
miniBrain
-
- Members
-
- 192 posts
Mini Mad
- Location: Preston
Posted 11 September 2012 - 09:47 PM
Hi Darren, Some great work on the repairs there!
I'd definitely take a look inside the diff. Here's what I found when I took mine apart:

As well as loads of swarf in the sump, I also found a tooth from a planet gear jammed in the selector lever - that was why I couldn't get 3rd. All fixed now though - used a diff upgrade kit from Guessworks (£55).
Bob
I'd definitely take a look inside the diff. Here's what I found when I took mine apart:
As well as loads of swarf in the sump, I also found a tooth from a planet gear jammed in the selector lever - that was why I couldn't get 3rd. All fixed now though - used a diff upgrade kit from Guessworks (£55).
Bob
#66
Minidarren83
-
- Members
-
- 1,207 posts
One Carb Or Two?
- Location: Stanford Le hope
Posted 12 September 2012 - 02:00 AM
Cheers miniyellowmini glad you popped in for a look and yes get off yer backside and get cracking lol
Hi Graham like you say the welding side of things should come together although I now thing a new inner wing is needed not sure I can fab a new one up just yet, I need to get in there with a good torch but from what I can see all the dogs look good well they are all the same shape no missing teeth all gears select and when in gear the synchro hubs and baulk rings look to be good to. Unluckily for me although most of the bores look to be ok it seems the pistons at one point were siezed in there and honing until the marks are gone I feel will push it overbore so I will just go up a couple of sizes make it a little more fun plus it needs new cam bearings so a trip to the machine shop is unavoidable
As always your input is welcome cheers Darren
Hi Darren,
nasty looking over sill you have there, but you are getting so good at fabrication and welding that it will be fine soon. The gearbox looks nice, Have you had a very close look at the dog teeth on all synchro sides to check for wear, just in case. As for the block, the bores look pretty good where the pistons have been and unless you are going to over bore it then try a home honing tool. I did with mine and the bores came up very nicely. Are there any ridges on the bore walls??
Graham
Hi Graham like you say the welding side of things should come together although I now thing a new inner wing is needed not sure I can fab a new one up just yet, I need to get in there with a good torch but from what I can see all the dogs look good well they are all the same shape no missing teeth all gears select and when in gear the synchro hubs and baulk rings look to be good to. Unluckily for me although most of the bores look to be ok it seems the pistons at one point were siezed in there and honing until the marks are gone I feel will push it overbore so I will just go up a couple of sizes make it a little more fun plus it needs new cam bearings so a trip to the machine shop is unavoidable
As always your input is welcome cheers Darren
#67
Minidarren83
-
- Members
-
- 1,207 posts
One Carb Or Two?
- Location: Stanford Le hope
Posted 12 September 2012 - 02:07 AM
Hi Darren, Some great work on the repairs there!
I'd definitely take a look inside the diff. Here's what I found when I took mine apart:
As well as loads of swarf in the sump, I also found a tooth from a planet gear jammed in the selector lever - that was why I couldn't get 3rd. All fixed now though - used a diff upgrade kit from Guessworks (£55).
Bob
Hi bob from reading your thread a while ago it was my first thought that the diff could be the source of all the metal swarf in the case I'm just building up the courage to to start pulling the box apart lol maybe I'll just whip off the diff and see what I find before stripping the rest of the box but lots of pictures and labeled bags I'm sure it will all fit back in
Thanks for popping along darren
#68
evansisgreat
-

- Members
-
- 1,095 posts
One Carb Or Two?
- Local Club: Not yet
Posted 12 September 2012 - 03:59 PM
Great build mate, really coming on.
#69
Minidarren83
-
- Members
-
- 1,207 posts
One Carb Or Two?
- Location: Stanford Le hope
Posted 26 September 2012 - 08:50 AM
Just a quick update still no pictures as my laptop is still u/s but I am working away and still taking pictures and will upload when I can but I've decided that the passengers inner wing is to far gone for repair and have pulled it off along with the door post and so far have replaced the post and inner strengthener with a doner one and the door fits nice and have moved on to the doorstep which I will be welding in this afternoon the old is cut out and the new one fitted with the door in place and as always the pattern step is well out of shape so lots of cutting done to make it match the profile of the door frame. Hopefully get some pictures up this weekend and more progress
Darren
Darren
#70
Minidarren83
-
- Members
-
- 1,207 posts
One Carb Or Two?
- Location: Stanford Le hope
Posted 26 September 2012 - 08:59 AM
Test photo to see if I can upload photos from my mobile. If nothing appears then just ignore this post lol
#71
Minidarren83
-
- Members
-
- 1,207 posts
One Carb Or Two?
- Location: Stanford Le hope
Posted 27 September 2012 - 06:11 PM
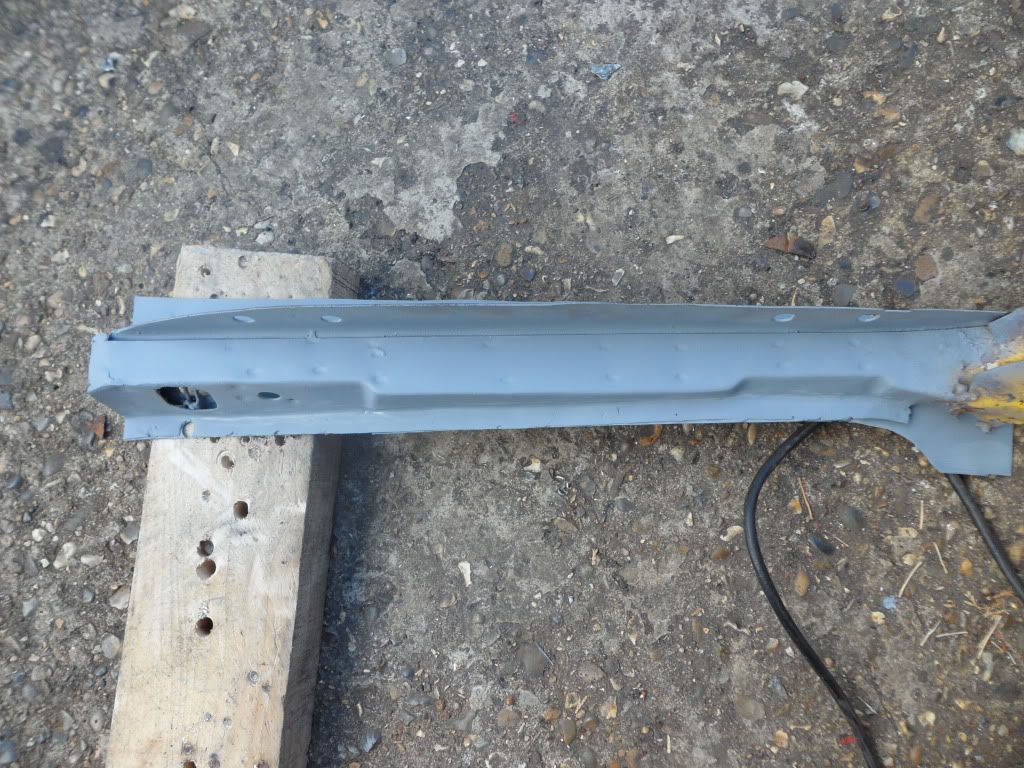
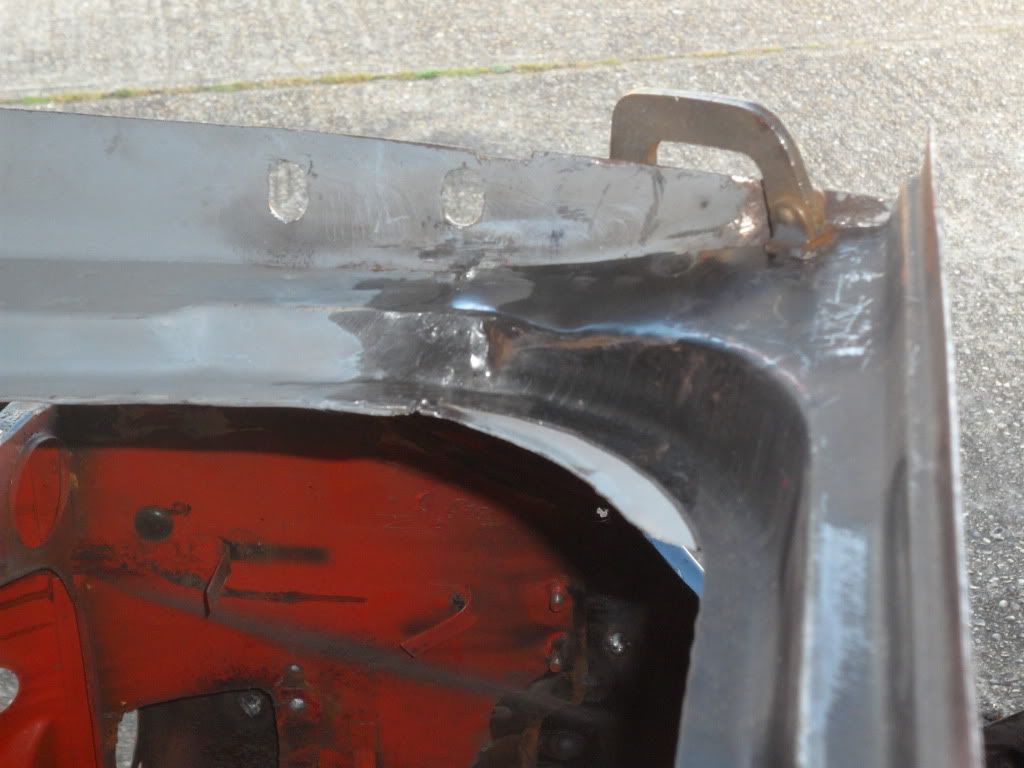
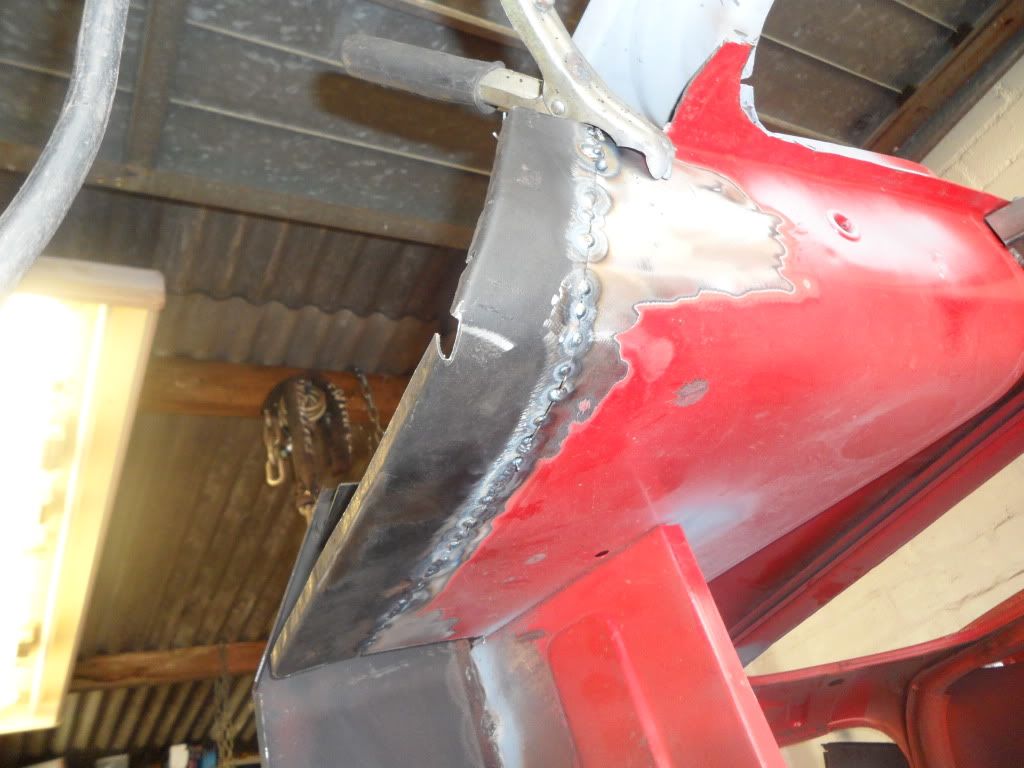
hi there finaly got a new laptop so i have a few pictures to upload and as i said above i got the doorstep all welded in today
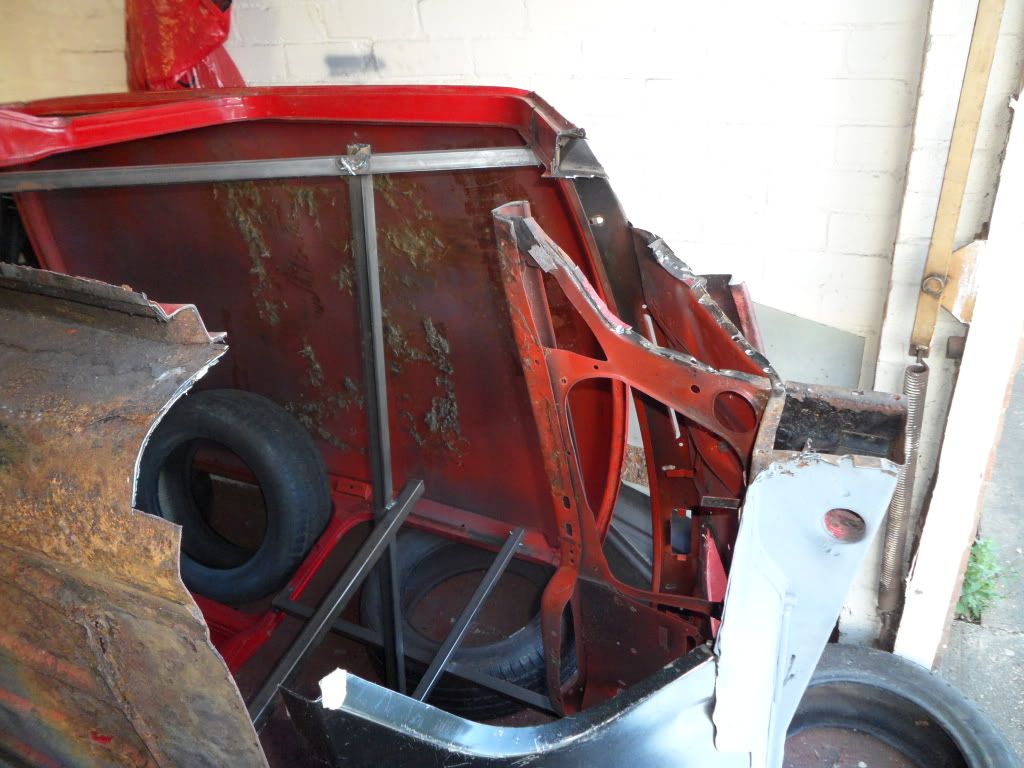

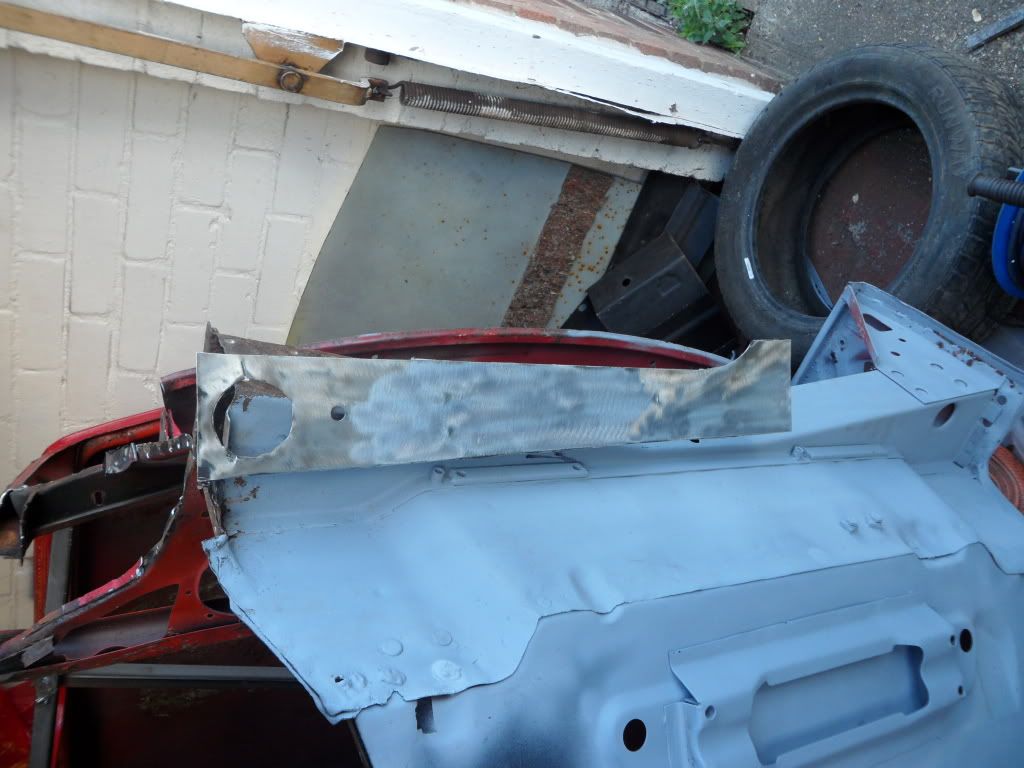
i made up a new inner a post boxing plate going from what was left of the old panel
got the donor door post all cleaned up
and then clamped the two together and welded and cleaned off turned out pretty well and i will put the flange for the flitch when i fit that
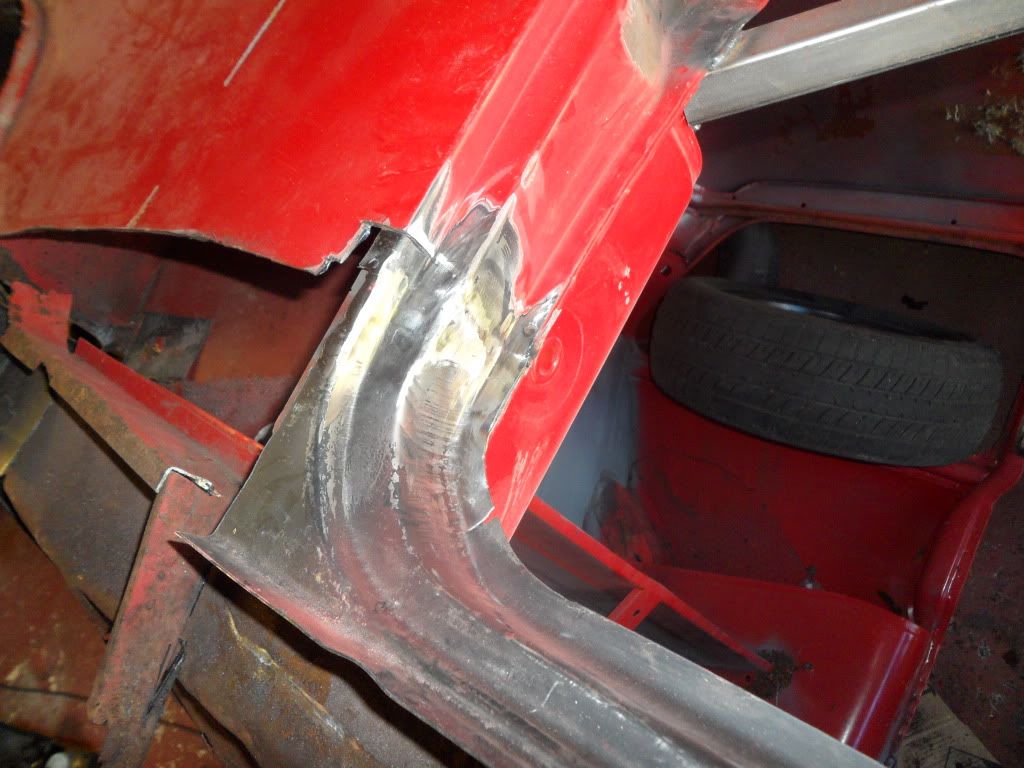
then welded in the door post using the door itself to make sure it was strait also using the previous measurements taken
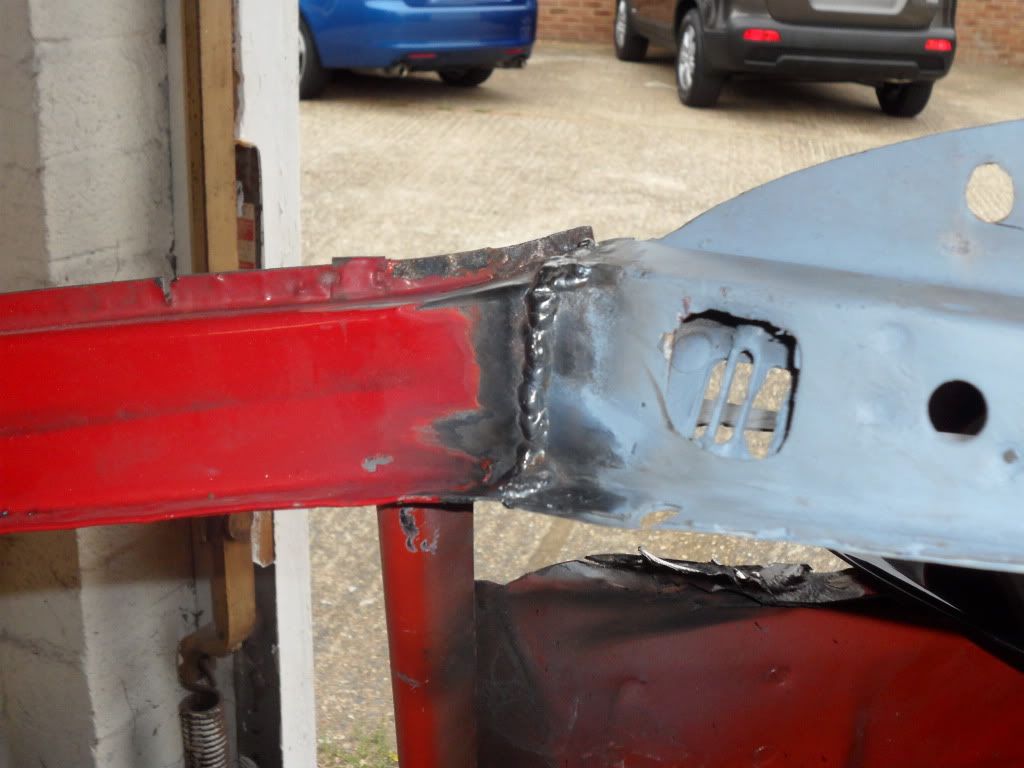
and the rear for penetration
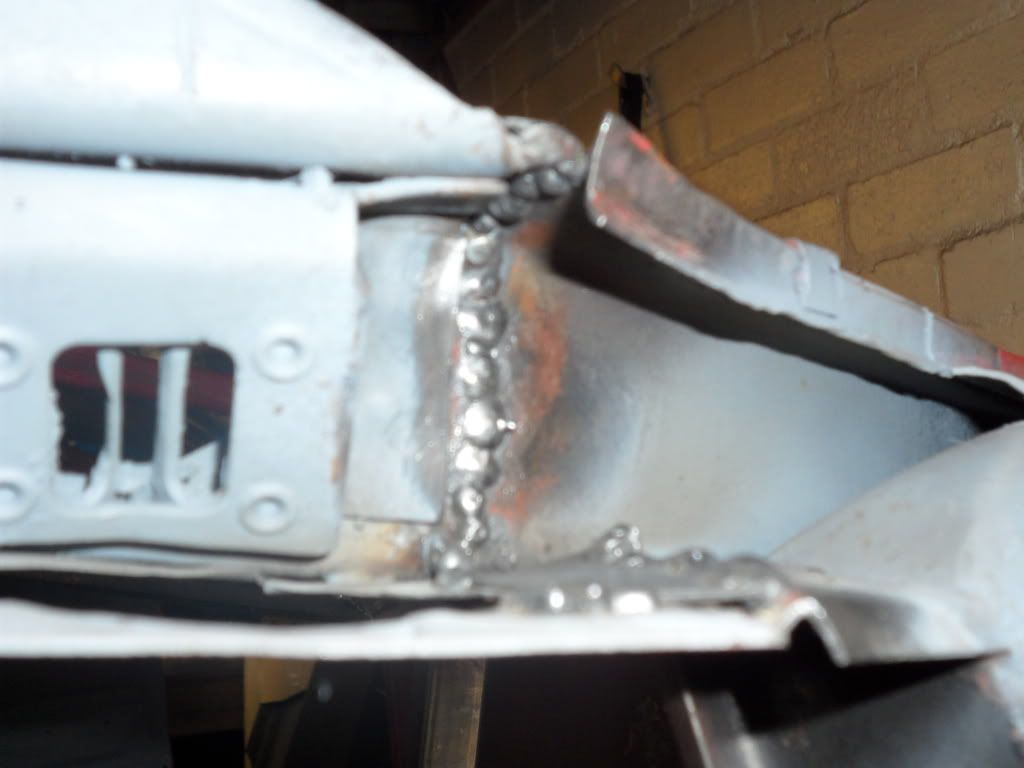
and then all ground down cleaned up and a little primer and as it turned out well i took a couple of pics


i then fitted and welded the doorstep in again using the the door to check for the gaps but got no pics with bare welds only when it was ground down
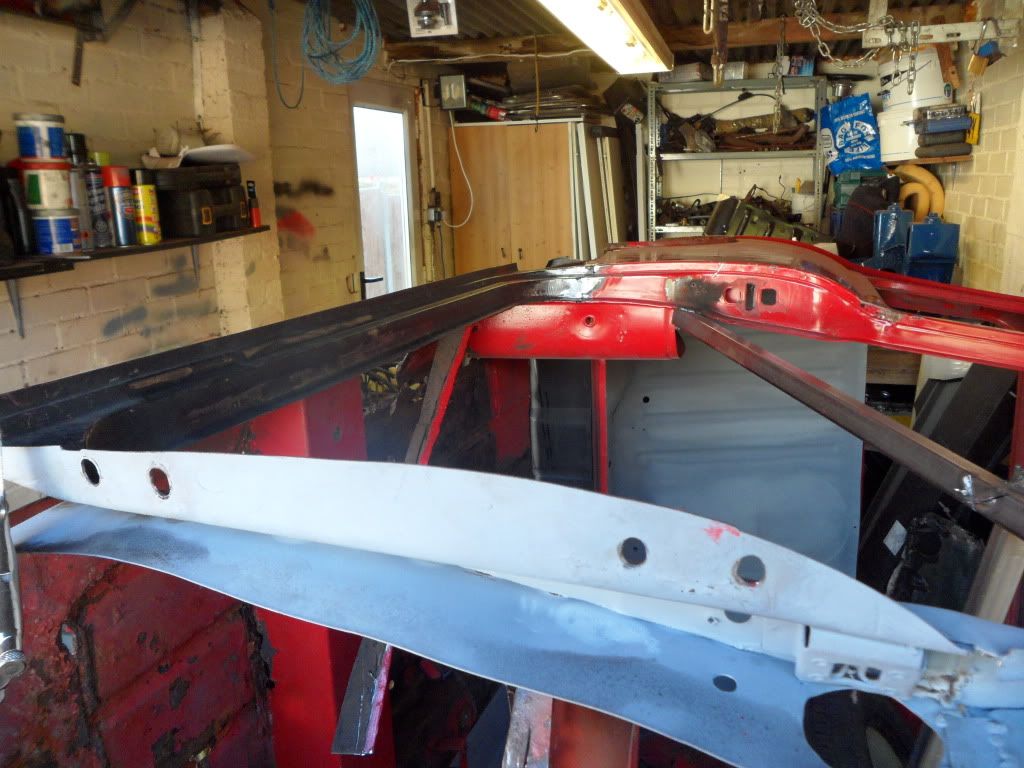
and as i have set my door gaps fairly tight there were a couple of welds on the door that were just touching the door frame so flatted them of also i stripped the door down as it was propa heavy putting on and off all the time and was supprised to find an mpi door so well chuffed

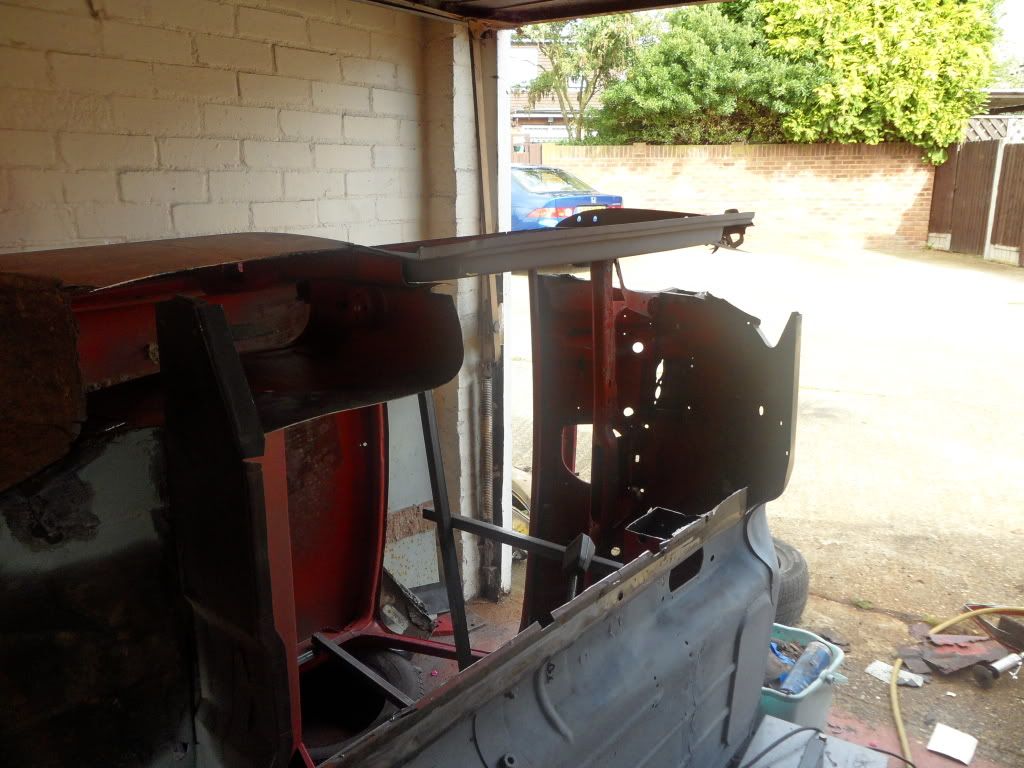
thats all for now should be starting on the floor removal over this weekend so more coming just need to save up for a new inner wing and front crossmember half
darren
i made up a new inner a post boxing plate going from what was left of the old panel
got the donor door post all cleaned up
and then clamped the two together and welded and cleaned off turned out pretty well and i will put the flange for the flitch when i fit that
then welded in the door post using the door itself to make sure it was strait also using the previous measurements taken
and the rear for penetration
and then all ground down cleaned up and a little primer and as it turned out well i took a couple of pics
i then fitted and welded the doorstep in again using the the door to check for the gaps but got no pics with bare welds only when it was ground down
and as i have set my door gaps fairly tight there were a couple of welds on the door that were just touching the door frame so flatted them of also i stripped the door down as it was propa heavy putting on and off all the time and was supprised to find an mpi door so well chuffed
thats all for now should be starting on the floor removal over this weekend so more coming just need to save up for a new inner wing and front crossmember half
darren
Edited by Minidarren83, 27 September 2012 - 06:17 PM.
#72
grahama
-
- Members
-
- 2,442 posts
Up Into Fourth
- Location: Warrington
- Local Club: None in my area !!
Posted 27 September 2012 - 08:17 PM
Darren,
nice work on the major cut out and reweld. Glad you used the door to check all the gaps as they can go off so easily. You are getting good at beating the rust into submission !!
Graham
nice work on the major cut out and reweld. Glad you used the door to check all the gaps as they can go off so easily. You are getting good at beating the rust into submission !!
Graham
#73
BenH
-

- Members
-
- 742 posts
One Carb Or Two?
- Local Club: CV1 Minis
Posted 27 September 2012 - 08:34 PM
Wow, Darren, really impressed with the work, Definatley saved one from the scrappy, I thought i had my work cut out in my boot section but you've had to completely rebuild it! Nice write up and pics, Keep it up
Ben
Ben
#74
Minidarren83
-
- Members
-
- 1,207 posts
One Carb Or Two?
- Location: Stanford Le hope
Posted 28 September 2012 - 03:09 AM
Thanks for the replays lads I don't feel I can call myself a mini restorer just yet , got that pesky boot to finish off and still need to get to the standards of your work. Ben the speed that you make progress is astonishing thanks for popping along
Darren
Darren
#75
Minidarren83
-
- Members
-
- 1,207 posts
One Carb Or Two?
- Location: Stanford Le hope
Posted 02 October 2012 - 07:47 PM
first update of the week
well it has been a fairly good week so far on the mini ive got most of the drivers floor cut out all the way down to the tunnel just need a final trim with a strait edge then its ready for the new heritage half floor that i picked up of ebay for £41 bargain the only problem is it is for a later mini with the small footwell but i can live with that
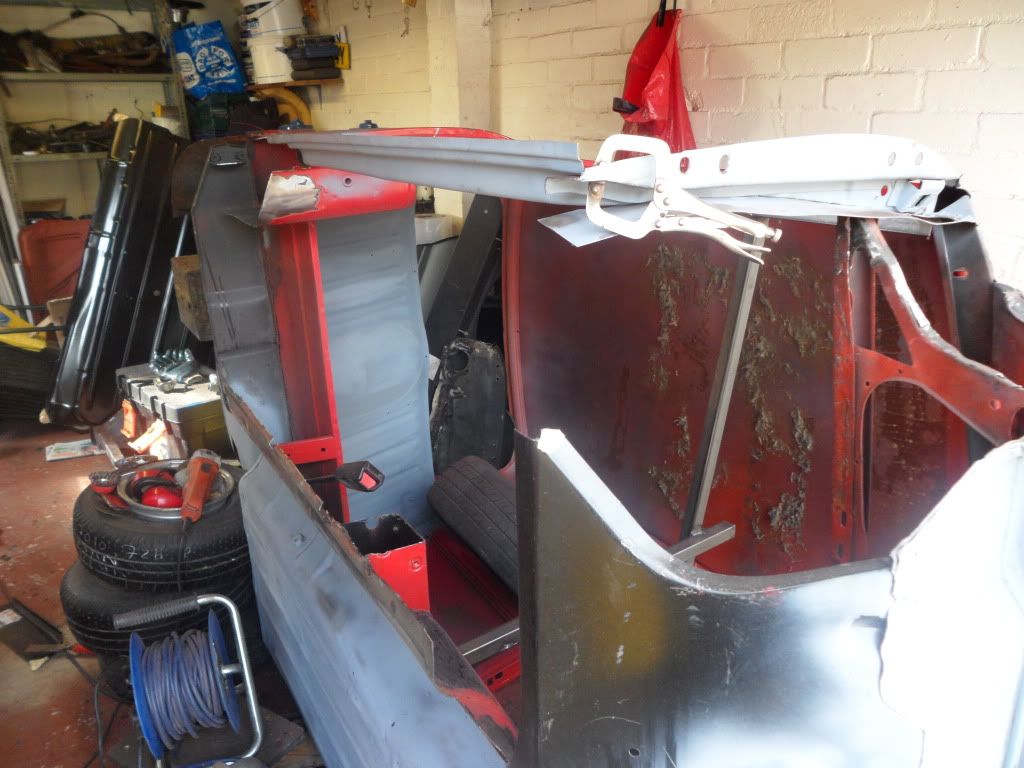
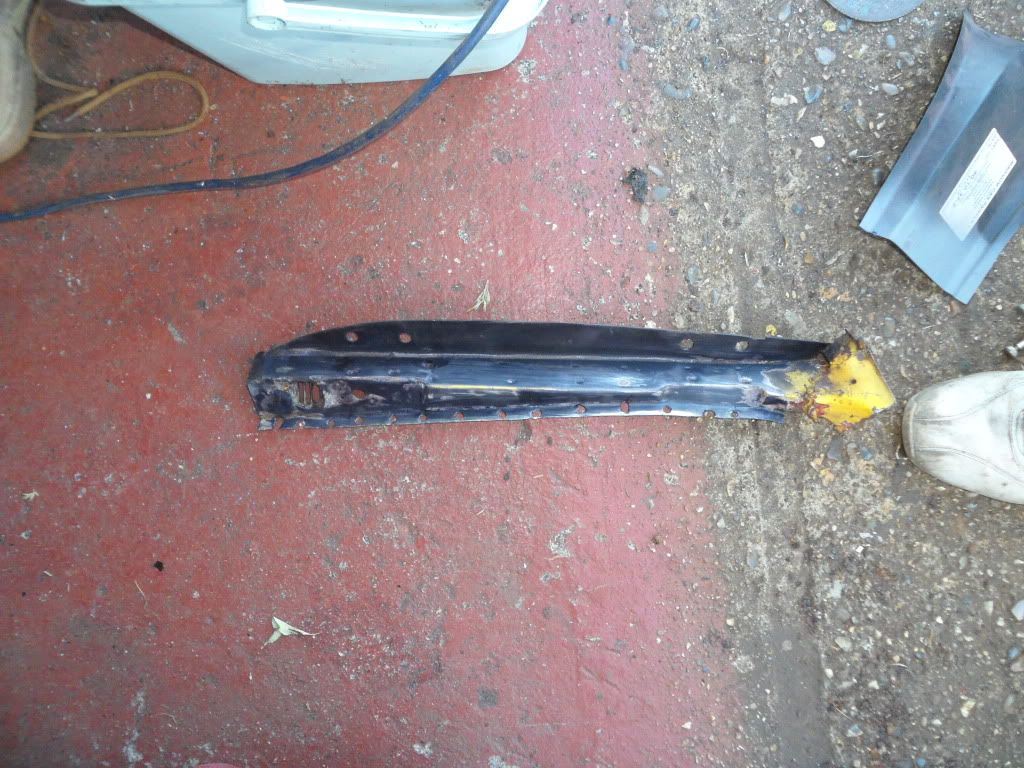
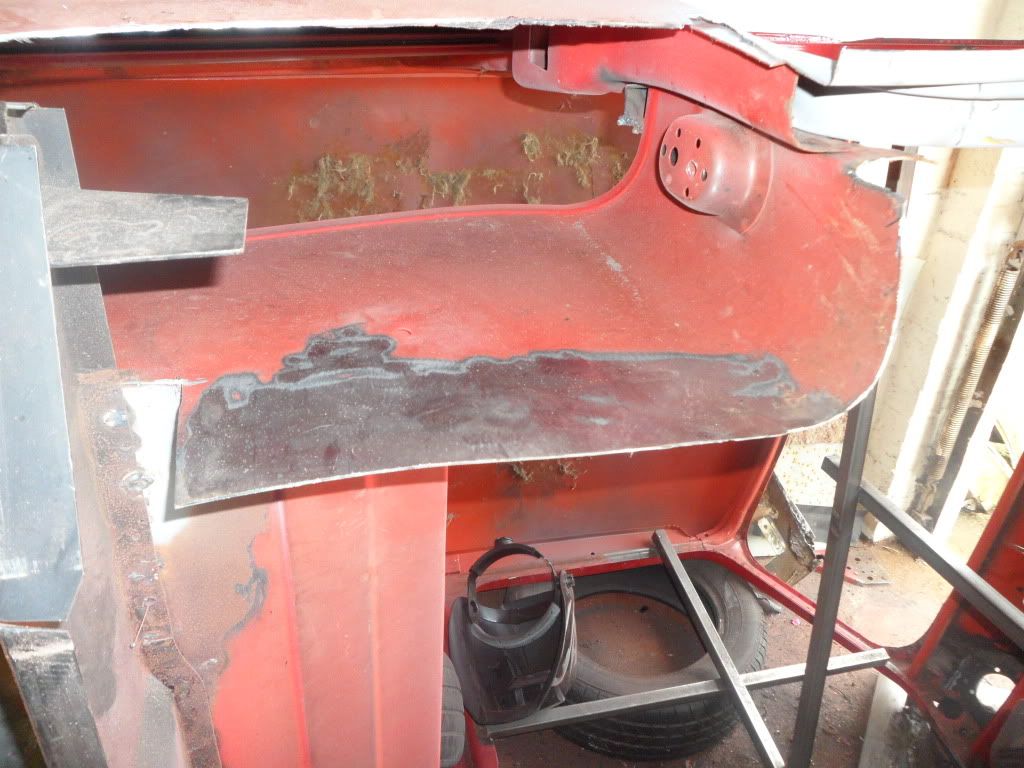
but before the floor goues on i need to tidy up the lower 2-3 inches of the companion bin as this area was pretty crusty and the flange that meets the floor was non existant and over the years of repairs and patches was just ugly so out it came
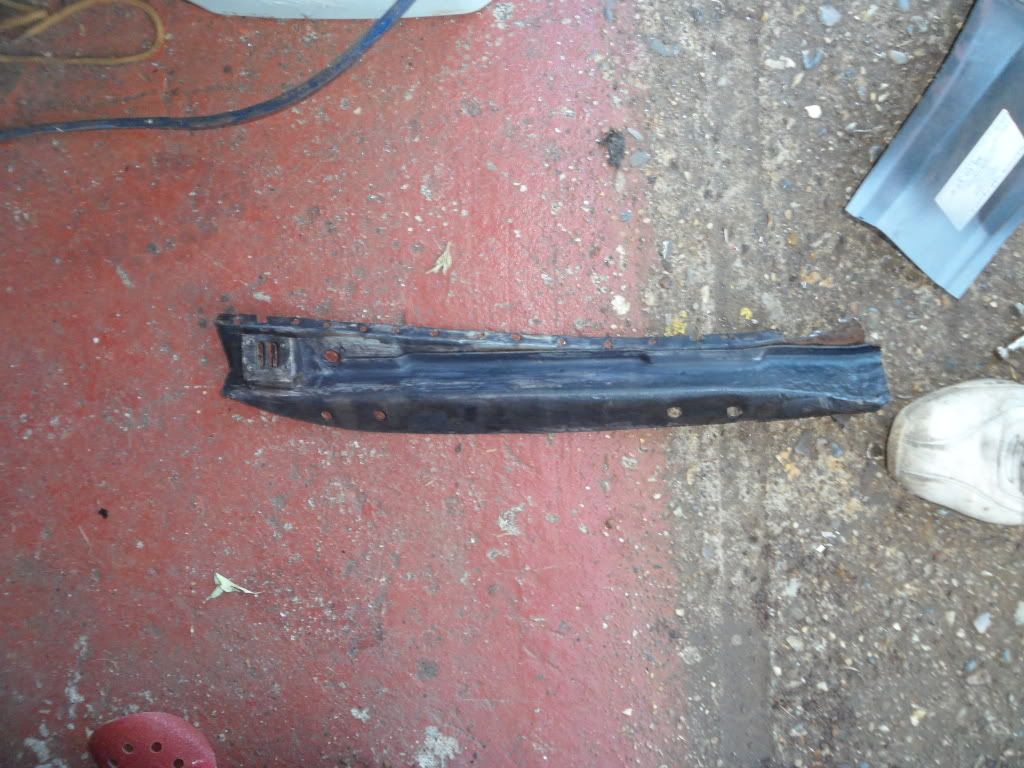
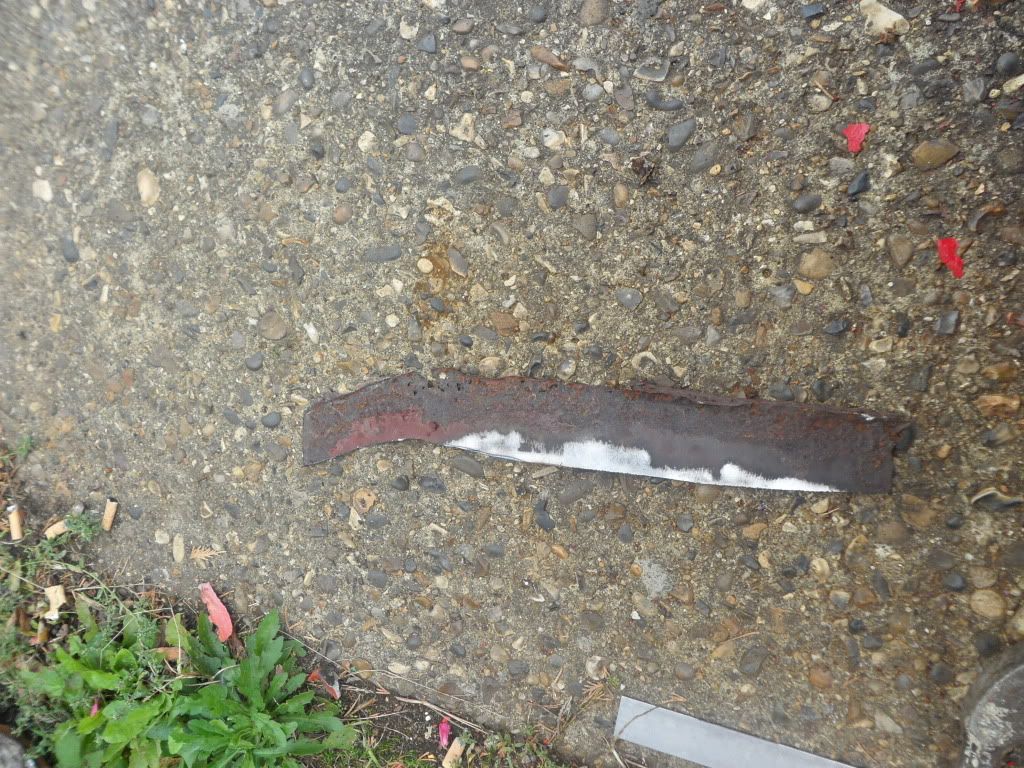
i then bashed the piece flat so that o could make a template of it
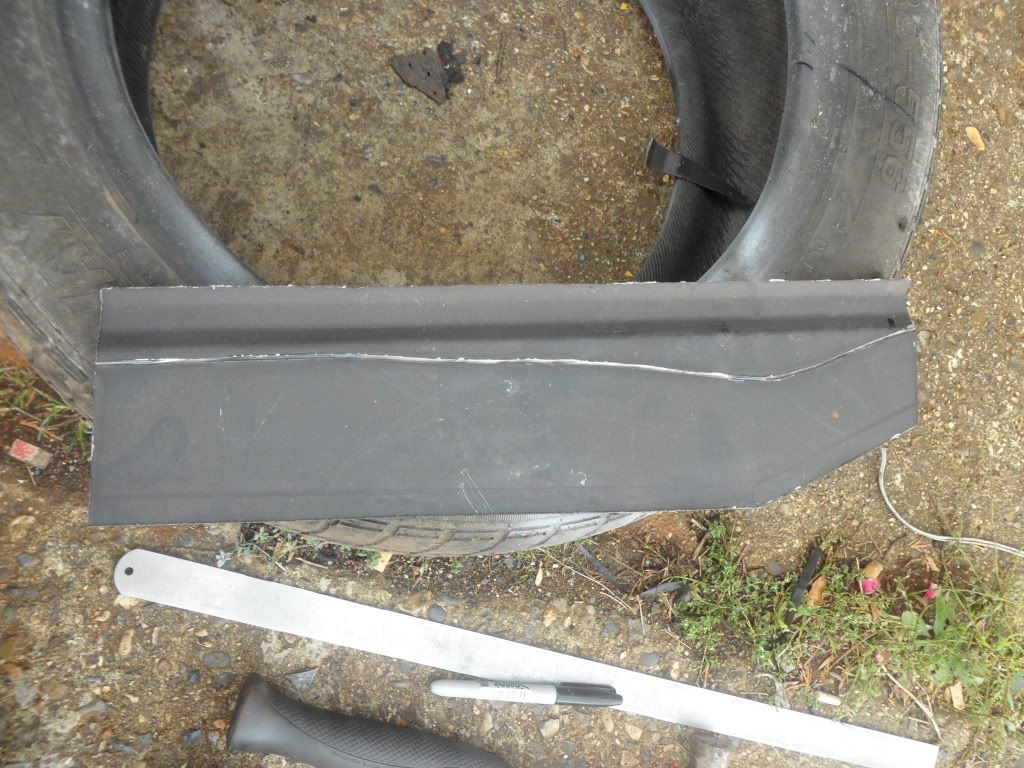
Then traced it out on a piece of steel and added the flanges and started cutting out

i find the best way to cut out a line that is not straight it to follow the line with the grinder or cut off wheel to score the metal and then bend and flex until it snaps off then trim the edges with the sanding disc. i then used a peice of angle and clamped it to the panel and bit by bit hammered over the flanges until they sat flat and did the same for the smaller flange but i forgot to take a pic of this process im sure you can all imagine
the part was then tacked in and for the curved part i just clamped and tacked as i went to follow the line which turned out better than i could of hoped for although the main section dropped a little when i welded it probably from the heat
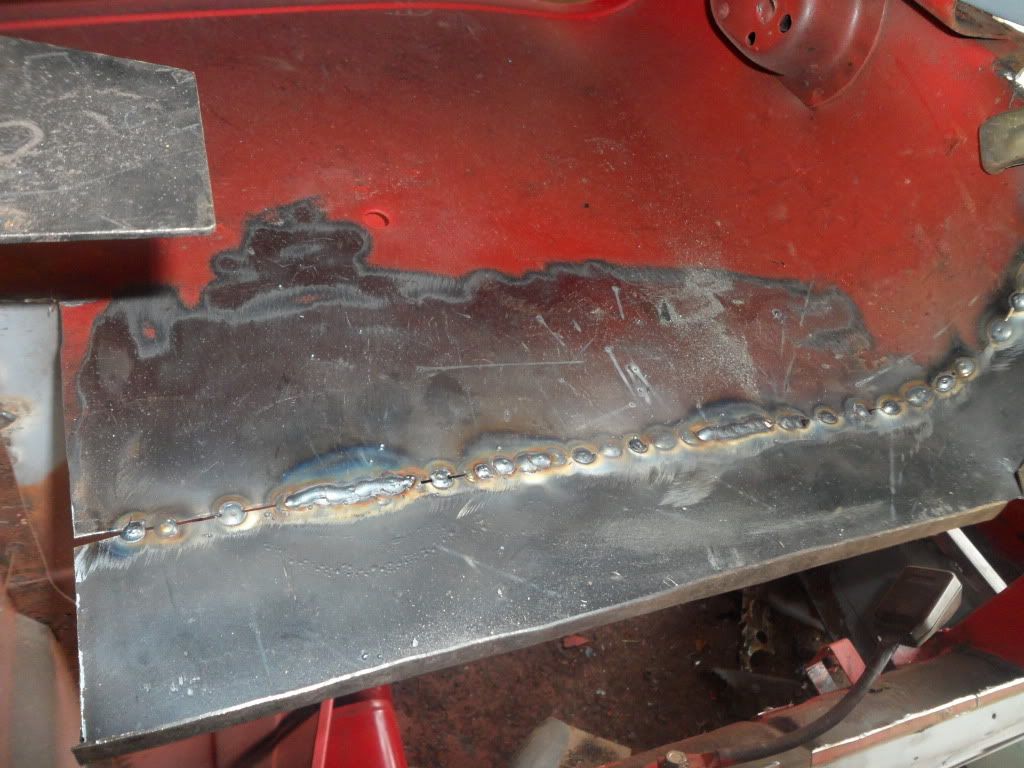
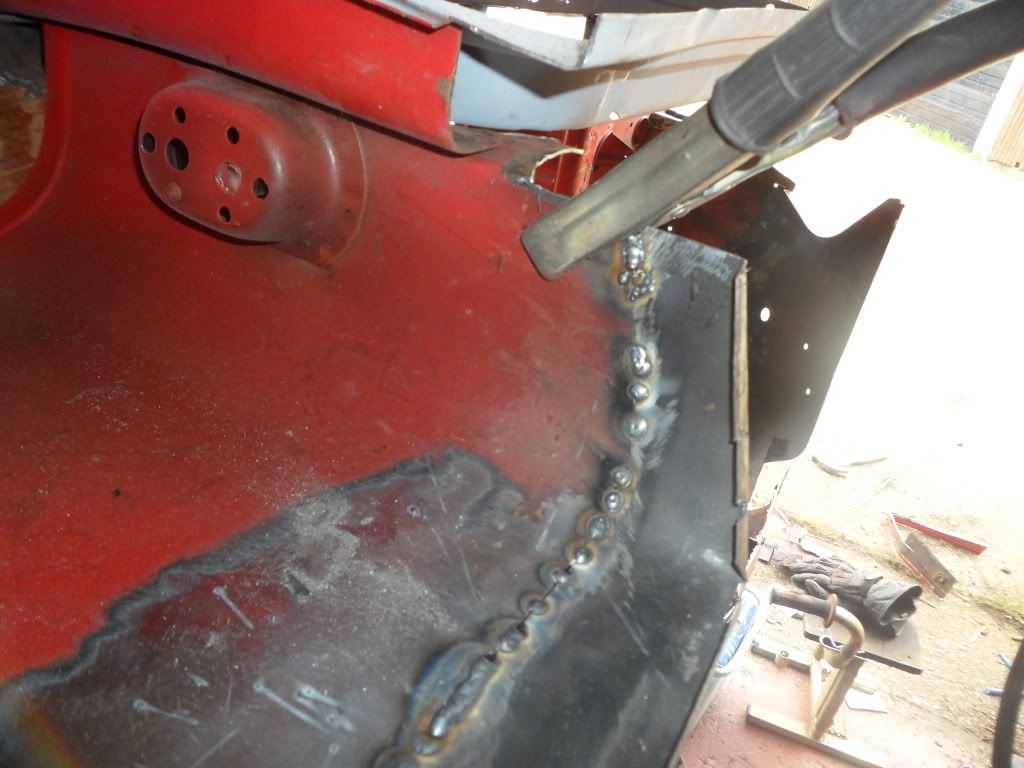
and then fully welded in getting better i think only blew two small holes and the penetration was spot on
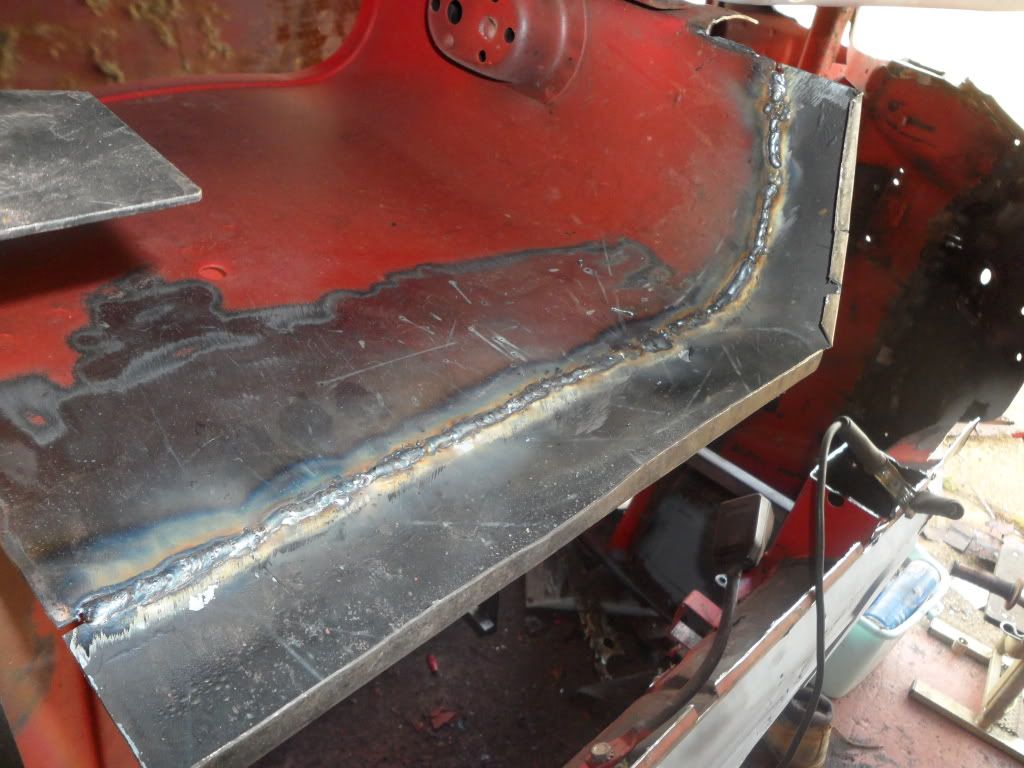
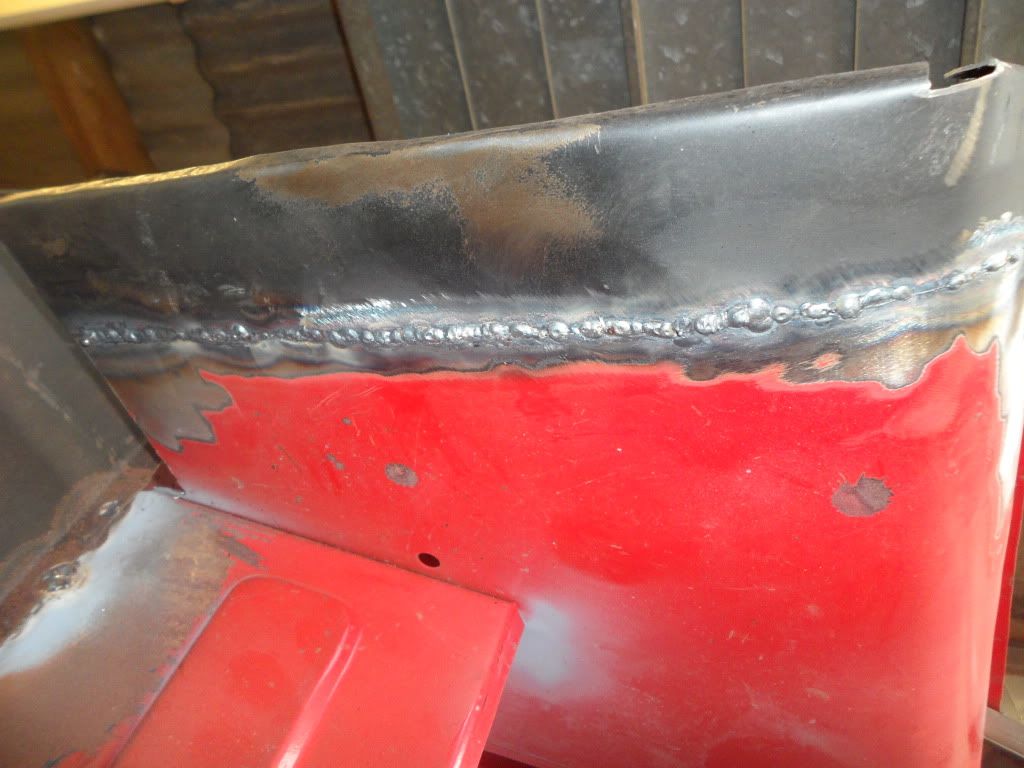
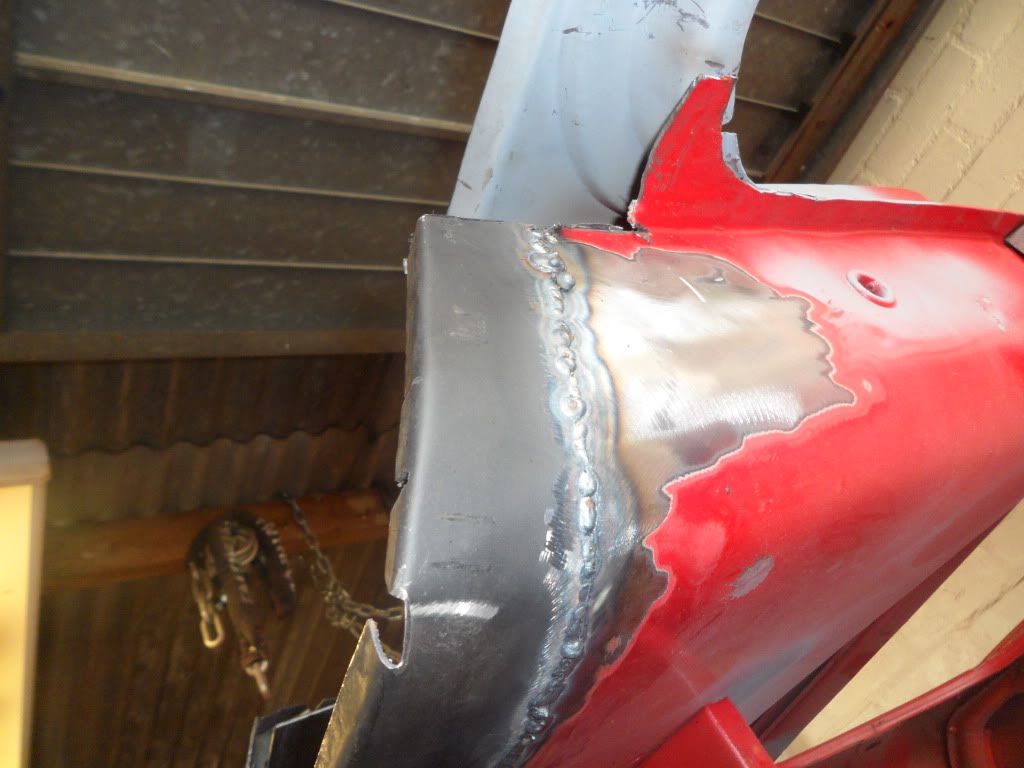
then started the grinding i am more than pleased with how the front turned out and the middle that you wont see didnt drop too much but i need more clamps in the future
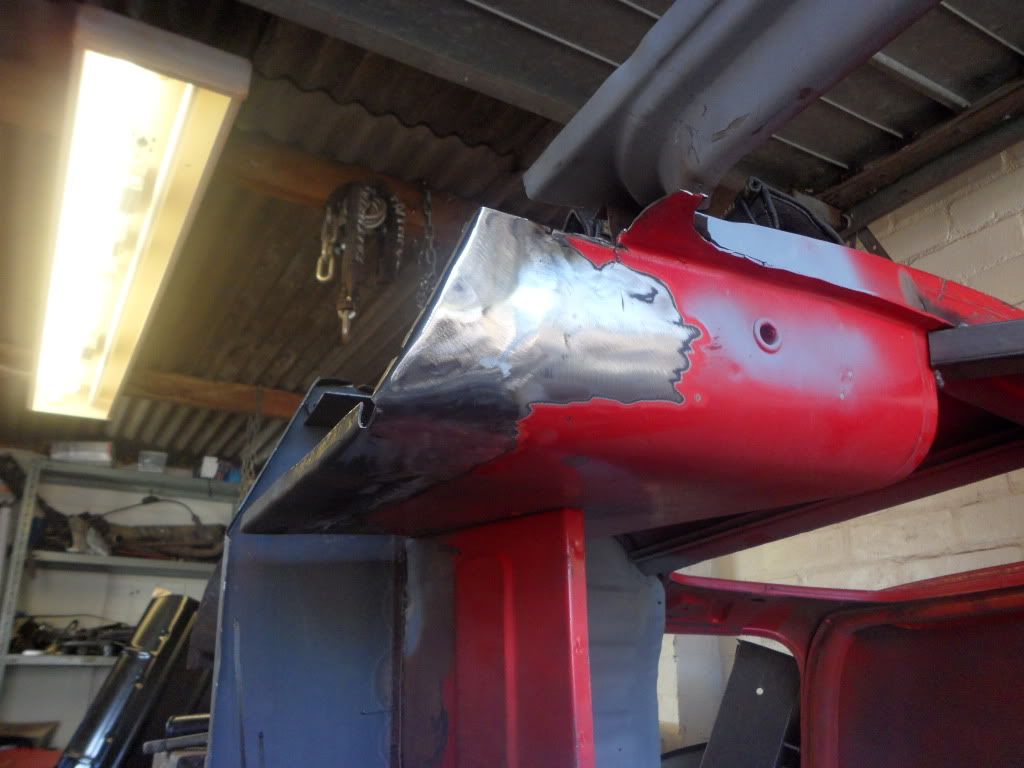
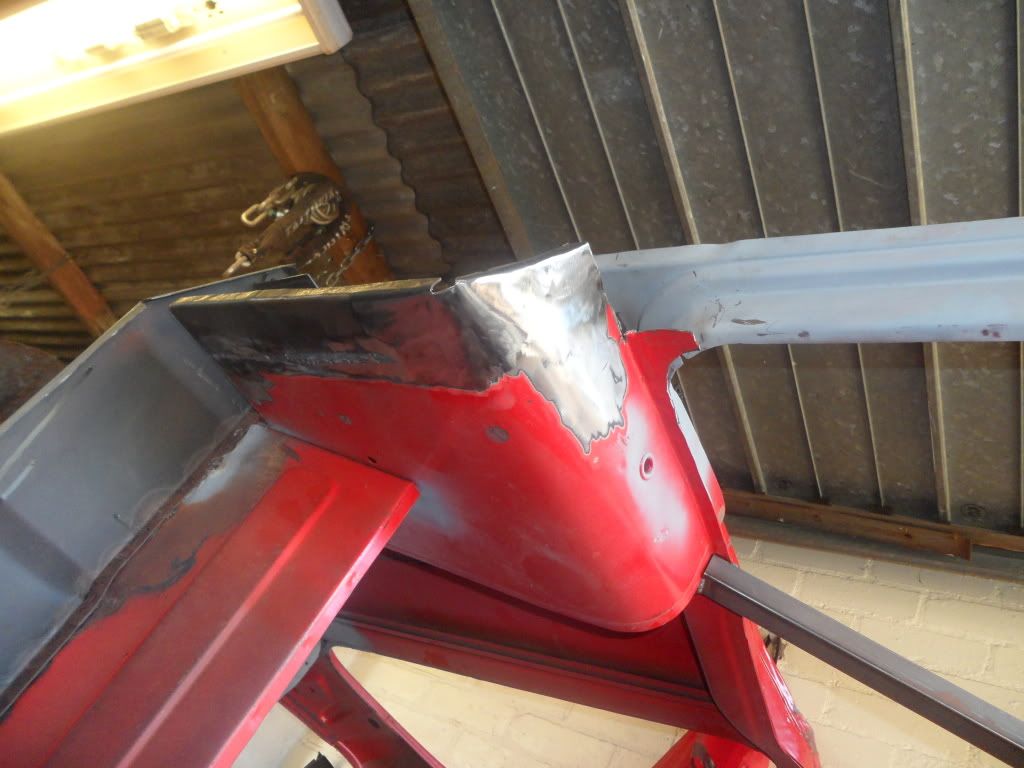
a small skim of filler will be needed this part to make it look perfect but i am happy as larry
then with a bit of primer on it looks good i will filler when i bare metal this area
just one more patch on this area then i can start lining up the floor which i should have done by tomorrow so more to come
cheers darren
well it has been a fairly good week so far on the mini ive got most of the drivers floor cut out all the way down to the tunnel just need a final trim with a strait edge then its ready for the new heritage half floor that i picked up of ebay for £41 bargain the only problem is it is for a later mini with the small footwell but i can live with that
but before the floor goues on i need to tidy up the lower 2-3 inches of the companion bin as this area was pretty crusty and the flange that meets the floor was non existant and over the years of repairs and patches was just ugly so out it came
i then bashed the piece flat so that o could make a template of it
Then traced it out on a piece of steel and added the flanges and started cutting out
i find the best way to cut out a line that is not straight it to follow the line with the grinder or cut off wheel to score the metal and then bend and flex until it snaps off then trim the edges with the sanding disc. i then used a peice of angle and clamped it to the panel and bit by bit hammered over the flanges until they sat flat and did the same for the smaller flange but i forgot to take a pic of this process im sure you can all imagine
the part was then tacked in and for the curved part i just clamped and tacked as i went to follow the line which turned out better than i could of hoped for although the main section dropped a little when i welded it probably from the heat
and then fully welded in getting better i think only blew two small holes and the penetration was spot on
then started the grinding i am more than pleased with how the front turned out and the middle that you wont see didnt drop too much but i need more clamps in the future
a small skim of filler will be needed this part to make it look perfect but i am happy as larry
then with a bit of primer on it looks good i will filler when i bare metal this area
just one more patch on this area then i can start lining up the floor which i should have done by tomorrow so more to come
cheers darren


0 user(s) are reading this topic
0 members, 0 guests, 0 anonymous users


