Jump to content


Photo
- - - - -

Two Retards, A Broken Compressor And A Mini……


  • Please log in to reply
30 replies to this topic

#1 jonnyenglish

jonnyenglish

    Mini Mad

  • Members
  • PipPipPipPip
  • 229 posts
  • Location: Maldon, Essex

Posted 21 November 2012 - 01:39 PM

Ok let me begin by saying this is no ordinary project (it actually is I’m just building the suspense), it is different as we both don’t have the first idea about restoration, spraying/painting, and well Mini’s. We do however know a little bit about engines and how they work but what else is involved in making this Mini the icon it was 23 years ago?…

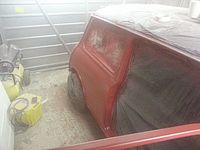
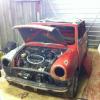
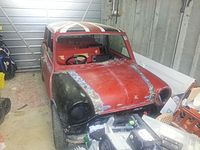
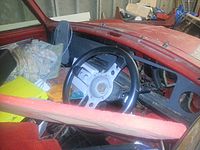
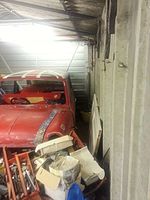
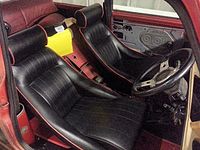
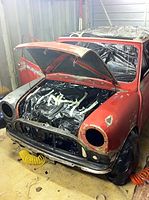
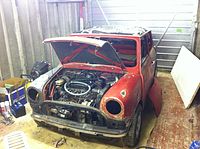
Me and my good friend Jacques decided we wanted to restore my sisters 23 year old mini it had been sat for 4 years in a garage. So I bought it off her for £600 (this includes everything to get the car running interior etc.) We felt it had a good base as around 4 years ago (before it went and lived in the garage) it had various panels replaced and all rust removed and welded by professionals the work you see undertaken in this thread is all us and the mini in our little workshop (garage) below is the mini as we picked it up…


Posted Image
Posted Image
Posted Image
Posted Image
Posted Image
Posted Image
Posted Image
Posted Image
Posted Image
Posted Image
Posted Image
Posted Image
Posted Image

We have named the mini Stanley.

After much umming and arring (spelling?) we decided we would start with the paint work as getting it running would be the easy bit (hopefully)! As none of us have ever sprayed this made for a unique and interesting job!

The tools…

As the compressor we had lying around (my daddy’s) was broken see below…..


Posted Image
Posted Image

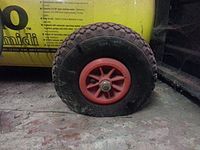
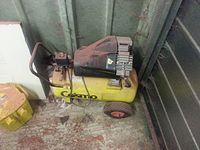
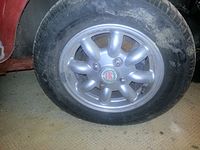
This flat tyre made it no longer road worthy and therefore unusable (tis actually broken not sure how though so we think it’s the flat tyre) so we hit ebay running and ended up with this da da…


Posted Image

With this new foundation we thought about getting a top of the range spray gun so we hit fleabay running turns out you can get a lot for your money (£29.99)!!


Posted Image

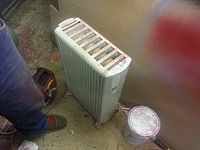
I then read somewhere that it needs to be relatively warm to paint and as this is mid November its just starting to get nippy here in the heart of Essex so over to the house (and much to my mums dismay) we stole her oven to heat our gorgeous little hovel…


Posted Image

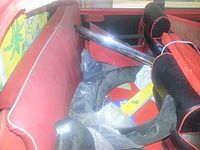
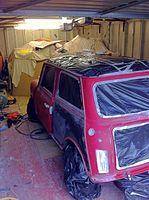
We were now ready to spray our stallion so we began with the prep work possibly the most boringly tedious of all tasks known to man but alas alack it must be done! First off we had to get the car into the middle of the room but on this particular weekend someone (don’t know who) decided to park outside the garage door so that we couldn’t open it SO GRATING! But hey ho after a bit of genius from Jacques, me and him managed to lift the beast into its current resting place! We then began sanding, filling, masking and well you all know what’s involved this took hours!….


Posted Image
Posted Image
Posted Image
Posted Image
Posted Image
Posted Image
Posted Image
Posted Image
Posted Image


Next things began to get more exciting we get we get to use our weapon of mass construction our top of the range spray gun pictured below…

Posted Image


This is when we discovered something that scared us out our pantaloons the compressor (rated 150psi) decided it was broken when it gets to 150psi it doesn’t cut out as it should instead it releases the safety and ejaculates all the compressed air and my word did we wet ourselves! Still the show must go on so we keep an eye on the pressure gauge as the last thing we want is this happening as we start with the primer!

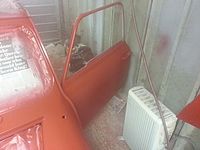
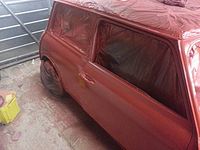
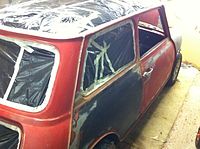
Gun in hand and top of the range masks in place we began to primer our old boy Stanley (same age as me 23!)


Posted Image
Posted Image
Posted Image


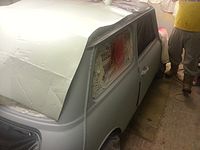
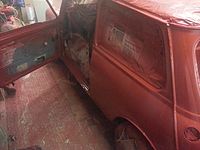
With the car half primered (3 coats later) and a couple of days to harden we started the heinous task of sanding Stanley again (I hate this!) but hey ho it had to be done!


Posted Image
Posted Image

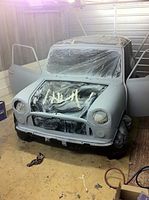
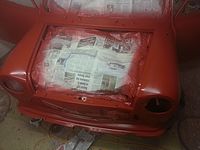
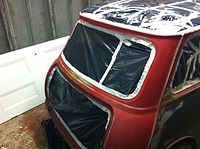
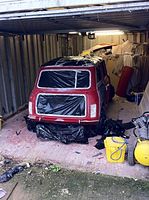
Once we had done this we panel wiped, tack clothed and he was ready for the next 3 coats of primer! It was at this very point that we realised we had made a most catastrophicly epic fail. Most of you have probably already worked this out…….. black sacks are a big no no when it comes to masking (well for me anyway)! As when the paint dries it then begins to flake and the compressed air blows it into the air and all over your lovely new paint! We learnt the hard way! However we kept going as we had started and it wasn’t as bad as we had previously thought and hey ho its only primer right? Another regret was the spray gun although its done a great job (surprisingly) its suction fed which means your always left with waste (well we were anyway) methinks gravity fed might be better!?!….

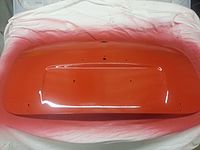
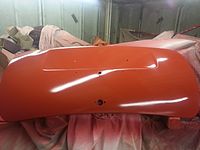
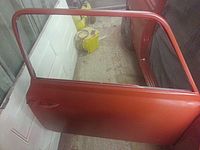
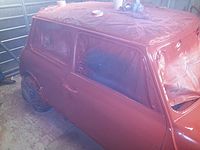
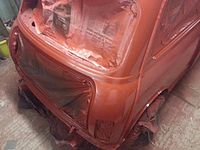
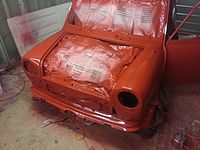
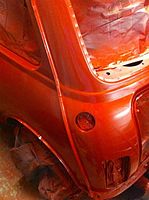
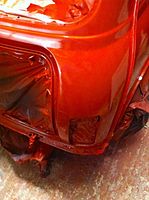
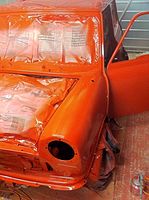
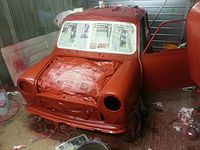
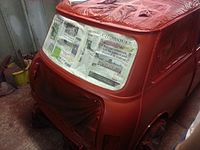
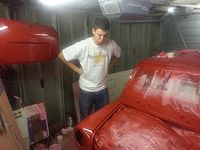
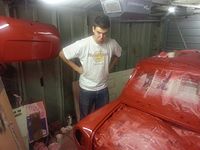
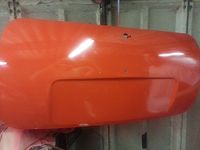
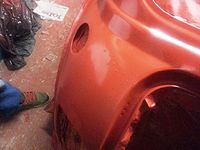
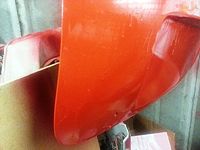
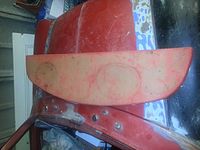
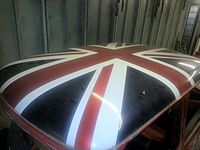
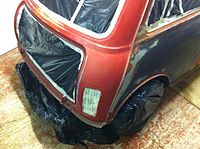
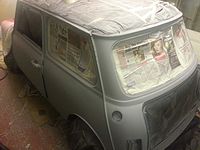
Well once we finished our 7 coats of primer we yet again sanded the stallion back getting him ready for his lovely little bit of colour!! So excited!! We started by having a little practice on the bonnet and the boot lid this went surprisingly well how can you say…. Bad the finish was less then acceptable….


Posted Image
Posted Image


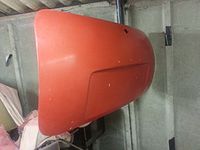
As you can see from the pics it looks more like red oxide this was a concern as I wanted it better and shinier also it had major orange peel not happy L but I was not to be disheartened whether it was the correct thing to do or not we decided more thinners could be the was forward so instead of the 50:50 ratio that we used originally we went for 75(thinners):25(paint) the result was so much better! But still not perfect…


Posted Image
Posted Image
Posted Image

#2 jonnyenglish

jonnyenglish

    Mini Mad

  • Members
  • PipPipPipPip
  • 229 posts
  • Location: Maldon, Essex

Posted 21 November 2012 - 01:39 PM

So although the paint had only had 3 coats at this stage it wasn’t looking to bad! So we decided to tackle Stanley head on, it was paint time! The 1st 3 coats on the car looked a bit like this…


Posted Image
Posted Image
Posted Image
Posted Image
Posted Image
Posted Image
Posted Image
Posted Image
Posted Image


Again I was disappointed so we sanded it back a touch and went in again 1 week later the next 3 coats looked a little better! Was well happy!


Posted Image
Posted Image
Posted Image
Posted Image

But again still not perfect…

Annoyingly the pics look like its orange but I assure you its not! Next job was to sand this back for the last time!! Then the last 3 finishing coats can be applied! So last night we sat out there until 12pm sanding re-masking and getting Stanley ready for his final battle before we get him running like the thoroughbred he once was! At the moment the paint has been sanded flat and looks like this…


Posted Image
Posted Image

Posted Image
Posted Image


Complaints to the drinks lady! She’s so messy!


Posted Image
Posted Image
Posted Image


Hopefully tonight or tomorrow we will get the paint finished it will be epic (I hope) I’m so excited and we’ve both had so much fun so far (apart from sanding) and I appreciate we haven’t done the welding and were learning slowly but anyone who can and wants to perform a restoration should its so fulfilling! Any tips, comments and advice will be welcomed! i will update the thread every week to let you all know any progress but hopefully should have stan finished by the end of the year!!

(sorry for the quality of the photo’s they were taken on my mobiley!)

Thanks for looking and any comments welcome!

Jonny English

Posted Image


Jacques Baby


Posted Image

Edited by jonnyenglish, 21 November 2012 - 02:26 PM.


#3 MaxAndPaddy

MaxAndPaddy

    Spamela Anderson

  • TMF+ Member
  • PipPipPipPipPipPipPipPipPip
  • 4,700 posts
  • Name: Elvis
  • Location: North Yorkshire
  • Local Club: TMF

Posted 21 November 2012 - 02:19 PM

Great read!!!

My kind of project...lots of tea, drinks, getting things wrong, messing up, and feeling a hero at the end of it :D

Best of luck with the rest I'l be following the thread!!

#4 fordson

fordson

    Mini Mad

  • Members
  • PipPipPipPip
  • 203 posts

Posted 21 November 2012 - 02:58 PM

I don't think iv ever laughed so much reading a project thread!! (In a good way) keep it up lads everyone learns in time ;)

#5 steven

steven

    One Carb Or Two?

  • Banned from Buying/Selling
  • PipPipPipPipPipPipPip
  • 1,195 posts
  • Location: Uk

Posted 21 November 2012 - 03:04 PM

will be watching this on, another mini called stanley on tmf :thumbsup:

#6 Jacques124

Jacques124

    Mini Mad

  • Members
  • PipPipPipPip
  • 169 posts

Posted 21 November 2012 - 03:24 PM

Glad the thread is up and running mr JONNY!! looking forward to finishing the job with you my lovely friend! :w00t:

#7 jonnyenglish

jonnyenglish

    Mini Mad

  • Members
  • PipPipPipPip
  • 229 posts
  • Location: Maldon, Essex

Posted 22 November 2012 - 08:55 PM

well here come the next installment of this epic tale of stan the mini and us 2 retards.... things didnt go great tonight we went out panel wiped the car tack clothed turns out our lovely little mini needs a quality dose of imodium because this poor mini has now got the most horrendous runs (see pics) and it aint pretty!! so now were to square 1!! so annoying! the joys of being a proffessional hey!

we cant seem to get the right finish first we tried doing it the way we did originally and it was flat and seems to have dust on it but not sure so i thought in my infinite wisdom that weshould go slower!! genius worked a charm the bits that havent got runs look amazing however there is more run than glossy!! were going round in circles! any tips? other than go to a pro? oh well heres some pics to tickle your taste buds!!

Posted Image
Posted Image
Posted Image
Posted Image
Posted Image
Posted Image

Edited by jonnyenglish, 22 November 2012 - 08:58 PM.


#8 Andrew O

Andrew O

    Previously known as Andrewo330.

  • Members
  • PipPipPipPipPipPipPip
  • 1,425 posts

Posted 22 November 2012 - 09:59 PM

I'm loving this project thread, When you say you're spraying in circles that doesn't sound right.
You should be spraying from side to side or up and down ( Over lapping ) in a fluid motion
Keep going though, You'll get there

Andrew.

#9 Alex_B

Alex_B

    Doesn't put foot in mouth enough!

  • TMF+ Member
  • PipPipPipPipPipPipPipPipPip
  • 4,573 posts
  • Location: Eastbourne

Posted 22 November 2012 - 10:00 PM

Those arnt runs.


think more waves ;)

Thats pretty good though for your first spray job, the cause of runs is going to heavily / slowly and not getting a good overlap, what you want to aim for is a medium to wet coat and a 50% overlap, so spray horizontally across the panel then on the next run, overlap the last run by 50%.

but if that was me I would be flatting those runs out and you may (providing that you dont go through) only need to polish it up,
So use a fine grit wet and dry paper, wet, on a wet flatting block, and rub down the runs till they disappear just be careful about going through the paintwork and hitting primer.
then Polish up with a mechanical polisher and polishing compound :)

very enjoyable write ups by the way!

#10 iMurray

iMurray

    Mild Cheddar

  • Members
  • PipPipPipPipPipPipPip
  • 1,396 posts
  • Location: Southampton

Posted 22 November 2012 - 10:17 PM

Chuckle chuckle

#11 fordson

fordson

    Mini Mad

  • Members
  • PipPipPipPip
  • 203 posts

Posted 23 November 2012 - 12:59 PM

I only thing I can surgest with regards to the paint running / waterfall. would be try turning down the needle on the gun so there's less paint coming out. your better of doing thin coats and building it up. also you should be able to adjust the fan 'width' of paint as it comes out of the gun. good luck lads

#12 jonnyenglish

jonnyenglish

    Mini Mad

  • Members
  • PipPipPipPip
  • 229 posts
  • Location: Maldon, Essex

Posted 23 November 2012 - 01:08 PM

Thanks for the advice guys! Going to be having another crack at it tonight! Got loads to do as we need to sand it all back!! Gutted as i don't have much paint left grrrr does anyone know where i could buy like a liter? oh well should be fun! gonna whack an Imodium in with the next mix i think!

Jon

#13 lawrie124

lawrie124

    Camshaft & Stage Two Head

  • TMF+ Member
  • PipPipPipPipPipPipPipPip
  • 1,710 posts
  • Location: Reading

Posted 23 November 2012 - 01:45 PM

Top write up, and good luck with the finishing. Me and my 14 year old will be doing the same too in the next couple of months, so any hints or tips you learn along the way and share will be great.

#14 Wise Old Elf

Wise Old Elf

    Camshaft & Stage Two Head

  • Members
  • PipPipPipPipPipPipPipPip
  • 1,655 posts
  • Location: Maldon
  • Local Club: Club Lotus

Posted 23 November 2012 - 02:15 PM

Hi

Sorry no tips but a couple of questions; how many litres of paint have you used so far?
You are not far from me; where did you buy your paint?

Cheers

Jason

#15 ryan22_lgm

ryan22_lgm

    One Carb Or Two?

  • Traders
  • PipPipPipPipPipPipPip
  • 1,478 posts
  • Location: woolacombe, north devon
  • Local Club: north devon mini register

Posted 23 November 2012 - 02:44 PM

surely you need to clear coat over the top of this paint? thats the reason it wont give you the finish you are looking for. light dusty even coats then clear coat over the top :)


0 user(s) are reading this topic

0 members, 0 guests, 0 anonymous users