Jump to content


Photo
- - - - -

1964 Mk1 Morris 850


  • Please log in to reply
829 replies to this topic

#541 timmy850

timmy850

    Up Into Fourth

  • TMF+ Member
  • PipPipPipPipPipPipPipPipPip
  • 2,997 posts
  • Location: NSW, Australia
  • Local Club: MITG

Posted 06 June 2019 - 11:33 AM

Nice job adapting the globes to fit. I do like the look of the car with the lamps fitted  =]

Thanks Jared!


Those lamps look very good! A bit of a dumb question, but how do they attach to the grille? 

Cheers Vinay. They have two studs and a flat bar that goes on the back of the grille. 

22814568130_1a2649fe27_b.jpg


#542 giannoutsos

giannoutsos

    Stage One Kit Fitted

  • Noobies
  • PipPipPip
  • 58 posts
  • Location: athens

Posted 06 June 2019 - 03:31 PM

Wow just red 20pages, what a lovely mini. Good work there, I totally agree on what you said about the dellorto good carbs.
Have fun
John

#543 timmy850

timmy850

    Up Into Fourth

  • TMF+ Member
  • PipPipPipPipPipPipPipPipPip
  • 2,997 posts
  • Location: NSW, Australia
  • Local Club: MITG

Posted 09 June 2019 - 08:11 AM

Wow just red 20pages, what a lovely mini. Good work there, I totally agree on what you said about the dellorto good carbs.
Have fun
John

Thanks John. I'm a big convert to Dellortos and love everything about them!


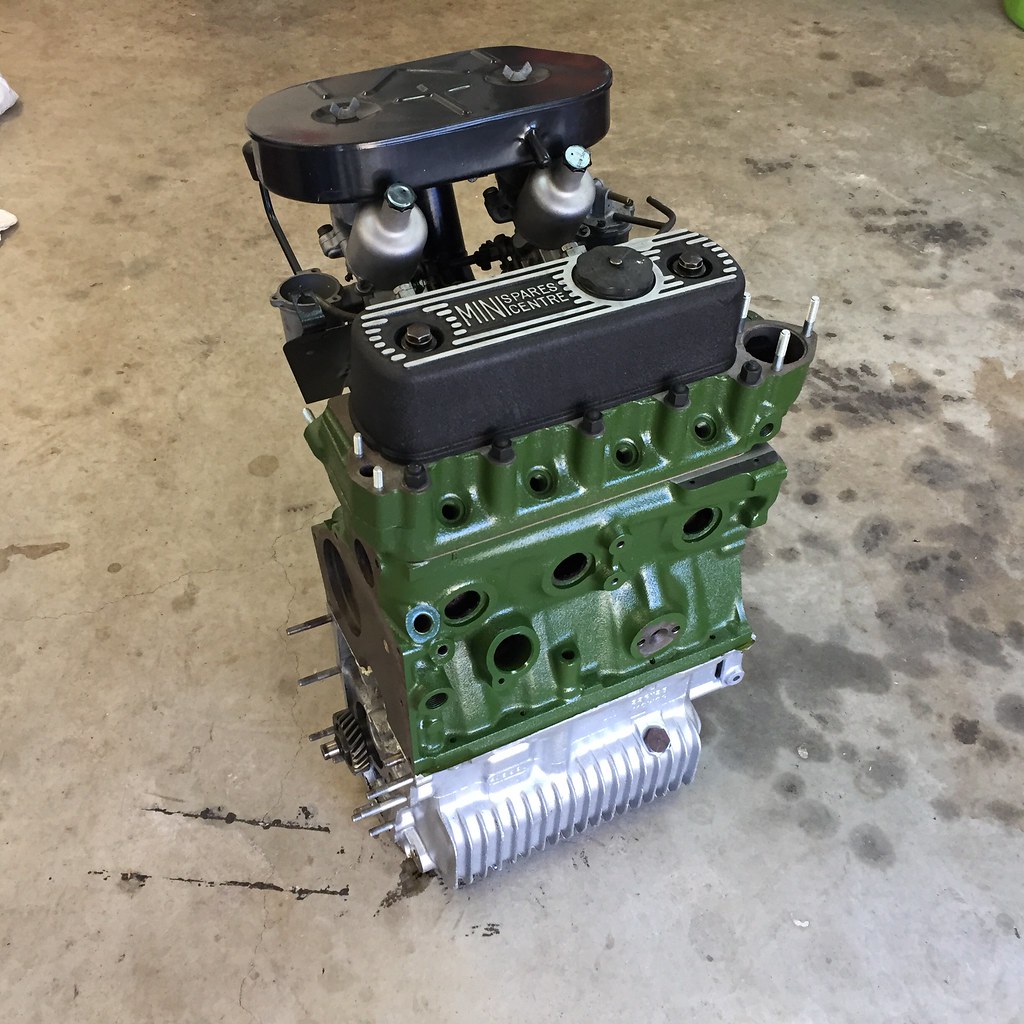
I had a busy day in the garage today! The engine block got a good scrub, threads cleaned out and a coat of paint

48028619842_de22d2d039_b.jpg


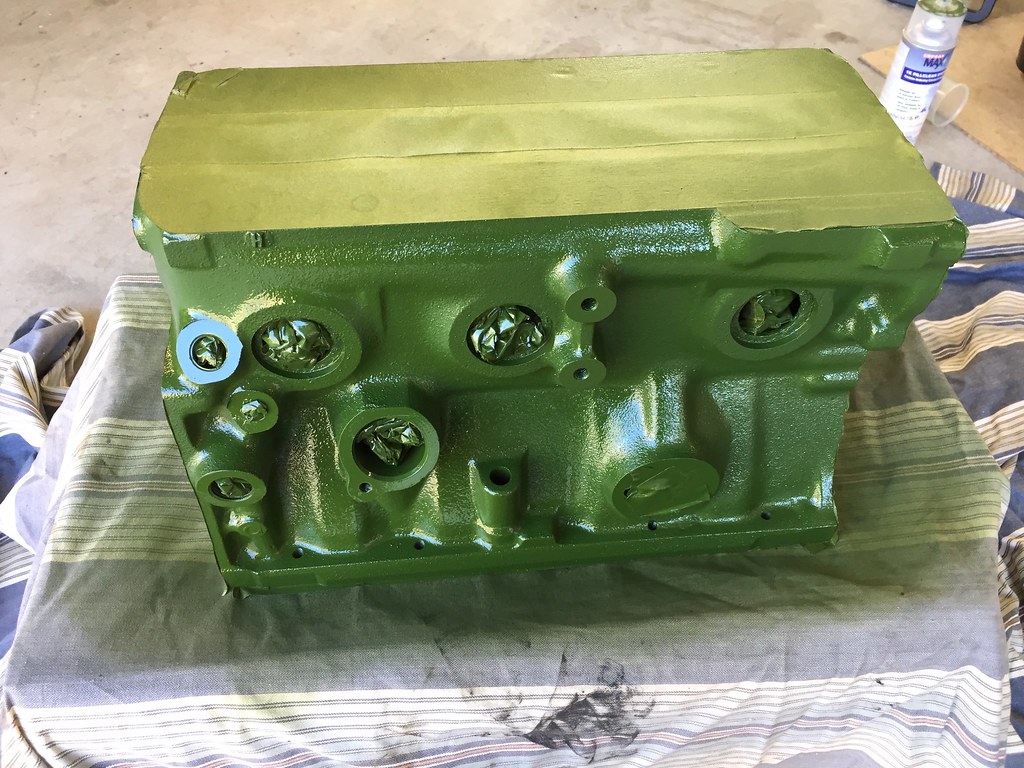
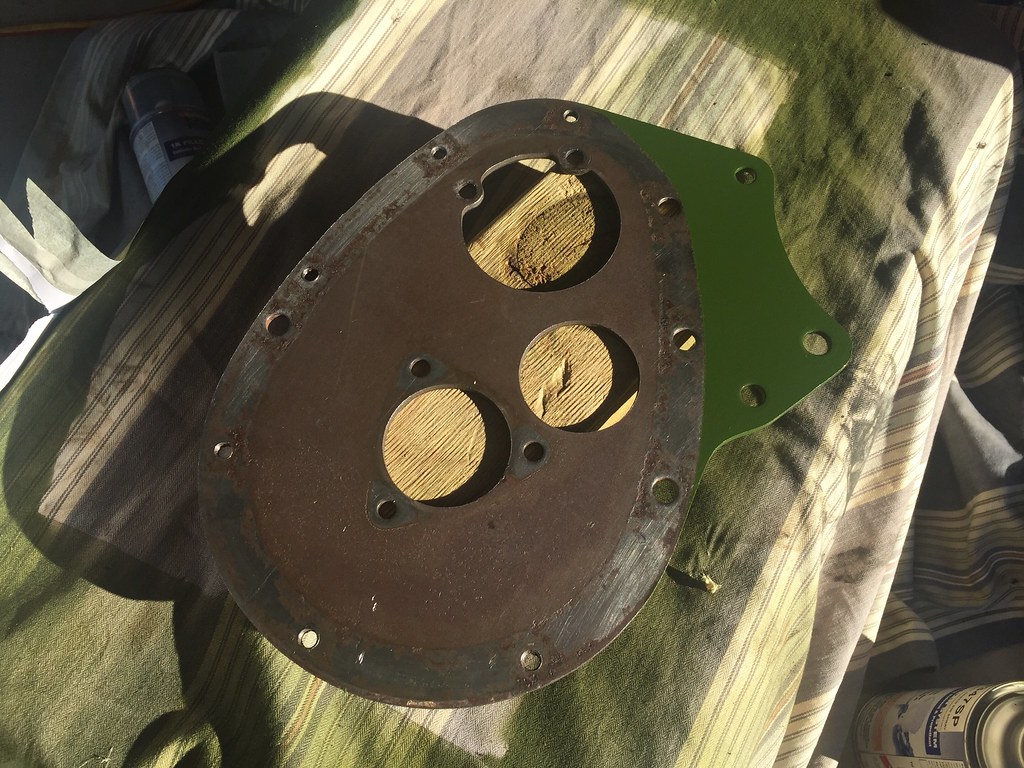
I did a quick mock up for couple of inspiration photos, hopefully it'll be together again soon, but I'm really happy with the look  :D  I'm yet to decide on the colour for the additional parts (timing cover, tappet covers, oil filter assembly etc) - but they will either be green/black/silver 

48028551983_f02dc2496e_b.jpg


48028620262_aff84152d1_b.jpg


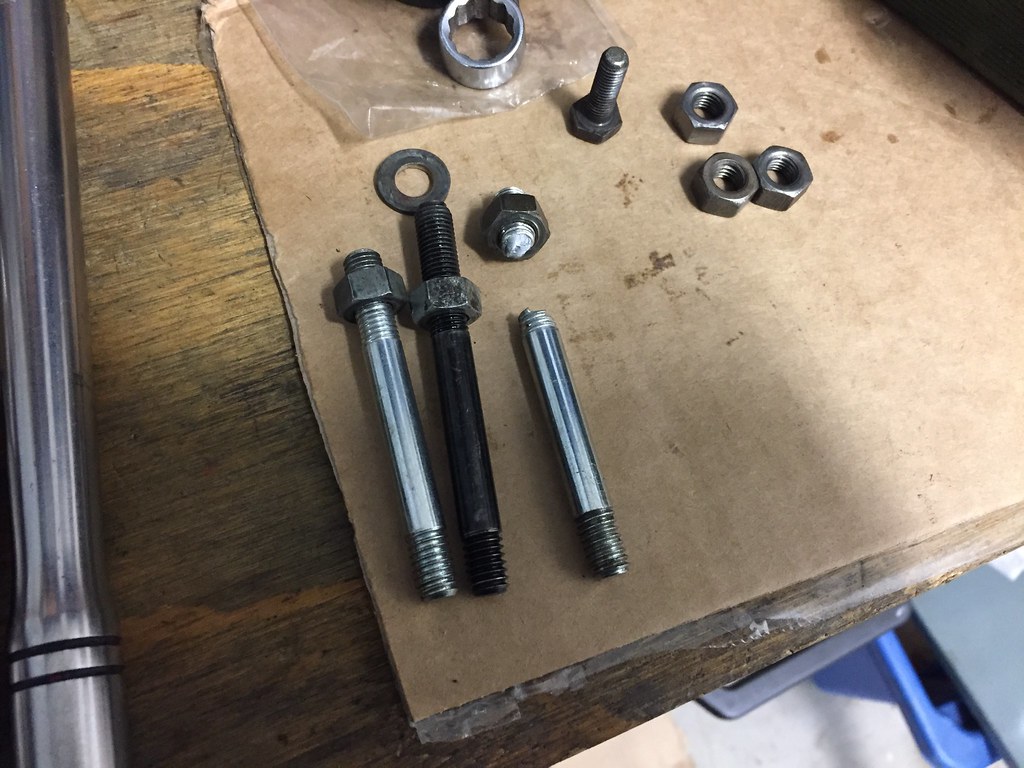
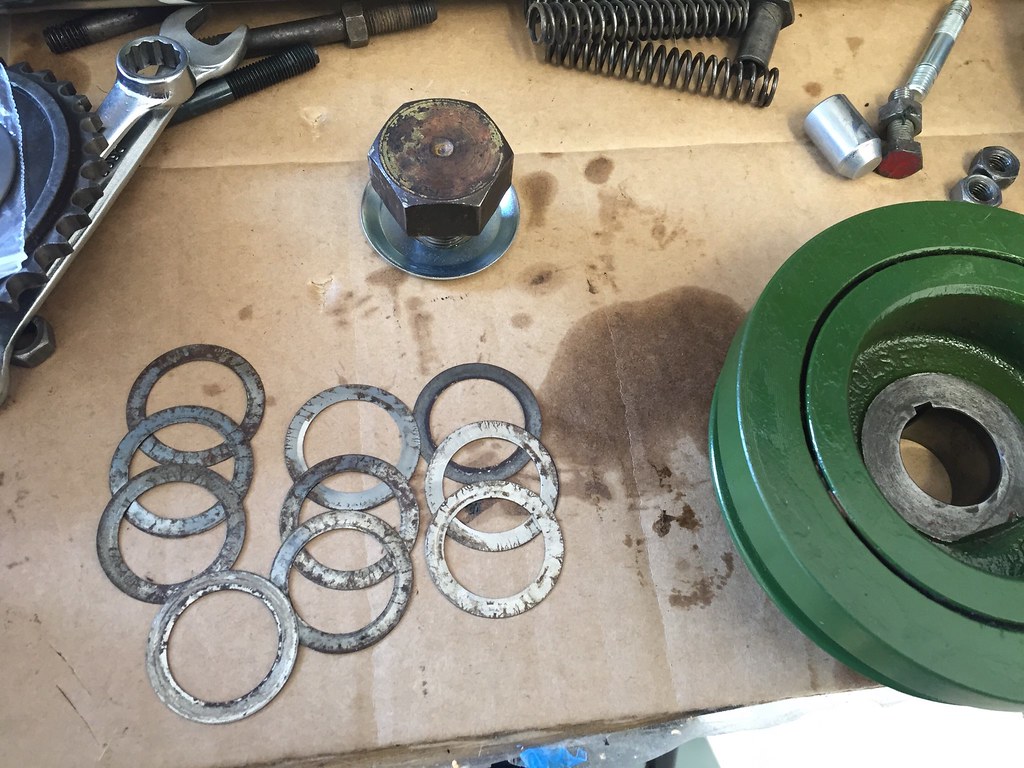
I installed the crank and checked the end float. I bought original size thrust washers a few years ago and they turned out to be too loose. I got some +003 oversize thrust washers and now the end float is in spec. This block came back from the engine shop with no additional external parts fitted and it had been a couple of years since I stripped them so I wasn't quite sure which parts went where. Luckily I had a spare 998 block set aside so I was able to get an oil pressure relief assembly, oil feed banjo bolt, distributor drive and housing and a whole selection of nuts and bolts. 

48028552878_8fa7f8edb3_b.jpg


So next:

Replace the cam bearings (all the engine bearings that were initially available were cheap King bearings and now I've got ACL bearings to replace them all)

Install cam + oil pump

Install timing gears + modify to suit duplex chain

Build one good rocker assembly from the two I have + find a set of pushrods

Install welch plugs


Edited by timmy850, 09 June 2019 - 09:25 AM.


#544 timmy850

timmy850

    Up Into Fourth

  • TMF+ Member
  • PipPipPipPipPipPipPipPipPip
  • 2,997 posts
  • Location: NSW, Australia
  • Local Club: MITG

Posted 12 June 2019 - 07:52 AM

I had a hand on Monday (public holiday over here) to change the cam bearings. The ones already in the block were OK, but I wanted to change them all to new ACL bearings for peace of mind as they are very cheap in the grand scheme of things. When they were done I gave the block another good clean out to make sure there was no debris anywhere


I put the crank in and put the pistons into the block. The piston to deck clearance is spot on, which is good. I had the pulley on the end of the crank here to make it easier to turn over

48036033242_82261ac1cd_b.jpg


Next up:

Install cam

Clean and paint front timing plate + tappet covers 


I am still deciding what to do with the tappet covers. I have 2 flat covers with no breather, which will suit the ultimate engine steady on the LHS of the engine bay. The extra top engine steady will probably be a good idea with the magic wand gearbox. If I find a tappet cover with a breather it won't fit with the extra engine steady, but I will have breathing ports on the clutch housing and rocker cover.. 


#545 Vinay-RS

Vinay-RS

    Put's foolish ideas in peoples heads

  • Members
  • PipPipPipPipPipPipPipPipPip
  • 2,093 posts
  • Location: Cape Town

Posted 12 June 2019 - 08:29 AM

Would the extra engine steady make a major difference to the feel of the car when driving? Isn't it better to have the extra breathers to extra all the oil fumes from the engine?  


#546 timmy850

timmy850

    Up Into Fourth

  • TMF+ Member
  • PipPipPipPipPipPipPipPipPip
  • 2,997 posts
  • Location: NSW, Australia
  • Local Club: MITG

Posted 12 June 2019 - 11:28 AM

Would the extra engine steady make a major difference to the feel of the car when driving? Isn't it better to have the extra breathers to extra all the oil fumes from the engine?

I’m still not sure.. The factory engines normally had 2 breathers, mine had tappet + rocker cover, later engines here had rocker + clutch housing. It’s something I can always change in the future if I have an issue I guess

I think the top engine steady will make a significant difference, especially seeing as the magic wand gearbox doesn’t provide any support like a remote shift does. Open to suggestions though!

#547 Vinay-RS

Vinay-RS

    Put's foolish ideas in peoples heads

  • Members
  • PipPipPipPipPipPipPipPipPip
  • 2,093 posts
  • Location: Cape Town

Posted 12 June 2019 - 12:50 PM


Would the extra engine steady make a major difference to the feel of the car when driving? Isn't it better to have the extra breathers to extra all the oil fumes from the engine?

I’m still not sure.. The factory engines normally had 2 breathers, mine had tappet + rocker cover, later engines here had rocker + clutch housing. It’s something I can always change in the future if I have an issue I guess

I think the top engine steady will make a significant difference, especially seeing as the magic wand gearbox doesn’t provide any support like a remote shift does. Open to suggestions though!


What about fitting the lower two steadies? Would you need to modify something to use those? They're a bit more subtle and later Minis came with them as standard I think. 


#548 timmy850

timmy850

    Up Into Fourth

  • TMF+ Member
  • PipPipPipPipPipPipPipPipPip
  • 2,997 posts
  • Location: NSW, Australia
  • Local Club: MITG

Posted 14 June 2019 - 04:40 AM


Would the extra engine steady make a major difference to the feel of the car when driving? Isn't it better to have the extra breathers to extra all the oil fumes from the engine?

I’m still not sure.. The factory engines normally had 2 breathers, mine had tappet + rocker cover, later engines here had rocker + clutch housing. It’s something I can always change in the future if I have an issue I guess

I think the top engine steady will make a significant difference, especially seeing as the magic wand gearbox doesn’t provide any support like a remote shift does. Open to suggestions though!
What about fitting the lower two steadies? Would you need to modify something to use those? They're a bit more subtle and later Minis came with them as standard I think.

I have got the two lower ones in the stash ready to be fitted :D I’m just debating to go overkill on the engine steadies or the breathers.

I got some lovely new ARP rod bolts today. Some things are worth spending money on, and rod bolts are one of them. A dead rod bolt will make a huge amount of expensive damage!

48065146762_a7abd60653_b.jpg


Edited by timmy850, 15 June 2019 - 10:02 AM.


#549 timmy850

timmy850

    Up Into Fourth

  • TMF+ Member
  • PipPipPipPipPipPipPipPipPip
  • 2,997 posts
  • Location: NSW, Australia
  • Local Club: MITG

Posted 18 June 2019 - 12:11 AM

I've test fit the cam and new duplex timing gears and they all fit great. I'll need to paint the timing end plate before I can put the timing gears in for good. The oil pump needs to be bolted up, but has been test fitted and all OK.

One of the next jobs to finish was the rocker assembly as it's needed to torque the head down. I pulled apart two assemblies and one set had much better condition rocker arms.
48082390266_dcb94f59f1_b.jpg

The old rocker shafts were pretty worn on both sets so I ordered in a new "heavy duty" shaft
48082493752_6837c356d3_b.jpg

Putting them back together is very easy especially if you take photos, I'll need to get some better split pins for the end as I only had some thin ones in the garage.
48082391066_6924f95c5b_b.jpg

All looks good on the head. I think the next major item is put the head on and check the cam timing. I think the engine has well and truly passed the "lift it off the engine stand by yourself" stage of the build, so I'll need to dig out the engine crane soon too
48082494507_51a8eef0a2_b.jpg

#550 Jared Mk3

Jared Mk3

    Has a small thing but it does make a difference

  • Members
  • PipPipPipPipPipPipPipPip
  • 1,974 posts
  • Location: Kokstad, South Africa
  • Local Club: MOCKZN

Posted 18 June 2019 - 04:00 PM

Making some good progress  =]


#551 timmy850

timmy850

    Up Into Fourth

  • TMF+ Member
  • PipPipPipPipPipPipPipPipPip
  • 2,997 posts
  • Location: NSW, Australia
  • Local Club: MITG

Posted 23 June 2019 - 08:40 AM

I've been busy in the garage during the last week. The new ARP rod bolts are torqued up and so are the main bearing caps. 

48090288551_6a9ea29e64_b.jpg


I cleaned up the deck of the block and the bottom of the head, installed the new head studs and started torquing everything down. Some of the brand new rocker studs were very low quality - 1 snapped and the other 2 were feeling similar and I decided to remove them before snapping. I had a collection of used ones leftover from stripping these engines and the old stock ones torqued up perfectly. 

48112439418_a51155da35_b.jpg


After getting the head on I set all the valve clearances and spun the engine over to check everything was spinning without any tight spots or issues. The timing end plate was bolted on and then I started to check the cam timing. This took a bit of time to measure properly, and I am currently out by about 5.5 degrees. A new offset cam woodruff key will sort this out, then I can finish off the timing side of the engine.

48112399361_906d68f455_b.jpg


Most of the assembly is pretty straightforward, but cleaning/checking/measuring everything takes a lot of time to get right  :D


#552 timmy850

timmy850

    Up Into Fourth

  • TMF+ Member
  • PipPipPipPipPipPipPipPipPip
  • 2,997 posts
  • Location: NSW, Australia
  • Local Club: MITG

Posted 26 June 2019 - 11:30 AM

Today I needed to find some crank shims to get the spacing correct on the timing gears. It took me a while to find the stash, and I had 9 thin ones and 1 thick one. I needed 1 thick and 1 thin to get the spacing right
48129944083_603396ab1f_b.jpg

A lot of time is spent cleaning and painting...
48090320793_50bdee5fdf_b.jpg

48123776831_a1ddbc5933_b.jpg

The flywheel housing took ages to clean, now I need to install the new idler and outrigger bearings. Then the idler gear is shimmed and it's about time I can add the engine onto the gearbox..
48130886723_5e79e1126f_b.jpg

New studs and bolts all around makes it nice to work on :D
48130886963_d6a1647b4d_b.jpg

#553 giannoutsos

giannoutsos

    Stage One Kit Fitted

  • Noobies
  • PipPipPip
  • 58 posts
  • Location: athens

Posted 26 June 2019 - 03:06 PM

Good progress mate, keep it up
John

#554 Jared Mk3

Jared Mk3

    Has a small thing but it does make a difference

  • Members
  • PipPipPipPipPipPipPipPip
  • 1,974 posts
  • Location: Kokstad, South Africa
  • Local Club: MOCKZN

Posted 26 June 2019 - 05:51 PM

What's the decision in terms of diff and driveshaft setup?


#555 timmy850

timmy850

    Up Into Fourth

  • TMF+ Member
  • PipPipPipPipPipPipPipPipPip
  • 2,997 posts
  • Location: NSW, Australia
  • Local Club: MITG

Posted 27 June 2019 - 06:01 AM

Good progress mate, keep it up
John

  
Thanks John!

What's the decision in terms of diff and driveshaft setup?

The diff has a competition spec single diff pin, A+ thrust washers and pot joints. I’ve got a nice pair of used pots so they are going to be rebuilt with new ball bearings and boots. The driveshafts are standard 70’s units as far as I’m aware. Some of my initial plans had to be scaled back a bit to suit my current budget and timeframe...


1 user(s) are reading this topic

0 members, 1 guests, 0 anonymous users