Time for a bit of an update, I decided to try plan C for bonnet clearance (or is it D? I've lost count), but before I come to that I did a bit of work to tidy up wiring loom routing around the front of the engine bay, just needed a couple of notches and it all runs nicely up inside the top of the front panel....

And I decided to try rubnuts (like rivnuts but rubber that are a flexible and temporary fit) for the wiper motor mounts, the square holes were in poor shape and needed correcting so drilling out holes and trying these out wasn't much or a risk, and it works well I think....

I see other people have modified the subframe to lower the engine to clear the bonnet so this is what I thought I'd try this time out, I found a subframe locally that is in good condition and cheap, it's also pre-SPI so the engine sits further back in the engine bay which I thought might help.
I made a jig so I could ensure new holes ended up I the right place, didn't take one before I cut but here it is after cutting.....

I cut out sections from around the mounting holes to drop it down and to work out by how much wider I thought I needed the subframe to be in order to drop the engine by about 15 - 20mm which is about where I'd worked out it would need to be to just clear the bonnet skin at the highest point, I used the old bonnet I tried modifying with the hump cut out to check this. It seemed to be about 3mm at each side so I decided to err on the side of caution and add in 5mm at each side which I could then fill in with some sheet steel of a thickness required to bring the engine up to it's maximum.
So I cut U shaped sections of 5mm steel to fit in the gaps I had cut, welded in place, then welded on a 2.5mm sheet on the outside which I could then drop the jig into and use it to drill new holes.

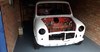
I installed the subframe and dropped the engine back in to see how it fit, actually I found the engine to now be much lower than I anticipated (clearly I didn't do a very good job of measuring how far I needed to go widening the subframe at the mounting points).
No real problem though I just tried a few shims to edge the engine upwards to work out what thickness of sheet steel I need to fill in each side to mount it as I wanted. Actually I could have probably dispensed with the U shape entirely and simply welded on a plate to the outside having cut the openings (more on this to follow). with 4mm plates on the inside this is where it ends up....

Then in with the new bonnet to see what I need to do with the ribbing so it doesn't foul the cam cover, it needs a bit at the front plus a notch on one side at the rear to cater for the oil filler cap, this is how it looks, bit it's not quite right, needs a small mod at one side of the front.

I've filled it out with 4mm sheet steel and drilled holes for the mounts and the engine drops in nicely, the bonnet closes with no fouling and there's a good clearance everywhere....


However, I've decided to go back to my SPI subframe and do the same modification but without the U shaped inserts, I think this will clear the bonnet and will cure the one problem I now have which is the exhaust headers are tricky to get in as the engine is that bit further back in the bay.
In the mean time I decided to work on a modification I've been thinking about to more securely fit my dash, it's designed to fit in a car that is fully built and has little fittings that turn to lock it in place up against the inside of the top and bottom dash rails. This is OK as it means it can be fitted without causing damage but they're prone to bending and I feel it pulls the dash too far back in the middle and at the bottom, it's kind of OK but means the clocks will be a bit obscured at the top. Example of the fixings as it came, there's two of the lugs on each of the 4 mounting points....

So I made up some small brackets with two bolts welded in to replace the four fixings on the rear of the dash, then 4 opposing mounts that to fit to the car onto which the dash will fit and can be bolted into place.


The new mounts for the car, these are the ones for the sides, central ones are similar but I made them up later and didn't take a photo before fitting.

I fitted the outer mounts to the car first, this was a bit fiddly and I had to re-do one of them as it wasn't quite right, but I'd only tack welded them in place anticipating it not going perfectly. The inners were much easier to do once I had the outers in place, partly because clamping them in place was possible unlike the outers. Here they are all tacked in place....

And the dash fitted and bolted in, I"m very pleased with this! they're all now securely welded in place and cleaned up.

The last thing I did just today was to try fitting my tweeters into the top of the dash, originally I thought this wouldn't be possible hence my earlier post about mounting to the door but I realised while I was doing the dash mounts that there was actually a lot of space between the padded rail and the top rail of the car, the padded rail is damaged anyway so thought I'd experiment, and it works, I'll just need to make up some kind of bracket ot bond to the underside to fix in place....