Jump to content


Photo
- - - - -

1275 Gt Lightweight Racer "the Gasket"

clubman

  • Please log in to reply
12 replies to this topic

#1 yannick de brabander

yannick de brabander

    Stage One Kit Fitted

  • Noobies
  • PipPipPip
  • 55 posts
  • Location: Herentals

Posted 09 November 2016 - 07:31 PM

Hi,


Im Yannick from Belgium,

im 25 and I want to share the restauration of my 1275 gt wich I bought couple years ago.

I was always looking to other people on this forum, and since you inspired me with many sweet ideas, I desided to try and do the same for and with you!

I started already some weeks ago, but I hesitated to make a post, but I guess, it's never to late!

Here yet couple of pics from how I bought him till the state its currently in:


Attached File  IMG_2623.JPG   59.6K   26 downloads

Attached File  IMG_2630.JPG   59.4K   19 downloads

Here the car was still running completelly perfect


Attached File  IMG_2766.JPG   42.72K   22 downloads

My little workshop (under construction)


Attached File  IMG_2983.JPG   53.94K   23 downloads

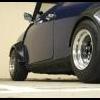
Current state, only subframes need to be removed, and I can start working on that body :D


Attached File  IMG_2804.JPG   53.31K   30 downloads

Few of the bits ordered so far!


engine specifications:

specialist%20components%20sprint%20engin


specialist%20components%20sprint%20engin


I do hope with this post that I will find answers on some of my question during the build...

I am not a specialist in many ways of view, but with you people on my side and the fact im really motivated to get it as light and as perfect handling as possible,

I might succeed in my goals.


Thank you and see you soon, Yannick "The Gasket"


Edited by yannick de brabander, 26 February 2017 - 03:11 PM.


#2 giannoutsos

giannoutsos

    Stage One Kit Fitted

  • Noobies
  • PipPipPip
  • 58 posts
  • Location: athens

Posted 09 November 2016 - 08:45 PM

Hi Yannich,
This looks like a good base to start your restoration, I do like your garage, think you got enough space?
I also like your taste in parts.
Good luck with the resto.
John

#3 yannick de brabander

yannick de brabander

    Stage One Kit Fitted

  • Noobies
  • PipPipPip
  • 55 posts
  • Location: Herentals

Posted 10 November 2016 - 05:32 PM

Hi Yannich,
This looks like a good base to start your restoration, I do like your garage, think you got enough space?
I also like your taste in parts.
Good luck with the resto.
John

Hi John,


Thank you for ur support!

About the space i was hesitating aswell in the beginning, but i got like 100m² upstairs of that to store all old parts,

So i don't worry about it no more :D

I will make picture of the rest of the space wich i got as fast I am goiing back there, but sadly enough monday i was getting some huge pain in my spine,

So I desided to take off this week, and try to recover from that :D

Atleast now I got time to order few extra bits....


Regards Gasket


#4 yannick de brabander

yannick de brabander

    Stage One Kit Fitted

  • Noobies
  • PipPipPip
  • 55 posts
  • Location: Herentals

Posted 10 November 2016 - 05:37 PM

Maybe someone got an idea where to get such seats? or is it custom 1 time job?

I heard was JEF fabrications or someting like that, but don't know if there is anyone closer willing to fabricate 1 or 2 seats like that :D


Attached File  IMG_2966.JPG   64.38K   23 downloads


Regards Gasket


#5 yannick de brabander

yannick de brabander

    Stage One Kit Fitted

  • Noobies
  • PipPipPip
  • 55 posts
  • Location: Herentals

Posted 10 December 2016 - 09:18 PM

Attached File  IMG_3057.JPG   62.24K   8 downloads

Jig arrived,


Attached File  IMG_3062.JPG   56.57K   15 downloads

Attached File  IMG_3064.JPG   43.06K   7 downloads

Attached File  IMG_3040.JPG   69.47K   13 downloads

now loads of silicone to remove


Attached File  IMG_2991.JPG   63.49K   18 downloads

Attached File  IMG_2992.JPG   46.39K   11 downloads

and when I am getting tired of that for a moment I can still premount my suspension parts :D


Attached File  IMG_2773.JPG   72.35K   14 downloads

Attached File  IMG_2801.JPG   33.3K   13 downloads

meanwhile tires and rims are also already


Edited by yannick de brabander, 10 December 2016 - 09:24 PM.


#6 yannick de brabander

yannick de brabander

    Stage One Kit Fitted

  • Noobies
  • PipPipPip
  • 55 posts
  • Location: Herentals

Posted 11 December 2016 - 09:39 PM

Was a good and boring day :D (like most when taking out sealant and sealant, and more sealant...)

So i decided to start cutting some parts out

All wich is not needed will eventually go out anyway ^^

Attached File  IMG_3073.JPG   42.24K   7 downloads

Attached File  IMG_3074-min.JPG   34.45K   15 downloads


I think when working on that body, I should just take my time, and perhaps, do piece by piece, step by step.

Anyone got a tip about how to best remove the sealant?

I now use a sharp knife to cut it away...


Thanks in advance :D

regards Gasket


#7 yannick de brabander

yannick de brabander

    Stage One Kit Fitted

  • Noobies
  • PipPipPip
  • 55 posts
  • Location: Herentals

Posted 23 December 2016 - 08:48 AM

Did some more work on the floor latelly,

Attached File  1482482210_tmp_IMG_3152.jpg   61.89K   12 downloads


also i added a heater, to make it a bit more comfortable :D

Attached File  IMG_3153.JPG   68.68K   2 downloads


when I was to frozen to use my grinder the other day,

decided to work on my suspension components for a moment

Attached File  IMG_3103.JPG   31.73K   13 downloads

im not sure if there shouldnt be any spacer between the bearing from the front upraight and the aluminum of the hub wich is fitted on the braking disc :/ .

I really got my doubts on that, since clearance right now is so minimal...

When im back from xmas holiday in couple of days, ill take a closer look at it again, perhaps with some better pictures...

Attached File  IMG_3104.JPG   38.43K   19 downloadsAttached File  IMG_3132.JPG   56.67K   7 downloads

Attached File  IMG_3114.JPG   54K   13 downloads

think next thing ill do when im back its finishing the complete floor, and starting then to make my front subframe lighter

got the drills ready anyway :D

+ needs also some welding on the front anti rollbar etc.


If I don't hear u before xmas anymore, Merry Xmas to all theminiforum members, and talk to you soon :)


regards The Gasket


Attached Files


#8 yannick de brabander

yannick de brabander

    Stage One Kit Fitted

  • Noobies
  • PipPipPip
  • 55 posts
  • Location: Herentals

Posted 23 December 2016 - 06:48 PM

Attached File  IMG_3150.JPG   49.3K   5 downloads

Loaded the engine aswell, will drop him off at specialist components for the bmw conversion :D

really looking forward to meet them and discust final specifications in the beginning of january :D


#9 yannick de brabander

yannick de brabander

    Stage One Kit Fitted

  • Noobies
  • PipPipPip
  • 55 posts
  • Location: Herentals

Posted 12 February 2017 - 07:58 PM

Ok, some time has past by,

I didn't take the time to post on a high level rate, since I was spending much time to get as much paint of as possible,

each night like 1 or 2 houres after staying outside whole day for work ^^

Like many of you will probably understand that.


current state:

Attached File  IMG_3360.JPG   58.99K   8 downloads

Attached File  IMG_3357.JPG   53.3K   9 downloads

Attached File  IMG_3355.JPG   59.58K   5 downloads

Attached File  IMG_3309.JPG   56.03K   5 downloads


I also recieved parts of my aluminum rollcage:

Attached File  IMG_3380.JPG   52.16K   9 downloads


I also dropped of my engine at specialist components first week of january.

Seems like they know well what they are doiing, and I can't wait for them to send it back in the specs I wanted to :D


Next job on the list before I gonna work more on the body, I need to build some kind of dust-stopper-wall around the car, since my dad, getting mad of it.

Someting I completelly understand ^^


Regards,


The Gasket


#10 yannick de brabander

yannick de brabander

    Stage One Kit Fitted

  • Noobies
  • PipPipPip
  • 55 posts
  • Location: Herentals

Posted 26 February 2017 - 02:45 PM

Hi all,


Have been working on the body just a little last 2 weeks..

Was bad weather in belgium,

And my dad's choice was to keep working in that ... so I was to exhausted to work late nights on the mini.


Here some of the pics while dimple dying the rear seat


Attached File  IMG_3456.JPG   43.63K   3 downloads

Attached File  IMG_3457.JPG   51.67K   0 downloads

Attached File  IMG_3459.JPG   57.32K   0 downloads

Attached File  IMG_3461.JPG   55.17K   0 downloads

Attached File  IMG_3540.JPG   52.01K   1 downloads

Attached File  IMG_3538.JPG   59.35K   3 downloads


next job on the list is remove more unnecessary metals, to get things more light :D

anyone perhaps got an idea how far I can cut away the rear shelf and still keep it solid enough?


Regards,

Gasket

Attached Files


Edited by yannick de brabander, 27 February 2017 - 08:13 PM.


#11 slyrmini

slyrmini

    Mini Mad

  • Members
  • PipPipPipPip
  • 278 posts
  • Location: RCT

Posted 05 November 2018 - 10:18 AM

Awesome!


#12 johnR

johnR

    Up Into Fourth

  • Members
  • PipPipPipPipPipPipPipPipPip
  • 2,242 posts
  • Location: Dorset

Posted 05 November 2018 - 09:34 PM

What fuel tank will you use? Normally the rear seat back is protection from possible fuel spillage?
The body looks to be in great condition.

#13 Jase

Jase

    One Carb Or Two?

  • Traders
  • PipPipPipPipPipPipPip
  • 1,160 posts
  • Location: Wales

Posted 16 November 2018 - 09:07 PM

How did I miss this thread, looks amazing. How are you getting on with the project?


Also tagged with one or more of these keywords: clubman

0 user(s) are reading this topic

0 members, 0 guests, 0 anonymous users