Silver Mini - 998 To Mg Metro 1275cc
#1
Posted 19 April 2009 - 01:24 PM
My mini started life as a 1992 Mini City E ^^, which means it was a carb'd 998 (no CAT, just!) with a terrible final drive ratio . Ive owned this car since I was 14 (im now nearly 22! :S) It looked as you would expect when I first had it, standard and was just about saved from having the chrome crap from the shows thrown at it and being run into the ground. As I wasnt old enough to drive, me and my dad took the decision to sorn it and restore it, despite the fact it was MOT'able, had only done 32,000miles and a spare, usable car hanging around wouldnt have done the family any harm. The usual "door panels and forward" bodywork needed doing aswell as the rear subframe, I could only assume the car had seen a LOT of road salt and little to none waxoyl! However looking back and comparing to some restorations ive seen, the rust wasnt that bad but we restored just in time! To cut a long story short (and stay on topic!) the resoration was completed 3 months after i passed my test when I was 17.
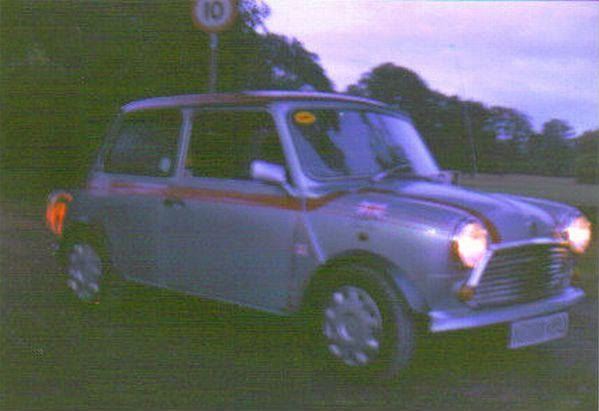
The car now looked like this, the day it passed its MOT :
Being seventeen and after a lot of money and hard work I was more than satisfied with the car I had. Everything I pictured in my head at the start of the resto was there and I LOVED driving it 
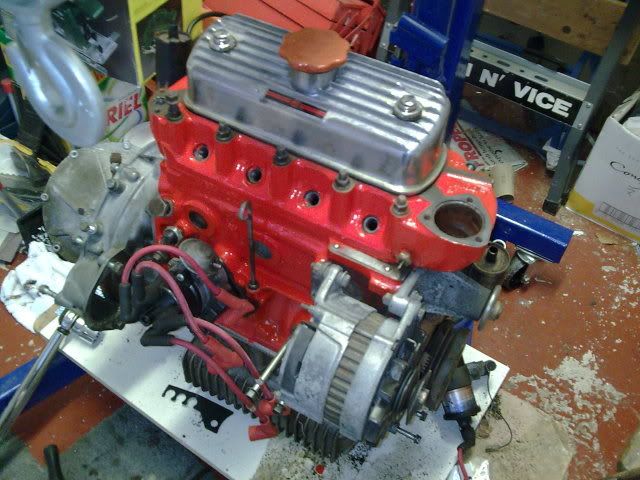
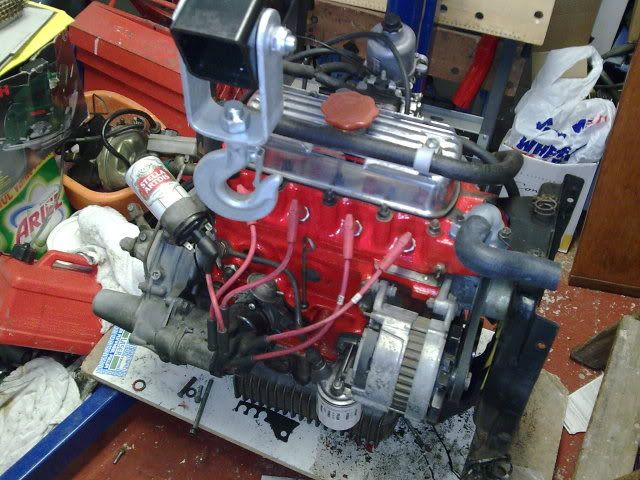
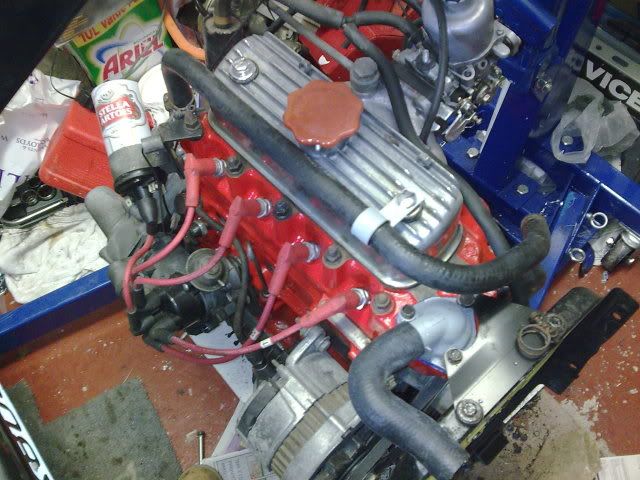
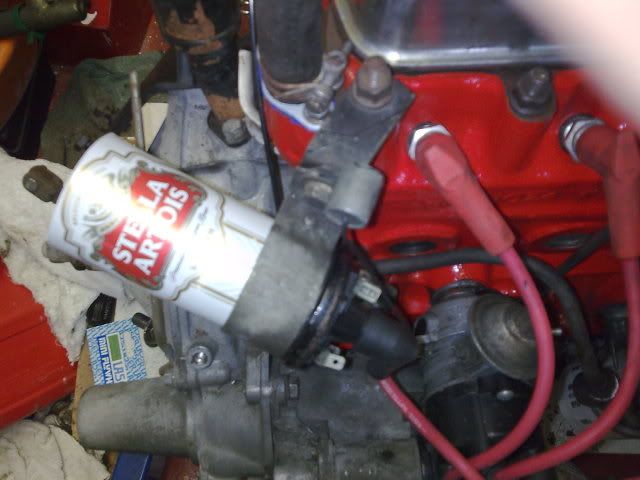
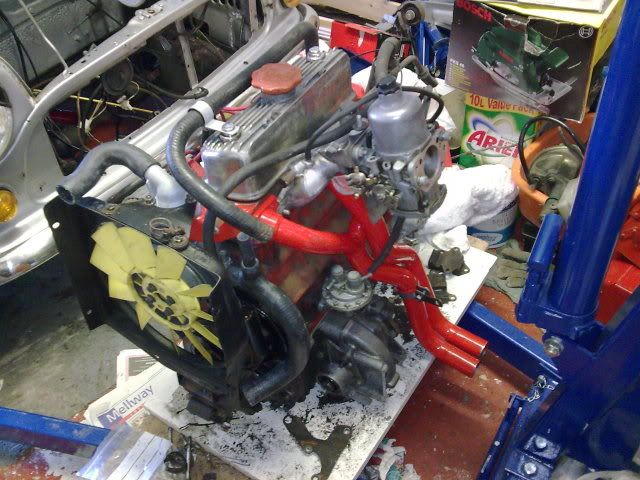
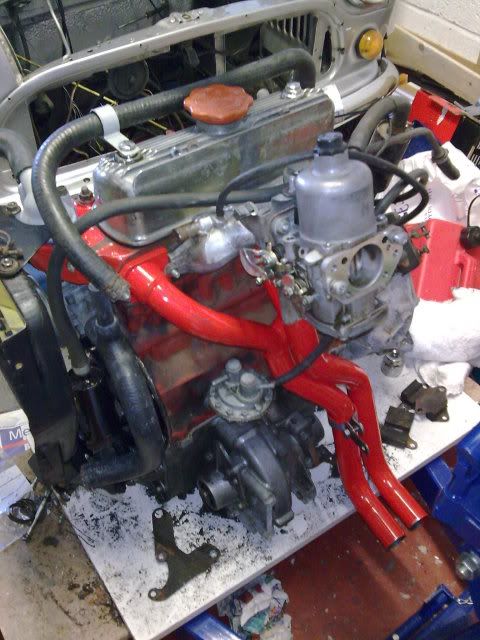
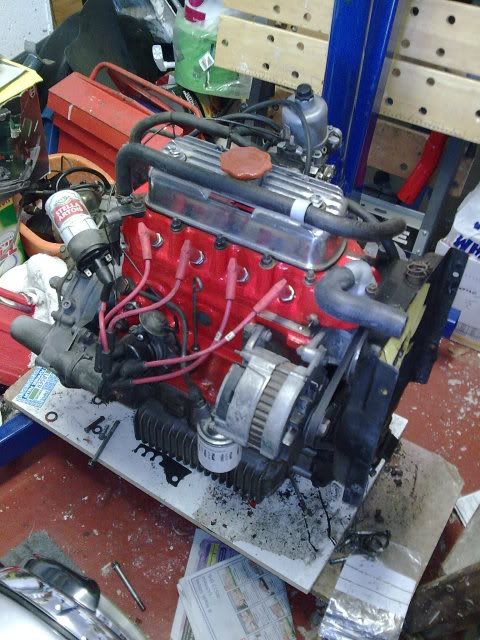
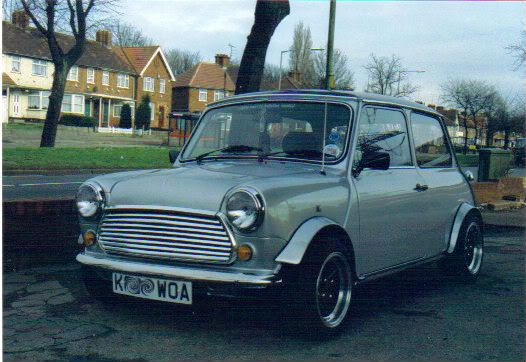
As most young mini owners can appreciate, thinking 1275 and up when your seventeen isnt a realistic option, around this time literally NO 998's were getting featured in the mags, unless it was a non modified 60's era mini. I've always wanted a feature and naturally a bit more power, especially as the years have passed. At the time however, as you do, I fitted a stage one kit and due to the low mileage of the engine at the time (32,000m) this made it quite nippy and kept me and my insurance premium satisfied for a while
2 years later and more visual mods here and there, this was a more accurate representation of the mini:
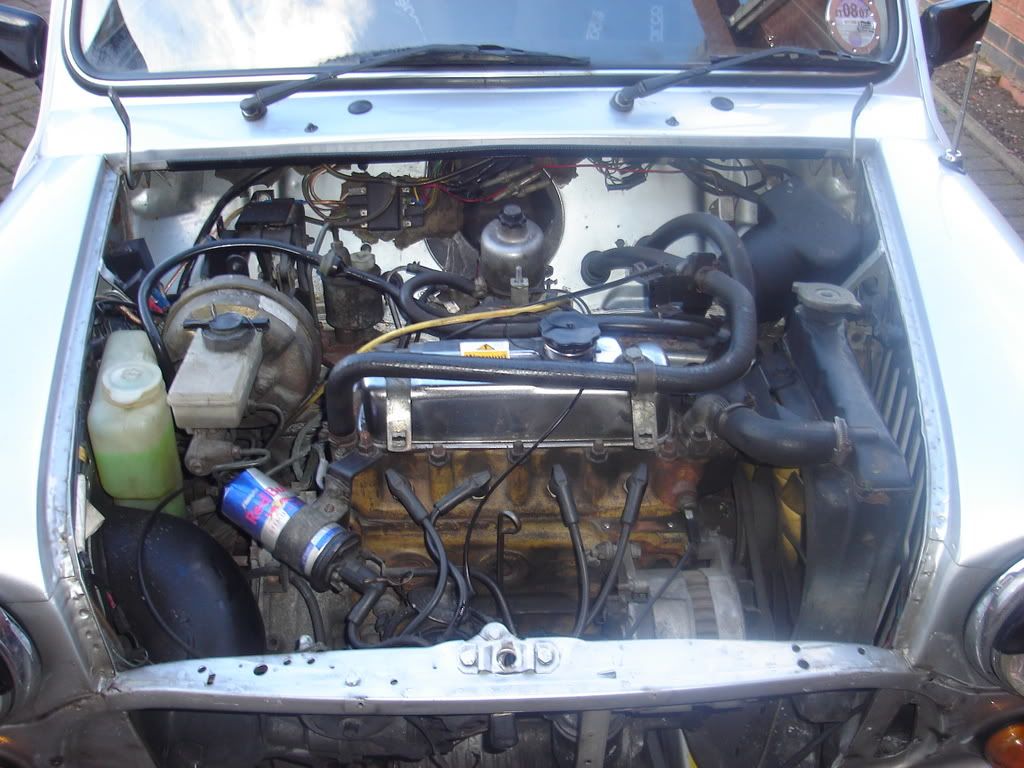
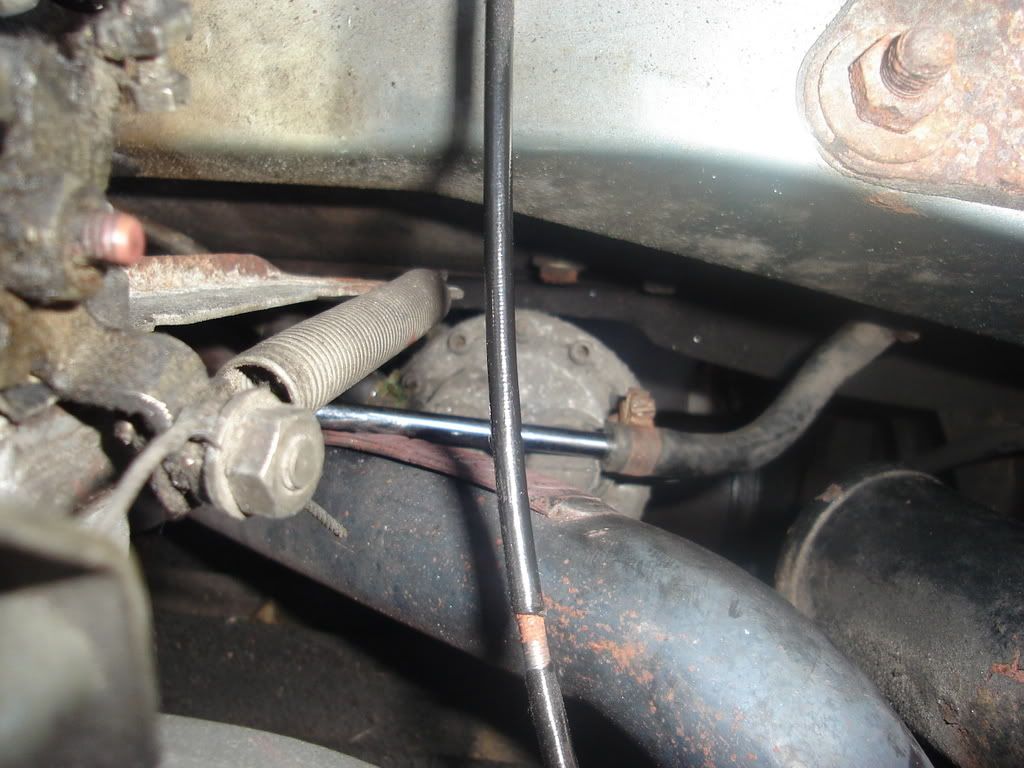
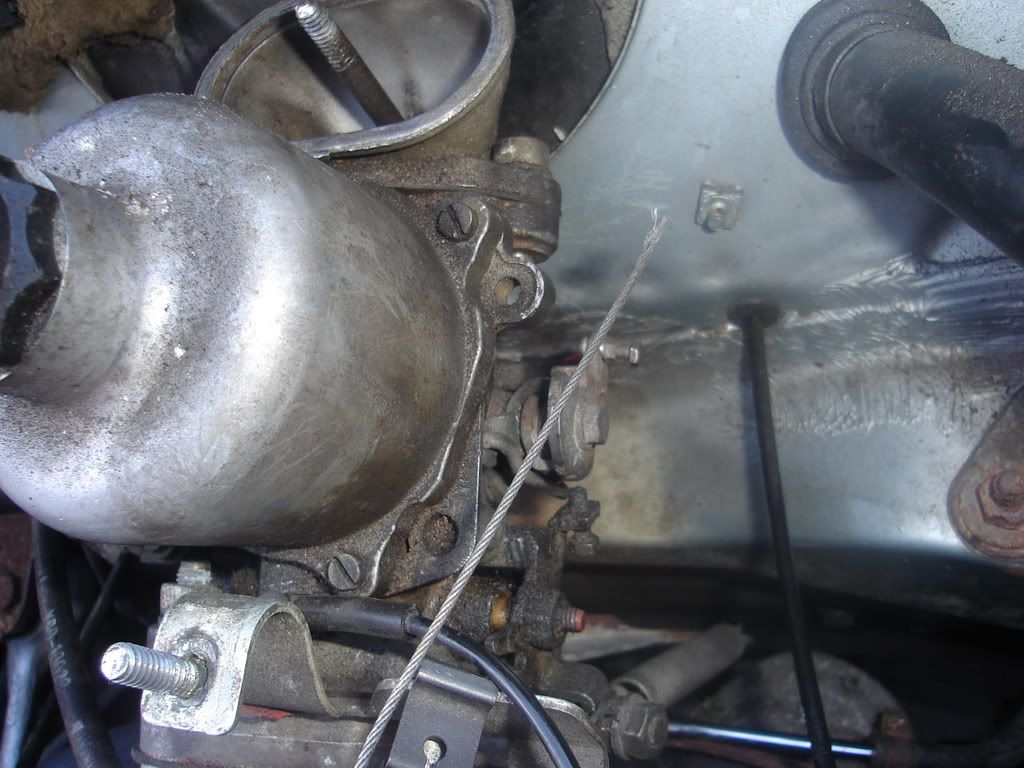
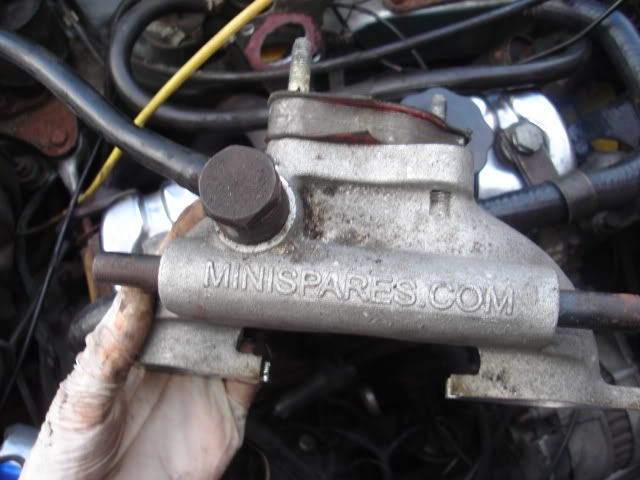
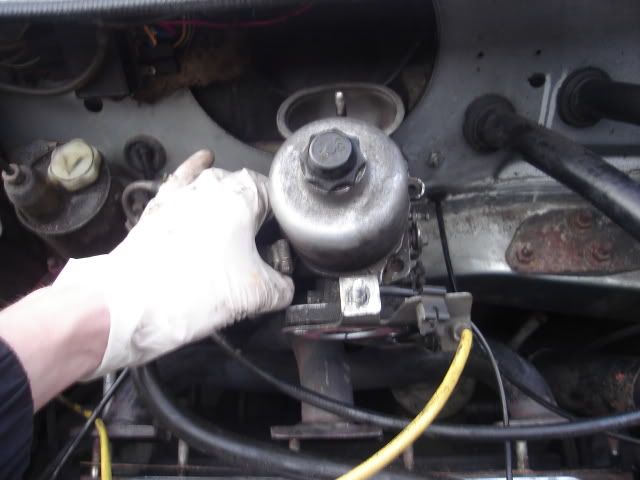
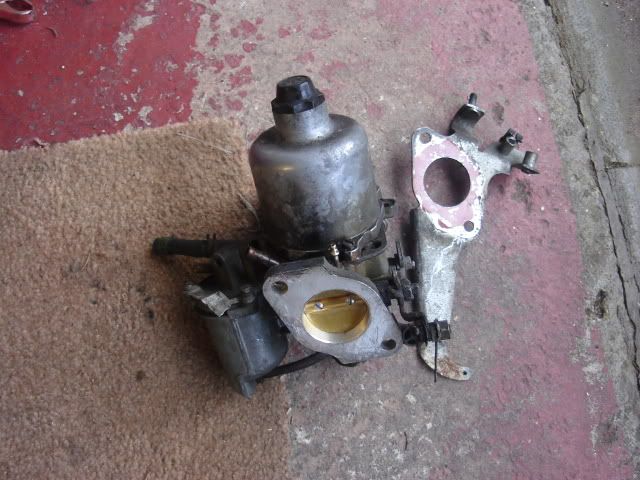
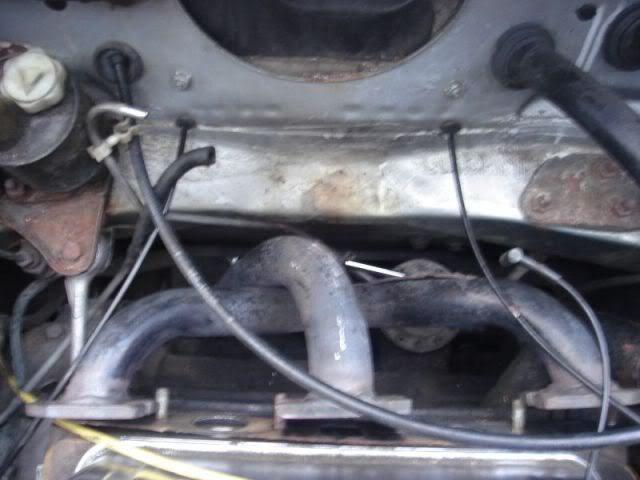
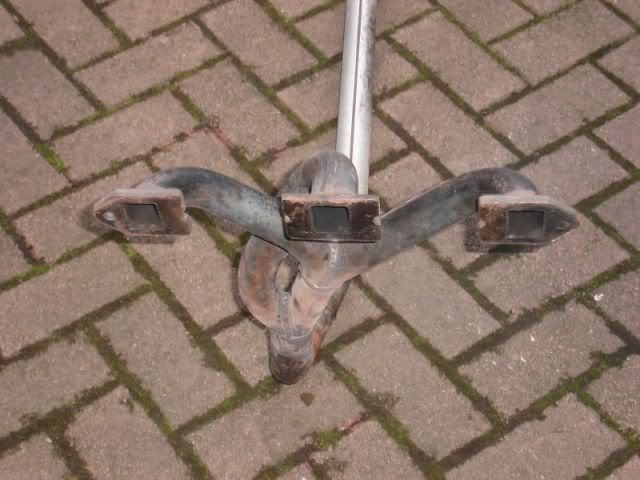
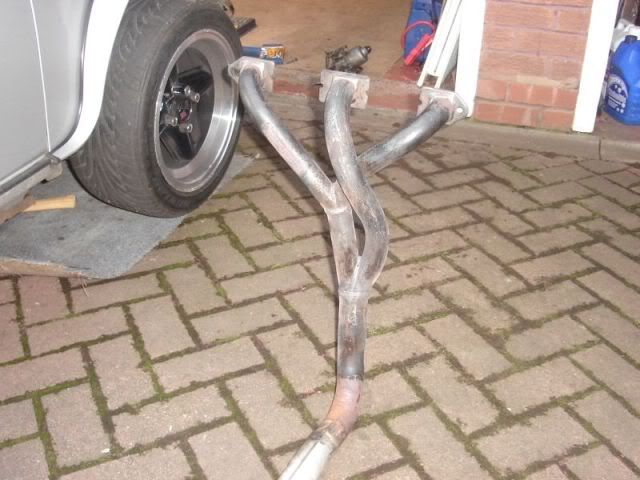
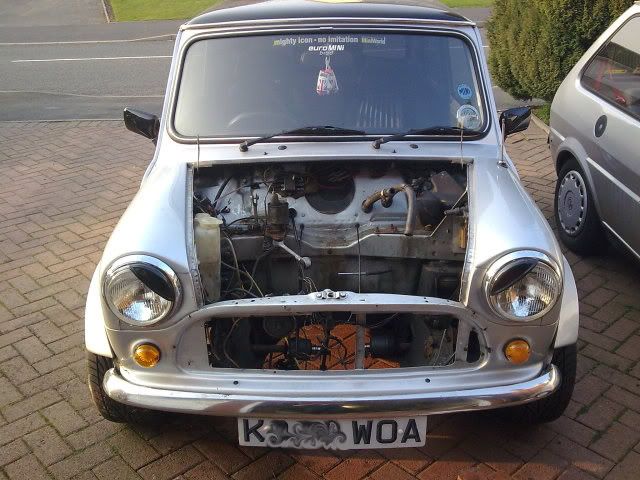
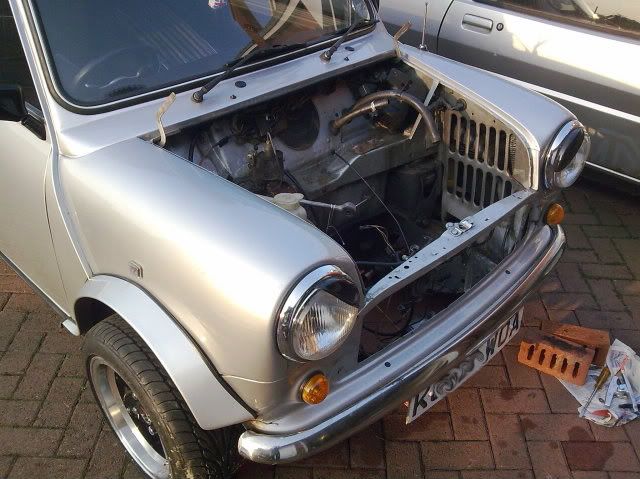
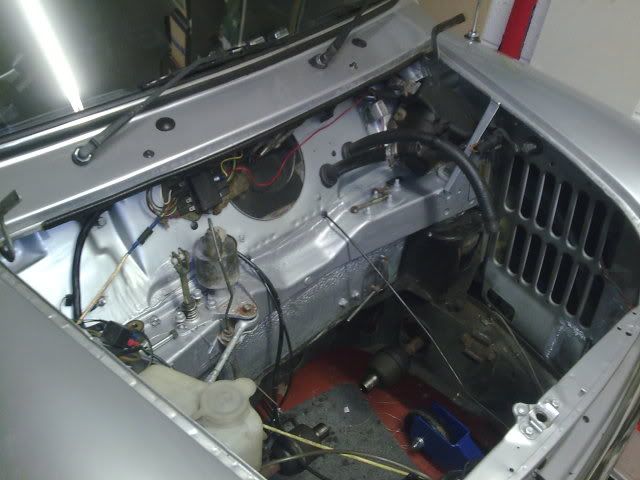
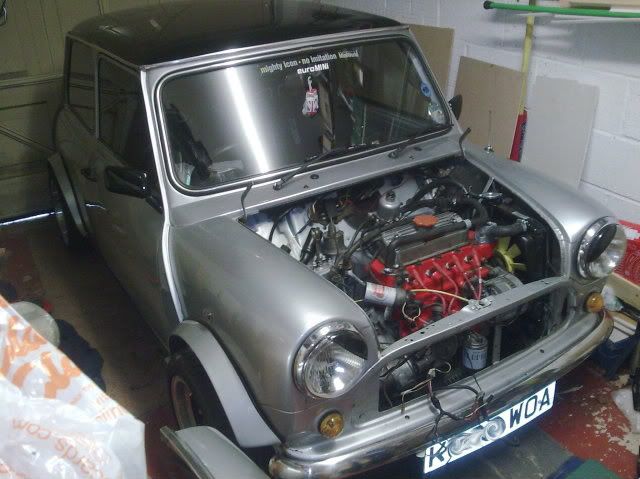
During this time I was going to numerous shows and enjoying driving the car whilst keeping up the necessary maintenance. However, the final drive ratio I mentioned earlier was becoming more and more frustrating. The engine was excellent and I never had any problems with it, but after lots of aggressive gear changing, either the selector rods or the clutch (we never actually found out) gave up, the mini was now off the road again.
Roughly 3-4 months before all this happened however (were now in 2006!) I regularly attended my local mini show, which was Aston Hall. I've put the mini in the concours a few times, not with any intention of winning anything, as its a daily driver, but more for a better parking space and getting to hear what people think about it, makes all the hard work worthwhile The one year, I stayed with my car nearly the whole day whilst waiting for the judges to come round, so hadnt seen any of the show. Later, my Dad and Grandad turned up to have a look at the show and come see me. After a while they went off while I stayed with the car. Ten minutes later, they both came back and my Dad said to me "you need to come and look at this!"
Walking over to the Cars For Sale area my Dad showed me this:
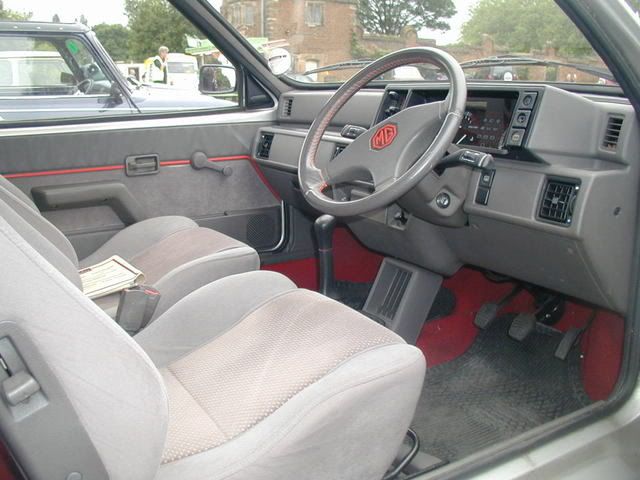
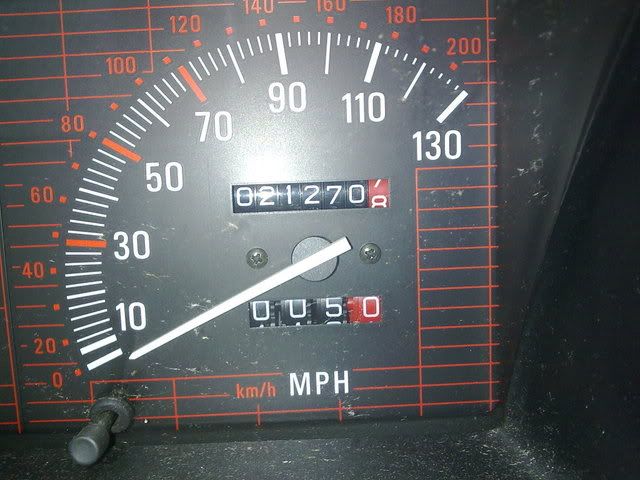
I couldnt quite believe what he was telling me (and what I was seeing), as sat in front of me was a G reg (unleaded) Mg Metro with Full service history only 2 owners and it had only covered 21,200 miles, I was stunned. As you would I then asked how much. It was £350. After picking my jaw up off the floor, I instantly replied "its got to be clocked" my Dad smiled and said "go look at the interior!".
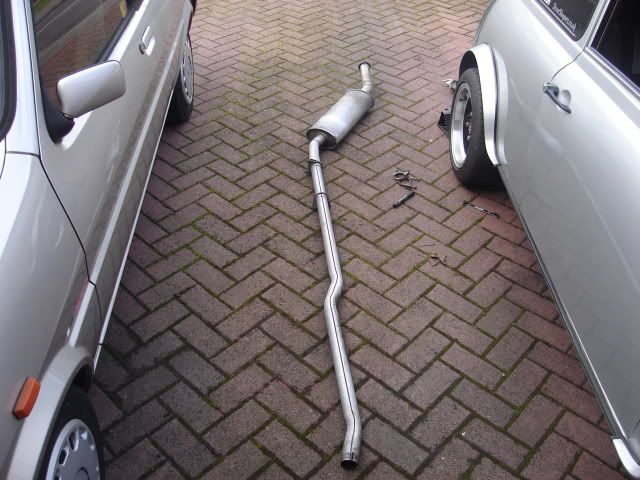
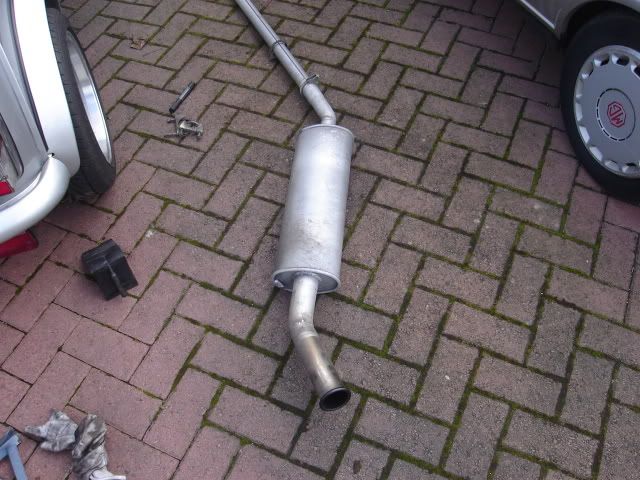
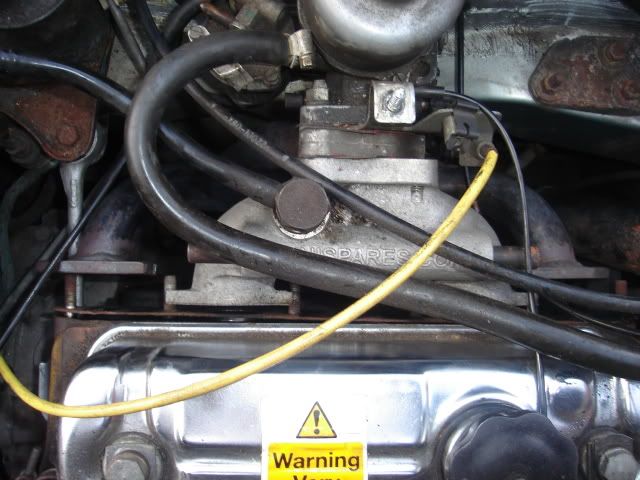
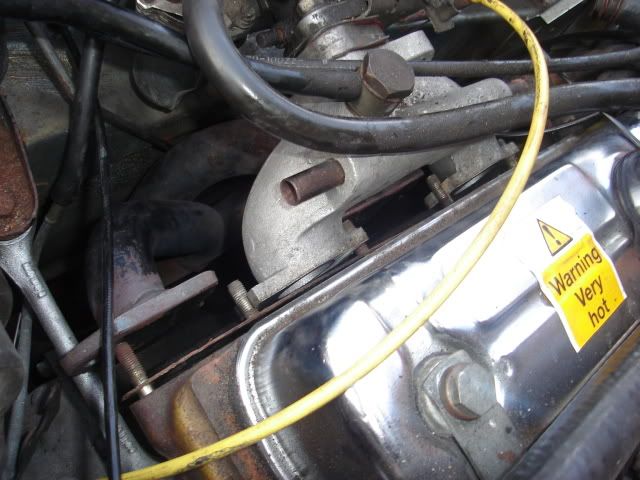
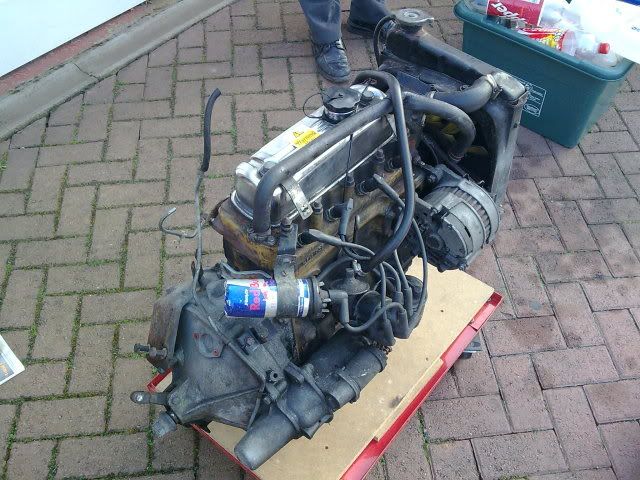
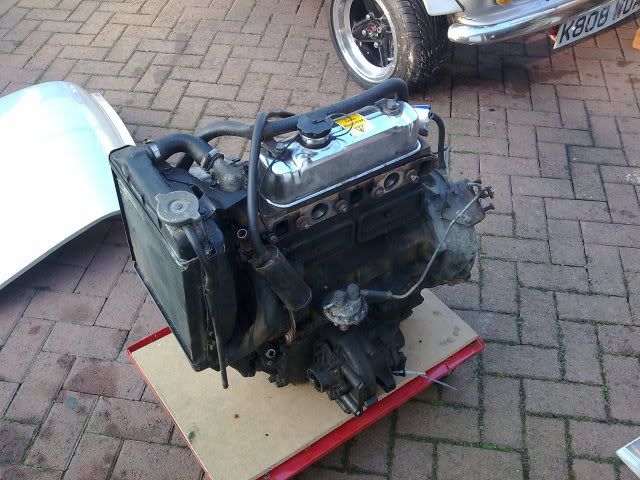
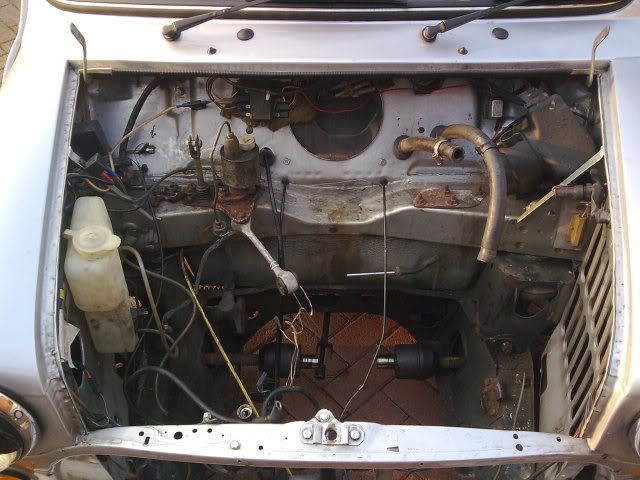
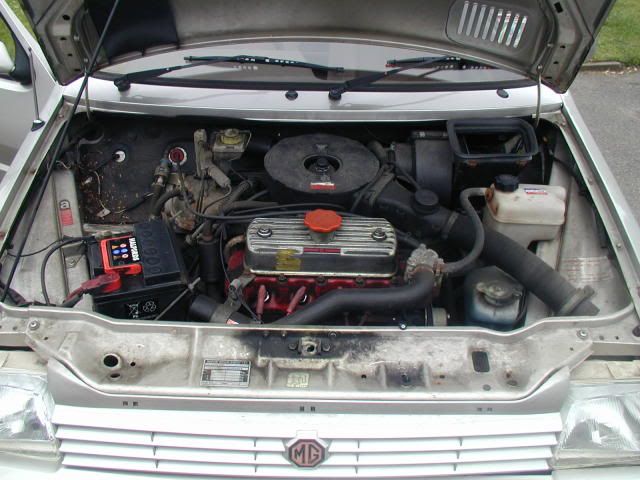
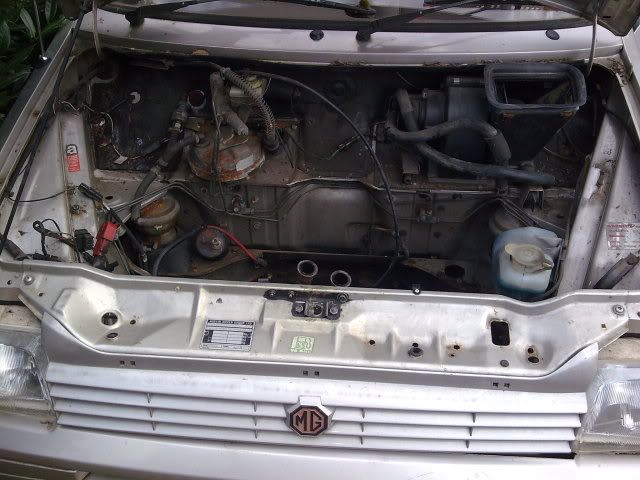
I had bid on an MG Metro 3-4 months previous, one with double the mileage and I just missed winning it. It went for double the price of this one! So keeping this in mind and after a test drive, LOTS of looking it over/chatting with the owner, my dad made me see sense, but funnily still had to force me to buy it! (I had the money, but was unemployed at the time, so was very apprehensive) I gambled and was now the owner of an excellent donor car
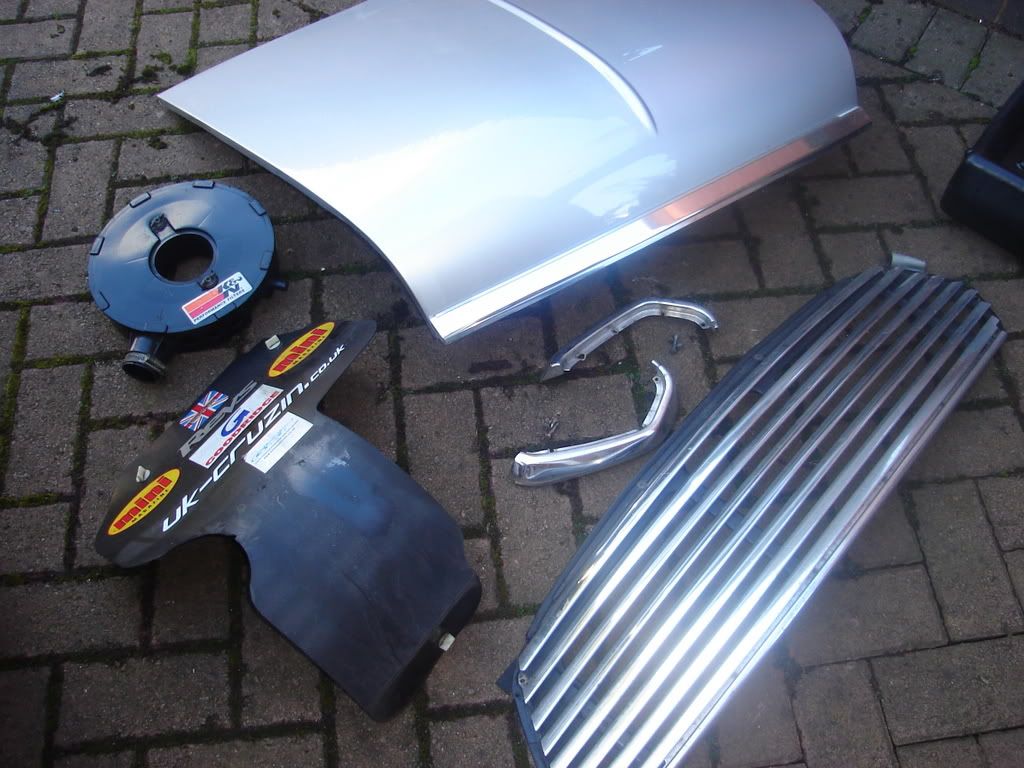
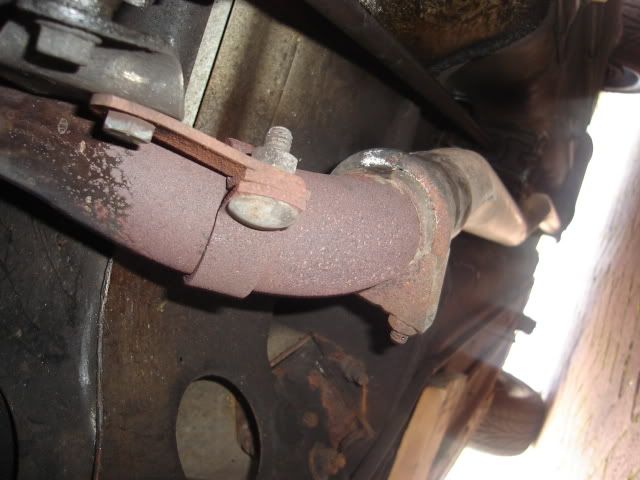
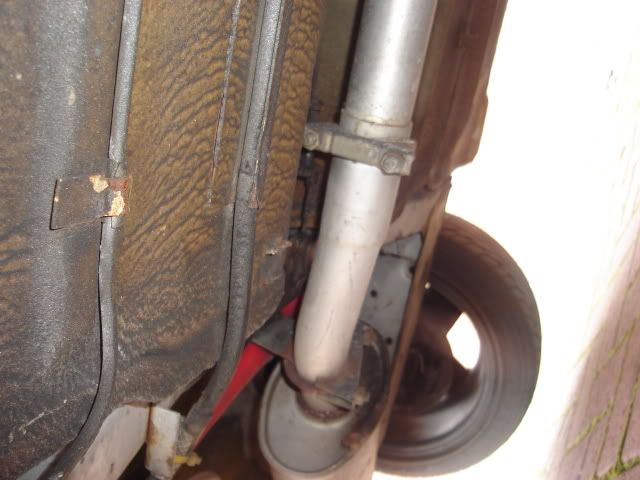
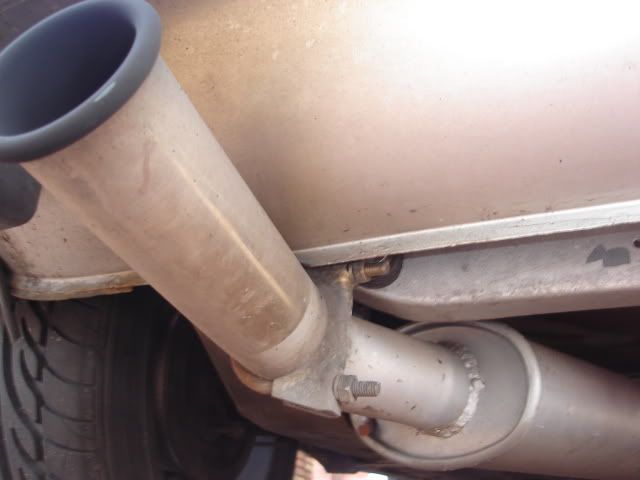
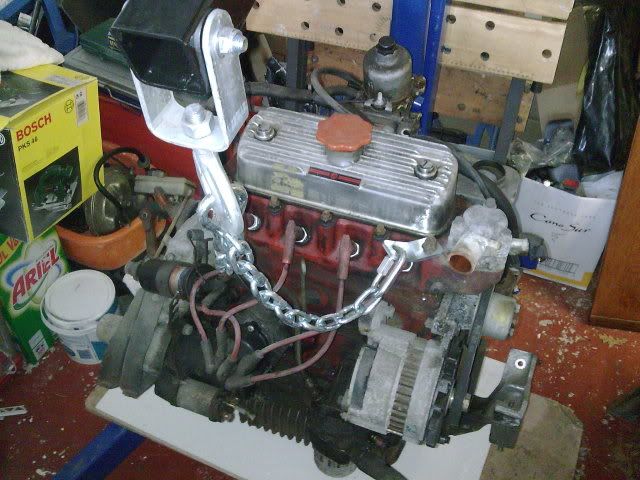
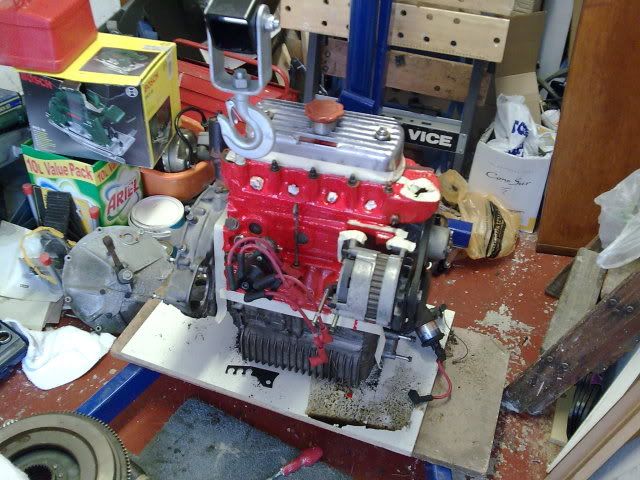
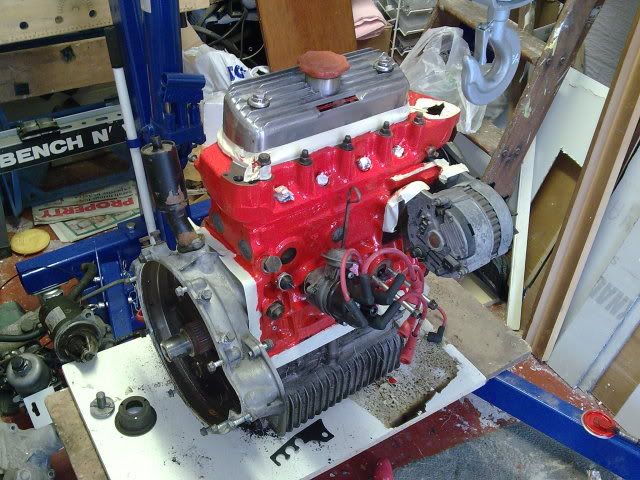
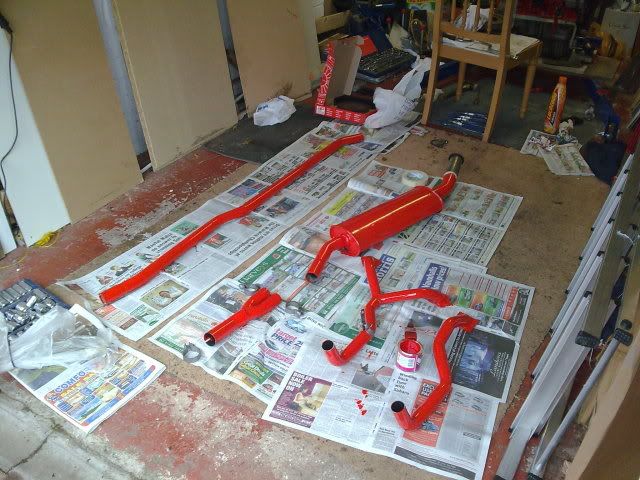
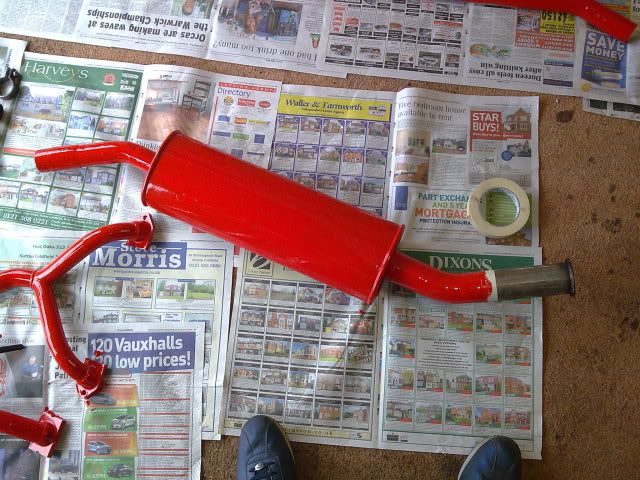
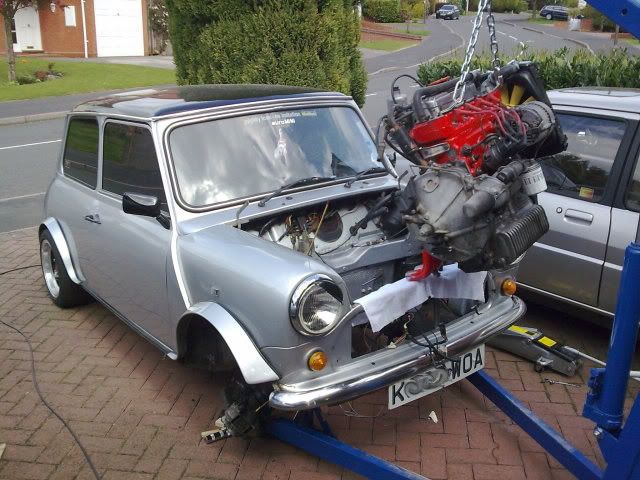
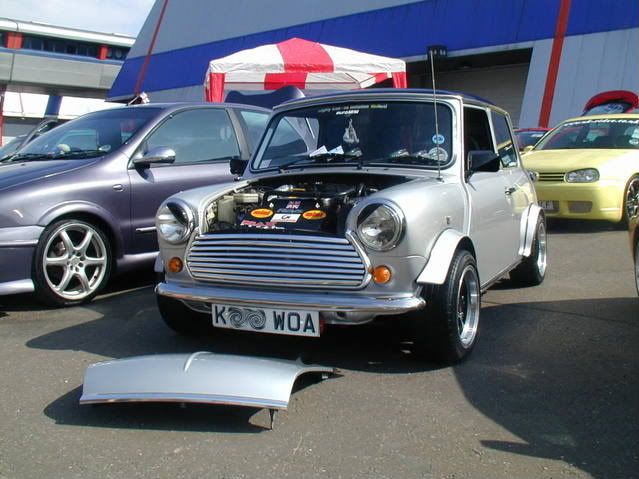
A few more pics:
#2
Posted 19 April 2009 - 01:45 PM
Whilst working we dont stop too much for photos, I dont like to hang around when doing stuff like this and would prefer to just get on with it! However, I usually take before and afters and have some photos, so heres what I have of when the mini engine (998) came out Apologies for the size
^^ BATTERY DISCONNECTED^^
^^ DRAINING OIL ^^
^^ DRAINED^^
^^FUEL LINE PLUGGED^^
^^START OF CARB REMOVAL^^
Im starting to re-upload more photos now, will start a new post with better pic sizes
Edited by silva_mini, 19 April 2009 - 01:45 PM.
#3
Posted 19 April 2009 - 02:17 PM
#4
Posted 19 April 2009 - 02:43 PM
#5
Posted 19 April 2009 - 03:15 PM
As you can see, the engine is now sat in the garage ready for all the fiddly little metro-to-mini parts changes that need to be done, engine mounts, correct breathers, radiator hoses etc. Were also changing the clutch as a precaution (probably doesnt need it anyway, but still ), oil filter, fan belt. Its having a brand new radiator (not the old one off the 998), new lcb manifold, K&N filter. All of these parts were bought after a trip to minispares had everything in stock apart from a fan spacer and new engine steady bushes, which I was very pleased about There were lots of things on the parts list we wrote up, think most of the rest were gaskets and small uninteresting brackets etc! Unfortunately no photos of the new stuff when bought
Next up, a step I could have skipped and wasnt really looking forward to, but had to be done - cleaning and painting the engine We cleaned the engine parts with some old rags and a small amount of petrol, it came up well, with the oil that was there lifting off prettty easily, block was very, very dull afterwards though! A day left to dry off and a tin of Halfords engine paint later and.......
Photos above show the paint drying with masking tape still on.
^^ Masking tape removed.
You can see from the photos aswell that we started work on the clutch change. I decided that one coat was enough on the block, which left me with a lot of red heat resistant paint left over. I couldnt resist painting my exhaust system and manifold I realise I will probably regret this as its going to smell for a while after starting, also the manifold will probably not stay red for long! However, A. lets see if this Halfords paint is really heat resistant! and B. it keeps a bit of an MG red theme going for the mini. and of course a little more protection from rust
Will look nice of anyone ever looks under the car, especially from the rear as theres a set of red musical air horns mounted to the rear subframe, right next to the exhaust!
#6
Posted 19 April 2009 - 03:48 PM
You can see we've fitted the fan, radiator holder and also the relevant hoses. Plugs and leads are back in, new oil filter on.
Ive also made up a coil cover, something I like to do and did for the 998, but I used Red Bull This time I didnt want blue on the can, was going to go for my favourite Red Stripe, however the banner stripe down the can is too long! so I went for a Stella can instead A bit chavvy, but hey! I'll be looking out for a Stainless bracket when I hit the mini shows
A test fit of the mainfold has proved to be a bit of a stumbling block. Having a problem with getting the bottom steady bracket to fit properly and also having the joys of trying to get the seal tight and everything lined up Something we didnt have too much trouble with on the 998, the one peice Cooper Freeflow was manufactured to perfection, something that cant be said for Mini Spares Millenium LCB However, im aware that most other LCB's are the same and we were expecting this, so, no disrespect to Minispares
Anyway, any opinions and advice let me know Also, a quick question if anyone fancies answering?? Is it possible to lower the engine in (with extreme tilt if its going to work im presuming!) with the LCB exhaust manifold already fitted?? Anyone done it?? More work and pics soon
#7
Posted 19 April 2009 - 11:17 PM
#8
Posted 19 April 2009 - 11:42 PM
Oh and I don't think you can drop and engine in with a manifold on, its difficult enough with the rad on.
Unless you took off the subframe mounted the engine in it and lifted that into the shell.
Should be quick once it's done, good luck and keep going, car looks great.
#9
Posted 20 April 2009 - 09:00 AM
Thanks I did have to rush the painting a bit, I couldnt hang all the parts anywhere so had to roll all the parts over to do the other sides! Did it a bit too quickly, despite them all being touch dry Managed to soak the stuck on newspaper off and re-touch up thoughLooks really nice. You're more patient than me when it comes to painting! It must have taken you a fair while to do you exhaust system!!!
Thanks for the positives So glad I invested in the MG now, but a bit of a shame to rape it of its engine, the shell was completely solid on it It just hasnt got the same handling as the mini though, the few times I did drive it the understeer and soft suspension was a bit scary, really had to remind myself that i wasnt driving my mini lol. It was bought solely for the engine though I know I could have sold it for a tasty profit (even the engine on its own), but this conversion has been in mind since day one of having my miniThat MG was a BARRRRGAIN!!!!
Oh and I don't think you can drop and engine in with a manifold on, its difficult enough with the rad on.
Unless you took off the subframe mounted the engine in it and lifted that into the shell.
Should be quick once it's done, good luck and keep going, car looks great.
Thanks for answereing my q. Shame that, means a little bit more fiddly work (i HATE getting exhaust manifolds sealed!), but hey Im hoping its going to be as quick as I think, I really want a 1380, but theres no point boring this out with the mileage its done, one day though
#10
Posted 21 April 2009 - 07:48 PM
Metro wise id stick everything on ebay should get all your money you spent on it back
I did it with my metro i had took the engine out and then split it .... car cost me £300 got £270 back from selling the parts
So thats engine and metro turbo 4 pots for £30 ?!?!? cant go wrong for £30
#11
Posted 21 April 2009 - 08:19 PM
#12
Posted 23 April 2009 - 09:17 AM
Looks good so far keep it up
Metro wise id stick everything on ebay should get all your money you spent on it back
I did it with my metro i had took the engine out and then split it .... car cost me £300 got £270 back from selling the parts
So thats engine and metro turbo 4 pots for £30 ?!?!? cant go wrong for £30
Thats an inpressive re-sale from the parts I was planning to ebay the MG branded cosmetic stuff, seats, steering wheel, wheel trims, red seat belts etc. But I may go a bit further now and get some more money back If the seats were black from the metro, id have put them straight in the mini, but the grey is far too light!
#13
Posted 23 April 2009 - 09:58 AM
Here's a pic of the painted bulkhead, did this about a week ago, only just got the pics off my phone though.
A quick (out of focus! ) photo from the exhaust manifold sealing session, shows half washer. Im anticipating this will need to be done again when the engine is in, but, not much time wasted as it was done late in the evening in the garage.
Now we come to yesterday's (Wednesday 22nd) work. A full days work, not many pictures and A LOT of frustration
First up, I removed the gear linkage from the Mini to compare it to the Metro one. Despite having read somewhere that the linkages are the same on both cars, I dicovered they arent Metro one is longer. However, as the metro unit is lower mileage, I opened up the casing and salvaged what I could and transferred it to the mini casing. I also had the large rubber bushes that sit between the floorpan/ linkage, metro gearstick was also transferred. End result? a much, much stiffer, more responsive gear lever. VERY pleased with this as the original mini one had a lot of play in it No pics unfortunately (there was LOTS of grease on my hands!) Whilst I was doing this, my dad fitted the radiator to the engine and together we flushed out my heater system on the car and also the engine itself.
Next up, we set about fitting the engine Tested the speedo drive cable with a cordless drill as we feared we may have damaged it when removing the 998. It was fine, so we carried on
Now we started to lower the engine in with exhaust manifold on, we just managed it, but had to remove the carb to get the engine fully in. However, regretted leaving the manifold on, will be explained later After getting the engine sitting in the bay we went about joining the engine mounts to the car. 2 Hours + fun then ensued, as the engine mounts were new, the rubber on the mounts was slightly too big and had obviously never been used/compressed before. We found we could get one side fixed with bolts in, but then the other side would be raised and way off getting it fixed in After lots of swearing, lost time, engine crane and trolley jack use, the holes finally lined up and the engine was 'in'
Next was connect the driveshafts, but we then noticed a few ball bearings appearing on the drive , we believe these are out of one of the pot joints so will need to be changed before we get it running. We will try to do this with the engine in, as I dont want to take it out and mess about getting the engine mounts lined up again
The reason why keeping the exhaust manifold on was a waste was due to lack of room for fitting the static gear linkage rod (solid rod with the bolt through) We slackened off the manifold and fitted the bolt and hit the split pin back through on the selector rod. The slackening also enabled us to fit the LCB Y peice, which was impossible to fit with the manifold tightened up (LCB's are new to us on mini's, we've always used Maniflow Cooper Freeflows for 998's )
Another problem was the top engine steady bolt from my 998 was too long, new one ordered from Minispares, the correct size we believe I reckon we are a day and a halfs work (possibly 2 depending how things go) away from getting it running. If there wasnt the problem and wasted time with the engine mounts I reckon we'd have had it running by last night, but we also now have the added problem of the pot joint. We need to nick one off the metro and replace, so theres going to be a few hours lost there But, as things stand, this is the state of play at the moment..........
Apologies for the lack of pics (again!) Hopefully another update and maybe a video of it running soon!
Edited by silva_mini, 23 April 2009 - 10:01 AM.
#14
Posted 23 April 2009 - 02:14 PM
Looks like you got a bargain on that Metro, I don't think it will be missed .
I hope your exhaust stays like that, looks brilliant.
Subscribed!
#15
Posted 23 April 2009 - 03:26 PM
0 user(s) are reading this topic
0 members, 0 guests, 0 anonymous users