Jump to content


Photo
- - - - -

Ken -The 1275 High Compression Engine Micra Mini (Running Project)


  • Please log in to reply
749 replies to this topic

#676 lawrence

lawrence

    One Carb Or Two?

  • Members
  • PipPipPipPipPipPipPip
  • 1,330 posts

Posted 09 February 2018 - 09:10 PM


Time for an update people, as any of you know who work nights it buggers you up for at least 2 days after them. Well ive got 3 weeks worth! The money will be nice but im not getting a lot done on mini! L


So ive basically been doing little things

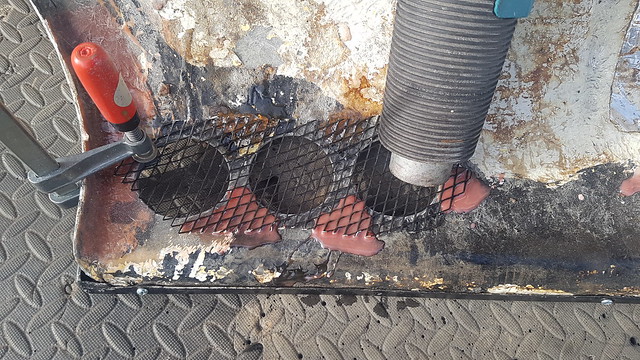
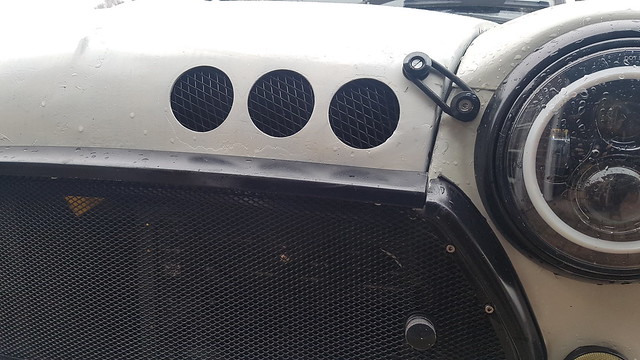
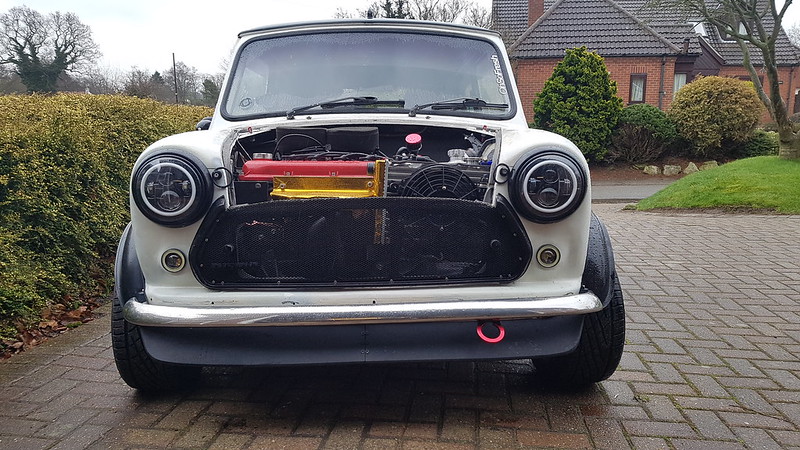
Fitted some mesh behind the grill holes

26261808528_703d837e32_z.jpg20180207_115748 by Lawrence Balls, on Flickr


40135599061_e1550a3039_z.jpg20180207_125234 by Lawrence Balls, on Flickr


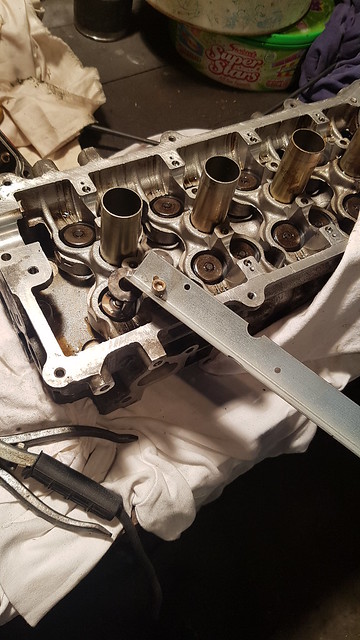
fitted heat reflective tape, some heatwrap to the exhaust

40135605321_ddac8fb5de_z.jpg20180207_123142 by Lawrence Balls, on Flickr


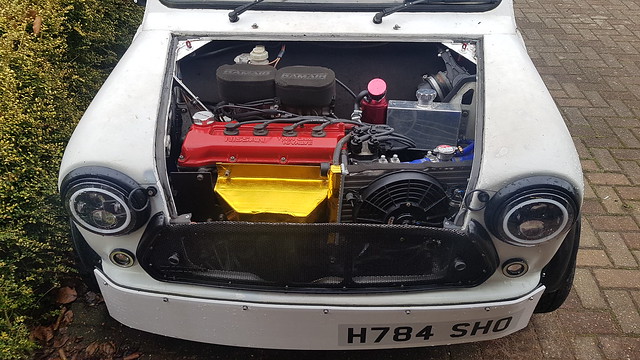
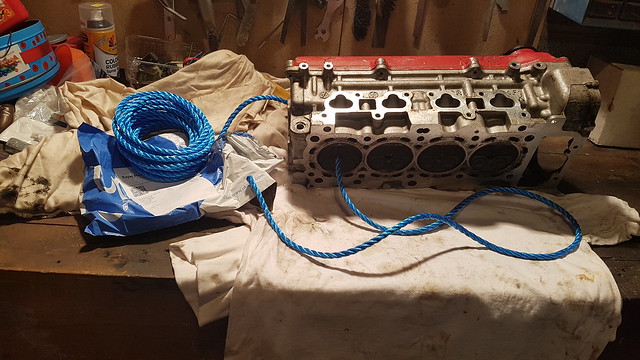
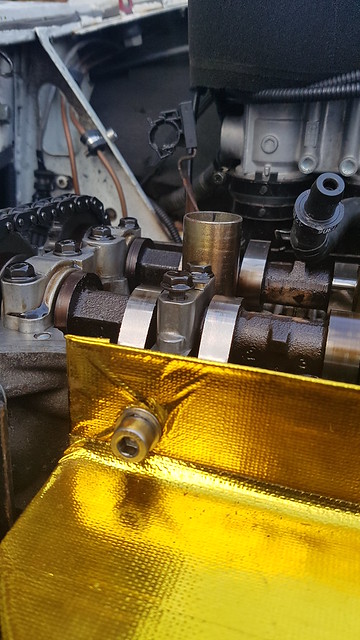
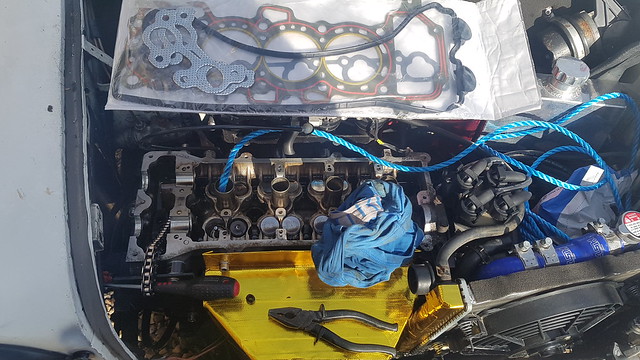
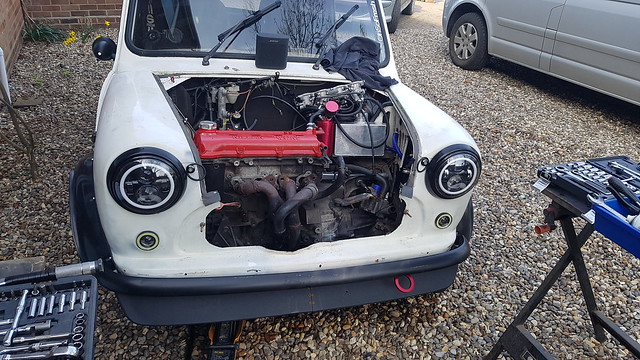
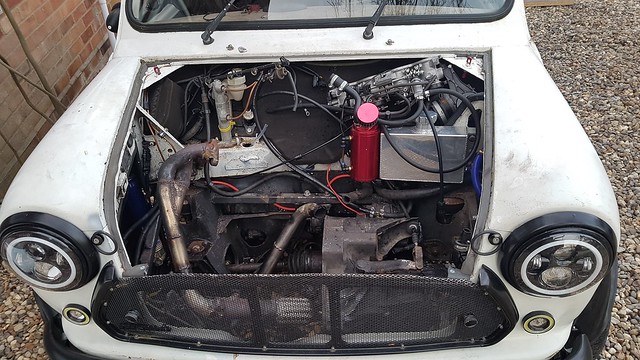
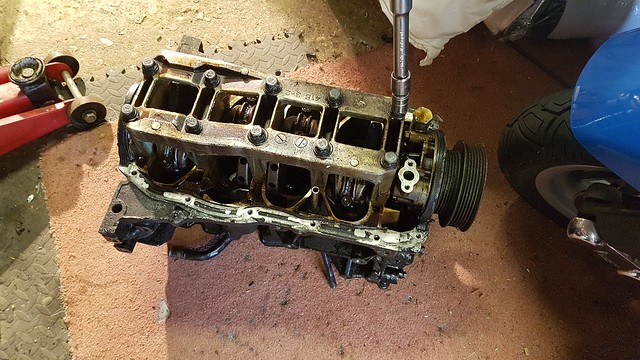
Engine bay now completely done. You can see the new place for my coil pack now too.

28354860169_e93449c21a_z.jpg20180207_125116 by Lawrence Balls, on Flickr


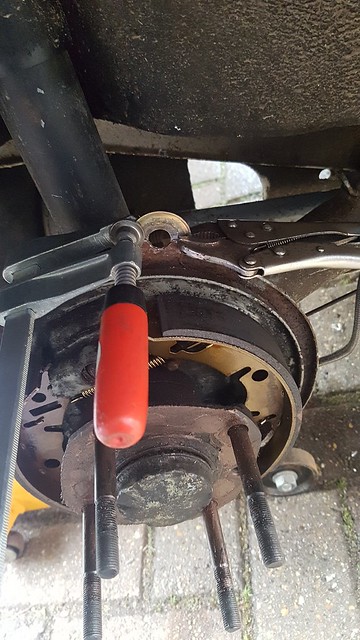
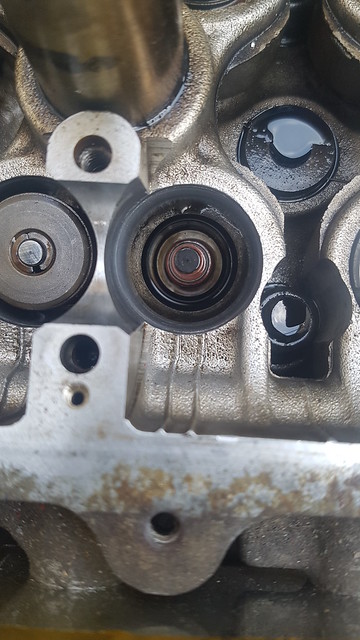
fitting the speed sensor for the digidash

39423749424_4156e004a3_z.jpg20180207_131444 by Lawrence Balls, on Flickr
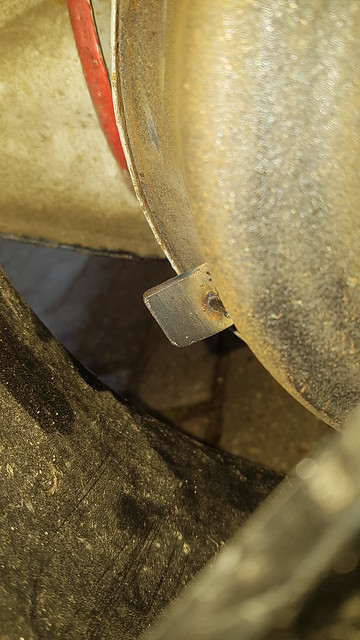
mount being made

25263659947_3f692688fa_z.jpg20180207_132456 by Lawrence Balls, on Flickr

 painted

40102590842_86609201d0_z.jpg20180207_141353 by Lawrence Balls, on Flickr


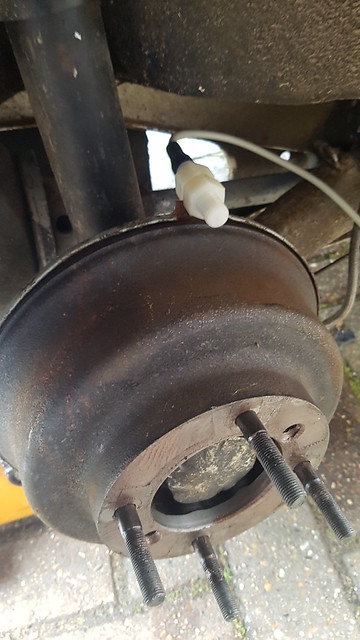
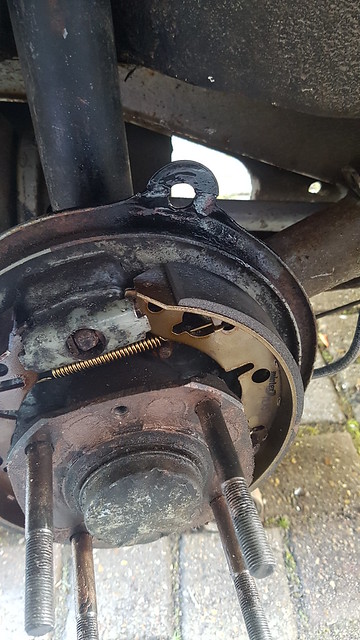
tabs welded to the drum

40102614802_906ce023a6_z.jpg20180207_151344 by Lawrence Balls, on Flickr


I ran test mode and the digidash is recognising the sensor as working, just need to extend the wiring and cable tie the sensor out of the way of the shock absorber as it is a little close, so that’s the speedo nearly sorted.


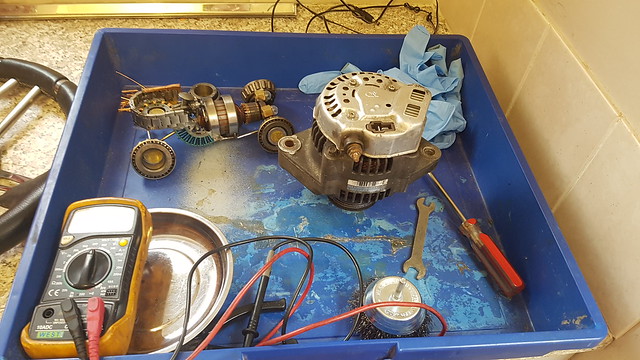
Onto the alternator, new module has arrived – The battery is on charge tonight so all being well tomorrow I will roll her back in front of the garage and get the bloody alternator working


So this afternoon observer cat was watching from the window wondering why I was messing around in the rain

28391833239_458c3086a5_z.jpg
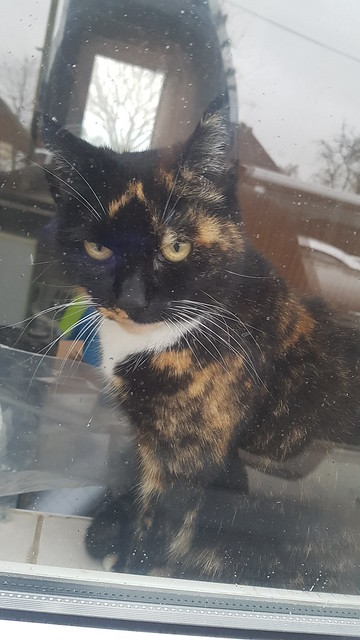
20180209_154231 by Lawrence Balls, on Flickr
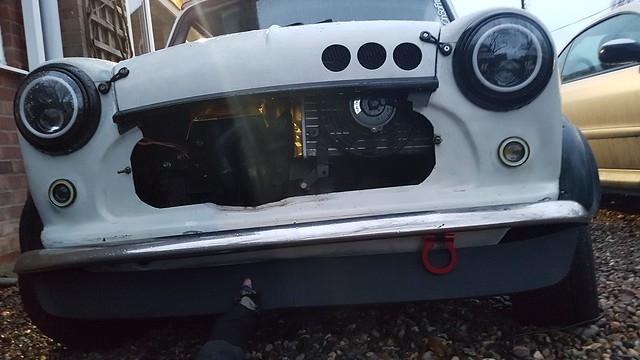
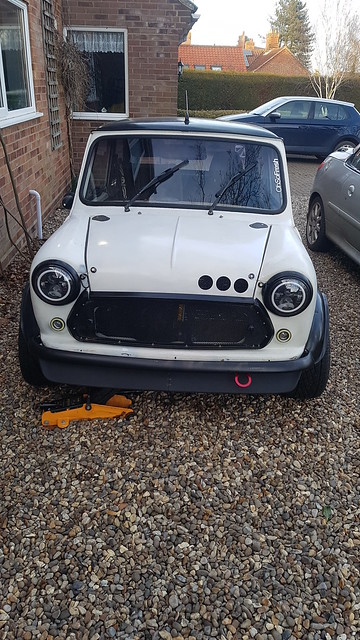
 

Took off air dam

28391825089_7b3fe5399f_z.jpg20180209_154943 by Lawrence Balls, on Flickr


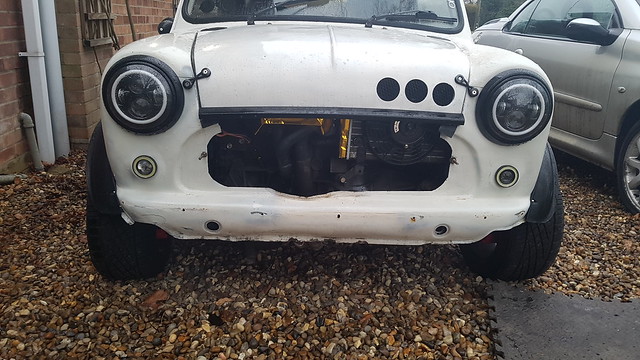
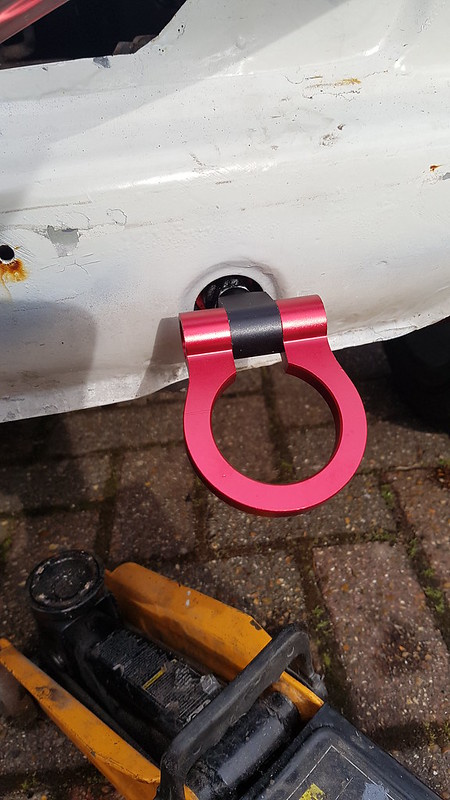
mocked up the tow eye, bumper and splitter

26299297838_abf2da10e9_z.jpg20180209_165749 by Lawrence Balls, on Flickr


observer cat approved

40172221031_7217fb9de8_z.jpg
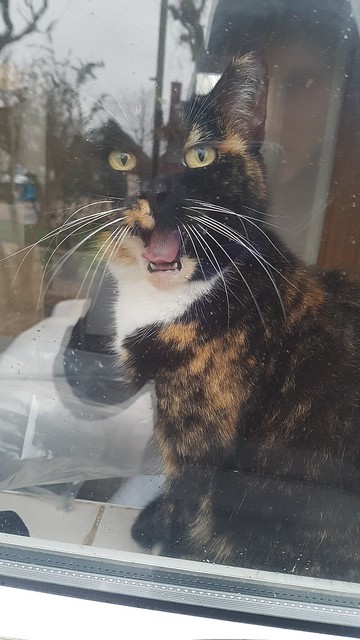
20180209_154239 by Lawrence Balls, on Flickr


made an adaptor for the tow bar

39461159044_63ec98d214_z.jpg
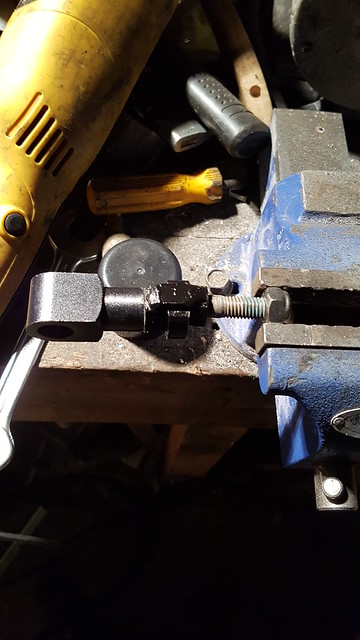
20180209_180306 by Lawrence Balls, on Flickr


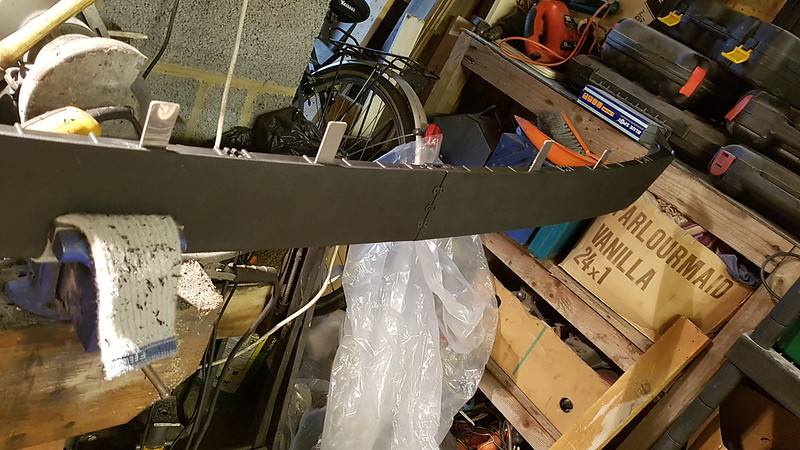
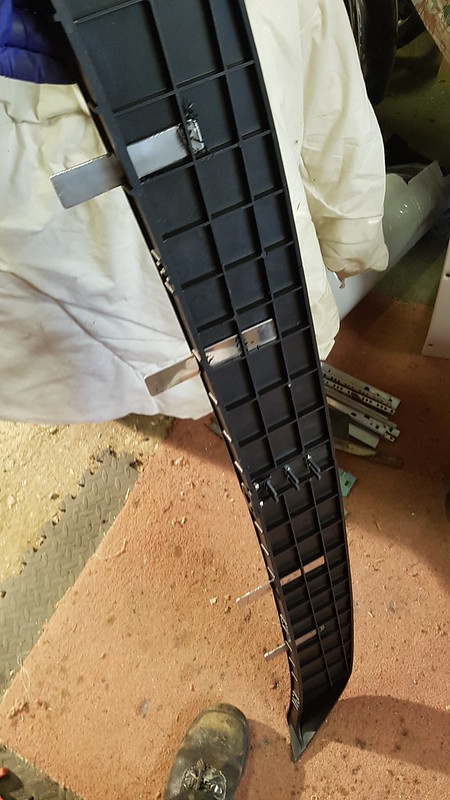
And finally cut some lengths of stainless to make brackets with tomorrow.

40139351532_30d266d4a7_z.jpg
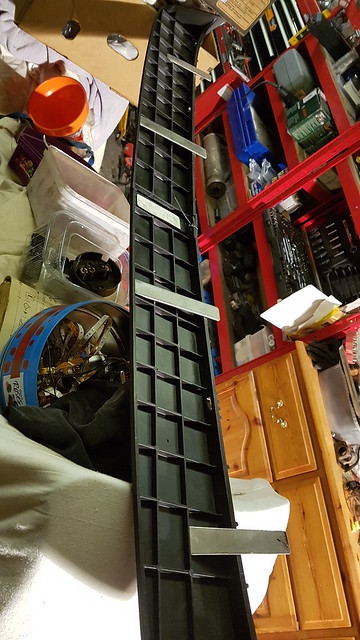
20180209_184332 by Lawrence Balls, on Flickr I contemplated bending them tonight and fiberglassing them on instead of drilling holes for bolts but decided against it as ive already bought the bolts and cba to faff about with horrible fiberglass!


So plan for tomorrow

>Bumper brackets to be made

>Splitter to be fitted

>Wiring extended for speedo

>Check the output on megasquirt for tacho.

>drill out subframe mount and fit tow eye


That’s all for now folks. 


#677 lawrence

lawrence

    One Carb Or Two?

  • Members
  • PipPipPipPipPipPipPip
  • 1,330 posts

Posted 11 February 2018 - 10:02 AM

Small update from yesterday,

subframe hole drilled slightly. Also had to remove the engine mount and trim the bolt down a little. But tow eye is now fitted and would be functional if needed! Alloy mounts fitted also
26311799548_cff474d035_c.jpg20180210_113127 by Lawrence Balls, on Flickr

From the front
39286398905_69ef5b2d00_c.jpg20180210_113114 by Lawrence Balls, on Flickr

Brackets fitted to the splitter
40184910581_51a97e648b_c.jpg20180210_130344 by Lawrence Balls, on Flickr
40184895391_8843333f6e_c.jpg20180210_130504 by Lawrence Balls, on Flickr

The metal strips are interference fit to the splitter, it means I've avoided drilling holes in the front!

And bent up
26311763088_7a2ebda371_c.jpg20180210_133120 by Lawrence Balls, on Flickr

And all fitted
26327652068_bcd950cecf_c.jpg20180210_151120 by Lawrence Balls, on Flickr
Bumper fitted also. Just 3 little brackets for the bumper.

Need to decide do I stick with chrome or plastidip the chrome Matt black. Can't decide. Opinions please people?

I didn't have time to fix the alternator but am planning to do it this afternoon

That's all for now :) I'm getting there!!
Lawrence

#678 Will16

Will16

    Wants a custom member title

  • Members
  • PipPipPipPipPipPipPip
  • 1,090 posts
  • Location: Abingdon, Oxfordshire

Posted 11 February 2018 - 12:36 PM

Front end looks really mean now man! Splitter is sick!

#679 lawrence

lawrence

    One Carb Or Two?

  • Members
  • PipPipPipPipPipPipPip
  • 1,330 posts

Posted 19 February 2018 - 09:36 AM

Thanks for the likes and comments guys. I've been doing a few bits and pieces to mini but mostly I have been working, got to fund my habit somehow!


Plastidipped the front bumper

40307039041_917b4d9095_z.jpg20180216_161428 by Lawrence Balls, on Flickr

needs a few more coats but it looks good.


Then bits started going wrong.

>Alternator.

Fitted the new regulator, wired in, started engine. Doesn't work

dam

engine off, checked all wiring again with continuity checker, its fine (so it should be its taken me ages to make a waterproof loom!)

So Its now taken off to fully inspect it on the bench but I may need a new one.


>Washer pump

Did some pre mot wiring checks like adjusting lights etc and checking everything works.

The washer pump now doesn't! Urh. 

So i have bought an entire washer kit the comes with the reservoir, pump, hose everything. Will fit it when it arrives.


>MISFIRE!

Cheeky bugger has now got a miss at idle! How dare she, above idle its fine, no issues at all but let her idle for a little while and the misfire starts. 

Spark checked-all good

Plug checked- sooty plugs 2,3 and4 which I expected as she was overfueling and is sitting at idle.


Plug one is oily, like moist oily, checked the piston, its oily also. 

Cleaned the plug and the misfire went 


So new valve stem oil seals needed, add this to the puffs of smoke I get on startup and setting off all points in this direction. The engine currently fitted was at 95k I believe so I am not annoyed at it, it's just an inconvenience.


Rope bought to do the rope trick and we will go from there. But as my cams are coming out I'm sure you can guess what will happen ;)


Lawrence


#680 paulrockliffe

paulrockliffe

    Camshaft & Stage Two Head

  • Members
  • PipPipPipPipPipPipPipPip
  • 1,763 posts
  • Location: Durham

Posted 19 February 2018 - 10:40 AM

What cam are you fitting? 


I'm picking up a Micra with 40k on the engine later this week with the the plan of doing the swap either next winter or the winter after, depending on how busy I am with a loft conversion at home and whether I've got all the bits paid for and delivered; need to be able to get it done fairly quickly as I don't want to be working on the car when the weather is nice!


#681 lawrence

lawrence

    One Carb Or Two?

  • Members
  • PipPipPipPipPipPipPip
  • 1,330 posts

Posted 20 February 2018 - 11:06 PM

They are 744 cams from matt Humphries. About 3mm more lift I think and a longer duration. Make sure you give yourself lots of time to do the conversion.


So alternator

40388956861_5e38a9707c_z.jpg20180219_120619 by Lawrence Balls, on Flickr


I removed the alternator from the car so I could completely continuity check it. Problem was found in two of the diodes. Flowing voltage both ways which obviously is wrong!


So I have resealed the diode bridge with a bit of nail varnish.


And all back together ready to fit

39492159665_cc8da66e77_z.jpg20180219_123016 by Lawrence Balls, on Flickr


Made myself a new tool to pop the valve collets off so I can change the seals

40388943601_6296c156f6_z.jpg20180220_150744 by Lawrence Balls, on Flickr

if its stupid but it works then its not stupid J


rope has arrived too

39492142665_8e7c9bb9e0_z.jpg20180220_152341 by Lawrence Balls, on Flickr


onwards to dismantling

39492127435_01f603f01d_z.jpg20180220_155829 by Lawrence Balls, on Flickr


Found an issue. Not sure why its happened but it would explain the strange rattling noise on idle that I had put down to the chain! No damage to the cam, caps or head tho so ive dodged a bullet there.


I have a feeling it may be due to my torque gauge and me under torqueing them. Ive had it 9 years and its never been calibrated plus it only cost £20! So after pay day im going to purchase a new torque wrench and demote my current one to a breaker bar which coincidentally I want too.


Next update dependent on weather, it keeps raining here! Keep an eye out.


Lawrence


#682 lawrence

lawrence

    One Carb Or Two?

  • Members
  • PipPipPipPipPipPipPip
  • 1,330 posts

Posted 09 March 2018 - 11:56 PM

So people, long time no update for me.


The snow came. We all know about it so I wont bang on. It was proper cold and nasty outside so I did some extra shifts at work and had some lazy days.


I have since been paid and am trying my hardest to stay out of my overdraft as im currently saving for a house with my girlfriend, that means ive spent very little on mini.


But today the weather has warmed up somewhat so I went out to play


So continuing off from before, new gasket set bought as I cant for the life of me find the valve stem seals I know I have. Ah well more spares that will be handy for another day

40667268992_38ab147391_z.jpg20180309_114124 by Lawrence Balls, on Flickr


So new valve seals fitted for the offending cylinder

26838154198_7cfa5a3feb_z.jpg20180309_115348 by Lawrence Balls, on Flickr


The exhaust side seals I took off were rather crisp. The rubber itself was a lot stiffer compared with the inlet side. I can only assume over time the exhaust valve is getting hot and that’s degraded the rubber more than the inlet that is being cooled with petrol and the air intake. Inlet side was a faff to change due to the ITBs but its done now.


I have also now purchased a new torque wrench (with my birthday money! Woop!)

40716694451_8602cd193f_z.jpg20180309_203736 by Lawrence Balls, on Flickr


Hopefully that will fix my bolt problem. Also on that note I discovered the upper timing chain lower bolt pulley was also not torqued to spec. I am 100% sure that it was torqued correctly before as I cut open the back of my hand when I did it so tend to remember that sorta thing!


Lastly the instant gasket between the timing chain cover and the cylinder head seems to have failed already. Im putting it down to cheap liquid gasket but its annoying all the same!

39814490615_0118380c9e_z.jpg20180309_133648 by Lawrence Balls, on Flickr


That’s all for now folks.


Another update tomorrow hopefully. Wont be anything too fun as im putting bits back together. Who knows, hopefully the alternator may even work!!!


Lawrence


#683 lawrence

lawrence

    One Carb Or Two?

  • Members
  • PipPipPipPipPipPipPip
  • 1,330 posts

Posted 14 March 2018 - 09:42 AM

Little update,

Cams back in
40700262472_e92a2c16a9_c.jpg20180310_102413 by Lawrence Balls, on Flickr
40032876414_e33a0d9e37_c.jpg20180310_102420 by Lawrence Balls, on Flickr

And welded up my old torque wrench, now to be a breaker bar
40700314802_800dd77788_c.jpg20180310_123036 by Lawrence Balls, on Flickr

Before I did it I checked the difference. It was 12. So anything done up was done up 12nm less than it should be. Kicking myself for that!

But it's not all good news. My cams are off. I turned the engine over by hand, apart from the new effort with the cams making the valves harder to open where the cam touches the bucket then engine turned over by hand fine.

But she won't start. I checked everything but not even a cough with easy start. I have skipped a tooth somewhere annoyingly.

Plans today.
-re alignment of cams, bet they are both a tooth out.
-check alternator.
-glue magnets for speed sensor.
-repair welder now I have finally got around to buying the part I need.

That's all folks
Lawrence

#684 lawrence

lawrence

    One Carb Or Two?

  • Members
  • PipPipPipPipPipPipPip
  • 1,330 posts

Posted 15 March 2018 - 12:03 AM

Well people, today didn’t got to plan at all!


Started off with rechecking the timing, that wasn’t so bad a job. It was out 180degrees – im a muppet!

Great

Retimed. Engine spun by hand. No crunches. Good.

Span over. Engine didn’t start. Easy start – popped and backfired.

Hmm – timing issue.

Checked. One tooth out still. Ok so ill pop off the sprockets and itll be fine

Haha. Famous last thought that one.

Sprockets off. Turning engine over by hand via the crank bolt to TDC again and it wont go all the way round. Nothing shifted. Flipped direction on the ratchet. Fine for ¾ of the engine rotation then it locked up again. Flipped ratchet again, same result

Hmm.

Not cam related. They were disconnected. Not upper chain related as that’s slack and not catching on anything.

Repeated this for about 15mins. Even tried my endoscope to have a look inside the engine timing- no luck there.


Stopped for lunch


Back from lunch- cant seem to find any issues. Engine turns fine for ¾ then locks up.

So im now thinking when I loosened the cams off the second time the bottom chain was slack for a moment and it doubled back on itself and that its partway around the lower sprocket and hitting something.

Bottom chain needs to come off to check and retime engine.


THAT’S AN ENGINE OUT JOB!!!! Ahh – it was going so well.


But – reality check – the engine puffed smoke, it would have failed emissions and not got an MOT so I had to change the stem seals. There is no use me having a grump about it and I had to face facts, and it was either my error or some really bad luck that the chain acted up.


So – new plan this afternoon. Engine out!


Everything removed

40767745412_9cc734ca35_z.jpg20180314_150406 by Lawrence Balls, on Flickr


engine and box separated

40100154554_6c450a0d1e_z.jpg20180314_162800 by Lawrence Balls, on Flickr


My nice work area

40100104684_c24496161f_z.jpg20180314_162805 by Lawrence Balls, on Flickr

my new engine transportation system.

40809488451_f874e1fbfb_z.jpg20180314_164455 by Lawrence Balls, on Flickr


A definite improvement from back in Jan 2015! Although I was tempted to do it again for old time sake! 3 years ago! How time flies when your engines still break!!!!!!!

35300975710_c950f55edc_z.jpg20150107_141701 by Lawrence Balls, on Flickr


and how I left her

25937893337_7e0af438aa_z.jpg20180314_170852 by Lawrence Balls, on Flickr


now this is my issue

26939882408_211d93b57a_z.jpg20180314_140238 by Lawrence Balls, on Flickr


That’s my old 1.3 that had the fun high comp engine till it went pop.


Ive got most of the bits needed to rebuild it. It was my plan to do so this summer and swop it over when the weather improved.


I have just purchased a set of rings – honing tool will be bought soon.


“Project new high comp 1.3” is a go!!


Update soon people


Lawrence 


#685 lawrence

lawrence

    One Carb Or Two?

  • Members
  • PipPipPipPipPipPipPip
  • 1,330 posts

Posted 15 March 2018 - 03:09 PM


Small update. Half day due to night shift tonight and having a nap.


Engine taken apart, not found the issue yet

40781219932_8ce13b7ce9_z.jpg20180315_112547 by Lawrence Balls, on Flickr


workbench cleared and skimmed head dismantled. I tested the valves and they all need lapping in

40823095821_c3a1113c52_z.jpg20180315_115137 by Lawrence Balls, on Flickr


all dismantled and cleaned 39928322585_1295fdf9db_z.jpg20180315_124656 by Lawrence Balls, on Flickr


lapped the first lot of valves in

26953496218_556ff075cc_z.jpg20180315_124712 by Lawrence Balls, on Flickr


They still leak a little after using fine compound. Will use coarse and then fine and see if I can improve them.


Bought

>Gasket sealent

>Honing tool


Im on 2 night shifts now. Next update will be Sunday. Going to dig out the 1275, block, pistons and crank and give it all a clean-up. Ive got a week off work next week, viewing some houses with the girlfriend and hopefully will have the engine ready to go back in by the end of the week.


Lawrence


#686 McMini 22

McMini 22

    Mini Mad

  • Members
  • PipPipPipPip
  • 289 posts
  • Location: East lothian

Posted 19 March 2018 - 03:20 PM

It's a bummer you are having to do all this extra work. It will be interesting to find out what caused the bottom end to lock.

#687 lawrence

lawrence

    One Carb Or Two?

  • Members
  • PipPipPipPipPipPipPip
  • 1,330 posts

Posted 21 March 2018 - 08:15 PM


I agree it is a little bit of a setback but at the end of the day it’s the engine I wanted to make for her eventually so im still happy overall. Regading the engine not turning over ive put that to one side. I have more days off of this week and Monday Tuesday next week all dedicated to getting her working.


So today

Started off with the honing

27071592918_bea42c9249_z.jpg20180321_120306 by Lawrence Balls, on Flickr


went well I think considering I haven’t done it before.

40942836181_b1b2dba1ab_z.jpg20180321_120953 by Lawrence Balls, on Flickr


Then I started digging out bits of the 1.3 from when I took it apart and found this!

Result!

Past me had cable tied the shells!

40942815691_ae66a57d11_z.jpg20180321_122642 by Lawrence Balls, on Flickr


In addition to that past me had also put the end caps on the con rods so those shells were fine too and the crank is fine as I had oiled it and wrapped in a towel. Again cable tied.


But those of you who follow this know my luck

Oh whats that, a piston.

26070168517_408b8566a8_z.jpg20180321_123241 by Lawrence Balls, on Flickr

40234331864_922ffa05c9_z.jpg20180321_123255 by Lawrence Balls, on Flickr


but wait- theres more

40048478195_22309c32e1_z.jpg20180321_125252 by Lawrence Balls, on Flickr


I was livid. Literally so annoyed! not only have I spend time dismantling and honing this engine as well as buying parts and wasting my money!


I needed a pick me up. So decided to clean up the bore and trial fit a ring. Now if the gaps are too much I was going to be properly grumpy.


But my luck returned

40234314704_7ed4f1bfef_z.jpg20180321_125248 by Lawrence Balls, on Flickr

Within spec. 0.254 was too small and 0.279 too tight. Recommended is 0.2-0.3!


I had a think. Broken pistons were what caused that excessive blowby and pressurisation of the crankcase that was my problem with this engine (before the rad popped and it overheated) I simply assumed it was worn bores/rings.


So as a bit of a stress/anger relief I chose to smash the pistons off the rods using a combination of hammer, chisel and grinder.

40234283394_8c63869959_z.jpg20180321_151344 by Lawrence Balls, on Flickr


The remains of the offending items

39133241020_2ed1418696_z.jpg20180321_151337 by Lawrence Balls, on Flickr


After that I decided what all well researched micra people would do.

To take apart another 998 engine!

27071502958_e5caf308d2_z.jpg20180321_151350 by Lawrence Balls, on Flickr


grimy pistons removed

40942701251_81c62e8894_z.jpg20180321_153625 by Lawrence Balls, on Flickr


and some washing up done to clean em up

40942700441_84b79d2220_z.jpg20180321_160109 by Lawrence Balls, on Flickr


So plan is – find garage to press out gudgeon pins from the 1.3 rods and pop on the 998 pistons


To those of you not in the know for micra engines.

>Both the 998 and 1275 have the same bore 71mm

>Same piston design roughly- same rings etc – but the 998 has no dish whereas the 1275 pistons do.

>Different rods – 998 are longer

>different crank – 1275 has a longer throw


So to make a high compression engine using

>998 pistons

>1275 rods and crank

>1275 block

>skimmed head

>new cams


Watch this space – Oh and if your worried Frank from MSC (micra guru) said the engine will be fine but that the compression will be “quite high” and will need super unleaded to help it.


Lawrence


Oh, and the girlfriend and I have put in an offer for a garage - has a house attached too! 


#688 McMini 22

McMini 22

    Mini Mad

  • Members
  • PipPipPipPip
  • 289 posts
  • Location: East lothian

Posted 22 March 2018 - 04:26 PM

Good progress!
How did you hone the bores? The cross hatch angle looks a bit shallow and should be close to 45 degrees.

#689 Will16

Will16

    Wants a custom member title

  • Members
  • PipPipPipPipPipPipPip
  • 1,090 posts
  • Location: Abingdon, Oxfordshire

Posted 22 March 2018 - 05:17 PM

Looking good man, props to you for just cracking on building a spec'd engine, I know I'd of thrown my toys out the pram and left if for a few months :lol: Nice one on getting a house too!


#690 lawrence

lawrence

    One Carb Or Two?

  • Members
  • PipPipPipPipPipPipPip
  • 1,330 posts

Posted 23 March 2018 - 11:49 AM

I did the bores myself with a 3 arm self centering type honer. Never done it before tho. It does feel quite rough and the angle was 40 degs mostly (checked with a protractor). Reckon that will be ok?

House we hope will go through. Has a
reasonable size garage too which is essential for me, got some nice plans for it.

Will update when the pistons are back from the shop

Lawrence


1 user(s) are reading this topic

0 members, 1 guests, 0 anonymous users