Hallo, Just wondering how hard is it to achieve some negative Camber in the rear?


Negative Camber In The Rear
Started by
dipstick
, Nov 05 2009 10:26 PM
27 replies to this topic
#2

chappy
-
- Members
-

- 1,253 posts
One Carb Or Two?
Posted 05 November 2009 - 10:30 PM
buy some adjustable camber brackets 
(although, negative camber isnt for show or style, if set up properly it can greatly increase grip/handling/road holding.)
sam
(although, negative camber isnt for show or style, if set up properly it can greatly increase grip/handling/road holding.)
sam
#3
Kam
-

- TMF+ Member
-
- 4,140 posts
Straight to the Point
- Location: Hampshire
- Local Club: 16vMini club
Posted 06 November 2009 - 12:26 AM
As above, whats the car gonna be used for? You'll notice MORE tyre wear with neg camber so if its primalary a daily driver you'll need to keep an eye on your side wear
#4
dipstick
-
- Noobies
-
- 60 posts
Stage One Kit Fitted
Posted 06 November 2009 - 08:14 PM
As above, whats the car gonna be used for? You'll notice MORE tyre wear with neg camber so if its primalary a daily driver you'll need to keep an eye on your side wear
Its a weekend car...Im not looking for massive camber...-1° to -1.5°...by the way where is a good source for the brackets? Im in Canada.

Edited by dipstick, 06 November 2009 - 08:21 PM.
#5
camp freddy
-

- TMF+ Member
-
- 3,696 posts
Definitely Not Camp Or A Freddy
- Local Club: Wreake Mini Wanderers
Posted 06 November 2009 - 08:33 PM
As above, whats the car gonna be used for? You'll notice MORE tyre wear with neg camber so if its primalary a daily driver you'll need to keep an eye on your side wear
Its a weekend car...Im not looking for massive camber...-1° to -1.5°
do it makes loads of difference
#6
Macming
-

- Noobies
-
- 81 posts
Stage One Kit Fitted
- Local Club: Miniclan
Posted 08 November 2009 - 01:53 AM
You could do it the cheap but long way. Remove the outboard brackets and file the bolt holes into a slot. (up the way) so's the outer end of the arm shaft goes up into the slot as the weight of the car goes onto them.DON'T TAKE OFF TO MUCH METAL FOR THE INITIAL TRIAL RUN. Start with no more than 2mm.(You can also adjust toe in and toe out this way by angling the slot towards the front or back as you go up instead of fitting shims between the bracket and the subframe ).(Adjustable brackets were invented to do away with this by the way).Miss this bit out unless you have some reasonable mechy skiles.Refit the brackets leaving the shaft nut slack and nip them up.Rememder to roll the car back and forwards a few meters to settle the suspension before looking. Stand back and give them a good mark one eyeball..Make sure the car is on a level surface and you have plenty of room to get behind it by at least 2/3 cars length.You'll be amazed by just how much you can judge the difference in angles especialy if your tyres stick out slightly. Don't be tempted to do one side at a time because it throws your eye off if you have one side up and one side down .Aim for at least 3 trial fittings and don't rush.I know this sounds like a lot of time and work but you end up with a rock solid job. If you've got access to a camber guage so much the better.It will take away the uncertainty of deciding if your eyes are playing tricks.Do bear in mind, as I'm sure you've found out most Minis are not flat and square anyway. so you might end up with different lengths of slots at each side to give you what your aiming for,some fine fettling is always required no matter which bit of a Mini you're working on.One point.When your happy with the angles,and it's time to bolt everything up.slacken the nut on the outside of the shaft,jack up the car and let the shaft come down to the bottom of the slot.then tighten the bracket up.Let the car down off the jack so's the shaft settles up into the top of the slot.Then tighten the outer and inner nuts up on the shaft.If you don't do it this way you can have trouble getting a socket on the two inside bolts.
#7
chappy
-
- Members
-
- 1,253 posts
One Carb Or Two?
Posted 09 November 2009 - 10:46 AM
Don't Bodge it! 
Go for KAD rear camber brackets, im sure they'd ship them out to you.
If not minisport ones are reasonably good. You'd need to get it setup properly though which ever brackets you choose.
Sam
Go for KAD rear camber brackets, im sure they'd ship them out to you.
If not minisport ones are reasonably good. You'd need to get it setup properly though which ever brackets you choose.
Sam
#8
Cooperman
-

- TMF+ Member
-
- 23,303 posts
Uncle Cooperman, Voted Mr TMF 2011
- Location: Cambs.
- Local Club: MCR, HAMOC, Chelmsford M.C.
Posted 09 November 2009 - 02:55 PM
To measure the rear camber I use a piece of 1/4" thick ply board about 20" square. It has to be exactly square.
Sit the car on a flat and smooth surface, like inside your workshop and place the board against the tyre vertically and in line with the rear wheel centre. Now, using a steel rule, measure from the lowest point of the wheel rim to the edge of the board and do the same at the top. The difference between these two dimensions is the amount of camber over the wheel diameter. From this you can work out the angle and filoe the slot to suit. In fact you don't need to roll the car back and forward as the rear radius arms are true training arms and the wheel moves vertically.
For a road car the ideal settings are between 0.25 degrees and 0.5 degrees negative.
For reference, to get the best handling, the rear wheels should toe-in by between 1/16" and 1/8".
#9
dipstick
-
- Noobies
-
- 60 posts
Stage One Kit Fitted
Posted 09 November 2009 - 04:35 PM
To measure the rear camber I use a piece of 1/4" thick ply board about 20" square. It has to be exactly square.
Sit the car on a flat and smooth surface, like inside your workshop and place the board against the tyre vertically and in line with the rear wheel centre. Now, using a steel rule, measure from the lowest point of the wheel rim to the edge of the board and do the same at the top. The difference between these two dimensions is the amount of camber over the wheel diameter. From this you can work out the angle and filoe the slot to suit. In fact you don't need to roll the car back and forward as the rear radius arms are true training arms and the wheel moves vertically.
For a road car the ideal settings are between 0.25 degrees and 0.5 degrees negative.
For reference, to get the best handling, the rear wheels should toe-in by between 1/16" and 1/8".
Brackets it is....thanks for the Info guys...really appreciate it...has anybody have any experience with minimania.com.
http://www.minimania...9/InvDetail.cfm (fixed)
http://www.minimania...3/InvDetail.cfm (adjustable)
#10
icklemini
-

- Traders
-
- 2,982 posts
Up Into Fourth
- Location: Northampton
Posted 09 November 2009 - 10:19 PM
to get the best handling, the rear wheels should toe-in by between 1/16" and 1/8".
Nar too much in my experience.. zero to 1/16" far better.
#11
dipstick
-
- Noobies
-
- 60 posts
Stage One Kit Fitted
Posted 09 November 2009 - 10:42 PM
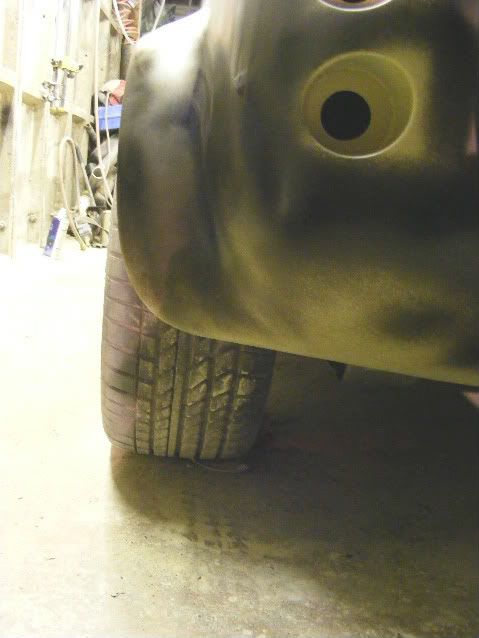
Thats what im thinking...on a side note, does anybody know the et on the oem 12" cooper wheels, the one below?
Attached Files
-
 9860g7f_20.jpeg 95.22K
10 downloads
9860g7f_20.jpeg 95.22K
10 downloads
#12
bmcecosse
-

- Members
-
- 9,699 posts
Crazy About Mini's
- Local Club: http://www.srps.org.uk/
Posted 09 November 2009 - 10:45 PM
Just file the slot! It's NOT a bodge - it's simply a way of 'blueprinting' the suspension - and it ends up far stronger than some of the over-priced brackets which are poor weak things! Aim for dead upright wheels - or perhaps 0.5 degree negative at the back. More important is to have both rear wheels parallel - no toe out or toe in!
#13
icklemini
-
- Traders
-
- 2,982 posts
Up Into Fourth
- Location: Northampton
Posted 09 November 2009 - 11:23 PM
Hows that then?and it ends up far stronger than some of the over-priced brackets which are poor weak things
#14
minivanman
-
- TMF+ Member
-
- 3,454 posts
Up Into Fourth
- Local Club: Backstreet Minis
Posted 09 November 2009 - 11:31 PM
since when has there ever had to be a reason other than his opinion Dave?Hows that then?and it ends up far stronger than some of the over-priced brackets which are poor weak things
#15
R1minimagic
-

- Traders
-
- 4,660 posts
Up Into Fourth
- Location: Manchester
Posted 09 November 2009 - 11:42 PM
Why do you want negative camber on the back of a mini?!!
I think those aftermarket brackets are pointless, once you have set it you dont need to adjust it anymore, they look crap and tinny, just file it out a bit at a time until it is right!
I think those aftermarket brackets are pointless, once you have set it you dont need to adjust it anymore, they look crap and tinny, just file it out a bit at a time until it is right!
Edited by R1minimagic, 09 November 2009 - 11:45 PM.


1 user(s) are reading this topic
0 members, 1 guests, 0 anonymous users


