 Looking forward to seeing it finished. Don't take it to the same body shop!


Rio-Tec (Aka Demoraliser) B20 And Rovers Finest Steel Wheels Equals
Started by
Kam
, Nov 19 2009 08:15 PM
1065 replies to this topic
#511
 B20 And Rovers Finest Steel Wheels Equals: post #511")
bakker110
-

- Members
-

- 426 posts
Speeding Along Now
- Local Club: TMF
Posted 08 February 2011 - 11:18 PM
Kam this is looking good mate. You are actually insane but I would only ever do this with a standard front. I have that option on my car thought Looking forward to seeing it finished. Don't take it to the same body shop!
Looking forward to seeing it finished. Don't take it to the same body shop!
#512
mike174
-

- Members
-
- 457 posts
BH2N Big Cheese
Posted 08 February 2011 - 11:20 PM
Looking good Kam
Cheers mate, hopefully it will look alot better when you see it in 6(ish) months time

Or you could get it done sooner and i could see it at a show

#513
Kam
-
- TMF+ Member
-
- 4,144 posts
Straight to the Point
- Location: Hampshire
- Local Club: 16vMini club
Posted 09 February 2011 - 12:08 AM
by the way, is it running yet?
All running mate, just switch on your xbox/ps3 and drive an integra type-r about, it sounds the same, honest

Kam this is looking good mate. You are actually insane but I would only ever do this with a standard front. I have that option on my car thought
Insane? Of course! Normal is boring!
 Don't worry about the bodyshop Andy, he knows he foooked up last time and knows it aint coming back even though he wants it to, but I've got another bodyshop waiting to do it - a respected mini one
Or you could get it done sooner and i could see it at a show
At this rate, the first 'show' your gonna see it at will be in germini, so just head there and you should get another lap in it
#514
leadly
-

- Members
-
- 779 posts
One Carb Or Two?
- Location: Derby
- Local Club: [] D.C.M.O.C []
Posted 10 February 2011 - 01:24 PM
Just spent the last couple of days, reading a few pages of this build thread at a time and I must say, i'm really impressed with your efforts. I'm looking at a honda build in a few years time so this has been perfect for information and highlighting the ball aches I will no doubt encounter.
Keep up the good work Kam and i'll be sure to keep reading!
Best of luck,
- Rich
Keep up the good work Kam and i'll be sure to keep reading!
Best of luck,
- Rich
#515
Kam
-
- TMF+ Member
-
- 4,144 posts
Straight to the Point
- Location: Hampshire
- Local Club: 16vMini club
Posted 10 February 2011 - 09:59 PM
Sorry for the minor update, but who cares, my diary my build my rules my way or the highway! 
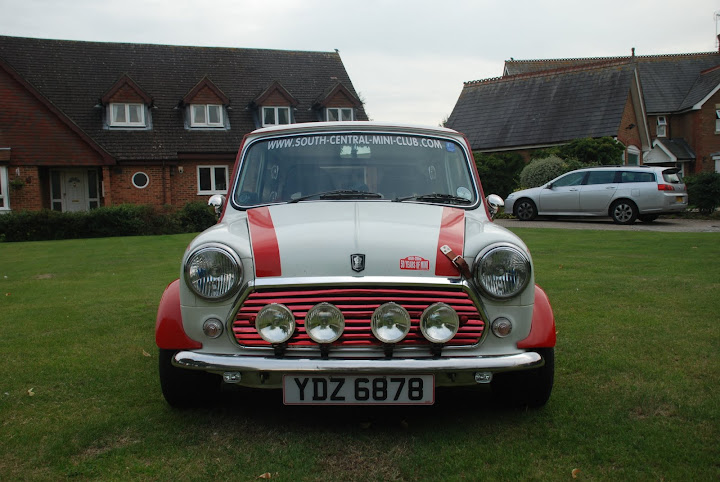
Picked up a heritage MPI bonnet from minispares the other day, and duly chucked it on for a nice 'completion shot'

One thing that was worrying me a few days ago was the position of the safety hook as its sits on the left hand side.........

.......so it clears the front mounted rad on the MPI's, but this will get in the way of me cutting out a section on the front slam panel to make as much room as poss for a suitable rad, and it HAS to be cut as otherwise cutting the frame was a complete waste of time, yellow circle shows where the catch sits

And I can't have it over on the right hand side as they are on the carb/SPI's as there is hardly any room over there and also still got the the rocker cover to go on

Mind you it may still go on that side but will be seriously close to the rocker cover when the bonnet drops, we'll see, so at this stage I'm guessing it can only go on the left hand side but much further out

Which means it needs to be cut out and re-welded back on the bonnet somewhere else, so will try that once the rad is in so I know where the space is, but will probably just 'tack' it in myself to try it out in the meantime and get someone else (Burny?) to weld it in properly for me
Or I might just leave it and let the elves do it for me overnight, they have been helping me out alot lately
I can see quite a few problems ahead trying to squeeze it all in a steel front end but to be honest I really don't care, after that seeing the bonnet on there its proven to me it needs its original roundnose on there rather than the clubby front I had
I will make it work even with my ability or die trying!
Next job - have a KFC again (Kams Favourite Chicken!)
Picked up a heritage MPI bonnet from minispares the other day, and duly chucked it on for a nice 'completion shot'
One thing that was worrying me a few days ago was the position of the safety hook as its sits on the left hand side.........
.......so it clears the front mounted rad on the MPI's, but this will get in the way of me cutting out a section on the front slam panel to make as much room as poss for a suitable rad, and it HAS to be cut as otherwise cutting the frame was a complete waste of time, yellow circle shows where the catch sits
And I can't have it over on the right hand side as they are on the carb/SPI's as there is hardly any room over there and also still got the the rocker cover to go on
Mind you it may still go on that side but will be seriously close to the rocker cover when the bonnet drops, we'll see, so at this stage I'm guessing it can only go on the left hand side but much further out
Which means it needs to be cut out and re-welded back on the bonnet somewhere else, so will try that once the rad is in so I know where the space is, but will probably just 'tack' it in myself to try it out in the meantime and get someone else (Burny?) to weld it in properly for me
Or I might just leave it and let the elves do it for me overnight, they have been helping me out alot lately
I can see quite a few problems ahead trying to squeeze it all in a steel front end but to be honest I really don't care, after that seeing the bonnet on there its proven to me it needs its original roundnose on there rather than the clubby front I had
I will make it work even with my ability or die trying!
Next job - have a KFC again (Kams Favourite Chicken!)
#516
Kam
-
- TMF+ Member
-
- 4,144 posts
Straight to the Point
- Location: Hampshire
- Local Club: 16vMini club
Posted 10 February 2011 - 09:59 PM
Just spent the last couple of days, reading a few pages of this build thread at a time and I must say, i'm really impressed with your efforts. I'm looking at a honda build in a few years time so this has been perfect for information and highlighting the ball aches I will no doubt encounter.
Keep up the good work Kam and i'll be sure to keep reading!
Best of luck,
- Rich
Thanks for the kinds words Rich, is appreciated mate
#517
Burnard
-

- Banned
-
- 3,350 posts
4 gears good........... .......................5 gears Better
- Location: Reading
Posted 10 February 2011 - 10:35 PM
Why not ditch the internal safty catch and get a retro leather strap? much simpler solution and doesnt look out of place...
Got one on my car because im paranoid:
If you leave an address and a key, the elves might do it for you haha
One random question... how old r you? (insurancey type question)
Got one on my car because im paranoid:
If you leave an address and a key, the elves might do it for you haha
One random question... how old r you?
(insurancey type question)
#518
1984mini25
-

- Members
-
- 8,843 posts
Crazy About Mini's
- Location: -
Posted 10 February 2011 - 10:43 PM
Why not ditch the internal safty catch and get a retro leather strap? much simpler solution and doesnt look out of place...
Got one on my car because im paranoidlove strap ons:
#519
Spenner
-

- Members
-
- 890 posts
One Carb Or Two?
- Local Club: Blakehill mini's
Posted 10 February 2011 - 10:50 PM
Looking good Kam
ive been helping Chris were i can this week with his new ecu and keeping him motivated
Spenner
ive been helping Chris were i can this week with his new ecu and keeping him motivated
Spenner
#520
ginger_monkey
-

- Members
-
- 1,080 posts
One Carb Or Two?
Posted 10 February 2011 - 11:22 PM
cheers Spenner me old chum
Kam can you send the little elves over to mine after your done with them so they can fit a new front for me
Kam can you send the little elves over to mine after your done with them so they can fit a new front for me
#521
GreaseMonkey
-

- Members
-
- 3,663 posts
Has Ratchet, Will Make Noises
Posted 11 February 2011 - 12:10 AM
No no I need them before you Ginger!
#522
Kam
-
- TMF+ Member
-
- 4,144 posts
Straight to the Point
- Location: Hampshire
- Local Club: 16vMini club
Posted 11 February 2011 - 02:09 AM
Why not ditch the internal safty catch and get a retro leather strap?
One random question... how old r you?
Your missing the point, car has to look normal, no alloys, no bucket seats, no honda 5 speed gear knob! Just a normal little mini that a little old lady would drive where no one would batter an eyelid until she boots it
Am I'm 6789 years old, will be 6790 in July
Kam can you send the little elves over to mine after your done with them so they can fit a new front for me
I was thinking about this the other day Chris (no, not the elves)...........if your fiberglass front is trimmed down and cut into already because everything is fitted tight then surely when you get a steel panel and cut everything from the inside like teadrop/inner wing brackets to make it flush (like I have) you'll have trouble to get the same clearance as your fiberglass front? as the fiberglass is just a copy of the outer skin but a steel panel has bends and kinks so it sits more 'inside' if you know what I mean?
Hopefully you won't have any issues and I'm not thinking straight but just got me thinking thats all......
#523
Kam
-
- TMF+ Member
-
- 4,144 posts
Straight to the Point
- Location: Hampshire
- Local Club: 16vMini club
Posted 11 February 2011 - 02:12 AM
ive been helping Chris were i can this week with his new ecu and keeping him motivated
I take it your 'man flu' has now cleared up?
Keep him motivated!
#524
ginger_monkey
-
- Members
-
- 1,080 posts
One Carb Or Two?
Posted 11 February 2011 - 12:43 PM
I'll make it fit mate. The fiberglass front has had so much trimming and fettling now it's gonna be fun when I get the metal front and go... There's no space to fit this what so ever!!!! It's impossible. The fun continues
#525
Kam
-
- TMF+ Member
-
- 4,144 posts
Straight to the Point
- Location: Hampshire
- Local Club: 16vMini club
Posted 06 March 2011 - 10:30 PM
Right! I've had enough!
I gave myself a few weeks away from the car for a breather and all that, been nice but I have been missing all the stress, aggro, arguments, money woes, sleepless nights and all the other fun that comes along with doing build projects
Its been nice but time to get back on it!
Started off with trying to finish up the front end, everything works around this, the whole engine bay is based around what room the front end gives me so it makes sense to finish it first! Its been a PITA to be honest as I decided to make another change and NOT have any bolts showing on the end of the wings like I had before, I wanted this front not to look like a pull away front end?
So made up a couple of plates with its bolts fixed on

And welded up some counterpart plates on the wings

Put the front end back on and and held everything in place with the bolts and some clamps then welded the two plates together and welded up the nuts to the plate

Any hey presto, hidden fixings! the two bolts now go into the inner wing then into the now captive nuts, simples!
Just got to drill the two holes on the front lower panel now just above the mini teardrop locations to secure the front end, but I can do that tomorrow as the engine needs to come out for that - what fun!
As for my rad, well I'm not saying its a done n dusted deal now I've cut into the frame but I feel I got alot more better choice for a rad, so I've decided to leave it and worry later about what rad will fit and get on with the big one...........no, not rebuilding the engine myself but the alternator location for a roundnose........
This could be made simple I believe by just forgetting about the dam alternator in the first place and just trickle charge the battery most days! But I thought I'd at least give it a try
I had two plans for the alternator, plan A was to use a suzuki swift one mounted on the front like the allspeed one I had before, I felt there was a small chance it would fit, so tried it out


Looks small? But no, it won't work not only does the body stick out too far hitting the slats in the front grille but the alternator was just resting against the casing for the picture, even if I cut into the slats of the grille for more clearance it still needs a mounting plate to hole it on the casing so it will stick out further, so I opted for plan B........
Plan B was to sit in the corner and cry, but I didn't feel like doing that so I opted for Plan C instead which was an idea I had tucked away but didn't think I would need to use it as Plan A would work!
Plan C was to buy an alternator bracket from Minitec from across the pond, I know these are only made for there MTB frames so I wasn't sure if anyone has used one on an Allspeed frame before or if it would even work? I could already see a couple of problems beforehand using one but decided to risk it and order one otherwise it meant going back to Plan B which I wasn't in the mood for as I was feeling in one of my "Kam do" attitudes!
I was thinking of buying Gingermonkeys old alternator bracket as he had it in use so it works, but I wanted to be awkward and have the alternator moving with the engine rather than the frame, probably don't make a dam difference but hey its me - I like hasssle!
So Plan C it was, I got the alternator bracket through, you can see the slotted hole on the right hand side

which attaches to this single unused hole at the very top of the head

But I knew about the first problem before I even ordered it! the hole won't line up using the Allspeed frame as the bottom of the bracket sits too deep and hits the corner brace of the allspeed frame


You can see the problem here, the two bolts attach to the bottom section of the original honda lower alternator mount, but thats no good to me or this frame so the angle came out to play again!
After cutting that bit off I put the inlet manny on just to make sure it would clear, I knew it would but just peace of mind and all that


The top section tucks in nicely under the wing

Before anyone thinks I got money to burn on this build so cutting up this custom alternator bracket don't mean anything to me it does, I didn't take the decision lightly but unfortunately I can't make this bracket, if you can then give yourself a pat on the back but some of us don't have the equipment or materials to make this, yes it wasn't cheap to buy for something that could end up going wrong but I was confident of making it work
On the MTB frames the top corner section of the inner wings (in front of the wiper motor) needs to be hacked away to allow the original honda alternator to be used, I thought I might aswell see how my suzuki swift alternator being a tad bit slimmer might hold up, so I chucked it on, but the holes didn't line up


That top lip of the corner section was preventing it from moving, so you can see where the original honda alternator with its fat arse has no chance!


I cut the top lip of the corner section for now just to see how the swift ones fairs up.......even that has got about 3mm clearance now!


So looks like that corner section has got to be hacked away no matter which alternator I choose to use now, swift one I think around 45amps and the honda has enough! so I might just keep it honda
I gave myself a few weeks away from the car for a breather and all that, been nice but I have been missing all the stress, aggro, arguments, money woes, sleepless nights and all the other fun that comes along with doing build projects
Its been nice but time to get back on it!
Started off with trying to finish up the front end, everything works around this, the whole engine bay is based around what room the front end gives me so it makes sense to finish it first! Its been a PITA to be honest as I decided to make another change and NOT have any bolts showing on the end of the wings like I had before, I wanted this front not to look like a pull away front end?
So made up a couple of plates with its bolts fixed on
And welded up some counterpart plates on the wings
Put the front end back on and and held everything in place with the bolts and some clamps then welded the two plates together and welded up the nuts to the plate
Any hey presto, hidden fixings! the two bolts now go into the inner wing then into the now captive nuts, simples!
Just got to drill the two holes on the front lower panel now just above the mini teardrop locations to secure the front end, but I can do that tomorrow as the engine needs to come out for that - what fun!
As for my rad, well I'm not saying its a done n dusted deal now I've cut into the frame but I feel I got alot more better choice for a rad, so I've decided to leave it and worry later about what rad will fit and get on with the big one...........no, not rebuilding the engine myself but the alternator location for a roundnose........
This could be made simple I believe by just forgetting about the dam alternator in the first place and just trickle charge the battery most days!
But I thought I'd at least give it a tryI had two plans for the alternator, plan A was to use a suzuki swift one mounted on the front like the allspeed one I had before, I felt there was a small chance it would fit, so tried it out
Looks small? But no, it won't work
not only does the body stick out too far hitting the slats in the front grille but the alternator was just resting against the casing for the picture, even if I cut into the slats of the grille for more clearance it still needs a mounting plate to hole it on the casing so it will stick out further, so I opted for plan B........Plan B was to sit in the corner and cry, but I didn't feel like doing that
so I opted for Plan C instead which was an idea I had tucked away but didn't think I would need to use it as Plan A would work!Plan C was to buy an alternator bracket from Minitec from across the pond, I know these are only made for there MTB frames so I wasn't sure if anyone has used one on an Allspeed frame before or if it would even work? I could already see a couple of problems beforehand using one but decided to risk it and order one otherwise it meant going back to Plan B which I wasn't in the mood for as I was feeling in one of my "Kam do" attitudes!
I was thinking of buying Gingermonkeys old alternator bracket as he had it in use so it works, but I wanted to be awkward and have the alternator moving with the engine rather than the frame, probably don't make a dam difference but hey its me - I like hasssle!
So Plan C it was, I got the alternator bracket through, you can see the slotted hole on the right hand side
which attaches to this single unused hole at the very top of the head
But I knew about the first problem before I even ordered it! the hole won't line up using the Allspeed frame as the bottom of the bracket sits too deep and hits the corner brace of the allspeed frame
You can see the problem here, the two bolts attach to the bottom section of the original honda lower alternator mount, but thats no good to me or this frame so the angle came out to play again!
After cutting that bit off I put the inlet manny on just to make sure it would clear, I knew it would but just peace of mind and all that
The top section tucks in nicely under the wing
Before anyone thinks I got money to burn on this build so cutting up this custom alternator bracket don't mean anything to me it does, I didn't take the decision lightly but unfortunately I can't make this bracket, if you can then give yourself a pat on the back but some of us don't have the equipment or materials to make this, yes it wasn't cheap to buy for something that could end up going wrong but I was confident of making it work
On the MTB frames the top corner section of the inner wings (in front of the wiper motor) needs to be hacked away to allow the original honda alternator to be used, I thought I might aswell see how my suzuki swift alternator being a tad bit slimmer might hold up, so I chucked it on, but the holes didn't line up
That top lip of the corner section was preventing it from moving, so you can see where the original honda alternator with its fat arse has no chance!
I cut the top lip of the corner section for now just to see how the swift ones fairs up.......even that has got about 3mm clearance now!
So looks like that corner section has got to be hacked away no matter which alternator I choose to use now, swift one I think around 45amps and the honda has enough! so I might just keep it honda


0 user(s) are reading this topic
0 members, 0 guests, 0 anonymous users


