

Luigi has been sat stripped in a barn for some time now after running out of MOT then getting hit by flood damage.
There is big plans for an engine conversion and other things but for now the first job is getting it MOT'ed and back on the road
Luigi came into my ownership on the 7th November 2009
here we go with the first post#
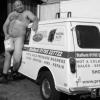
This is just loading up out of the barn

This is all strapped up ready for the drive home to Precious Towers

First thing we did was give him a steam clean to get ready for the workshop


In place in his new warm home


So then tonight i have had an hour to play so i got martin round to help me roll him on his side so i can start sorting the welding out
lXcQK9XqX_Y
I then started to find out the work that was needed on the drivers side floor
This plate ended up like this by pulling with my fingers!!

and this one!!!

Whoever did this "repair" needs shooting

And thats where we are upto, atm i am pricing up replacing the panels or repairing them.