Thanks for the input and the link - that link lead to anoter interesting one too.
That minter auto has done the same mileage as mine, and has the same colour and seats.
I'm holding off on the repair of the wings as I'm reconsidering just getting new panels.
I knew HL stood for High Line - just one of those things lodged in the memory banks from long ago. It wasn't which track they were on, just denoting a higher thim level than the base (city) models. I actually worked at Longbridge when these cars were made.
I think as mine is un messed with, and quite a nice spec to begin with I'll leave it as stock and will try and get it back to good condition.
Mart.


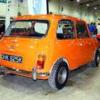
Meet Pokey - 1982 Mini 1000 Hle.
Started by
82hle
, Mar 25 2010 09:04 PM
51 replies to this topic
#17

mk3 Cooper S
-
- Members
-

- 5,569 posts
Crazy About Mini's
Posted 28 March 2010 - 07:59 PM
From memory the HLE stands for High Line Economy due to a diff ratio od 2.95 :1
I love the rear number plate on your car - I am still racking my brain whereabouts in Shiley I used to see this car?? I think it is the size of the plate that makes it familiar?
With all the good work you are doing if you deciede to change the wings make sure you put "good quality" ones on as replacements I fitted rotted in a few years and certainly are not the same quality metal as the originals,
Are you keeping it on 10's?
#18
Shifty
-

- Admin
-
- 13,147 posts
Sponsored by Fosters (tm)
- Name: Sean
- Location: Shropshire(sunny)
- Local Club: TMF
Posted 28 March 2010 - 08:02 PM
And HLS is "High Line Special"
#19
82hle
-
- Noobies
-
- 100 posts
Mini Mad
Posted 30 March 2010 - 09:34 PM
Ok Folks, a little bit of progress to report. I stopped working on the front end because I had second thoughts about repairing the existing wings and front panel. I took a breather while I weighed up the pros and cons of replacing or repairing.
I turned my attention to the back end, and removed the valance. I cut it off first, then had the tedious job of removing the remaining flange and spot welds. Anyway, got them all off and offered up the heritage valance - very nice fit. I looked at the heritage panel and a pattern one side by side and bought the heritage panel without hesitation, it had far more shape to it. the pattern part was flat by comparison. Havn't welded it in yet, but it is clamped in place for now.

Removing the rear bumper revealed a little bit of rust that needs repairing.. Fairly typical I believe.

I almost bought replacement wings and front panel, but after considering the options, I have decided to continue repairing what I have.
So here's tonights effort - the left side of the front panel made good with 2 little pieces of metal. Quite a lot of shape to them, but most of it is covered by the grille and indicator.

There's a little more to do where the recess is, may need to cut back the flange a bit more to get good metal.
I know I'm going against some good advice, but I reckon I stand a better chance of decent panel fit by repairing the original panels than fitting pattern parts. - It's an experiment, lets see how it pans out.
Mart.
I turned my attention to the back end, and removed the valance. I cut it off first, then had the tedious job of removing the remaining flange and spot welds. Anyway, got them all off and offered up the heritage valance - very nice fit. I looked at the heritage panel and a pattern one side by side and bought the heritage panel without hesitation, it had far more shape to it. the pattern part was flat by comparison. Havn't welded it in yet, but it is clamped in place for now.
Removing the rear bumper revealed a little bit of rust that needs repairing.. Fairly typical I believe.
I almost bought replacement wings and front panel, but after considering the options, I have decided to continue repairing what I have.
So here's tonights effort - the left side of the front panel made good with 2 little pieces of metal. Quite a lot of shape to them, but most of it is covered by the grille and indicator.
There's a little more to do where the recess is, may need to cut back the flange a bit more to get good metal.
I know I'm going against some good advice, but I reckon I stand a better chance of decent panel fit by repairing the original panels than fitting pattern parts. - It's an experiment, lets see how it pans out.
Mart.
Edited by 82hle, 30 March 2010 - 09:48 PM.
#20
82hle
-
- Noobies
-
- 100 posts
Mini Mad
Posted 03 April 2010 - 06:30 PM
Been slogging away repairing the front wing - bought a wing off a bloke who had it on ebay. I bought it just so I could cut it up to make the repair panels. Was a bit gutted to find (after picking it up in the dark and rain) that it was rusty in the area I needed - the bit around the headlamp.
Decided to use the parts that were all right, and make up the last bit that was rusty on the donor wing.
Cut out the outer part and welded in a section from the donor wing:

Cut out the leftmost part and welded in another bit of the donor wing, then made up the gap with a piece cut from an old headlamp surround (non Mini) that had almost the right shape. Had to make up part of the front face, trim it all back, and grind the welds smooth but I was pleased with ny efforts.

Little bit of paint to protect it until it can be painted proper:


Here's a reminder of how this side looked:

Next to do will be the wing to front panel joint at the wheelarch both sides, and finish the bit on the vent hole on the front panel.
Couple of things worth mentioning - First, the wing now feels really strong now it's welded up - that rot takes a hell of a lot of strength from it.
Other thing is, I bought those headlamp reinforcing rings from Hadrian - about £11 the pair (collected - I work in Coventry) _ I think they are pretty useful on a job like this. I intend to leave them as a separate item so the wing and ring can both have a protective coat of paint and waxoyl.
I'm still enjoying it..
EDIT: I have some more pictures to post, but they are on a different subject. I have done a little more to the bodywork though and have just one picture so I will add it here.
I used a little bit of the wing I bought, and made up the other piece, and welded them in to repair the join between the wing and the front panel on the left.

This was hard work, and I am beginning to see why the advice to get new panels was good advice.
I've got so far now, I will continue, but it is a slog.
Mart.
Decided to use the parts that were all right, and make up the last bit that was rusty on the donor wing.
Cut out the outer part and welded in a section from the donor wing:
Cut out the leftmost part and welded in another bit of the donor wing, then made up the gap with a piece cut from an old headlamp surround (non Mini) that had almost the right shape. Had to make up part of the front face, trim it all back, and grind the welds smooth but I was pleased with ny efforts.
Little bit of paint to protect it until it can be painted proper:
Here's a reminder of how this side looked:
Next to do will be the wing to front panel joint at the wheelarch both sides, and finish the bit on the vent hole on the front panel.
Couple of things worth mentioning - First, the wing now feels really strong now it's welded up - that rot takes a hell of a lot of strength from it.
Other thing is, I bought those headlamp reinforcing rings from Hadrian - about £11 the pair (collected - I work in Coventry) _ I think they are pretty useful on a job like this. I intend to leave them as a separate item so the wing and ring can both have a protective coat of paint and waxoyl.
I'm still enjoying it..
EDIT: I have some more pictures to post, but they are on a different subject. I have done a little more to the bodywork though and have just one picture so I will add it here.
I used a little bit of the wing I bought, and made up the other piece, and welded them in to repair the join between the wing and the front panel on the left.
This was hard work, and I am beginning to see why the advice to get new panels was good advice.
I've got so far now, I will continue, but it is a slog.
Mart.
Edited by 82hle, 06 April 2010 - 10:51 PM.
#21
82hle
-
- Noobies
-
- 100 posts
Mini Mad
Posted 06 April 2010 - 10:49 PM
Front Brakes and Hubs:
Feeling a little burnt out on doing the bodywork, and having already done the rear brakes when I did the subframe, I decided to look at the front brakes, and as it turned out the swivel hubs and ball joints too.
I had been soaking the adjusters and the cylinder bolts in penetrating oil for the last week. What a waste of time. I pulled the shoes and springs from both sides and looked at the adjusters. All were tight, I got them to move by applying vice grips to the barrel and using the adjuster spanner at the same time. One adjuster on each side was rounded off. I removed the cylinders and struggled with the undersize headed screws. Had to hammer on a good 5/16 socket - I think they should be 11/32.
The big ones were almost as bad - good job I have a good quality 6 sided socket.
I decided to do what I did over 25 years ago and weld some nuts on to the adjusters. To do it properly I needed to pull the backplates - I had never pulled the front hubs before, but it was easier than expected. I bought a sykes pickavant flywheel puller recently and the seller threw in some other things that might be useful. One was a home made tool to hold the hub while undoing the nut, and it worked a treat.
Three small headed screws later and the first backplate was off. I had some 10mm flange nuts with a 15mm hex. I drilled these out partially from the flange end so they fitted well down over the adjusters. I welded them on with the welder on full blast. These nuts are about as big as I could go while still clearing the steering arms. I did both sides and cleaned and painted the backplates.

The adjuster setback overcome, while they were drying I thought about the ball joints. I could feel a little slack on both sides. I read up about lapping and watched the excellent video on U-Tube (will insert link here if I can find it) I decided to see if I could just re-shim the existing parts rather than replace them with inferior parts from China.
First I needed to hold the suspension up - I remember seeing wedges fitted in the rebound stop area but I had a different idea - I jacked up the suspension under the bottom joint until the car just lifted off the jackstands - I removed the shock and used it to mark up a couple of holes in a bit of scrap angle iron. I fitted the angle in place of the shock, lowered the jack and hey presto - the suspension is held up to allow the removal of the ball joints.

I dismantled the joints, (there was a 1-1/2" deep socket in the box of goodies that came with the flywheel puller - that really was a bargain), cleaned everything, and had a brainwave - I reassembled the bottom one on the top and the top one on the bottom, both sides. I got all the joints to the point where they were able to move, but with no discernable play. - the bottom one done initially without the spring of course.
I cleaned the threads on the pins with a die and ran a tap through the nuts, and reassembled everything back up.

I left the hub au naturel rather than painting it as I didn't intend to clean and paint all the arms etc, I just wanted to fix what needed fixing.
So with the backplates now painted, I fitted the cylinders - you can use a standard headed bolt (7/16") instead of the undersized jobbie as long as you have a nice slim socket.

The shoes were reassembled - dead easy with it down flat - and no hub in the way. Don't do what I did the first time round and forget the little beehive springs that hold the end of the shoe to the cylinder.
The red springs were a lucky find - have had them in a drawer for the last 25 years!

The backplates are best assembled off the car then refitted after - made easier by the small headed bolts and a slender socket. You can see where the shoe is clearanced to allow access to the top bolt.

Hubs were refitted and the nuts done up hand tight for now.
I dropped the drums on to keep the brakes clean, but need to give them a good clean before fitting them properly.
So all in all a good days work.
Here's my parting shot - ever seen a steering rack gaiter like this?

I think it's about due for replacement!
Mart.
Feeling a little burnt out on doing the bodywork, and having already done the rear brakes when I did the subframe, I decided to look at the front brakes, and as it turned out the swivel hubs and ball joints too.
I had been soaking the adjusters and the cylinder bolts in penetrating oil for the last week. What a waste of time. I pulled the shoes and springs from both sides and looked at the adjusters. All were tight, I got them to move by applying vice grips to the barrel and using the adjuster spanner at the same time. One adjuster on each side was rounded off. I removed the cylinders and struggled with the undersize headed screws. Had to hammer on a good 5/16 socket - I think they should be 11/32.
The big ones were almost as bad - good job I have a good quality 6 sided socket.
I decided to do what I did over 25 years ago and weld some nuts on to the adjusters. To do it properly I needed to pull the backplates - I had never pulled the front hubs before, but it was easier than expected. I bought a sykes pickavant flywheel puller recently and the seller threw in some other things that might be useful. One was a home made tool to hold the hub while undoing the nut, and it worked a treat.
Three small headed screws later and the first backplate was off. I had some 10mm flange nuts with a 15mm hex. I drilled these out partially from the flange end so they fitted well down over the adjusters. I welded them on with the welder on full blast. These nuts are about as big as I could go while still clearing the steering arms. I did both sides and cleaned and painted the backplates.
The adjuster setback overcome, while they were drying I thought about the ball joints. I could feel a little slack on both sides. I read up about lapping and watched the excellent video on U-Tube (will insert link here if I can find it) I decided to see if I could just re-shim the existing parts rather than replace them with inferior parts from China.
First I needed to hold the suspension up - I remember seeing wedges fitted in the rebound stop area but I had a different idea - I jacked up the suspension under the bottom joint until the car just lifted off the jackstands - I removed the shock and used it to mark up a couple of holes in a bit of scrap angle iron. I fitted the angle in place of the shock, lowered the jack and hey presto - the suspension is held up to allow the removal of the ball joints.
I dismantled the joints, (there was a 1-1/2" deep socket in the box of goodies that came with the flywheel puller - that really was a bargain), cleaned everything, and had a brainwave - I reassembled the bottom one on the top and the top one on the bottom, both sides. I got all the joints to the point where they were able to move, but with no discernable play. - the bottom one done initially without the spring of course.
I cleaned the threads on the pins with a die and ran a tap through the nuts, and reassembled everything back up.
I left the hub au naturel rather than painting it as I didn't intend to clean and paint all the arms etc, I just wanted to fix what needed fixing.
So with the backplates now painted, I fitted the cylinders - you can use a standard headed bolt (7/16") instead of the undersized jobbie as long as you have a nice slim socket.
The shoes were reassembled - dead easy with it down flat - and no hub in the way. Don't do what I did the first time round and forget the little beehive springs that hold the end of the shoe to the cylinder.
The red springs were a lucky find - have had them in a drawer for the last 25 years!
The backplates are best assembled off the car then refitted after - made easier by the small headed bolts and a slender socket. You can see where the shoe is clearanced to allow access to the top bolt.
Hubs were refitted and the nuts done up hand tight for now.
I dropped the drums on to keep the brakes clean, but need to give them a good clean before fitting them properly.
So all in all a good days work.
Here's my parting shot - ever seen a steering rack gaiter like this?
I think it's about due for replacement!
Mart.
Edited by 82hle, 07 April 2010 - 08:41 AM.
#22
Down&Out
-

- Traders
-
- 4,853 posts
The King Of Retro Cool
- Location: -
Posted 07 April 2010 - 12:21 AM
Thats lovely 
#23
82hle
-
- Noobies
-
- 100 posts
Mini Mad
Posted 11 April 2010 - 12:42 AM
Hoo Boy! one of the jobs that I thought would be the easiest turned out to be the hardest!
Because when I bought the car I thought one of my kids would end up driving it, I bought all new brake parts, including new front flexies. When I fitted the new front brakes I cut the old flexies, so fitting the new ones was a must.
The left side was easier but harder. The big nut was just about accessible by putting all my extensions together and going down the front face of the rad. But the nut was really tight and it took a lot of perseverance to get it undone.
Shiny object that is out of focus is the nut for the brake hose.

On the right hand side, I could not get access because the clutch lever and plunger were in the way. I wanted to check the clutch mechanism out, so I set to and removed the clutch cover - what a swine of a job! The rearmost screw took ages, and the two lower ones were only slightly better.
Once removed, though, access to the banjo and big bolt was unfettered.

So the new flexies have been fitted. here's a brain dump of info for anyone doing the same job:
Spanner size brake hose at wheel cylinder end: 15mm
Spanner size hose end at subframe: 18mm
Socket size big nut: 15/16"
Socket size banjo bolt oh rhs: 5/8"
You should fit the hoses to the wheel cylinders first then fix the subframe end, ensuring they are not twisted.
So the clutch: I was considering replacing the clutch, as when I first got the car it was slipping. I did not drive it like this, but when trying to turn the engine by towing it, it would slip. As I removed the last bolt on the clutch cover, the cover popped off. This told me the release mechanism was still under tension, that is, holding the clutch partially released. The lever was tight, but would move slightly. I removed it, and found the plunger very tight. I removed the nuts and knocked it back and forth a little, and then knocked it right out.
The cover with the stuck plunger:

And the plunger showing why it was tight:

I was then able to clean it all up, regrease and reassemble.
I decided not to change the clutch, as I had found a good reason for the slippage, and I didn't want to risk problems with flywheel removal and upsetting the factory balance. I reassembled the clutch cover, and other than being a right royal pain, it went well. The engine mount was refitted with next to no drama.
So some good progress over the last couple of days.. I had already replaced the perished rack gaiters, so just some new brake pipe to procure and making up the new pipes should be relatively simple compared to the flexies.
Mart.
Because when I bought the car I thought one of my kids would end up driving it, I bought all new brake parts, including new front flexies. When I fitted the new front brakes I cut the old flexies, so fitting the new ones was a must.
The left side was easier but harder. The big nut was just about accessible by putting all my extensions together and going down the front face of the rad. But the nut was really tight and it took a lot of perseverance to get it undone.
Shiny object that is out of focus is the nut for the brake hose.
On the right hand side, I could not get access because the clutch lever and plunger were in the way. I wanted to check the clutch mechanism out, so I set to and removed the clutch cover - what a swine of a job! The rearmost screw took ages, and the two lower ones were only slightly better.
Once removed, though, access to the banjo and big bolt was unfettered.
So the new flexies have been fitted. here's a brain dump of info for anyone doing the same job:
Spanner size brake hose at wheel cylinder end: 15mm
Spanner size hose end at subframe: 18mm
Socket size big nut: 15/16"
Socket size banjo bolt oh rhs: 5/8"
You should fit the hoses to the wheel cylinders first then fix the subframe end, ensuring they are not twisted.
So the clutch: I was considering replacing the clutch, as when I first got the car it was slipping. I did not drive it like this, but when trying to turn the engine by towing it, it would slip. As I removed the last bolt on the clutch cover, the cover popped off. This told me the release mechanism was still under tension, that is, holding the clutch partially released. The lever was tight, but would move slightly. I removed it, and found the plunger very tight. I removed the nuts and knocked it back and forth a little, and then knocked it right out.
The cover with the stuck plunger:
And the plunger showing why it was tight:
I was then able to clean it all up, regrease and reassemble.
I decided not to change the clutch, as I had found a good reason for the slippage, and I didn't want to risk problems with flywheel removal and upsetting the factory balance. I reassembled the clutch cover, and other than being a right royal pain, it went well. The engine mount was refitted with next to no drama.
So some good progress over the last couple of days.. I had already replaced the perished rack gaiters, so just some new brake pipe to procure and making up the new pipes should be relatively simple compared to the flexies.
Mart.
#24
82hle
-
- Noobies
-
- 100 posts
Mini Mad
Posted 19 April 2010 - 11:46 AM
Sooo.
Back to the bodywork.
I was continuing on with repairing the wings, but the more I did the less satisfied I was with the job. I bid on and won a front panel on ebay. This made me reappraise what I wanted to do to the front end.
I had a long hard look at how it was.

Even tried it with some lights in.

And decided I wasn't happy with it. Fired up the angle grinder and 20 minutes later:

That was quite a bold move.
Removing the wing showed this dirt buildup on top of the vent pipe:

And that was after jet washing – no wonder they rot here.
I then set about removing the flanges using my home made spot weld drill – a right ball ache but here's the inner wing flange for example – only drilled too deep on one and that was the first one I tried.

I removed the doors – got 7 out of the 8 nuts off ok, broke 1 stud.
Removed the A panels
And after offering the front panel and wings in place welded the wings to the front panel.
I thought about the best way to do this, and decided to trim down the flange on the front panel to about 5mm, then seam weld along this edge onto the flange on the wing. This worked well as I could do it with the parts upside down on a bench.

The seam should be less prone to water ingress like this.
The front panel was an older pattern piece, and both wings were hadrian. This side was a real pig to get the two pieces matched up, I struggled with every inch.

Whereas this side aligned perfectly right from the start:

Im now at the position where the front panel is bolted to the subframe and everything is resting in place waiting for final prep and welding.


So quite a turn around – still plenty to do, but solid progress being made.
Oh yeah - I applied for the log book - and a new one turned up last week - so that's another step in the right direction.
Oh yeah 2 - The guy I bought the front panel off also had a pair of twin SU's complete with manifold etc - so that lot found a new home.
Mart.
Back to the bodywork.
I was continuing on with repairing the wings, but the more I did the less satisfied I was with the job. I bid on and won a front panel on ebay. This made me reappraise what I wanted to do to the front end.
I had a long hard look at how it was.
Even tried it with some lights in.
And decided I wasn't happy with it. Fired up the angle grinder and 20 minutes later:
That was quite a bold move.
Removing the wing showed this dirt buildup on top of the vent pipe:
And that was after jet washing – no wonder they rot here.
I then set about removing the flanges using my home made spot weld drill – a right ball ache but here's the inner wing flange for example – only drilled too deep on one and that was the first one I tried.
I removed the doors – got 7 out of the 8 nuts off ok, broke 1 stud.
Removed the A panels
And after offering the front panel and wings in place welded the wings to the front panel.
I thought about the best way to do this, and decided to trim down the flange on the front panel to about 5mm, then seam weld along this edge onto the flange on the wing. This worked well as I could do it with the parts upside down on a bench.
The seam should be less prone to water ingress like this.
The front panel was an older pattern piece, and both wings were hadrian. This side was a real pig to get the two pieces matched up, I struggled with every inch.
Whereas this side aligned perfectly right from the start:
Im now at the position where the front panel is bolted to the subframe and everything is resting in place waiting for final prep and welding.
So quite a turn around – still plenty to do, but solid progress being made.
Oh yeah - I applied for the log book - and a new one turned up last week - so that's another step in the right direction.
Oh yeah 2 - The guy I bought the front panel off also had a pair of twin SU's complete with manifold etc - so that lot found a new home.
Mart.
Edited by 82hle, 19 April 2010 - 02:30 PM.
#25
Shifty
-
- Admin
-
- 13,147 posts
Sponsored by Fosters (tm)
- Name: Sean
- Location: Shropshire(sunny)
- Local Club: TMF
Posted 19 April 2010 - 06:32 PM
Is this a good time to say "I told you so" about the front end???
I've repaired them before and it takes longer to do than replace, once they've started to rust the only course of action is to rip it off.
To get access to the brake fittings on the front subby I usually bend the inner wing out of the way, be gentle and it goes back like new!!
Nice work though!!
I've repaired them before and it takes longer to do than replace, once they've started to rust the only course of action is to rip it off.
To get access to the brake fittings on the front subby I usually bend the inner wing out of the way, be gentle and it goes back like new!!
Nice work though!!
#26
Shifty
-
- Admin
-
- 13,147 posts
Sponsored by Fosters (tm)
- Name: Sean
- Location: Shropshire(sunny)
- Local Club: TMF
Posted 19 April 2010 - 06:36 PM
Oh yeah!!
Don't forget to trial fit the door before welding everything up.
I usually start with the door and work out.
- Set the door up so it fits nice in the frame.
- Bolt front panel on.
- Bolt bonnet on so theres a nice gap on the back and it sit central
- Clamp A-panels on so door gaps are good.
- Trial fit wings.
-Spend the next 4 hours swearing tapping/bashing/crowbaring etc until gaps are good.
#27
Scallywag630
-

- Banned
-
- 2,850 posts
Up Into Fourth
Posted 19 April 2010 - 07:01 PM
Nice job. Always better to have new steel, in my opinion.
#28
82hle
-
- Noobies
-
- 100 posts
Mini Mad
Posted 21 April 2010 - 09:40 AM
I appreciate the input.
This is the first time I have tried this job, so expert advice is well received.
The front end is now welded on.
Despite my best efforts the fit is crap.
I made some big mistakes, and if I were to do it again I'd do it different.
Problem is, now it's all welded I can't re-do it.
But I can make the best of it.
First mistake was to weld the wings to the a-panels completely on the inside. I thought I was being clever by eliminating a moisture trap inside the wing/a-panel area but it caused some distortion and the penetration of the weld through to the a-panel will be hard to remove without a lot of refinishing after.


Second mistake was not getting the right shape at the wing to scuttle joints. I worked on them and got them as good as I could, but they're far from perfect.

The fit to the bonnet isn't great, but not too bad.
Both wings are now welded to the inner flitches


Both A panels are also swaged round the a-pillar strengtheners (or whatever they are called) and just need a couple of tacks.
Maybe I'm being hyper-critical, but it has been a lot of work for a mediocre result.
Mart.
This is the first time I have tried this job, so expert advice is well received.
The front end is now welded on.
Despite my best efforts the fit is crap.
I made some big mistakes, and if I were to do it again I'd do it different.
Problem is, now it's all welded I can't re-do it.
But I can make the best of it.
First mistake was to weld the wings to the a-panels completely on the inside. I thought I was being clever by eliminating a moisture trap inside the wing/a-panel area but it caused some distortion and the penetration of the weld through to the a-panel will be hard to remove without a lot of refinishing after.
Second mistake was not getting the right shape at the wing to scuttle joints. I worked on them and got them as good as I could, but they're far from perfect.
The fit to the bonnet isn't great, but not too bad.
Both wings are now welded to the inner flitches
Both A panels are also swaged round the a-pillar strengtheners (or whatever they are called) and just need a couple of tacks.
Maybe I'm being hyper-critical, but it has been a lot of work for a mediocre result.
Mart.
#29
miniman86
-

- Members
-
- 1,939 posts
Camshaft & Stage Two Head
- Location: Near Southend, Essex!
- Local Club: smag, Waltham Abby
Posted 21 April 2010 - 10:34 PM
looks like good progress mate, keep up the good work 
#30
mk3 Cooper S
-
- Members
-
- 5,569 posts
Crazy About Mini's
Posted 21 April 2010 - 11:02 PM
Your car definatley deserves the new front end. All of the bits you are not happy with will be sorted when you prep for paint. Keep up your good work.


1 user(s) are reading this topic
0 members, 1 guests, 0 anonymous users


