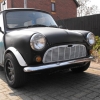
Florence My '97 Cooper
#61

Posted 21 August 2011 - 12:02 PM
If not, i'd say rocker cover gasket. Get a new one, glue it to the rocker cover, and make sure it fits perfectly all the way round (easier said than done!).
Good luck.
#62

Posted 21 August 2011 - 12:04 PM
Edit: It's the third one it's had in as many weeks.
Edited by bcjames, 21 August 2011 - 12:05 PM.
#63

Posted 23 August 2011 - 10:34 AM
While I'm waiting for that to come back, I thought I'd paint my block. The bits you can see anyway. Being an MPi, this is really awkward unless you strip a lot of bits off, so while it's in bits I pulled off the last few items in the way and cracked on. Several patience testing hours later, a first coat is on! I also touched up the servo, and might do the upper mount too.

Cleaned by bcjamesmini, on Flickr

Painted! by bcjamesmini, on Flickr
Edited by bcjames, 27 August 2011 - 07:49 PM.
#64

Posted 27 August 2011 - 05:49 PM

It's out! by bcjamesmini, on Flickr
I had been soaking the bolts for a few weeks, but one still snapped. Its broken at the head, so I still have a stud sticking out to try and get out
Subframe is to be stripped, derusted, and repainted
And I still don't have my engine complete again yet!
Edited by bcjames, 27 August 2011 - 07:47 PM.
#65

Posted 27 August 2011 - 07:45 PM

Tidy by bcjamesmini, on Flickr
Tomorrows job, try and get this out!

Schnap by bcjamesmini, on Flickr
Edited by bcjames, 27 August 2011 - 07:50 PM.
#67

Posted 28 August 2011 - 01:48 PM
Is it helicoilable?
#68

Posted 28 August 2011 - 01:50 PM
#69

Posted 28 August 2011 - 01:56 PM
If it were me, I'd cut out the plate immediately around the nut, and weld in a new peice of plate with a new nut welded to it. Drastic, but a proper job.
#70

Posted 28 August 2011 - 03:17 PM
Anyway, the picture will explain my grin

Two bolts! by bcjamesmini, on Flickr
I think I need to get a tap to run down it as the bolt doesn't go in smoothly by hand. But what a feeling when that seized bolt finally collapsed!
All the abuse to the area has also shown it's nicely solid around there
Tomorrows job, or later if I feel like it, strip the subframe.
#71

Posted 29 August 2011 - 09:55 AM

Snapped tip by bcjamesmini, on Flickr
Wonder if they'll warranty them!
#72

Posted 30 August 2011 - 08:28 AM

Rear subframe by bcjamesmini, on Flickr
Excuse the mess in the photo, with half the engine bay out and then the rear too, the garage is getting a bit crammed!
Edited by bcjames, 30 August 2011 - 08:29 AM.
#73

Posted 30 August 2011 - 08:47 AM
#74

Posted 30 August 2011 - 08:52 AM
Stanford hall is the deadline. Aside a couple of London trips I'm 'working' from home, so it should be achievable! I'll be ordering parts today
#75

Posted 30 August 2011 - 04:17 PM
Found a can of chassis black in the garage so I painted the subframe. Ran out just before the end so finished a couple of bits with some Hammerite. Came up really nice.

Subframe painted by bcjamesmini, on Flickr
In less than good news, the radius arms aren't too great. The arms themselves don't look too bad, still have paint on, but the shafts are completely pitted rusted, and marked from the roller bearing.

Radius arms by bcjamesmini, on Flickr
Top on is still a bit greasy but the bottom one here is completely cleaned, and completely fubar.

Shafts by bcjamesmini, on Flickr
So it still looks like this for today:

Still all in bits by bcjamesmini, on Flickr
I hope I can remember how to put it all back together
Edited by bcjames, 30 August 2011 - 04:21 PM.
0 user(s) are reading this topic
0 members, 0 guests, 0 anonymous users


