Hi,
how did you sort out the subframe hole line up problem ?? Will the line up not cause crabbing when driving ?? Sorry if easy question but first time with minis !!
Graham


Maggie's Mighty Mini
Started by
vincieshile
, Jun 07 2010 08:41 PM
30 replies to this topic
#16

grahama
-

- Members
-

- 2,442 posts
Up Into Fourth
- Location: Warrington
- Local Club: None in my area !!
Posted 28 June 2010 - 08:45 PM

#18
vincieshile
-
- Noobies
-
- 42 posts
On The Road
- Local Club: not yet
Posted 30 June 2010 - 04:56 PM
Hi,
how did you sort out the subframe hole line up problem ?? Will the line up not cause crabbing when driving ?? Sorry if easy question but first time with minis !!
Graham
I may have exagerated a bit in my posts. The problem was with the 'teardrops' the bolt hole in the teardrop was about an inch above that in the front panel. We loosened all nuts (tower bolts and engine mounts) until we got enough play to enter the bolts through the teardrops, then we gradually tightened all nuts. Vincie Shile
#19
vincieshile
-
- Noobies
-
- 42 posts
On The Road
- Local Club: not yet
Posted 30 June 2010 - 05:05 PM
Hi Vincieshile
I like the look of this rebuild. You have some talents there, especially the gas welding.
Underside & subframes on is quite a milestone. I look forward to seeing it all in paint.
What plans for the engine & interior?
Kind regards
Steve
Thanks Steve. Engine, just a standard 1000 c.c. Interior, haven't yet decided. I know what I would like but alot depends on whats left in my pockets when I get that far. Right now I would be content with being able to drive around the house.
#20
vincieshile
-
- Noobies
-
- 42 posts
On The Road
- Local Club: not yet
Posted 04 July 2010 - 09:29 AM
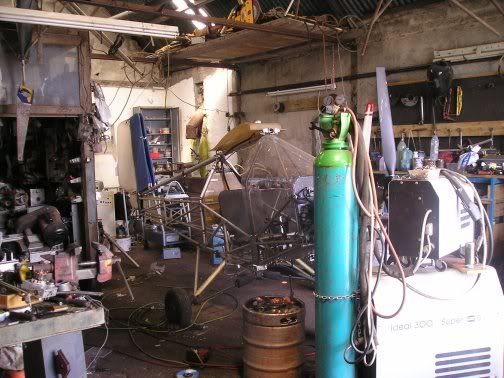
Back to Tom's shed to do little jobs, fix a hole on the exhaust, remove a sheared bolt from the rad, and a few other minor bits. Tom's shed has become no tidier that when 'Maggie' was being stripped there 5 years ago. Where 'Maggie' once stood is now a small aircraft awaiting attention. In another shed is a half-built helicoptor - 'Choppy'
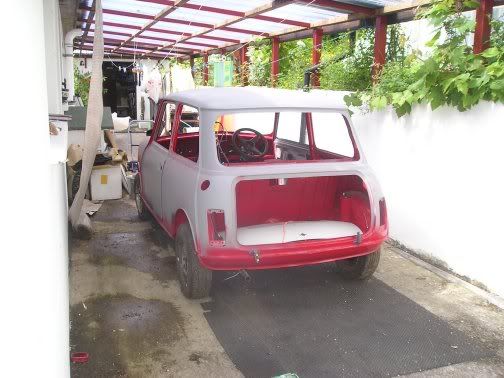
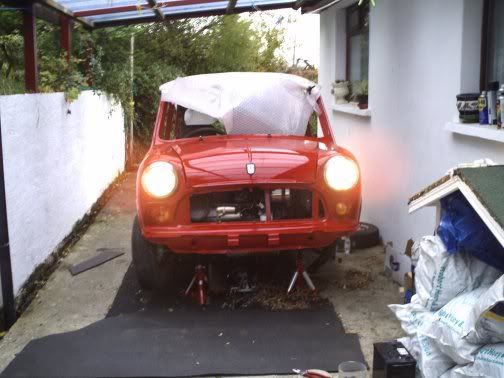
As the weather has been unsettled during the last week I decided to move 'Maggie' in under the car-port. So Maggie is back on 'all fours' and under shelter. If good weather returns it's easy to move her out where there is more space.
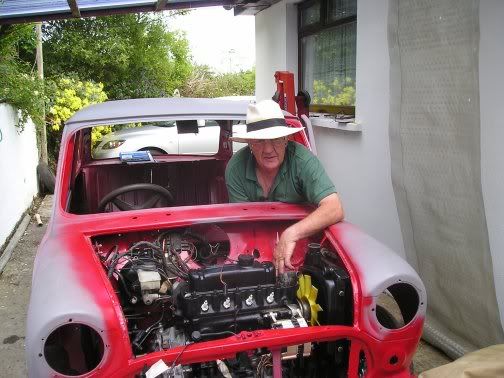
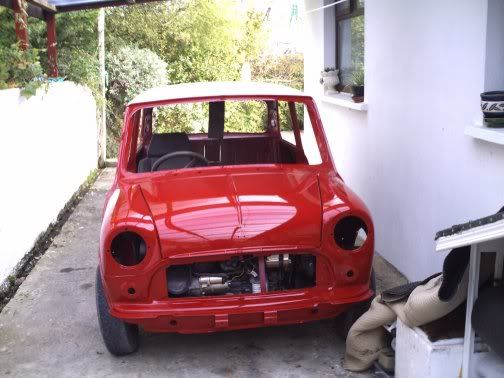
My biggest job at present is figuring out the loom - what goes where.
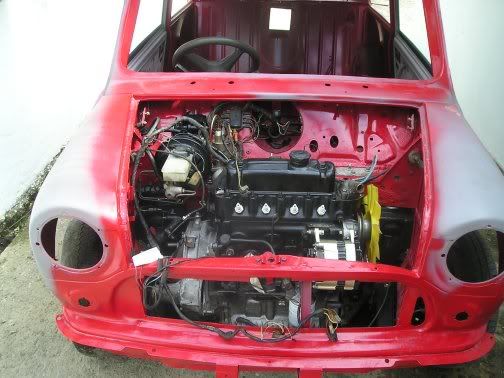

With no glass, access is easier. Here fitting the collar that holds exhaust pipe to the manifold.
Day after day, hour after hour, fitting, unfitting, refitting. If only I knew what to do and how to do it I would have alot more done. Then I met some setbacks. Having fitted the clutch master and slave cylinders I filled the former with fluid and with Tommie's help began to 'bleed'. But it didn't work. Took off the cylinder, discovered the bit that moves up and down (I don't know the right name, plunger or piston, maybe) had seized during the 5 years it had been lying around idle. Had to resort to one of my suppliers, Mervyn Johnston (a legend in Irish rallying) who supplied me with new rubbers and washers. Then all worked fine.
Also had problems with the manifold. When I came to fit the servo pipe I realised there was no-where to fit it. Again off to Mervyn who gave me a replacement with the hole for the servo pipe. Having fitted that manifold discovered it was too large for the exhaust pipe and the collar which hold the two together. Back to mervyn who drilled a hole it the first one which is now fitted and working happily.
My other supplier is another legend in autotest driving - Ken Irwen. Both have a vast knowlege of Minis.
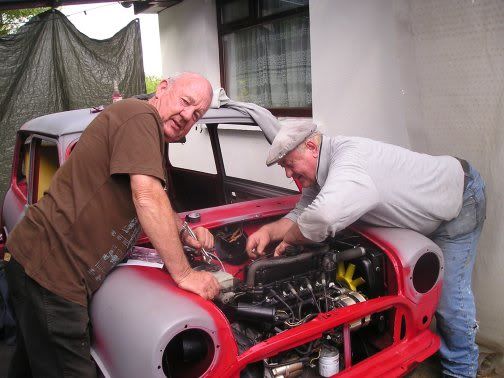
Eventually came to the stage that we felt the engine could be started but try as we may nothing would happen. The problem seemed to be in the firing order. Yes, we tried the standard Mini firing order, checked every book. phoned a friend, tried all sorts of combination, tried different distributor caps. Finally after 7 hours (over 2 days) Tommy brought a distributor cap from an old Morris Minor engine which he uses to drive a lathe. We put on the leads as they were on the Morris engine. No good. Swapped the two end leads and she 'coughed' as if running on 2 pistons. Swapped the 2 middle leads and she started and runs beautifully. (Note the fan ) We are puzzled.

It is now the 5th August and much has happened since my last post, though there's little to photograph. It seems to be always 3 steps forward and 2 steps back and sometimes even, 3 steps back.
When we tried to bleed the brakes the piston in the master cylinder wouldn't work. So it was off to my supplier, Mervyen Johnston who managed to get a 'kit' (rubbers, washers etc.) from somewhere in England and sorted my problem. Mind you I haven't bled the brakes yet.

Decided to fit the throttle cable only to discover the sleeve was missing. Eventuall ordered and received a new cable.

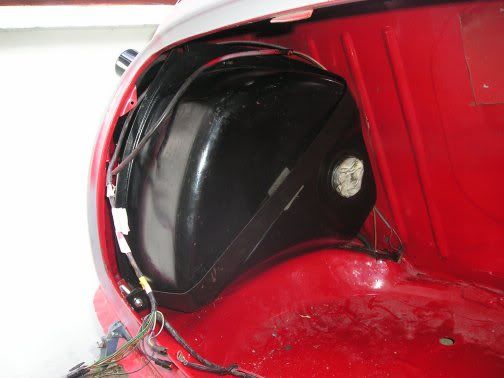
Fitted the fuel tank. Loads of problems. Because I had fitted a new boot floor the bracket for holding the strap was missing. Thankfully I had kept tt part of the boot floor and so was able to re-use the bracket. Now because it was a new boot floor it had an elongated hole between the fuel tank and the back seat. It puzzled me until I 'phoned a friend' who told me that it was meant for the later Minis with fuel injection. He advised me to make a plate with two suitable holes (one for the fuel line and one for the breather pipe). As always that took ages. Finall I got the tank fitted, poured in a gallon of petrol, started the engine and everything worked perfectly.
Next I noticed my radiator leaking. Again it was off to Mervyn who soldered a joint at the bottom. I refitted it and problem solved.
Then I decided to fit the speedo cable only to find out that I should have done so before the engine was fitted. To do it now would'nt be easy. The radiator had to come out, a job, by now, I was getting used to. Only problem, water, water everywhere. Fitted the cable but it took about an hour to stop the pipe joints from leaking.
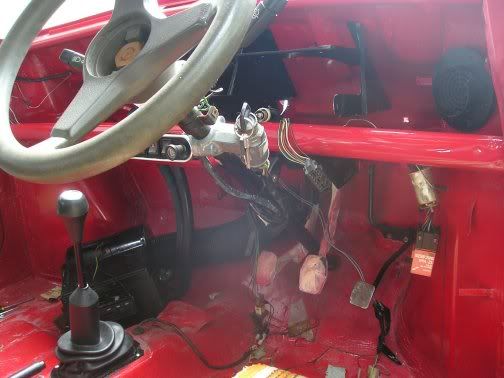
My big problem at present is all these cables hanging under the dash; where do the go? And would anyone happen to have a spare boss to suit the centre of my steering wheel?
Tom and I spent a few hours bleeding the brakes. Nothing worked for a long time and then everything began to work. Good brakes now. Then decided to tune the carb. Noticed petrol dripping from the bottom of the carb. removed carb to investigate. Noticed paint pealing off the bulkhead where the petrol had dripped.
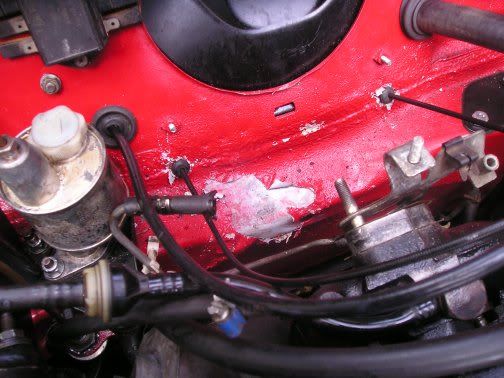
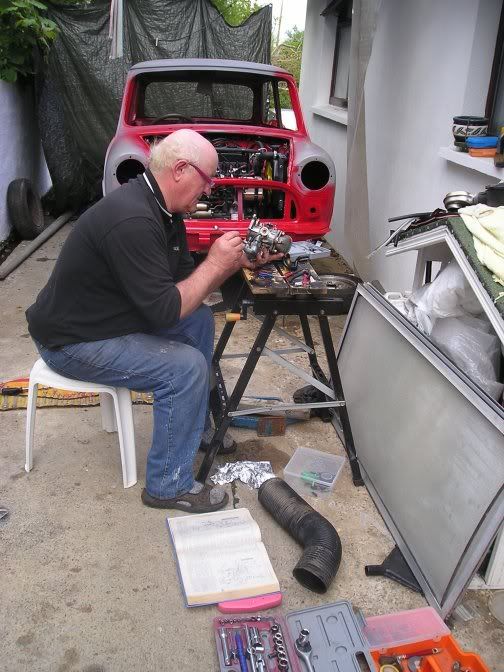
Spent an hour at the carb. Finally discovered a rubber gland (no. 44 in the Hayne's manual) had perished while lying about over the last 5 years. Another run to Mervyn today.
Below: Tom studies the carb. How many Mini bits can you spot lying about?
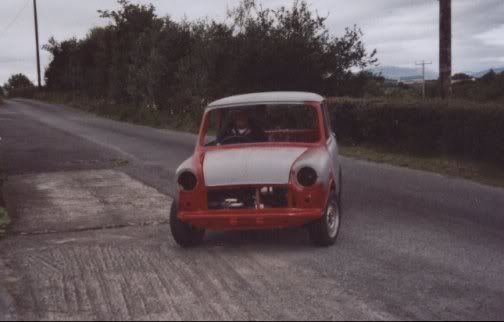
A quick run to Mervyn and the carb was sorted. Fitted it and Maggie started up nicely. Then decided to drive around the house. Another set back - no reverse. I had 5 forward gears but no reverse. To make a very long story short - we discovered the rod (don't know the reight ward for it) connecting the gear shift with the gear box was upside down. So jacked up the car removed rolling pin (with difficulty) and revolved the connecting rod. Yes - it worked. And today for the first time in 5 years I drove Maggie up and down the road. Tomorrow Maggie goes for her final coat of paint.
Yes, at long last Maggie is 'drivable' (if there's such a word). Tom drove her up and down the road. Now she is ready to go for her final coat of paint.
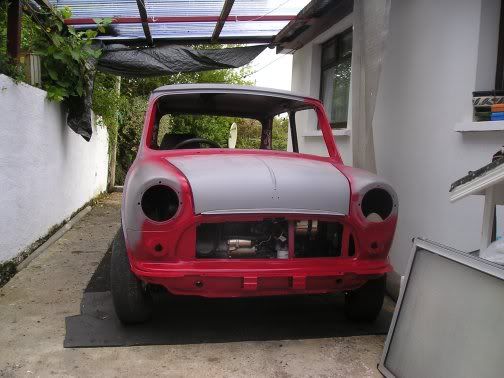
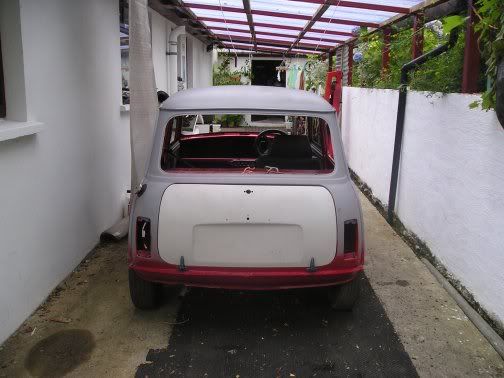
After my last post, Maggie was moved to Seoirse's next door for spraying. Weeks have past and nothing has happened until the last few days. At last Maggie has a fresh coat of paint. One more coat and she will be back home. Then begins the job of replacing lights, bumpers, interior etc.
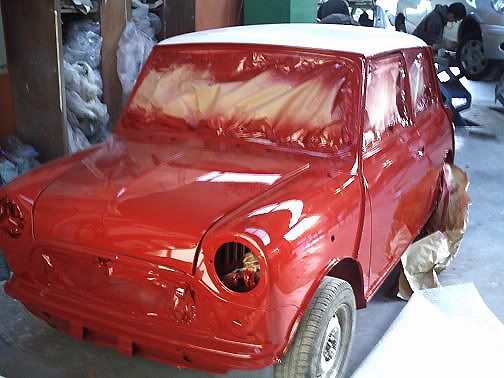
And at last Maggie has her final coat and is back at my back door.
Maggie was then transported to Mervyn Johnston to have the engine tuned, wheels aligned, lights focused, roof lining and all glass fitted.
This Forum for some reason won't allow me to add any more.
As the weather has been unsettled during the last week I decided to move 'Maggie' in under the car-port. So Maggie is back on 'all fours' and under shelter. If good weather returns it's easy to move her out where there is more space.
My biggest job at present is figuring out the loom - what goes where.
With no glass, access is easier. Here fitting the collar that holds exhaust pipe to the manifold.
Day after day, hour after hour, fitting, unfitting, refitting. If only I knew what to do and how to do it I would have alot more done. Then I met some setbacks. Having fitted the clutch master and slave cylinders I filled the former with fluid and with Tommie's help began to 'bleed'. But it didn't work. Took off the cylinder, discovered the bit that moves up and down (I don't know the right name, plunger or piston, maybe) had seized during the 5 years it had been lying around idle. Had to resort to one of my suppliers, Mervyn Johnston (a legend in Irish rallying) who supplied me with new rubbers and washers. Then all worked fine.
Also had problems with the manifold. When I came to fit the servo pipe I realised there was no-where to fit it. Again off to Mervyn who gave me a replacement with the hole for the servo pipe. Having fitted that manifold discovered it was too large for the exhaust pipe and the collar which hold the two together. Back to mervyn who drilled a hole it the first one which is now fitted and working happily.
My other supplier is another legend in autotest driving - Ken Irwen. Both have a vast knowlege of Minis.
Eventually came to the stage that we felt the engine could be started but try as we may nothing would happen. The problem seemed to be in the firing order. Yes, we tried the standard Mini firing order, checked every book. phoned a friend, tried all sorts of combination, tried different distributor caps. Finally after 7 hours (over 2 days) Tommy brought a distributor cap from an old Morris Minor engine which he uses to drive a lathe. We put on the leads as they were on the Morris engine. No good. Swapped the two end leads and she 'coughed' as if running on 2 pistons. Swapped the 2 middle leads and she started and runs beautifully. (Note the fan ) We are puzzled.
It is now the 5th August and much has happened since my last post, though there's little to photograph. It seems to be always 3 steps forward and 2 steps back and sometimes even, 3 steps back.
When we tried to bleed the brakes the piston in the master cylinder wouldn't work. So it was off to my supplier, Mervyen Johnston who managed to get a 'kit' (rubbers, washers etc.) from somewhere in England and sorted my problem. Mind you I haven't bled the brakes yet.
Decided to fit the throttle cable only to discover the sleeve was missing. Eventuall ordered and received a new cable.
Fitted the fuel tank. Loads of problems. Because I had fitted a new boot floor the bracket for holding the strap was missing. Thankfully I had kept tt part of the boot floor and so was able to re-use the bracket. Now because it was a new boot floor it had an elongated hole between the fuel tank and the back seat. It puzzled me until I 'phoned a friend' who told me that it was meant for the later Minis with fuel injection. He advised me to make a plate with two suitable holes (one for the fuel line and one for the breather pipe). As always that took ages. Finall I got the tank fitted, poured in a gallon of petrol, started the engine and everything worked perfectly.
Next I noticed my radiator leaking. Again it was off to Mervyn who soldered a joint at the bottom. I refitted it and problem solved.
Then I decided to fit the speedo cable only to find out that I should have done so before the engine was fitted. To do it now would'nt be easy. The radiator had to come out, a job, by now, I was getting used to. Only problem, water, water everywhere. Fitted the cable but it took about an hour to stop the pipe joints from leaking.
My big problem at present is all these cables hanging under the dash; where do the go? And would anyone happen to have a spare boss to suit the centre of my steering wheel?
Tom and I spent a few hours bleeding the brakes. Nothing worked for a long time and then everything began to work. Good brakes now. Then decided to tune the carb. Noticed petrol dripping from the bottom of the carb. removed carb to investigate. Noticed paint pealing off the bulkhead where the petrol had dripped.
Spent an hour at the carb. Finally discovered a rubber gland (no. 44 in the Hayne's manual) had perished while lying about over the last 5 years. Another run to Mervyn today.
Below: Tom studies the carb. How many Mini bits can you spot lying about?
A quick run to Mervyn and the carb was sorted. Fitted it and Maggie started up nicely. Then decided to drive around the house. Another set back - no reverse. I had 5 forward gears but no reverse. To make a very long story short - we discovered the rod (don't know the reight ward for it) connecting the gear shift with the gear box was upside down. So jacked up the car removed rolling pin (with difficulty) and revolved the connecting rod. Yes - it worked. And today for the first time in 5 years I drove Maggie up and down the road. Tomorrow Maggie goes for her final coat of paint.
Yes, at long last Maggie is 'drivable' (if there's such a word). Tom drove her up and down the road. Now she is ready to go for her final coat of paint.
After my last post, Maggie was moved to Seoirse's next door for spraying. Weeks have past and nothing has happened until the last few days. At last Maggie has a fresh coat of paint. One more coat and she will be back home. Then begins the job of replacing lights, bumpers, interior etc.
And at last Maggie has her final coat and is back at my back door.
Maggie was then transported to Mervyn Johnston to have the engine tuned, wheels aligned, lights focused, roof lining and all glass fitted.
This Forum for some reason won't allow me to add any more.
Edited by vincieshile, 04 May 2011 - 04:56 PM.
#21
vincieshile
-
- Noobies
-
- 42 posts
On The Road
- Local Club: not yet
Posted 29 November 2011 - 05:37 PM
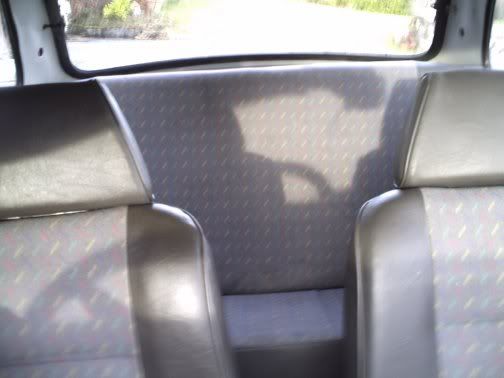
Below: the old and the new
Spent hours at original seats; cleanig, spraying sub-frame and getting them ready to fit. A few cigarette burns were covered over with a little paint of the same colour tone as the fabric.

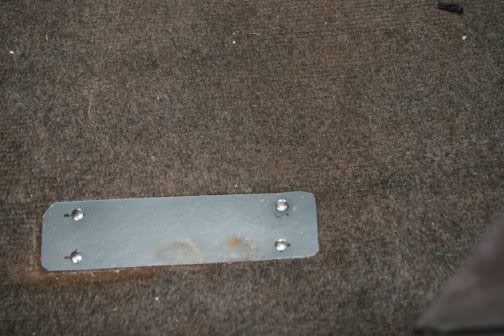
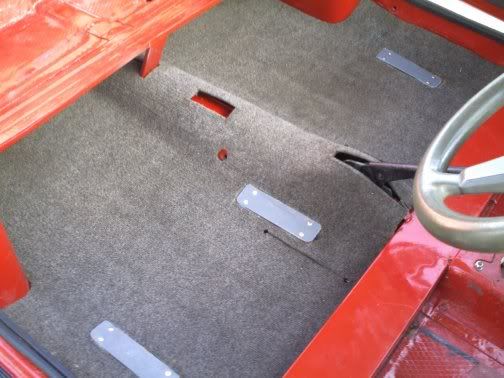
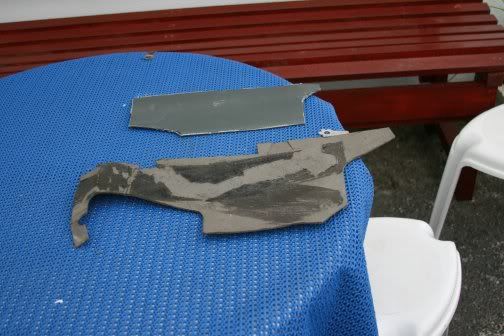
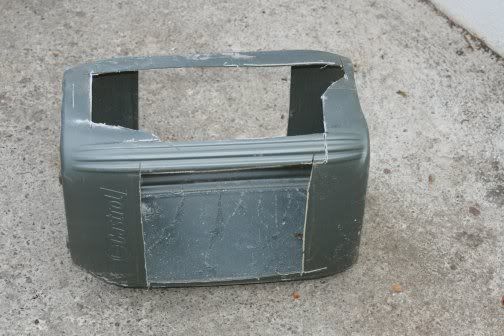
Spent hours at the carpets. By now I know every cleaning agent available and how to use it. 15 years of grime and dust etc. were removed. The 4 plastic panels on which the front seats rest were badly broken and worn. My friend and 'chief engineer' Tom arrived at my house with his pickup. In the back was an empty 5 gallon plastic drum with flat sides. Just what I needed. From it I cut out new panels. A friend who does leather work fixed the panels to the carpet with studs.
Spent hours at original seats; cleanig, spraying sub-frame and getting them ready to fit. A few cigarette burns were covered over with a little paint of the same colour tone as the fabric.
Spent hours at the carpets. By now I know every cleaning agent available and how to use it. 15 years of grime and dust etc. were removed. The 4 plastic panels on which the front seats rest were badly broken and worn. My friend and 'chief engineer' Tom arrived at my house with his pickup. In the back was an empty 5 gallon plastic drum with flat sides. Just what I needed. From it I cut out new panels. A friend who does leather work fixed the panels to the carpet with studs.
#22
davej
-

- Members
-
- 985 posts
Kelly Jones
- Location: North Wales
Posted 29 November 2011 - 06:02 PM
I've just read through the build, brilliant work.
#23
LouisT
-

- Members
-
- 197 posts
Mini Mad
- Location: Manchester
Posted 29 November 2011 - 06:04 PM
what a transformation!!!hats off to you and you're engineer!!
Great job, what interior and wheels have you got to go on her.
Cheers
Louis
Great job, what interior and wheels have you got to go on her.
Cheers
Louis
#24
maggies_minder
-
- Members
-
- 4,393 posts
TMFs New official Spamster
- Location: i dont know
- Local Club: sutton coldfield mini club
Posted 29 November 2011 - 06:05 PM
good job, and heres me thinking i had the only Maggie round here.
#25
vincieshile
-
- Noobies
-
- 42 posts
On The Road
- Local Club: not yet
Posted 29 November 2011 - 07:56 PM
Thanks lads for your remarks. It's been a while since I've posted here but now I intend to post all that has happened since my last posts. by the way can anyone tell me how to edit what I posted a year ago? Where's the 'Edit' button gone?
So it seems there is another 'Maggie' about.
Strange thing I notice - minis have both male and female names.What sex is a mini?????
So it seems there is another 'Maggie' about.
Strange thing I notice - minis have both male and female names.What sex is a mini?????
#26
vincieshile
-
- Noobies
-
- 42 posts
On The Road
- Local Club: not yet
Posted 29 November 2011 - 08:17 PM
Grille, arches and wheels added.
#27
vincieshile
-
- Noobies
-
- 42 posts
On The Road
- Local Club: not yet
Posted 29 November 2011 - 08:19 PM
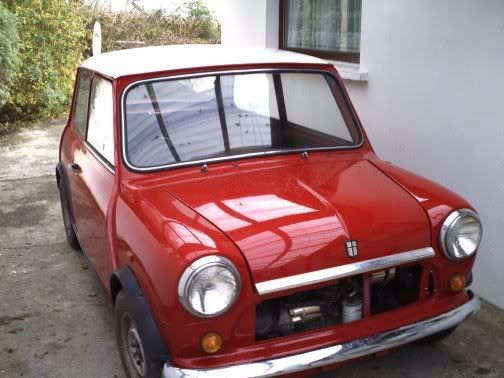
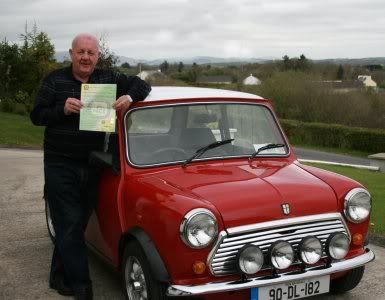
Maggie with more lights and Taxed and Insured and on the road legally (16 Feb. 2011).
Still lots of little jobs to do such as stopping water coming in through the door.
(visit http://www.theminifo...00#entry2084276 )
Actually I learned a lot from this site http://www.theminifo...howtopic=125702 and for anyone doing a full restoration it is well worth having it bookmarked, almost as good or maybe better than the Haynes manual.
14th April 2011 Maggie passed her NCT first time with flying colours. I felt good as it was, to some extent, a stamp of approval of the project.
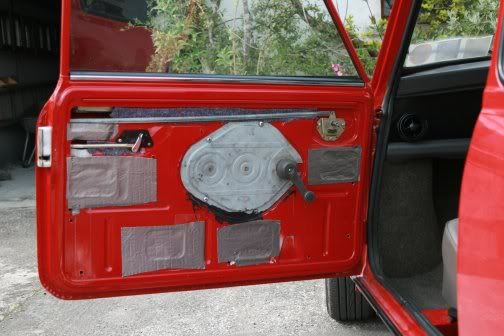
The one part of Maggie not dealt with till now was the dash. If I could afford it I would go for a wooden dash but for the time being decided to replace the original dash which is made up of silly bits and pieces of card and vinyl. As some of the card shelves had sagged I reinforced them with bits of plastic from the same oil drum as used for the carpet panels.

Dash finally finished. And as I finished fitting the last piece I declared Maggie fully restored. And I celebrated with a bottle of wine (I had no whiskey). That was on the 28th April 2011.
Though Maggie is fully restored doesn't mean that I am finished working at Maggie. I hope to continue making improvements but at present I am enjoying driving her whenever I can.
I have 2 white bonnet strips to fit
I'm looking for a radio and speakers to add
Hope to pick up chome door handles and boot handle
some day a wooden dash and console
etc. etc.
#28
vincieshile
-
- Noobies
-
- 42 posts
On The Road
- Local Club: not yet
Posted 29 November 2011 - 08:49 PM
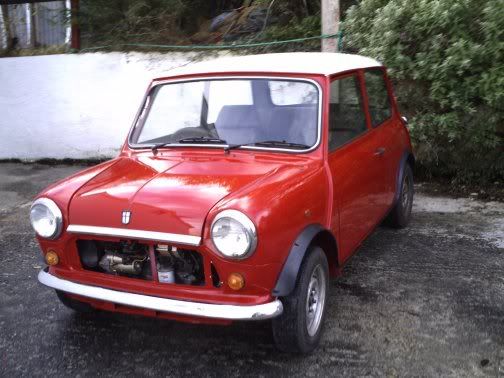
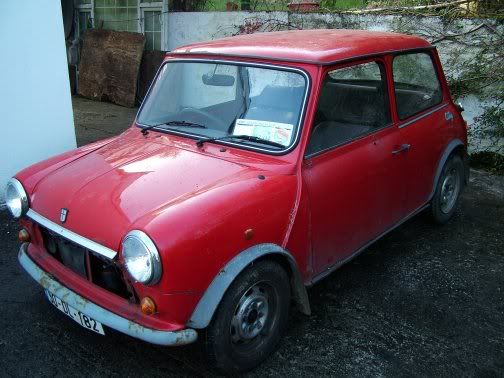
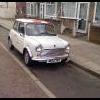
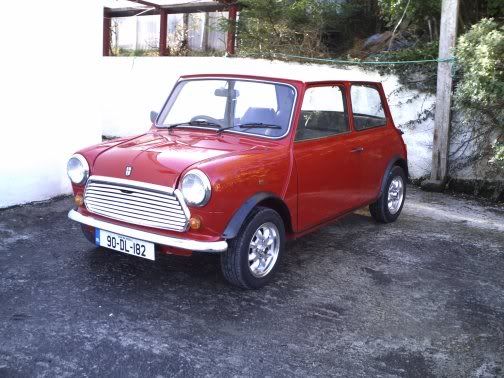
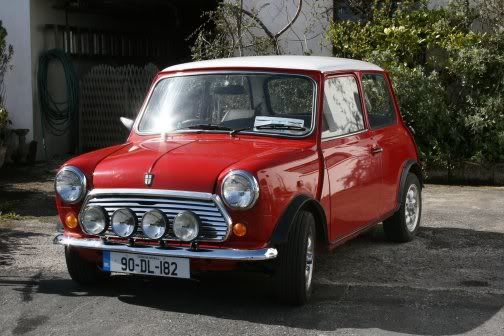
Here's a few general photos of Maggie as she looked at the end of summer 2011.
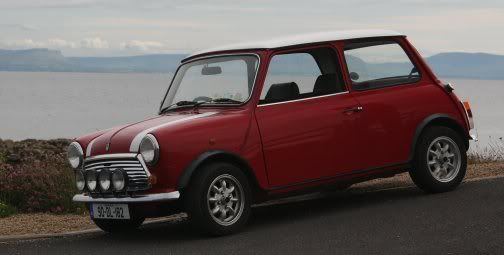
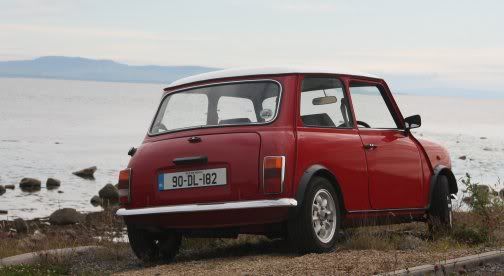
Note right reversing light has been converted to a fog light. I did ask the NCT (MOT) people if it was legal and they said it was.
Note right reversing light has been converted to a fog light. I did ask the NCT (MOT) people if it was legal and they said it was.
#29
vincieshile
-
- Noobies
-
- 42 posts
On The Road
- Local Club: not yet
Posted 29 November 2011 - 09:08 PM
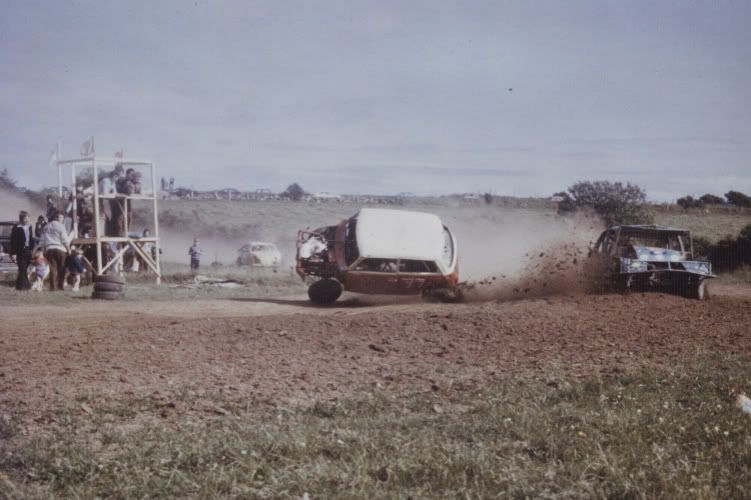
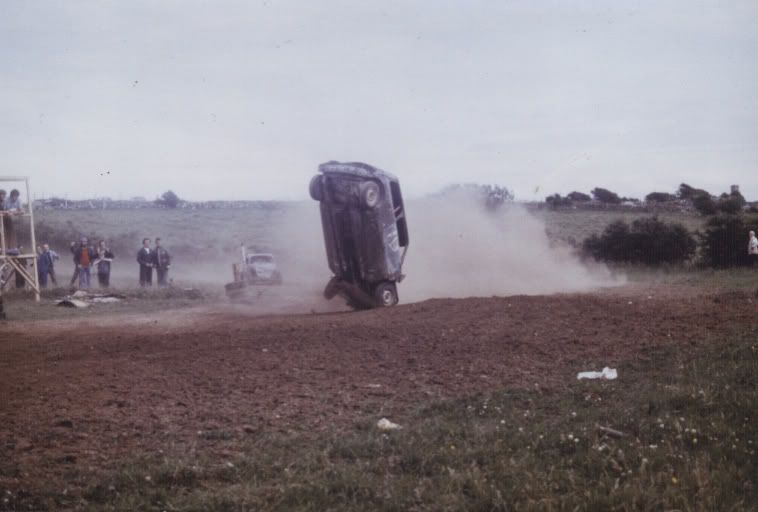
I would like to share with you photos of my past Minis
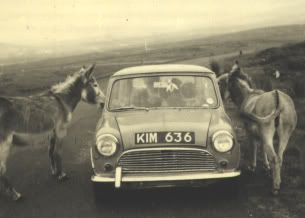
My first ever mini seen here being checked by the local police!
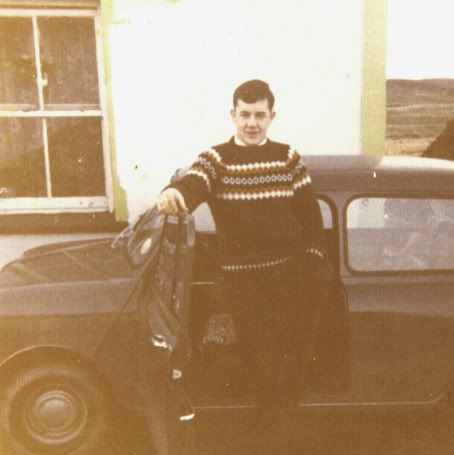
Next Mini and my first new Mini.
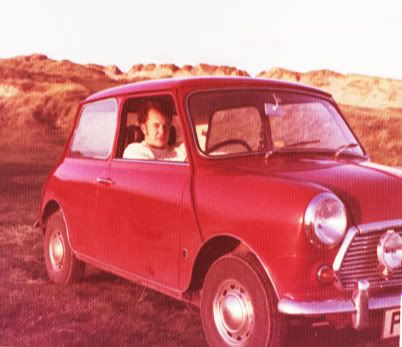
PIH 280
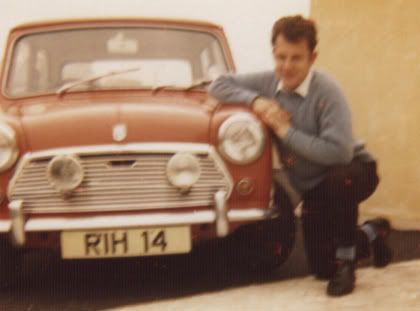
RIH 14
Minis making fools of themselves
My first ever mini seen here being checked by the local police!
Next Mini and my first new Mini.
PIH 280
RIH 14
Minis making fools of themselves
#30
davej
-
- Members
-
- 985 posts
Kelly Jones
- Location: North Wales
Posted 29 November 2011 - 09:16 PM
Lovely photos thank you for sharing. Maggie is looking lovely, I bet you are made up. I really like the idea with the rear fog light, I might have a go at that with mine.
The edit button should be at the bottom of your post.
Mini`s and all cars in my eyes should have girls names
The edit button should be at the bottom of your post.
Mini`s and all cars in my eyes should have girls names


1 user(s) are reading this topic
0 members, 1 guests, 0 anonymous users


