Phantastic job so far.
Nice to see one more Mini back to the road


Passed Test

Posted 14 November 2016 - 07:00 PM
Phantastic job so far.
Nice to see one more Mini back to the road
One Carb Or Two?

Posted 14 November 2016 - 10:58 PM
One Carb Or Two?
Posted 14 November 2016 - 10:59 PM
Speeding Along Now

Posted 19 November 2016 - 11:38 AM
Speeding Along Now
Posted 24 November 2016 - 01:34 PM
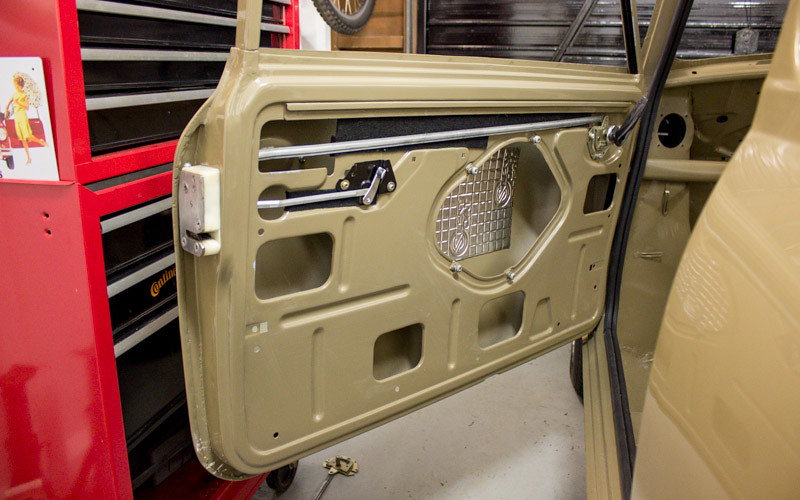
Started adding the door fittings. We now have a door that opens from both handles closes and locks from the key and the interior lever :)
I've applied one sheet of 187mm x 265mm silent coat to the door skin. Not sure if this is enough to be effective as its smaller than the original stuff that was on there before. May look into this further.
Also got my autojumbled chrome handles on...
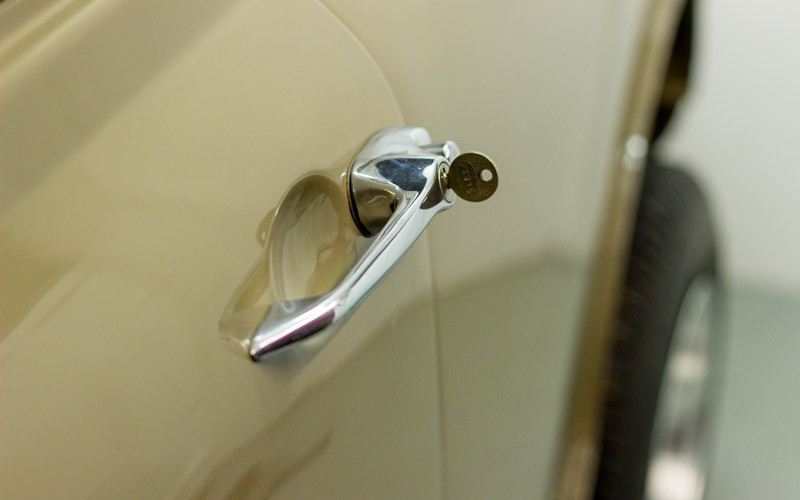
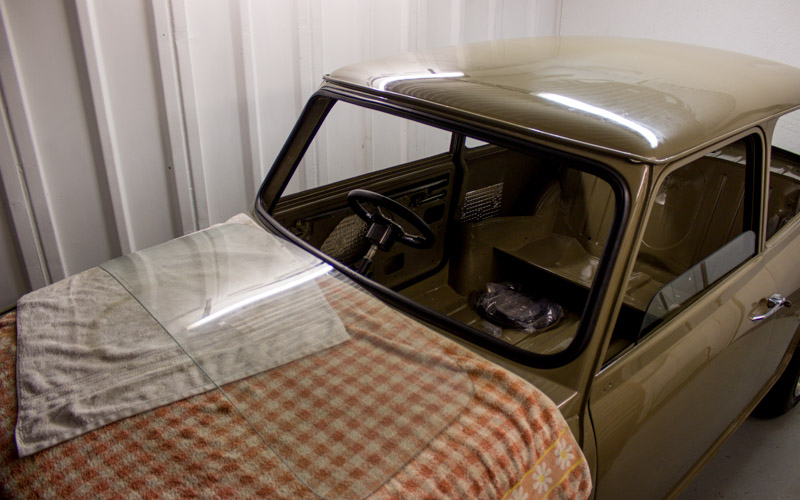
I've been working on preparing the glass to go back in. Daviewonder: great shout on that scraper tool. It worked really well. The glass isn't in amazing condition anyway, but its much improved without a fine cloud of paint covering it. I also removed and rust-repaired one of the runners which has suffered from water ingress. Then I painted all of them (not including the surfaces in contact withe the regulator) to try to give them a bit more protection for the future.
Speeding Along Now
Posted 13 December 2016 - 01:26 PM
AAAARGH! Disaster strikes! After two long and painful sessions trying to fit the windscreen, I have come to the conclusion that the hole is too small. 
I managed to get it in this much but it is way too tight.
The rubber in the corners where the glass is in is compressed like this...
...and like this. So there is no way the trim strip is going in there.
I measured the aperture, and I have 414mm in the middle, and 410mm at either end. I haven't found any official data yet, but the internet generally thinks you should have 414mm across the full width. I'm going to do more investigation but I suspect I will have to resort to filing down the metal. Damn.
Crazy About Mini's

Posted 13 December 2016 - 01:50 PM
I'd be very surprised if you needed to adjust the aperture - if your scuttle lined up nicely then all should be fine.
One thing I would check is that the rubber isn't inside out - the gap on one side is narrower/thinner than the other and this needs to go to the metal with the bigger side to the glass.
You'd be surprised how much that gap will open up when you come to put the fillet strip in, but until the glass is fully in and settled it won't look right anyway. Once it is in, go round and give it all a good thump to settle it.
One Carb Or Two?

Posted 13 December 2016 - 01:52 PM
Been there, at the same stage! I measured and measure and had the screen held in the aperture to get the gap right before I started welding in the scuttle. However I did something wrong as I ended up in the same state as you! I used a tungsten bit in the die grinder to remove metal. This chewed off metal instead of heating it and sending sparks everywhere. I covered up as much paintwork as possible before hand. It took a while to get the hole to the right size and a few attempts of putting the glass in but got there in the end. Painted the exposed edge and squirted in some waxoyl under the rubber before I fitted the filler strip.
Twisted Paint Polisher!!!

Posted 13 December 2016 - 04:39 PM
I'd be very surprised if you needed to adjust the aperture - if your scuttle lined up nicely then all should be fine.
One thing I would check is that the rubber isn't inside out - the gap on one side is narrower/thinner than the other and this needs to go to the metal with the bigger side to the glass.
You'd be surprised how much that gap will open up when you come to put the fillet strip in, but until the glass is fully in and settled it won't look right anyway. Once it is in, go round and give it all a good thump to settle it.
You will be surprised just how much they can differ. Been caught with that issue with my lads car but both the Mini Special and Paddy i triple checked the measurements before fitting and had to move and trim things slightly to get the correct aperture gap across the width of the scuttle.
Also compared to the original scuttle the Heritage pressing had an excess of material on the flange to top dash rail by several mm on one side.
Crazy About Mini's
Posted 13 December 2016 - 05:44 PM
Maybe I've always been lucky, but then thinking about I've only done scuttle corners rather than full panels which might explain it
Speeding Along Now
Posted 13 December 2016 - 09:05 PM
Mill Road Garage

Posted 13 December 2016 - 09:48 PM
Don't give up Rich and please don't start removing metal!!
I had this same issue recently where the screen didn't want to go in and the rubber went like yours.
First off, is this a minispares rubber? If so, the one i did was too.
I mixed some car shampoo with a little water to make a thick paste and then liberally brushed it into the rubber and then started dropping in the glass, then i kept applying the shampoo as i was going round to keep it slippy and eventually it went in (just) but once it was in and settled, the fillet strip went in fairly easily even though the channel for it seemed to be closed up like yours still.
I used wide rigid plastic trim tools to ease the glass in and had a helper too so that the side i got in didn't pop out when i did the other side.
It seems impossible i know but stick with it
Ben
One Carb Or Two?

Posted 14 December 2016 - 12:52 PM
Speeding Along Now
Posted 01 January 2017 - 08:59 PM
OK windscreen, I don't like you and you don't like me, but lets do this! This has to been one of the toughest jobs I have done on the car (except for getting the doors to fit!)
I gave it one more try to fit the screen without modifying the aperture, but no joy. Finally bit the bullet and used a carbide burr to enlarge the aperture to a consistent height of 414mm along the screen. Then after repainting the bare metal, I had another go...
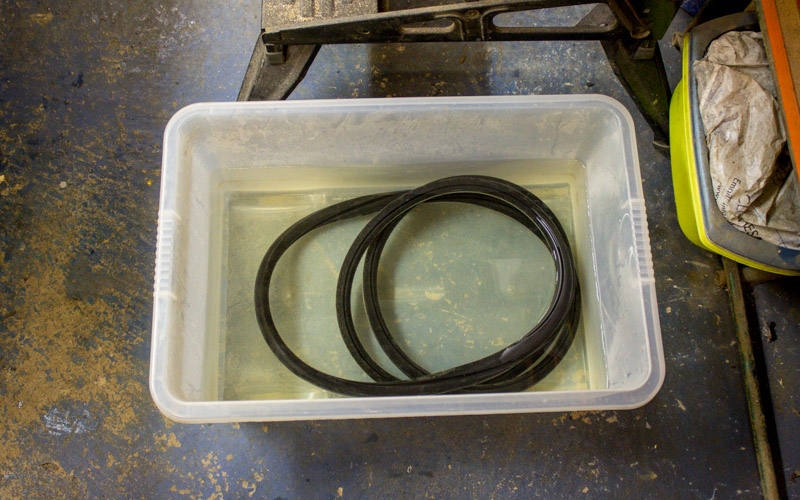
First off, soaked the rubber in hot water for half an hour.
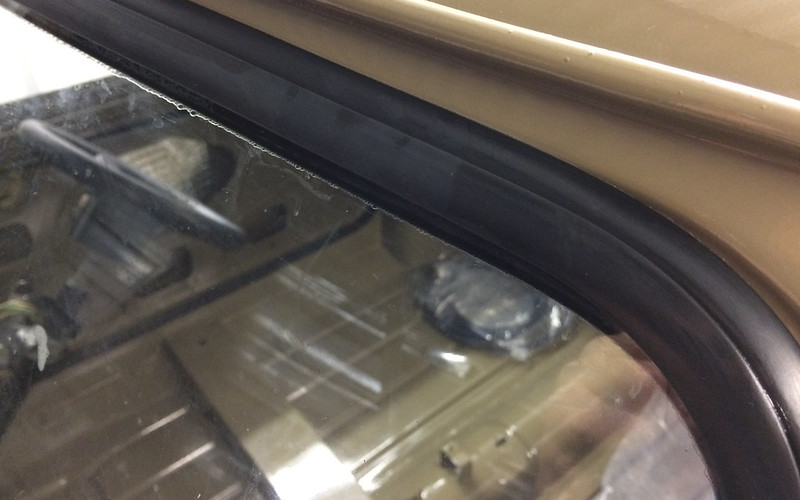
Seal mounted in frame quite easily.
Much pain later, (but easier than before) the glass is finally in the seal. Used lots of lightly diluted fairy liquid!

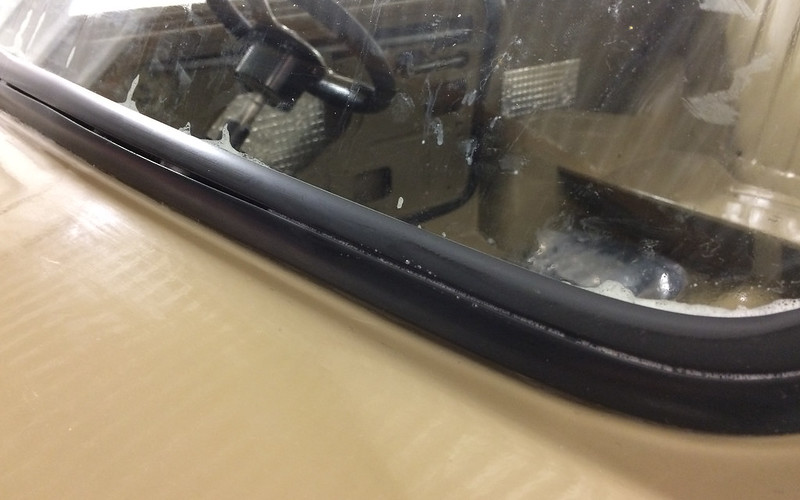
Here it is with the trim strip installed. 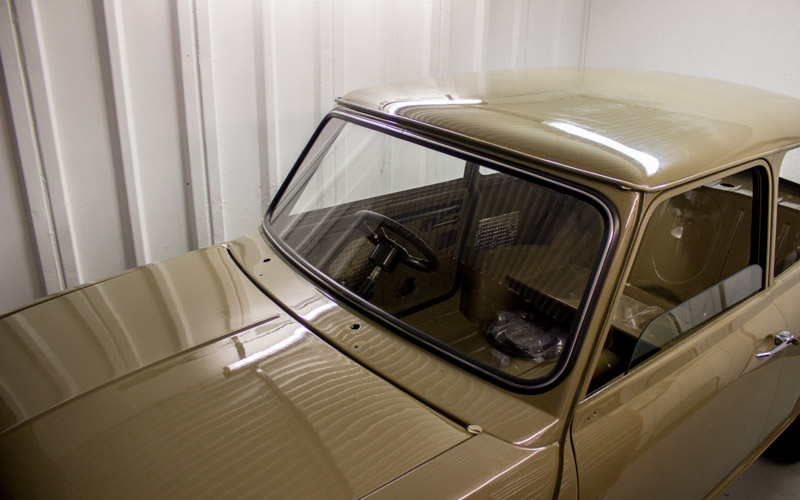
The flimsy tool I bought from minispares wasn't up to the job at all, and broke pretty quickly. Here is my home-bodged rebuilt version, welded back together and attached to an old screwdriver handle. 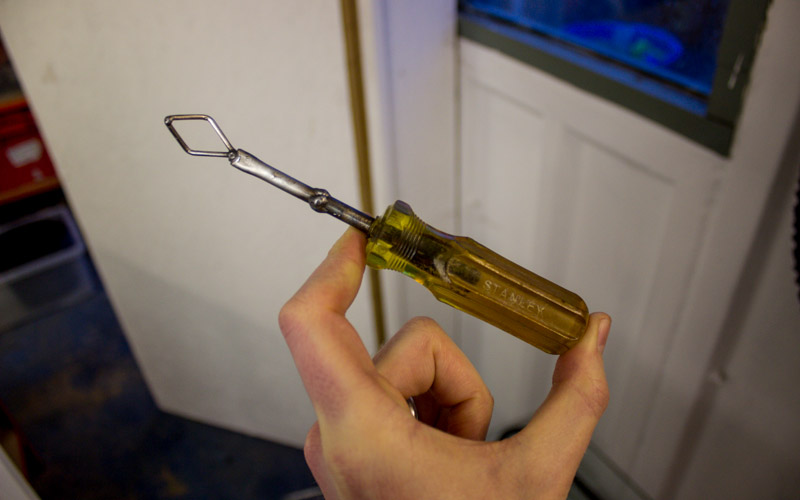
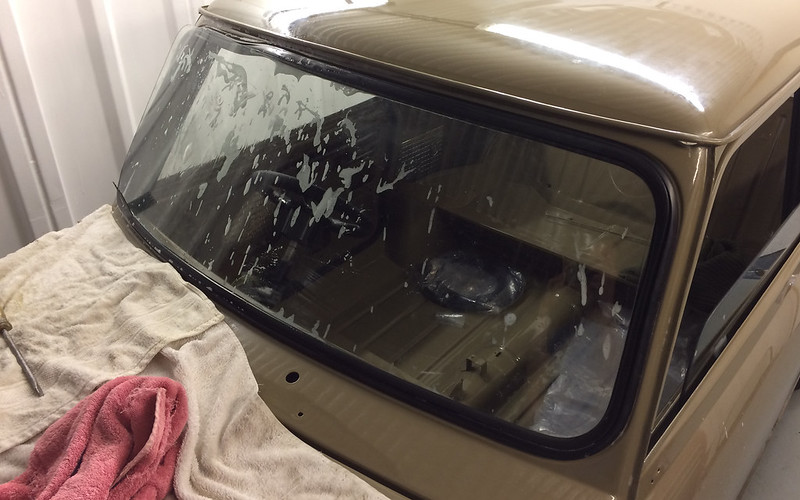
The back window was a doddle by comparison!

I am THE CLAMP MAKER

Posted 01 January 2017 - 09:28 PM
This is looking great, I didn't like fitting the windscreen on my project either, the worst job for me was the headlining.


0 members, 1 guests, 0 anonymous users


