Jump to content


Photo
- - - - -

Volvo - Z-car Meets Zeemax


  • Please log in to reply
91 replies to this topic

#1 RED HOT

RED HOT

    Fantasy F1 Winner 2011

  • Traders
  • PipPipPipPipPip
  • 354 posts

Posted 20 September 2010 - 11:08 PM

Evening all,

Well it’s been on the cards now for some time; about 6 months and the factory tour actually :D , but finally and to Andy’s enjoyment I’m sure :D , here is the beginning of my “project thread”.

I went up primarily to decide on which engine to go for and after the tour, info gathering and test drive I decided (like a few recently) to go for the Volvo kit.

I already had a mini that I was going to V-Tec, but after further inspection of the MoT failure I purchased it soon became apparent that I didn’t have the time to replace the panels that needed doing; this is now on hold as the tool chest has since grown as to has available space so that’s now the next project.....................

With that shell knocked on the head I was on the hunt for a donor vehicle, and luckily enough I came across a Zeemax’d shell with loads of extras that had just been stripped, blasted and re-sprayed; a few bits were and still do require attention, but most of that is just me wanting to be different :genius:

The paint wasn’t amazing so taking a welder and sander to it didn’t bother me that much, the kit also needs some TLC as the arches and bumpers / skirts don’t line up 100%.

Right, let’s move onto some pictures, as that’s what most people want to see after all

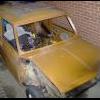
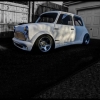
Here are a few pictures from the previous owner:-
Posted Image
Posted Image

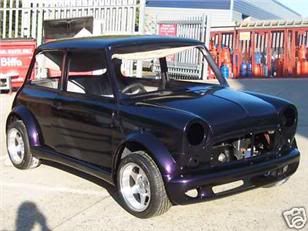
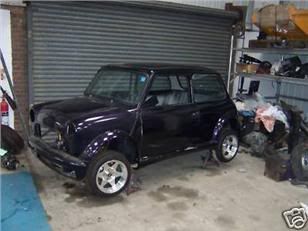
It’s a genuine Zeemax kit but unfortunately a bit more time could have been spent fitting it correctly :)

In the pictures it looks pretty good, but the paint was rushed also, so runs and light patches were present as well as scratches and dents from storage; the car was built and had a Vauxhall 1.8 in the front, the owner had most of it completed, but then time became an issue and project progress ceased.


The first thing I did was wash it, I needed to assess how bad the paint was as initially I planned to match the paint and drive it around for a bit to “run her in” before the re-spray, unfortunately the paint couldn’t be matched so I decided to go full hog and probably made the choice/s to do a few more things than I would have, but looking at it now I’m glad it happened like that.

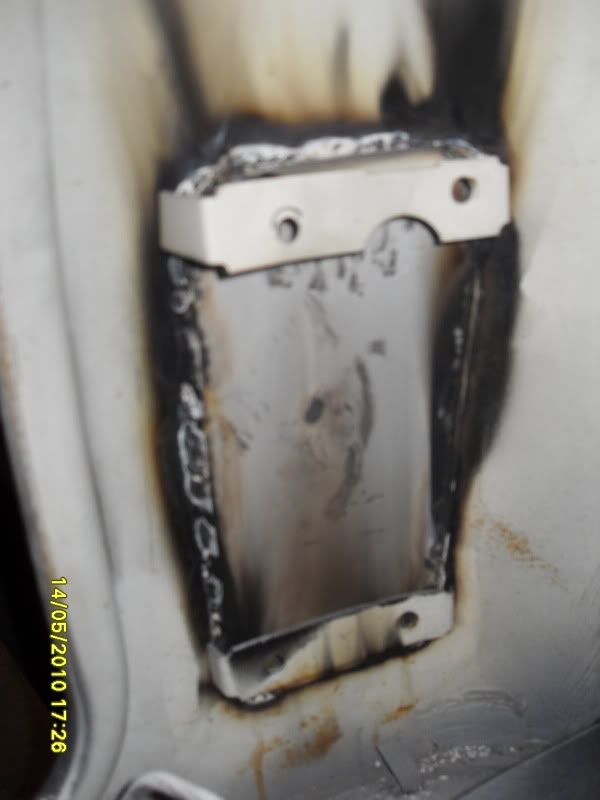
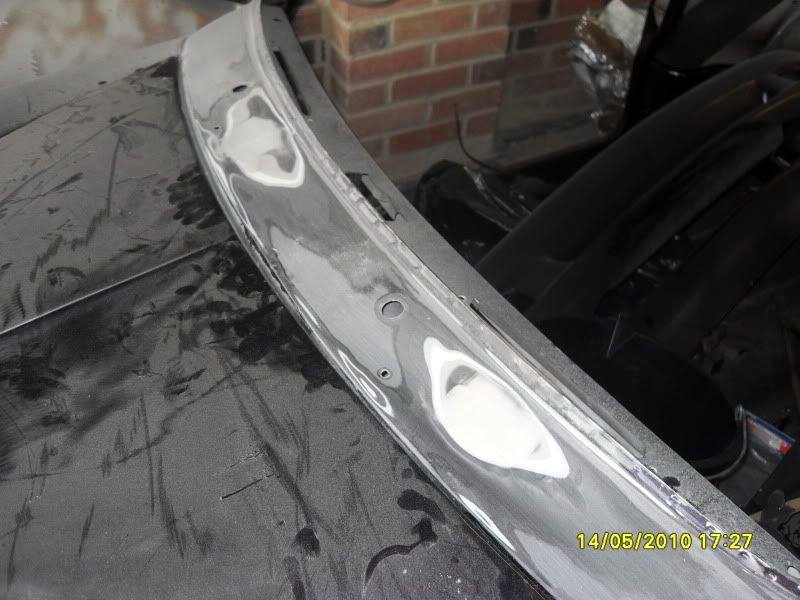
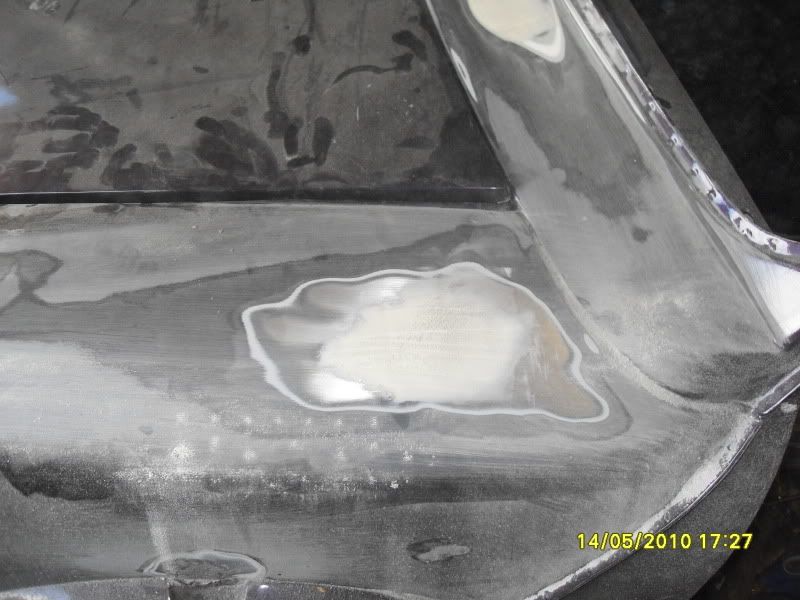
First “proper job” was to flush the filler cap, rear lights, redundant wiper holes and aerial hole in the wing; I’m going for a smoother look, but hopefully not too smooth, I’m keeping all the gutters and seams in place as imo think it keeps a bit of mini about it. I’m semi flushing the boot lid; removing hinges and handle but keeping the number plate recess. The main reason for this is lack of number plate options if it doesn’t go on the boot lid, with the kit and look I’m after, sticking it to the rear bumper wasn’t an option.

Please forgive the lack of pictures, old laptop went tits up and I lost a few showing initial progress.


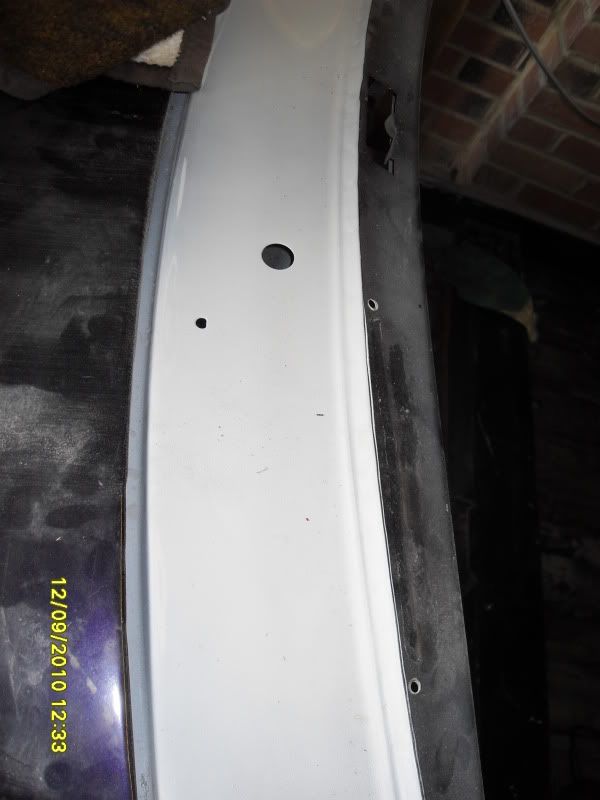
Plates welded in position and filler applied and sanded
Posted Image
Posted Image
Posted Image

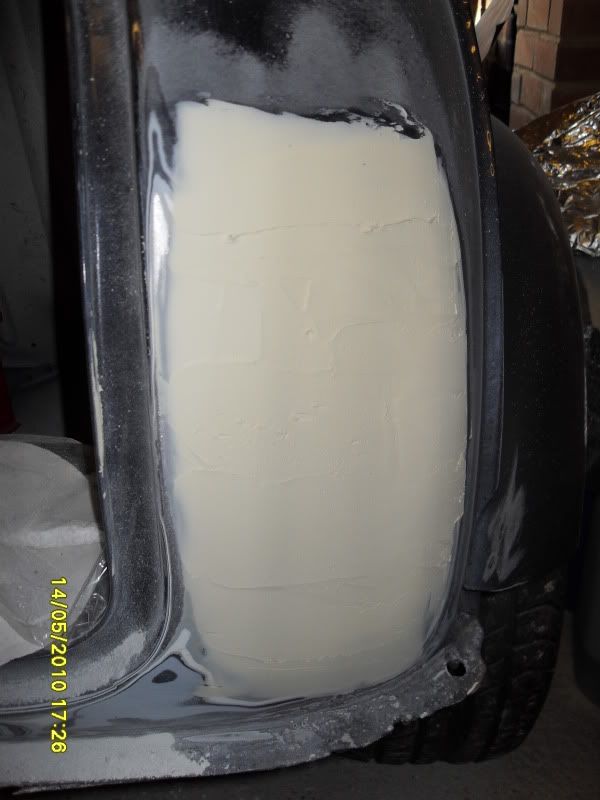
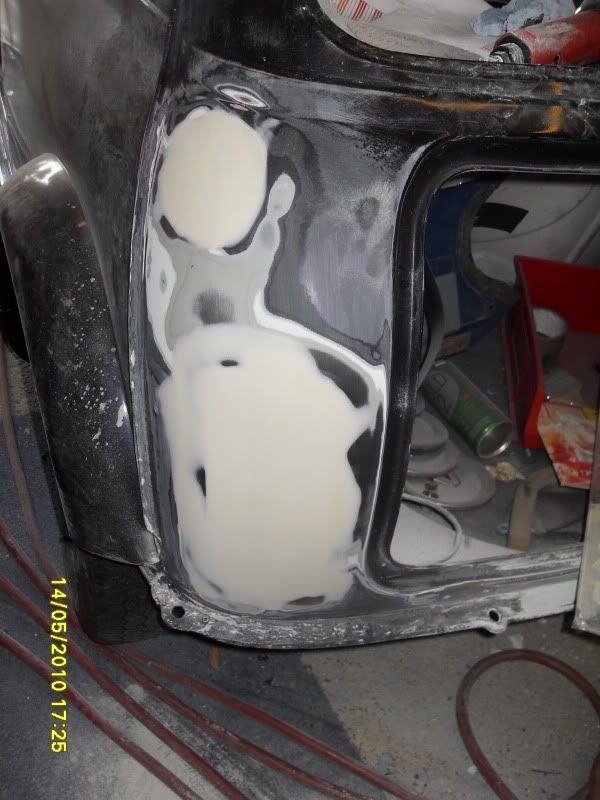
The rear lights have been a real pain, sanding and filling to get the contour to a level I’ll accept!
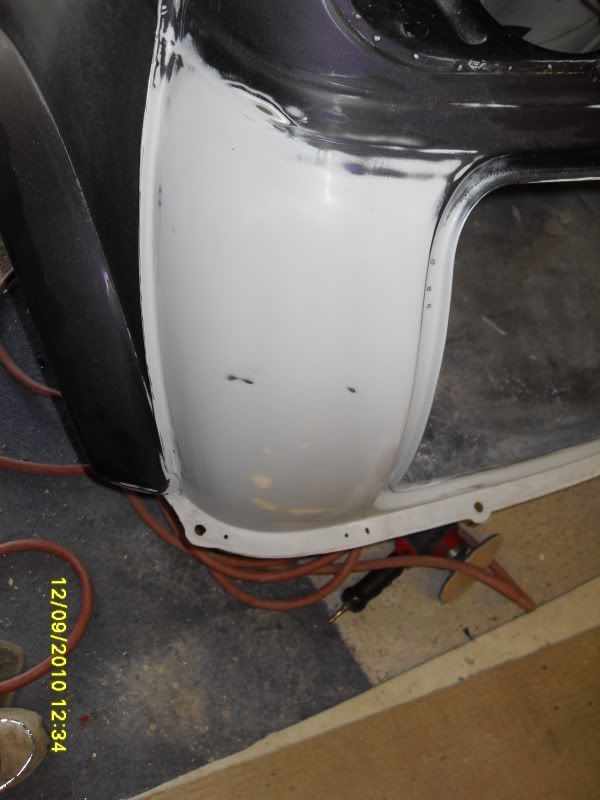
Posted Image
Posted Image
Almost done ..

The front areas
Posted Image
Posted Image
Posted Image

Posted Image
Posted Image

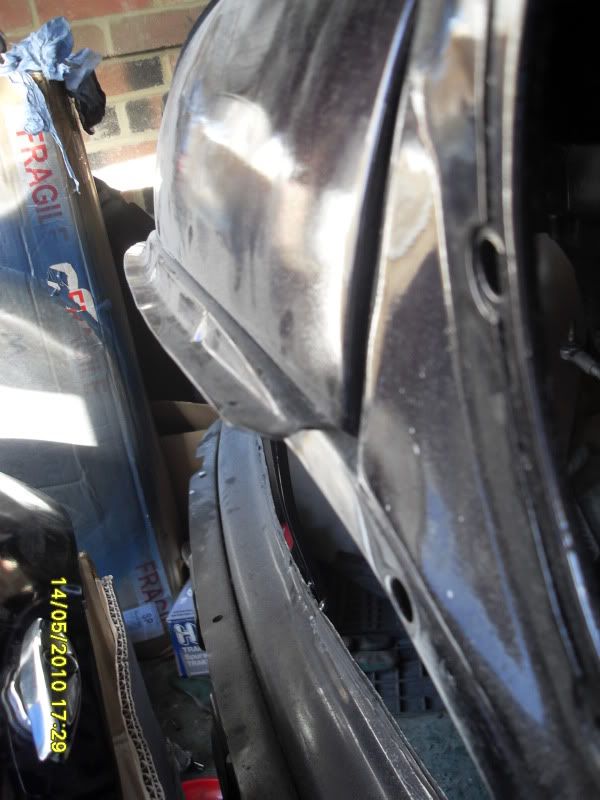
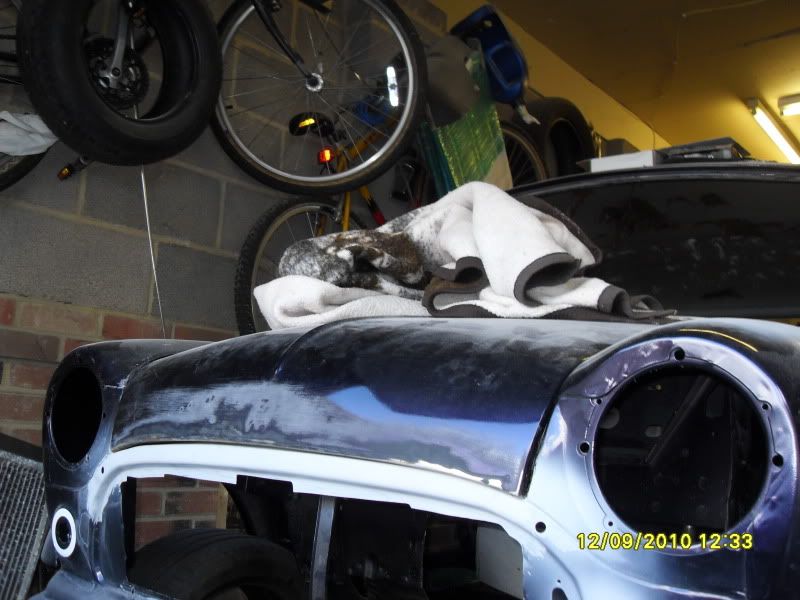
As you can see I also removed the lip from the bonnet and welding up most of the grille mounting holes, can’t believe how different it looks without it.

Posted Image
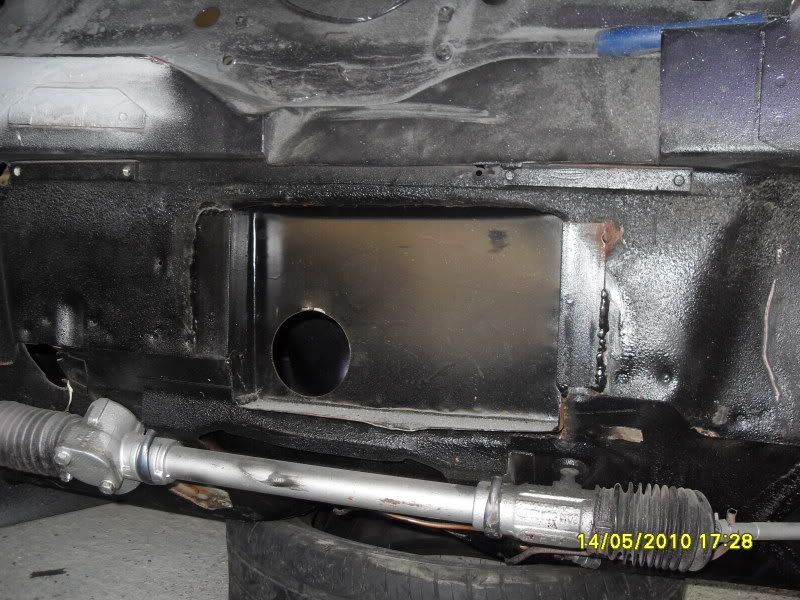
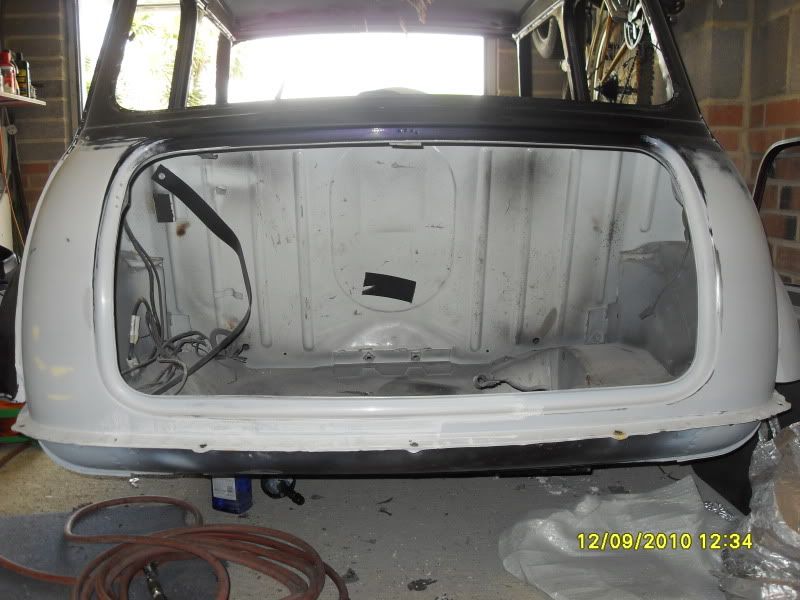
This box has since been removed and waiting for replacement panel to weld in position.

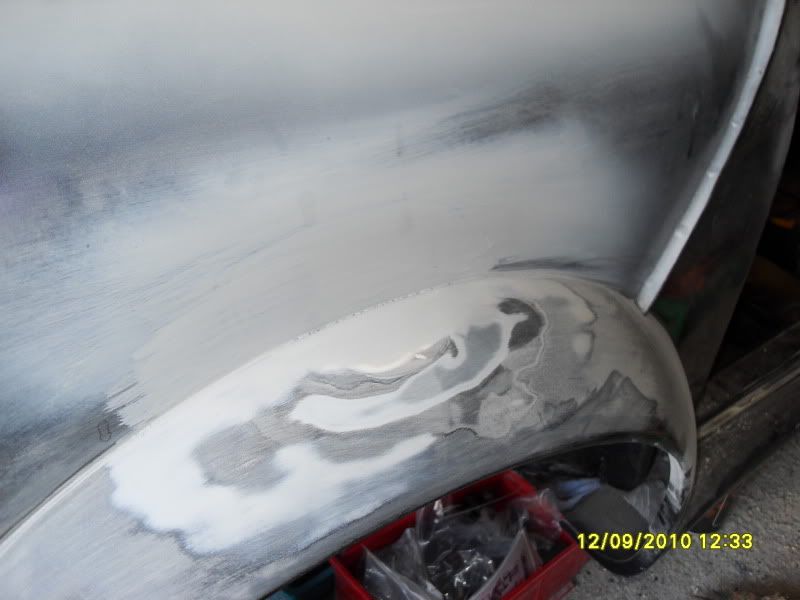
Another area I didn’t like was the indicator positions, one side lined up perfectly to the hole, shame the same couldn’t be said for the other! This left only one option, weld up the current holes and fill the arches.

Posted Image


Progress took a downward spiral from here as I was deciding on what frame to go for... Race or road... road or race.... a combination of both.... but I finally came up with something that fitted the bill; The fact a friend rolled his Evo TME and me stupidly offering to strip it and transfer the bits to his new one also hasn’t helped me out lol

Whilst all this was happening physical progress might not have been moving, but I did manage to sort a few “special” bits and pieces out :)

I want the bonnet and doors to be slightly different to regular minis in one way or another, and hopefully if things go to plan that will be achieved. This in turn has resulted in further modifications including Mk1 sliding windows; the idea didn’t leave sufficient room for winding windows so they had to go, also resulted in total re-design of the locking mechanisms on which I’m currently waiting for the last bit to be lasered and delivered for trial fitment. This will all be revealed once I know it works.

Only working on the car at weekends leaves a lot of time during the week to think, this isn’t good as I change my mind rather frequently, this leads to further stupid ideas, again more on these to follow as they are “works in progress” and I don’t want people to steal my ideas lol

Seats were really bugging me, I have some Recaro’s to fit, but size was a serious issue, luckily during a site visit this week I managed to stumble across the answer:-

Posted Image

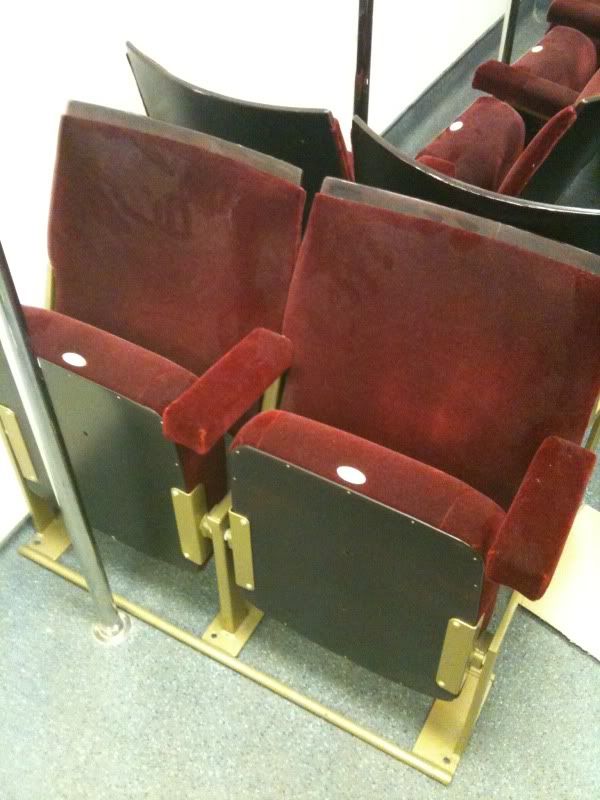
I know they height will be an issue and they are quite dusty, but I think they’ll look schweeeet.

After an email from Chris saying the rear frame was in production meant I really needed to pull my finger out, so this past weekend I spent most of my time turning this:-
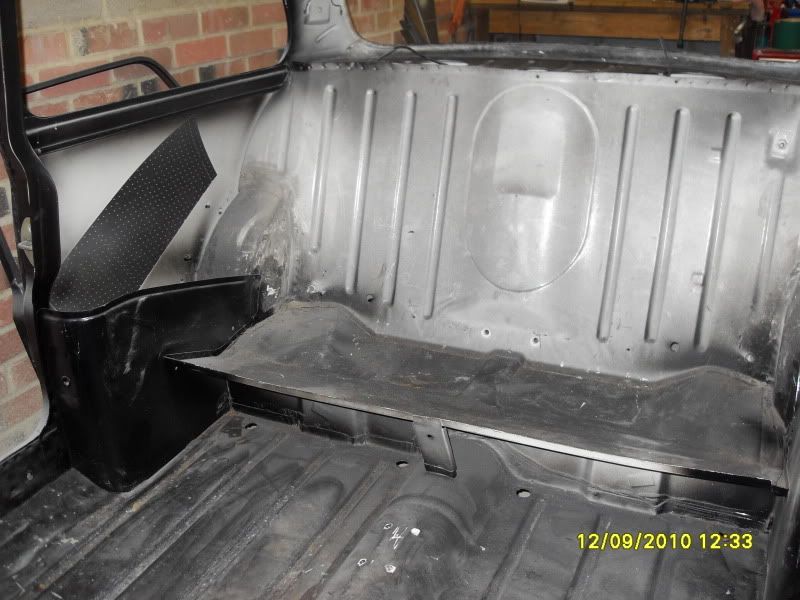
Posted Image

Into this
Posted Image

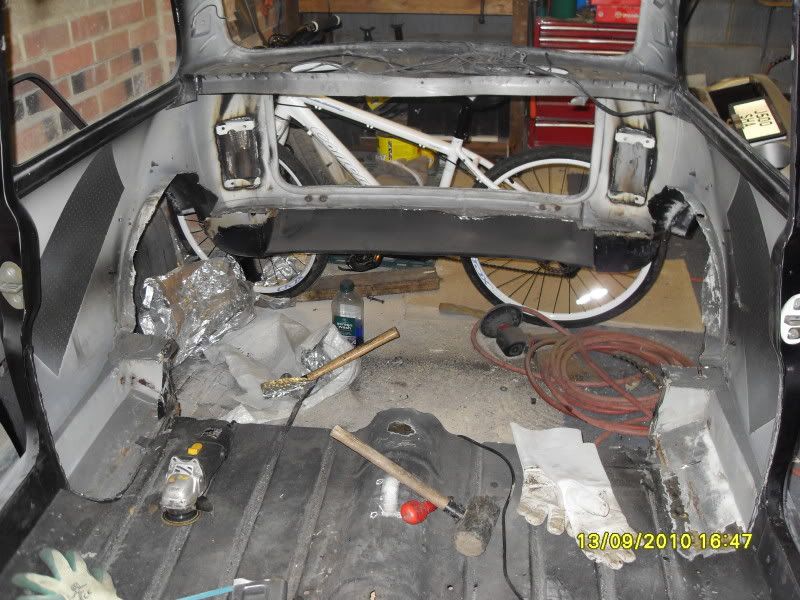
... it still need to trim the final edge and remove the parcel shelf, but the worst of it is done, at least I’ll have somewhere to store this now anyway.....
Posted Image

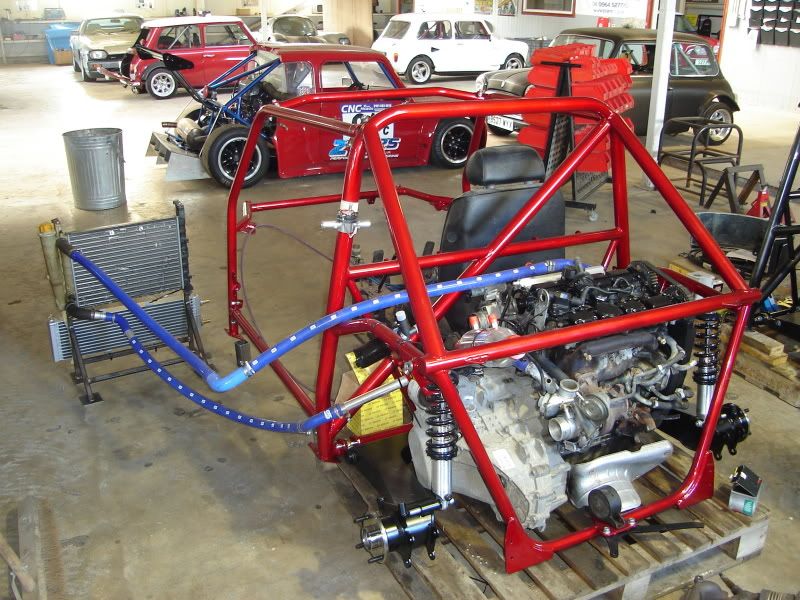
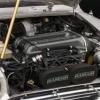
Currently being set-up ready for mapping

Having the rear frame in also means that the dash can be trial fitted as too can the seats; whilst these are having custom bracketry made I’ll continue with body work.

That’s me so far, but please don’t expect daily updates, I’m terrible for remembering the camera and I start back at uni soon so work commitments here will hinder garage time I’m sure.

I’m awaiting a few exciting bits as mentioned / teased above so will update with any juicy progress as and when.

Thanks for tuning in

Kev

Edited by RED HOT, 19 June 2011 - 09:18 PM.


#2 SAILINON

SAILINON

    Learner Driver

  • Noobies
  • PipPip
  • 20 posts

Posted 21 September 2010 - 09:51 AM

Looks GREAT! :D

The rear lights and boot lid did look like it took some time. Sorry to hear your laptop went "T!ts up"

#3 minidream94

minidream94

    One Carb Or Two?

  • Members
  • PipPipPipPipPipPipPip
  • 1,233 posts

Posted 21 September 2010 - 02:39 PM

Nice project mate. One question tho, Whats the difference between the vtec and this volvo engine? Such as brake horses and torques and stuff?

#4 DAVEY_C

DAVEY_C

    Super Mini Mad

  • Members
  • PipPipPipPipPipPip
  • 555 posts
  • Location: kildare, ireland
  • Local Club: irish minis owner club

Posted 21 September 2010 - 03:27 PM

nice project you got going on there, it will be interesting to watch the progress.

as for that rear end, that smoothing looks the dogs kahoona's.....

#5 RED HOT

RED HOT

    Fantasy F1 Winner 2011

  • Traders
  • PipPipPipPipPip
  • 354 posts

Posted 21 September 2010 - 03:48 PM

Nice project mate. One question tho, Whats the difference between the vtec and this volvo engine? Such as brake horses and torques and stuff?


Out of the box the V-Tec has more power than the Volvo lump, but the Volvo is cheaper to tune and has torque...... lower down the rev range. Its quite a bit cheaper to buy than the V-Tec also; the Honda boys love the conversion too which keeps the prices of them higher. Only down side is when you discuss it with someone and say you have a "Volvo" engine going in....... the look on peoples faces changes to, You what!!!!

Thanks for the comments on the smoothing too :angel:

Kev

#6 minisilverbullet

minisilverbullet

    Up Into Fourth

  • TMF+ Member
  • PipPipPipPipPipPipPipPipPip
  • 3,799 posts
  • Name: Craig
  • Location: Sweden

Posted 21 September 2010 - 05:21 PM

Lots of hard core volvo tuners over here!

We have a drag strip in my town, Every wed its 2 quid in and a sort of run what you brung!

Guy pulls up in his volvo (standard looking), promptly removes his kids seats, changes his wheels and then goes and embarrasses a corvette down the strip!

Now I am not a Swede - but you should of heard the cheers he got from the crowd!

Good luck with the project!

#7 G-J

G-J

    Learner Driver

  • Noobies
  • PipPip
  • 22 posts

Posted 09 October 2010 - 04:30 PM

Hello Red Hot,

I am from the Netherlands and I absolutely love the Volvo.
One of these day’s I am gone build me one :)

Keep the good work up and keep posting pictures.

Cheers G-J

#8 PoLonY

PoLonY

    Stage One Kit Fitted

  • Noobies
  • PipPipPip
  • 62 posts

Posted 12 October 2010 - 03:05 PM

as a Volvo owner, ill be keeping close tabs on this project!!
those motors are plenty powerful and torquey stock and being turbo, easy to make more >_<

#9 RED HOT

RED HOT

    Fantasy F1 Winner 2011

  • Traders
  • PipPipPipPipPip
  • 354 posts

Posted 12 October 2010 - 07:26 PM

Cheers for the comments guys, seems we have a few Volvo fans in the midst too. Will try and update as often as possible and with as much detail to; might just assist any future Volvo or Z builders later down the line.

If anybody has any specific questions feel free to fire away and if I can help I will, Volvo builds are pretty new so hopefully we can all learn a thing or too, preferably not the hard way though!

No pictorial updates as they’d be pretty boring to be fair!! but here’s a summary of what’s been going on....

Firstly, when removing the rear end especially around the boot floor, rear valance and back section "sandwich" I noticed some rather brown and patchy bits, also known as rust. I couldn’t tell how bad it was until I had chomped a bit further and removed the rear valance corner sections. Upon further work and inspection it didn't look good so I removed this completely.

This took a little while as I didn't have a spot weld drill so I ground each spot out from below whilst trying to leave the rear section / top lip in tact. Once done I was glad I never left it as the sandwich filling (boot floor area) was pretty bad and rust was working its way up to the rear section; it would have been very annoying seeing this bubble up with rust after paint! A little surface rust was visible so this was ground out and treated.

Removing this seriously made the rear end wobble about so a new valance was ordered up to get some strength back into the rear end

The newly purchased rear valance was ordered on Tuesday and arrived on Friday so the weekend was a goer. It wasn’t an original panel so didn’t know what to expect, but as I’m going to be trimming it back a little for later plans >_< …. I thought I’d give it a go, and to be fair it wasn’t bad and id certainly buy one again, the outer ends needed to be pulled in slightly, but nothing a clamp either end couldn’t fix.

One thing to note is that prior to welding this back in place I did check the radii of the rear end to ensure it matched up with the curvature of the boot lid. With a clamp in the middle and one either end no further adjustment was required so this goes to prove the part can’t have been that far out.

Once this had been secured and whilst the grinder was out I decided to trim the arches right back too, these have been taken right back to where the Zeemax arches bolt onto the body, this should give me plenty of wheel clearance should I decide to go low.

The only grinding left prior to frame arrival / fitment is the parcel shelf and a final trim of the floor; left this longer than required as I’m going to cut this back once I have the frame in situ so I can cut to match the mounting strip exactly. Although I have dimensions I really don’t want to cut it short.

The only other update was the buying of a larger set of injectors. Been reading mixed reviews on the standard ones and the highest BHP figures available from them safely, so decided to upgrade. These are currently with Z-Cars and will hopefully be fitted before the mapping session on Thursday.

Currently have my fingers crossed as the injectors aren’t Volvo ones, but apparently they are direct fitment (according to a few Volvo forums), so I guess I’ll find out soon enough!

That’s all for now, still waiting on sheet metal parts and some machined components to enable the doors to proceed further (can’t wait to show these bits off), but once the frame arrives (should be before the month is out) dash, centre console and seat work can begin. For some reason that’s the bits I’ve wanted to start since the project began; a few different things going on here too, so keen to see if the ideas in my head can evolve into reality.

Thanks
Kev

#10 PoLonY

PoLonY

    Stage One Kit Fitted

  • Noobies
  • PipPipPip
  • 62 posts

Posted 13 October 2010 - 11:49 AM

nice, what engine did you get? the B420T or the B419T?low pressure turbo or high pressure turbo model?

i have the B419T high pressure turbo model (the T4) which is the stronger motor but has the smaller injectors, you getting the Bosch 440cc injector by any chance?

seriously thinking hard about doing this to my mini, but homemade, no Z cars my side of the world!

#11 minibugga

minibugga

    Stage One Kit Fitted

  • Noobies
  • PipPipPip
  • 87 posts

Posted 13 October 2010 - 01:09 PM

Hey Kev, nice build!

I was wondering how much heavier the volvo engine is compared to the vtec. Could you tell?

Hope to see some updates soon :D

Thanks, Gonzo

#12 RED HOT

RED HOT

    Fantasy F1 Winner 2011

  • Traders
  • PipPipPipPipPip
  • 354 posts

Posted 13 October 2010 - 07:03 PM

nice, what engine did you get? the B420T or the B419T?low pressure turbo or high pressure turbo model?

i have the B419T high pressure turbo model (the T4) which is the stronger motor but has the smaller injectors, you getting the Bosch 440cc injector by any chance?

seriously thinking hard about doing this to my mini, but homemade, no Z cars my side of the world!


Its the B4194T, when reading up on the injectors someone said the standard ones were good for 280 where others said they would be running at 90% at nearer the 250bhp figure.... so as you have said above, I decided to get the Bosch green's (440's) as that seems to be an accepted size and safe for the figures i'm hoping for.

Z Cars can be sent anywhere :-


Hey Kev, nice build!

I was wondering how much heavier the volvo engine is compared to the vtec. Could you tell?

Hope to see some updates soon :-

Thanks, Gonzo


I have no idea to be honest, it wasn't something that was even thought of when making my choice.

#13 Milten

Milten

    Just On Tickover

  • Noobies
  • Pip
  • 9 posts

Posted 13 October 2010 - 07:41 PM

Good luck man. Keep posting news :-

#14 PoLonY

PoLonY

    Stage One Kit Fitted

  • Noobies
  • PipPipPip
  • 62 posts

Posted 14 October 2010 - 12:46 PM

nice, what engine did you get? the B420T or the B419T?low pressure turbo or high pressure turbo model?

i have the B419T high pressure turbo model (the T4) which is the stronger motor but has the smaller injectors, you getting the Bosch 440cc injector by any chance?

seriously thinking hard about doing this to my mini, but homemade, no Z cars my side of the world!


Its the B4194T, when reading up on the injectors someone said the standard ones were good for 280 where others said they would be running at 90% at nearer the 250bhp figure.... so as you have said above, I decided to get the Bosch green's (440's) as that seems to be an accepted size and safe for the figures i'm hoping for.

Z Cars can be sent anywhere :-


nice upgraded injectors are a must for more power, good choice! the stock internals are good for 300ish hp, but easily more with good tuning...
yeah they can but i like my house and current car (which i would need to sell to afford to ship a Z cars kit) since its that expensive to ship to SA, our exchange rate makes it ridiculous! :-

hope it all goes smoothly though, good luck!

#15 G-J

G-J

    Learner Driver

  • Noobies
  • PipPip
  • 22 posts

Posted 27 November 2010 - 04:32 PM

hello red hot,

Howe is the build going? :)

Cheers G-J.

Edited by G-J, 27 November 2010 - 04:34 PM.


1 user(s) are reading this topic

0 members, 1 guests, 0 anonymous users