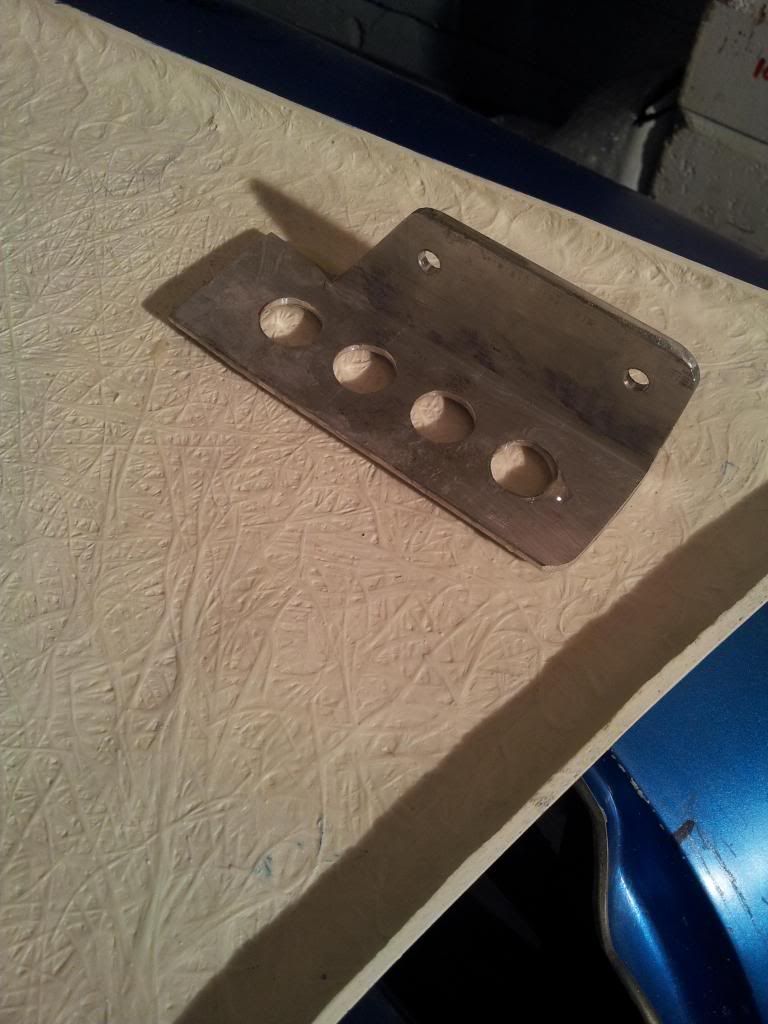
The sheet I actually had donated to me :) by a company in Birmingham when I was a student. It was in their scrap bin and they said help myself but it was a fairly big sheet and would have cost a pretty dime. So far i've made these spreader plates and my rear brake arms from it and have a bit more left!

Mini Scura Minus
Started by
blue blood
, Dec 05 2010 10:10 PM
377 replies to this topic
#332

rally515
-

- Members
-

- 3,848 posts
Up Into Fourth
- Location: Lancashire
Posted 02 February 2013 - 10:54 PM
Ohhh you lucky bugger,wish i could make a good find like that.
Going to have a look up on getting some so just looking for a ball park figure.
how is it to work with & cut ?
Going to have a look up on getting some so just looking for a ball park figure.
how is it to work with & cut ?
#333
blue blood
-
- Members
-
- 806 posts
One Carb Or Two?
Posted 02 February 2013 - 11:08 PM
as long as you take your time and have the right tools for the job its fine. ALWAYS USE LUBRICANT!!!! Ti can be a pig some times as it gets hot real quick through friction and can just melt what you are cutting it with. Like I say take your time as messing up can be costly!!
Regards Blue
Regards Blue
#334
blue blood
-
- Members
-
- 806 posts
One Carb Or Two?
Posted 05 February 2013 - 10:42 PM
Little bit more to add today as I got a few more hours in after work. So at the moment I am in the mind set of wanting to finish of parts I have started (eg the boot, doors and bonnet). Today I carried on with the doors.
So after a few measurements and some marking out I cut the bottoms off
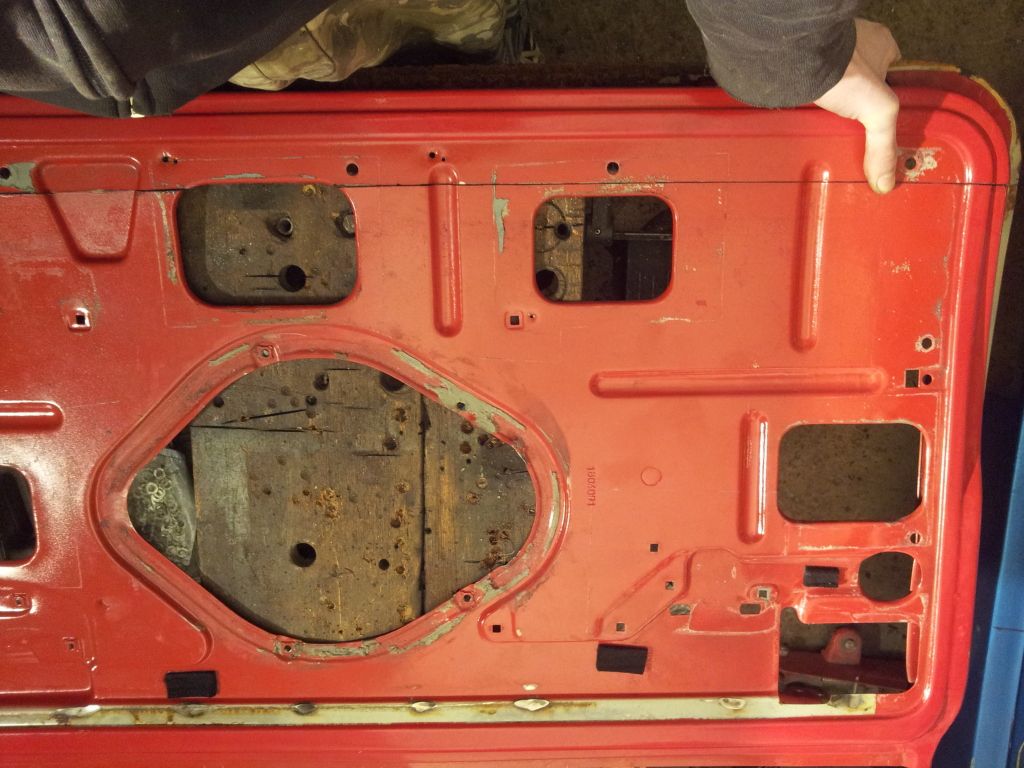
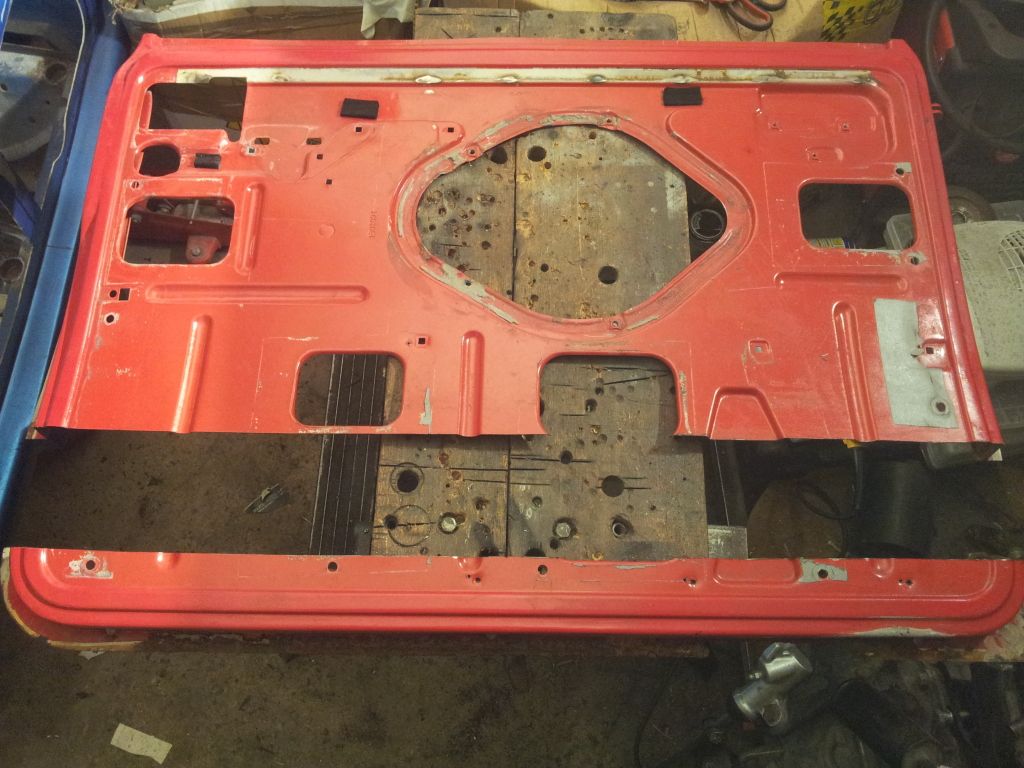
Now this is where my previous doors didn't work so well as I threw the old bottoms away and used repro door repair panels which are absolutely shocking. They do not match up at all, the recessed part for the door cards is large and they twisted / straight as bananas!!! So I will be refurbishing the bottoms to reuse, like I said before the door weren't in all that bad condition so the bottoms are useable with a bit of work done here and there.
Carrying on I went to hang a door but forgot that the one lower corner is round so I had to cut a square section out the corner. Re tried it to remeber that the raised part to keep the door card in place presses against the door frame when closed (these parts on original minus' were either bashed in with a hammer/club or just cut out both pretty ugly) so I cut a small section out for when I re work the door bottom on retaining the raised curved part (if that makes any sense).
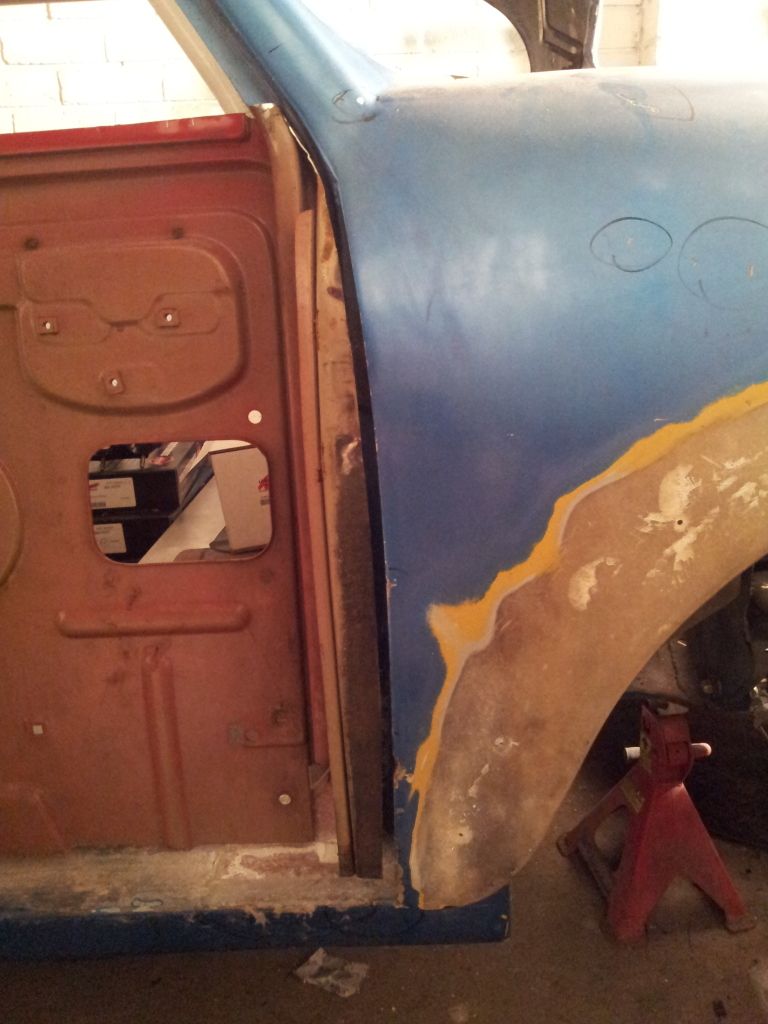
Here is the door hung:
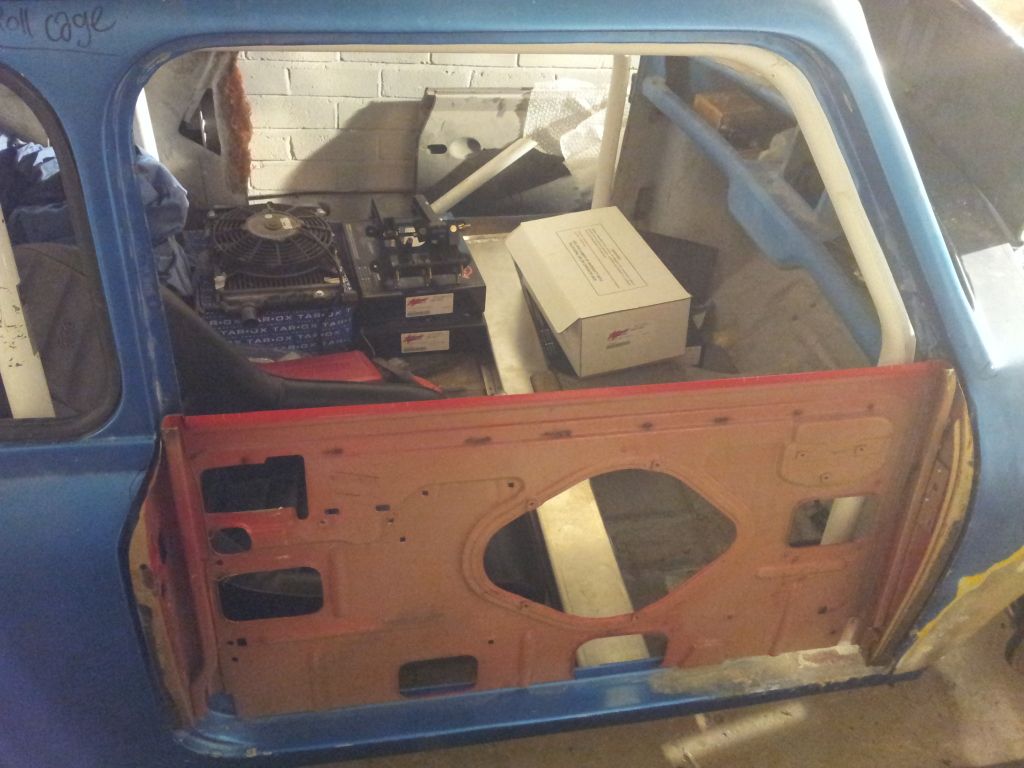

and even with no shims the panel gap looks like it will be quite good (as long as the skins go on with out a hitch)
Thats all for now folks.
Regards Blue
So after a few measurements and some marking out I cut the bottoms off
Now this is where my previous doors didn't work so well as I threw the old bottoms away and used repro door repair panels which are absolutely shocking. They do not match up at all, the recessed part for the door cards is large and they twisted / straight as bananas!!! So I will be refurbishing the bottoms to reuse, like I said before the door weren't in all that bad condition so the bottoms are useable with a bit of work done here and there.
Carrying on I went to hang a door but forgot that the one lower corner is round so I had to cut a square section out the corner. Re tried it to remeber that the raised part to keep the door card in place presses against the door frame when closed (these parts on original minus' were either bashed in with a hammer/club or just cut out both pretty ugly) so I cut a small section out for when I re work the door bottom on retaining the raised curved part (if that makes any sense).
Here is the door hung:
and even with no shims the panel gap looks like it will be quite good (as long as the skins go on with out a hitch)
Thats all for now folks.
Regards Blue
#335
blue blood
-
- Members
-
- 806 posts
One Carb Or Two?
Posted 14 February 2013 - 12:18 AM
Catching up on a few things. Now I have been doing the bonnet for quite a while now and have been putting it off. Basically I have finished the hinges now. I basically ba**sed it up on the drivers side spreader plate. I thought I had the final hinge position and drilled the holes in the nicely mirror finished piece only to find it was in the wrong place and needed to be mounted further back!! So I had to buy some more stainless sheet and start from scratch. So after a bit more cutting lots of annoying drilling (as stainless is a s**t to work with) I ended up with the hinges in their final resting place:
I also took another better quality video of it working. As you can see the bonnet still sags on one side but I do put it down to having a chunk out of it. The other issue is the pin doesn't always click into place so I may have to widen the hole a fraction. The squeak is from the nylon bushes but a but of WD40 sorted that out. Finally the last few moments of the video are of the panel gap on the back of the bonnet which is exactly what I want it to be :)
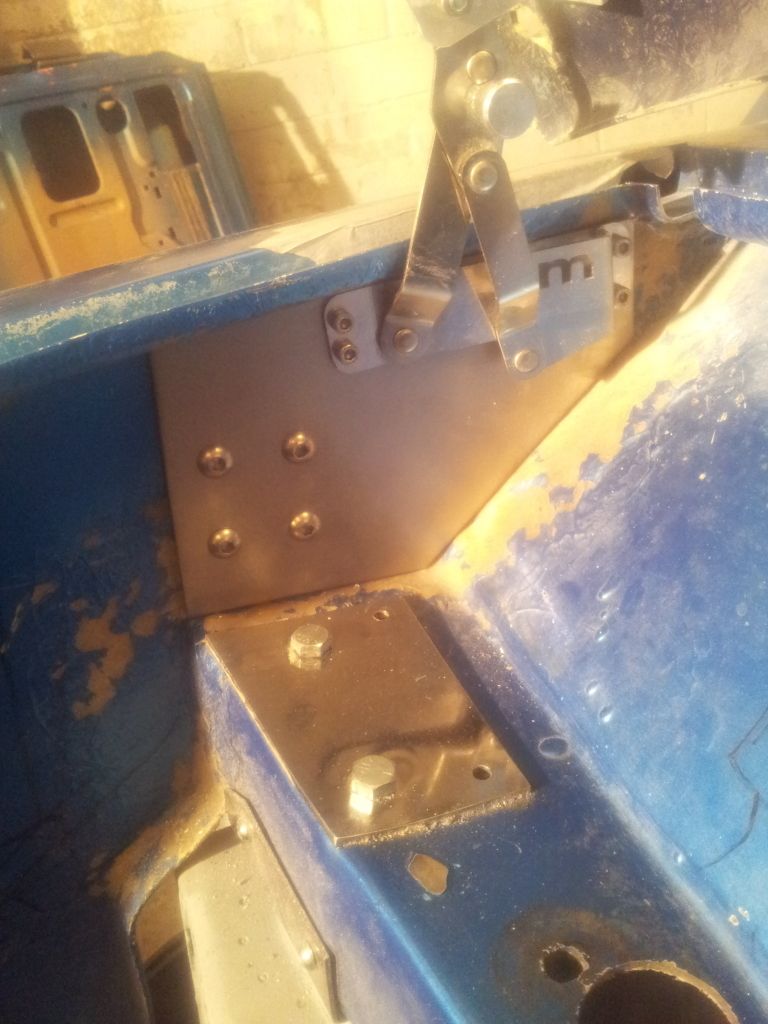
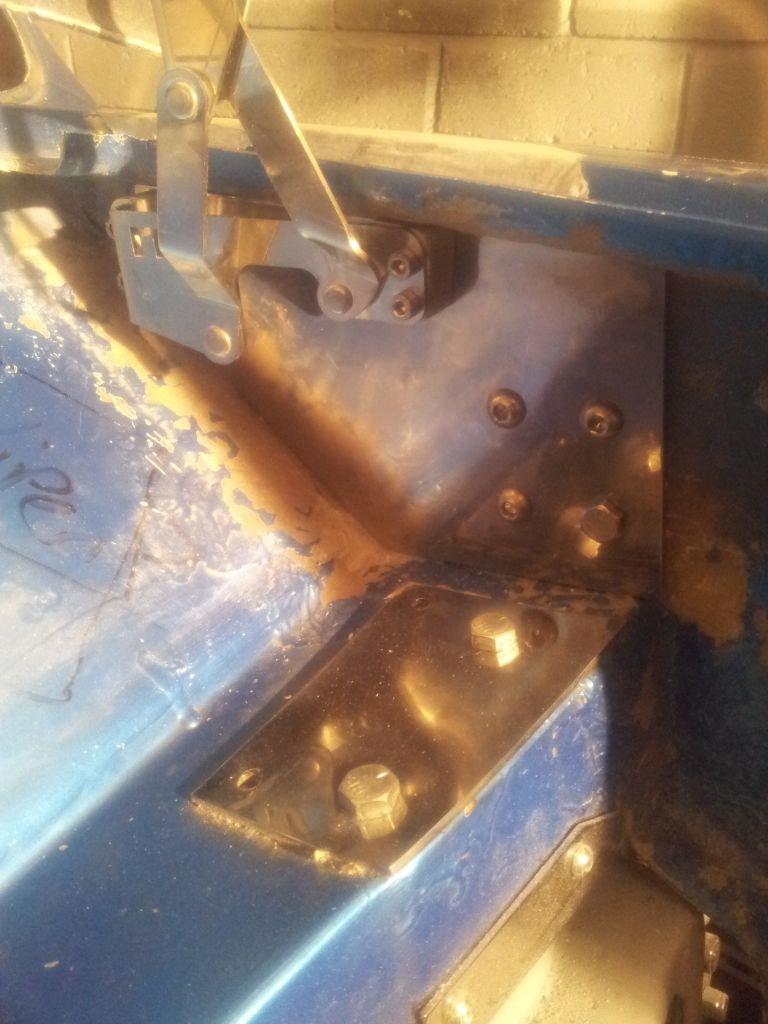
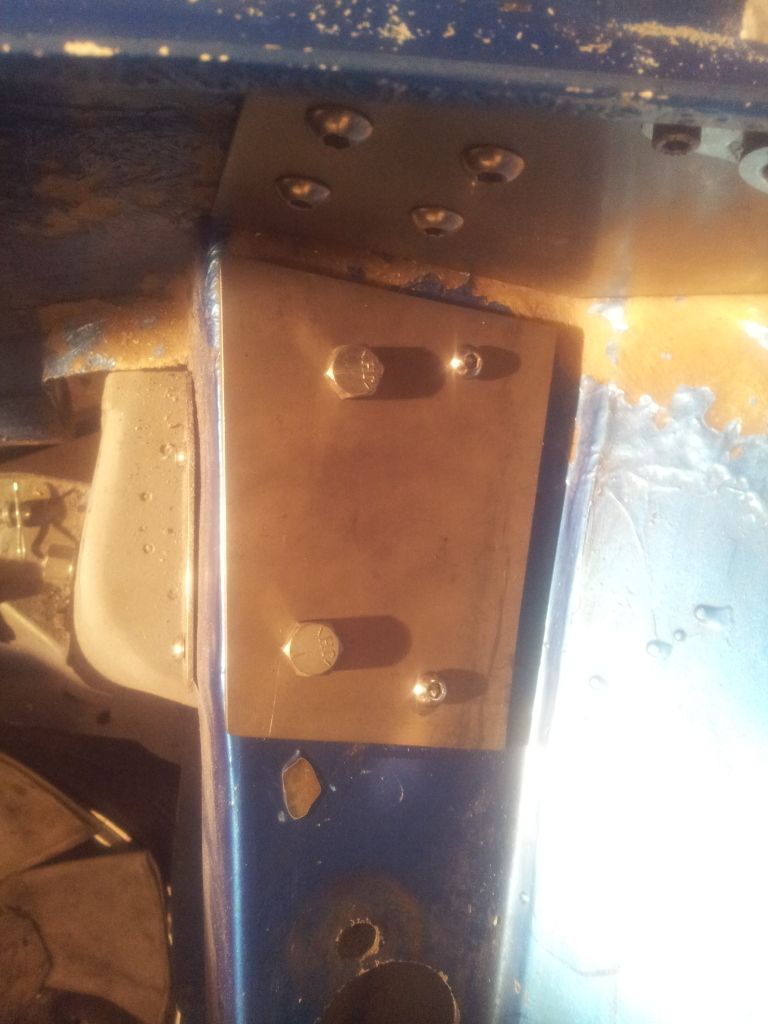
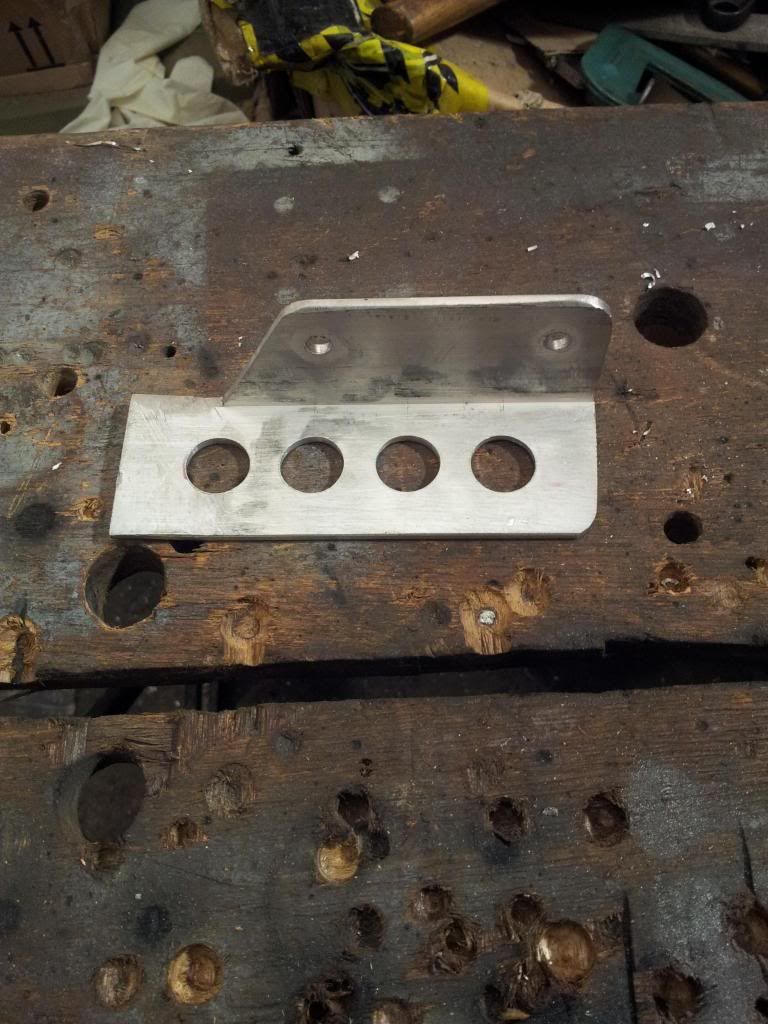
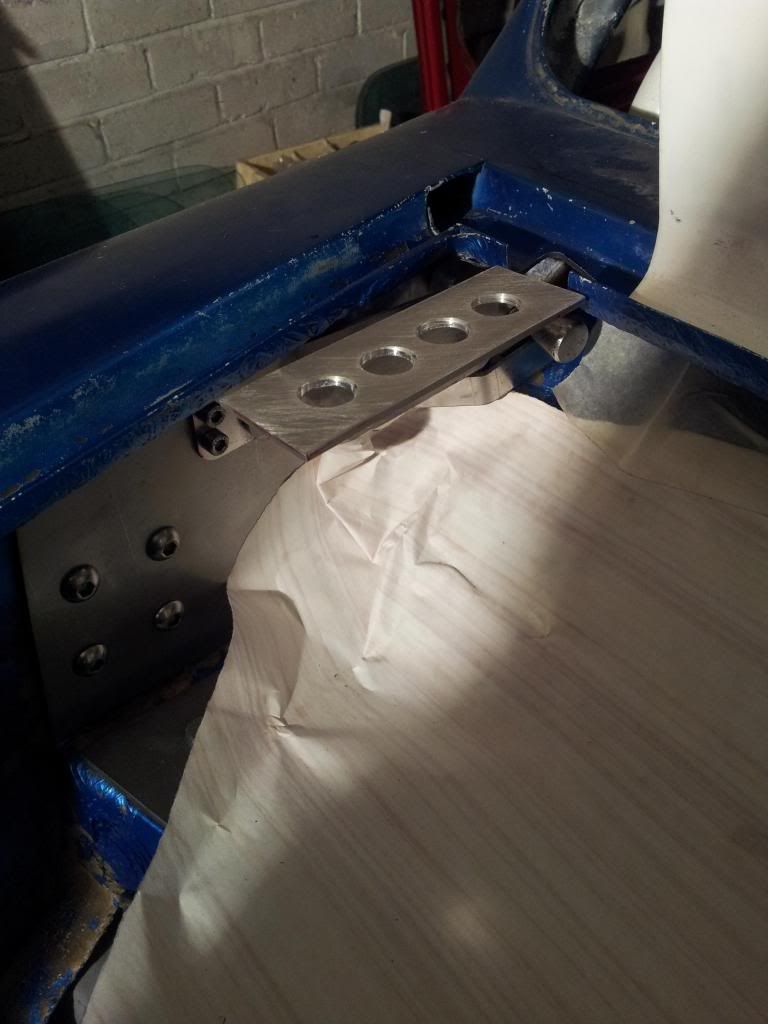
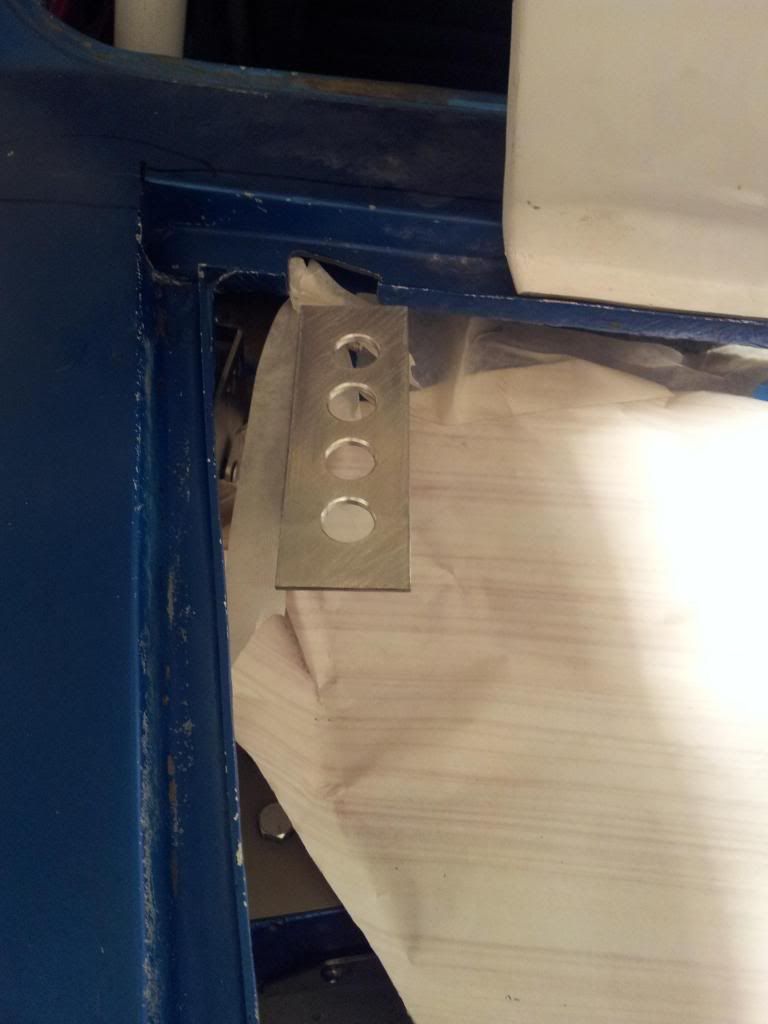
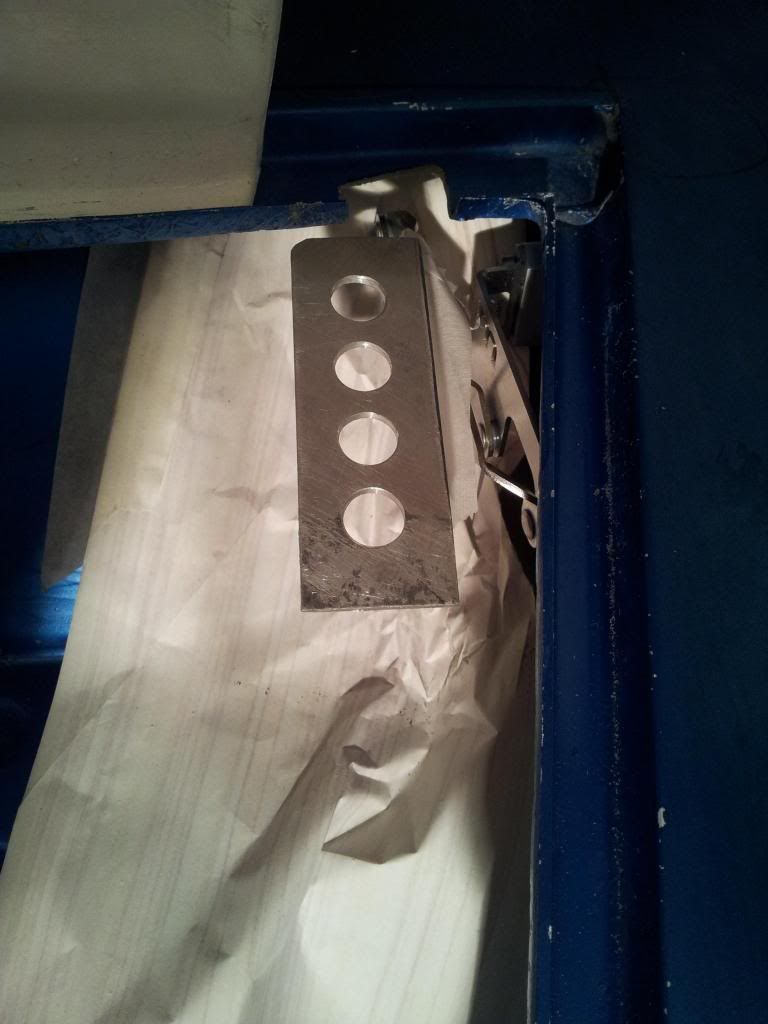
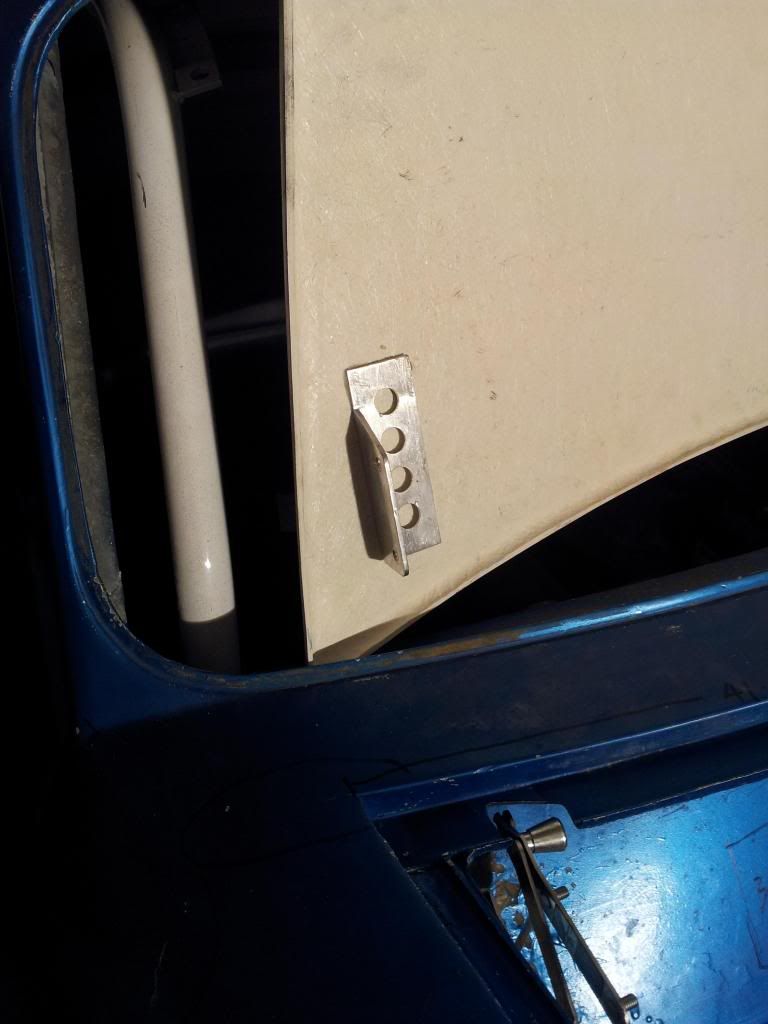
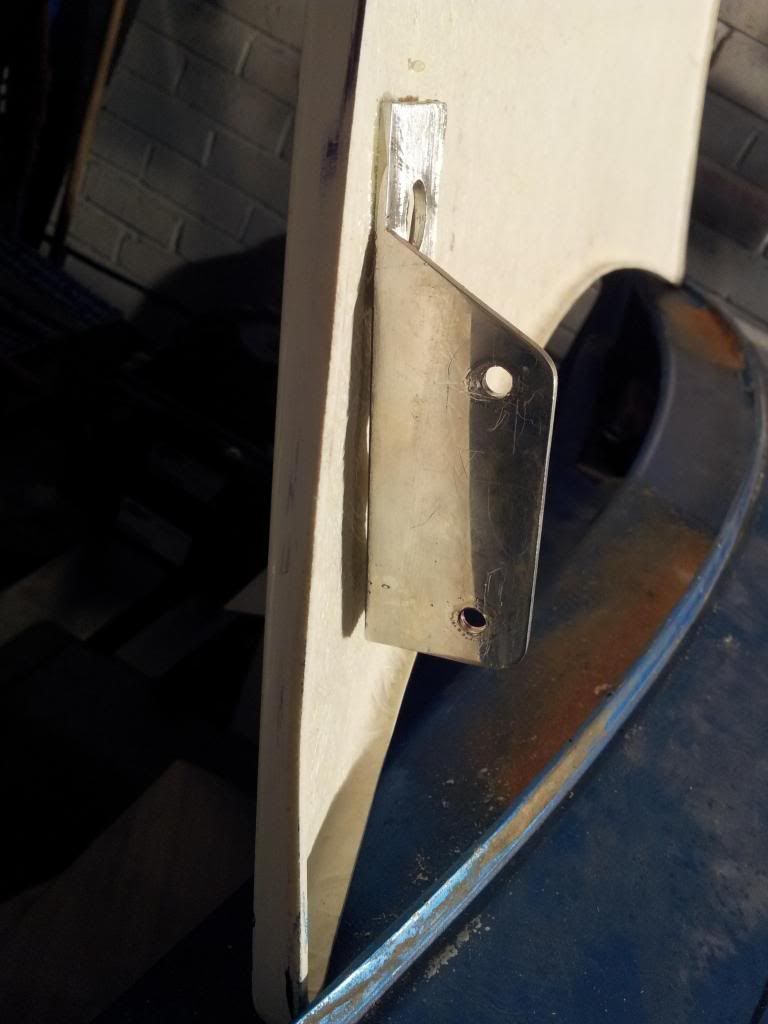
Finally I got round to marking, drilling and fitting one of the new Titanium bulkhead subframe spreader plates:
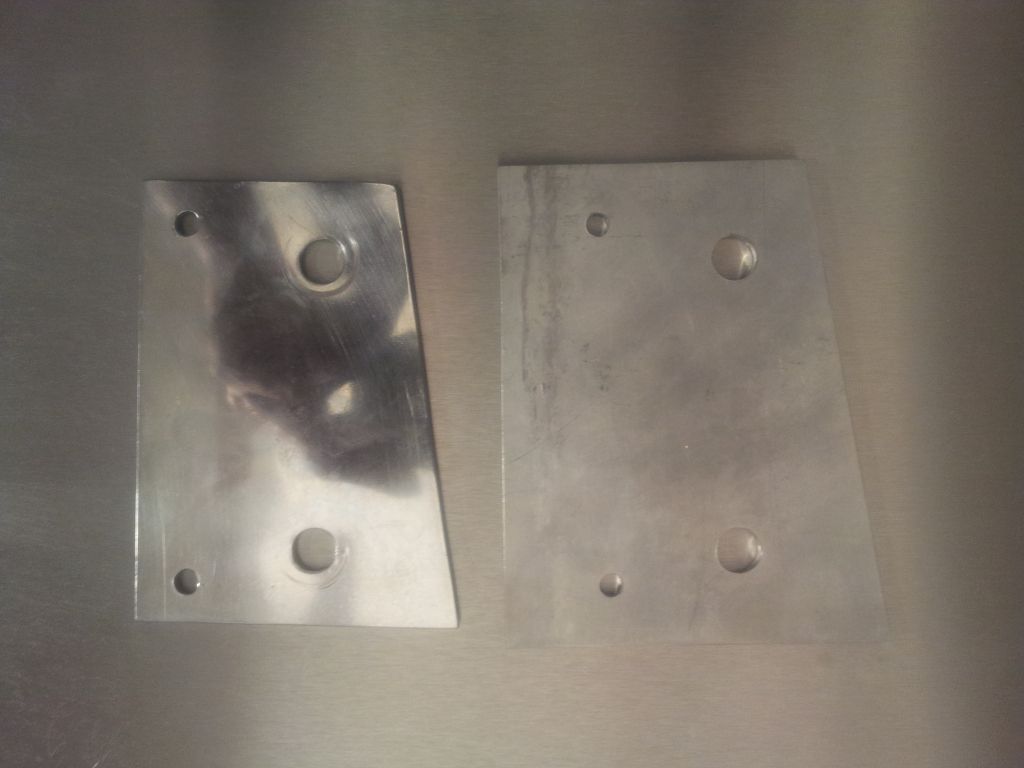
(old stainless steel piece on the left)
The titanium was surprisingly easy to drill (easier than stainless I thought). Like I put last time the new one is a bit bigger so can spread the load more efficiently.
In situ:
Thats all your getting for now folks.
Blue
I also took another better quality video of it working. As you can see the bonnet still sags on one side but I do put it down to having a chunk out of it. The other issue is the pin doesn't always click into place so I may have to widen the hole a fraction. The squeak is from the nylon bushes but a but of WD40 sorted that out. Finally the last few moments of the video are of the panel gap on the back of the bonnet which is exactly what I want it to be :)
Finally I got round to marking, drilling and fitting one of the new Titanium bulkhead subframe spreader plates:
(old stainless steel piece on the left)
The titanium was surprisingly easy to drill (easier than stainless I thought). Like I put last time the new one is a bit bigger so can spread the load more efficiently.
In situ:
Thats all your getting for now folks.
Blue
Edited by blue blood, 14 February 2013 - 08:11 PM.
#336
jonny f
-
- Members
-
- 1,492 posts
One Carb Or Two?
- Location: Surrey
- Local Club: Boxhill Mini Club
Posted 16 February 2013 - 09:02 PM
Looks good blue. Love the ti plates.
#337
Artful Dodger
-

- Members
-
- 4,435 posts
" I AM THE SPECIAL ONE"
- Local Club: aint no body got time fo dat
Posted 16 February 2013 - 09:17 PM
titanium is so cool  ally is as far as i can go, cant justify the cost of titanium!
i guess those hex bolts will be replaced with allen head bolts?
ally is as far as i can go, cant justify the cost of titanium! i guess those hex bolts will be replaced with allen head bolts?
#338
blue blood
-
- Members
-
- 806 posts
One Carb Or Two?
Posted 16 February 2013 - 10:06 PM
Thanks for the comments as ever. Yeah the hex bolt will be changed to allen head bolts. As far as the titanium goes the sheet of it that I have had my rear brake arms made from and the spreader plates ive made was donated to me while I was a student :) So one of the best freebies ever :) Glad you like the exotic extras.
Regards Blue
Regards Blue
#339
Minus68
-

- Noobies
-
- 2 posts
Starting My Mini Up
- Location: Chichester
- Local Club: Chi Minis & LSMOC
Posted 23 February 2013 - 06:53 PM
Hi Blue, I have really enjoyed reading your thread. I too have a Minus which I have owned for the past 18 years (Mini Minus Register #9) and am always glad to see another Minus heading back towards the road.
Keep up the good work and I look forward to further updates.
Keep up the good work and I look forward to further updates.
#340
Archived1
-

- Archived
-
- 619 posts
Super Mini Mad
Posted 23 February 2013 - 07:02 PM
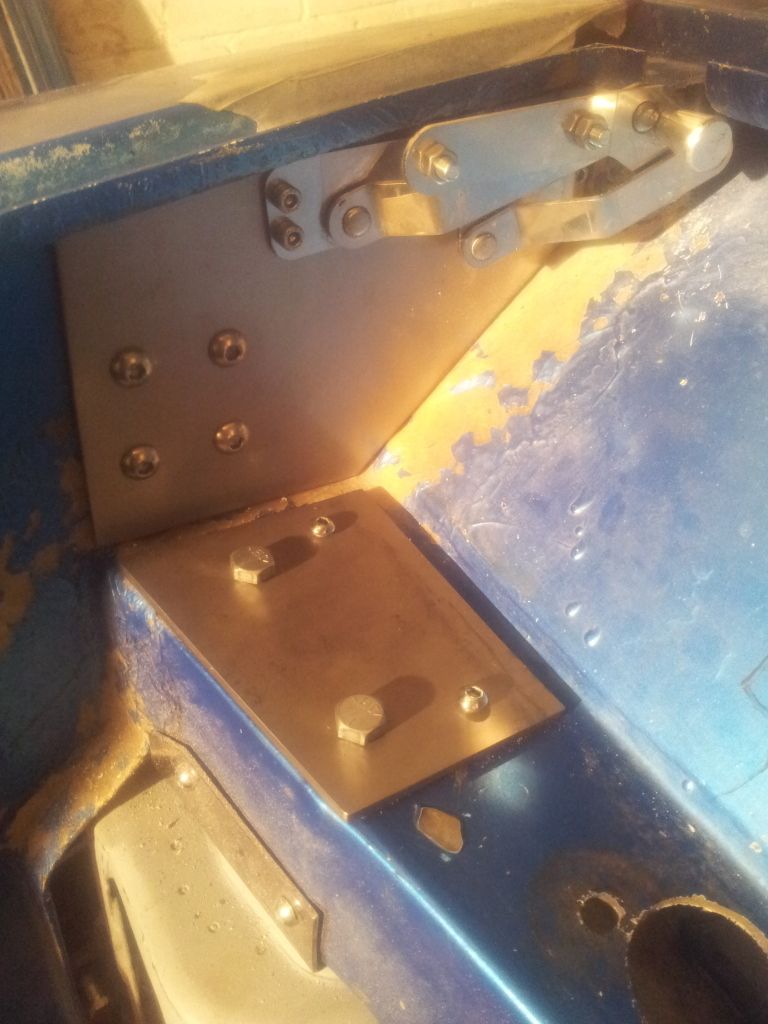
Those load spreading plates work well in there.
The minivation hinges seem pretty smart too.
The minivation hinges seem pretty smart too.
#341
blue blood
-
- Members
-
- 806 posts
One Carb Or Two?
Posted 23 February 2013 - 08:59 PM
Thanks for the comments guys. I want to start finishing off the bonnet soon with internal locking kit and all but I have recently purchased a car and it has unfortunately decided to break for me!!!! sods law. Anyhow I will try and get a few more updates soon hopefully. Minus68 it would be really helpfully to me if you could send me some pictures of the bottom of your doors :) also are you part of the facebook mini minus page?
Regards Blue
Regards Blue
#342
AndrewMini
-
- Noobies
-
- 154 posts
Mini Mad
- Location: Launceston, Cornwall
Posted 02 March 2013 - 11:21 AM
love the build, makes me want a minus so bad 
#343
blue blood
-
- Members
-
- 806 posts
One Carb Or Two?
Posted 02 March 2013 - 06:04 PM
Thanks man. I haven't put in much time lately because because my daily is in the garage getting fixed I haven't had it long either!!
Regards Blue
I haven't had it long either!!Regards Blue
#344
blue blood
-
- Members
-
- 806 posts
One Carb Or Two?
Posted 19 March 2013 - 05:58 PM
So I got a few hours in yesterday and managed to get what seems like absolutely nothing done!!!
So what I do have to show:
I started by drilling out the holes bigger on my bonnets brackets so when I come to fibreglass them into place there is more area to grip to on the bonnet and it should hopefully hold better.
Then from there with everything in place i.e the hinges, bonnet and coverage for no drips.
I used good old fashion araldite epoxy to stick the hinges in place:
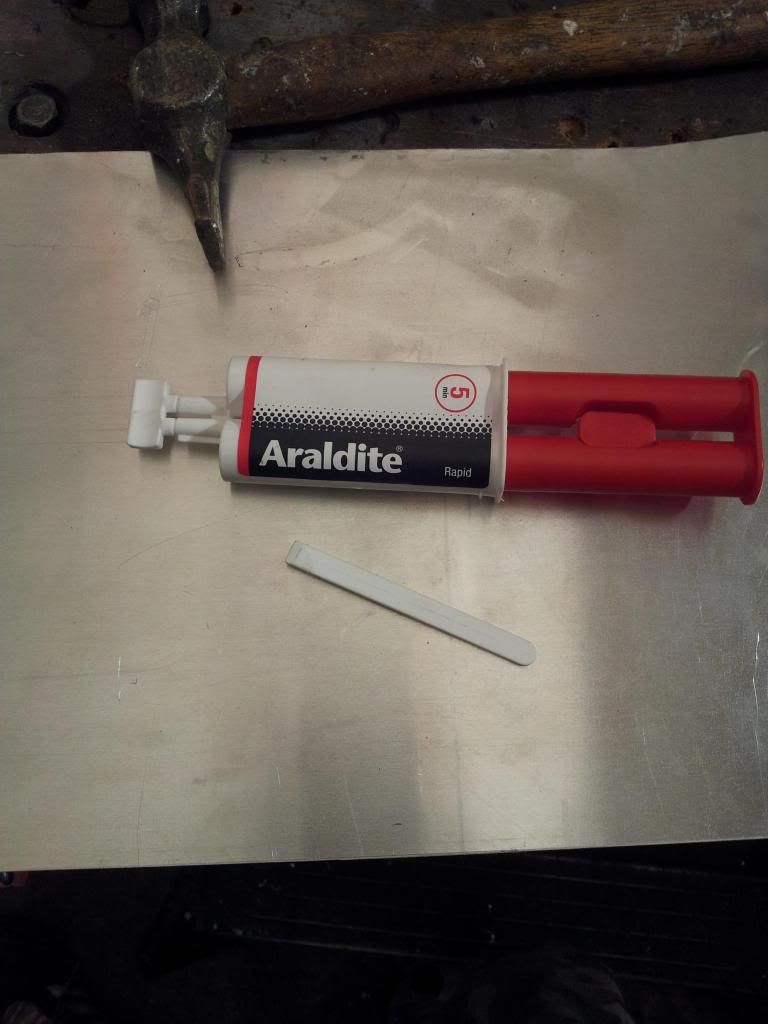
It has a bit of spacing between some part of the hinge and the bonnet but thats o.k as it will be filled up with glass strand matt and resin.
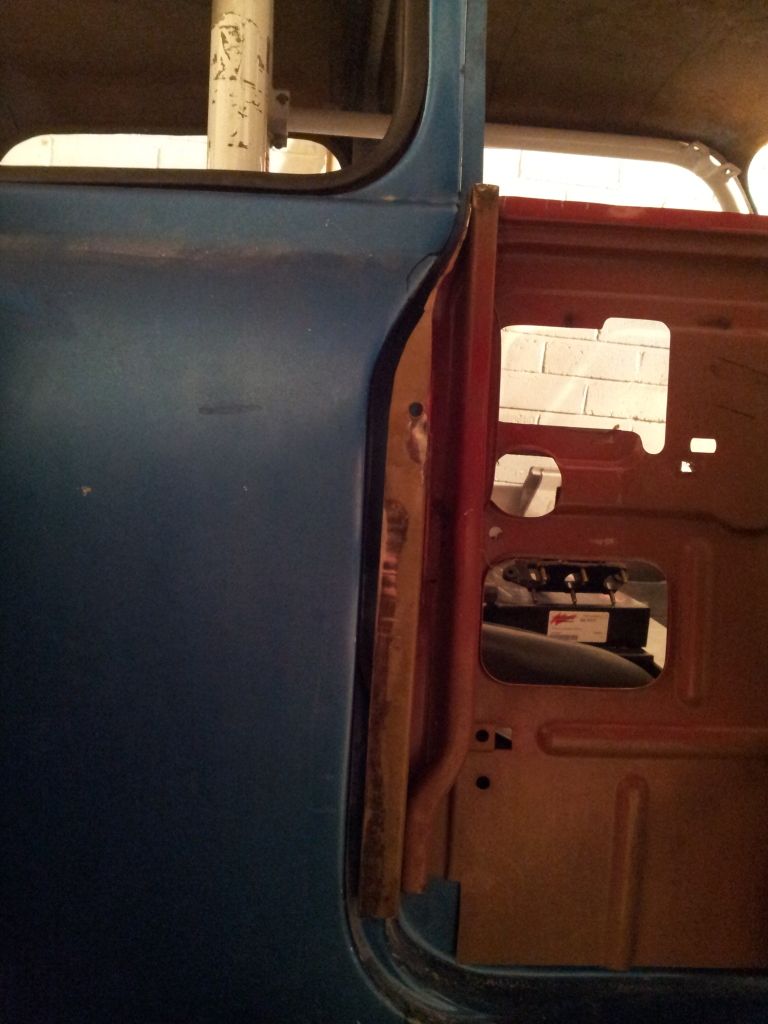
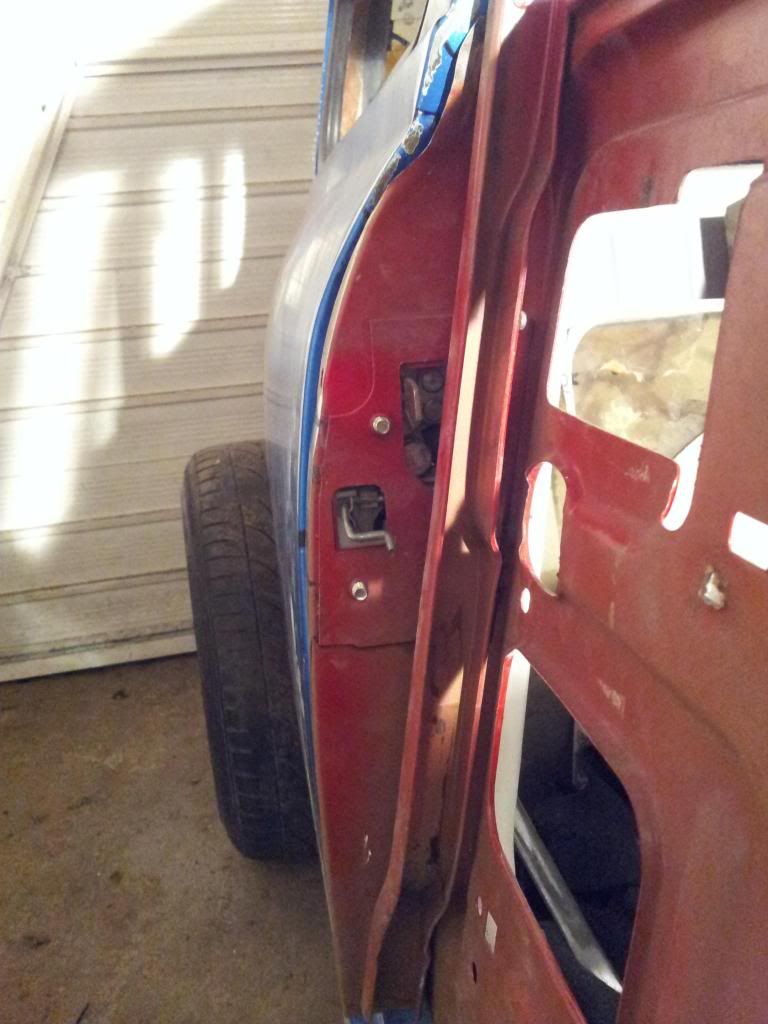
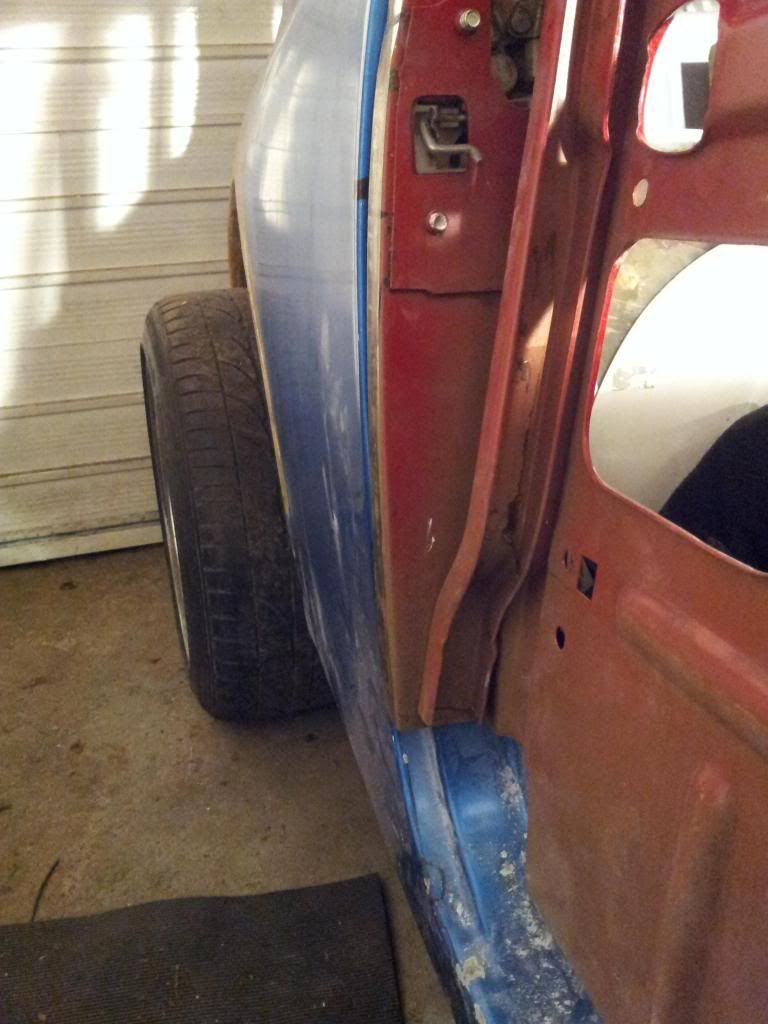
So with that all done and me having to get under the bonnet and hold everything in place while it dries enough (5minutes dry time my anus) I carried on with the doors a bit. I managed to chop down a section on the passenger side (no pictures) and then got side tracked and started to cut out the edge for the door seal on the drivers side. I did it by hand with a hacksaw and hand files as I didn't want to balls it up like I did on the other side and had to fix. Anyhow with that partially done I decided to add the door latch and locking mechanism to give it all a whirl:
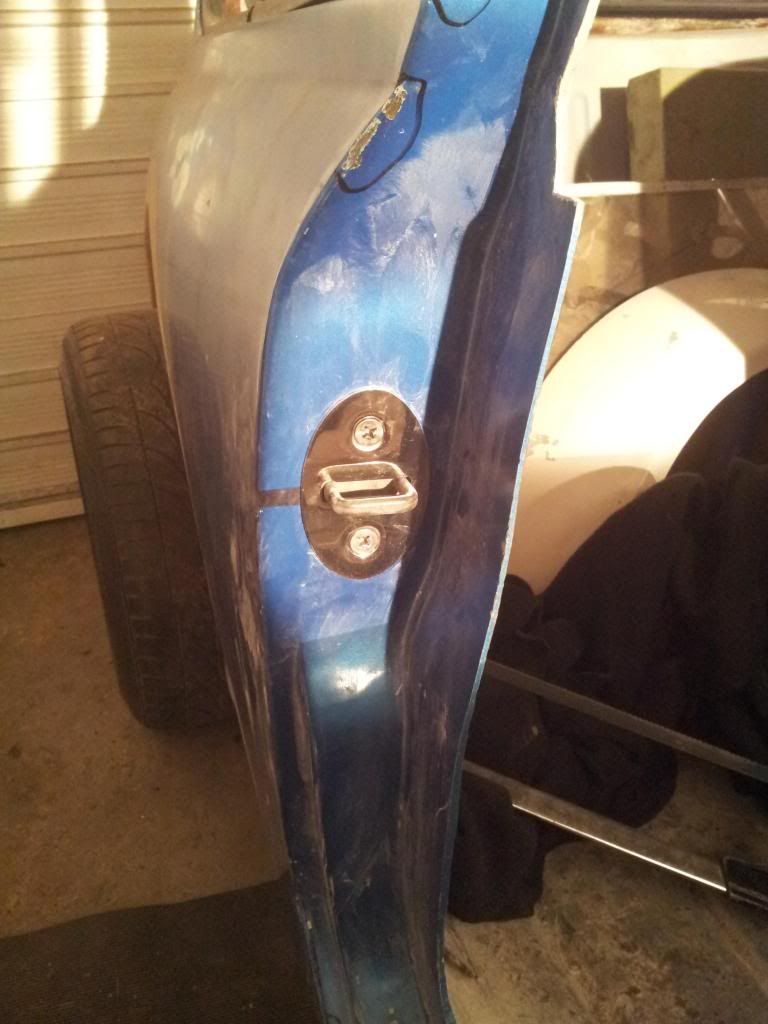
"Just like a Golf"
Anyhow, upon closing the door I noticed at the bottom it tapers out a good 5/6mm outwards without a skin on so I will be cutting a slither out and welding it back together a bit thinner so the bottom of the door doesn't stick out loads.

Anyhow thats all for now folks. Next time I will be finishing off fibreglassing the bonnet hinge brackets and also finishing off the boot hinge brackets that just need the ends finishing off.
Regards Blue
So what I do have to show:
I started by drilling out the holes bigger on my bonnets brackets so when I come to fibreglass them into place there is more area to grip to on the bonnet and it should hopefully hold better.
Then from there with everything in place i.e the hinges, bonnet and coverage for no drips.
I used good old fashion araldite epoxy to stick the hinges in place:
It has a bit of spacing between some part of the hinge and the bonnet but thats o.k as it will be filled up with glass strand matt and resin.
So with that all done and me having to get under the bonnet and hold everything in place while it dries enough (5minutes dry time my anus) I carried on with the doors a bit. I managed to chop down a section on the passenger side (no pictures) and then got side tracked and started to cut out the edge for the door seal on the drivers side. I did it by hand with a hacksaw and hand files as I didn't want to balls it up like I did on the other side and had to fix. Anyhow with that partially done I decided to add the door latch and locking mechanism to give it all a whirl:
"Just like a Golf"
Anyhow, upon closing the door I noticed at the bottom it tapers out a good 5/6mm outwards without a skin on so I will be cutting a slither out and welding it back together a bit thinner so the bottom of the door doesn't stick out loads.
Anyhow thats all for now folks. Next time I will be finishing off fibreglassing the bonnet hinge brackets and also finishing off the boot hinge brackets that just need the ends finishing off.
Regards Blue
#345
jonny f
-
- Members
-
- 1,492 posts
One Carb Or Two?
- Location: Surrey
- Local Club: Boxhill Mini Club
Posted 19 March 2013 - 07:50 PM
Looking great blue.
Want to make me a set of doors? Mine are horrible.
Want to make me a set of doors? Mine are horrible.


0 user(s) are reading this topic
0 members, 0 guests, 0 anonymous users


