Top work there!
How much did the compleate front end set u bak? Inners too

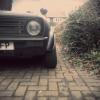
1971 Clubman Estate....now Turbo
Started by
woodenman23
, May 23 2011 10:34 PM
297 replies to this topic
#77

minimissions
-

- Members
-

- 3,427 posts
Up Into Fourth
- Location: North West
- Local Club: M.M.O.C
Posted 22 January 2012 - 10:30 AM
Hey wow that was a bash, just read through this build, and its a lovely clubby estate mate, i have bashed mine bought 5 months ago, but the damage was more to just the left hand side but still looked bad, only just got all the front rebuilt again. I will keep an eye out on this build!
Good luck with it all! :)
Good luck with it all! :)
#78
woodenman23
-
- Noobies
-
- 299 posts
Mini Mad
Posted 22 January 2012 - 07:17 PM
Stunning work there. You've got some skills mate.
What type of bolts did you use for the accelerator pedal repair at the bottom of bulkhead? I had the same issue. The originals have a round flat head to clear the subframe. I experimented with all sorts but in the end just made use of the originals as they weren't too bad. Also did you have to swap the tube from the old panel, that holds heater air pipe, on the right hand inner wing, or did you make a new one? Mine was too bad to reuse so I made my own as the inner wing doesn't come with one. See my Leyland Mini 1000 thread and towards the bottom of page 3 to see what I mean.
Anyway great work and an extremely interesting read.
Thanks. For the accelerator pedal repair I just used 1/4" UNF bolts I believe. Welded them on from the back, and then took the tops off with a grinder.
I didn't grind them all the way back, I left about as much material as there is on the standard bolts.
As for the sleave thing on the inner wing for the heater pipe, my inner wing came with it already attached.
I had a flick through your build thread, all I can say is WOW. Your fab skills are amazing.
Top work there!
How much did the compleate front end set u bak? Inners too
Can't remember off the top of my head but it was a lot, even more so because it's a Clubman front end.
Hey wow that was a bash, just read through this build, and its a lovely clubby estate mate, i have bashed mine bought 5 months ago, but the damage was more to just the left hand side but still looked bad, only just got all the front rebuilt again. I will keep an eye out on this build!
Good luck with it all! :)
Thanks man.
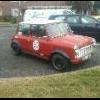
I remember seeing your estate at 'Mini's By the Sea' in Worthing last year, I was there with the flame.
Do you have a build thread for it?
Liam
#79
woodenman23
-
- Noobies
-
- 299 posts
Mini Mad
Posted 25 January 2012 - 08:53 PM
Small update, I got these today.
They seem to be in really good nick no signs of rust along the tops and bottoms.
To be fair the doors on the car aren't to bad and are easliy repairable, just these went for a decent price and will also save me a job.


Big thanks to my dads mate Simon for collecting them.
Sorry about the bad photos.
Liam
They seem to be in really good nick no signs of rust along the tops and bottoms.
To be fair the doors on the car aren't to bad and are easliy repairable, just these went for a decent price and will also save me a job.
Big thanks to my dads mate Simon for collecting them.
Sorry about the bad photos.
Liam
Edited by woodenman23, 25 January 2012 - 08:53 PM.
#80
hughJ
-

- Members
-
- 727 posts
Soldiering Along
- Location: Highlands, Scotland
Posted 25 January 2012 - 09:22 PM
Liam - They are good photos!! Look very nice doors. Most impressed by what you have done - that front end looks some job!
Keep up the good work - I know how hard it is.
Hugh
Keep up the good work - I know how hard it is.
Hugh
#81
minimissions
-
- Members
-
- 3,427 posts
Up Into Fourth
- Location: North West
- Local Club: M.M.O.C
Posted 28 January 2012 - 12:42 AM
Stunning work there. You've got some skills mate.
What type of bolts did you use for the accelerator pedal repair at the bottom of bulkhead? I had the same issue. The originals have a round flat head to clear the subframe. I experimented with all sorts but in the end just made use of the originals as they weren't too bad. Also did you have to swap the tube from the old panel, that holds heater air pipe, on the right hand inner wing, or did you make a new one? Mine was too bad to reuse so I made my own as the inner wing doesn't come with one. See my Leyland Mini 1000 thread and towards the bottom of page 3 to see what I mean.
Anyway great work and an extremely interesting read.
Thanks. For the accelerator pedal repair I just used 1/4" UNF bolts I believe. Welded them on from the back, and then took the tops off with a grinder.
I didn't grind them all the way back, I left about as much material as there is on the standard bolts.
As for the sleave thing on the inner wing for the heater pipe, my inner wing came with it already attached.
I had a flick through your build thread, all I can say is WOW. Your fab skills are amazing.Top work there!
How much did the compleate front end set u bak? Inners too
Can't remember off the top of my head but it was a lot, even more so because it's a Clubman front end.Hey wow that was a bash, just read through this build, and its a lovely clubby estate mate, i have bashed mine bought 5 months ago, but the damage was more to just the left hand side but still looked bad, only just got all the front rebuilt again. I will keep an eye out on this build!
Good luck with it all! :)
Thanks man.
I remember seeing your estate at 'Mini's By the Sea' in Worthing last year, I was there with the flame.
Do you have a build thread for it?
Liam
Hi yeah it was a the minis by the sea lol got a few looks, thought we would do somthing crazy before it came off the road! i have started a build thread hoping to get on with him as soon as i can miss him on the road

#82
woodenman23
-
- Noobies
-
- 299 posts
Mini Mad
Posted 28 January 2012 - 12:53 AM
Yeah found it today. Looking good, already got the front panel and wing on, have you got any plans for it or is it going back to how it was?
I know what you mean, mines been off the road for around around 9 mounths. I much prefer my estate to the flame.
I know what you mean, mines been off the road for around around 9 mounths. I much prefer my estate to the flame.
#83
woodenman23
-
- Noobies
-
- 299 posts
Mini Mad
Posted 05 February 2012 - 06:14 PM
During the week I've been attacking the plug welds at the front bit by bit, almost finished dressing them down.


Sorry not much of an update, I'll do one for what I did today later when I can be arsed to upload the photos.
Sorry not much of an update, I'll do one for what I did today later when I can be arsed to upload the photos.
Edited by woodenman23, 05 February 2012 - 06:17 PM.
#84
olds_kool_lews
-

- Traders
-
- 3,602 posts
Up Into Fourth
Posted 05 February 2012 - 06:29 PM
looking good mate! doing a fine job of repairing your estate! when are you hoping to have it finished? or is it just as and when?
#85
minimuk
-

- Members
-
- 1,947 posts
Camshaft & Stage Two Head
- Location: Midlands
Posted 05 February 2012 - 06:52 PM
nice job, turnin proffessional.... 
#86
woodenman23
-
- Noobies
-
- 299 posts
Mini Mad
Posted 05 February 2012 - 07:51 PM
So here it is....
Started off with a clean up of the garage and the car, as I made one hell of a mess in there the other day.
The days aim was to do some alignment checks. Should have done this right at the beginning but keen to start the project meant it slipped my mind. Anyway better now than never.

Car lifted off the home made trolley and put on axle-stands, then the rear subframe was bolted in.
Before starting the alignment checks we had to make sure the car was level.... this took some time.

Father giving me a hand.
We dropped the plumb bob from the centres of the:

You can just about see the eight makings on the floor.

What you are looking for when doing this is for the diagonals to intersect the centre line at the same point.
This shows that the front subframe is true, which was a bit of a surprise considering as it is the same one that was fitted when the accident happened. I have got to admit I was a little nervous during this process.

This is the most important intersection as tells you if there is any distortion in the shell, again I was happy to see the lines met.

Finally the rear subframe.

Looks a little like some Voodoo crap.

Liam
Started off with a clean up of the garage and the car, as I made one hell of a mess in there the other day.
The days aim was to do some alignment checks. Should have done this right at the beginning but keen to start the project meant it slipped my mind. Anyway better now than never.
Car lifted off the home made trolley and put on axle-stands, then the rear subframe was bolted in.
Before starting the alignment checks we had to make sure the car was level.... this took some time.
Father giving me a hand.
We dropped the plumb bob from the centres of the:
- Front subframe front mounting bolts
- Front subframe rear mounting bolts
- Rear subframe front mounting block lower bolts
- Rear subframe rear mounting block bolts
You can just about see the eight makings on the floor.
What you are looking for when doing this is for the diagonals to intersect the centre line at the same point.
This shows that the front subframe is true, which was a bit of a surprise considering as it is the same one that was fitted when the accident happened. I have got to admit I was a little nervous during this process.
This is the most important intersection as tells you if there is any distortion in the shell, again I was happy to see the lines met.
Finally the rear subframe.
Looks a little like some Voodoo crap.
Liam
#87
woodenman23
-
- Noobies
-
- 299 posts
Mini Mad
Posted 05 February 2012 - 08:13 PM
And here are some of the measurements we took

Liam
Liam
#88
vtec_miniestate
-

- Members
-
- 356 posts
Speeding Along Now
- Local Club: Torbay Mini Club
Posted 05 February 2012 - 10:15 PM
Loving the rebuild :)
#89
woodenman23
-
- Noobies
-
- 299 posts
Mini Mad
Posted 06 February 2012 - 11:50 AM
Thanks guys
As and when really. This is my first rebuild so I'm taking my time with it and there is the issue of funds.
looking good mate! doing a fine job of repairing your estate! when are you hoping to have it finished? or is it just as and when?
As and when really. This is my first rebuild so I'm taking my time with it and there is the issue of funds.
#90
mini danny
-
- Members
-
- 5,229 posts
I am a mini daddy.
- Local Club: british mini club
Posted 06 February 2012 - 12:44 PM
Thanks guys
looking good mate! doing a fine job of repairing your estate! when are you hoping to have it finished? or is it just as and when?
As and when really. This is my first rebuild so I'm taking my time with it and there is the issue of funds.
looking good mate and just one thing your not taking your time you wizzing through it Haha


1 user(s) are reading this topic
0 members, 1 guests, 0 anonymous users


