Cheers magne :0) i think it was your thread come to think of it. Hmm. Might need some more research into that then.
Rear doors been sorted as ive ordered a genuine lower door skin from the lower window edge down. Should come next week so going to start stripping the door tomorrow.

Austin Mini Van Bare Metal Rebuild
Started by
SAL 821X
, May 25 2011 07:39 PM
1693 replies to this topic
#121

SAL 821X
-
- Members
-

- 1,890 posts
Camshaft & Stage Two Head
- Location: Hinckley
- Local Club: Leicester Mini Owners Club
Posted 09 October 2012 - 10:45 PM
#122
SAL 821X
-
- Members
-
- 1,890 posts
Camshaft & Stage Two Head
- Location: Hinckley
- Local Club: Leicester Mini Owners Club
Posted 17 October 2012 - 06:45 PM
Van restoration lesson two: when measuring to cut something out. Always take into accout the thickness of the cutting disc..... Balls I'll have cut that out wrong then 
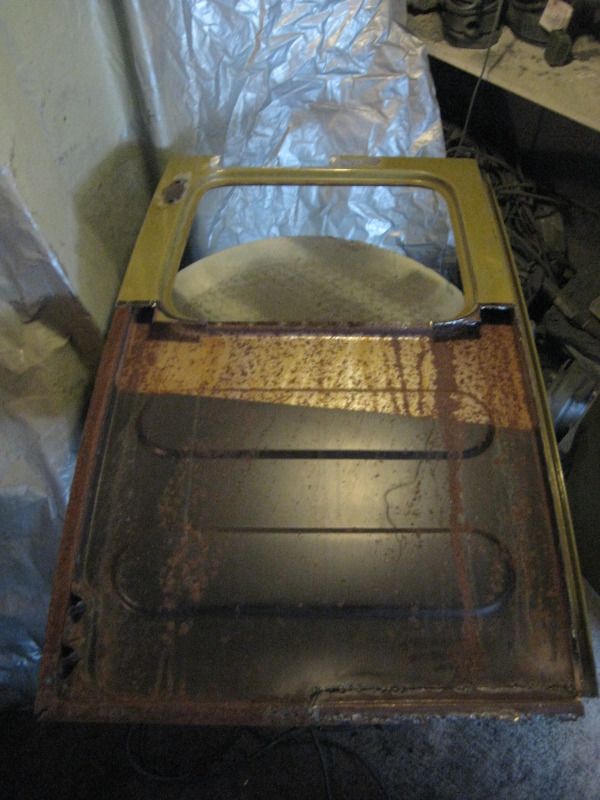
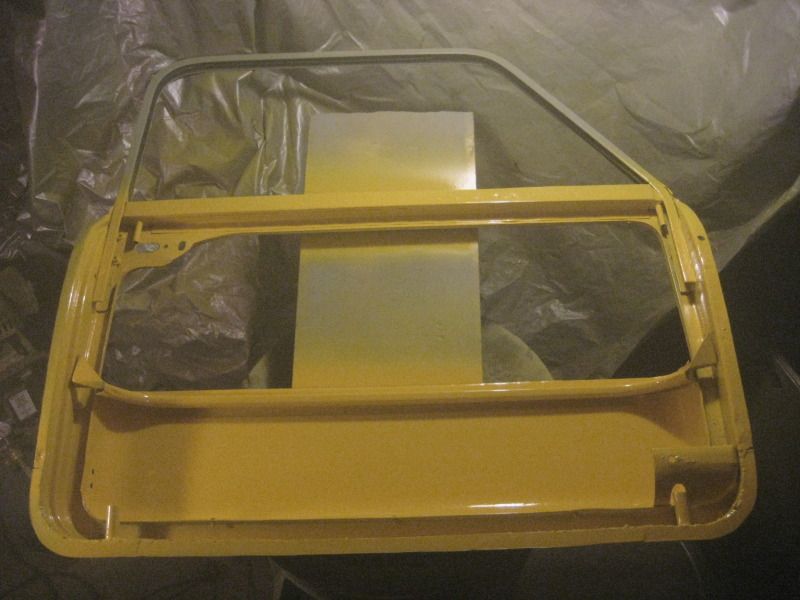
I now have the skin off the rear door and a new one sat next to it waiting to go on. I've slightly over cut the window corner, so the gap is 3-4mm to wide for the new panel. Will have to think how to close the gap when i come to weld it up.
Got friday off from work so plan of action is to get the insides of the door painted in the yellow.
Will take so snaps and post progress on friday.
Night all.
#123
SAL 821X
-
- Members
-
- 1,890 posts
Camshaft & Stage Two Head
- Location: Hinckley
- Local Club: Leicester Mini Owners Club
Posted 18 October 2012 - 08:23 AM
Just nicked this picture off Ryans Flubber thread as it gives me a good indication of how I need to repair the section of load bed.
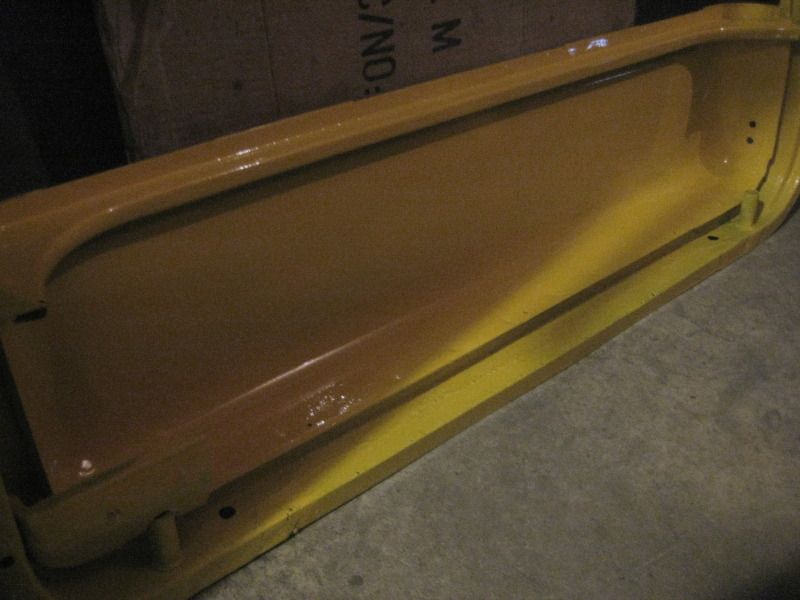
This is how mine currently looks.
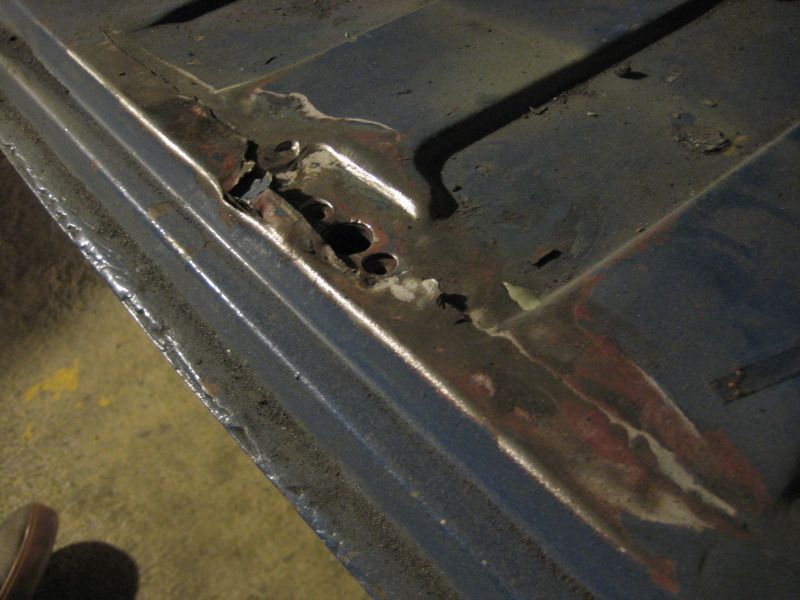
And this is how it should look I think.

This is how mine currently looks.
And this is how it should look I think.
#124
Yoda
-

- Traders
-
- 1,958 posts
Camshaft & Stage Two Head
- Location: Dartford, Kent
- Local Club: Medway mini club
Posted 18 October 2012 - 08:33 AM
Van restoration lesson two: when measuring to cut something out. Always take into accout the thickness of the cutting disc..... Balls I'll have cut that out wrong then
Will have to think how to close the gap when i come to weld it up.
Get some 3mm steel welding rod and weld it in the gap! Same technique as setting poor door to pillar gaps

#125
SAL 821X
-
- Members
-
- 1,890 posts
Camshaft & Stage Two Head
- Location: Hinckley
- Local Club: Leicester Mini Owners Club
Posted 18 October 2012 - 09:15 AM
Van restoration lesson two: when measuring to cut something out. Always take into accout the thickness of the cutting disc..... Balls I'll have cut that out wrong then
Will have to think how to close the gap when i come to weld it up.
Get some 3mm steel welding rod and weld it in the gap! Same technique as setting poor door to pillar gaps
A-HA Yoda! you are wise and great, hadn't thought of that.
#126
SAL 821X
-
- Members
-
- 1,890 posts
Camshaft & Stage Two Head
- Location: Hinckley
- Local Club: Leicester Mini Owners Club
Posted 22 October 2012 - 10:41 AM
So Friday saw me painting the door frames and the new skins.
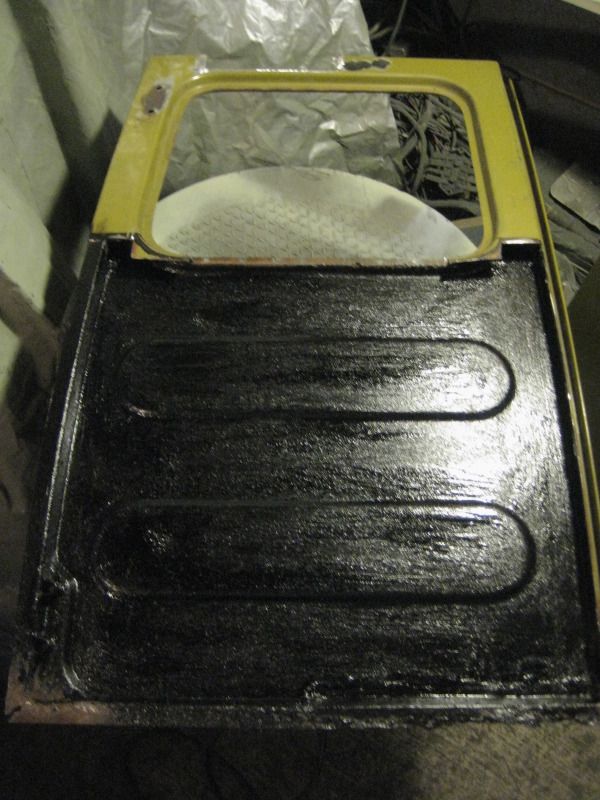
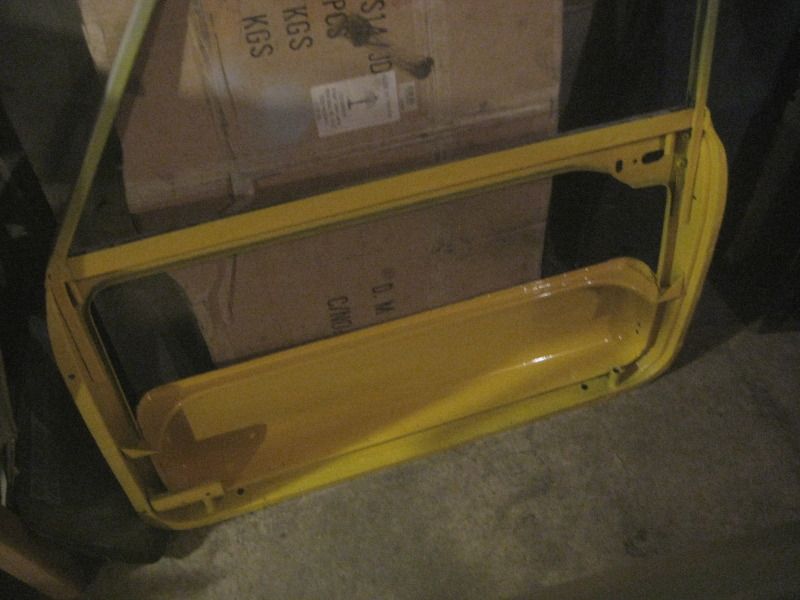
Firstly I treated the inside of the rear door with a nice thick layer of under seal. I've noticed that the lower corner is going to need some attention also as it has rusted through.
Painted up
I then moved onto painting the door frames.
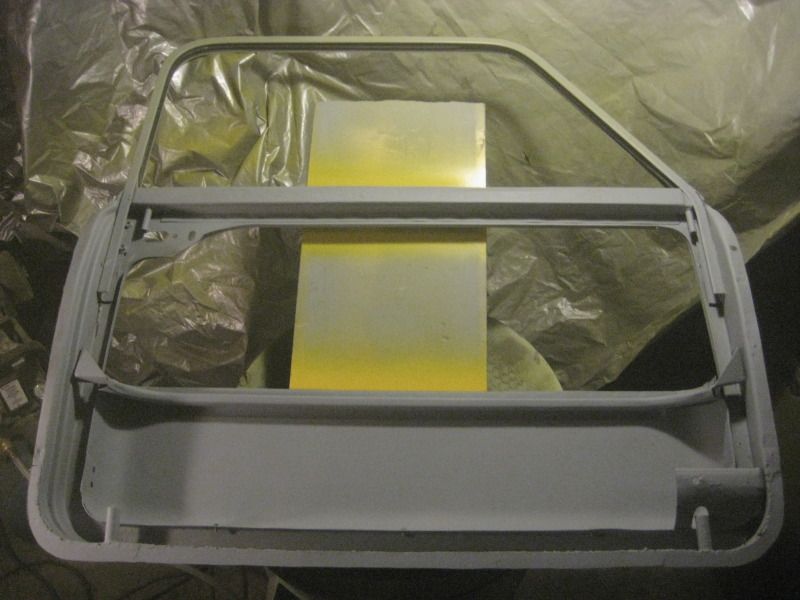
Topcoat
I'm having to spray them in the garage with the door shut to stop over spray, the lights not that great in there so they might be abit patchy. Didn't manage to get any pictures of the skins, the paint smog meant I couldn't see the end of the garage by the time I'd finished. Made it interesting when leaving the garage as I have an up and over door. Ended up commando rolling out, jumped up to shut the door, being followed by a massive plume of yellow, next doors not come round to complain that his black cars speckled yellow yet! so I think I'm safe.
Hoping to get some time again Weds so going to try and attach one of the skins.
Firstly I treated the inside of the rear door with a nice thick layer of under seal. I've noticed that the lower corner is going to need some attention also as it has rusted through.
Painted up
I then moved onto painting the door frames.
Topcoat
I'm having to spray them in the garage with the door shut to stop over spray, the lights not that great in there so they might be abit patchy. Didn't manage to get any pictures of the skins, the paint smog meant I couldn't see the end of the garage by the time I'd finished. Made it interesting when leaving the garage as I have an up and over door. Ended up commando rolling out, jumped up to shut the door, being followed by a massive plume of yellow, next doors not come round to complain that his black cars speckled yellow yet! so I think I'm safe.
Hoping to get some time again Weds so going to try and attach one of the skins.
#127
SAL 821X
-
- Members
-
- 1,890 posts
Camshaft & Stage Two Head
- Location: Hinckley
- Local Club: Leicester Mini Owners Club
Posted 23 October 2012 - 07:58 AM
Went had a look see in the garage last night now that the dust has settled...
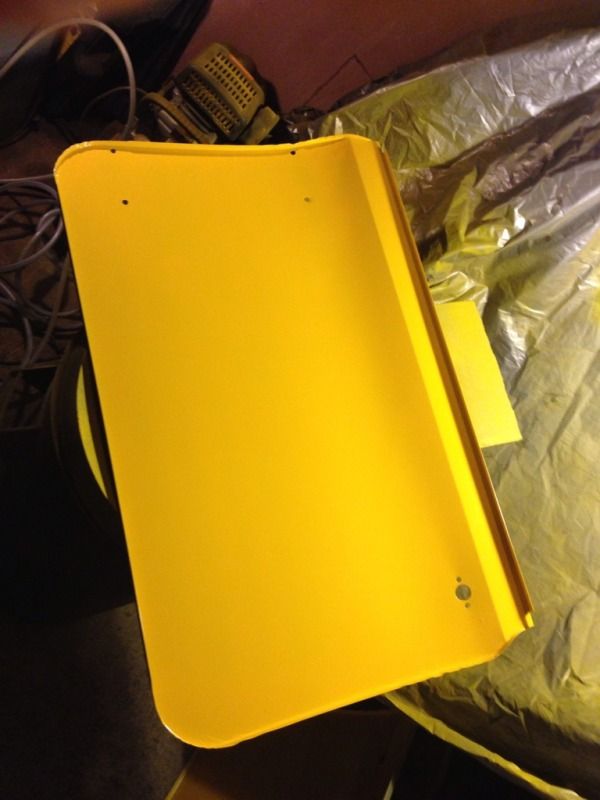
Really shows off the colour getting it down on a larger flat surface. The finish isn't that bad I feel for my very limited experience of painting flat panels, good enough for being mainly covered in door card anyway.
Now on to fitting the skins to the frames....EKKKKKKKK! I'm a bit scared to say the least. Slowly, slowly, catchy monkey will be employed I think.
#128
Mad Max
-

- Members
-
- 306 posts
Speeding Along Now
- Location: On a driveway under a car
Posted 23 October 2012 - 08:45 AM
Doing a cracking job on them doors. Something i have learnt from my diy car resto's is check the door fit before spraying the shell and pref the doors. Obviously abit late for that one, but nothing worse then assuming the hinges will line up on a car and only finding out after spraying it. :)
#129
SAL 821X
-
- Members
-
- 1,890 posts
Camshaft & Stage Two Head
- Location: Hinckley
- Local Club: Leicester Mini Owners Club
Posted 23 October 2012 - 12:34 PM
Yes about that actually. If I do need to weld some rod in to close the gaps should there be any, do I weld it to the car or to the door skin?
#130
SAL 821X
-
- Members
-
- 1,890 posts
Camshaft & Stage Two Head
- Location: Hinckley
- Local Club: Leicester Mini Owners Club
Posted 23 October 2012 - 12:47 PM
Further to that.
Would running a bead of silicone sealant around the inner edge of the skin, before offering it up to the frame, aid keeping it in the right place while I line the door up with the shell?
Would this also benefit any ingest of water alone the seam.
If that makes sense
Would running a bead of silicone sealant around the inner edge of the skin, before offering it up to the frame, aid keeping it in the right place while I line the door up with the shell?
Would this also benefit any ingest of water alone the seam.
If that makes sense
#131
Minidarren83
-

- Members
-
- 1,207 posts
One Carb Or Two?
- Location: Stanford Le hope
Posted 24 October 2012 - 03:00 PM
I would use a good automotive sealant like tiger seal as I think silicone ones tend to eat metal so I have been told
#132
SAL 821X
-
- Members
-
- 1,890 posts
Camshaft & Stage Two Head
- Location: Hinckley
- Local Club: Leicester Mini Owners Club
Posted 24 October 2012 - 03:12 PM
Glad you mentioned that Darren, think I will give that a miss then until the skins on.
Thanks
Matt
Thanks
Matt
#133
sonikk4
-

- Admin
-
- 16,175 posts
Twisted Paint Polisher!!!
- Name: Neil
- Location: Cotwolds.
Posted 24 October 2012 - 08:32 PM
I would use some skin pins so once you have it all lined up then drill a couple of holes and fit pins. Job done plus they wont move around as much as sealant.
With regards to the welding rods weld to the door skin. See this link
http://www.theminifo...nnet-boot-gaps/
With regards to the welding rods weld to the door skin. See this link
http://www.theminifo...nnet-boot-gaps/
#134
ryan22_lgm
-

- Traders
-
- 1,478 posts
One Carb Or Two?
- Location: woolacombe, north devon
- Local Club: north devon mini register
Posted 24 October 2012 - 10:27 PM
:) i can get you a pic from the underside if you want? there is a thick washer on the rear of the hole in the centre
#135
SAL 821X
-
- Members
-
- 1,890 posts
Camshaft & Stage Two Head
- Location: Hinckley
- Local Club: Leicester Mini Owners Club
Posted 25 October 2012 - 07:51 AM
:) i can get you a pic from the underside if you want? there is a thick washer on the rear of the hole in the centre
Thanks Ryan that would be great if you could. I can see that there is a washer but can't get to it from the underside because of the valence. Mine is slightly different also in that it has two screws that I guess hold the plate in place.
See here:


0 user(s) are reading this topic
0 members, 0 guests, 0 anonymous users


