Jump to content


Photo
- - - - -

Smurf Mayfair Resto


  • Please log in to reply
25 replies to this topic

#1 GlynC

GlynC

    Stage One Kit Fitted

  • Noobies
  • PipPipPip
  • 99 posts
  • Location: Ashby

Posted 10 October 2011 - 04:06 PM

Thought I would detail the start of our "Mini Adventure" hope the photo's are ok and it not to loaded with them. Any advice welcome, I am sure I will be needing some soon!

We aquired our Mini in September it’s a 1990 Mayfair Henley Blue Old English White Roof 12 months MOT with a genuine 47,000 miles for which we have every MOT and service stamp and receipt. It will be my son’s first car when he hits 17 next March so the pressure is on to get moving with the rebuild. So this winter will be spent in the Garage by the looks of it ;D I had a couple of mini's in the 80's one of which was a 1275GT which I loved, but I had forgotton just how rusty they could be!
I have just spent the best part of two years rebuilding a 1975 Triumph Stag, which is now around 90% done. But I am in no rush as that went back on the road in July and the remaining work is just me wanting to improve it. My lad has never wielded a spanner before so he has a steep learning curve to go with his A level studies :proud:
Back to the Mini, my lad and his mates have nicknamed it the Smurf for obvious reasons I guess!
The aim is to have a really solid mini which looks cosmetically good and drives well. I am not aiming for concours so the rebuild will be limited to replacing what it needs and not a complete restoration and strip down. Having said that I won't be missing out anything either so it will be done properly.
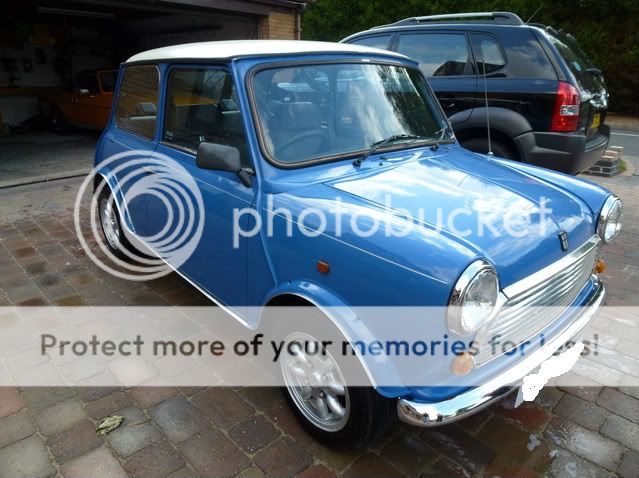
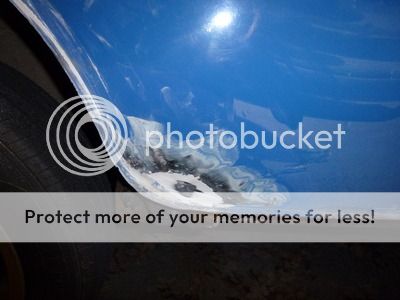
Mechanically the car is A1 and runs like a sewing machine, unfortunately the not so optional extra of the mini "tin-worm" has surfaced and chewed its way through some of the body in the usual places.
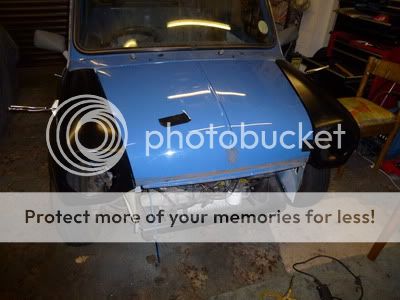
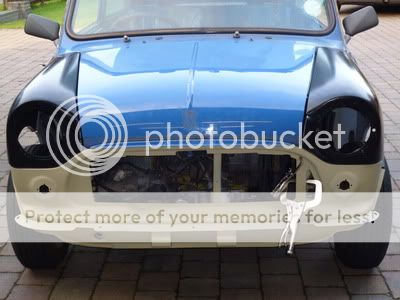
This is what we started with as with all photos looks good eh?
Posted Image
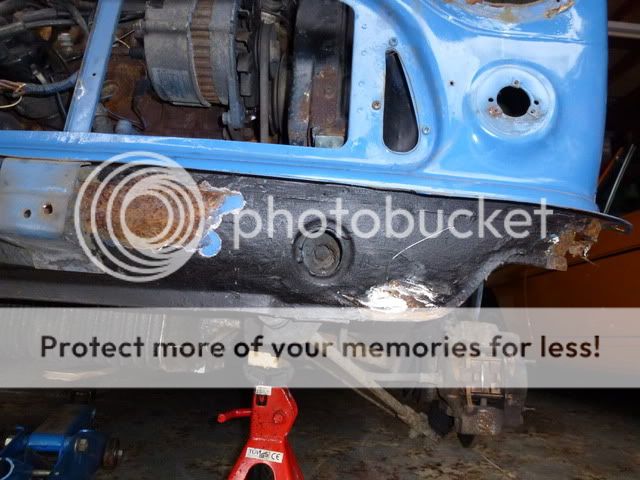
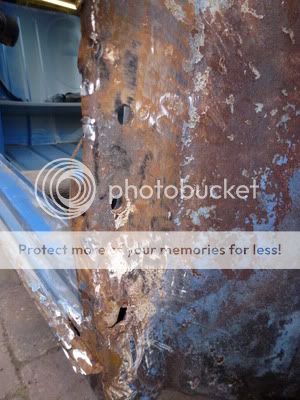
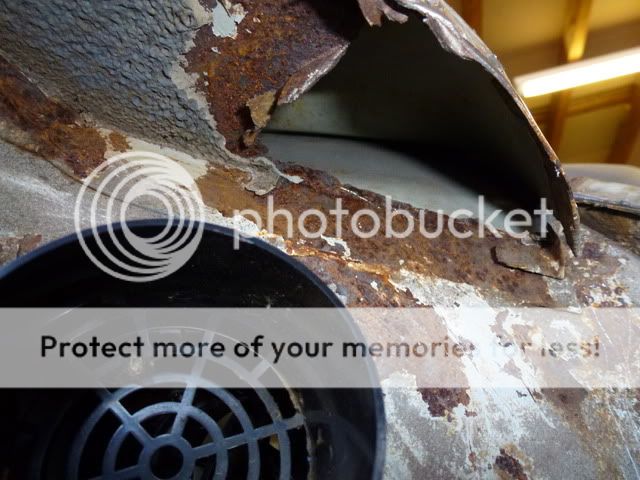
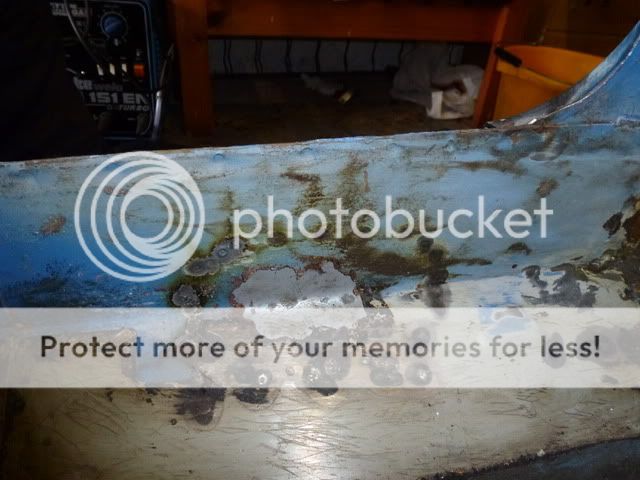
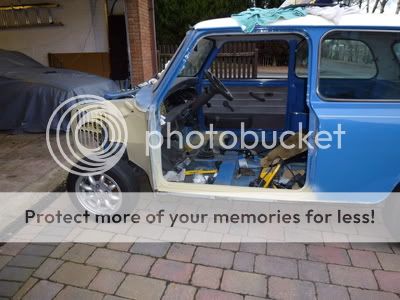
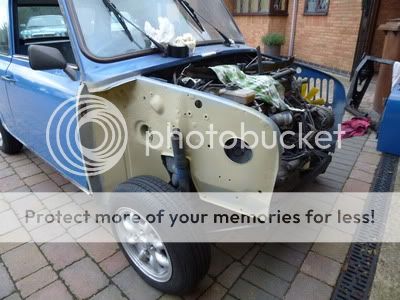
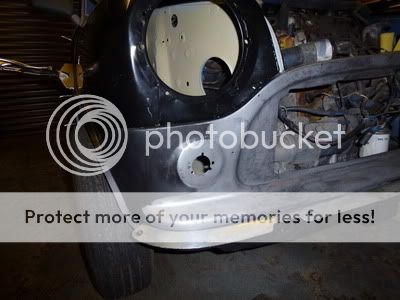
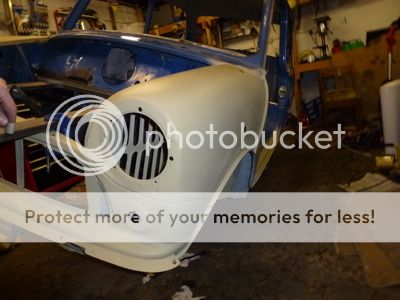
Then I started work on stripping the front, having decided to work from front to back. The wings a gonner, other side was similar ;D
Posted Image
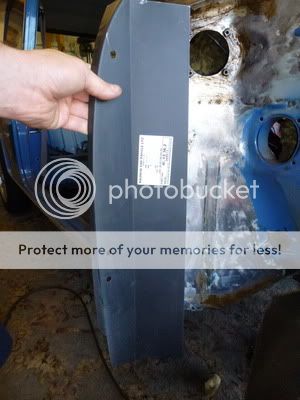
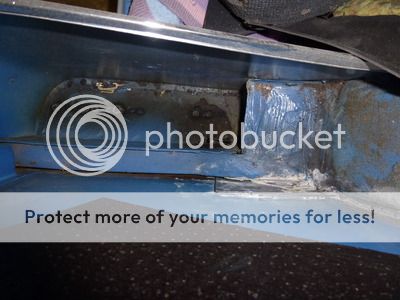
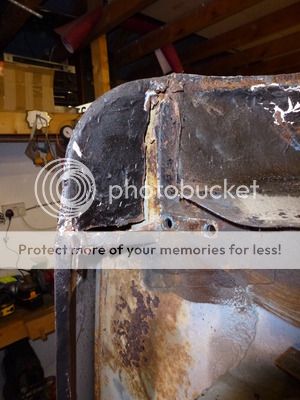
Then the front panel, much of the same with a few bits of welded plate over the top here and there, leaving the rust in for good measure :ohno:
Posted Image
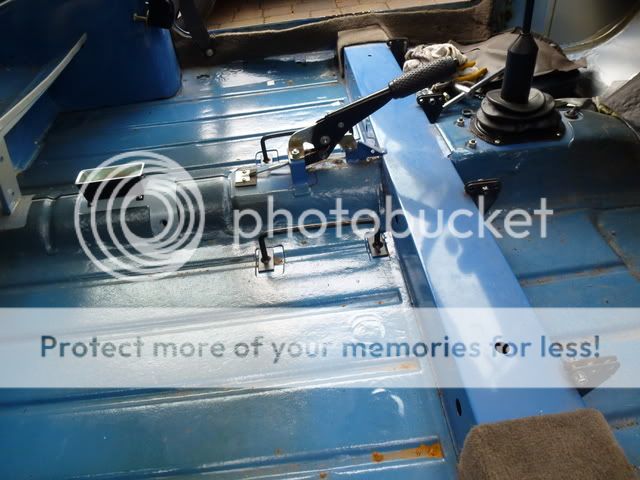
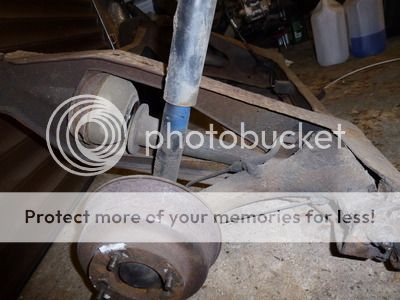
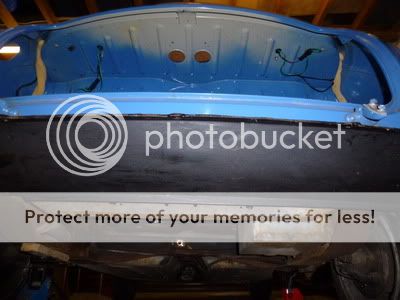
But the floors and underneath are very good and won't need much more than a clean up and paint on the underside. Boot floor and battery box are like new too :)
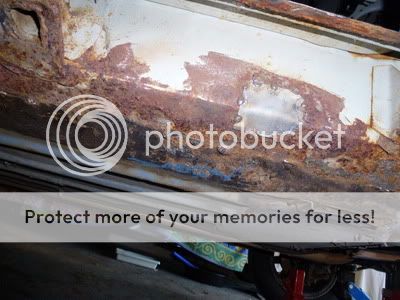
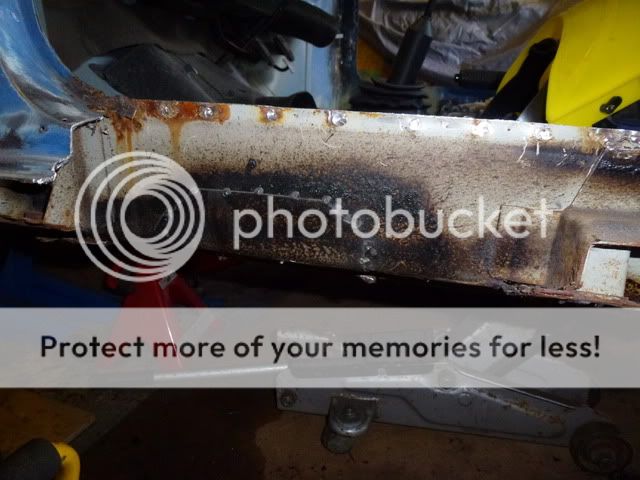
Sills have been replaced but I may have them off to double check whats going on under them as I sense any new metal has just been welded over the not so nice bits! Probably done by the garage for the MOT !
Posted Image

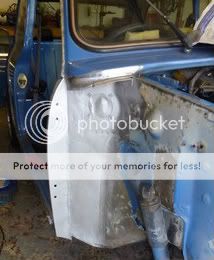
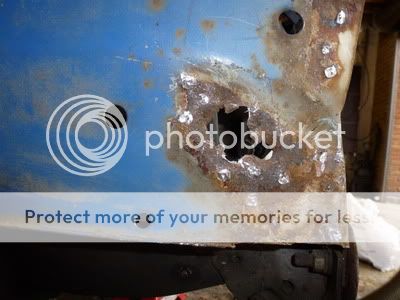
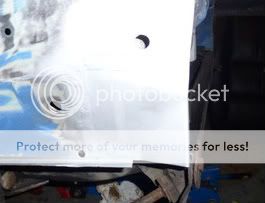
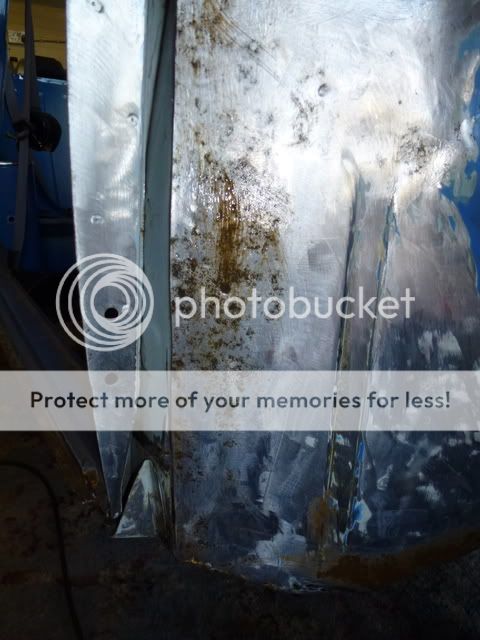
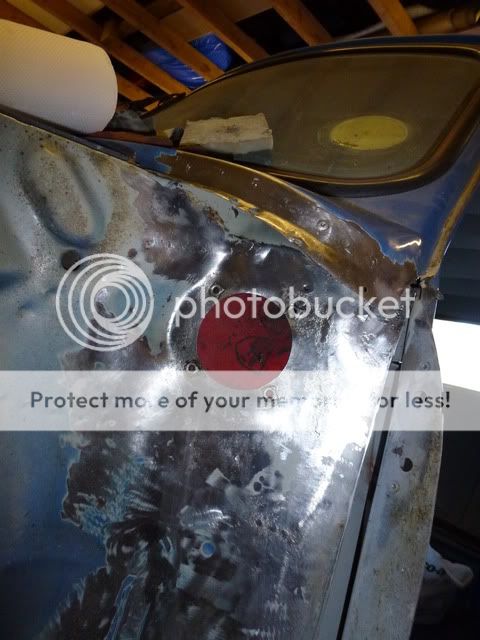
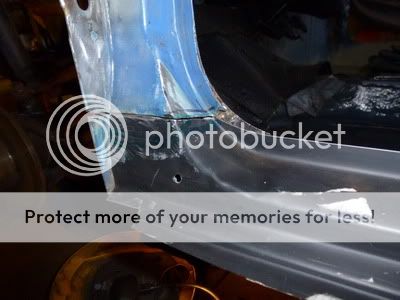
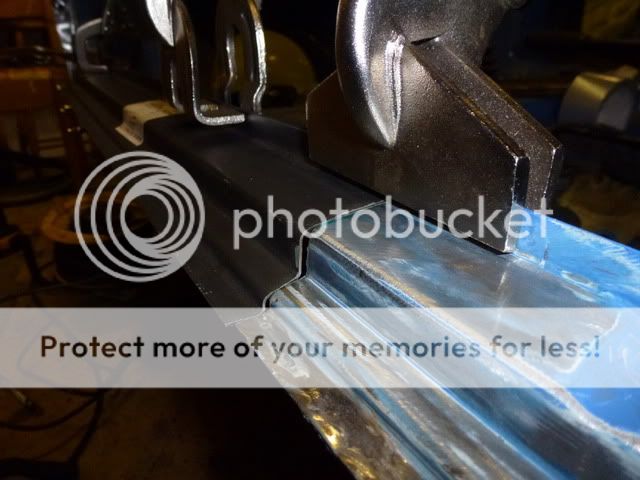
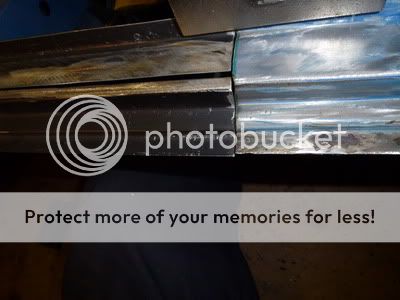
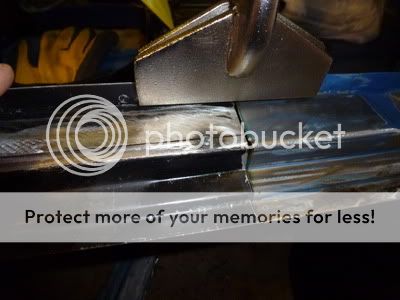
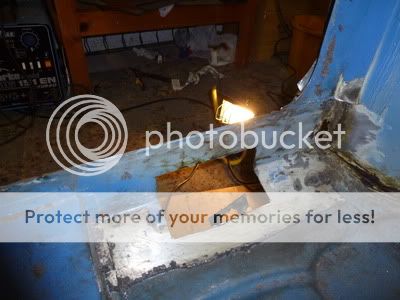
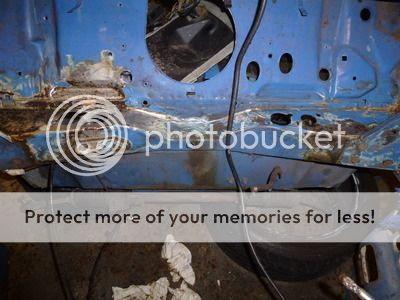
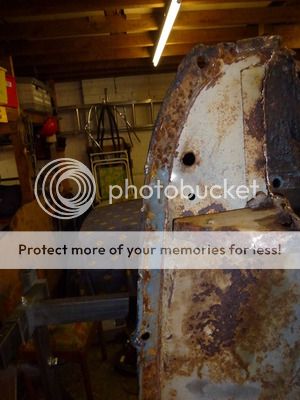
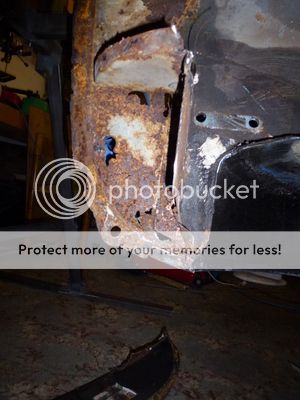
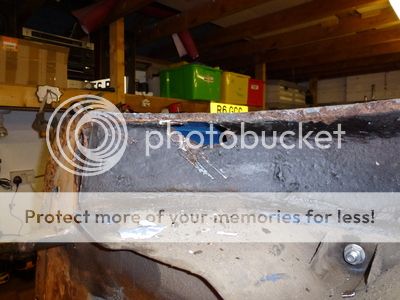
So I have cut off the front sections and already found the odd bit of bodgery. At some stage the A panels had been “replaced” but only half of them. The lower half had been cut away and a new section welded in. The fold on the inner wing door section hadn’t been completed as you can see (hopefully) in the photo. This was the same on both A Panels. Luckily apart from the Front panel welding this was the only work I could find that had been done on the front end.
Posted Image
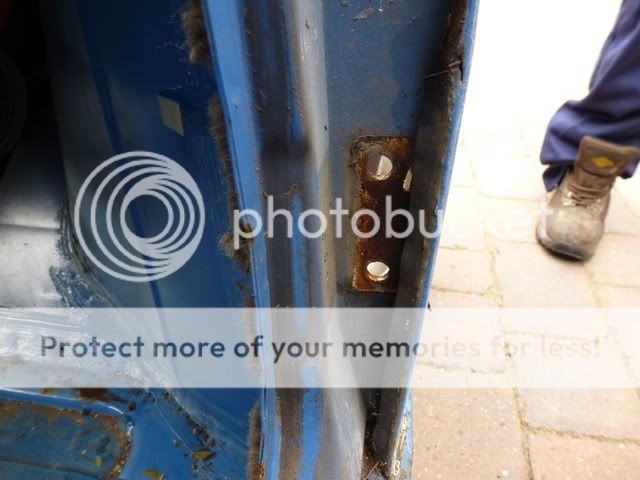
Made getting the door off a bit harder as it was across the hinge! I was left with one question …Why??
Overall though I am pleased and replacement parts seem easy to obtain, so it won't be long before I have the MIG out and the rusty bits chopped out and repaired properly! More photo's when I can load them up.
Cheers
Glyn

#2 GlynC

GlynC

    Stage One Kit Fitted

  • Noobies
  • PipPipPip
  • 99 posts
  • Location: Ashby

Posted 24 October 2011 - 02:35 PM

Thought I would update our project Smurf thread. :D I have added a few pictures before and after each stage. Hope it's of interest I have taken loads of shots during but thought I wouldn't bore you all too much ? Feel free to leave some comments, I am learning about Mini's quickly and the forum projects section has been of great use to me as I approach the jobs I have to do.

Things have now moved on a bit I have cleaned up and repaired the inner wing section by the door post. Which looked like this after removal of the panels. So I showed it the cutting disc and drilled out the spots carefully....Luckily behind it was clean with little traces of rust. So a good rub down and some Zinc primer, and paint made that like brand new.
Posted Image
Now looks better with some new metal fitted. Scuttle has cleaned up well too. Even the closing panel was removed of it's rust and left in place! The near side one is totally different and will need removing though. Also took off the shock mount and cleaned that up, small amount of rust but nothing major the wire wheel and rust remover disposed of that.
Posted Image
Then moved on to the front section of the inner wing which looked a tad rough once the front panel brackets were removed. It seems where there is a welded joint there will be rust on a mini.
Posted Image
Added some new metal to that area and removed any rust, I am trying to preserve as much of the original panel as possible but leave no traces of tin worm. Used a card template to ensure the panel size/shape is maintained.
Flash has blown this out a bit but you can see the repaired section. Have similar to do on the N/s.
Posted Image
Now moved onto the o/s sill and inner sill. I took off the recently fitted sill and have removed a “patch” to the inner sill and replaced with new metal. Haven't uploaded the pics yet. I think much of the bodgery on our car was done in order to pass the yearly mot so the standard of work was generally poor. Patches of new metal over the rusty spots! Nothing painted cleaned just blob welded patches !! O_O I guess we are not alone ?

One quick question I have noticed the subframe mounting at the rear of the sill looks iffy. The bracket itself still looks strong but the outer section looks past it’s best. I have seen repair sections for this has anyone fitted one and can offer any advice. Or a link to a thread with the work being done :proud: I think I will also need to add some new metal to the back section of the inner sill around the same area as this looks poor. I have left this for now though and started on the Near side inner wing and the near side doorstep/sill which I have to do. I have planned to get the front done first.
I will then take the engine out and remove the rear subframe to allow access to more things to wave the Mig at O_O although I need to work out what I set the car up on as I don't have a spit.
I was trying to keep the car mobile for a while as it's useful to be able to move it around in the garage, I have all my gear set up down one side so moving the mini round means am able to get to things easy, or I am just lazy ;D

Cheers
Glyn

#3 MaxAndPaddy

MaxAndPaddy

    Spamela Anderson

  • TMF+ Member
  • PipPipPipPipPipPipPipPipPip
  • 4,700 posts
  • Name: Elvis
  • Location: North Yorkshire
  • Local Club: TMF

Posted 24 October 2011 - 02:56 PM

That first pic I thought niceeee mini!...It still shocks me how good they can look on top and how much is hiding away under a bit of paint..... check out the other rebuilds for advice and pics on the rear subframe theres a few that have done/are doing similar

Enjoying your rebuild!!

#4 GlynC

GlynC

    Stage One Kit Fitted

  • Noobies
  • PipPipPip
  • 99 posts
  • Location: Ashby

Posted 24 October 2011 - 04:21 PM

Thanks mate
Your right about pictures though. Something I found out the hard way after travelling miles to see Mini's for sale. Some of which shouldn't have even been on the road. O_O

#5 GlynC

GlynC

    Stage One Kit Fitted

  • Noobies
  • PipPipPip
  • 99 posts
  • Location: Ashby

Posted 18 November 2011 - 03:18 PM

Bit of an update I have been a slow to post things so will try and catch up a bit
New repair panels arrived for the inner wing/flitch and have ordered some more for the front sections section of the inner wing, they seem to be a good fit
Decided to start on the Drivers side and get this all sorted first. I have a bit more work on the near side as the step needs doing too :(
First off I decided to take off as little of the existing metal as possible as I felt the rust could be removed and treated also by only repairing a smaller section there is less work and less stripping as the dash supports are welded on the back of this panel! Looks a tad rough at the mo :lol:
Posted Image
First off I drilled out the spot welds which hold this section to the door hinge panel, then using a cutting disc I carefully cut off down the fold in the metal.
The section then came off easily and I was pleased to see the main hinge panel is in good nick. Also could see into the sill etc. and this is also in good condition. :D Here’s the repair section
Posted Image
Although I then got carried away and decided to whip off the “recently” added outer sills as I was not happy with a little patchwork of bodgery I found which had been added to the inner sill.
Posted Image
Glad I did as :arrow:
A: they weren’t on that well! Once I broke a few of the welds the hammer got them off and luckily the step flange etc. is in good nick and should clean up well for the new panel. (note to self must order new sills)
B: the rust hadn’t been cleaned off before they had been welded on (typical garage job for the MOT)
C: they hadn’t painted anything before adding the sills!! Even the bl**dy sticker was still on the inside! Not meant to last me thinks!
Luckily the inner sill and the floor are in good condition and what rust there is will come off with the flap wheel and some rust remover. I will then make a decent job of fitting the new panels which will be treated properly before fitting and Waxoyled afterwards! Watch this space for more action on sill work ;)
So I slapped on some Bilthamber and let itdo it's stuff so we should end up with nice shiny steel :D
Posted Image

#6 GlynC

GlynC

    Stage One Kit Fitted

  • Noobies
  • PipPipPip
  • 99 posts
  • Location: Ashby

Posted 18 November 2011 - 03:20 PM

There’s more
Started on the n/s inner wing. De-rusting cutting out the bad bits.
Took me a while to get the remnants of the scuttle closing panel out without too much damage. But once done I got stuck in to the rust and tidied it all up. Took a few days of soaking with rust remover and wire brush on the drill but worth the effort for not rust!
From this
Posted Image
To this also cut off the door hinge section ready for the repair section
Posted Image
Then I removed the shock mount …shock being the operative word. Metal had rusted through the inner wing so I cut it out de-rusted the area and primed up with etch weld
Posted Image
So after making up a suitable section I showed it the Mig ground back then primed it up.
Posted Image
I decided to set about the sill and door step then, rather than complete the inner wing repair. This would give me better access to the bottom area of the inner wing as I have some rot to repair there in the corner.
So I whipped off the sill held with the obligatory blobs of weld, Also took of part of the door step to reveal some of the previous bodging, nice blob weld patch over the rotten metal! Compete with a spray of wax to protect it
Posted Image
The inside view
Posted Image
Then after cleaning up the edges I cut the door frame lower section as this was rusted too and the replacement panel seems a good fit.
Posted Image
Sadly the profile of the middle wasn’t quite as good and will need some serious fettling!
Posted Image

#7 GlynC

GlynC

    Stage One Kit Fitted

  • Noobies
  • PipPipPip
  • 99 posts
  • Location: Ashby

Posted 18 November 2011 - 03:26 PM

Right managed to upload a few more shots of the work around the door step
This panel from Magnum has the wrong width to the profile as I tried to show in one of the previous shots.
So the only way I can think of rectifying this is to remove some of the metals in the middle and weld back together.
Here’s after I “slotted” it
Posted Image
Then a quick tack to test the sizing again, seems to fit well now.
Posted Image
Sadly I overdid it with the welding and thought the section would take the heat …dingbat! It has curled a bit so I now have it clamped firmly on the bench.
Posted Image
Moving on I cut out the rotten section where it had been bodged previously and fabricated a patch and welded that in.
Posted Image
Looks a lot stronger now! Yes, still have a small bit in the corner to sort
Posted Image
I have now sorted the door step last weekend trial hung the door a few times to make sure the gaps looks ok needed a fair amount of work to get it all straigntened out, rotten job took hell of a lot of time. I'll get a few pictures uploaded soon of that along with the inner wing/flitch front section and the door hinge panel repair. I have secured a decent rear subframe too (genuine job) nearly new with all the suspension and hi-lo's for £80 as the one in is original and has some shoddy welding on it so I might as well whip that out and replace whilst I doing other jobs. I also noticed whilst grovelling under the back end the valance has been replaced but the closing panels are shot…why? The valance hasn’t even been painted on the inside, just liberal under-seal on the outer face! Bodgers! My pet het.
More to come been a busy few weeks
:proud:

#8 GlynC

GlynC

    Stage One Kit Fitted

  • Noobies
  • PipPipPip
  • 99 posts
  • Location: Ashby

Posted 02 February 2012 - 06:05 PM

Been a while since I have posted an update, but despite getting a bit cheesed off before Christmas with spending too long in a cold garage I have soldiered on and made some progress.
I finally finished the two inner wings and door sill repairs. Both inner wings have been repaired where required and totally de-rusted, I then etch primed them and finished off with a coat of high build primer. I won’t mention the step as I think the air was blue at times. Here’s a shot of the sides.
Posted Image
Posted Image
I have spent the last few weekends and over Christmas and New Year lining up the panels for fitting up the front. I have lost count of the number of times I have had the doors on and off. But after lots of attempts I have managed to align the A panels and get a good door gap. A word of warning to anyone fitting the repair sections to the hinge panels, don’t rely on the hinge holes being aligned to give the right fitting. I Welded mine on using them as a datum point but had to panel beat the lip for the A panel and then dress this to the correct shape to get the right door gap and achieve a flush finish with the door. I think I could take off and put on a door in my sleep now!!
I have used all pattern panels for wings, A panels, hinge repair, front panel and Step. I have to say despite folks often telling me to buy Heritage I have found them fairly good to fit and my main issues were with the door step and the hinge sections which knock everything else out when you start to build up from the A Panels. Anyway after lots of trial fitting with arms full of clamps, I began to fix the panels on with either skin pins or rivets in areas like the top of the wing where I needed to shut the bonnet.
Here we have the wings on with rivets and A panels pinned in place.
Posted Image

After spending hours, days on getting the wings right I headed on the fitting the front panel, using the sub-frame bolts to locate the new panel on. One this picture my lad had only cleaned off half of the rubbish coating they use on some of these panels. What a hateful job that is too. We used a wire brush in the dril thinners and wire wool to shift it all before primering it up with etch first then a coat of high build.
Posted Image
Posted Image

I was so so pleased as this started to come together. I then needed to work on the wings to bonnet gaps. When we bought the car the gaps were rubbish which was the original factory fit too! So I have promised myself to improve on this and was a tad worried I might struggle with the pattern parts. But after a day of fiddling and checking, trying slight changes and removing metal where required to allow the flanges to sit right I managed to get some very nice straight tidy wing to bonnet gaps without sacrificing any of the other joins. All I can say to anyone doing similar is you need a lot of patience and when you feel your losing it go and have a brew and sit and have a think. I ended up with these which I am really pleased with…..photo from above
Posted Image

So today I welded up the n/s A panel again door off and one a few times to make sure everything was aligned after zinc primering everything. I then pushed her out of the garage to turn her round to weld up the d/s A Panel and took a few quick shots. Here is the front just bolted and clamped at the mo
Posted Image
And then a couple of shots of the gaps I have managed to get on the wings. These are both riveted on and the moment. I need to adjust the bonnets height a bit but was more concerned with the gaps to the wings at this stage. Managed to get the wing to scuttle gap nice and tight too.
Posted Image

Posted Image
This brings me up to date to the middle of Jan I'll post the rest in a minute to where I am now
Thanks for looking Cheers
Glyn

#9 GlynC

GlynC

    Stage One Kit Fitted

  • Noobies
  • PipPipPip
  • 99 posts
  • Location: Ashby

Posted 02 February 2012 - 06:22 PM

Well I stuck at it despite the cold weather I have braved the garage and the cold hands :ohno: and now have completed the majority of the welding on the Smurfs new front end. Have to say despite many folks warning me off the pattern parts I haven’t had too many issues other than the door step which was really rubbish.
The A panels have fitted well and the front and wings have all gone together and have given me better more even gaps than the original ones!! I would have liked to have got the bonnet gaps slightly narrower but this would have messed up some of the other fits so I settled on what I considered to be acceptable and bearing in mind the photos I had of the original untouched panels I am very pleased.
I started by fitting and tacking on the A panels and must have had the doors off 20 times again to make sure it all sat right first. Then I re-fitted the wings with rivets and clamped and bolted on the front panel. I then removed the wings (for access) and welded up the front panel.
Here’s the front panels brackets all primed and sealed. Decided to do this before attaching the wings for ease.
Posted Image
I then drilled or punch all the flanges to be welded on the wings. Cleaned them all up with the grinder and gave them a coat of etch weld. After this had dried I took the opportunity to seam seal around the headlights and the inner wing to a panel and scuttle whilst access was easy. I add some more later before stone chip covering but wanted to make sure the corners were done now.
Then I refitted the wings with rivets made sure of all my lines again and again and again !! Then got stuck in with the welder. Here’s the o/s wing attached with a few spots left to do.
Posted Image
Once both the wings were secured following the same pattern I made sure the A panel to wing was clamped well and prepped up the wing to front panel joint. This is probably the hardest to clamp IMHO. As you have to be careful you don’t just bend the flange as these need to be pulled together nice and close for welding. I used a variety of clamps and bad language to achieve this!! The main issue is that the panels have varying widths of flange in places and you struggle to get them together cleanly on the inside as you need to concentrate on the finish on the outside (if that makes sense? )This is especially hard to get right on the corners as the flanges sizes were much more variable here!
A quick tip for anyone doing this in the same way is to clamp some flattened copper heating pipe under the spot to be welded, this takes away some of the heat and assists in not blowing through the section underneath. I used the same when doing the wings and again it works a treat. Try it when you spot welding with a MIG and see what I mean. The copper keeps the weld neat and tidy so you don't get any metal blobs underneath. It's one of the best tips I picked up and I have used it on a lot of welding jobs since. You can just about see the section of copper under the flange in the photo clamped on.
Also there is no room under the wing for my big head wearing a welding helmet!
Here’s a picture I took through the headlight hole. Posted Image
This one shows the front finish which I very pleased with. I have decided once I have the rest of the car stripped and upside down I will re-visit the inner flanges and seam weld the edges to add more strength.
Posted Image
Here’s the finished front end with bonnet added for good measure.
Posted Image
I then welded up the a panel to wing flange. A much easier job after tackling the inside front wing! Pleased again with the result and some good
strong welds, this one shows them after a clean-up with the grinder before etch primer
. Posted Image
This one shows the finished area etch primed then followed by a coat of high build
. Posted Image
I spent the rest of this last weekend stripping down the engine bay ready to drop the front subby and engine. I left these in place whilst re-building the front end after advice from a few other restorers. It seems to have done the trick as we have achieved some good results with the panels and I am pleased with the overall fit.
Once the engines out we’ll get the rear end stripped and need to source the spit to get stuck in on the underside and back end.
Hope you like the pictures any comments welcome
Cheers
Glyn

#10 scotty_1987

scotty_1987

    One Carb Or Two?

  • Members
  • PipPipPipPipPipPipPip
  • 874 posts
  • Location: Dublin, Ireland
  • Local Club: MiniBallers

Posted 02 February 2012 - 06:28 PM

nice work man..keep it up :lol: ! what are the plans for it ??

#11 GlynC

GlynC

    Stage One Kit Fitted

  • Noobies
  • PipPipPip
  • 99 posts
  • Location: Ashby

Posted 02 February 2012 - 07:27 PM

Cheers mate
Plans are to bring the old girl back to A1 and hand her over to my eager 17 year old son who spends the odd weekend in the garage as my assistant!! He has gotten the bug for older cars from me and wouldn't entertain a saxo or Clio! It was a mini or a Morris minor to be honest.
I want to keep her as straight as possible really and restrict mods to useful sensible and cosmetic only.
The interior was in very good condition so most of t should go back in fine. No real abuse after 40k miles with an elderly owner
Cheers Glyn

#12 GlynC

GlynC

    Stage One Kit Fitted

  • Noobies
  • PipPipPip
  • 99 posts
  • Location: Ashby

Posted 19 February 2012 - 09:03 PM

Update on progress on our Smurf resto.
First off I set about getting the engine out and after consideration I decided to drop the whole assembly on the sub-frame. So we spent a few hours stripping down the engine bay and ancillaries and then after roping in some help from SWMBO and my daughter, my son and I lifted the shell over the engine and wheel barrowed it backwards. Job done, but of course this reveals some areas needing some work and de-rusting but thankfully nothing too bad !
Posted Image
So I spent the next few days de-rusting the engine bay with some Bilthamber. I wanted the main part of the work in the bay done so I could get the shell fitted to the Jig I bought last week. After a lot searching and looking at alternatives I opted for the version which bolts to the suspension mounts of the mini rather than the pole through the middle. Both achieve the desired result but I felt the additional cost was worth it as this model will also work for a lot of other cars as I hankering after a TR6 or another Stag but don’t tell the Mrs!! Once I was happy with the engine bay I dropped the rear sub-frame which came off easily to be honest as I had been squirting penetrating fluid on the bolts for the last few weeks! That left me with a nice rusty sub-frame to dismantle when I have time. I have an A1 used one, I picked up a few months ago to replace it. Which will be stripped painted a fitted with all new brake lines bushes etc. All the other parts will be cleaned and painted.
Posted Image
Whilst I had been waiting for the rust remover to do its stuff in the engine bay I had a poke around a few spots I knew were going to supply me with more work. The rear quarter in front of the rear wheel arch always looked like a bodge job so I took the flap disc to it, after choking on the filler dust ( must get more masks!) here we have the quick fix. Filler on the outside and a bit of metal stuffed down the back see the second pic. At ;east they used metal!
Posted Image
Posted Image
Then I had a morning of putting the Jig together and fitting it all on the shell. Must say its good quality, balanced and well made. Gives me confidence when rolling the shell round in the garage.
Posted Image
Posted Image
Really makes getting to the lower and underneath sections so easy. I hate welding lying on my back it has to be the most hateful job! Hopefully I won’t be suffering that for a while!
I then set about the rear end which is my next area to put right. “Bodie and Doyle” the “professionals” had fitted a new valance at some stage this picture is before I fitted the Jig.
Posted Image
They had bodged the closing panels and left the lip of the old panel on.
Posted Image
So I cut the dam mess off and the offside wasn’t too bad behind it
Posted Image
Not so lucky for the near side, panels on order!
Posted Image
The best bit was the new valance which they had under-sealed on the outside (see a previous picture) but on the inside they had left the rubbish black paint on. They had even welded it to the remains of the closing quarter section through the label!!! Nothing like a bit of clean metal to weld to eh?
Posted Image
Also the fresh under-seal drew me to it like a magnet, and yes once the black sticky muck was removed the filler was revealed and the resulting hole, Hold that order and add a wheelarch!
Posted Image
Spent the rest of this afternoon cleaning off the floor pans. Luckily they seem to have been wax treated at an early stage and are spotless. At least I won’t be fitting new floors!
Any comments welcome
Cheers Glyn

#13 MaxAndPaddy

MaxAndPaddy

    Spamela Anderson

  • TMF+ Member
  • PipPipPipPipPipPipPipPipPip
  • 4,700 posts
  • Name: Elvis
  • Location: North Yorkshire
  • Local Club: TMF

Posted 19 February 2012 - 10:00 PM

No messing eh? ...you put us all to shame

Cant believe how much you've got done already....looking good!

=]

#14 GlynC

GlynC

    Stage One Kit Fitted

  • Noobies
  • PipPipPip
  • 99 posts
  • Location: Ashby

Posted 20 February 2012 - 12:49 PM

Thanks mate ;D
I think the "back end" will slow me down as its one of those areas that doesn't lend itself to being repaired in a straight forward fashion, if that makes sense. I had bought the boot corner repair sections but now I have her upside down I think I'll make my own and do it slightly differently. It will be stronger and hopefully resist the rust better.
I have a day off today (my birthday) which is being spent cutting and grinding out the rusty bits. Just having a quiet brew :D

#15 ToM 2012

ToM 2012

    Up Into Fourth

  • Members
  • PipPipPipPipPipPipPipPipPip
  • 4,066 posts
  • Location: halesowen

Posted 20 February 2012 - 02:03 PM

looking good keep up the good work =]


1 user(s) are reading this topic

0 members, 1 guests, 0 anonymous users