
Edited by brandon7, 23 March 2008 - 06:05 PM.


Mini Mad


Posted 23 March 2008 - 06:04 PM
Edited by brandon7, 23 March 2008 - 06:05 PM.
One Carb Or Two?
Posted 23 March 2008 - 06:23 PM

Edited by dean_chad, 23 March 2008 - 06:47 PM.
Up Into Fourth

Posted 23 March 2008 - 06:36 PM
Speeding Along Now

Posted 24 March 2008 - 11:48 AM

Mini Mad

Posted 24 March 2008 - 01:32 PM
Edited by Fevmeister, 24 March 2008 - 01:33 PM.
One Carb Or Two?

Posted 24 March 2008 - 02:05 PM
Timing out? How do you adjust the timing on a carbed R1 engine? would be interested to know.Are you only going to put the one seat in??????
By the sounds of it, the engine timing is faaaaaaaaaaar out mate. It's a quickish job (about 10hrs) for someone who knows what they're doing.
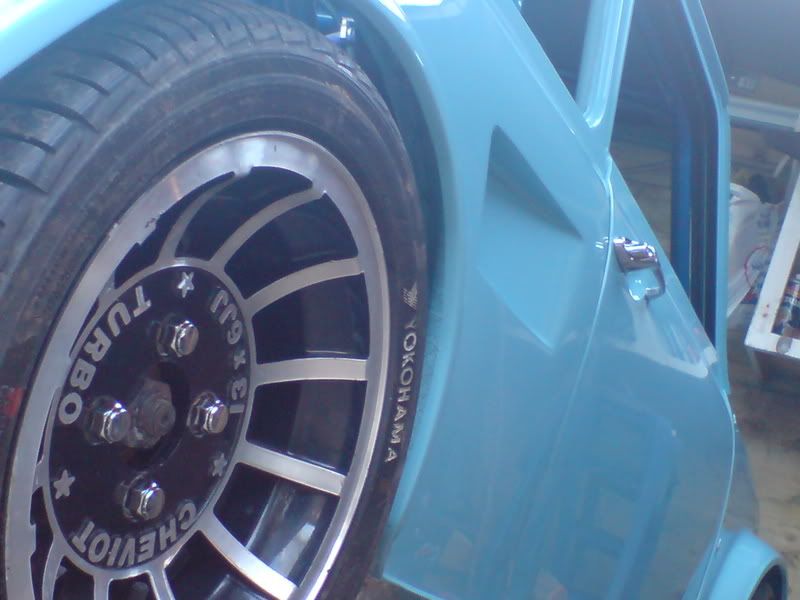
Where did you get the alloys from and for how much??
One Carb Or Two?

Posted 24 March 2008 - 02:34 PM
Edited by R1mini, 24 March 2008 - 02:35 PM.
Z Cars

Posted 24 March 2008 - 02:39 PM
One Carb Or Two?
Posted 24 March 2008 - 05:10 PM
Dean, what will it rev to while driving in 3rd gear? Is the rev limiter coming in too early? Could be stuck in a neutral or clutch-in map.
And by the way its looking mint.
Sounds like your changing gear far too early!!!
It takes a while to get used to driving a bike engined car, Ive driven a r1 car and it seem bizzare to rev it past 13 in each gear compared to about 10.5 in the busa. Good progress though mate, downhill all the way now.
I would look at the hub drilling first to be honest, not that im insulting your engineering skills, try and run the wheels on anothe car first to eliminate the wheels being Knackered.
Cheers
Edited by dean_chad, 24 March 2008 - 05:15 PM.
One Carb Or Two?
Posted 25 March 2008 - 08:25 PM
![=]](http://www.theminiforum.co.uk/forums/public/style_emoticons/default/lol.gif) Also being attatched to that bar means it will follow the engine roll as power is put down in vice verser
Also being attatched to that bar means it will follow the engine roll as power is put down in vice verserEdited by dean_chad, 25 March 2008 - 08:29 PM.
He's just too casual!

Posted 25 March 2008 - 08:52 PM
 keep up the good work
Up Into Fourth
Posted 25 March 2008 - 09:01 PM
One Carb Or Two?
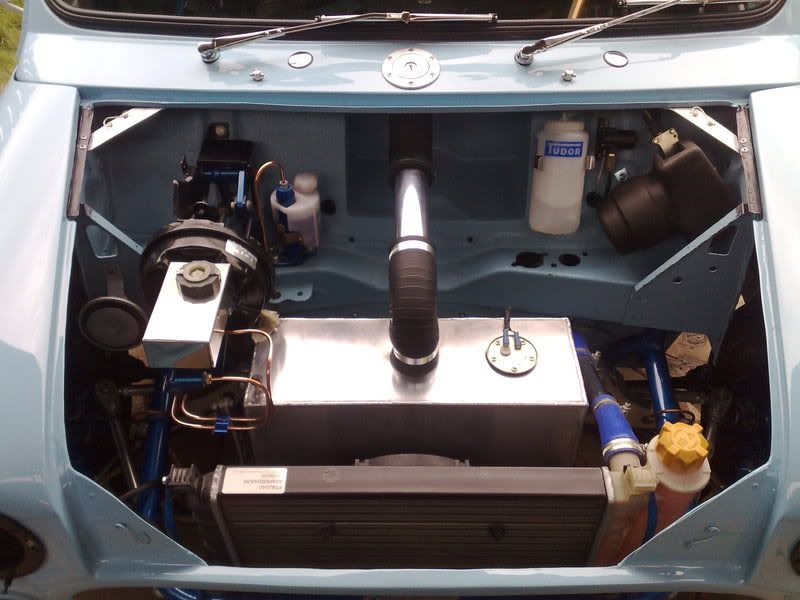
Posted 27 March 2008 - 08:44 PM
Edited by dean_chad, 27 March 2008 - 08:57 PM.
Das Pingu's

Posted 29 March 2008 - 11:17 PM
One Carb Or Two?
Posted 06 April 2008 - 09:18 PM


0 members, 1 guests, 0 anonymous users


